

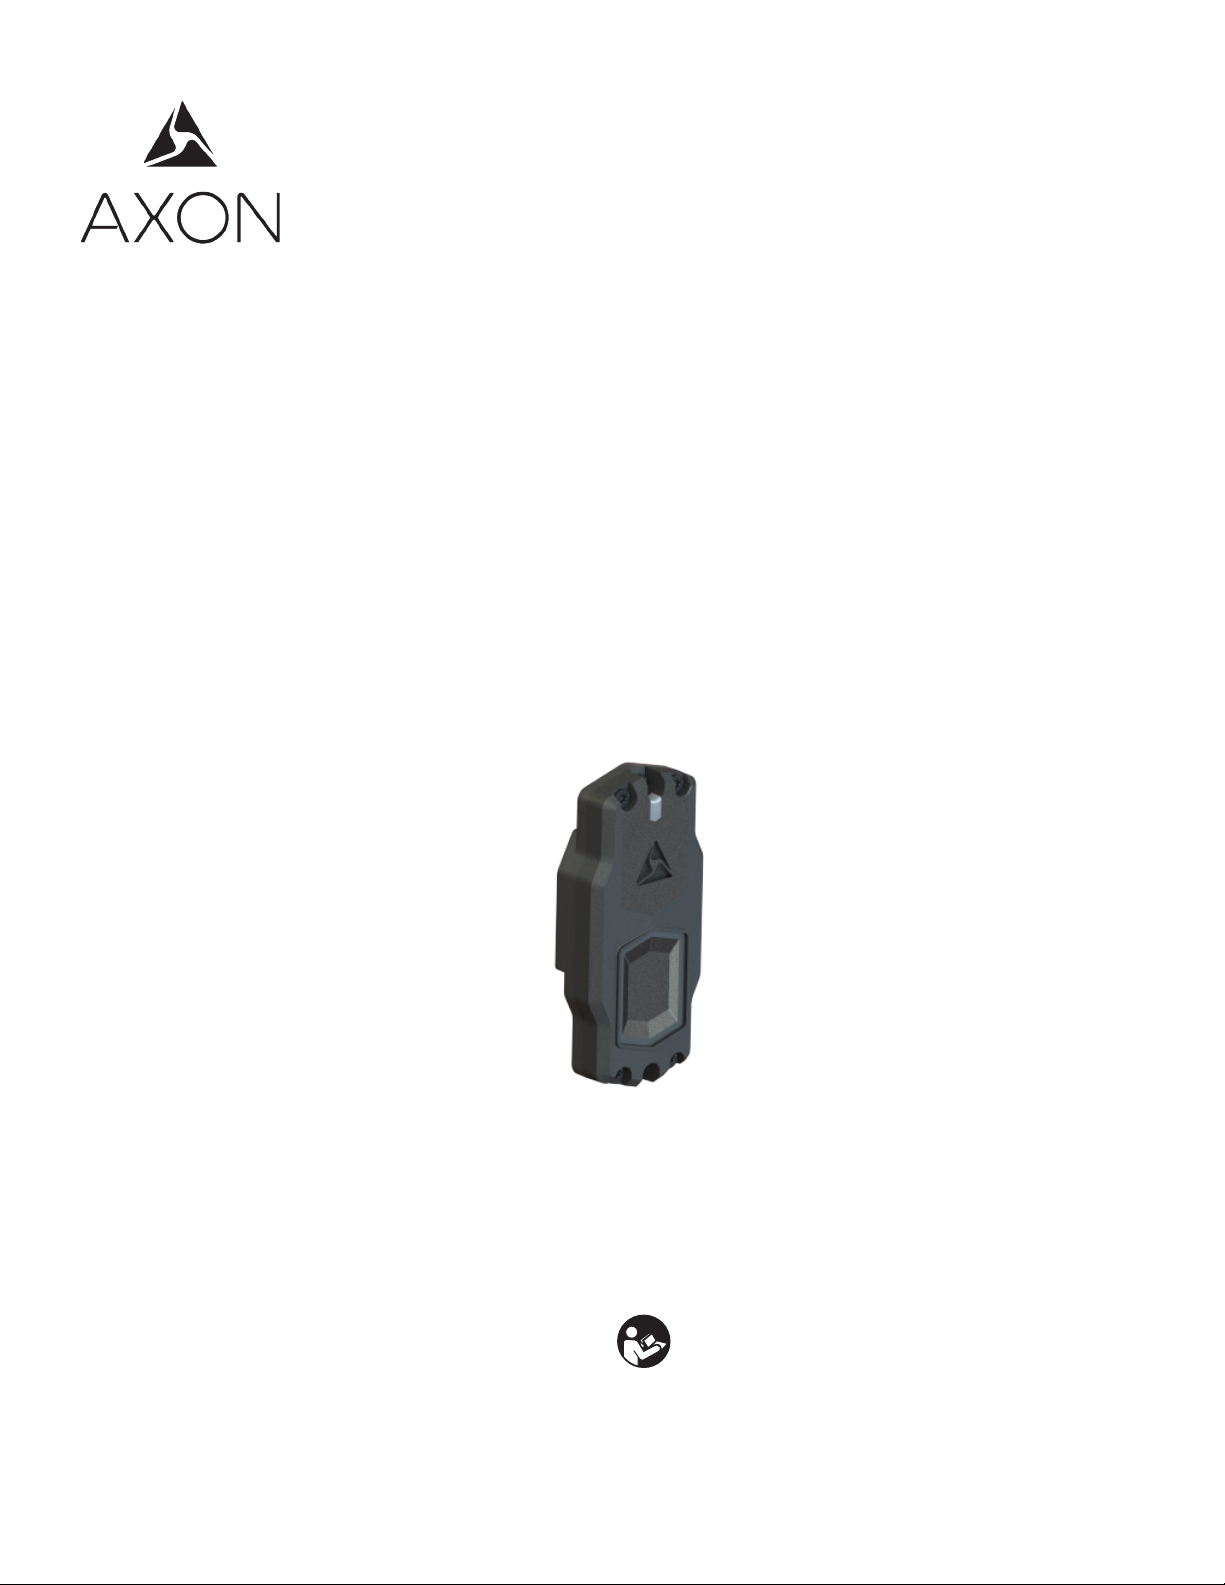
Axon Signal Sidearm
User Manual
Model AX1012
IMPORTANT SAFETY INSTRUCTIONS
Read all warnings and instructions. Save these
instructions.
The most up-to-date warnings and instructions are
available at www.axon.com
MMU[00NN] Rev: DRAFT A1

Contents
1 Chapter 1: Introduction
1 What is Axon Signal Sidearm?
1 Getting to know your Signal Sidearm Sensor
2 Chapter 2: Axon Signal Sidearm Operation
2 Operating Modes
2 Low Power Mode
2 Test Mode
2 Field Mode
3 Mute Mode
3 Registering and Assigning Signal Sidearm
3 Registering and Assigning a Signal Sidearm with ADM
3 Registering and Assigning a Signal Sidearm using Evidence.com
4 Reassigning a Signal Sidearm
4 Reassigning a Signal Sidearm with ADM
4 Reassigning a Signal Sidearm using Evidence.com:
4 Updating Signal Sidearm Sensor Firmware
5 Updating the Sensor’s Clock after Battery Replacement
6 Chapter 3: Axon Signal Sidearm Maintenance and Troubleshooting
6 Battery Replacement
7 Sensor Reset
7 Factory Firmware Reset
7 Troubleshooting
11 Customer Service
12 Chapter 4: Additional Information
12 Warranty Policy
12 Warnings
12 Radio Waves
14 Declaration of Conformity
14 Compliance Marks
i
Chapter 1: Introduction
What is Axon Signal Sidearm?
The Axon Signal Sidearm sensor is designed to work with common duty holsters. When a firearm
is removed from the holster, the Signal Sidearm sensor alerts Axon systems equipped with Signal
technology. Upon receipt of this signal, a compatible device can perform a programmed response.
The sensor is powered by a CR2430 battery. The battery should last 1 year with normal use.
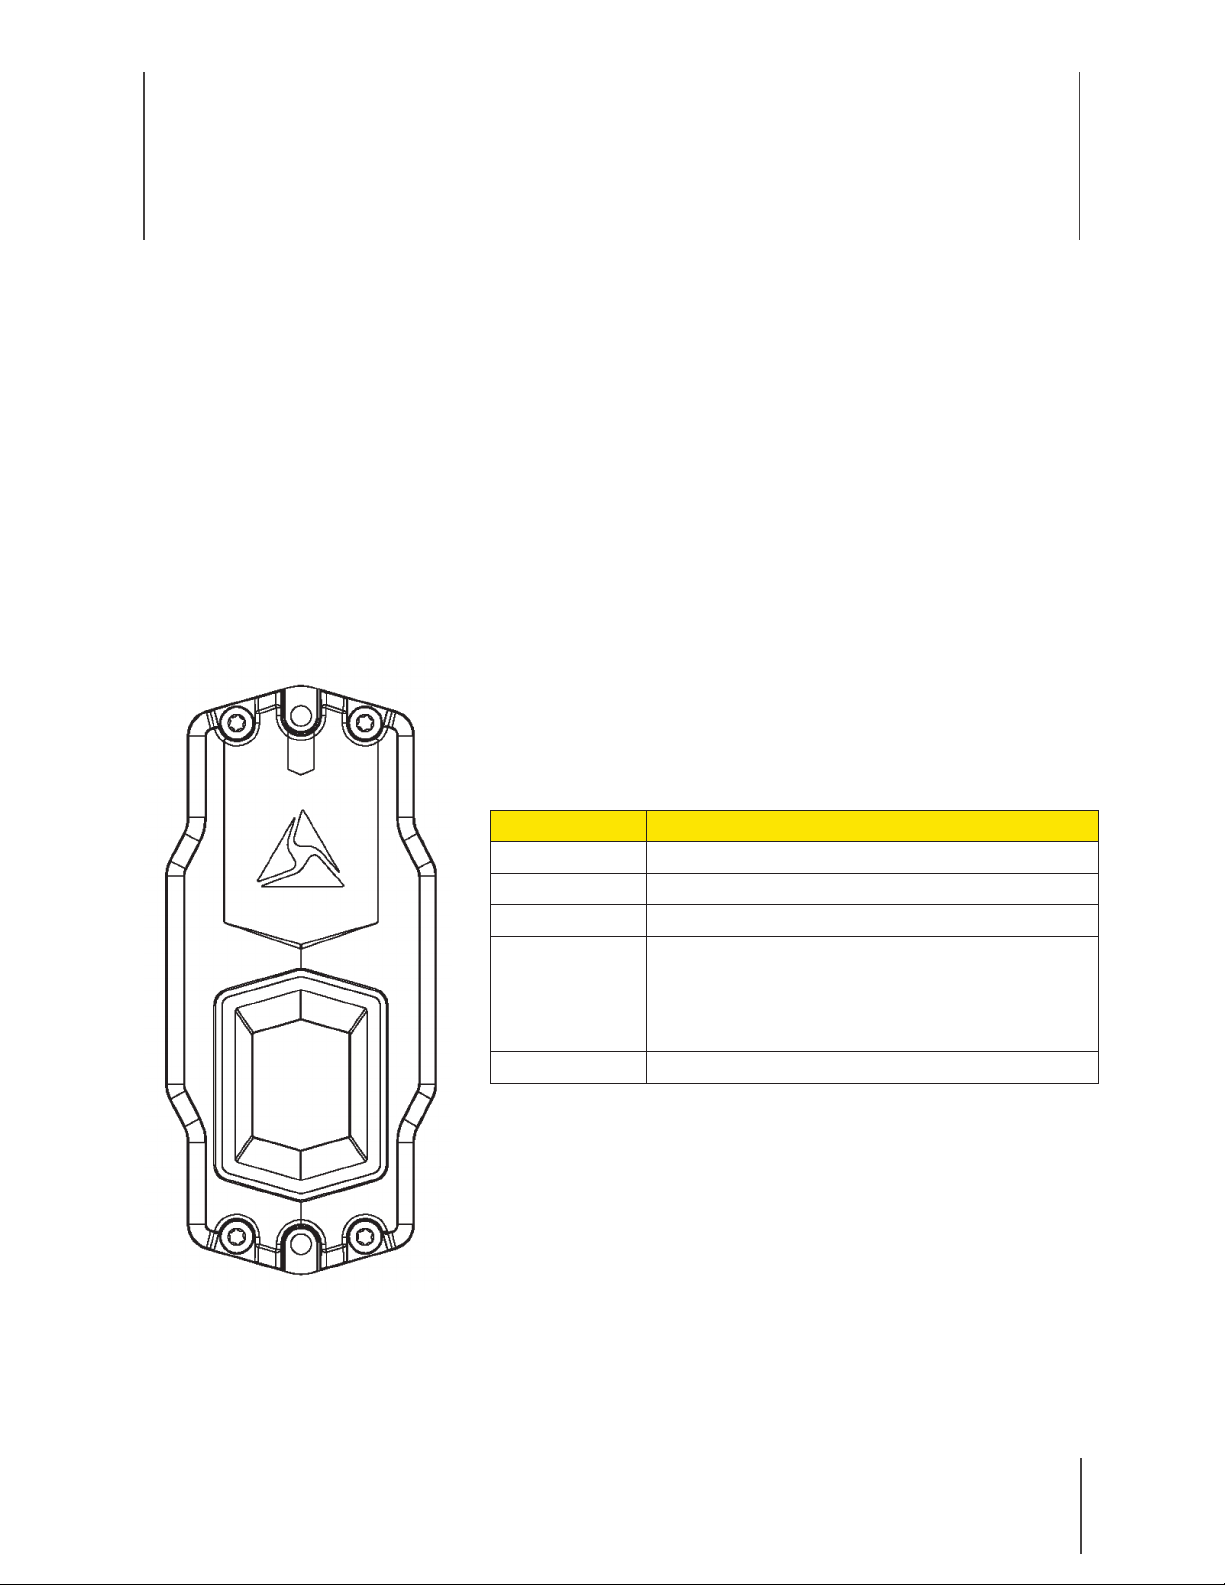
Getting to know your Signal Sidearm Sensor
A
B
C
D
A
A The screws that hold the sensor together. These screws are
removed screws for battery replacement.
B The screws that attach the sensor to the bracket.
C Status LED indicator, which shows device and battery status.
LED REFERENCE
Mode Status LED indication
Low Power O
Tes t On (when the firearm is holstered)
Field O (after taking the sensor out of Test Mode)
Mute Blinking green indicates battery power is
good.
Blinking red indicates the battery is low and
needs to be replaced.
Sensor Reset Blinking yellow.
D Button used to cycle the device through the operating modes.
A A
B
1

Chapter 2: Axon Signal Sidearm Operation
This chapter provides information on the Axon Signal Sidearm sensor operating modes and
working with the sensor.
Operating Modes
The Axon Signal Sidearm sensor has four operating modes. The sensor should be placed in Field
Mode during normal operations.
Low Power Mode
The sensor is shipped from the factory in Low Power Mode. To make use of your sensor, follow the
steps below to take it out of the Low Power Mode.
1 Remove firearm from holster.
2 Follow instructions to install the sensor.
3 To enter Test Mode, press the button for 1 second. The LED blinks green 3 times. If there is
no activity for 30 seconds, the sensor returns to Low Power Mode.
Test Mode
Use Test Mode to confirm that the sensor detects when you insert and remove your firearm from
the holster. After entering Test Mode:
1 Replace firearm in the holster. The LED should illuminate green.
2 Remove your firearm from the holster. The LED should turn o.
3 Repeat steps 1 and 2 three more times.
4 If the LED does not illuminate or turn o, repeat the installation and ensure the sensor is as
close to the holster as possible.
5 To enter Field Mode, press and hold the button for 5 seconds. The LED blinks green 3 times
and then turns o when the sensor enters Field Mode.
Field Mode
In Field Mode, the sensor alerts Axon systems equipped with Signal technology when the firearm
is removed from the holster.
1 When the firearm is removed from the holster, Signal Sidearm alerts an Axon system
equipped with Axon Signal technology of a status change. The duration of the alert is 30
seconds.
2 To enter Mute Mode, press and hold the button for 5 seconds.
2

Axon Signal Sidearm User Manual
Mute Mode
Mute Mode is intended for situations in which you need to remove your firearm from the holster,
but do not want to alert Axon systems with Signal technology.
Additionally, when you are in Mute Mode, the color of the LED indicates the power status of your
battery.
• To enter Mute Mode, press and hold the button for 5 seconds.
A green blinking LED means Mute Mode is active and the battery is good.
A red blinking LED means Mute Mode is active and the battery is low and needs to be
replaced.
The sensor automatically returns to Field Mode after 30 seconds elapses or when your
firearm is removed from the holster, whichever occurs first.
Registering and Assigning Signal Sidearm
Using the Axon Device Manager (ADM) beta app is the preferred method for registering and
assigning Axon Signal Sidearm units. Signal Sidearm units can also be registered and assigned
through Evidence.com.
Maintaining up-to-date device assignment ensures the accuracy of audit trails and delivery of
low battery notifications and other device alerts.
Registering and Assigning a Signal Sidearm with ADM
1 Log in to ADM.
2 Place the Signal Sidearm sensor on the back of the phone, ensuring the mute button is
facing up and makes contact with the back of the phone.
3 Once ADM finds the sensor, tap the screen to assign.
4 Enter the name or badge number of the person you want to assign the sensor to and tap
enter.
The Signal Sidearm sensor is assigned.
5 Tap Complete to exit.
Registering and Assigning a Signal Sidearm using Evidence.com
1 Sign in to your Evidence.com account.
2 On the menu bar, click Admin and then under Devices, click Signal Sidearm Registration.
3 Enter the Signal Sidearm sensor Serial Number.
4 Optionally, enter the name or badge number of the person you want to assign the sensor
to in the Assignee field.
5 Click Register Device.
Chapter 2: Axon Signal Sidearm Operation 3

Axon Signal Sidearm User Manual
Reassigning a Signal Sidearm
Axon Signal Sidearm units can be reassigned to dierent users as needed. Using the Axon Device
Manager (ADM) beta app is the preferred method for reassigning Axon Signal Sidearm units.
Signal Sidearm units can also be reassigned through Evidence.com.
Maintaining up-to-date device assignment ensures the accuracy of audit trails and delivery of
low battery notifications and other device alerts.
Reassigning a Signal Sidearm with ADM
1 Log in to ADM.
2 Place the Signal Sidearm sensor on the back of the phone, ensuring the mute button is
facing up and makes contact with the back of the phone.
3 Once ADM finds the sensor, it shows the name of the current assignee.
4 Tap Reassign, enter the name or badge number of the person you want to assign the sensor
to, and then tap enter.
The Signal Sidearm sensor is reassigned.
5 Tap Complete to exit.
Reassigning a Signal Sidearm using Evidence.com:
1 Sign in to your Evidence.com account.
2 On the menu bar, click Devices.
3 Search for the Signal Sidearm sensor you want to reassign.
4 In the search results, click the Serial Number for the Signal Sidearm unit you want to reassign.
5 Click the Assign Device tab.
6 Enter the name or badge number of the person you want to assign the sensor to in the
Assign Device To field.
7 Click Assign Device.
Updating Signal Sidearm Sensor Firmware
Axon periodically releases updates for the firmware of all Axon devices, including Signal Sidearm.
These updates typically include improvements in device stability and new functionality. Axon
recommends that you update the firmware for all your devices as soon as the update is available.
1 Log in to ADM.
2 Place the Signal Sidearm unit you are updating in Mute Mode.
3 Tap the BETA menu in the upper right. This will take you to the Signal Sidearm Beta section.
(If you do not see the BETA menu, ensure you are using the beta version of Axon Device
Manager).
The app detects any Signal Sidearm sensors that are with Bluetooth range (approximately
30 feet).
Chapter 2: Axon Signal Sidearm Operation 4

Axon Signal Sidearm User Manual
4 Tap the sensor serial number for the sensor you want to update.
5 Tap Firmware Update.
Note: ADM automatically checks and updates the sensor’s internal clock after it connects
to the sensor.
6 ADM retrieves the latest firmware and updates the sensor’s firmware.
ADM disconnects from the sensor, the sensor resets, and then enters Test Mode. If there is
no activity for 30 seconds, the sensor returns to Low Power Mode.
Updating the Sensor ’s Clock after Battery Replacement
After the battery in the Signal Sidearm sensor is replaced, you must use ADM to connect to the
sensor to verify that the sensor is working correctly using Bluetooth and to set the sensor’s
internal clock.
1 Log in to ADM.
2 Place the Signal Sidearm unit with the new battery in Mute Mode.
3 Tap the BETA menu in the upper right. This will take you to the Signal Sidearm Beta section.
(If you do not see the BETA menu, ensure you are using the beta version of Axon Device
Manager).
The app detects any Signal Sidearm sensors that are with Bluetooth range (approximately
30 feet).
4 Tap the sensor serial number for the sensor you want to update.
5 ADM automatically checks and updates the sensor’s internal clock after it connects to the
sensor.
6 Tap Complete to exit.
Chapter 2: Axon Signal Sidearm Operation 5

Chapter 3: Axon Signal Sidearm Maintenance
and Troubleshooting
This chapter provides information on replacing the battery in the Signal Sidearm sensor, resetting
the sensor, resetting the sensor firmware to factory settings, troubleshooting, and contact information for Axon Customer Service.
Battery Replacement
Users and agency administrators will recieve an email from Evidence.com infomring them that
the battery for their Signal Sidearm sensor is low and should be replaced. The battery should last
1 year with normal use. The Signal Sidearm sensor is powered by a CR2430 battery. Follow these
steps to replace the battery.
1 Put the sensor in Mute Mode.
2 Safely remove the firearm from the holster.
3 Remove the screws that attach the sensor to the bracket, as shown in Figure A.
4 Remove the screws to take the sensor apart, as shown in Figure B.
5 Replace the CR2430 battery and reassemble the sensor as shown in Figure C.
• When the sensor has a new battery, the sensor automatically enters Test Mode.
• If the sensor does not detect any activity after being in Test Mode for 30 seconds, it will
enter Low Power Mode.
6 Re-attach the sensor to the bracket with the screws removed in Step 3.
7 Place the sensor in Field mode.
8 Use the Axon Device Manager Android app to connect to the Signal Sidearm sensor. Check
that the sensor Status is Set time finished and that a check mark is shown on the Set Time
tab. This verifies the sensor is working correctly using Bluetooth and that the sensor’s clock
is set.
Figure A: Remove sensor
from bracket
Figure B: Remove sensor
screws
Figure C: Replace battery and
screws
6

Axon Signal Sidearm User Manual
Sensor Reset
Follow these steps to reset the sensor (i.e. power the sensor down and back on). You can reset the
sensor from any mode.
1 Press and hold the button for 20 seconds.
After 5 seconds, the sensor enters Mute Mode and the LED begins blinking green or red.
Continue to hold the button until the LED begins blinking yellow, which indicates the reset
has started.
The LED blinks green 3 times and then the device enters Test Mode. If there is no activity for
30 seconds, the sensor returns to Low Power Mode.
Factory Firmware Reset
Follow these steps to reset the sensor’s firmware to the original factory settings. You can reset
the sensor firmware from any mode.
1 Press and hold the button for 30-35 seconds or until the LED stops blinking yellow.
After 5 seconds, the device enters Mute Mode and the LED begins blinking green or red.
After 20 seconds the LED begins blinking yellow. Continue to hold the button until the LED
stops blinking.
The device resets to the factory firmware settings. There is no LED activity for 5-10 seconds. Then the LED blinks green 3 times and the device enters Test Mode. If there is no
activity for 30 seconds, the sensor returns to Low Power Mode.
Troubleshooting
This section has troubleshooting information for issues you might experience with the Signal
Sidearm sensor. The section is organized as a list of issues with the possible causes and remedies
for those issues.
If the solutions listed in this section do not resolve your issue or if your issue is not listed, please
contact Axon Customer Service.
My Axon camera does not activate when I draw my sidearm from my holster.
• Possible Cause 1: The Axon camera or the Signal Sidearm sensors are not powered on or
do not have sucient battery power to function properly.
Remedy 1: Ensure that the camera is powered on and has sucient battery power. If you
have received a notification indicating that your Signal Sidearm sensor is low on battery,
the battery needs to be replaced. You can check the status of the battery by entering
Mute Mode (hold button for 5 seconds). If the battery is low, the LED will blink red rather
than green. If the battery is low or the sensor does not respond to the 5-second press,
try replacing the battery.
• Possible Cause 2: The Signal Sidearm sensor is loose or was not installed correctly.
Remedy 2: If any of the screws holding the sensor to the bracket or the bracket to the
holster have come loose, the sensor may not be able to consistently determine the state
of your sidearm. Tighten all screws and check to see if that solves the activation issues.
Additionally, check to make sure the Signal Sidearm bracket is correct for your holster.
Chapter 3: Axon Signal Sidearm Maintenance and Troubleshooting
7

Axon Signal Sidearm User Manual
• Possible Cause 3: The Signal Sidearm sensor was installed on a non-approved holster or
the incorrect bracket was used to install the sensor.
Remedy 3: Obtain the correct bracket from Axon for your holster and reinstall.
• Possible Cause 4: The Signal Sidearm sensor was subjected to a major impact, became
submerged, or was damaged in some other way.
Remedy 4: The sensor may have been damaged in a manner where it is no longer able
to function properly. You can attempt to replace the battery or reset the sensor (see
Possible Cause 6 in this section). If this does not resolve the issue, please contact Axon
technical support.
• Possible Cause 5: If the Signal Sidearm sensor was used outside the operating temperature range, you may experience unexpected behavior.
Remedy 5: Allow the sensor to warm or cool to the point where it is in the operating
temperature range of the sensor. The sensor normal operating and storage temperature
range: -4 °F to 122 °F [-20 °C to 50 °C].
• Possible Cause 6: The Signal Sidearm sensor may have a firmware issue that is preventing it from functioning properly.
Remedy 6: The sensor can be reset by holding the button for 20 seconds or by removing
the sensor cover then removing and reinserting the battery. Note that a sensor reset will
cause the sensor to enter Low Power Mode when it powers back on. If your sidearm is in
the holster, the green LED will come on.
• Possible Cause 7: There may be a problem with your camera.
Remedy 7: If your camera is not reacting to your Signal Sidearm sensor or to other Axon
Signal enabled sensors, there may be a problem with your camera. Consult the troubleshooting guide for your camera.
• Possible Cause 8: There is an aftermarket modification to your sidearm or holster that is
interfering with the functionality of the Signal Sidearm sensor.
Remedy 8: Signal Sidearm works with published holsters and sidearms that have not
been modified. Modifications such as using an aftermarket slide or painting the holster
may cause the Signal Sidearm sensor to not function correctly.
• Possible Cause 9: Your Signal Sidearm sensor is not in Field Mode.
Remedy 9: Your sensor may be in Mute Mode (blinking green LED). Wait 30 seconds for
your sensor to exit Mute Mode.
Your sensor may be in Test Mode (LED on solid if sidearm is in holster or o if sidearm is
out of holster). Hold the button for 5 seconds to enter Field Mode.
Your sensor may be in Low Power Mode. Press the button to enter Test Mode, then press
and hold for 5 seconds to enter Field Mode.
I am unable to enter Mute Mode.
• Possible Cause 1: Your Signal Sidearm sensor is not in Field Mode.
Remedy 1: Your sensor may be in Mute Mode (blinking green LED). Wait 30 seconds for
your sensor to exit Mute Mode.
Your sensor may be in Test Mode (LED on solid if sidearm is in holster or o if sidearm is
out of holster). Hold the button for 5 seconds to enter Field Mode.
Chapter 3: Axon Signal Sidearm Maintenance and Troubleshooting
8

Axon Signal Sidearm User Manual
Your sensor may be in Low Power Mode. Press the button to enter Test Mode, then press
and hold for 5 seconds to enter Field Mode.
• Possible Cause 2: The button may be damaged and unable to receive any input.
Remedy 2: There is no solution to this problem that will allow you to maintain full func-
tionality of your sensor. You can diagnose a problem with the button by first replacing
the battery. After the battery is replaced, if you hold the button for 5 seconds and do not
exit Test Mode, the button is damaged. Stop using your Signal Sidearm sensor.
• Possible Cause 3: The Signal Sidearm sensor may have a firmware issue that is preventing it from functioning properly.
Remedy 3: The sensor can be reset by holding the button for 20 seconds or by opening
the sensor and removing and reinserting the battery. Note that a sensor reset will cause
the sensor to power back on in Test Mode. If your sidearm is in the holster, the green LED
will come on and if the sidearm is out of the holster the green LED will be o.
My camera activated, but I haven’t drawn my sidearm.
• Possible Cause 1: Your camera may have activated because another Axon Signal device
was used in range of your camera.
Remedy 1: This is intended functionality of your camera.
• Possible Cause 2: Your Signal Sidearm sensor may have registered a false positive. This
could be the result of multiple issues.
Remedy 2: If your Signal Sidearm sensor has been functioning properly, inspect the sensor for any damage. If you get repeated false positives, your Signal Sidearm may be malfunctioning. Please contact Axon technical support.
I’m having trouble installing the sensor on my holster. It’s too tight and the bracket is
bending or there is a big gap between the sensor and the holster.
• Possible Cause 1: You may have the incorrect bracket for your holster or your holster is
not a supported model.
Remedy 1: Ensure your bracket is correct for you holster. If you do not have the correct
bracket, one can be requested from Axon.
• Possible Cause 2: You may have placed a spacer on the incorrect side of the bracket.
Remedy 2: Use of a holster spacer is acceptable, provided that the spacer is installed be-
tween the bracket and the belt clip. Do not install a spacer between the bracket and the
holster as this may reduce performance of your Signal Sidearm sensor.
My battery lasted much less time than the published battery life specification.
• Possible Cause 1: The battery life estimate is based on typical sensor use. If you use Mute
Mode or draw your sidearm much more frequently than the typical use case, then battery
life can be reduced.
Remedy 1: Axon does not recommend adjusting the use of your sidearm and holster to
improve battery life.
• Possible Cause 2: Your Signal Sidearm sensor may have a firmware or hardware issue that
is causing it to use more battery power than expected.
Remedy 2: Replacing the battery will reset the sensor and should correct any firmware
problem that is causing the battery to drain too quickly. If this problem continues, then
there may be a hardware problem with your sensor. Please contact Axon technical sup-
Chapter 3: Axon Signal Sidearm Maintenance and Troubleshooting
9

Axon Signal Sidearm User Manual
port.
My Signal Sidearm is too sensitive.
• Possible Cause 1: The Signal Sidearm sensor has been designed with the input of law enforcement ocers to provide an optimal balance of sensitivity for registering true sidearm draws and rejecting normal daily interactions with the sidearm.
Remedy 1: Each holster and sidearm combination may result in a slightly dierent distance that the sidearm can be withdrawn before the sensor registers the absence of the
sidearm. In general, once the end of the sidearm’s slide passes the center of the sensor,
the sensor can detect that the sidearm is no longer present. It typically takes between
one and two seconds for this to occur.
My Signal Sidearm sensor keeps ending up in Test Mode or Low Power Mode.
• Possible Cause 1: The design and location of the button on the sensor is intended to pre-
vent accidental presses or holds, but in some rare cases, it may be possible that an action
by the user may result in the button being held down without the user’s knowledge. This
will cause the sensor to reset.
Remedy 1: You may need to study your daily activities and identify the cause to prevent
this from happening.
• Possible Cause 2: The battery in your sensor may be very low and the sensor may be
powering o and restarting randomly.
Remedy 2: You can check for a low battery by entering Mute Mode and looking at the
LED. Replace the battery if it is low.
• Possible Cause 3: The button or button circuitry may be damaged in such a way that it
appears to be held down.
Remedy 3: If your sensor is resetting repeatedly, this is likely the cause and you will need
to replace your sensor.
• Possible Cause 4: The wrong battery size or type was inserted in the sensor, the battery
was inserted upside down, or the battery holder is damaged or corroded. This may be
causing an intermittent connection.
Remedy 4: Visually inspect the sensor battery holder and the battery. If there is any corrosion or the battery holder appears to be partially disconnected from the circuit board,
stop use of the sensor immediately. Ensure that the battery type is a CR2430 and is installed with the “+” facing up.
The LED is very dim, flickering, or does not turn on when expected.
• Possible Cause 1: The battery in your sensor may be very low and/or the sensor may be
very cold.
Remedy 1: Replace the battery and/or allow the sensor to warm up.
• Possible Cause 2: The LED may be damaged.
Remedy 2: Resetting the sensor by holding the button for 20 seconds or by removing the
battery should trigger an LED illumination (three short blinks of the green LED). If doing
so results in dim, flickering, or no LED activity, you have a damaged LED. Your sensor will
continue to function without a functioning LED, but it will be dicult to know when the
sensor is in Mute Mode.
Chapter 3: Axon Signal Sidearm Maintenance and Troubleshooting
10

Axon Signal Sidearm User Manual
Customer Service
Visit www.axon.com and view the Support options, or call 1-800-978-2737.
Chapter 3: Axon Signal Sidearm Maintenance and Troubleshooting
11

Chapter 4: Additional Information
This chapter provides additional information associated with Axon Signal Sidearm.
Warranty Policy
Axon Enterprise warranty provisions are applicable on all Axon Signal Sidearm products. See
Axon Enterprise’s website, www.axon.com, for detailed warranty information.
Warnings
For a full list of the warning associated with this product, see www.axon.com.
Radio Waves
The Signal Sidearm transmission is in the frequency range of 2402 to 2480 MHz.
Changes or modifications to the equipment not expressly approved by the manufacturer could
void the product warranty and the user’s authority to operate the equipment.
Your wireless device is a radio transmitter and receiver. It is designed and manufactured not
to exceed the emission limits for exposure to radio frequency (RF) energy set by the Federal
Communications Commission (FCC) of the U.S. Government. These limits are part of comprehensive
guidelines and establish permitted levels of RF energy for the general population. The guidelines
are based on standards that were developed by independent scientific organizations through
periodic and thorough evaluation of scientific studies. The standards include a substantial safety
margin designed to assure the safety of all persons, regardless of age and health. Before a device
model is available for sale to the public, it must be tested and certified to the FCC that it does
not exceed the limit established by the government-adopted requirement for safe exposure.
This equipment has been tested and found to comply with the limits for a Class B digital device,
pursuant to part 15 of the FCC Rules. These limits are designed to provide reasonable protection
against harmful interference in a residential installation. This equipment generates, uses and can
radiate radio frequency energy and, if not installed and used in accordance with the instructions,
may cause harmful interference to radio communications. However, there is no guarantee that
interference will not occur in a particular installation. If this equipment does cause harmful
interference to radio or television reception, which can be determined by turning the equipment
o and on, the user is encouraged to try to correct the interference by one or more of the following
measures:
12

Axon Signal Sidearm User Manual
Reorient or relocate the receiving antenna.
Increase the separation between the equipment and receiver.
Connect the equipment into an outlet on a circuit dierent from that to which the receiver is
connected.
Consult Axon Enterprise Customer Service for help.
FCC/IC NOTICE: This device meets the body worn human exposure limits found in ANSI/ IEEE
C95.1, 2005. Proper operation of this equipment according to the instructions found in this guide
will result in exposure substantially below the FCC’s recommended limits. To comply with the
FCC and ANSI C95.1 RF exposure limits, this device has been tested for compliance with FCC RF
Exposure limits in the typical configuration. The radiated output power of this wireless device is
far below the FCC radio frequency exposure limits.
AVIS Commission fédérale des Communications (FCC)/Industrie Canada (IC): Cet appareil
répond aux limites d’exposition humaines du corps trouvées dans ANSI/IEEE C95.1, 2005. Le bon
fonctionnement de cet équipement selon les instructions contenues dans ce guide entraînera
une exposition nettement inférieure aux limites recommandées par la Commission Fédérale des
Communications (FCC). Afin de respecter les limites d’exposition à l’énergie radiofréquence (RF)
de la FCC et de l’ANSI C95.1, ce dispositif a été testé pour se conformer aux limites d’exposition
à l’énergie radiofréquence (RF) de la FCC dans la configuration typique. La puissance de sortie
rayonnée de ce périphérique sans fil est bien inférieure aux limites d’exposition radiofréquence de
la Commission Fédérale des Communications (FCC).
This device complies with part 15 of the FCC Rules. Operation is subject to the following two
conditions: (1) This device may not cause harmful interference, and (2) this device must accept any
interference received, including interference that may cause undesired operation.
This device complies with Industry Canada licence-exempt RSS standard(s). Operation is subject
to the following two conditions: (1) this device may not cause interference, and (2) this device
must accept any interference, includ¬ing interference that may cause undesired operation of the
device.
Le présent appareil est conforme aux CNR d’Industrie Canada applicables aux appareils radio
exempts de licence. L’exploitation est autorisée aux deux conditions suivantes : (1) l’appareil
ne doit pas produire de brouillage, et (2) l’utilisateur de l’appareil doit accepter tout brouillage
radioélectrique subi, même si le brouillage est susceptible d’en compromettre le fonctionnement.
THIS MODEL DEVICE MEETS THE GOVERNMENT’S REQUIREMENTS FOR EXPOSURE TO RADIO
WAVES.
CE DISPOSITIF RÉPOND AUX EXIGENCES GOUVERNEMENTALES POUR L’EXPOSITION AUX
ONDES RADIO.
Section 7.1.3 of RSS-GEN
This Device complies with Industry Canada License-exempt RSS standard(s). Operation is subject
to the following two conditions: 1) this device may not cause interference, and 2) this device must
accept any interference, includ¬ing interference that may cause undesired operation of the device.
Cet appareil est conforme aux normes d’exemption de licence RSS d’Industrie Canada. Son
utilisation est soumise aux conditions suivantes : 1) cet appareil ne doit pas causer de brouillage,
et 2) doit accepter tout brouillage, y compris le brouillage pouvant entraîner un fonctionnement
indésirable.
Chapter 4: Additional Information 13

Axon Signal Sidearm User Manual
Section 7.1.2 of RSS-GEN
Under Industry Canada regulations, this radio transmitter may only operate using an antenna of
a type and maximum (or lesser) gain approved for the transmitter by Industry Canada. To reduce
potential radio interference to other users, the antenna type and its gain should be so chosen that
the equivalent isotropically radiated power (e.i.r.p.) is not more than that necessary for successful
communication.
Conformément à la réglementation d’Industrie Canada, le présent émetteur radio ne peut
fonctionner qu’au moyen d’une antenne d’un seul type et d’un gain maximal (ou inférieur)
approuvé pour l’émetteur par Industrie Canada. Dans le but de réduire les risques de brouillage
radioélectrique pour les autres utilisateurs, il faut choisir le type d’antenne et son gain de sorte
que la puissance isotrope rayonnée équivalente (p.i.r.e.) ne dépasse pas celle requise pour établir
une communication satisfaisante.
Declaration of Conformity
Axon declares that this Axon system is compliant with the requirements of the Radio Equipment
Directive (RED) 2014/53/EU, Electromagnetic Compatibility (EMC) 2014/30/EU directive and the
EU Low Voltage Directive 2014/35/EU. A copy of the original Declaration of Conformity can be
found at www.axon.com.
Compliance Marks
Chapter 4: Additional Information 14

Product functions and specifications may change without notice and the actual product may vary from the
illustrations in this manual.
Android is a trademark of Google, Inc.; Bluetooth is a trademark of Bluetooth SIG; Google Play is a trademark of
Google, Inc.; Torx is a trademark of Acumen Global Technologies; Wi-Fi is a trademark of the Wi-Fi Alliance; and
Windows is a trademark of Microsoft Corporation.
, AXON, Axon, Axon Device Manager, Axon Signal Sidearm, and Evidence.com are trademarks of Axon
Enterprise, Inc., some of which are registered in the US and other countries. For more information, visit www.axon.
com/legal. All rights reserved. © 2017 Axon Enterprise, Inc.
XXXNNNN Rev: DRAFT A1
 Loading...