

Page 1
PROJECT PEN KITS
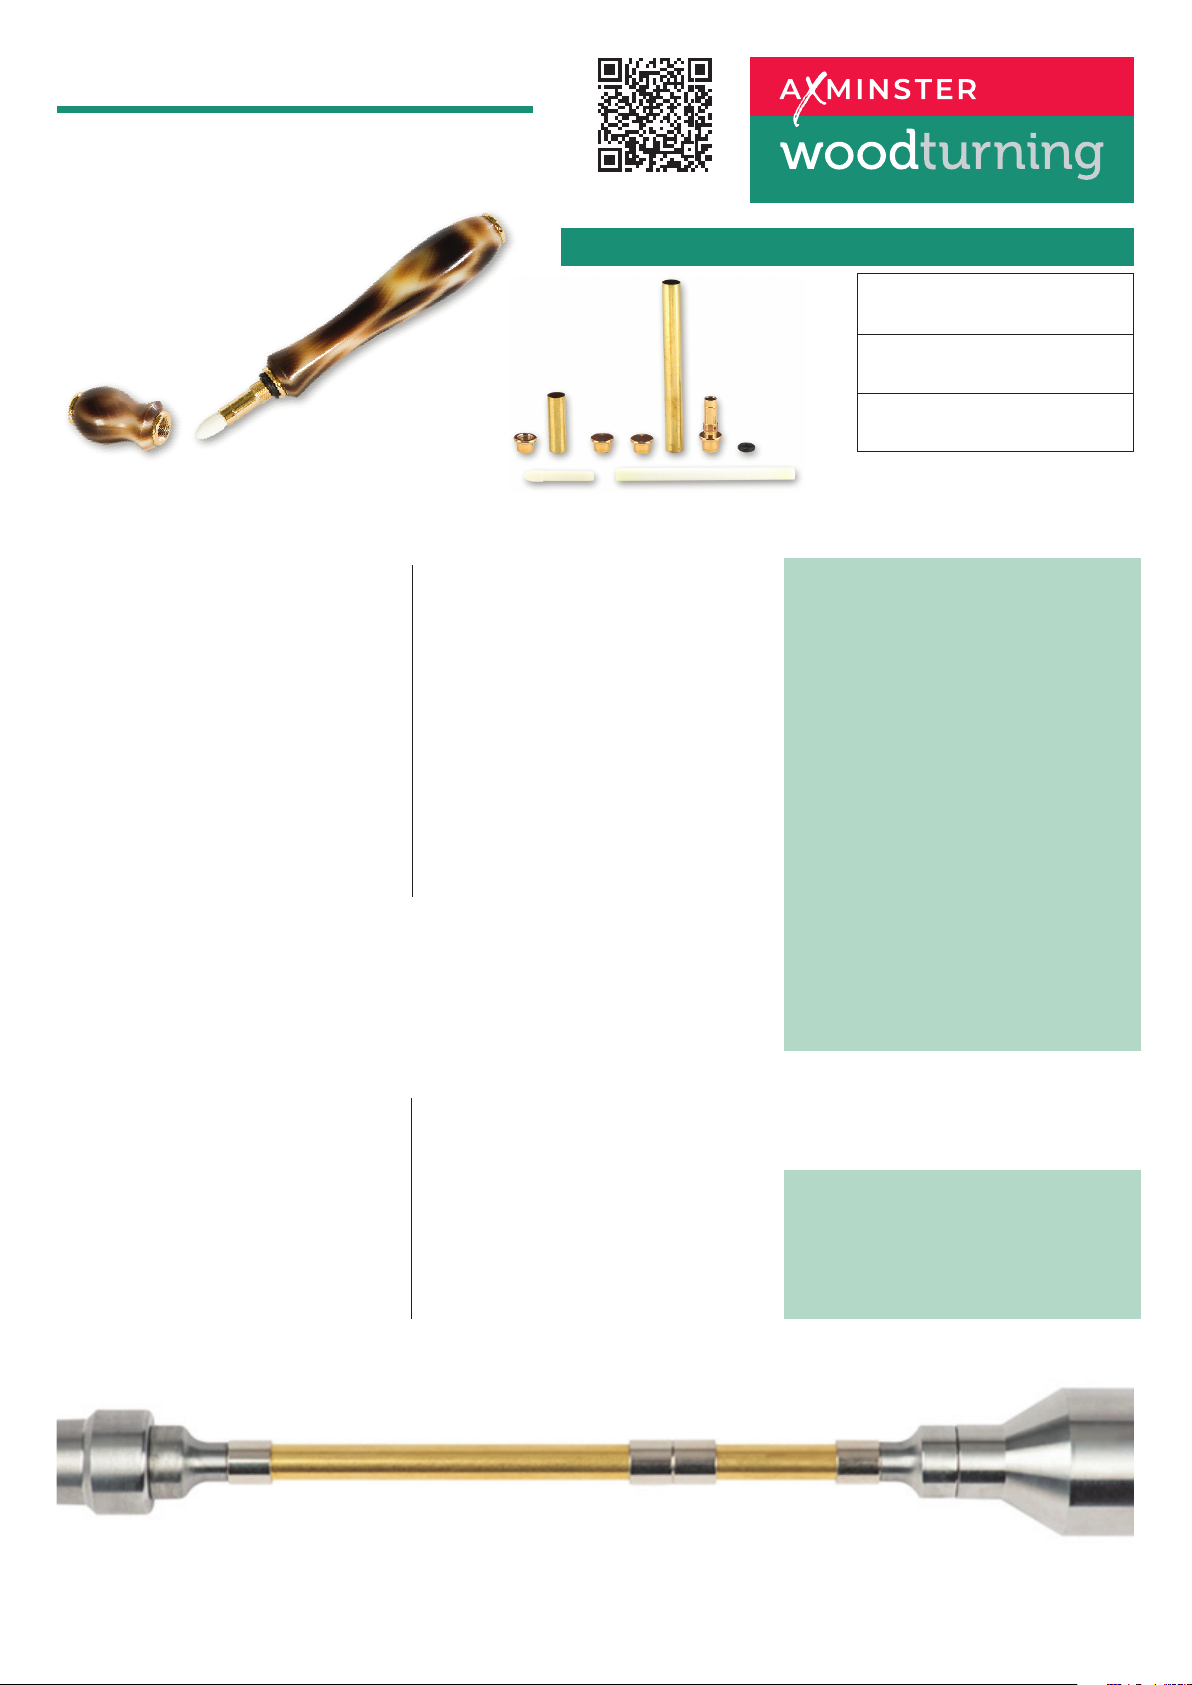
Perfume Pen Kit - 24kt
Code: 800249
PREPARING THE BLANKS, HINTS & TIPS
Preparing a wooden or acrylic/polyester
blank for a pen mandrel.
1. Cut a blank to the length of each tube
plus approximately 2.5mm to allow for
trimming and squaring off the ends.
2. Mark the centre on the end of the blank.
3. Using the recommended drill bit, drill a
hole lengthwise through the blank.
4. Apply epoxy glue, Polyurethane glue or
gap filling cyanoacrylate (super glue) to
the tubes.
5. Insert the tube into the blank with a
twisting motion to spread the glue
evenly inside the hole.
6. Centre the tube lengthwise inside
the blank.
7. Allow the adhesive to cure.
8. When cured, square the ends of the
blank. Using a barrel trimmer with a
guide matching the inner diameter
of the tube or a universal pen blank
squaring jig with a disc sander.
9. Take the excess material down flush
with the ends of the brass tube.
(do not trim beyond the length of the
tube since this may interfere with
operation of the mechanism and
assembly).
For more info and
videos scan here
WHAT’S REQUIRED
Bushing Set:
103840
Drill Bit Size:
8 mm
Minimum Blank Size:
19 mm x 19 mm x 105 mm
Tips/Hints
• If using a wooden blank, draw a short
pencil line lengthwise across the centre
of the blank. This will help maintain grain
alignment when mounting the blanks
onto a mandrel.
• Excessive pressure may cause the drill
bit to wander and/or split the blank.
Slow the feed rate and back the drill bit
out repeatedly for chip removal.
• Roughen the brass tube slightly with
abrasive for better adhesion.
• Certain acrylic blanks are more
transparent than others, especially
lighter colors or blanks with light colored
swirls. To avoid the risk of the brass tube
showing through the pen blank, paint
the tubes white or black before gluing
them in.
• The barrel trimmer guide also cleans any
adhesive that may have gotten inside of
the tube.
TURNING THE BLANK, HINTS & TIPS
1. Mount the bushings and blanks onto a
pen mandrel according to the diagram
(If using a wooden blank, check the
grain alignment).
2. Secure the bushings and blanks onto
the mandrel.
3. Slide the tailstock with a live centre into
place against the mandrel and lock in
position. This is for support; only slight
pressure is required.
4. Using sharp tools, turn the blanks down
to become the Pen Barrel and the Cap
with the profile of your choice.
5. Turn the blanks very slightly oversize,
then sand and polish the ends down to
the same diameter as the bushings.
6. Using successively finer abrasives
gradually sand and polish the Pen
Barrel and Cap.
7. Finish the Pen Barrel and Cap with your
preferred choice of polish.
Tips/Hints
• Don’t be afraid to sharpen frequently
especially when turning acrylics.
Continues over...
Page 2
ASSEMBLY, HINTS & TIPS
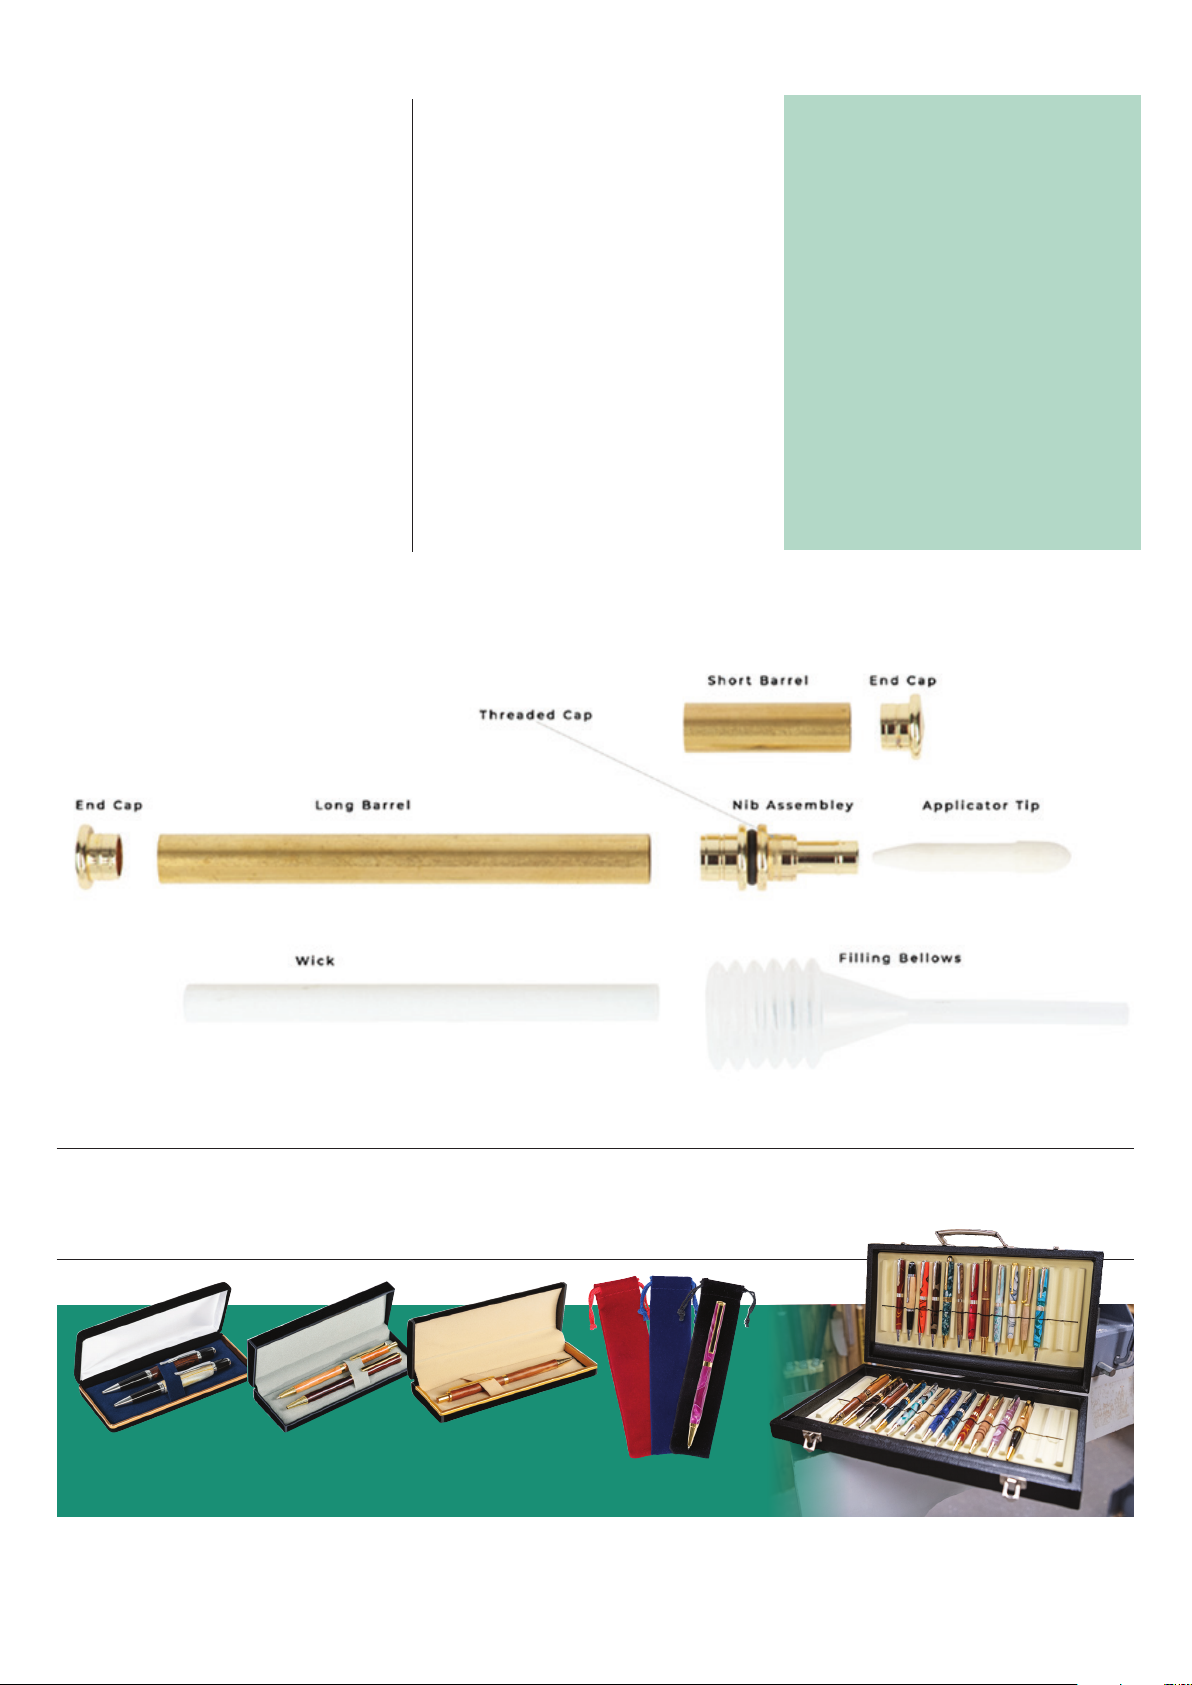
1. Layout parts according to diagram A,
ensuring the turned Pen Barrels are the
same orientation as when mounted on
the mandrel.
Note: When removing the blanks from
the mandrel, use a felt tip pen to mark
the inside of each tube where they join to
maintain the grain or pattern alignment.
2. Insert the End Cap into the bottom of
the Long Barrel and press home.
3. Insert the Wick into the Long Barrel.
4. Remove the Threaded Cap from the Nib
Assembly, then press the Nib Assembly
into the other end of the Long Barrel.
5. Insert the Threaded Cap into the Short
Barrel and press home.
6. Insert the second End Cap into the
opposite end of the short. upper Pen
Barrel and press home.
DIAGRAM A
7. Insert the Applicator Tip into the Nib
Assembly.
8. Screw the Nib Assembly into the
Threaded Cap.
The Perfume Pen is now complete.
Note: The parts should screw together
freely. Be sure the rubber ‘O’ Ring is
mounted between the two sections.
Loading the Applicator with Perfume
Dip the Applicator tip, while in the pen,
into the perfume bottle and hold it
there for one minute. This will soak up
the perfume. The white applicator tip
will swell and stay in place when filled
with liquid.
Before refilling the pen, clean the
applicator tip by soaking it in house
hold type alcohol.
Tips/Hints
• Use a woodworking vice, one handed
bar clamp, arbor press or a dedicated
pen press.
• Press parts together slowly and steadily
• When pressing the parts together,
CHECK the parts are correctly aligned
with each other and straight. If the part
is crooked or misaligned, it will result in
a poor fit or render the pen unuseable.
• When laying out your pen barrel with
the parts, pay careful attention to keep
the pen barrels in the same orientation
as when on the mandrel. i.e. a pen barrel
may have a “top” and “bottom”, now is
the time to be certain of the orientation.
Visit the Knowledge blog ‘How To Make A Pen’ for hints, tips and videos
knowledge.axminstertools.com/pen-turning
VIEW OUR FULL RANGE OF
PEN CASES AND DISPLAY BOXES ONLINE
Axminster Tools, Axminster, Devon, EX13 5PH
AXMINSTERTOOLS.COM
 Loading...