

Page 1
PROJECT PEN KITS
Eggoscope Kit
Code: 502544
PREPARING THE BLANKS, HINTS & TIPS
1. Cut a blank, approximately 50mm
square by 57mm long. It is important
the blank is 57mm long, in order for the
mechanism to fit correctly.
2. Mark the centre on the end of the blank.
3. Using a 13/16” sawtooth, forstner
cutter or drill bit, drill a hole lengthwise
through the blank.
For more info and
videos scan here
WHAT’S REQUIRED
Bushing Set:
502709
Drill Bit Size:
13/16”
Minimum Blank Size:
50 mm x 50 mm x 57 mm
Tips/Hints
• Excessive pressure may cause the drill
bit to wander and/or split the blank.
Slow the feed rate and back the drill bit
out repeatedly for chip removal.
TURNING THE BLANK, HINTS & TIPS
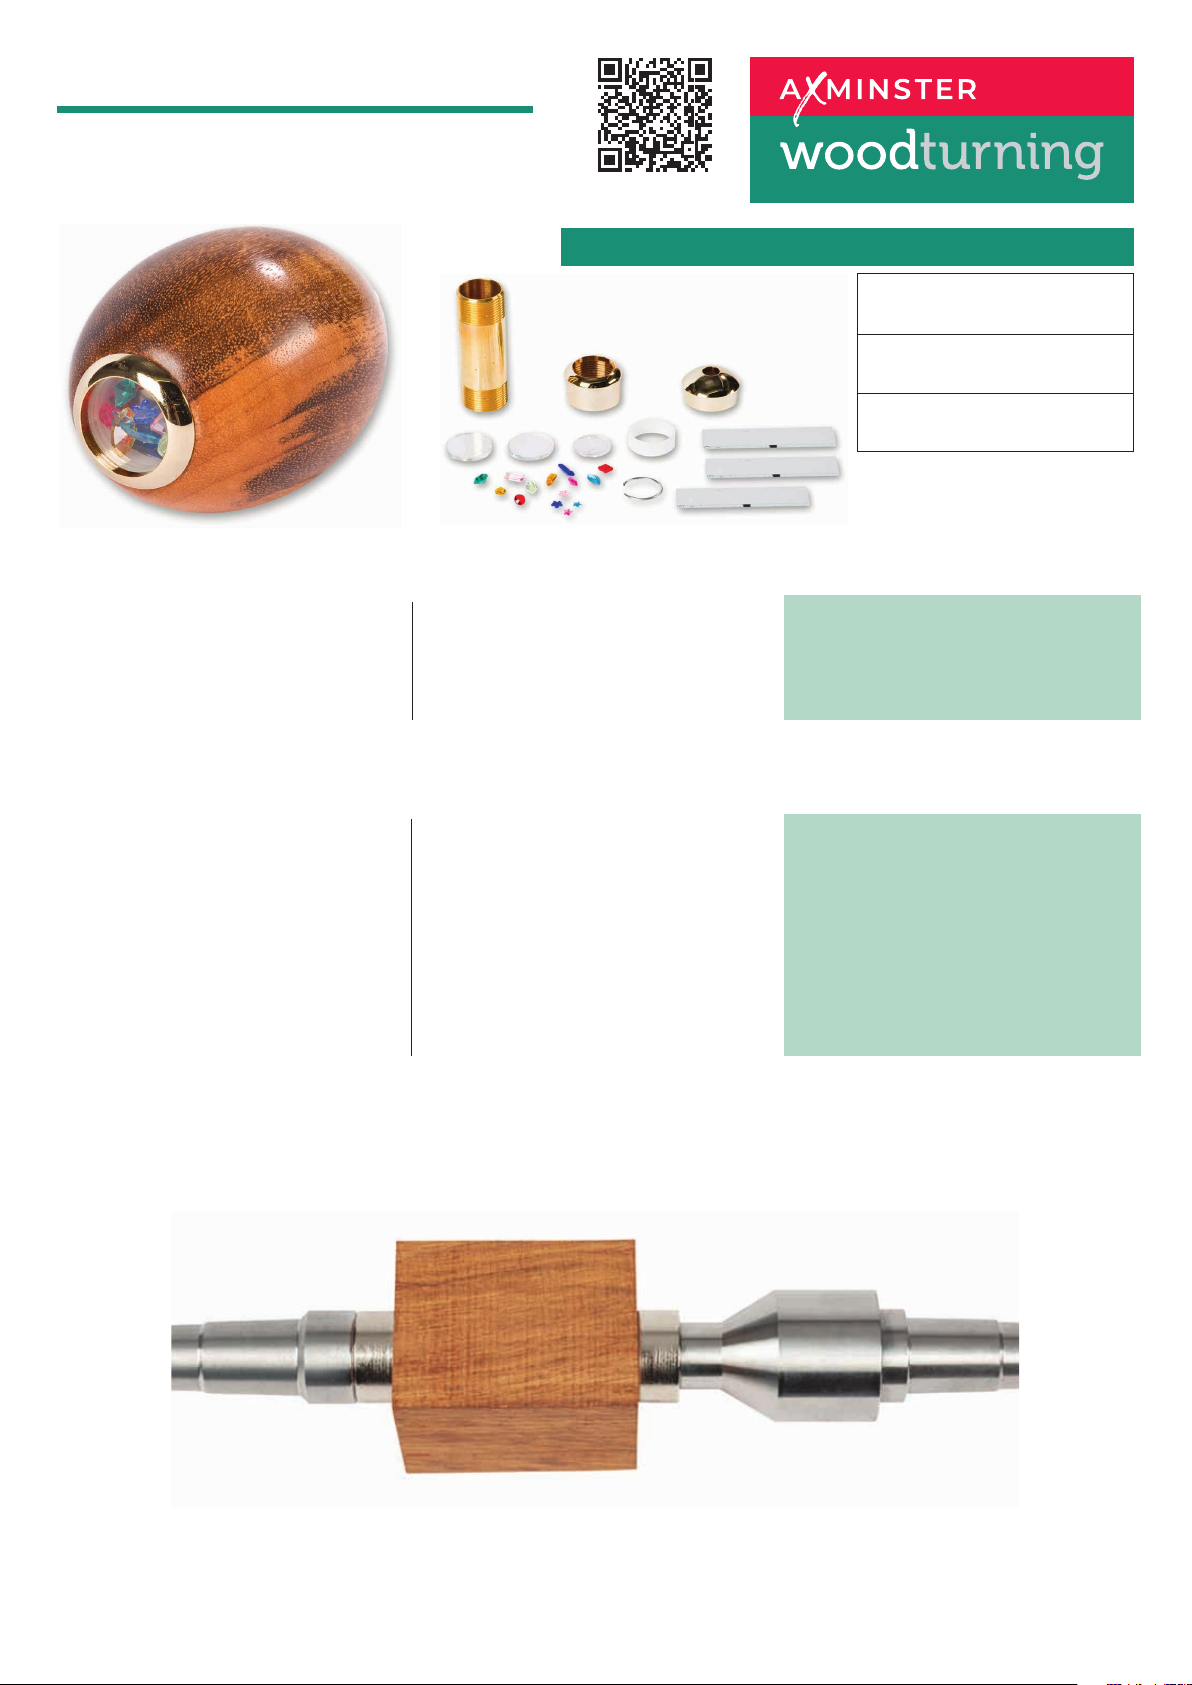
1. Mount the bushings and blank onto a
pen mandrel according to the diagram.
2. Secure the bushings and blank onto the
mandrel.
3. Slide the tailstock with a live centre into
place against the mandrel and lock in
position. This is for support; only slight
pressure is required.
4. Using sharp tools, turn the blank down
to a profile of your choice.
5. The outside diameter of the ‘egg’ after
turning ideally should be between
45mm and 48mm.
6. Using successively finer abrasives
gradually sand and polish the ‘egg’.
7. Finish the ‘egg’ with your preferred
choice of polish.
Tips/Hints
• Don’t be afraid to sharpen frequently
especially when turning acrylics.
Continues over...
Page 2
ASSEMBLY, HINTS & TIPS
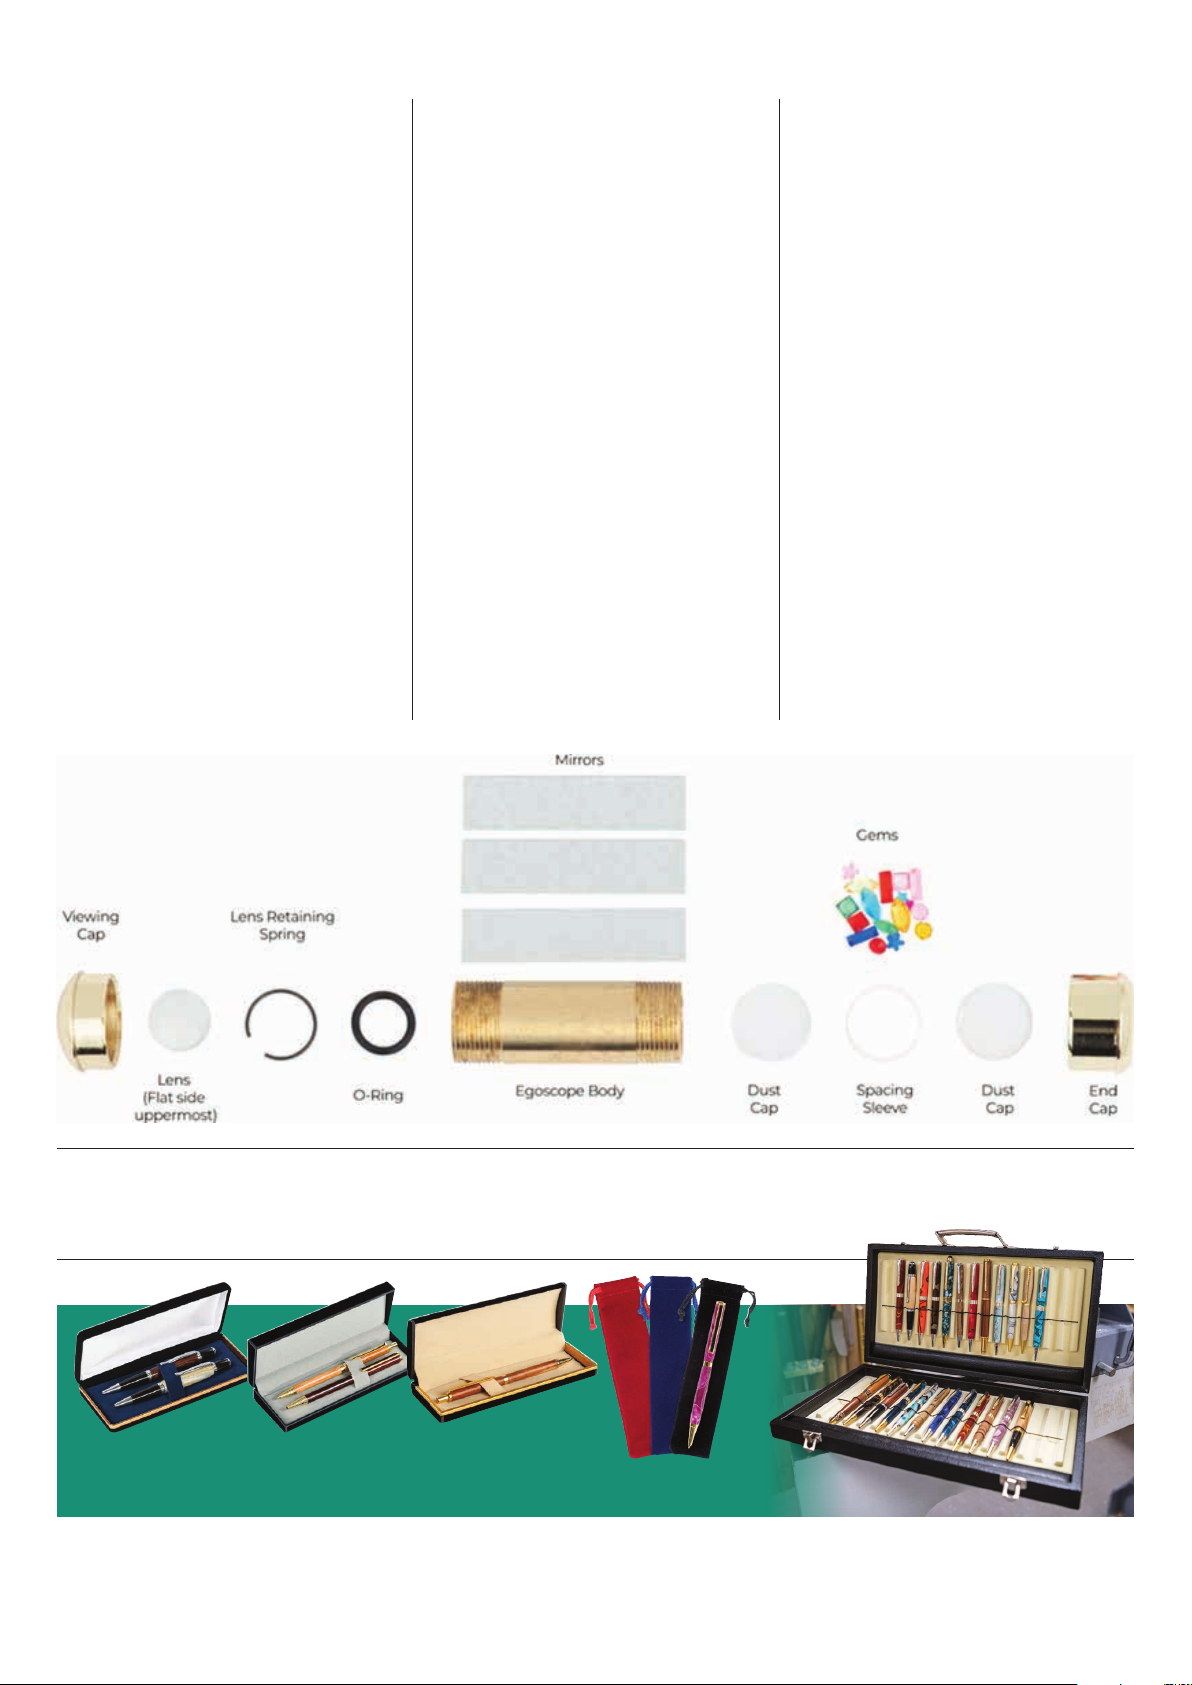
Layout parts according to diagram A
Installing the lens in the Viewing Cap
1. Position the Viewing Cap with the
eye-hole facing down.
2. Drop the Lens into the recess inside the
cap with the convex side down, flat side
up.
3. Place the Retaining Spring on top of the
Lens. The Retaining Spring sits inside a
recess behind the Lens. Use the eraser
tip on a pencil to hold one side and use
a thin blunt instrument (another pencil
for example) to push the Spring down
into the recess to secure the Lens in
place.
Assembling the Image End
4. Position the End Cap with the open
threaded end facing up.
5. Peel the protective paper off one of the
Retaining Dust Covers and position it to
seat on the bottom of the End Cap.
6. Insert the Spacing Sleeve into the
End Cap so that it seats firmly on the
Retaining Dust Cover. Press firmly
to force the Spacing Sleeve to seat
completely on the Retaining Dust
Cover.
7. Insert the Gems. The Gems should
occupy no more than 1/2 of the space
in the image end cavity. A variety
of gems are provided to allow for a
selection that pleases the user.
Note: Putting too many gems (i.e. all
provided) into the cavity may cause
the objects to jam in the cavity and not
tumble freely. If they do not tumble after
final assembly, remove selected gems to
allow for the remaining gems to tumble
freely.
8. Remove the protective paper from the
Remaining Dust Cover and position
it on top of the Spacing Sleeve to
completely enclose the Gems in the
image cavity.
Installing the Mirrors
9. Mark the eyepiece edge of the Mirrors
with a black marker pen.
Note: The three pieces of Mirror are
marked with a black “X” or a line on one
side. This indicates the back side of the
Mirror and should be placed away from
the center when assembling these pieces.
10. Place the three mirrors inside the
Threaded Brass Tube one-by one
forming an equilateral triangle
Note: As usual, when handling cut glass,
use caution not to cut your fingers or chip
the glass.
Note: The mirrors should fit snugly inside
the tube. If the mirrors slide freely inside
the tube wrap a piece of self-adhesive
tape around so they fit snugly.
Final Assembly
11. Screw the Threaded Brass Tube (with
mirrors inside) into the End Cap (with
Gems and Dust Covers installed). The
tube will bottom on the top Dust
Cover to secure all of the components
inside.
12. Insert the Threaded Brass Tube and
End Cap assembly into the 13/16”
hole in the ‘egg’. Screw the assembled
Viewing Cap (with Lens and Retaining
Spring) onto the other end of the tube.
Note: Be careful to position the end
cap with the eyehole down so that
the Lens does not fall out. Tighten
securely. The Threaded Brass Tube will
be secured between the Lens inside
the Viewing Cap and the Dust Cover in
the End Cap.
Enjoy the view!
DIAGRAM A
Visit the Knowledge blog ‘How To Make A Pen’ for hints, tips and videos
knowledge.axminstertools.com/pen-turning
VIEW OUR FULL RANGE OF
PEN CASES AND DISPLAY BOXES ONLINE
Axminster Tools, Axminster, Devon, EX13 5PH
AXMINSTERTOOLS.COM
 Loading...