

Page 1
Step-by-step guide to…
1
2
3
ARTISAN
Order Code:
105768
DECORATIVE
BOX HINGE KIT
Difficulty Level : Confident
4
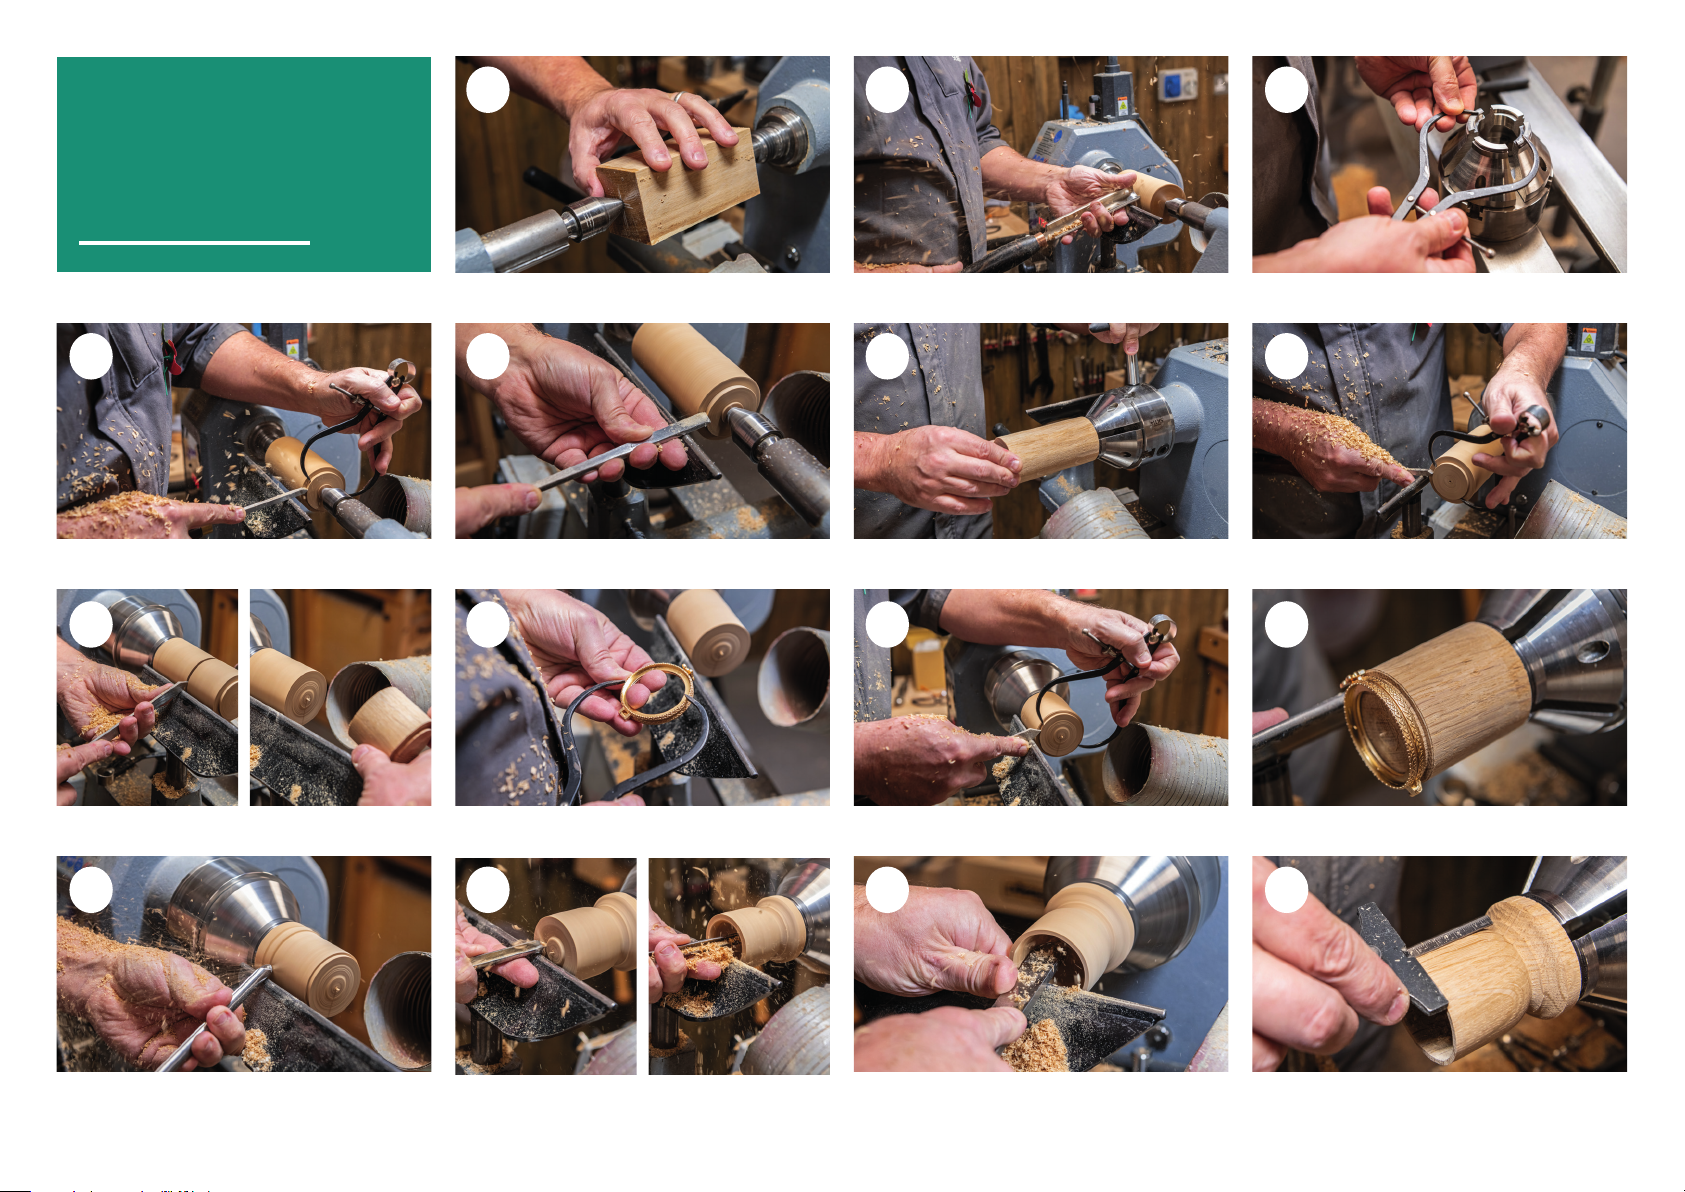
4. Cut a tenon to this size on the tailstock end of the blank. 5. Cut the tenon into a slight dovetail. 6. Remove from between centres, mount chuck onto the
8
8
1. Mount your blank between centres, this blank measures
125mm x 50mm.
5
9
2. Rough down to a cylinder.
6
lathe and hold the blank in the chuck
10
3. Using a set of O’Donnell jaws (610357), open to the optimal size
(true circle) and measure the internal with callipers.
7
7. Cut another tenon on this newly exposed end, the same size
as before and once again cut to a dovetail.
11
8. Using a parting tool, part off the lid section at 50mm. 9. This will leave you the base section in the chuck and ready
12
12. The external box shape can now be turned. 13. When happy with the external shape you can hollow the
to start sizing for the lid. Using callipers measure the inside
diameter of the hinge.
13
inside using a bowl gouge.
10. Now cut a tenon to suit the hinge measurement. 11. Test fit the hinge to ensure a good snug joint.
14
14. Finish off the shaping of the round bottom with a round
nose scraper to blend in the curves.
15
15. Check the depth before parting off to ensure you don’t cut
through the bottom.
Page 2
1716
18
19
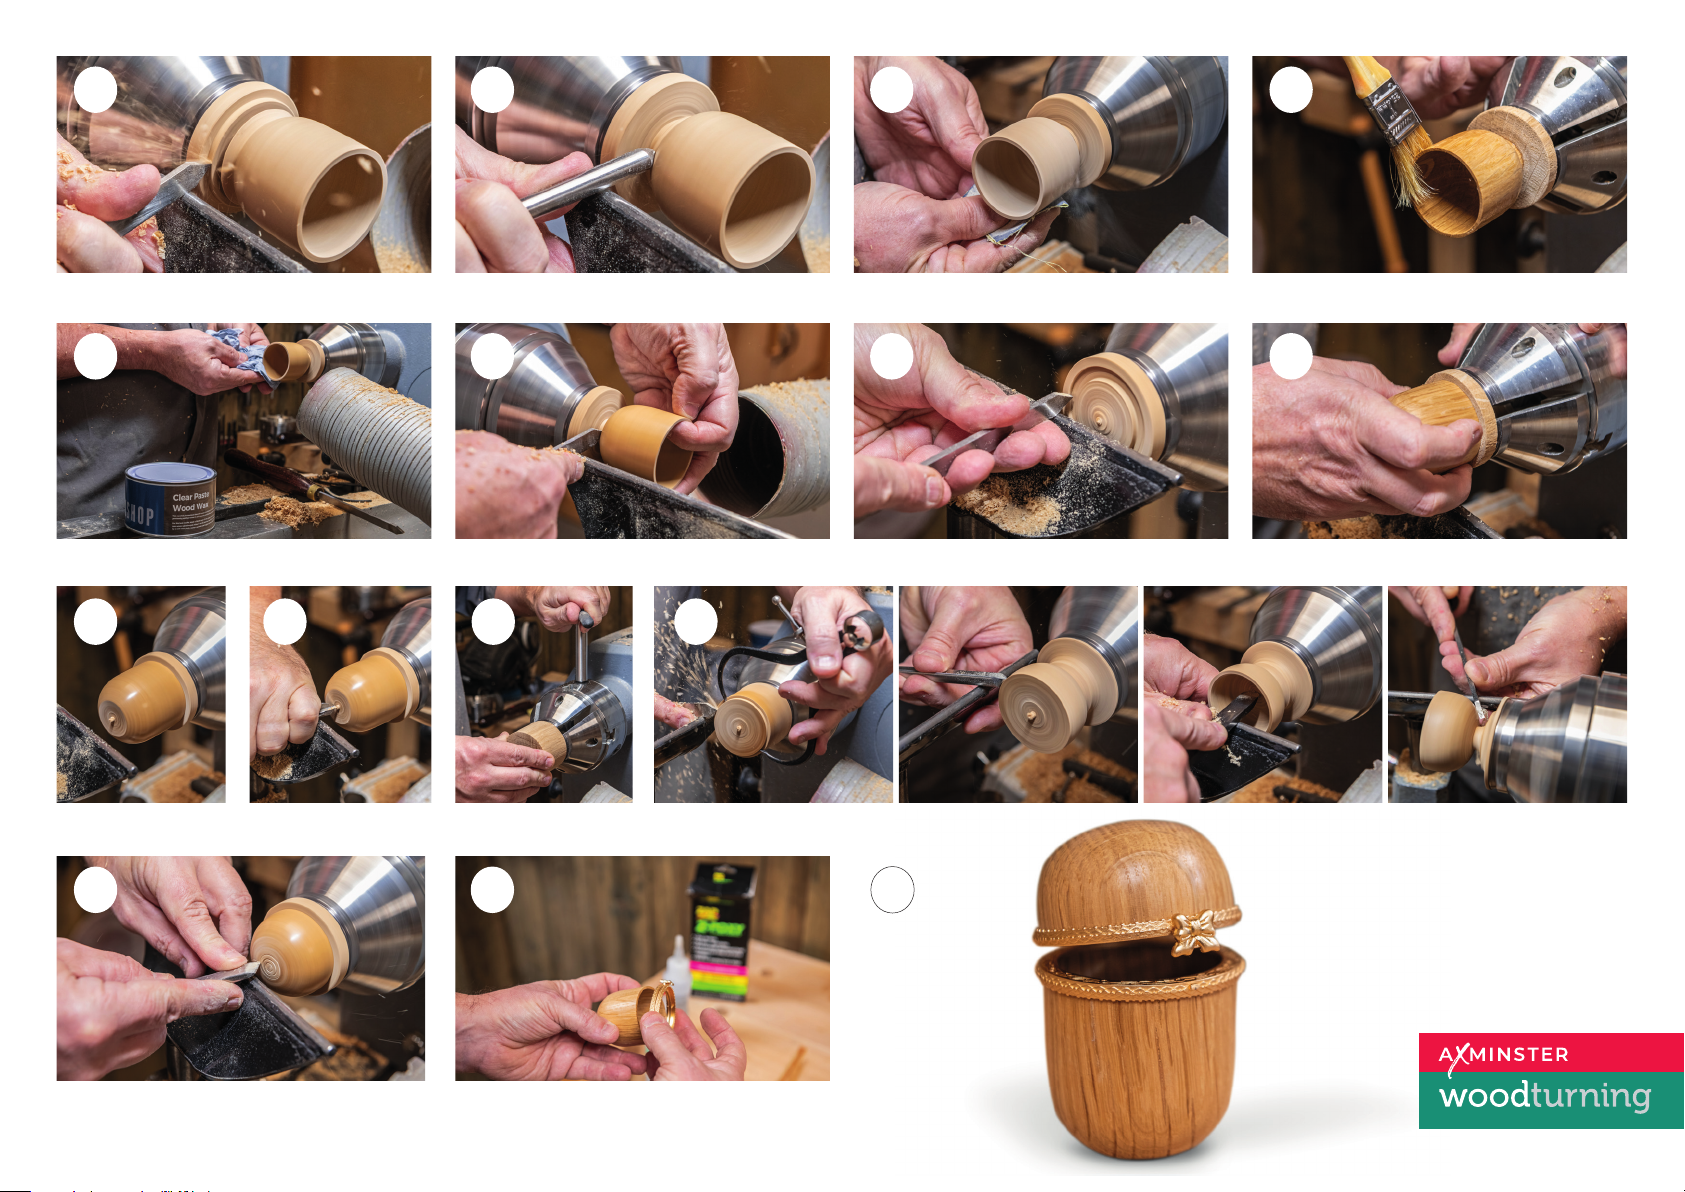
16. Knowing where the inside hollow stops you can make a
small depth cut with a parting tool.
20
20. Coat with wax and buff to a good finish. 21. Part the box off. 22. To finish the base, make a jam chuck from a
24
24. This gives you access
to the underside of
the box.
25
25. Using a bowl gouge
tidy up the base, sand
and polish.
17. Now finish the shaping around to the parting tool cut, this
is best done with a small bowl gouge.
21
26 27
26. Repeat this process on
the lid.
27. Go through all the above steps to finish the lid.
18. You are now ready to sand the inside and outside of the
box making sure you do not over sand and make the box
under-size for the hinge.
22
piece of scrap wood.
19. Coat the box in sanding sealer, wipe dry and lightly sand
back.
23
23. Cut in a recess to jam the box into.
28
28. Add decoration to the lid while holding in the jam chuck. 29. Using epoxy, glue the lid to both base and top.
29 30
30. Here what the finished box
looks like at this stage.
 Loading...