

Page 1
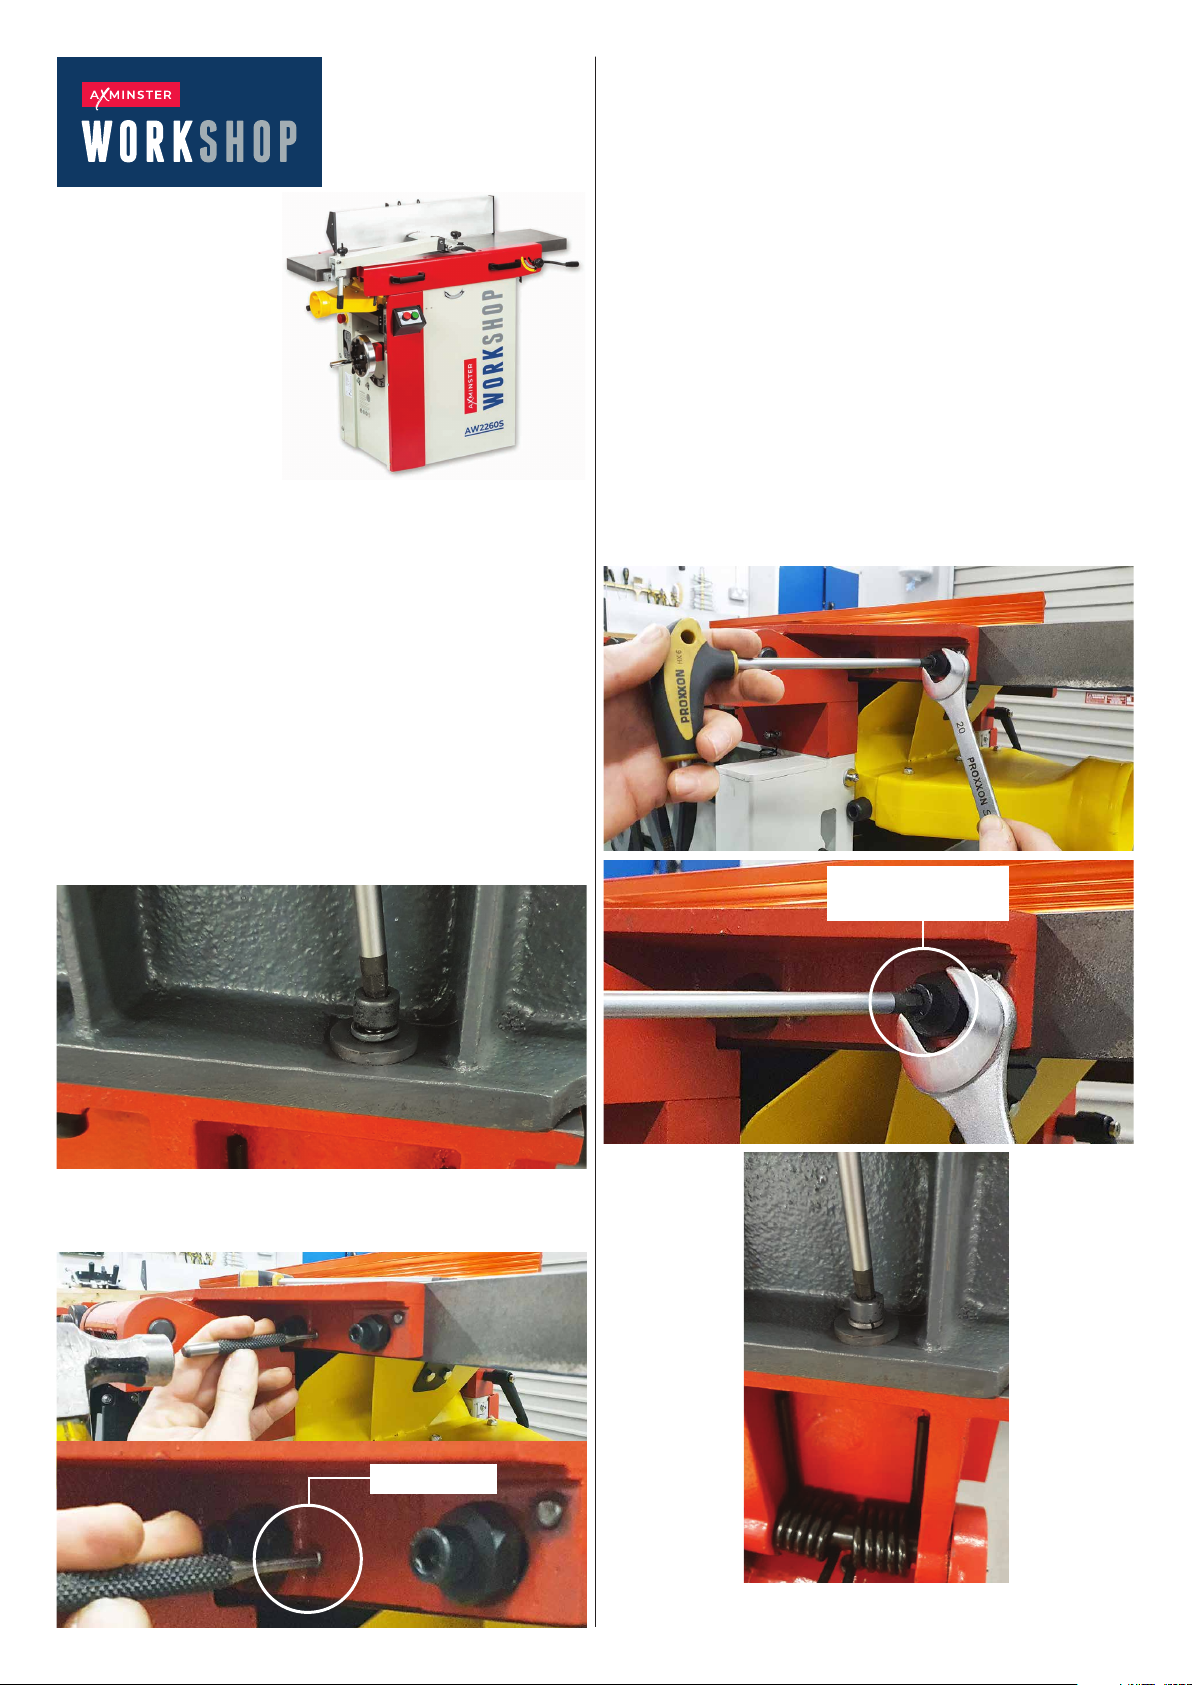
AW2260S PLANER
THICKNESSER
Code 108512
HOW TO LEVEL
THE PLANER
TABLES
1. To correct (lower) the outfeed table please
see method below -
• Firstly lower the infeed table, this will be
reset to the outfeed table at the end.
• Remove the front red cover (handle bolts),
the fence bracket & the larger rear main cover.
• Ensure that all checks are made with tables
locked off & adjustments are subtle & equal.
4. Undo both hex cap screws located at the
back of the machine & use a 20mm spanner
to rotate the cam bolts to lower the table,
rotate both cam bolts the same amount to
ensure that the table doesn’t drift too far out
of line.
VERY LITTLE ADJUSTMENTS WILL BE NEEDED.
5. A straight edge along the table on the hinge
side(back) will help gauge adjustment. To check
table height in relation to the cutters place a
straight edge on the outfeed table (hinge side,
back) then slowly rotate the cutterblock
until the cutter picks up the straight edge then
drops it down(see video) the straight edge
movement should be 3mm -6mm. Lock in place
by tightening the hex cap bolts & retighten the
table locking bolt No need to replace the pins.
2. Undo the outfeed table locking bolt, no
need to completely remove.
3. Remove both transit pins by tapping
them out -
Hex cap screw
& cam bolt
Transit Pin
Continues Over
Page 2
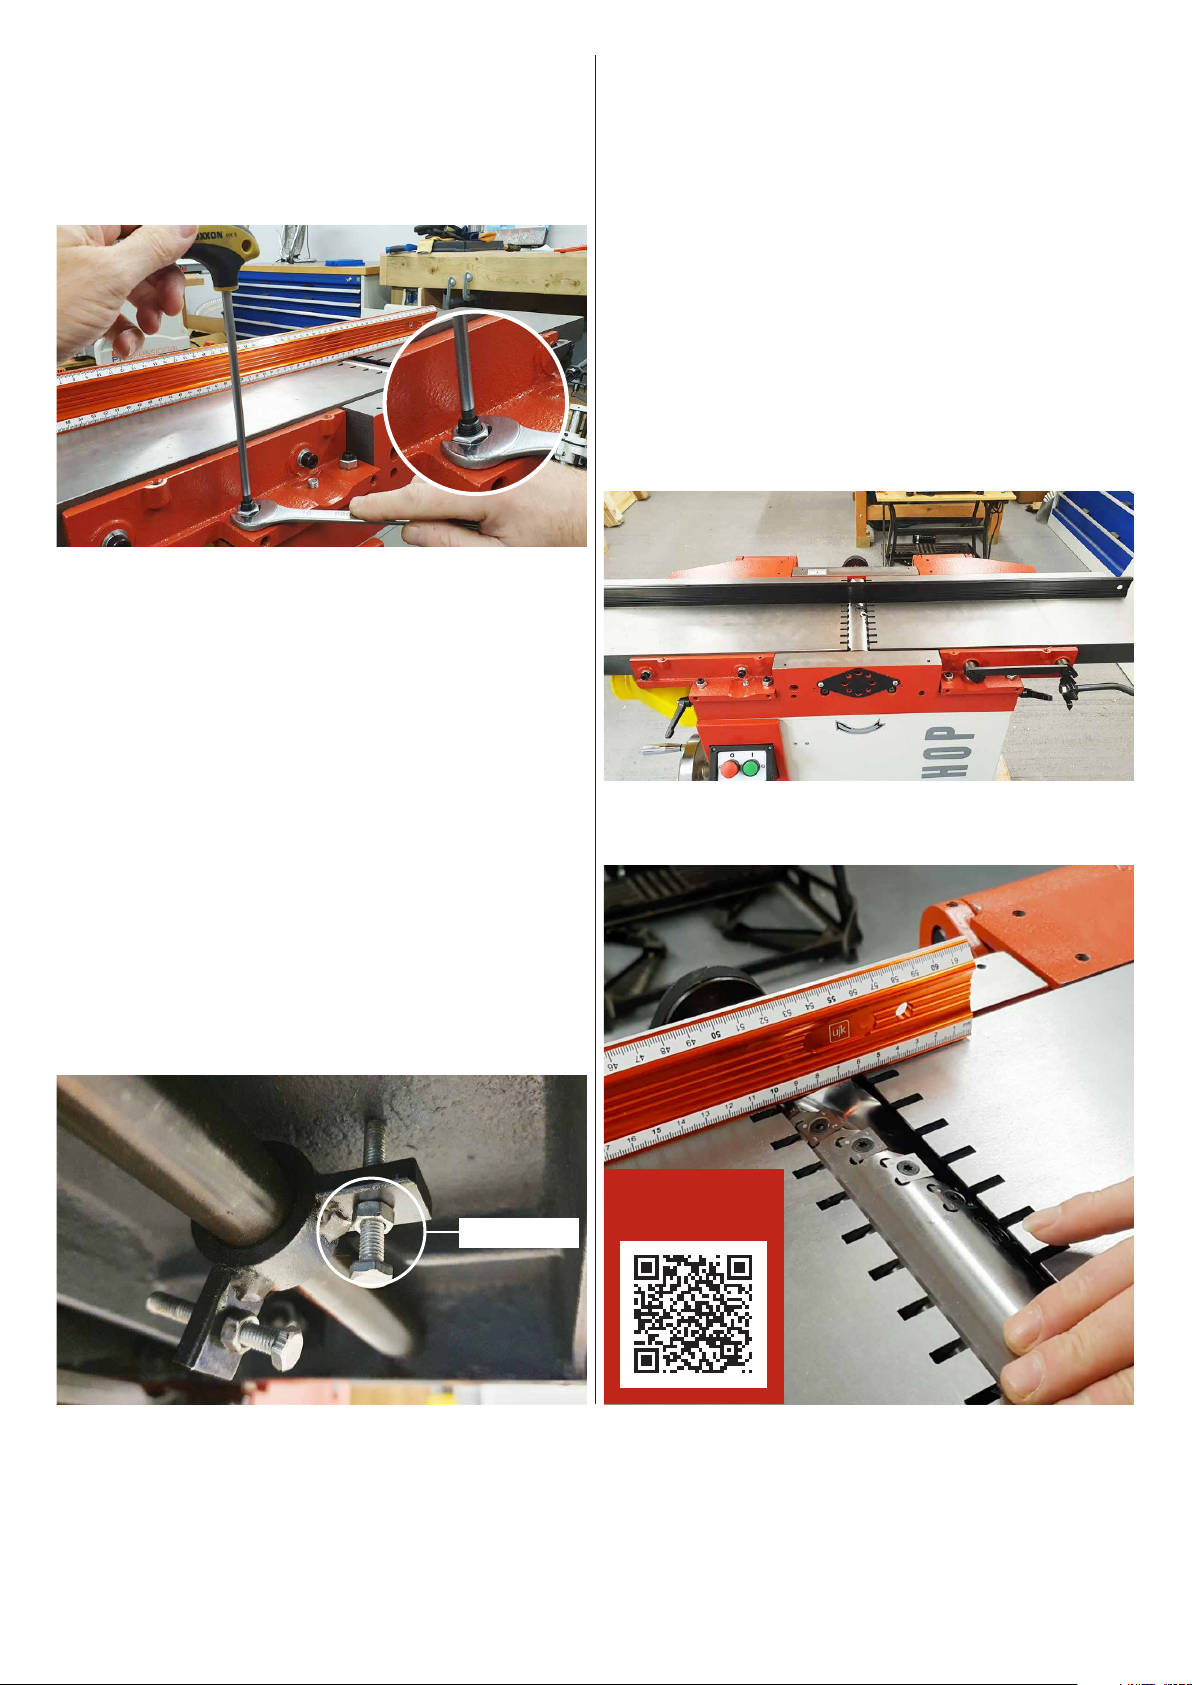
6. Adjustment will be also needed on the
locking (front) side of the table to match the
hinge side. With the table in its down position
& lightly locked undo the 17mm nuts with a
hex key in the grub screw.
7. Moving the grub screw upwards will allow
the table to drop down, once again move both
grub screws the same amount, VERY LITTLE
ADJUSTMENTS WILL BE NEEDED. To check
table height in relation to the cutters place a
straight edge on the outfeed table (locking side
front) then slowly rotate the cutterblock until
the cutter picks up the straight edge then
drops it down(see video) the straight edge
movement should be 3mm -6mm. Lock in place
by tightening the hex 17mm nuts, then recheck.
9. Finally check the levels (coplanar) of both
tables, a long straight edge or clean spirit will
be needed for this. With the infeed table raised
up to its fullest, put the straight edge along
both tables.
10. These tables should be with .02mm of each
other, a feeler gauge is best to check any gap,
remember any gap looks twice as big as it
actually is due to the reflection from the tables.
If adjustment is needed it usually means that
the outfeed hasn’t been raised up equally.
Revisit the Hinge side (rear) adjustment first
only moving one of the adjusting cams. The
locking side (front) will need to be adjusted to
match.
11. Refit front & rear panels then the fence
bracket.
8. The infeed will also need lowering to match
the outfeed table. A stop bolt is located under
the infeed table, winding this bolt out will lower
the final position of the infeed table. Lower the
infeed table, wind the bolt out, raise the infeed
table & check the height in relation to the
outfeed table.
Stop bolt
Watch Planer
Drag Test
Axminster Tools, Axminster Devon EX13 5PH
axminstertools.com
 Loading...