

Page 1
Guide for fitting
the Fence Upgrade for
AP2920B Bandsaw
The Rip fence for the AP2920B Bandsaw has
been upgraded to a T-style fence.
Below are the instructions for squaring to the
table and aligning to the blade.
Aligning the
fence to the blade
1. Ensure that the table
aligning instruction
has been followed
on page 11 of the
manual.
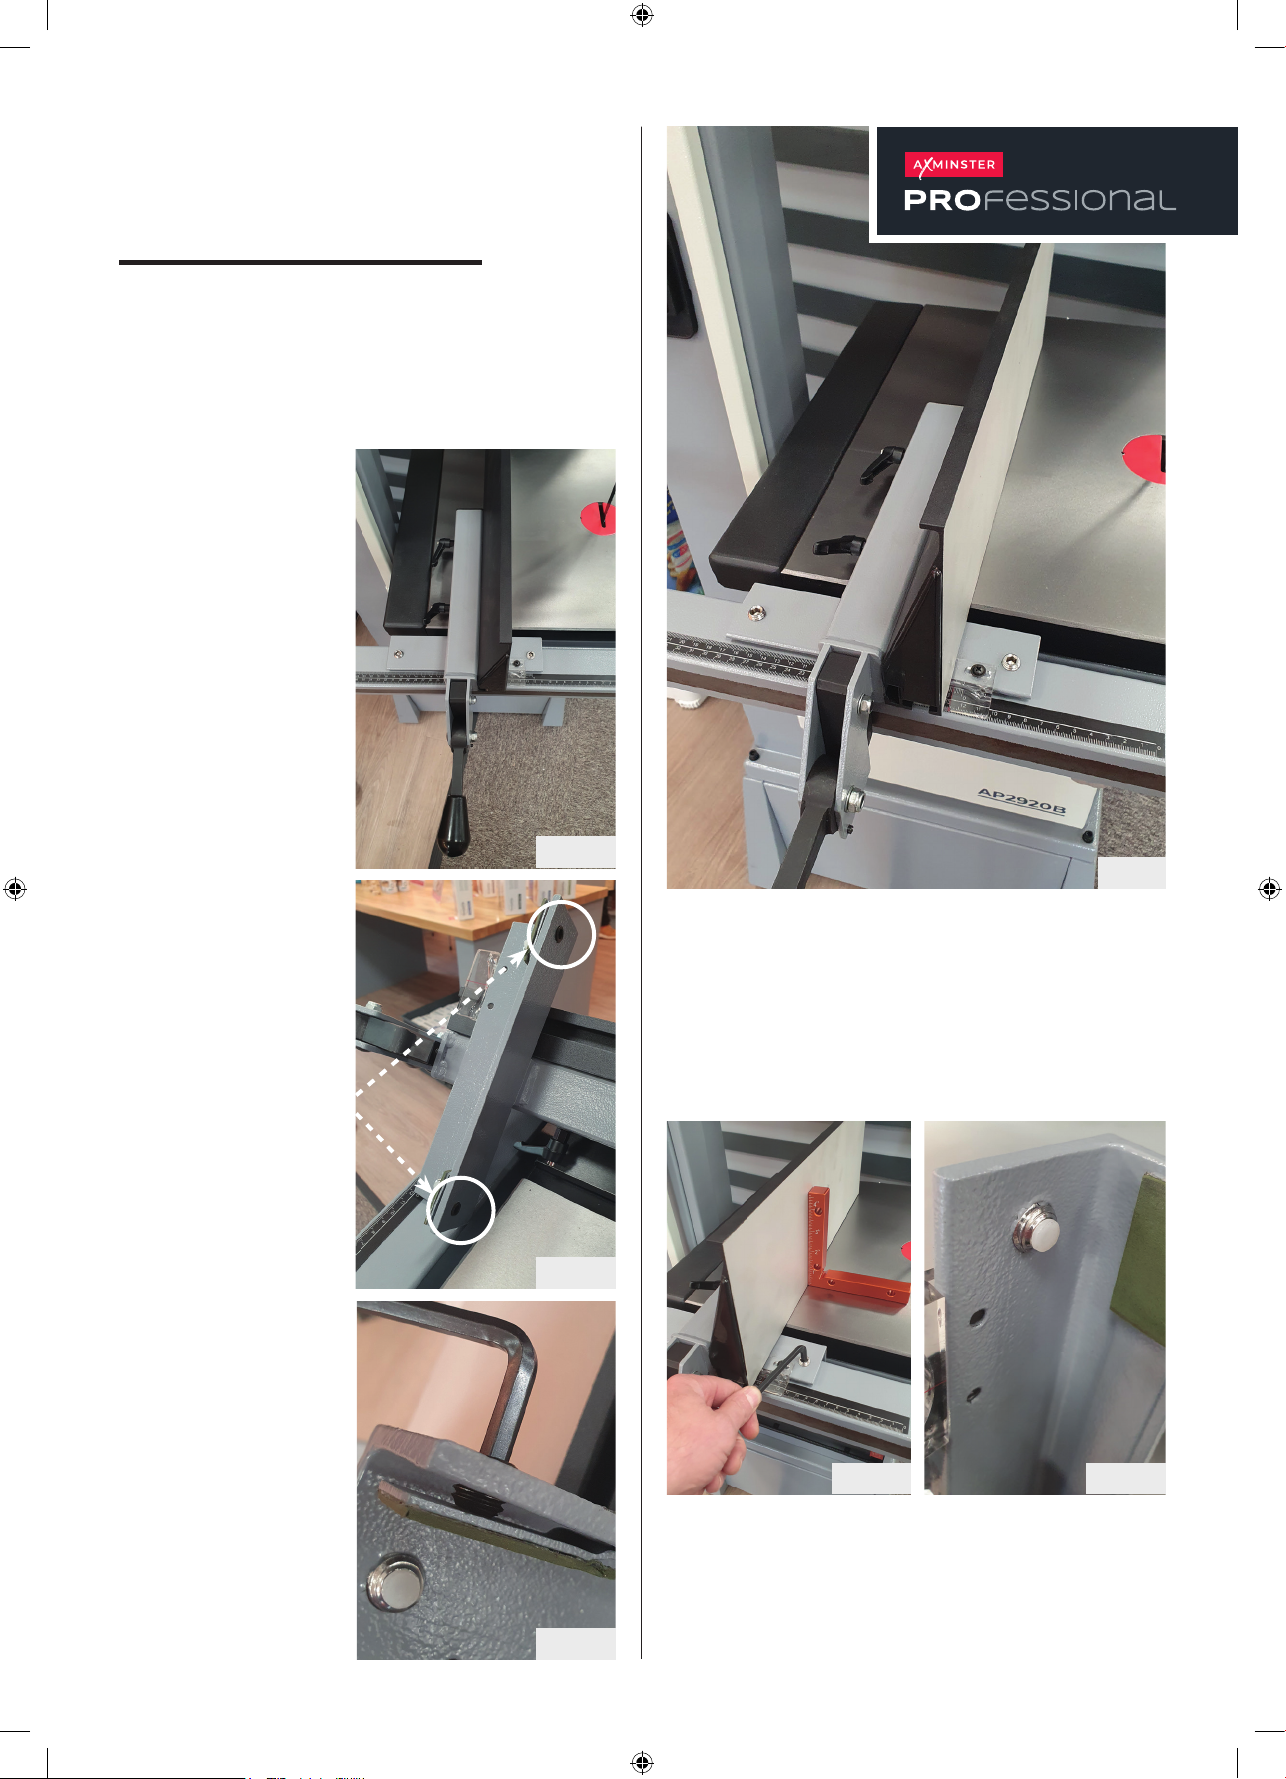
2. Place the fence on
the machine & slide
it over to the mitre
fence slot. FIG. 2
3. To align the fence
to the blade/mitre
fence slot the fence
has been fitted with
2 grub screws that
can be located here.
FIG. 3
FIG. 2
FIG. 1
Squaring the fence to the table
5. Ensure that the “squaring the table to the
blade “instruction has been followed on page
12 of the manual.”
Place the fence on the machine & slide it over
then lock it off around 100 – 150mm from the
blade, check for square with the fence in its
high position. FIG. 1
FIG. 3
4. Slide the fence over
to the mitre fence
slot and check for
alignment, if the
fence seems out of
line to the slot, then
adjustments can be
made by winding
either grub screw in
or out. FIG. 4
FIG. 4
FIG. 5 FIG. 6
6. If the fence seems out of square to the table,
then adjustment can be made by firstly
unlocking the fence then winding the 2 nylon
grub screws in or out. Adjust, relock then
recheck for square, adjust again if needed.
FIGS. 5 & 6
 Loading...