

Page 1
Step-by-step
guide to…
TRADITIONAL
1
2
3
4
PEPPER
MILL KIT
Difficulty Level : Beginner
Order Code:
800292
5
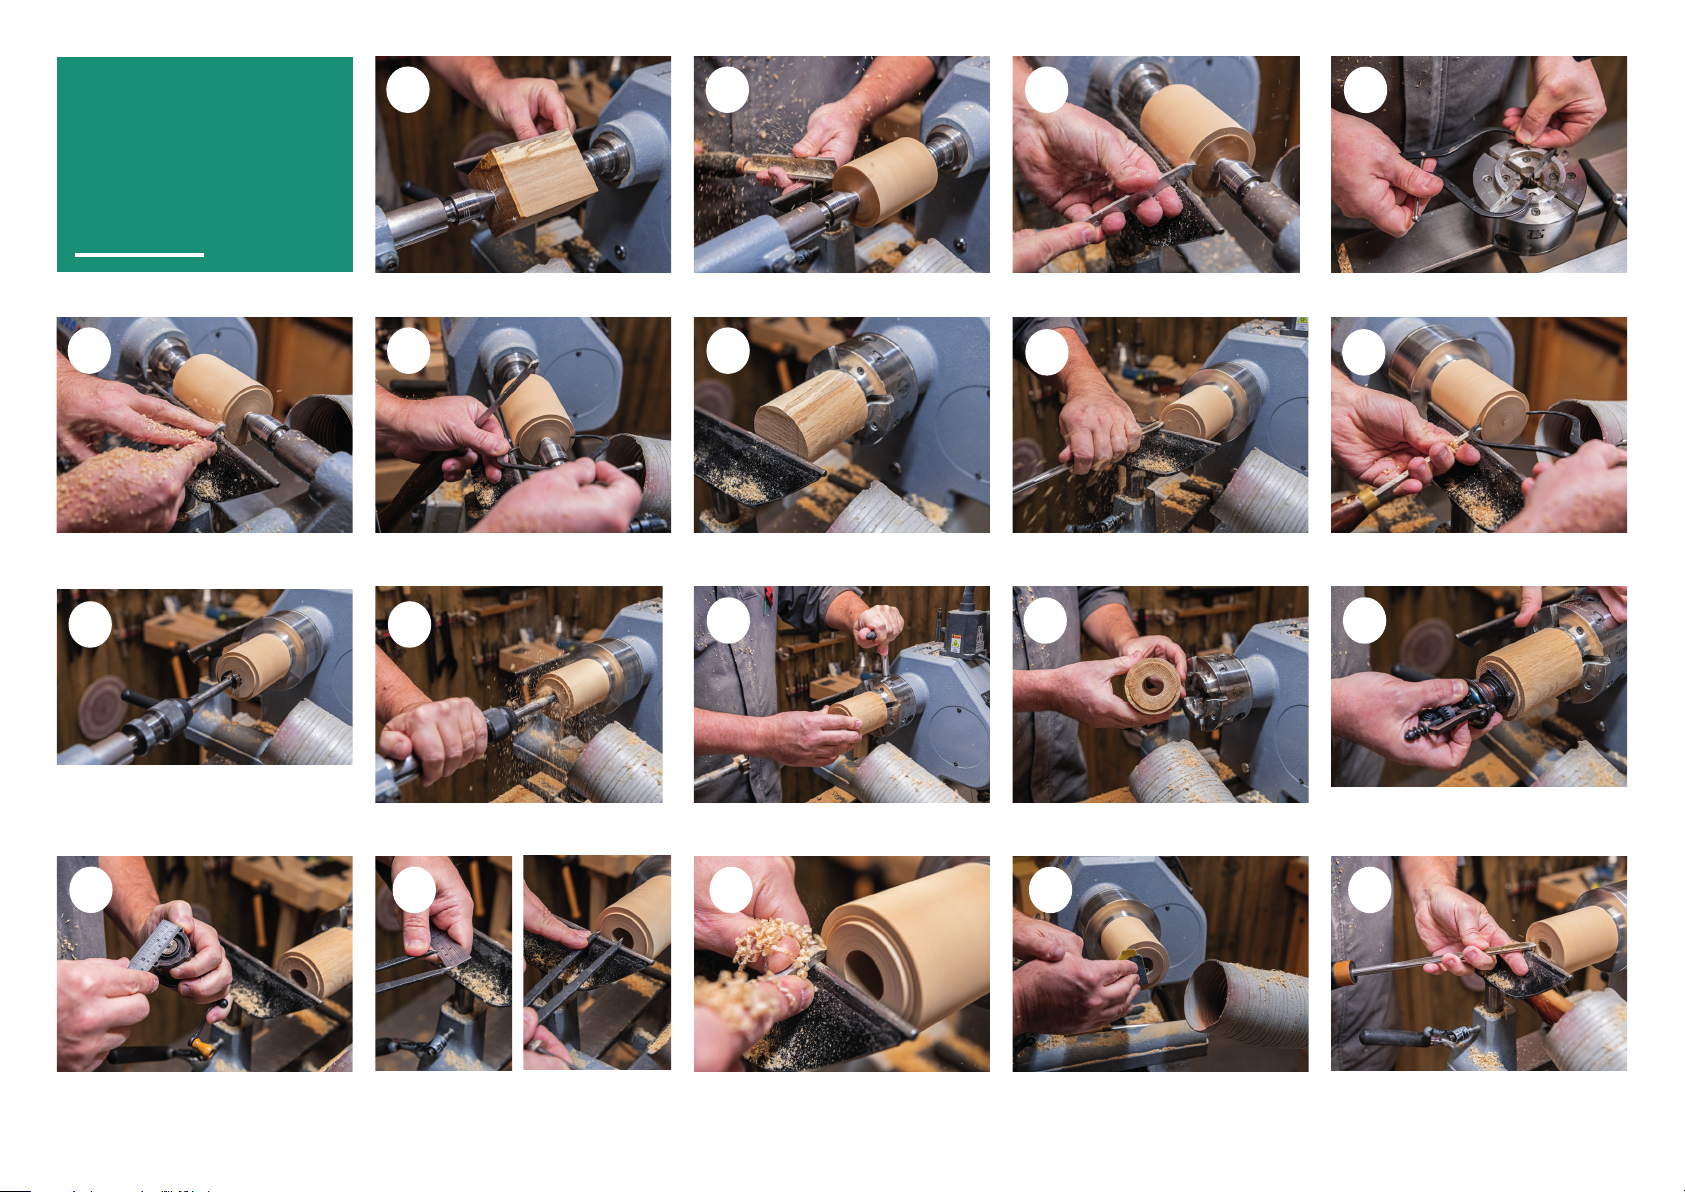
5. Size a foot on the tailstock end of your blank to
match the measure internal chuck grip.
10
10. To allow the peppercorns to fall all the way
through the finish grinder, a hole will need
to be drilled all the way through the blank.
We’re using a 28mm drill bit but anything
between 25mm and 28mm will work.
1. Start with your blank mounted between
centres.
6
6. Check periodically until you get the size right. 7. The blank can now be taken f rom between
11
11. Drill just past half the depth of the blank. 12. Now turn the blank over and drill through the
2. Rough down to a cylinder. 3. Clean up the tailstock end using a parting tool.
7
centres, the chuck mounted, and the blank
held in the chuck.
12
rest of the way.
8
8. Using your bowl gouge, clean off the face of
the blank.
13
13. You should now have a hole running all the
way through your blank.
4. Measure the internal grip of your chuck jaws
in preparation to hold your blank.
9
9. We will have to turn the blank over for the next
process so create a second hold point on this end
and the same size as the previous.
14
14. The mechanism will be screwed onto the
base using two supplied screws so offer the
mechanism up against the blank to gauge
the diameter so far.
15
15. Measure the underside of the mechanism in
preparation for turning the top.
16. Once measured transfer the measurement to
a set of dividers to mark your blank.
1716
17. Cut this diameter in to the top of the blank
ready for shaping.
18
18. Sand to a good finish. 19. Turn the blank over in the chuck and remove
19
the hold point.
Page 2
20
21
22
23
24
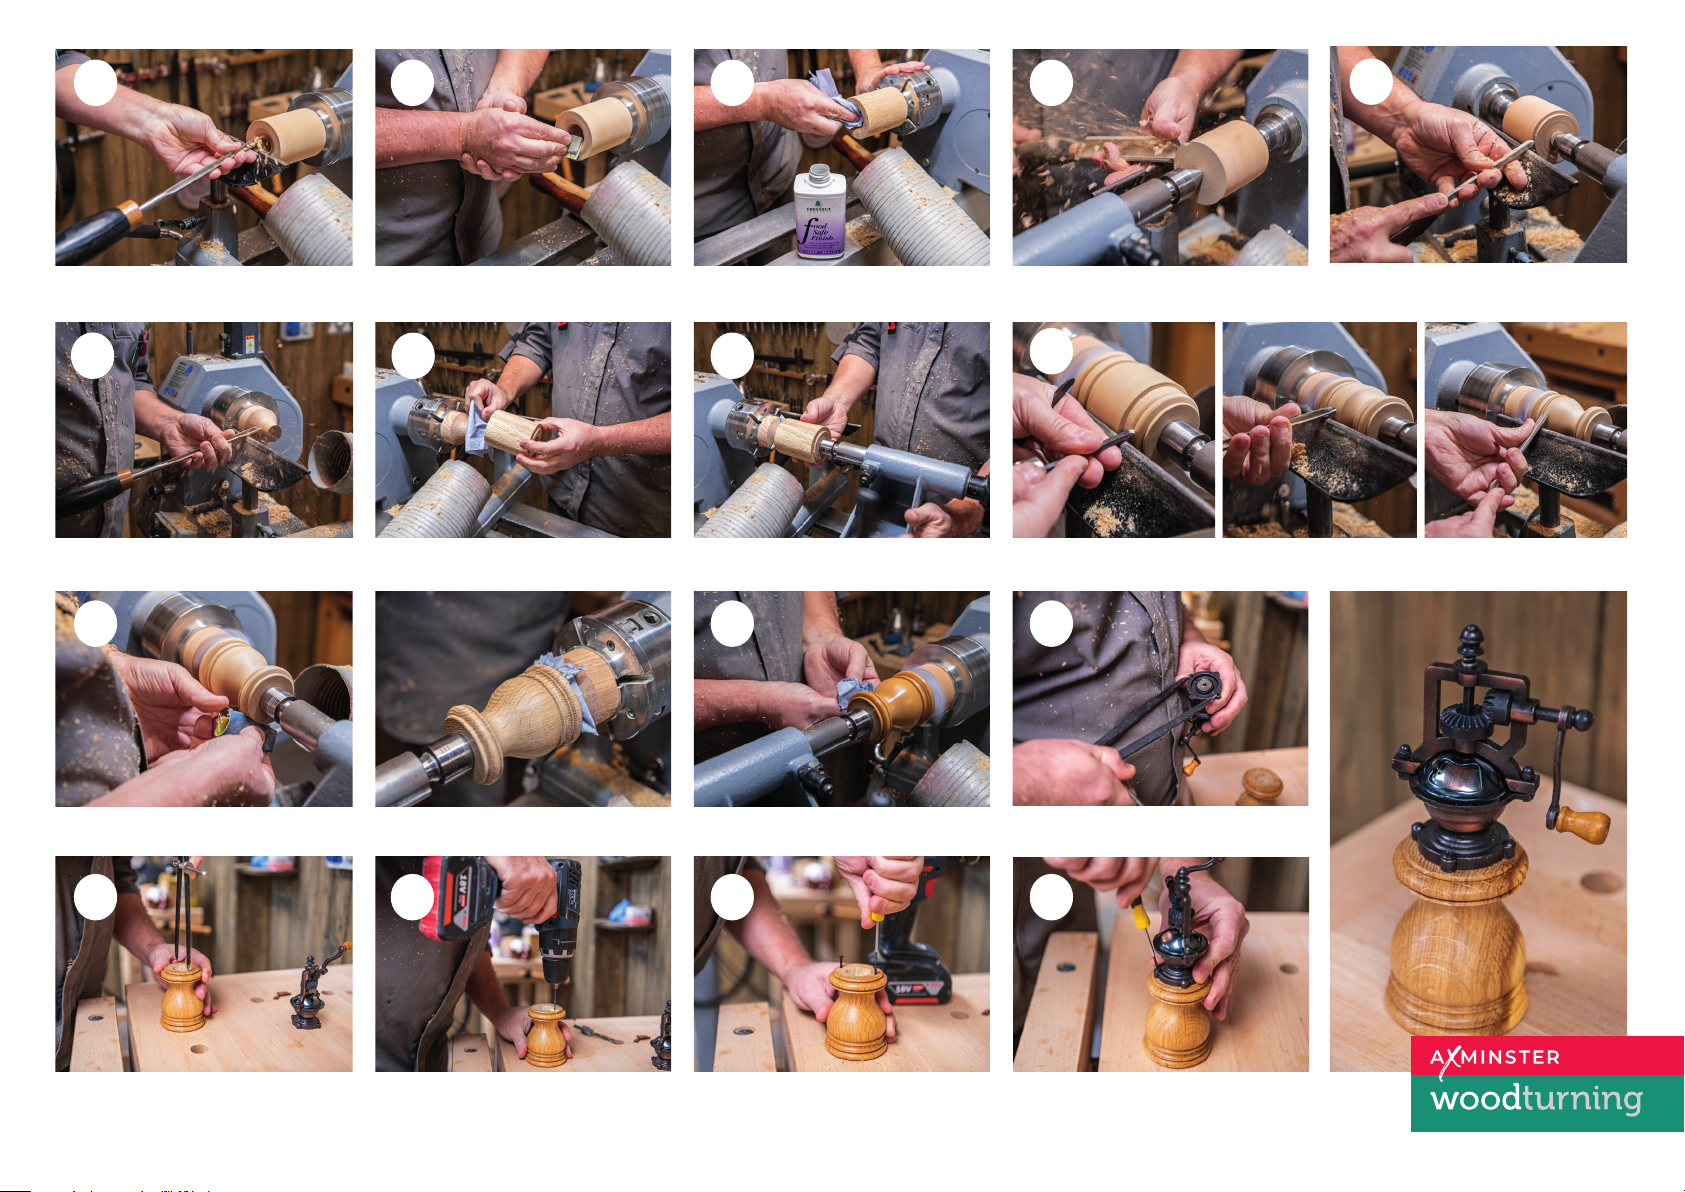
20. Using your bowl gouge, turn a radius toward
the through hole.
25
25. Turn the blank down to a concave cone
shape.
29
29. Sand to a good finish. 30. Give the whole project a finish of food safe oil
21. Sand to a good finish. 22. Give this surface a coat of food safe oil. 23. Remove the blank from the lathe and pre-
26
26. Add a piece of tissue to the cone and insert
the project blank over the cone.
27
27. Bring the tailstock up and hold between cen-
tres, using the through hole to centre on.
30
and remove from the lathe.
pare a blank to drive the project by roughing
a piece of scrap wood down to a cylinder.
24. Create a hold point and hold in the chuck.
28
28. Now the blank is secure and both top and bottom have been finished, you can turn your chosen
outside form.
31
31. In preparation to screw the mechanism onto
the base, use a set of dividers to measure the
centre spacing of the fixing holes.
32
32. Transfer this measurement to the top of the
grinder base and push in to create a shallow
hole where you will need to drill.
33
33. Using a 1mm drill bit, drill a shallow hole to
except the fixing screws.
34
34. Before adding the mechanism screw the
screws and remove them to cut the thread.
35
35. Now add the mechanism and screw in posi-
tion and there you have your finished Grinder.
 Loading...