

Page 1
Step-by-step guide to…
GOLD
1
2
3
PLATED
LETTER CLIP
Difficulty Level : Beginner
Order Code:
202157
4
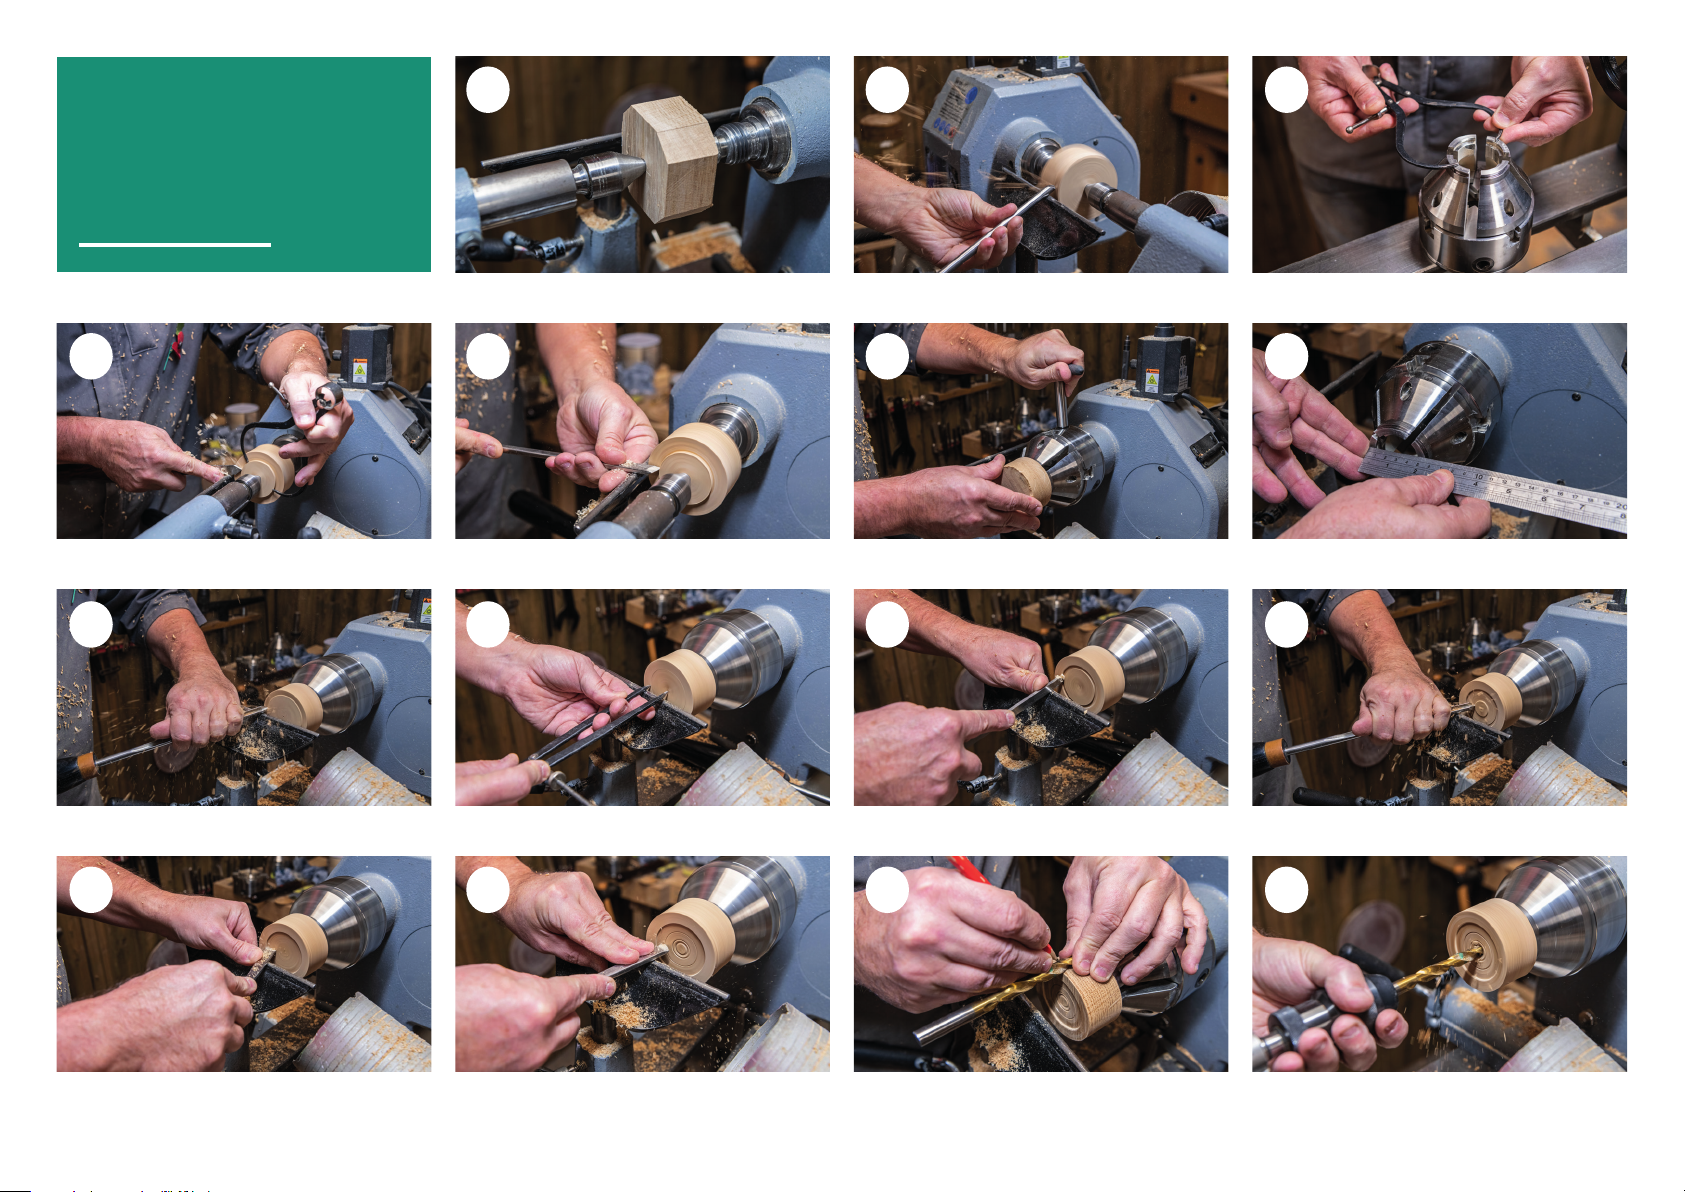
4. Cut a tenon on the face of your blank to measure your jaws
dimension.
8
1. Hold between centres and in this case, I’m using a pro drive
centre and a live ring centre.
5
5. Refine the tenon to suit your chuck jaws, in the case of the
O’Donnell jaws this is a dovetail.
9
2. Rough your blank down to a cylinder with a bowl gouge to
70mm.
6
6. Turn your blank over and mount into your chuck. 7. Now measure the external grip of your jaw in preparation to
10
3. Measure your jaws internal measurement and for this project
I’m using the O’Donnell whichmeasure 40mm internally.
7
turn a recess.
11
8. Tidy the face of your blank with a bowl gouge. 9. Now mark your recess diameter. 10. Cut in the recess diameter with a parting tool. 11. Cut the rest of the waist from the recess with a small bowl
12
12. Refine the recess to a dovetail with a skew chisel. 13. Decorate the recess as an added feature. 14. Measure the screw length that holds the pen kit in place,
13
14
this screw needs to be sunk into the base but still protrude
enough thread to hold the pen, if unsure just follow the
attached plan. Mark a 10mm drill to length.
gouge.
15
15. Hold the drill bit in a drill chuck mounted in the tailstock
and drill to your mark.
Page 2
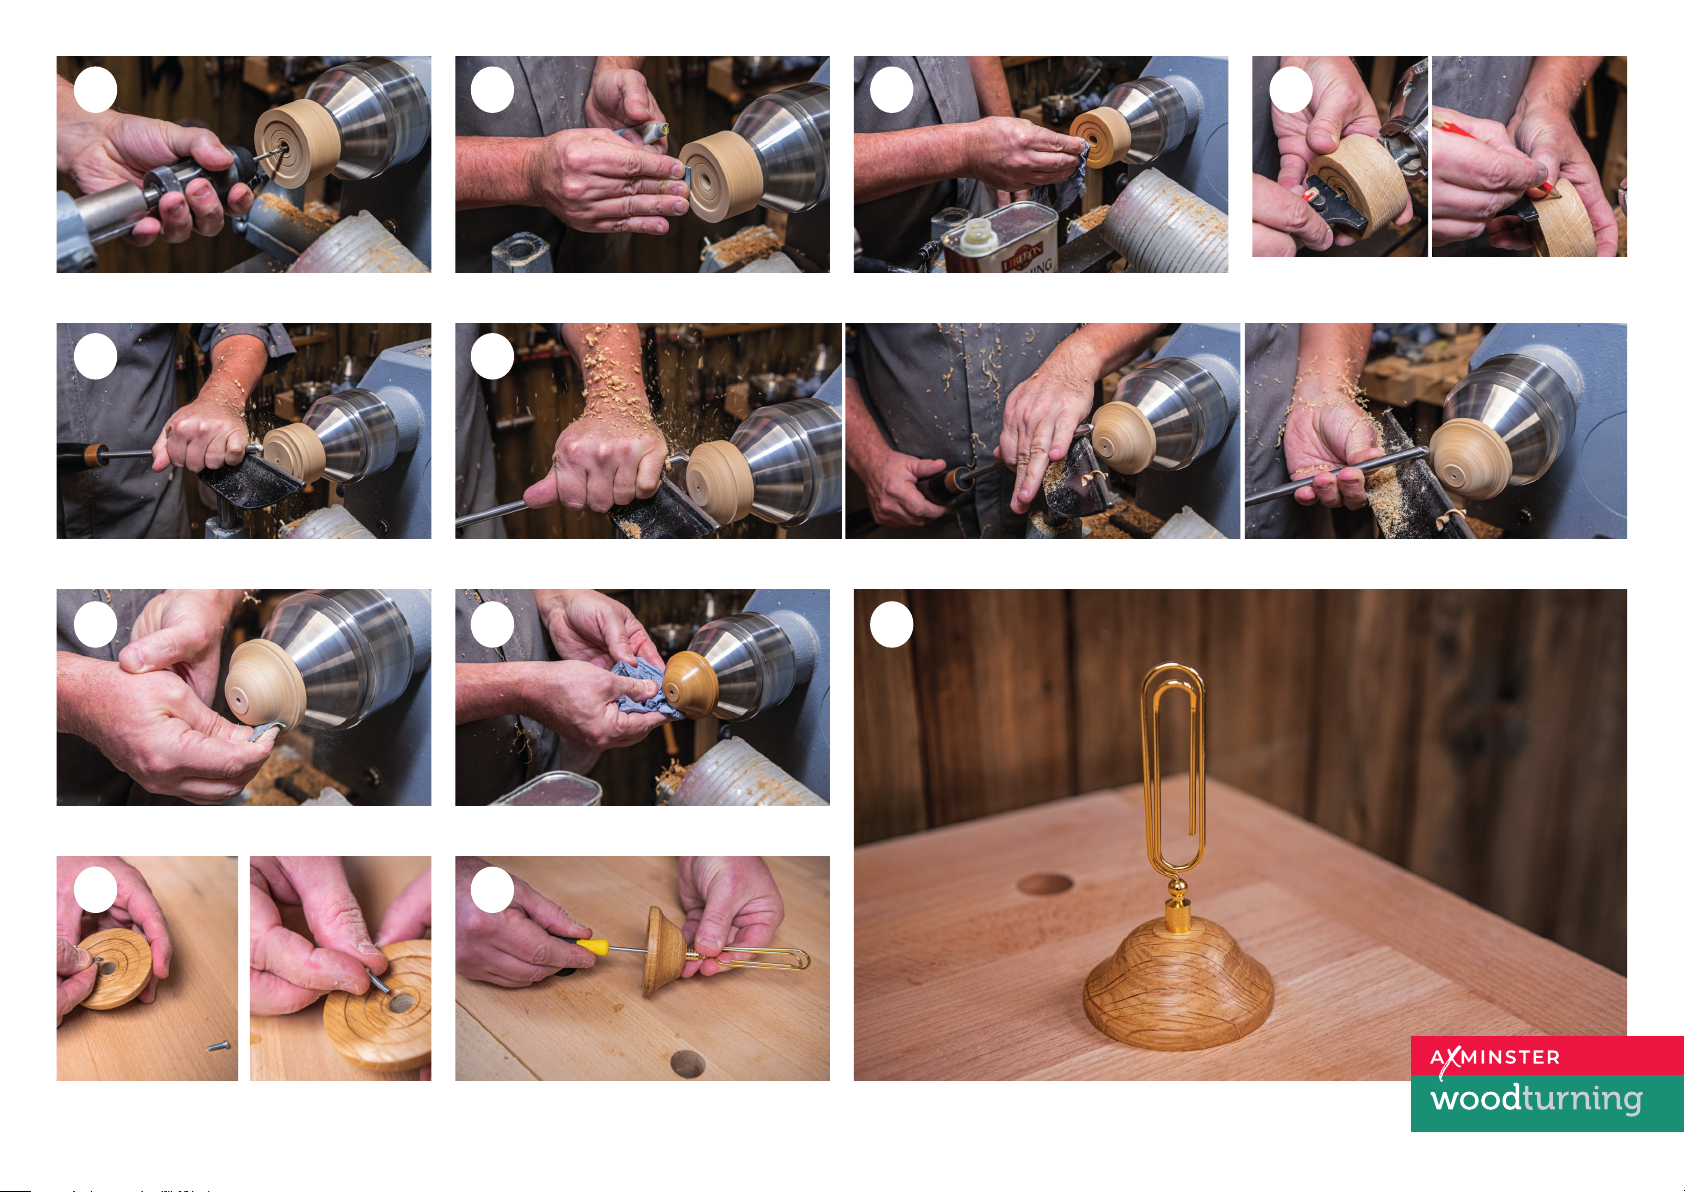
16. Now drill all the way through the blank with a 4mm drill bit to
allow the thread of the screw to pass all the way through.
1716
17. The base can now be sanded to a finish. 18. I’m using finishing oil to finish my base which is applied
18
with a polishing cloth then burnished in with a dry
polishing cloth until dry.
19
19. Double check your 10mm measurement with a depth
gauge and mark this on the outside of the base. Hold the
screw against the measurement to make sure all is correct
and if not, it can be corrected on the front face.
20
20. Holding the blank via its recessed base, turn down to the
finished thickness.
22
22. Sand to a good finish. 23. Oil the finished surface and buff with polishing cloth.
24
21
21. Once the important measurements have been turned you can have some fun with the shaping,
I’m using an Ogee design on mine which has a nice convex turning into a concave at the bottom.
23
25
26
24. Remove from the chuck and insert the washer and screw. 25. Screw the paper clip onto the base. 26. There we are, the finished Letter Clip.
 Loading...