

Page 1
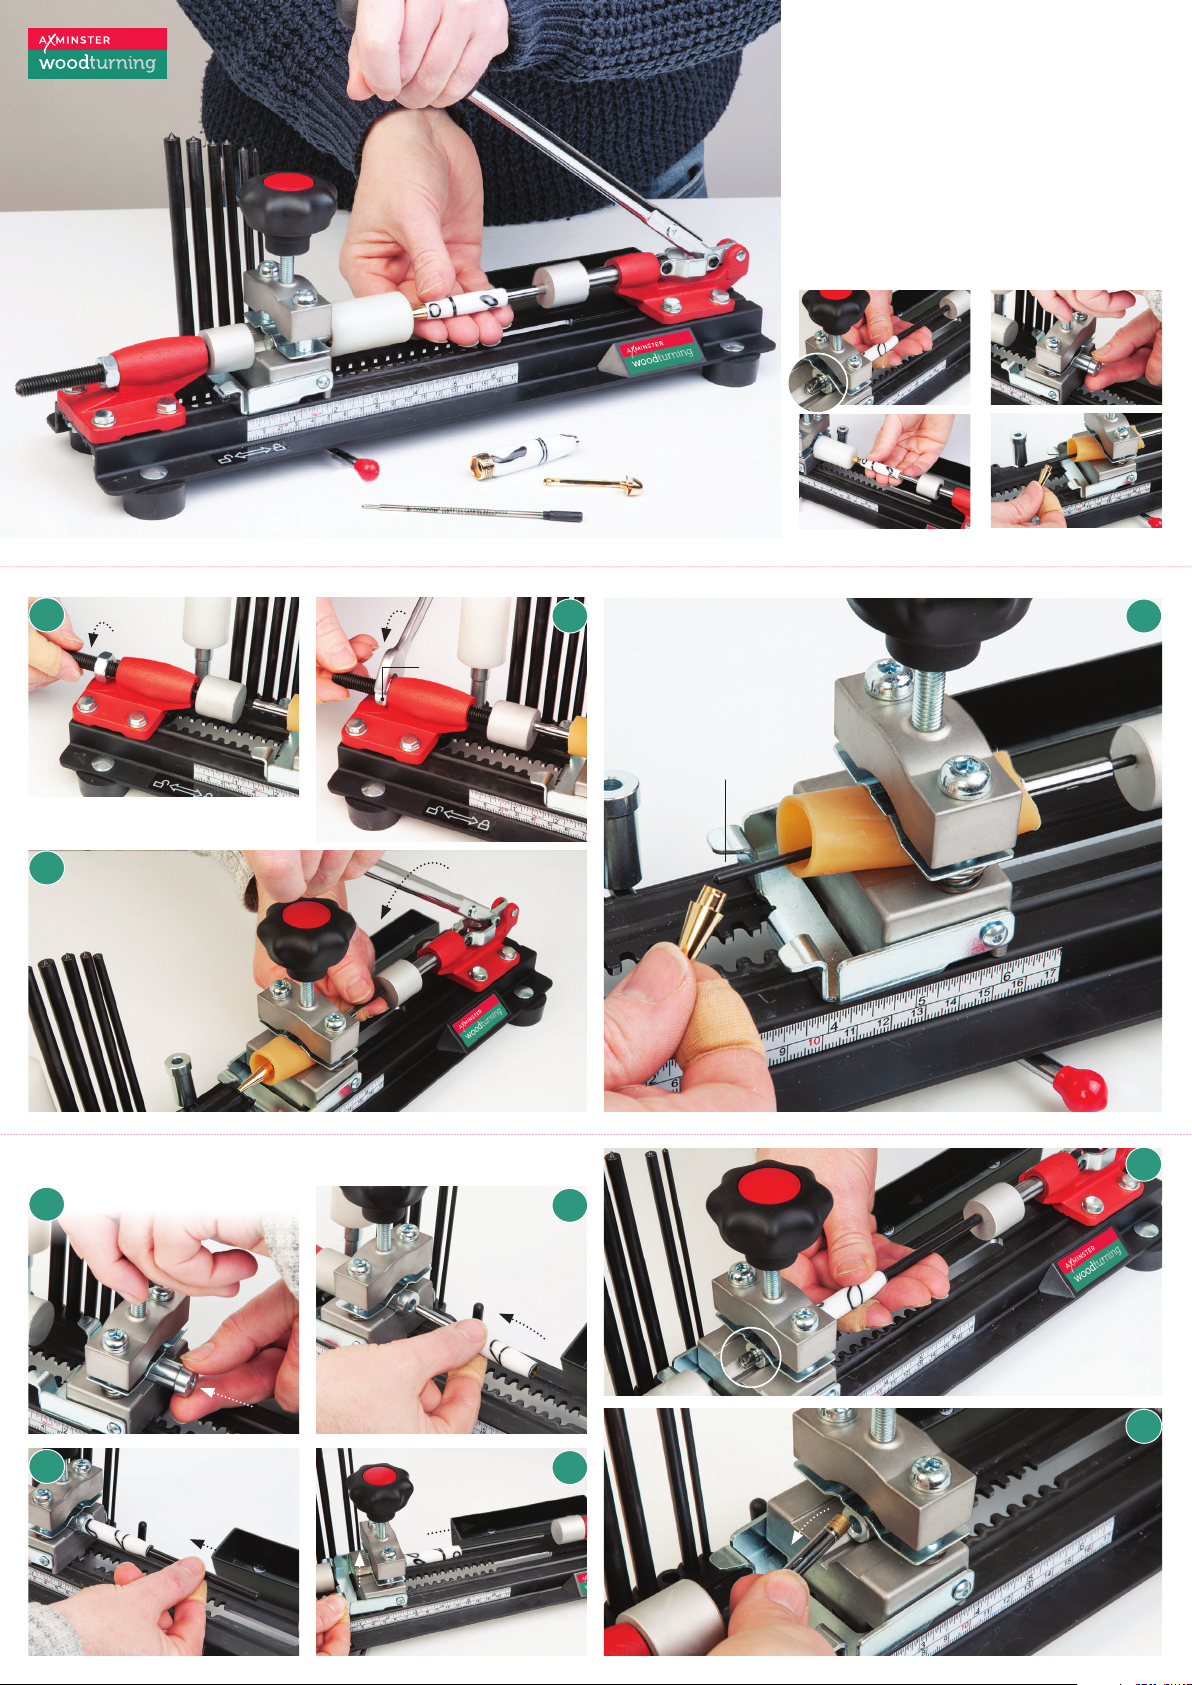
Assembly/Disassembly
Code 106069
Date: 01.10.2021
5
Deluxe Pen Press Instructions
• Combined tool for assembly and disassembly of pens
• Offers reliability, accuracy and control
• Press pen parts together for perfect results
• Allows disassembly of virtually any pen
• Features a strong arm with ergonomic handle
86
Lock
nut
Adjust the end support if needed to
push or to support the pen
7
Support the push
rod while operating
the toggle press
7mm Disassembly Bushing
1
Secure the 7mm bushing
into the sled clamp
Carefully push
out the pen nib
5
2
Inset the pen
mechanism into
the 7mm bushing
Support the pen &
carefully push the
pen mechanism out
Remove
the pen
3
Insert the 7mm tipped
end of the push rod
into the pen assembly
Move the sled
close to the arm
press and lock in
place
4
mechanism
from the
bushing
6
Page 2
A
1
B
2
E
B
C
D
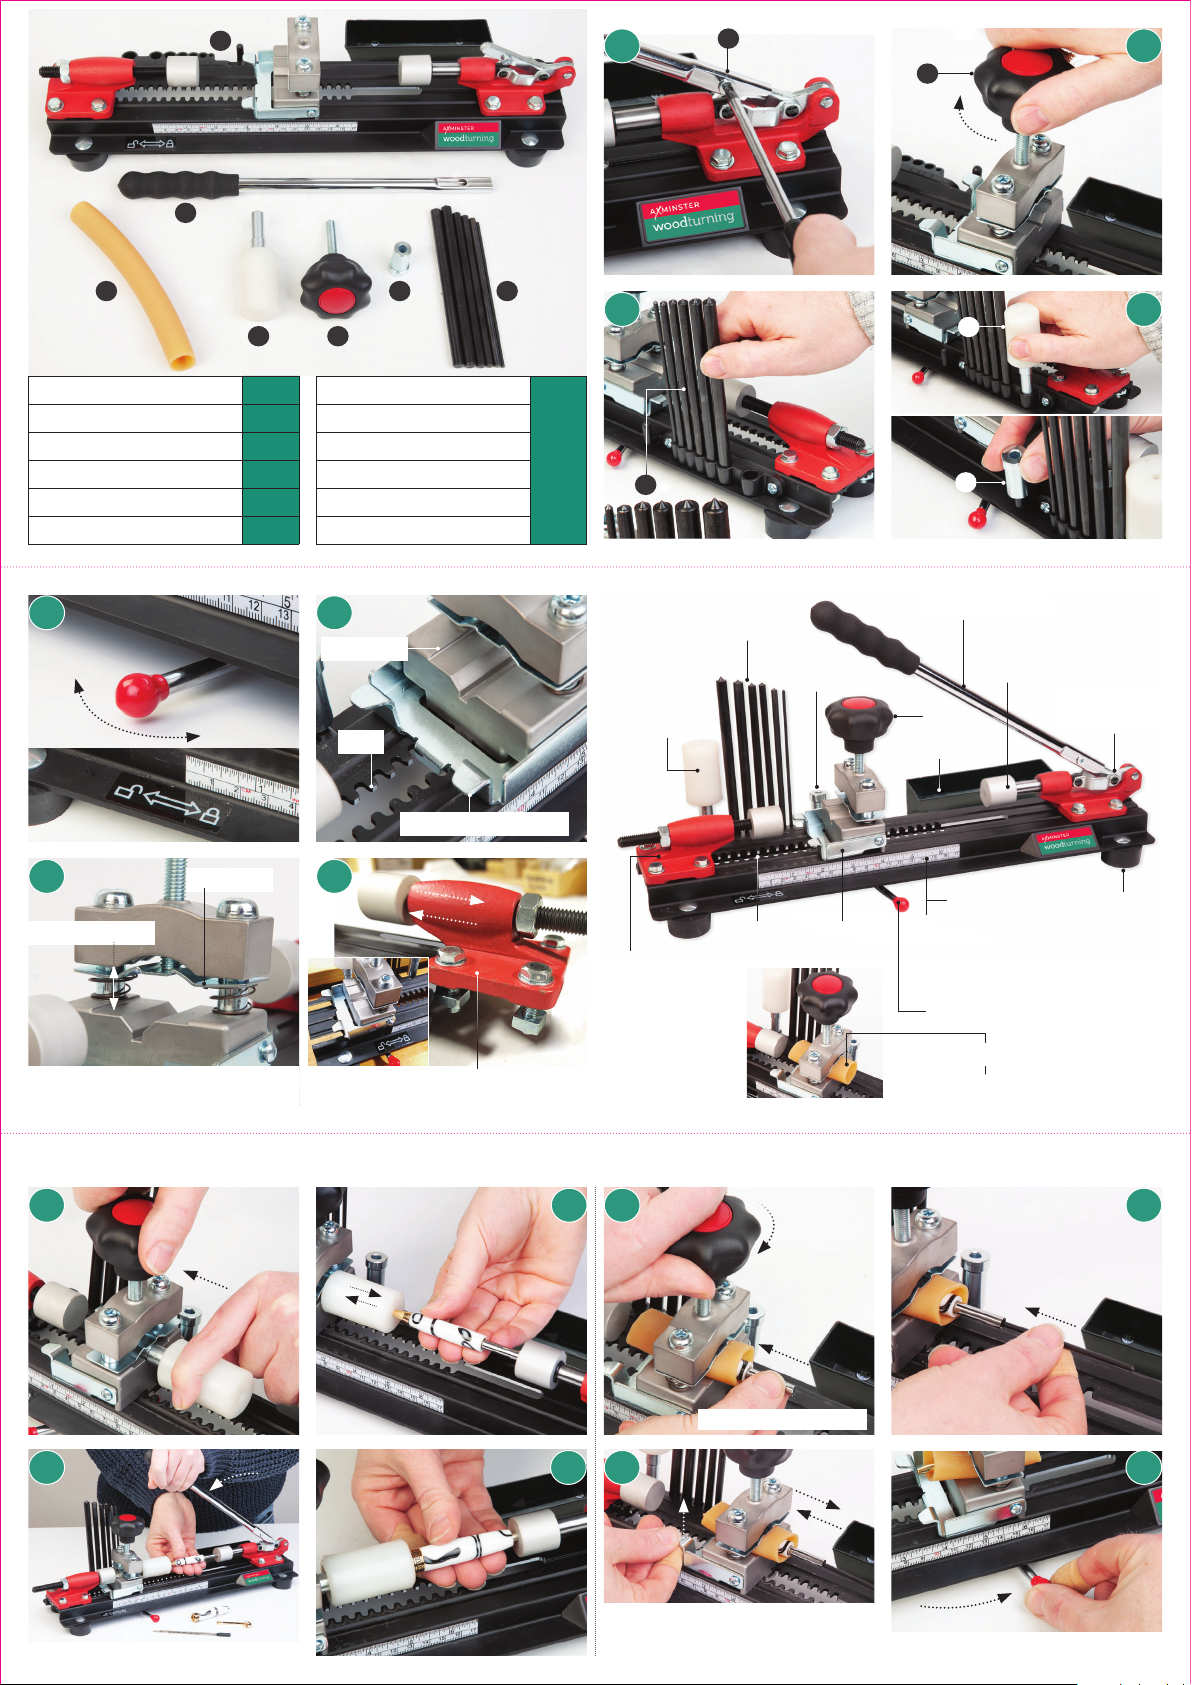
• Assembly/Disassembly Press
• Operating Handle B
• Disassembly Rubber
• Sprung Loaded Buffer D
• Clamping Knob E
• 7mm
Disassembly Bushing
Tube C
5
Unlock
Lock
E
A
• 3.0mm Tipped Push Rod
• 5.5mm Tipped Push Rod
• 6.0mm Tipped Push Rod
• 7.0mm Tipped Push Rod
• 8.5mm Tipped Push Rod
F
• 9.0mm Tipped Push Rod
6
Sliding sled
Rack
F G
Sliding sled rack lever
D
G
G
Sprung
loaded
buffer
3-9mm
Disassembly
Tipped push
rods
7mm
Bushing
Parts storage box
F
Operating handle
Arm press
Clamp
knob
Toggle press
mechanism
43
7 8
19mm clearance
Clamp assembly with 19mm
clearance for larger diameter pens
Sled Clamp
Removable end support assembly to
utilise the full length of the sled rack
Removable end
support assembly
with adjustable
buffer.
Sled rack
Sliding sled
rack lever
170mm Scale
Use the scale to insert parts
equally, e.g. reputability
Sliding sled clamping lever
Disassembly rubber tube
Cut the rubber tube
to the required length
Pen Assembly using Sprung loaded Buffer General Disassembly using Rubber Tube
Clamp the
sprung
buffer
in place
Assemble
the two parts
of the pen
together
1 2
21
DON’T OVER-TIGHTEN
Clamp the
pen in place
but not too
tight, to
prevent the
pen from
being
damaged
Insert the tipped
end of the push
rod into the pen
assembly
Foot
3 34
Move the sled closer to the arm press
and lock in place using the clamping
lever
4
Lock
Continues Over...
 Loading...