

Page 1
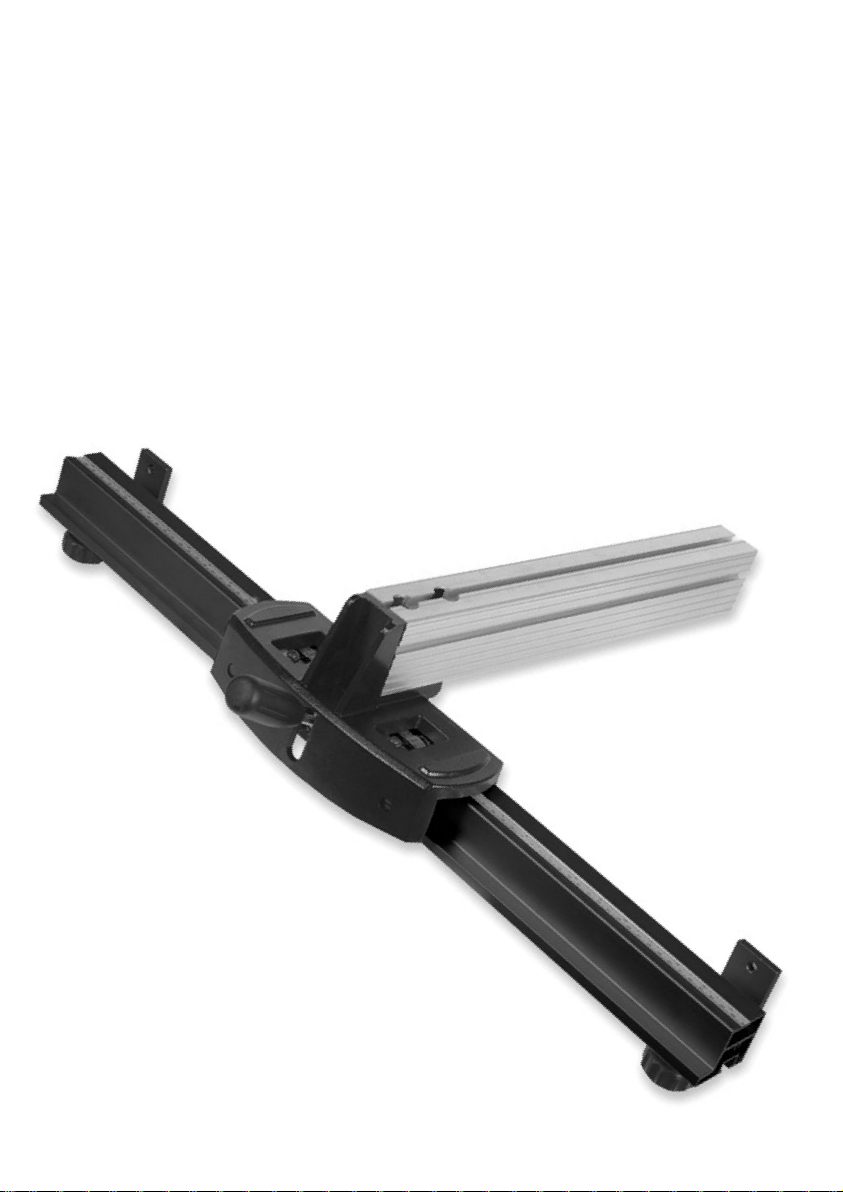
Code 100205
Axminster
Rip Fence Upgrade
Page 2

Index of Contents
Page No
Index of Contents 02
What’s Included 03
Mounting the Fence to the Bandsaw Table 04
Tool Illustration and Parts Description 05
Parts Breakdown/List 06-07
2
Page 3
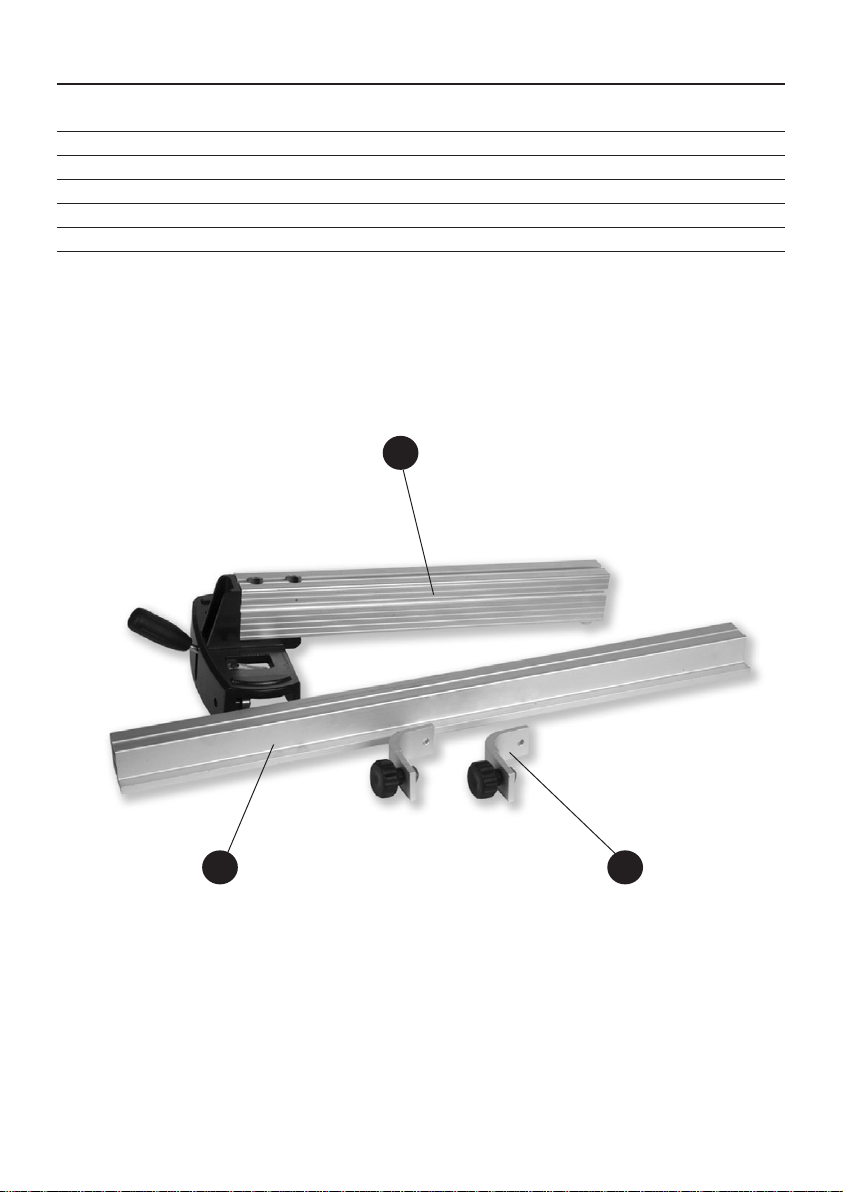
What’s Included
Quantity Item Part Model Number
1 No Bandsaw Guide Fence A 100205
1 No Guide Fence Rail B
2 No Mounting Brackets C
1 No Instruction Manual
A
B
C
3
Page 4
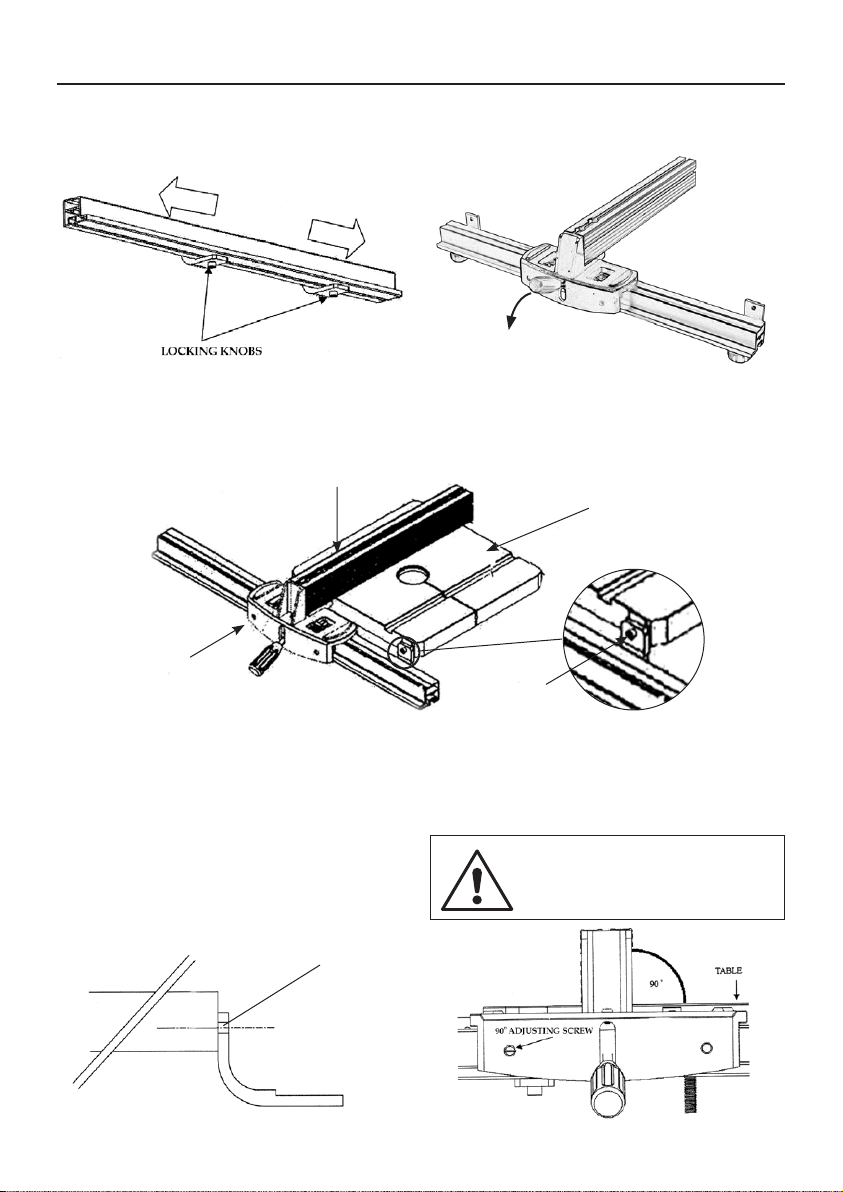
Mounting the Fence to the Bandsaw
Step 1
Place the mounting brackets to the fence rail and
loosely lock them in place with the two locking
knobs.
Press
Press
Step 2
Lock
Position the guide fence firmly down on top of the
guide fence rail and press down the handle to lock
in place. Make sure it is correctly positioned with
the bearings flush on the rail.
Bandsaw table
Mark
Step 3
Place (clamp preferably) the fence onto the table, put the attachment brackets as far apart as is
possible. Tighten the locking knobs. Press the assembly to the table top and front edge. Using a sharp
pencil mark the position of the fixing holes in the attachment brackets. Remove the fence assembly and
in the centre of the hole marks drill 5mm diameter holes and tap M6.
WARNING! MAKE CERTAIN THAT
(For guidance.... the centre line of the holes should
be approximately 23mm below the table edge.)
Approx 23mm
4
EVERYTHING IS LOCKED IN PLACE
BEFORE USING THE BANDSAW
Page 5
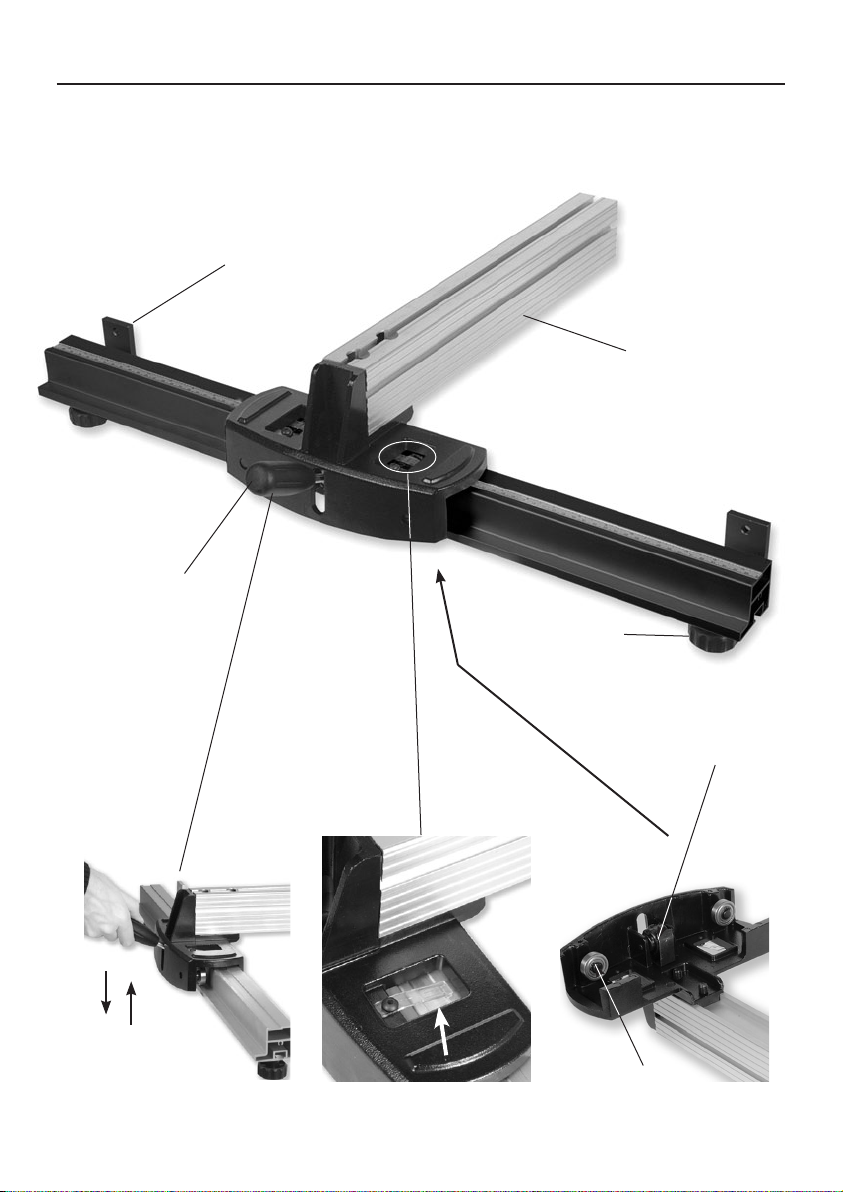
Rail mounting bracket
Guide fence
clamp handle
Tool Illustration and Parts Description
Guide fence
Locking knob
Lock
Unlock
Push down to lock the
fence in position
Guide fence
clamp roller
Measuring scale Guide fence guide rollers
5
Page 6
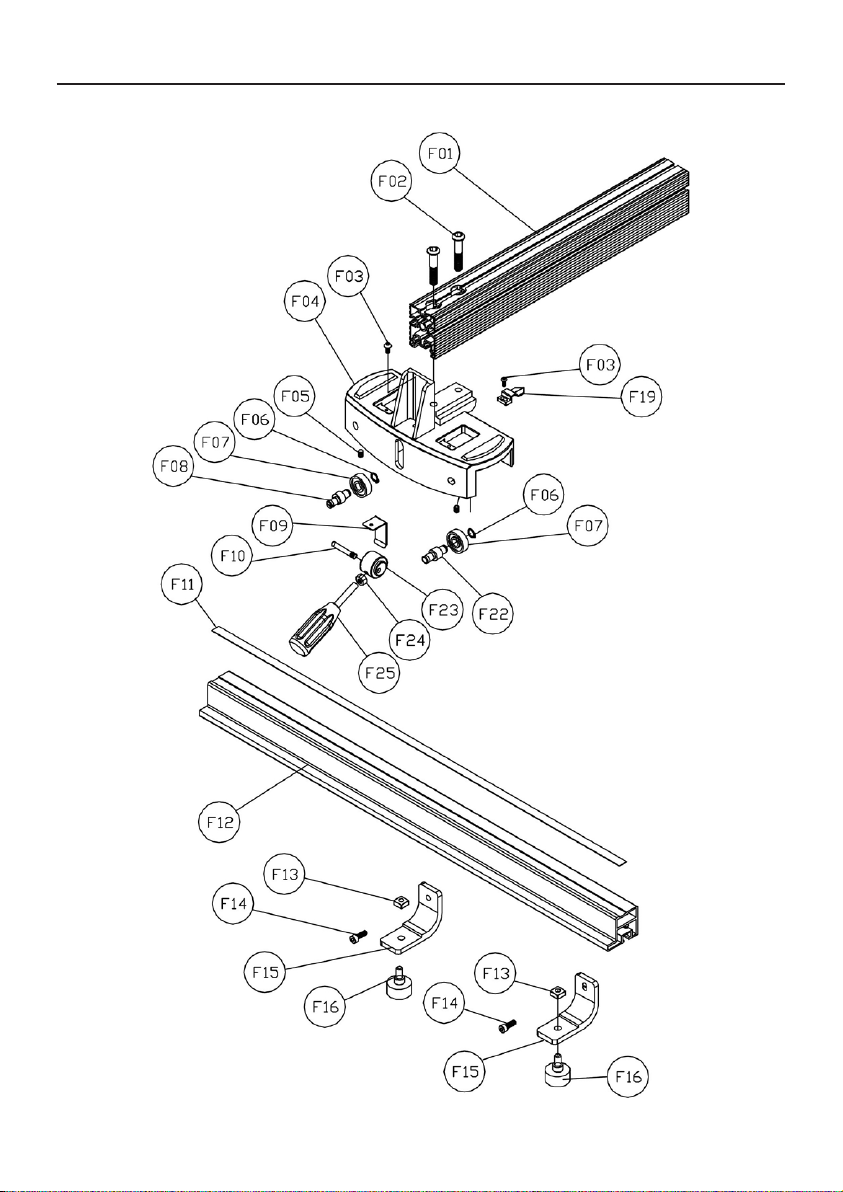
Parts Breakdown/List
6
Page 7

Parts Breakdown/List
NO. DESCRIPTION QTY
F01 Fence Body 1
F02 Socket Head Screw 10 x 25 2
F03 Socket Head Screw 5 x 10 2
F04 Fence Base 1
F05 Set Screw 1/4 x 1/4 2
F06 C-Ring S10 2
F07 Bearing 6200 2
F08 Eccentric Shaft 4
F09 Plate 1
F10 Pin 6 x 43 1
F11 Scale 1
F12 Large Fence Rail 1
F13 Square Nut 2
F14 CAP Screw 1/4 x 1” 2
F15 L Type Plate 2
F16 Knob 5/16”x 5/8” 2
F19 Pointer 1
F22 Bearing Shaft 1
F23 Lock Mechanism 1
F24 Nut 8mm 1
F25 Handle 1
7
Page 8

Please dispose of packaging for the product in a responsible manner. It is suitable for recycling.
Help to protect the environment, take the packaging to the local recycling centre and place into
the appropriate recycling bin.
Only for EU countries
Do not dispose of electric tools together with household waste material. In observance of
European Directive 2002/96/EC on waste electrical and electronic equipment and its
implementation in accordance with national law, electric tools that have reached the end of their
life must be collected separately and returned to an environmentally compatible recycling facility.
Axminster Tool Centre,
Unit 10 Weycroft Avenue, Axminster, Devon EX13 5PH
axminster.co.uk
 Loading...