

Rekid
Instruction manual
Rear-facing 9-18 kg
installed with ISOx
Tested and approved according to
ECE R44 / 04
ISOx size C/R3
Rear-facing 9-25 kg
installed with vehicle seat belt
ank you for choosing an Axkid child seat. Our team combined have over 30
years experience within child safety, and we have done our utmost to make the
Rekid child seat as safe as possible. e Rekid child restraint is
approved according to ECE R44/04, the latest European standards for child safety.
To maximise your child’s safety it is important that you keep the following in mind;
Read this instruction manual before installing the
Rekid child restraint in your vehicle.
Read this instruction manual carefully before installing the
Rekid child restraint. If in doubt, contact your retailer who can
demonstrate acorrect installation. An incorrect installation could
endanger your child.
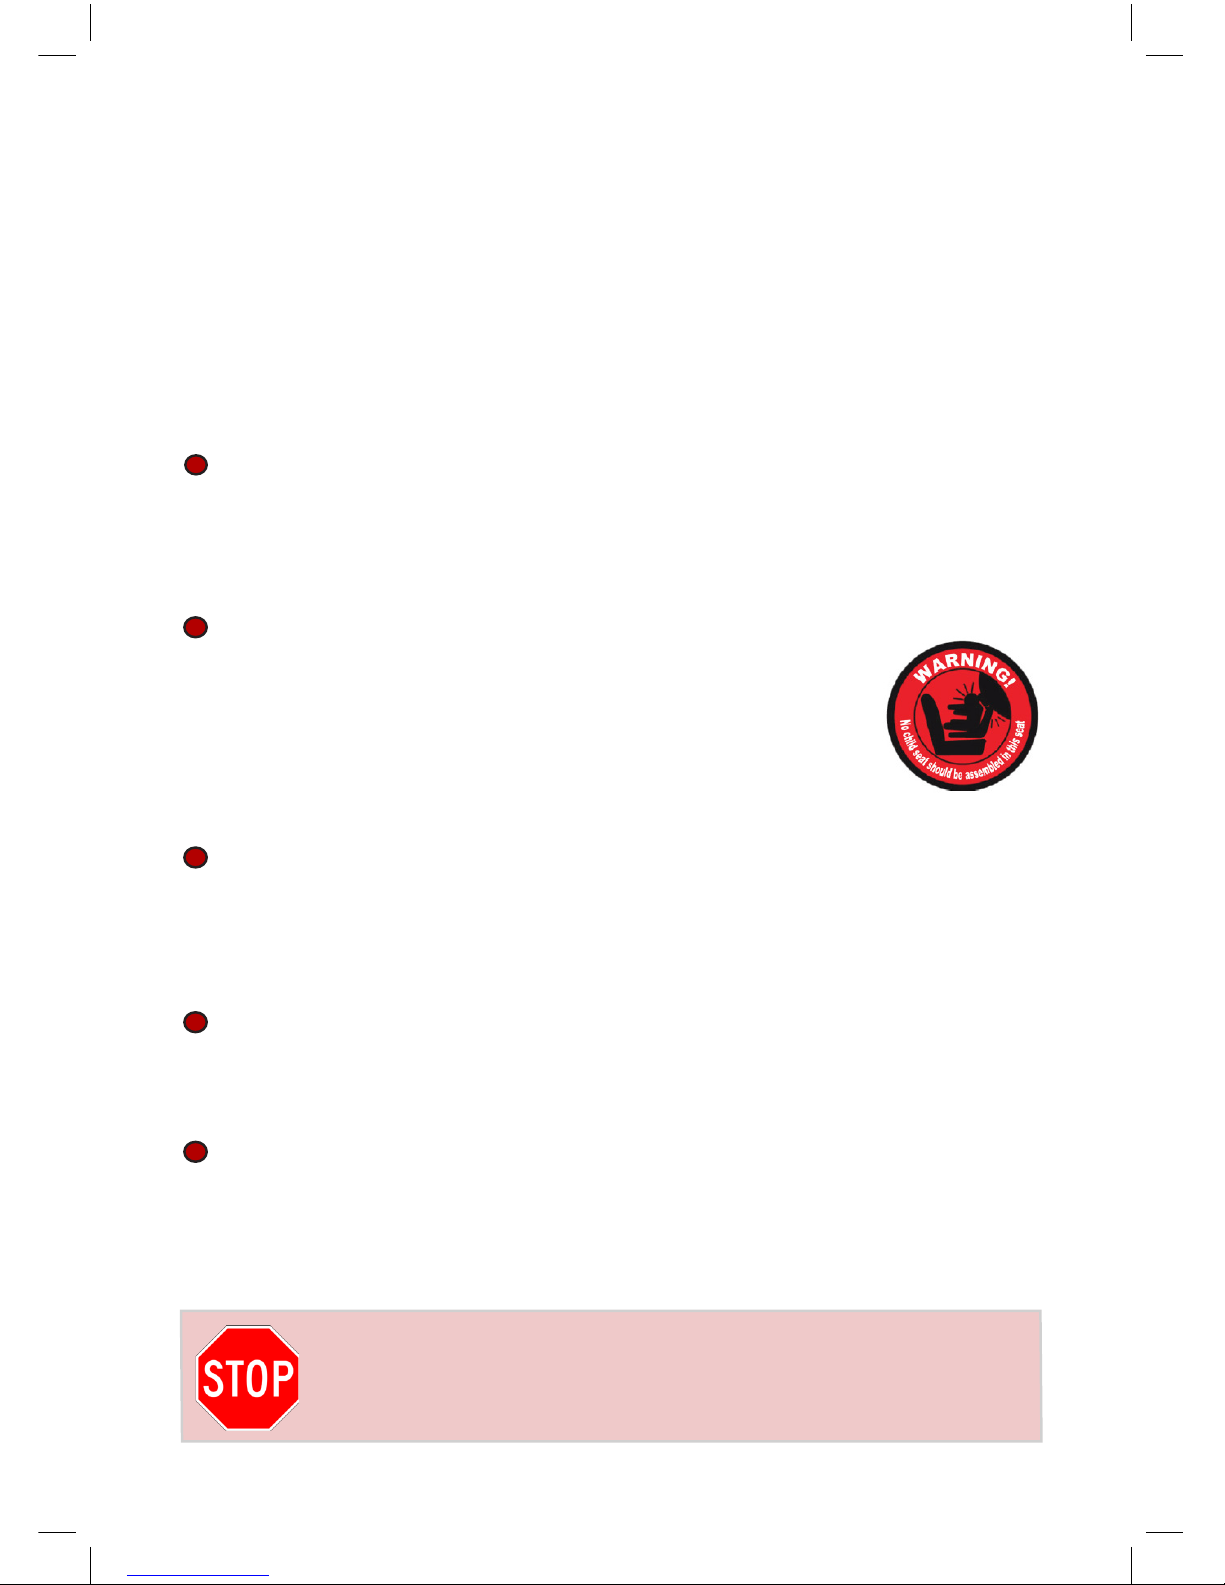
Do not use a child restraint in a seating position where an active
airbag is tted. If you still wish to install the Rekid in this location
the airbag must be disconnected at an authorised service centre.
Some vehicles may be equipped with a switch which allows you
to manually switch the airbag o. It is important to always check
if the vehicle’s indicator light shows that the airbag is turned o.
Extensive research has shown that the risk of serious injury or
worse is ve times greater for a young child when in a forward
facing restraint compared to a rearwardfacing restraint. In Rekid
your child can travel rearwardfacing up to 25kg.
Always use the support leg when installting the Rekid seat. e
support leg is a very important safety feature designed to maximise your child’s safety in an accident.
Should you have an accident, no matter how small, your child
restraint should be replaced. It may have damage that is undetectable and could seriously jeopardize your child’s safety. For this
reason Axkid do not recommend purchasing second hand child
restraints.
Important information

Contents
e Rekid child restraint is suitable for use from approximately six months of age,
or from when your child can sit up unsupported, up until the age of six. is
child restraint can be installed in two dierent ways depending on your child’s age
and size. A description of the Rekid’s dierent parts can be found on next page.
On the following pages you will nd instructions on how to install your Rekid.
Our Rekid child restraint is certied and approved for use;
Rearfacing 9-18 kg installed using ISOx
If your vehicle is equipped with ISOx brackets and your child weighs between
9-18 kg (20-39 lb) Axkid recommends using this installation.
Rearfacing 9-25 kg installed with vehicle belt
If your vehicle is not equipped with ISOx brackets you can still install Rekid using
vehicle’s lap-only or lap-diagonal seat belt and supplied tether straps.
11
5
Do not use the Rekid child restraint in seating
locations that are not equipped with approved
three-point seat belts (according to ECE Reg 16.)
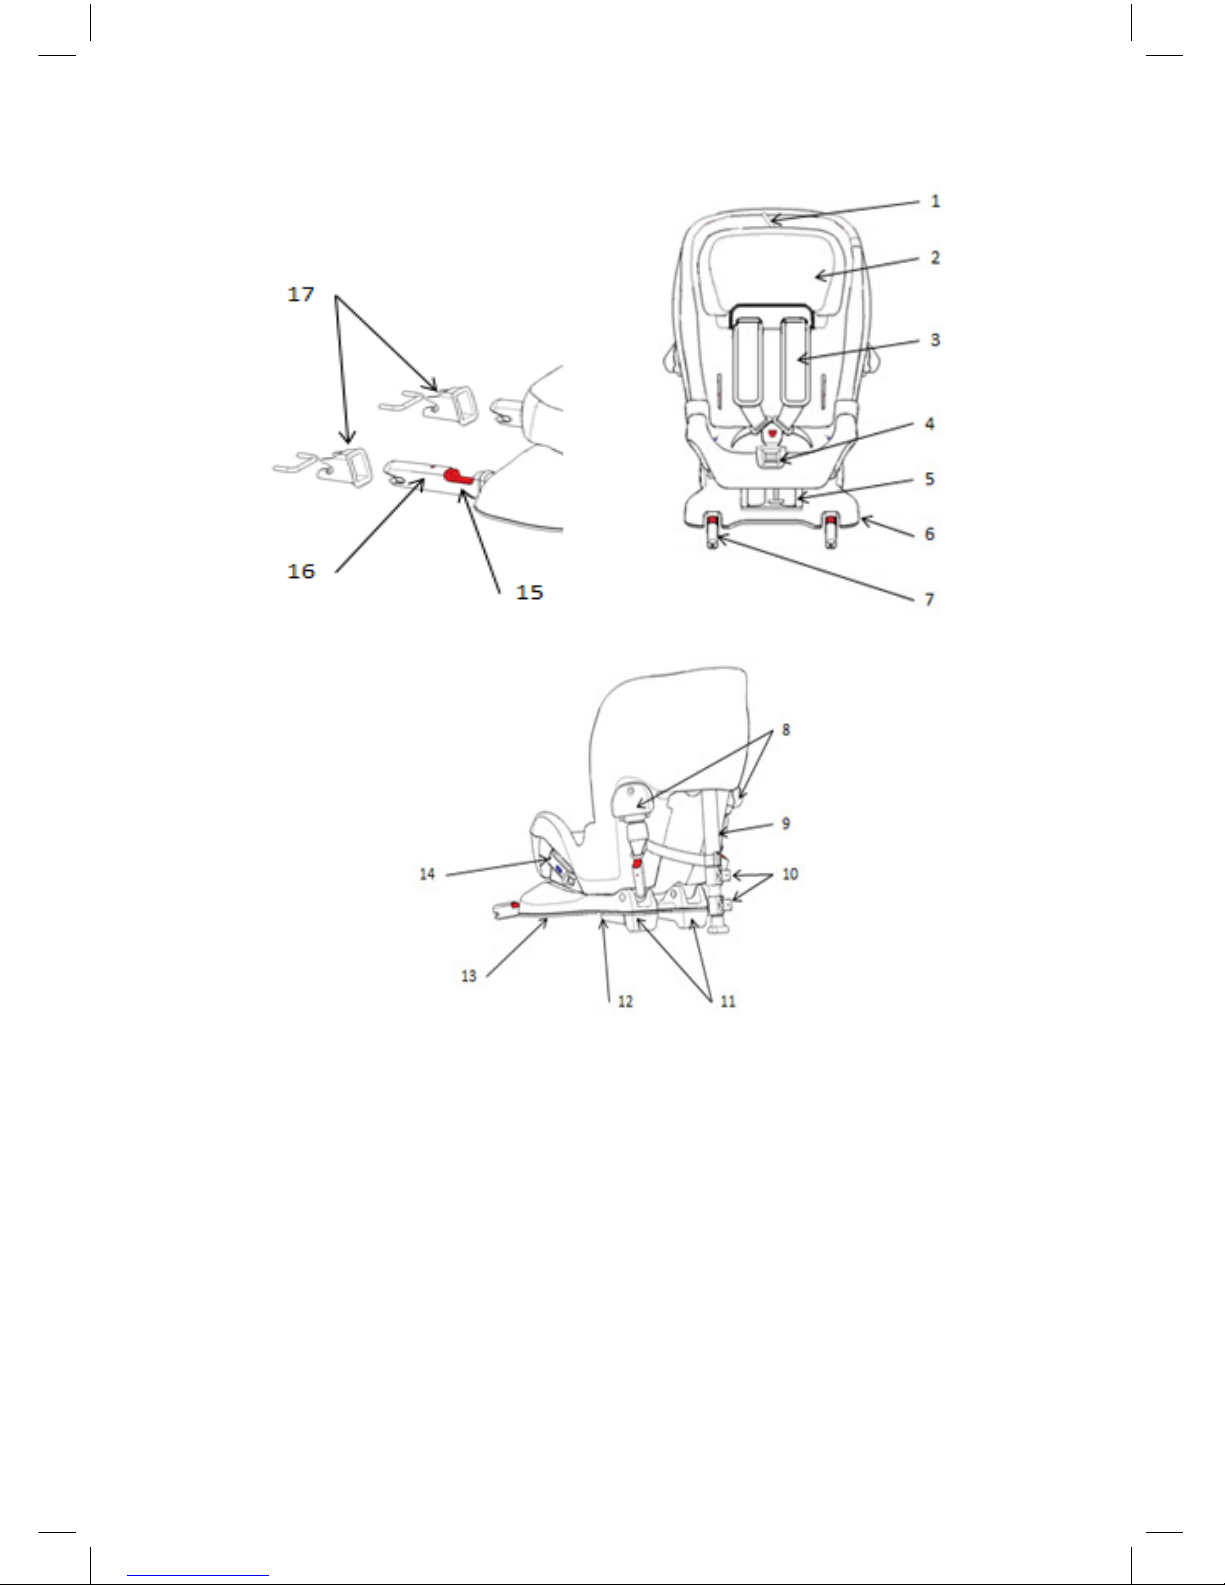
1. Parking brake neckrest
2. Adjustable Headrest
3. Internal harness
4. Harness adjustment button
5. Recline adjustment lever
6. Base
7. ISOFIX arms
8. Upper tether/anchorage straps
9. Support leg
10. Adjustors for support leg
11. Heels
12. Pocket for storage of instruction
manual
13. Adjustor for ISOx
14. Belt lock-o
15. Release button Isox
15. Indicator Isox
17.Guides for installation
Important to remember
Do not use a child restraint in a seating
position where an active airbag is tted. If
you still wish to install your Rekid in this
location the airbag must be disconnected at an authorized service centre. Some
vehicles may be equipped with a switch which
allows you to manually switch the airbag
o. It is important to always check if the
vehicle’s indicator light shows that the airbag
is turned o.
Placing the child restraint
e easiest way to lift the Rekid into the vehicle is with its back rst. To begin push and
hold the adjustor for ISOx(1). Now you
should be able to unfold the ISOx arms
(2). Place the child restraint in the vehicle
with the back of the restraint facing the front
of the vehicle. When installing Rekid in the
front seat it is possible, but not crucial, for
the back of the restraint to have contact with
the dashboard.
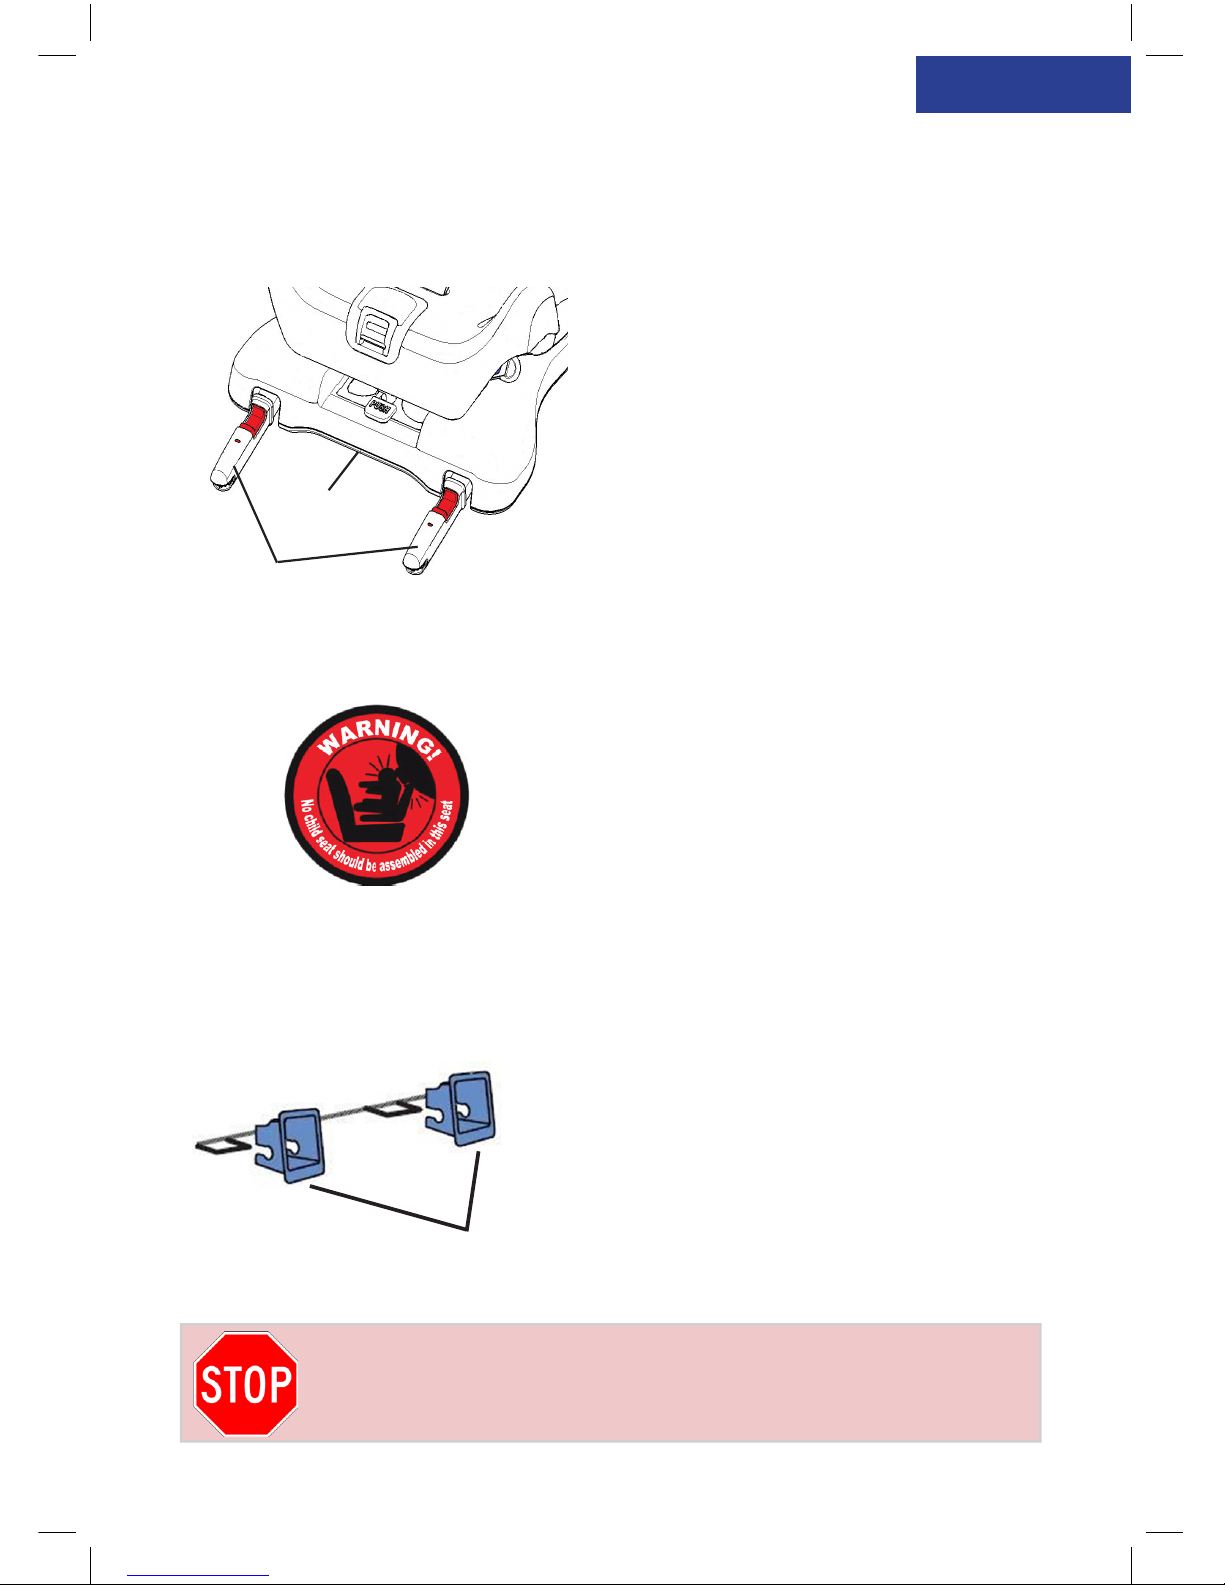
Attaching the ISOx ttings
e ISOx brackets are located in the bight
of the back seat between the backrest and
seat. e supplied ISOx-guides (3) may
assist you in locating these brackets, and
they will also help protecting the vehicle’s
upholstery. Push the ISOx ttings through
the guides and clip them onto the brackets.
Installing Rekid rear-facing
9-18kg using ISOx
Never install a child restraint in a passenger seat
where an active airbag is tted
5
Continued on next page
3
2
1

Once there is an audible click and both
indicators (4) are green they are properly
secured. To remove the Rekid child restraint, hold both of the release buttons
(5).
To adjust the angle of the child restraint,
press the Recline Adjustment Lever (6)
to select one of the three reclining positions. Always choose the most upright
position as possible, however your child
must be able to hold their head up on
its own, and there should be enough recline to ensure your child’s head does not
fall forward when sleeping. e rule of
thumb is that the older the child grows,
the more upright the seat can be installed.
Please note that once the installation of
the Rekid is complete, it will be somewhat
more reclined as it sinks into the vehicle’s
seat when tightening seat belts and tether
straps.
Attaching the lower tether straps
Some vehicles may already be tted with
anchorage points at the base of the front
seat rails.
If your vehicle does not have these anchor
points, the supplied lower tether straps
must be used to create anchor points. For
tips on how to install these tether straps
please see the example on the next page.
e anchoring point needs to be as close
to the oor as possible. In doing so you
should always insert the buckle through
the closest appropriate slot in the strap
to create a slip knot and pull tight. is
6
Continued on next page
5
4
6
Lower tether straps

Continued on next page
7

Continued on next page
8

9
needs to be repeated on both sides to create two anchor points. When installing
Rekid in the front passenger seat the tether
straps must be attached to the front gliding
tracks so the tether points will be located
along the front edge of the passenger seat.
Pull out the upper anchorage strap from
the belt housing (7) to an appropriate
length. Check that the white marking on
the strap (8) is visible. If not, you can try
crossing the straps over to give them some
extra length to enable the white marking
to be visible. Clip the anchor attachment
directly onto the anchorage point. Repeat
on the other side. Press down hard on the
on the top right side of the child restraint
then repeat for the left side(9). When you
do this its important that you really use
your full body weight to press down and
get the tether straps to really tighten hard.
is will give the anchorage straps their
rst tightening.
Unfold the support leg (10) out to its
maximum angle. Pull out the top latch
to release the upper part of the support leg
(11) until it reaches the oor. If the support leg does not reach the oor, repeat
with the lower latch (11). Its important
that you check that the support leg is an
angle over 80 degrees from the back of the
seat. You could check this by ensuring that
the support leg is further away from the
seat then the vertical line(12). Press down
on the child restraint from side to side
again, the anchorage straps will be then be
automatically tightened.
7
10
11
8
Continued on next page
11
12
9
If you have installed Rekid in the back seat
you can now move the front seat to a comfortable position. e back of the child restraint can, but is not necessary, be in contact with the back of the front seat.
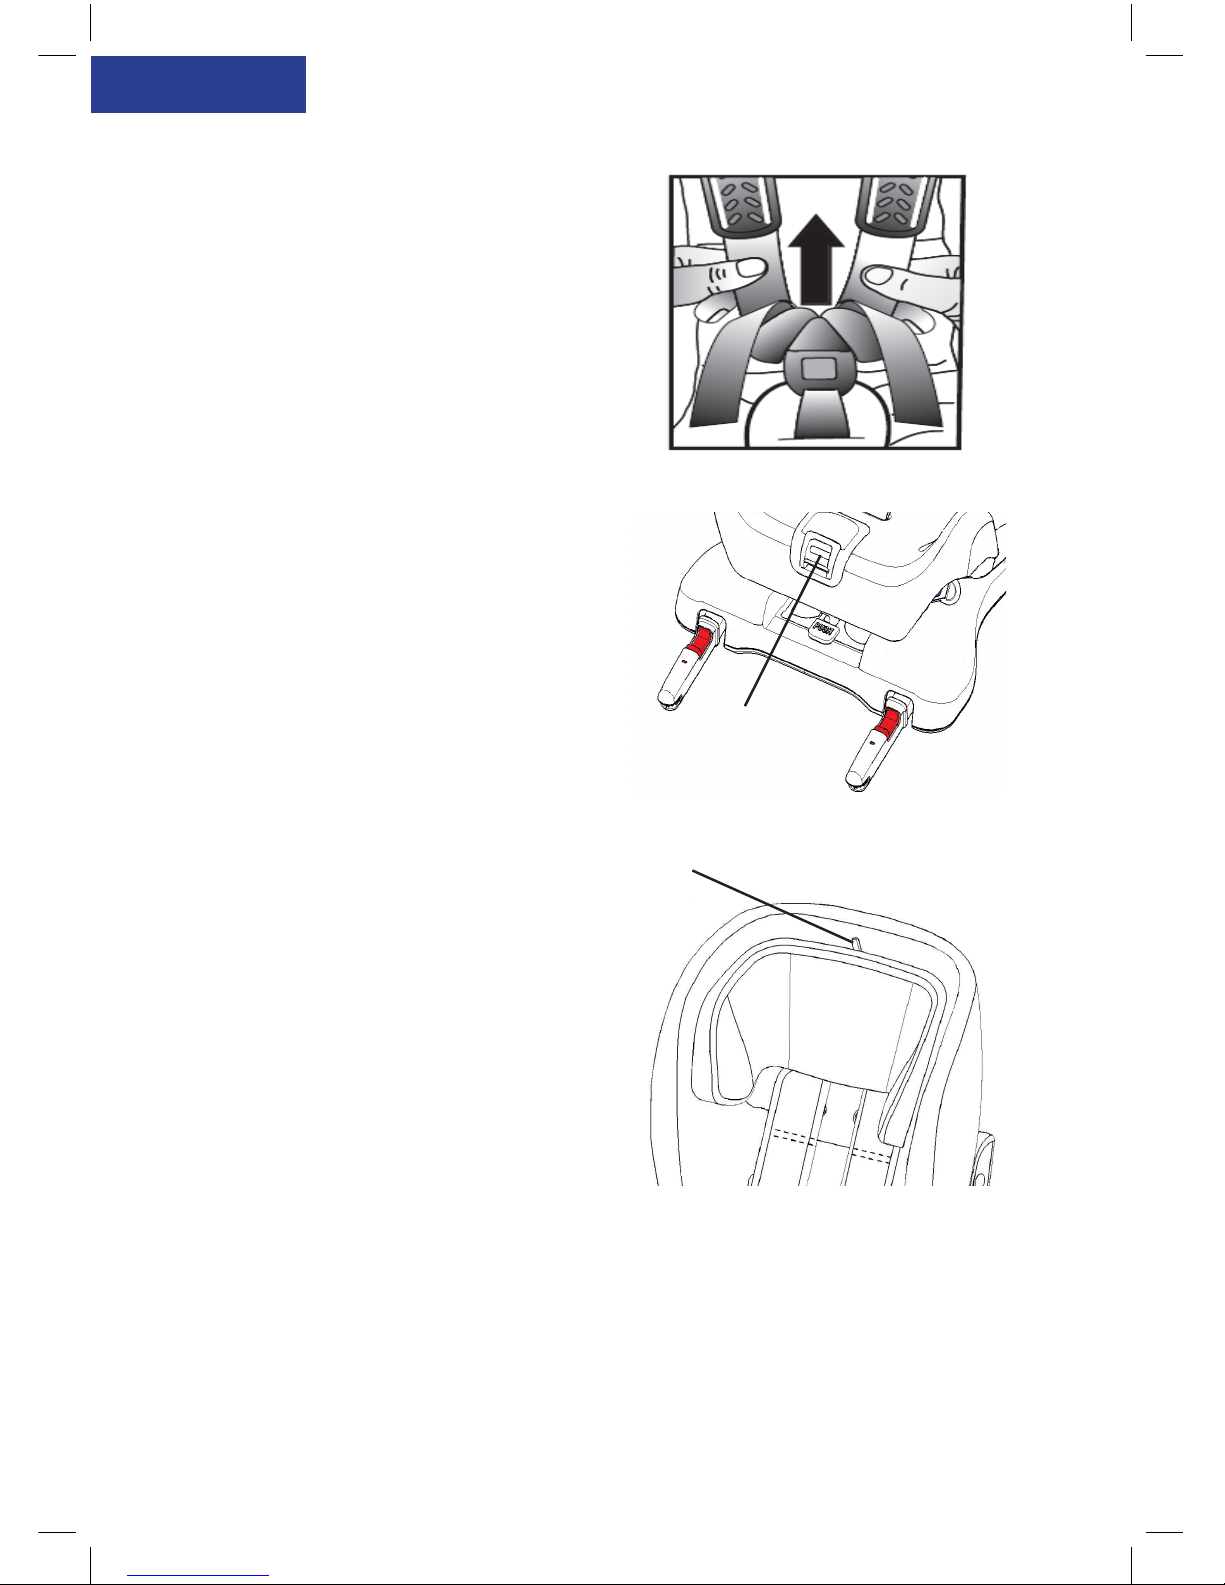
Adjusting the internal harness
Place your child in the car seat. Put your
child’s arms in between the shoulder straps
so that the straps are hanging over the chest
and stomach. Pull the shoulder straps together and insert the harness tongues into
the crotch buckle. Push the harness up over
the childs hip. Pull the harness adjustment
strap (13). It´s important that you always
pull the harness straight and central. Otherwise you might have a that the adjustment
strap gets stuck in the metall-lever(13).
is action will tighten the harness and
the headrest will automatically slide down
to the appropriate height. To release the
harness, press the harness adjustment button and pull both harness straps. Press the
red button on crotch buckle to disengage
buckle.
Parking brake on headrest
e headrest on your Rekid is
equipped with a parking brake. is
could be used if you want the headrest in a
x position. To activate the parkingbrake,
pull the harness until the headrest is at
the desired height, you will hear a “click”
sound from the headrest as it locks into
position. Make sure that the headrest can
not be pulled down. Activate the brake
by moving the lever (14) on the headrest
across to the right. Do not pull up the
headrest with the parking brake activated.
10
14
13

Never install a child restraint in a passenger seat
where an active airbag is tted
Rearward facing fastened with
seat belt
Important to remember
Do not use a child restraint in a seating
position where an active airbag is tted. If
you still wish to install your Rekid in this
location the airbag must be disconnected
at an authorized service centre. Some
vehicles may be equipped with a switch
which allows you to manually switch the
airbag o. It is important to always check
if the vehicle’s indicator light shows that
the airbag is turned o.
Placing the child restraint
e easiest way to lift the Rekid into
the vehicle is with its back rst. Place the
child restraint in the vehicle with the back
of the restraint facing the front of the vehicle. e heels (1) should be sitting over
the edge of the vehicle seat. e indented
vertical line on the heel should align vertically with the end of the vehicle’s seat.
If installing in a small vehicle, or if
your child does not require extra leg room,
you can instead place the heel upon the
vehicle’s seat this will also achieve a more
reclined position. When installing Rekid
in the front seat it is possible, but not crucial, for the back of the restraint to have
contact with the dashboard.
To adjust the angle, press the Recline
Continued on next page
11
1

Adjustment Lever (2) to select one of the three
reclining positions. Always choose the most upright angle as possible, but there should be enough
recline to ensure your child’s head does not fall
forward when sleeping. e rule of thumb is that
the older the child grows, the more upright the
seat can be installed. Bear in mind that once the
installation of the Rekid is complete, it will be
somewhat more reclined as it sinks into the vehicle’s seat from tightening seat belts and tether
straps.
Fastening the vehicle seat belt
Open the lock-os (3) on both sides of the
Rekid child restraint. Fully lengthen the seat belt
until the lap section of the belt is at least 70-80
cm (27-32 inches) long. Feed the seat belt between the seat cover and seat body through the
seat belt slot (4) until the belt comes out through
the opening on the other side. If you prefer, you
can instead feed the seat belt over the top of the
seat belt cover. Engage into the vehicle’s seat belt
buckle. Pull seat belt until all slack is removed
along the seat belt route. en secure both the
lap and shoulder belt in the lock-o closest to the
vehicle’s seat belt buckle. In the lock-o on the
opposite side, only the lap belt should be secured.
Attaching the lower tether straps
Some vehicles may already be tted with anchorage points at the base of the front seat rails,
or, if installing in the front passenger seat, in front
of that seat. If your vehicle does not have these
anchor points, the supplied lower tether straps
must be used to, see pages 7-8 for example. For
installation in the back seat, feed the buckle end
of the tether strap through either the rear of the
front seat rails, or the hinge of the front seat. e
12
Continued on next page
4
3
2
Lower tether straps

anchoring point needs to be as close to the oor
as possible. In doing so you you should always
insert the buckle through the closest appropriate slot in the strap tp create a slip knot then
pull tight. is needs to be repeated on both
sides to create two anchor points. When installing Rekid in the front passenger seat the tether
straps must be attached to the front gliding
tracks so the tether points will be located along
the front edge of the passenger seat.
Pull out the upper anchorage strap from the
belt housing (5) to an appropriate length.
Check that the white marking on the strap
(6) is visible. If not, you can try crossing the
straps over to give them some extra length
to enable the white marking to be visible.
Clip the anchor attachment directly onto the
anchorage point. Repeat on the other side.
Press down hard on the top right side of the
child restraint then repeat for the left side(7).
When you do this its important that you really use your full body weight to press down
and get the tether straps to really tighten
hard. is will give the anchorage straps their
rst tightening.
Unfold the support leg out to its maximum
angle. Pull out the top latch to release the upper part of the support leg (8) until it reaches
the oor. If the support leg does not reach the
oor, repeat with the lower latch(9). Its important that you check that the support leg is an
angle over 80 degress from the back of the
seat. You could check this by ensuring that
the support leg is further away from the seat
then the vertical line(10).
Press down on the child restraint from
side to side again, the anchorage straps will
be then be automatically tightened.
13
Continued on next page
5
8
9
6
11
10
7

If you have installed Rekid in the back seat
you can now move the front seat to a comfortable position. e back of the child restraint can, but is not necessary, be in contact
with the back of the front seat.
Adjusting the internal harness
Place your child in the car seat. Put your
child’s arms in between the shoulder straps
so that the straps are hanging over the chest
and stomach. Pull the shoulder straps together and insert the harness tongues into
the crotch buckle. Pull the harness adjustment strap (11). It´s important that you
always pull the harness straight and central
when you tighten the adjustment strap.
is will tighten the harness and the headrest will automatically slide down to the
appropriate height. To release the harness,
press the harness adjustment button and
pull both harness straps. Press the red button on crotch buckle to disengage buckle.
Parking brake on headrest
e headrest on your Rekid is
equipped with a parking brake. is
could be used if you want the headrest in a
x position. To activate the parkingbrake,
pull the harness until the headrest is at
the desired height, you will hear a “click”
sound from the headrest as it locks into
position. Make sure that the headrest can
not be pulled down. Activate the brake
by moving the lever (14) on the headrest
across to the right. Do not pull up the
headrest with the parking brake activated.
14
12
10
11

If the seat cover needs replacing ensure only original products from Axon Kids are
used. If other products are used the Rekid’s safety system may be compromised
and could lead to severe injury or death in case of an accident.
e seat cover can be removed and washed in a washing machine at 30º C on the
“Gentle Cycle” programme. Do not put the cover in a dryer as this can damage the
cover and the padding may separate from the fabric. On www.axkid.com you could
nd videos explaining how to deattach and attach the clothing.
Any plastic parts of Rekid can be cleaned with mild detergent and water. Do not
use aggressive chemicals containing solvents etc, as this can cause damage to the
plastic and compromise the safety of the child restraint.
All materials used in the Rekid child restraint are recyclable and should be recycled
as per your local legislation. Ask your local recycling centre for advice when recycling this product.
Do not make any modications or alterations to the Rekid child restraint other
than those described in this instruction manual. Follow the instructions in this
manual carefully. Any repairs must be carried out by the manufacturer or agent.
e Rekid child restraint is covered by a 12 month warranty from date of purchase.
Ensure you save your receipt and bring it to your place of purchase should you have
any warranty issues. e warranty does not cover:
* Normal wear and tear
* Damage due to incorrect use, neglect or accident
* If repairs have been carried out by a third party
All materials used have a very high UV-resistance rating. However, UV-light is very
aggressive and will ultimately lead to fading of the seat cover. is is not covered
by our warranty as it is considered normal wear and tear.
Never leave your child unattended in the car.
Ensure any luggage or loose objects are secured in your vehicle as they may cause
injuries to passengers in the event of a collision.
Store this instruction manual in the assigned pocket underneath the child restraint.
Warranty and handling
15
 Loading...