


Axkid AB, Odinslundsgatan 17, 412 66 Göteborg, Sweden ● www.axkid.com ● info@axkid.com ● +46 511 760 620
9-25kg
ECE R44/04
3-10
EN
Axkid Move
11-18
CZ
19-26
DE
27-35
ES
36-43
PL
44-51
PT
52-59
SE
60-67
SI
68-75
SK

B
C
E
F
D
G
I
J
Q
P
R
K
O
L
N
M
A
S
H

E
P
3
4
2
1
iii

1
2
3
5
6
7
9
8
10
S
B
i
ii

12
T
11
13
i
i

I
J
16
17
14
15
G

19
20 21
22
23
M
D
18
N

i
iii
iv
ii
25
24
i
ii

0°
10°
27
28 29
26
Q
R

E
31
32
33
34
F
35
30
K
H
i

36
L
Q
L
M
i
E
37
38
39
S
40
H

i
ii
iii
B
41
42
43 44
46
45
i
i

3
EN
Instruction Manual
Rear-facing 9-25 kg with vehicle seat belt and tethers
Read this instruction manual carefully before installing the Move child restraint. If in doubt, contact
your retailer who can demonstrate a correct installation. An incorrect installation could endanger
your child.
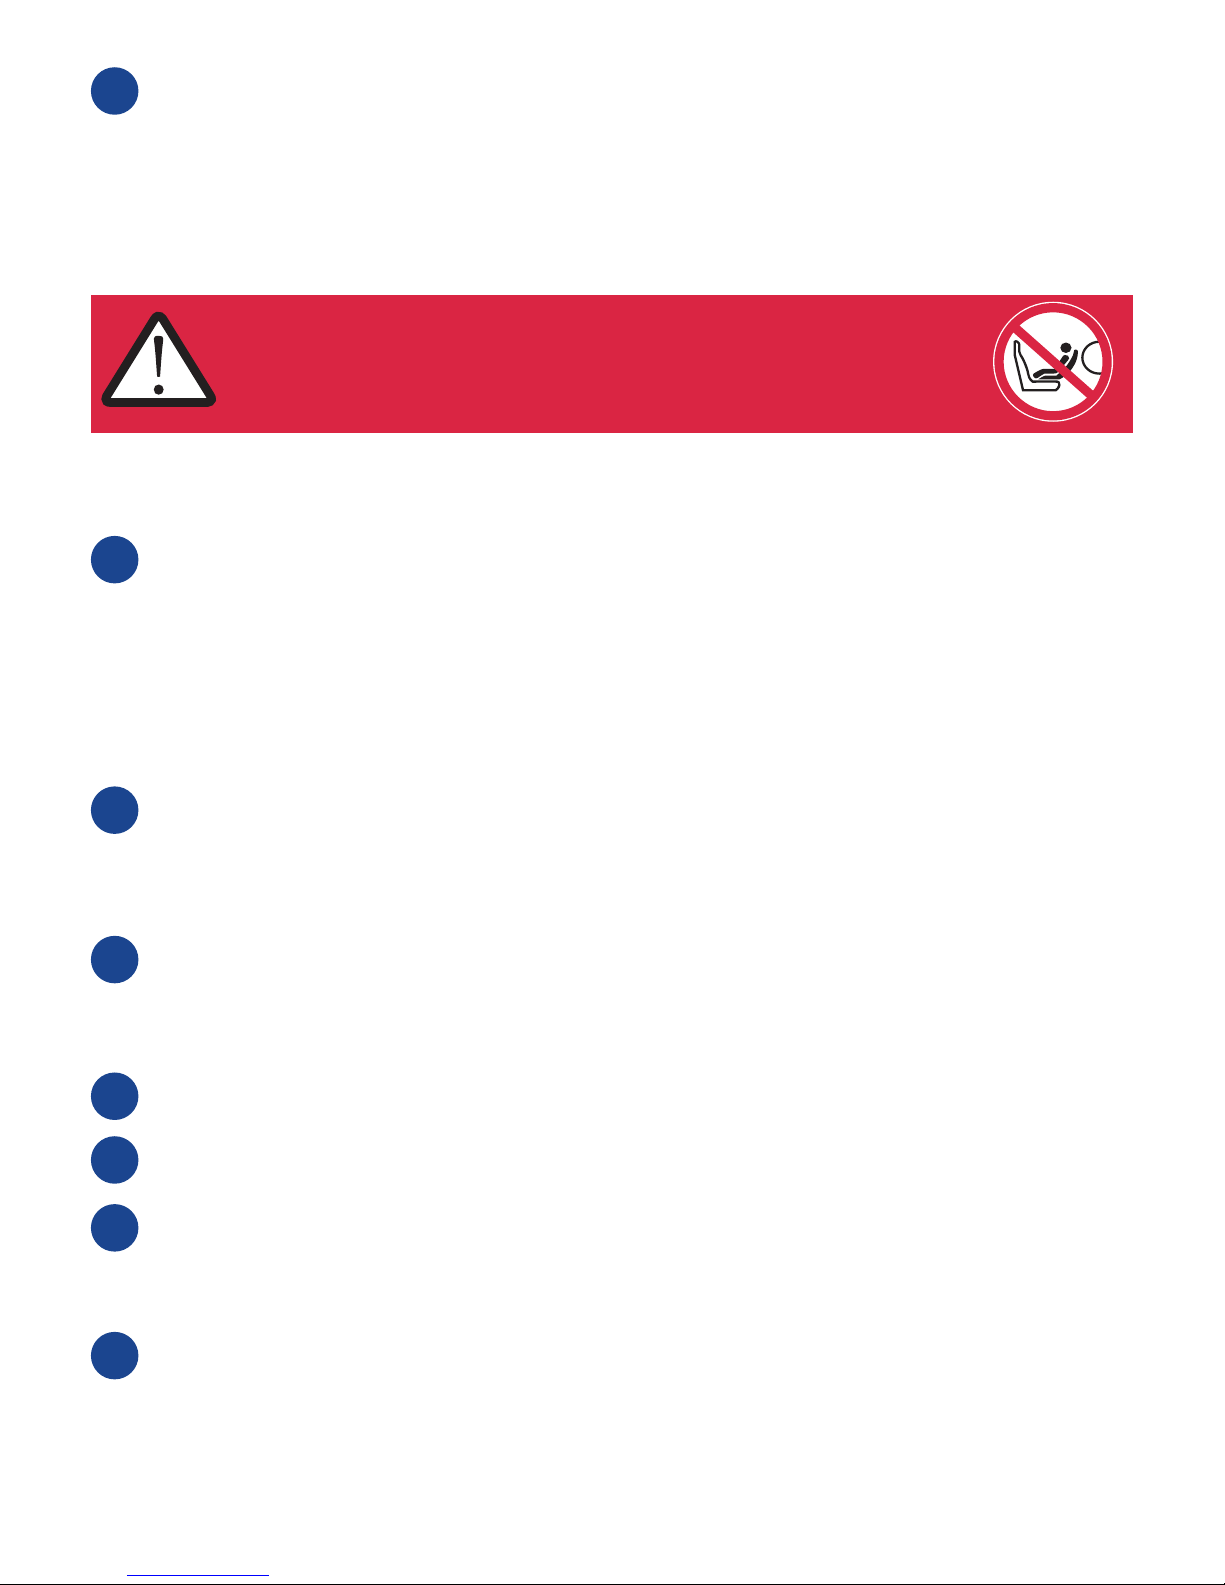
Do not use a child restraint in a seating position where an active airbag is fitted. If you still wish to
install the Move in this location the airbag must be disconnected at an authorised service centre.
Some vehicles may be equipped with a switch which allows you to manually switch the airbag o. It
is important to always check if the vehicle’s indicator light shows that the airbag is turned o.
Extensive research has shown that the risk of serious injury or worse is five times greater for a young
child when in a forward facing restraint compared to a rearward-facing restraint. In Move your child
can travel rearward-facing up to 25kg.
Always use the support leg when installing the Move seat. The support leg is a very important safety
feature designed to maximise your child’s safety in an accident.
Should you have an accident, no matter how small, your child restraint should be replaced. It may
have damage that is undetectable and could seriously jeopardize your child’s safety. For this reason
Axkid do not recommend purchasing second hand child restraints.
Never leave your child unattended in the car.
Ensure any luggage or loose objects are secured in your vehicle as they may cause injuries to
passengers in the event of a collision.
Store this instruction manual in the designated pocket (O) on the car seat.
Read this instruction manual before installing the Move child restraint in your vehicle. For
more information and installation videos visit www.axkid.com.
Thank you for choosing an Axkid child seat. Our team has over 30 years combined experience within
child safety, and we have done our utmost to make the Move child seat as safe as possible. The Move child
restraint is approved according to ECE R44/04, the latest European standards for child safety. To maximise
your child’s safety it is important that you keep the following in mind;
Important information
V1
Axkid Move

4
The child restraint can be used on any forward facing passenger seat which has a 3-point seat belt (i),
so long as there is no active airbag in place. The child restraint cannot be used with a 2-point lap belt (ii).
IMPORTANT: If you wish to install your Move in a location where an airbag is fitted, then the airbag
must be disconnected at an authorized service centre. Some vehicles may be equipped with a switch
which allows you to manually switch the airbag o. It is important to always check if the vehicle’s
indicator light shows that the airbag is turned o.
WARNING: Never use on a seat with an active airbag
WARNING: Never use on rearward or side facing vehicle seats
WARNING: Air bags are designed for adults and can seriously harm your child in a crash
Parts
1
A Headrest K Side impact pad connector
B Integral harness L Tether straps
C Harness buckle M Belt lock-o
D Seat belt slot N Grey button
E Harness adjuster button O Pocket for storage of instruction manual
F Harness adjustment strap P Zip
G Recline block Q Support leg
H Side impact pad R Leg extension button
I Heels S Yo ke
J Indented vertical line
Allowed and disallowed positioning of the child
car seat
Contents
Parts 4
Allowed and disallowed positioning of the child car seat 4-5
Rear-facing 9-25kg with vehicle seat belt and tethers
This assembly can be used for children weighing between 9-25 kg (20-55 lb).
5-9
Removing and fitting the covers 9
Care and maintenance 10
Warranty 10
The Move child restraint is suitable for use from approximately six months of age, or from when your
child can sit up unsupported, up until the age of six. This child restraint can ONLY be installed rear-
facing.

5
Allowed and disallowed positioning of the child car seat.
Front passenger seat (no active airbag) Ye s
Front passenger seat (active airbag) NO
Forward facing seat with 3-point seat belt Ye s
Seat with 2-point seat belt NO
Side facing seats NO
Rear facing seats NO
Never use this child seat in a car that is not equipped with an
ECE Reg 16 approved three-point belt.
Before you install the child restraint make sure that the headrest is at the correct height for your
child. The harness, when correctly installed, should be routed from the back of the seat to the
front and pass just above your child’s shoulders.
In order to adjust the height of the headrest and harness you will first need to detach the
harness. Press the harness adjuster button (E) and pull forward on the shoulder straps (not the
shoulder pads) to completely loosen the harness.
Open the zipper (P) on the back of the seat cover.
Unhook the shoulder straps from the yoke (S) at the back of the child restraint.
Unfasten the Velcro® and detach the shoulder pads (B) on the back of the seat.
Pull the shoulder pad straps and shoulder straps out from the seat.
Squeeze the plastic clip and gently pull the headrest free from the seat.
Reposition the headrest at one of the three heights that best suits your child. Push the bottom
of the headrest until the plastic clip locks in place.
2
3
4
5
6
7
8
9
Adjusting the headrest and harness height
Rear-facing 9-25 kg with seat belt & tethers

6
The easiest way to lift the Move into the vehicle is with its back first. Place the child restraint in
the vehicle with the back of the restraint facing the front of the vehicle.
The heels (I) should be sitting over the edge of the vehicle seat. The indented vertical line (J) on
the heel should align vertically with the end of the vehicle’s seat. If installing in a small vehicle, or
if your child does not require extra leg room, you can instead place the heel upon the vehicle’s
seat this will also achieve a more reclined position.
Note: When installing Move in the front seat it is possible, but not crucial, for the back of the restraint
to have contact with the dashboard.
To adjust the angle of the child restraint, rotate block (G) into one of the two tilt positions. Always
choose the most upright position as possible, however your child must be able to hold their
head up on its own, and there should be enough recline to ensure your child’s head does not fall
forward when sleeping. The rule of thumb is that the older the child grows, the more upright the seat
can be installed. Please note that once the installation of the Move is complete, it will be somewhat
more reclined as it sinks into the vehicle’s seat from tightening seat belts and tether straps.
Positioning the child restraint
15
16
17
Never install a child restraint in a passenger seat
where an active airbag is fitted.
Feed the harness straps (i) through the shoulder pads (ii).
Thread the harness straps and shoulder pad straps through the holes in the headrest to the
back of the seat ensuring all straps are at the same height. Connect the two shoulder pad
straps using the Velcro®.
Reconnect the harness straps to the yoke.
IMPORTANT! Make sure the harness straps pass through the same hole height positions on
the headrest and the seat. IMPORTANT! Ensure the harness is routed between the seat and
the support leg. The harness MUST NOT pass over the support leg’s horizontal bar (i).
Make sure the height is correct by placing your child in the seat.
WARNING! Never use this child seat without the shoulder pads. The shoulder pads are an
important safety feature.
11
12
13
14
10

7
Open the belt lock-o clips (M) on both sides of the Move child restraint. Fully lengthen the seat
belt until the lap section of the belt is at least 70-80cm (27-32 inches) long. Feed the seat belt
through the seat belt slot (D), between the seat cover and seat body until the belt comes out
through the seat belt slot on the other side. If you prefer, you can instead feed the seat belt through the
seat belt slot (D), then over the top of the seat cover and then through the seat belt slot on the other
side.
Insert the seat belt tongue into the vehicle’s seat belt buckle. Pull the seat belt until all slack is
removed along the seat belt route. Secure both the lap and shoulder belt in the lock-o closest
to the vehicle’s seat belt buckle.
In the lock-o on the opposite side, only the lap belt should be secured.
18
Fastening the vehicle seat belt
19
20
Unclip the tether straps from the child restraint.
Press the grey button (N) and pull the loop end out to maximise the length of the strap.
To attach the tether straps to an anchor point, wrap the strap around the chosen anchor point
and pass the metal clip through the loop.
When installing the Move on a back seat, wrap the tether straps through either the rear of the
front seat rails (i), or the hinge of the front seat (ii).
When installing the Move in the front passenger seat, the tether straps should be wrapped
around the nearest suitable anchor point (i) that will allow the straps to be tightened fully.
Anchor points set further back (ii) can be used and if need be the straps can be crossed over
(iii) and even looped together (iv).
Reattach the metal clips to each side of the child restraint and pull the free ends of both tether
straps until you have tensioned them. Pull each strap once again as hard as possible to ensure
the child restraint is secured tightly.
Unfold the support leg (Q) out to its maximum angle. Press the leg extension button (R) and extend the
support leg until it reaches the floor.
Note: The support leg belt may, but does not need, to be fully tensioned.
It is important that you check that the support leg is at an angle over 10° from the back of the
seat. You could check this by ensuring that the support leg is further away from the seat than
the vertical line.
Attaching the tether straps
21
22
23
26
27
28
24
25

8
Placing your child in the seat
Using the side impact protection pad
Press the harness adjuster button (E) and pull forward on the shoulder straps (not the shoulder pads)
to completely loosen the harness.
Press the red harness release button on the buckle and unfasten the harness.
Place your child in the car seat. Put your child’s arms in between the shoulder straps so that the
straps are hanging over the chest and stomach.
Pull the shoulder straps together and insert the harness tongues into the crotch buckle.
Pull the harness adjustment strap (F). It’s important that you always pull the harness straight
and central when you tighten the adjustment strap. Failure to pull the harness correctly may
cause the strap to jam in the mechanism.
Before placing your child in the seat, ensure you have adjusted the headrest and harness to the correct height
for your child (see steps 2 to 14)
31
30
32
33
34
35
Now firmly pull the straps on both sides of the seat to make sure that your seat is fully secured.
If you have installed Move in the back seat you can now move the front seat to a comfortable position.
Note: The back of the child restraint may, but does not need to be in contact with the back of the front
seat.
29
Although optional we STRONGLY advise using the side impact pad where possible to add extra
protection from side collisions.
Locate the side impact pad connector (K) on the child seat nearest to the side of the vehicle (i.e.
closest to the door).
IMPORTANT: Ensure the two triangular arrows (i) on the side impact pad (H) point in the same
direction as the triangular arrow on the side impact pad connector (K).
Place the upper of the two oval openings on the underside of the side impact pad over the side
impact pad connector. Push the side impact pad against the side of the car seat and slide the side
impact pad upwards onto the side impact pad connector. You will feel a slight click as the side impact
pad locks in place.
To remove: Push the side impact pad downwards and remove.

9
WARNING: Never attempt to remove the child restraint whilst your child is still seated in it.
Open the belt lock-o clips (M) on both sides of the child restraint.
Release the vehicle’s seat belt buckle (i) and completely remove the seat belt from the child
restraint. Collapse the support leg (Q). Unhook the tether straps’ (L) from the child restraint and
remove the child restraint from the vehicle. Finally unwrap the tether straps from the vehicle’s anchor
points and then re-hook the straps on to the child restraint.
WARNING: Never use the child restraint without its covers. The covers are an integral safety
feature.
Unclip the tether straps from the child restraint and remove the side impact pad (H) if attached.
Press the harness adjuster button (E) and pull forward on the shoulder straps (not the shoulder
pads) to completely loosen the harness.
Press the red harness release button on the buckle to unfasten the harness and remove the
crotch pad .
Open the zipper on the back of the seat cover. Unhook the shoulder straps from the yoke (S) at
the back of the child restraint.
Unfasten the Velcro® and detach the shoulder pads (B) on the back of the seat.
Pull the shoulder pad straps and shoulder straps out from the seat. Squeeze the plastic clip
and gently pull the headrest free from the seat.
Unhook the elastic loops (i) on both sides of the head rest and remove the headrest cover.
Release and remove the plastic strip along the front of the child restraint . IMPORTANT! Ensure you
pull the plastic strip and DO NOT pull the fabric . Store the plastic strip safely for when you need to fit the
seat cover again. If you do lose the plastic strip you will need to contact your retailer for a replacement.
Unfasten all the press studs (i),(ii), (iii).
Carefully remove the seat cover from around the harness adjuster housing (i). Feed all straps
through the slots in the seat cover and remove the cover.
To fit the cover, reverse the above steps ensuring the harness and shoulder pads are routed correctly
(see steps 9-13 for details on attaching the headrest, harness and shoulder pads).
Removing the child restraint from the vehicle
36
37
38
39
40
41
42
43
44
45
46
Removing and fitting the covers

10
Care and maintenance
The seat cover can be removed and washed in a washing machine at 30º C on the “Gentle
Cycle” programme. Do not put the cover in a dryer as this can damage the cover and the
padding may separate from the fabric.
Visit www.axkid.com to find videos explaining how to remove and attach the cover.
Any plastic parts of Move can be cleaned with mild detergent and water. Do not use
aggressive chemicals containing solvents etc, as this can cause damage to the plastic and
compromise the safety of the child restraint.
All materials used in the Move child restraint are recyclable and should be recycled as per your
local legislation. Ask your local recycling centre for advice when recycling this product.
Do not make any modifications or alterations to the Move child restraint other than those
described in this instruction manual. Follow the instructions in this manual carefully. Any repairs
must be carried out by the manufacturer or agent.
If the seat cover needs replacing ensure only original products from Axkid are used. If other
products are used the Move’s safety system may be compromised and could lead to severe
injury or death in case of an accident.
All materials used have a very high UV-resistance rating. However, UV-light is very aggressive
and will ultimately lead to fading of the seat cover. This is not covered by our warranty as it is
considered normal wear and tear.
Warranty
The Move child restraint is covered by a 24 month warranty from date of purchase. Ensure you
save your receipt and bring it to your place of purchase should you have any warranty issues.
The warranty does not cover:
* Normal wear and tear
* Damage due to incorrect use, neglect or accident
* If repairs have been carried out by a third party

11
Návod k použití
Umístění proti směru jízdy ve váhové kategorii 9-25 kg pomocí bezpečnostního pásu auta a upevňovacích pásků
Axkid Move
CZ
Před instalací autosedačky Move si pečlivě přečtěte tento návod k použití. Pokud jste na pochybách, obraťte se na
svého prodejce, který vám rád pomůže se správnou instalací. Nesprávná instalace může ohrozit vaše dítě.
Nepoužívejte autosedačku na sedadle, kde je aktivní airbag. Pokud chcete autosedačku Move nainstalovat
na místo s airbagem, musí se airbag vypnout nebo deaktivovat v autorizovaném servisu. Je vždy důležité se
přesvědčit, že airbag je deaktivovaný, některé vozy jsou vybaveny světelnou kontrolkou deaktivace.
Rozsáhlý výzkum prokázal, že riziko vážného zranění u malých dětí je pětkrát vyšší při použití autosedačky po
směru jízdy, ve srovnání s použitím zádržného systému v poloze proti směru jízdy. V autosedačce Move může
vaše dítě cestovat v poloze proti směru jízdy až do váhy 25kg.
Při instalaci autosedačky Move vždy používejte opěrnou nohu. Je to důležitý bezpečnostní prvek, navržený s
ohledem na co nejvyšší bezpečí vašeho dítěte v případě dopravní nehody.
Po dopravní nehodě, jakkoliv malé, by měl být váš zádržný systém vyměněn. Mohou se objevit nezjistitelné
závady, které mohou vážně ohrozit bezpečnost vašeho dítěte. To je také jeden z důvodů, proč Axkid
nedoporučuje nákup sedačky z druhé ruky.
Nikdy nenechávejte vaše dítě v autě bez dozoru.
Všechny zavazadla a nepřipevněné předměty je třeba v autě zajistit, v případě nehody mohou způsobit vážná
zranění cestujících.
Na vaší autosedačce najdete kapsičku, určenou pro uschování tohoto návodu (O).
Pečlivě si přečtěte tento návod k použití zádržného systému, autosedačky Move do vašeho automobilu.
Více informací a videa k instalaci najdete na www.axkid.com.
Děkujeme vám, že jste si vybrali autosedačku značky Axkid. Náš tým má více než 30-ti leté zkušenosti v oblasti dětské
bezpečnosti a vyvinuli jsme veškeré naše úsilí k tomu, aby byla autosedačka Move co nejbezpečnější. Autosedačka
Move je schválena podle normy ECE R44/04, nejnovějšího evropského standardu pro bezpečnost dětí. Abychom
maximalizovali bezpečnost vašeho dítěte, je důležité myslet na následující:
Důležité informace

12
Dětský zádržný systém může být instalován na jakékoliv sedadlo v automobilu, umístěné po směru jízdy,
které je vybaveno 3-bodovým bezpečnostním pásem (i), kde není aktivní airbag. Dětský zádržný systém
nelze instalovat na sedadlo, vybavené pouze 2-bodovým bezpečnostním pásem (ii).
DŮLEŽITÉ: Pokud chcete umístit sedačku Move na místo, vybavené airbagem, je třeba airbag nechat odpojit
v autorizovaném servisu. Některá vozidla disponují mechanickým vypínačem airbagu – v tom případě je možné
odpojit airbag tímto způsobem. Je třeba zkontrolovat světelný indikátor, signalizující vypnutí airbagu.
VAROVÁNÍ: Nikdy nepoužívejte na sedadle, kde je aktivní airbag.
VAROVÁNÍ: Nikdy nepoužívejte na sedadlech, umisťovaných v autě proti směru nebo bokem ke směru
jízdy.
VAROVÁNÍ: Airbagy jsou určeny pro dospělé cestující, vašim dětem mohou způsobit vážná zranění.
Části
1
A Opěrka hlavy K Konektor přídavné boční ochrany
B Integrované popruhy L Upevňovací pásky
C Přezka popruhů M Zajištění pásu
D Otvor pro bezpečnostní pás N Šedé tlačítko
E Tlačítko úpravy popruhů O Kapsička na uložení návodu
F Pásek nastavení popruhů P Zip
G Zabudovaný klín Q Opěrná noha
H Přídavná boční ochrana R Tlačítko prodloužení opěrné nohy
I Patky S Spona
J Svislá drážka
Povolené a nepovolené způsoby instalace
autosedačky
Obsah
Části 12
Povolené a nepovolené polohování 12-13
Proti-směrné 9-25kg s bezpečnostním pásem auta a pásky
Tento způsob montáže lze použít pro děti vážící 9-25 kg.
13-16
Sundání a nasazení potahu 17
Péče a údržba 18
Záruka 18
Autosedačku Move lze používat cca od 6 měsíců věku dítěte nebo od doby, kdy je dítě schopné
samostatně sedět, až do věku šesti let. Tento zádržný systém můžete do auta nainstalovat POUZE v
poloze proti směru jízdy.

13
Povolené a nepovolené způsoby instalace dětské autosedačky
Přední sedadlo spolujezdce (airbag není aktivní) Ano
Přední sedadlo spolujezdce (airbag je aktivní) Ne
Sedadlo vybavené 3-bodovým bezpečnostním pásem, směrem po směru jízdy Ano
Sedadlo vybavené 2-bodovým bezpečnostním pásem Ne
Sedadlo umístěné bokem ke směru jízdy Ne
Sedadlo umístěné zády ke směru jízdy Ne
Nikdy nepoužívejte tuto autosedačku v autě, které není vybaveno schváleným
3-bodovým pásem podle normy ECE R16.
Než budete instalovat sedačku do auta, ujistěte se, že opěrka hlavy je v optimální výšce pro vaše dítě.
Popruhy, pokud jsou správně nainstalovány, jsou vedeny ze zadní části sedačky dopředu a procházejí přímo
nad rameny dítěte.
Pokud chcete nastavit výšku opěrky hlavy a popruhů, je třeba nejdříve odepnout popruhy. Stiskněte tlačítko
úpravy popruhů (E) a vytáhněte ramenní popruhy směrem dopředu (bez ramenních vycpávek), čímž úplně
povolíte popruhy.
Rozepněte zip (P) na zadní straně potahu.
Vyhákněte ramenní popruhy z místa uchycení (S) v zadní části dětské autosedačky
Rozepněte suchý zip a odepněte ramenní vycpávky (B) na zadní části sedačky.
Vytáhněte pásky ramenních vycpávek i ramenní popruhy směrem ven.
Zamáčkněte plastové tlačítko a jemně vytáhněte opěrku hlavy ven ze sedačky.
Nastavte výšku opěrky hlavy do jedné ze tří možných poloh tak, aby co nejlépe vyhovovala vašemu dítěti.
Tlačte na kraj opěrky, dokud plastové tlačítko nezapadne na zvolené místo.
Veďte pásky popruhů (i) skrz ramenní vycpávky (ii).
2
3
4
5
6
7
8
9
10
Nastavení výšky opěrky hlavy a popruhů
Proti směru jízdy 9-25kg s bezpečnostním
pásem & upínacími pásky

14
Provlékněte popruhy a pásky ramenních vycpávek skrz otvory v hlavové opěrce směrem dozadu. Obě
strany musí být ve stejné výšce. Pomocí suchého zipu spojte oba pásky ramenních vycpávek.
Znovu nasaďte pásky popruhů do místa uchycení.
DŮLEŽITÉ! Ujistěte se, že pásky popruhů procházejí ve stejné výšce na opěrce hlavy a na sedačce.
DŮLEŽITÉ! Ujistěte se, že popruh je vedený mezi sedadlem a opěrnou nohou. Popruh NESMÍ procházet
přes vodorovnou lištu opěrné nohy (i).
Posaďte dítě do autosedačky a ověřte si, že jste výšku nastavili správně.
VAROVÁNÍ: Nikdy nepoužívejte autosedačku bez ramenních vycpávek. Ramenní vycpávky jsou jedním
z důležitých bezpečnostních prvků.
11
12
13
14
Nejjednodušší způsob usazení sedačky Move do auta je zády napřed. Obraťte záda autosedačky směrem
k přední části auta.
Patky (I) by měly být umístěny přes okraj sedadla automobilu. Svislá drážka (J) na patce by měla být zároveň
s hranou sedadla. Pokud instalujete sedačku v malém autě nebo pokud vaše dítě nepotřebuje extra
prostor na nohy, můžete posadit patkou přímo na sedadlo, čímž zároveň získáte možnost většího náklonu
autosedačky.
Poznámka: Pokud instalujete Move na přední sedadlo spolujezdce, je vhodné (ale ne zásadní), aby se záda
sedačky dotýkala palubní desky.
Otočením zabudovaného klínu (G) nastavte jednu ze dvou poloh náklonu autosedačky. Vždy nastavujte co
nejvíce vzpřímenou polohu, nicméně vaše dítě musí být schopno samo držet hlavičku. Zároveň by mělo být
dost nakloněné pro případ, že usne (aby mu nepadala hlavička dopředu). Čím je dítě starší, tím by měla být
sedačka více vzpřímená. Myslete, prosím, na to, že jakmile dokončíte instalaci Moveu, sedačka se jakoby vmáčkne
do sedadla auta díky dotažení popruhů a pásků a tím bude ještě o trochu více nakloněná.
Instalace dětské autosedačky
15
16
17
Nikdy neinstalujte dětskou sedačku na sedadlo auta,
kde je aktivní airbag.
Rozepněte upevňovací klipy pásu (M) na obou stranách autosedačky Move. Vytáhněte pás auta do jeho
plné délky nebo alespoň 70-80cm. Protáhněte pás otvorem pro bezpečnostní pás (D), mezi potahem
sedačky a skořepinou a vytáhněte ven stejným otvorem na druhé straně sedačky. Pokud je to pro vás
pohodlnější, můžete také protáhnout pás stejným otvorem jako v předchozím případě (D), potom horem přes potah
sedačky a skrz otvor na druhé straně zpátky
Zacvakněte jazýček přezky do zámku sedadla v autě. Zatáhněte za pás a upravte těsnost pásu po celé jeho
délce. Upevněte ramenní i bederní část pásu v blízkosti zámku bezpečnostního pásu vozidla.
18
Upevnění bezpečnostního pásu auta
19

15
Při upevňování na opačné straně se zaměřte pouze na bederní část pásu.
20
Vycvakněte upevňovací pásky z dětské autosedačky.
Stiskněte šedé tlačítko (N) a vytáhněte konec s očkem do maximální délky popruhu.
Obtočte pásek kolem zvoleného kotevního bodu a protáhněte kovovou sponu očkem, čímž k němu
upevňovací pásek připevníte.
Pokud instalujete Move na zadní sedadlo, obtočte upevňovací pásky buďto ze zadní strany kolejnic předního
sedadla (i), nebo kolem pantu nebo kovové tyčky uprostřed předního sedadla (ii).
Pokud instalujete sedačku na přední sedadlo spolujezdce, dolní kotvící pásky musí být obtočené kolem
nejbližšího kotvícího bodu (i), ke kterému bude možné pásky pořádně dotáhnout. Kotvící body dále vzadu
(ii) mohou být také použity a pokud je potřeba, pásky se mohou křížit (iii) nebo je můžete smotat dohromady
(iv).
Znovu připojte kovové spony na každou stranu sedačky a zatáhněte za volné konce obou upevňovacích
pásků a řádně je utáhněte. Ještě jednou zatáhněte vší silou za každý pásek, aby byla sedačka opravdu
pevně zajištěná.
Vytáhněte opěrnou nohu (Q) ven pod maximálním úhlem. Stiskněte tlačítko prodloužení nohy (R) a
prodlužte opěrnou nohu tak, aby se zapřela o podlahu.
Poznámka: Pás opěrné nohy může, ale nemusí být úplně napnutý.
Je důležité zkontrolovat, že opěrná noha svírá se zády autosedačky úhel vyšší než 10 stupňů. Můžete si to
ověřit třeba tím, že zkontrolujete náklon opěrné nohy vůči sedadlu, který má být větší než kolmý.
Znovu silně zatáhněte za pásky na obou stranách, aby byla autosedačka pořádně upevněná.
Pokud jste již autosedačku na zadním sedadle nainstalovali, můžete posunout přední sedadlo do pohodlné polohy.
Poznámka: Záda autosedačky se mohou, ale nemusí dotýkat zadní části předního sedadla.
Připojení upevňovacích pásků
21
22
23
24
25
27
28
29
26

16
Umístění dítěte do autosedačky
Použití přídavné boční ochrany
Než posadíte dítě do autosedačky, ujistěte se, že opěrka hlavy a popruhy jsou nastaveny na správnou výšku podle
velikosti vašeho dítěte (viz kroky 2 až 14)
Stiskněte tlačítko úpravy popruhů (E) a vytáhněte ramenní popruhy směrem dopředu (bez ramenních
vycpávek), čímž úplně povolíte popruhy.
Stiskněte červené tlačítko rozepnutí na upínací přezce a uvolněte popruhy.
Umístěte dítě do sedačky. Veďte paže dítěte pod ramenními popruhy tak, že popruhy visí přes hrudník a
žaludek.
Spojte ramenní pásy dohromady a jazýčky spony zacvakněte do přezky mezi nožičkami dítěte.
Zatáhněte za pásek úpravy popruhů (F). Když utahujete popruhy, je důležité vždy tahat pásek směrem
rovně a do středu. Pokud neutahujete správně, může se pásek v mechanismu zaseknout.
Použití přídavné boční ochrany není povinné, ale SILNĚ doporučujeme ji používat, poskytuje nadstandardní
ochranu při bočním nárazu.
Najděte na sedačce místo připojení přídavné boční ochrany (K), umístěné nejblíže ke straně vozidla (tj
nejblíže dveří).
DŮLEŽITÉ: Ujistěte se, že dvě trojúhelníkové šipky (i) na přídavné boční ochraně (H) ukazují stejným směrem jako
trojúhelníkové šipky na konektoru přídavné boční ochrany (K).
Nasaďte horní ze dvou oválných otvorů na spodní části přídavné boční ochrany na konektor přídavné boční
ochrany. Zatlačte přídavnou boční ochranu do boku autosedačky a vsuňte ji směrem nahoru do konektoru
přídavné boční ochrany. Ucítíte jemné zacvaknutí, jak se boční ochrana dostane na správné místo.
Sundat: Tlačte přídavnou boční ochranu směrem dolů a sejměte.
31
30
32
33
34
35
VAROVÁNÍ: Nikdy se nepokoušejte vytáhnout autosedačku, pokud v ní sedí dítě.
Povolte klipy, zajišťující pás (M) na obou stranách sedačky. Vycvakněte také přezku bezpečnostního pásu
auta (i) a úplně vytáhněte bezpečností pás mimo autosedačku. Složte opěrnou nohu (Q). Rozepněte
upevňovací pásky (L) a vyndejte autosedačku z vozidla. Nakonec sundejte upevňovací pásky z kotvících
bodů v autě a potom je znovu zahákněte na autosedačku.
Vyndání autosedačky z auta
36

17
Sejmutí a připevnění potahů
VAROVÁNÍ: Nikdy nepoužívejte dětskou autosedačku bez potahu. Potah je nedílný bezpečnostní prvek.
Vycvakněte upevňovací pásky z dětské autosedačky a sundejte přídavnou boční ochranu (H), pokud je
připojená.
Stiskněte tlačítko úpravy popruhů (E) a vytáhněte ramenní popruhy směrem dopředu (bez ramenních
vycpávek), čímž úplně povolíte popruhy.
Stiskněte na přezce červené rozepínací tlačítko popruhů, povolte popruhy a vyjměte podložku z oblasti mezi
nožičkami.
Rozepněte zip na zadní části potahu sedačky. Vyhákněte ramenní popruhy z místa uchycení (S) na zadní
části sedačky.
Rozepněte suchý zip a odepněte ramenní vycpávky (B) na zadní části sedačky.
Vytáhněte pásky ramenních vycpávek i ramenní popruhy směrem ven. Stiskněte plastový klip a jemně
vytáhněte opěrku hlavy úplně ven ze sedačky.
Vyhákněte elastická poutka (i) na obou stranách opěrky hlavy a sejměte z ní potah.
Uvolněte a sundejte plastový pásek kolem přední části dětské autosedačky. DŮLEŽITÉ! Ujistěte se, že
vytahujete jen plastový pásek a NE látku. Uložte si plastový pásek na bezpečné místo, budete ho potřebovat
při opětovném nasazování potahu. V případě jeho ztráty kontaktujte svého prodejce.
Rozepněte všechny cvočky (i), (ii), (iii).
Opatrně sejměte potah sedačky z oblasti okolo umístění seřizovače (i). Zasuňte všechny popruhy skrz
otvory v potahu sedačky a sejměte potah.
K nasazení potahu proveďte výše uvedené kroky v opačném pořadí. Ujistěte se, že ramenní pásy jsou vedeny
správně (detaily připojení opěrky hlavy, pásů a ramenních vycpávek - viz kroky 9-13)
37
38
39
40
41
42
43
44
45
46

18
Péče a údržba
Potah autosedačky můžete sundat a vyprat v pračce na jemný prací program do 30°C. Nesušte v sušičce!
Mohlo by dojít k poškození potahu a vycpávky by se mohly oddělit od látky.
Videa, znázorňující jak sejmout a opět nasadit potah najdete na www.axkid.com.
Všechny plastové části autosedačky Move můžete čistit jemným čisticím prostředkem a vodou.
Nepoužívejte agresivní chemikálie, obsahující rozpouštědla apod. Mohlo by dojít k poškození plastů a
ohrozit bezpečnost dětského zádržného systému.
Všechny materiály, použité na autosedačce Move jsou recyklovatelné a měly by proto být recyklovány v
souladu s místní legislativou. Pokud si nejste jistí, požádejte o radu nejbližšího odborníka v oblasti recyklace a
nakládání s odpadem.
Jakékoliv jiné úpravy a modifikace výrobku než ty, uvedené v tomto návodu, nejsou dovoleny. Pečlivě se
řiďte uvedenými instrukcemi. Všechny opravy musí být provedeny výrobcem nebo prodejcem Moveu.
Pokud potřebujete vyměnit potah výrobku, doporučujeme použít originální potah od výrobce, Axkid. Pokud
použijete jiný produkt, může dojít ke snížení bezpečnosti výrobku a může to v případě dopravní nehody vést i
k vážnému zranění nebo dokonce smrti.
Všechny použité materiály jsou vysoce odolné vůči UV záření. Nicméně, toto záření je velmi agresivní a
může časem vést k vyblednutí barev potahu. Na to se nevztahuje záruka, vyblednutí barev se považuje za
běžné opotřebení při používání.
Záruka
Na autosedačku Move poskytuje výrobce záruku 24 měsíců od data nákupu. Záruku lze uplatnit u
vašeho prodejce s dokladem o koupi výrobku. Pokud se na výrobku vyskytne závada, kontaktujte vašeho
prodejce. Doba záruky se prodlužuje o dobu, po kterou byl výrobek v servisu. Reklamaci je nezbytné
uplatnit co nejdříve po tom, co se závada objeví. Případné prodlení může způsobit zhoršení závady. Zboží
k reklamaci předávejte ve stavu, odpovídajícímu zásadám obecné hygieny. Zjevné vady (chybějící části)
je nutné reklamovat ihned nebo nejpozději do 10 dnů od zakoupení zboží. Na pozdější reklamace nebude
brán zřetel. Záruka se nevztahuje na:
* Běžné opotřebení při používání
* Závady způsobené nesprávným používáním, zanedbáním nebo dopravní nehodou
* Opravy a úpravy sedačky, prováděné třetí stranou

19
Bedienungsanleitung
Rückwärtsgerichtet 9-25 kg mit Fahrzeuggurt und Spanngurt
Axkid Move
DE
Lesen Sie diese Bedienunsganleitung vor dem Einbau des Move Kindersitzes sorgfältig durch. Im Zweifel
kontaktieren Sie Ihren Händler, der Ihnen eine korrekte Montage demonstrieren kann. Eine fehlerhafte
Montage kann Ihr Kind gefährden.
Verwenden Sie den Kindersitz nicht auf Sitzplätzen mit aktiven Airbags oder schalten Sie den Airbag
entsprechend aus. Gegebenenfalls muss dies durch einen Service-Techniker durchgeführt werden. Bitte
überprüfen Sie immer die Kontrollleuchte, die anzeigt, ob der Airbag ausgeschaltet ist.
Umfangreiche Forschungen haben ergeben, dass das Risiko für Kinder bei Verwendung von
vorwärtsgerichteten Sitzen ernsthafte, schwere Verletzungen zu erleiden, fünfmal so hoch ist, wie bei
rückwärtsgerichteten Sitzen!
Im Move-Kindersitz kann Ihr Kind bis zu 25 kg rückwärtsgerichtet reisen.
Verwenden Sie immer den Stützfuß beim Montieren des Move Sitzes. Der Stützfuß ist ein sehr wichtiges
Sicherheitsmerkmal, das entwickelt wurde, um die Sicherheit des Kindes im Falle eines Unfalls zu erhöhen.
Nach einem Unfall sollte das Kinderrückhaltesystem, unbeachtet der Schwere des Unfalls, ersetzt werden.
Es können nicht sichtbare Schäden entstanden sein und dadurch kann die Sicherheit des Kindes ernsthaft
gefährdet werden. Axkid empfiehlt daher, kein gebrauchtes Kinderrückhaltesystem zu kaufen.
Lassen Sie Ihr Kind niemals unbeaufsichtigt im Auto.
Sichern Sie jegliches Gepäck in Ihrem Fahrzeug, da dies im Falle eines Zusammenstoßes Verletzungen
verursachen kann.
Bewahren Sie diese Bedienungsanleitung in der dafür vorgesehenen Tasche (O) am Autositz auf.
Lesen Sie diese Bedienunsganleitung vor Gebrauch sorgfältig durch und bewahren Sie diese für
später auf. Für mehr Informationen und Anwendungsvideos besuchen Sie www.axkid.com oder
www.vital-innovations.de.
Danke, dass Sie sich zum Kauf eines Axkid Kindersitzes entschieden haben. Unser Team hat eine über 30-jährige
Erfahrung in Bezug auf Sicherheit von Kindern und wir haben unser Möglichstes getan, den Move Kindersitz so sicher
wie möglich zu machen. Das Move Rückhaltesystem ist zugelassen nach ECE R44/04, den neusten europäischen
Standards für Kindersicherheit. Um die maximale Sicherheit der Kinder zu gewährleisten, ist es wichtig, die folgenden
Punkte zu beachten:
Wichtige Informationen

20
Das Kinderrückhaltesystem kann an jedem vorwärtsgerichtetem Beifahrersitz mit Dreipunktgurt
benutzt werden, vorausgesetzt der Airbag ist ausgeschaltet. Das Rückhaltesystem kann nicht mit einem
2-Punkt Beckengurt benutzt werden (ii).
WICHTIG: Verwenden Sie den Kindersitz nicht auf Sitzplätzen mit aktiven Airbags oder schalten Sie die
Airbags entsprechend vorher aus. Gegebenenfalls muss dies durch einen Service-Techniker durchgeführt
werden. Bitte überprüfen Sie immer die Kontrollleuchte, die anzeigt, ob der Airbag ausgeschaltet ist.
WARNUNG: Verwenden Sie den Kindersitz niemals auf Sitzplätzen mit aktiven Airbags
WARNUNG: Verwenden Sie den Kindersitz niemals auf rückwärts- oder seitwärtsgerichteten
Fahrzeugsitzen.
WARNUNG: Airbags wurden für Erwachsene entwickelt und können Ihr Kind bei einem Unfall
ernsthaft verletzen.
1
Erlaubte und unerlaubte Positionen des Kindersitzes
Bestandteile des Sitzes
A Kopfstütze K
Konnektor für Seitenaufprallschutzpolster
B Sicherheitsgurt des Kindersitzes L Spanngurte
C Gurtschloss M Gurtklemme
D Schlitz für Sicherheitsgurt N Grauer Knopf
E Arretierungsknopf für 5-Punkt-Gurt O Tasche zum Verstauen der Bedienungsanleitung
F Arretierungsgurt für 5-Punkt-Gurt P Reißverschluss
G Verstellblock Q Stützfuß
H
Seitenaufprallschutzpolster
R
Knopf für Stützfußverlängerung
I Absatz S Gurtverbinder aus Metall
J Vertikale Einkerbung
Inhalte
Bestandteile des Sitzes 20
Erlaubte und unerlaubte Positionen des Kindersitzes 20-21
Rückwärtsgerichtetes Fahren, 9-25 kg mit Fahrzeuggurt und Spanngurt.
Dieser Aufbau kann für Kinder zwischen 9-25kg verwendet werden.
21-24
Entfernen und Anbringen der Stobezüge 25
Pflege und Wartung 26
Garantie 26
Das Move Kinderrückhaltesystem ist geeignet für den Einsatz ab etwa sechs Monaten (sobald Ihr Kind
selbständig sitzen kann) bis zu einem Alter von ca. sechs Jahren. Dieser Kindersitz kann ausschließlich
rückwärtsgerichtet installiert werden.

21
Erlaubte und unerlaubte Positionen des Kindersitzes
Beifahrersitz (kein aktiver Airbag) Ja
Beifahrersitz (aktiver Airbag) NEIN
Vorwärtsgerichteter Sitz mit Drei-Punkt-Gurt Ja
Sitz mit Zwei-Punkt-Gurt NEIN
Seitlich gerichtete Sitze NEIN
Rückwärtsgerichtete Sitze NEIN
Benutzen Sie den Kindersitz niemals in einem Auto, welches nicht mit
einem genehmigten ECE Reg 16
Drei-Punkt-Gurt ausgestattet ist.
Stellen Sie vor dem Einbau des Sitzes sicher, dass die Kopfstütze die richtige Höhe für Ihr Kind hat. Der
Gurt sollte, wenn er richtig installiert ist, von der Rückseite des Sitzes nach vorne über die Schultern Ihres
Kindes führen.
Damit die Höhe der Kopfstütze und des Gurtes verstellt werden kann, muss zunächst der Gurt gelöst
werden. Drücken Sie den Arretierungsknopf für den Gurt (E) und ziehen Sie die Schultergurte (nicht die
Schulterpolster) nach vorne, um den Gurt vollständig zu lösen.
Önen Sie den Reißverschluss (P) an der Rückseite des Sitzbezuges.
Entfernen Sie die Schultergurte von dem Gurtverbinder aus Metall (S) an der Rückseite des Sitzes
Önen Sie den Reißverschluss und entfernen Sie die Schulterpolster (B) an der Rückseite des Sitzes.
Ziehen Sie die Schulterpolstergurte und Schultergurte aus dem Sitz heraus.
Drücken Sie den Plastikclip und ziehen Sie vorsichtig an der Kopfstütze.
Wählen Sie die gewünschte Höhe der Kopfstütze aus einer der drei Positionen. Drücken Sie den Knopf
der Kopfstütze bis der Plastikclip richtig einrastet.
Ziehen Sie die Gurte (i) durch die Schulterpolster (ii).
Fädeln Sie die Gurte und Schulterpolstergurte durch die Löcher in der Kopfstütze an der Rückseite
des Sitzes, und stellen Sie sicher, dass alle Gurte auf gleicher Höhe sind. Verbinden Sie die beiden
Schulterpolster mittels Reißverschluss.
2
3
4
5
6
7
8
9
10
11
Einstellen der Kopfstütze und der Gurthöhe
Rückwärtsgerichtetes fahren, 9-25 kg mit
Fahrzeuggurt und Spanngurt.

22
Verbinden Sie die Gurte nun wieder mit dem Gurtverbinder aus Metall.
WICHTIG! Vergewissern Sie sich, dass die Gurte durch die gleiche Höhe der Löcher in der Kopfstütze
und am Sitz geführt werden. WICHTIG! Stellen Sie sicher, dass der Gurt zwischen dem Sitz und dem
Stützfuß verläuft. Der Gurt darf NICHT über die horizontale Stange des Stützfußes (i) geführt werden.
Setzen Sie Ihr Kind in den Sitz und prüfen Sie, ob die Höhe richtig eingestellt ist.
WARNUNG! Benutzen Sie diesen Kindersitz niemals ohne Schulterpolster. Die Schulterpolster sind
ein wichtiger Bestandteil des Sicherheitssystems.
12
13
14
Heben Sie den Move mit der Rückseite zuerst in das Fahrzeug. Platzieren Sie den Kindersitz so, dass
dessen Rückseite zur Fahrtrichtung ausgerichtet ist.
Der Fußabsatz (I) sollte dabei über den Rand des Fahrzeugsitzes hinausragen. Die vertikale Einkerbung
(J) am Fußbsatz sollte gleichmäßig zur Kante des Fahrzeugsitzes ausgerichtet sein. Beim Einbau
in kleineren Fahrzeugen oder wenn Ihr Kind keine extra lange Beinfreiheit benötigt, können Sie den
Fußabsatz auch auf den Fahrzeugsitz stellen.
Hinweis: Beim Befestigen des Move am Vordersitz kann die Rückseite des Kindersitzes das Armaturenbrett
berühren, dies ist aber nicht zwingend erforderlich.
Zum Einstellen der Neigung bewegen Sie den Verstellblock (G) und wählen eine der zwei Neigungen
aus. Wählen Sie einen möglichst aufrechten Winkel, wobei die Neigung so zu wählen ist, dass der Kopf
des Kindes beim Schlafen nicht nach vorne fällt. Eine Daumenregel besagt, dass je älter die Kinder
werden, desto aufrechter kann der Sitz eingestellt werden. Beachten Sie auch, dass sich der Kindersitz durch
Festziehen der Gurte etwas nach unten in den Fahrzeugsitz neigt.
Einbau des Sitzes
15
16
17
Verwenden Sie den Kindersitz niemals auf
Sitzplätzen mit aktiven Airbags.
Önen Sie die Gurtklemme (M) an beiden Seiten des Minikid. Ziehen Sie den Sicherheitsgurt vollständig
heraus bis der Beckengurt etwa 70-80 cm lang ist. Ziehen Sie den Gurt durch den Schlitz (D) unterhalb
des Sitzpolsters bis der Gurt auf der anderen Seite wieder herauskommt. Wenn Sie möchten, können Sie
den Gurt auch über das Polster spannen.
Stecken Sie den Sicherheitsgurt in das Gurtschloss und ziehen Sie den Gurt fest. Sichern Sie sowohl den
Hüftgurt als auch den Schultergurt in der Gurtsperre am Gurtschloss möglichst eng am Autositz.
In der Gurtsperre auf der anderen Seite wird nur der Hüftgurt gesichert.
18
Befestigen des Sicherheitsgurtes
19
20

23
Lösen Sie die Haltegurte von der Kinderrückhaltevorrichtung.
Drücken Sie den grauen Knopf (N) und ziehen Sie das Ende der Schlaufe heraus, um die Länge des
Gurtes zu maximieren.
Um die Spanngurte an einem Verankerungspunkt zu befestigen, müssen Sie den Gurt um den
gewünschten Verankerungspunkt wickeln und den Metallclip durch die Schlaufe führen.
Beim Einbau des Move auf dem Rücksitz können Sie die Spanngurte entweder an der Rückseite der
vorderen Sitzschienen (i) oder am Scharnier des Vordersitzes (ii) befestigen.
Beim Einbau des Move auf dem Beifahrersitz sollten Sie Spanngurte am nächstmöglichen
Verankerungspunkt (i) befestigt werden. Dadurch werden die Gurte vollständig gestrat. Sie können
auch an dem hintern Verankerungspunkt (ii) befestigt werden, gekreuzt werden (iii) oder auch
zusammengebunden werden (iv).
Befestigen Sie den Metallclip an jeder Seite des Sitzes und ziehen Sie an den Enden beider Gurtstraer
bis diese gut gespannt sind. Ziehen Sie erneut an beiden Gurten so fest wie möglich, um sicherzustellen,
dass der Kindersitz richtig befestigt ist.
Neigen Sie den Stützfuß (Q) bis zu seinem maximalen Winkel. Drücken Sie den Knopf für die
Stützfußverlängerung (R) und verlängern Sie den Stützfuß bis zum Boden. Hinweis: Der Gurt am Stützfuß
kann aber muss nicht vollständig gespannt werden.
Prüfen Sie hierbei, ob der Stützfuß einen Winkel von mehr als 10° ausgehend von der Rückseite des
Sitzes hat. Eindeutiges Zeichen dafür ist, wenn das Stützbein weiter vom Sitz weg platziert ist, als die
vertikale Linie.
Ziehen Sie nun die Gurte an beiden Seiten des Sitzes fest, um sicherzustellen, dass der Sitz vollständig
gesichert ist.
Wenn Sie den Move auf dem Rücksitz eingebaut haben, können Sie Ihren Vordersitz in eine komfortable
Position einstellen.
Hinweis: Die Rückseite des Kindersitzes kann den Vordersitz berühren.
Anbringen der Spanngurte
21
22
23
24
25
26
27
28
29

24
Obwohl optional, empfehlen wir DRINGEND überall dort, wo es möglich ist, das Seitenaufprallpolster zu
verwenden, um zusätzlichen Schutz vor Seitenkollisionen zu bieten.
Bringen Sie den Konnektor für das Seitenaufprallschutzpolster (K) am Kindersitz so an, dass er sich an
der nächstgelegenen Außenseite des Fahrzeugs befindet (d.h. zur nächstgelegenen Tür hin)
WICHTIG: Achten Sie darauf, dass die beiden dreieckigen Pfeile (i) am Seitenaufprallschutzpolster (H) in
dieselbe Richtung zeigen wie der dreieckige Pfeil am Konnektor des Seitenaufprallschutzpolsters (K).
Legen sie den Seitenaufprallschutz mit der Unterseite auf die Seitenfläche des Sitzes über den
Seitenaufprallkonnektor. Drücken Sie das Seitenaufprallpolster gegen die Seite des Autositzes und schieben
Sie das Seitenaufprallpolster nach oben auf den Seitenaufprallkonnektor. Sie hören ein leichtes Klicken, wenn
das Seitenaufprallpolster einrastet.
Abnehmen: Schieben Sie das Seitenaufprallpolster nach unten und entfernen Sie dieses.
30
Verwendung des Seitenaufprallschutzpolsters
Befestigen des Kindes im Kindersitz
Drücken Sie den Arretierungsknopf für 5-Punkt-Gurt (E) und ziehen Sie die Schultergurte (nicht die
Schulterpolster) vorwärts, um den Gurt vollständig zu lösen.
Drücken Sie den roten Auslöseknopf am Gurtschloss und lösen Sie den Gurt.
Setzen Sie Ihr Kind in den Kindersitz. Legen Sie die Arme des Kindes zwischen die Schultergurte, sodass
die Gurte über der Brust und dem Bauch des Kindes hängen.
Ziehen Sie die Schultergurte zusammen und stecken Sie diese in das Gurtschloss.
Ziehen Sie den Verstellgurt (F) an. Achten Sie darauf den Gurt immer gerade und zentral anzuziehen.
Andernfalls kann dies Schäden am Mechanismus verursachen.
Bevor Sie das Kind im Kindersitz befestigen stellen Sie sicher, dass Sie die richtige Höhe der Kopfstütze und
der Gurte eingestellt haben (siehe Schritte 2 bis 14)
31
32
33
34
35
WARNUNG: Entfernen Sie niemals den Sitz, während das Kind darin sitzt.
Önen Sie die Gurtklemme (M) an beiden Seiten des Sitzes. Lösen Sie das Gurtschloss des
Fahrzeuggurtes (i) und entfernen Sie den Fahrzeuggurt vollständig vom Sitz. Lösen Sie den Stützfuß
(Q). Lösen Sie die Spanngurte (L) vom Sitz und entfernen Sie diesen aus dem Fahrzeug. Entfernen Sie
schließlich die Spanngurte von den Verankerungspunkten am Auto und haken Sie die Spanngurte wieder am
Sitz ein.
Entfernen des Sitzes aus dem Auto
36

25
Entfernen und Anbringen der Stobezüge
WARNUNG: Verwenden Sie den Kindersitz niemals ohne Stobezüge. Diese sind ein wesentliches
Sicherheitsmerkmal.
Lösen Sie die Haltegurte von der Kinderrückhaltevorrichtung und entfernen Sie das
Seitenaufprallschutzpolster (H), falls angebracht.
Drücken Sie den Arretierungsknopf für 5-Punkt-Gurt (E) und ziehen Sie die Schultergurte (nicht die
Schulterpolster) vorwärts, um den Gurt vollständig zu lösen.
Drücken Sie den roten Auslöseknopf des Gurtes, um den Gurt zu lösen und das Schrittpolster zu
entfernen.
Önen Sie den Reißverschluss und entfernen Sie die Schultergurte vom Gurtverbinder aus Metall (S) an
der Rückseite des Sitzes.
Entfernen Sie die Schulterpolster (B) an der Seite des Sitzes.
Ziehen Sie die Schulterpolstergurte und Schultergurte aus dem Sitz heraus. Drücken Sie die
Kunststoklammer zusammen und ziehen Sie die Kopfstütze vorsichtig vom Sitz weg.
Lösen Sie die elastischen Schlaufen (i) an beiden Seiten der Kopfstütze und entfernen Sie die
Kopfstützenabdeckung.
Lösen und entfernen Sie den Plastikstreifen entlang der Vorderseite des Kindersitzes. WICHTIG!
Stellen Sie sicher, dass Sie nur den Plastikstreifen ziehen und nicht den Sto. Bewahren Sie den
Kunststostreifen sicher auf, damit Sie den Bezug wieder befestigen können. Sollten Sie den
Plastikstreifen verlieren, kontaktieren Sie Ihren Händler wegen Ersatz.
Lösen Sie alle Druckknöpfe (i), (ii), (iii).
Entfernen Sie vorsichtig die Sitzabdeckung von dem Gurtverstellergehäuse (i). Führen Sie alle Gurte
durch die Schlitze im Sitzbezug und entfernen Sie die Abdeckung.
Um den Stobezug wieder zu befestigen, gehen Sie in umgekehrter Reihenfolge vor und stellen Sie sicher,
dass der Gurt und die Schulterpolster richtig angebracht sind (siehe Schritte 9-13 für Details zum Anbringen der
Kopfstütze, des Gurtes und der Schulterpolster).
37
38
39
40
41
42
43
44
45
46

26
Pflege und Wartung
Der Sitzbezug ist abnehmbar und kann bei 30°C im Schonverfahren in der Waschmaschine gewaschen
werden. Nicht geeignet für Trockner, dies kann den Bezug beschädigen. Videos zum Entfernen und
Anbringen des Stobezuges finden Sie unter www.axkid.com oder unter www.vital-innovations.de
Jedes Plastikteil des Move kann mit einem milden Waschmittel und Wasser gereinigt werden.
Verwenden Sie keine aggressiven Reiniger, die Lösungsmittel etc. enthalten. Dies kann zu Schäden
führen und die Sicherheit des Kinderrückhaltesystems beeinträchtigen.
Alle Materialien, die im Move Rückhaltesystem verwendet werden, sind wiederverwendbar und sollten
gemäß der örtlichen und nationalen Vorschriften entsorgt werden. Fragen Sie Ihr lokales RecyclingUnternehmen um Rat.
Führen Sie keine Veränderungen am Move Rückhaltesystem durch außer diejenigen, welche in dieser
Bedienungsanleitung beschrieben. Befolgen Sie die Anleitungen sorgfältig. Jegliche Reparaturen
müssen durch den Hersteller oder Händler durchgeführt werden.
Wenn der Sitzbezug ersetzt werden muss, stellen Sie sicher, dass nur Originalprodukte von Axkid
verwendet werden. Falls andere Produkte benutzt werden, kann das Move Sicherheitssystem
beeinträchtigt werden. Hierbei kann es im Falle eines Unfalls zu schweren Verletzungen oder zum Tod
führen.
Alle verwendeten Materialien haben eine sehr hohe UV-Beständigkeit. Dennoch ist das UV-Licht sehr
aggressiv und wird letztlich zum Verblassen des Sitzbezuges führen. Dies wird nicht durch unsere
Garantie abgedeckt, da es sich hier um normale Abnutzung handelt.
Garantie
Der Garantiezeitraum beträgt 24 Monate ab Kaufdatum. Bewahren Sie Ihren Kaufbeleg gut
auf. Dieser muss im Falle eines Garantieanspruchs vorgezeigt werden. Folgendes wird nicht
von der Garantie abgedeckt:
- normale Abnutzung
- Schäden durch unsachgemäße Verwendung, Vernachlässigung oder Unfall
- Reparaturen durch Dritte

27
Manual de instrucciones
Mirando hacia atrás 9-25 kg con el cinturón de seguridad del vehículo y las correas de sujeción
Axkid Move
ES
Lea atentamente este manual de instrucciones antes de instalar la silla Move. Si tiene cualquier
duda, contacte con su tienda, donde le asesorarán para una correcta instalación. Una instalación
incorrecta puede poner en peligro a su hijo.
Nunca instale la silla de seguridad en el asiento de un vehículo con un airbag activo. Si quiere instalar
Move de todas formas, el airbag debe ser desconectado por un servicio técnico autorizado, o si su
vehículo está equipado con el interruptor que permite desconectar el airbag manualmente, use la
llave para desconectarlo. Es importante comprobar siempre que el indicador luminoso del vehículo
muestre que el airbag está desconectado.
Numerosos estudios demuestran que el riesgo de accidente grave o letal para un niño pequeño en
una silla de seguridad es 5 veces mayor cuando va mirando en el sentido de la marcha. En la silla
Move, tu hijo puede viajar mirando hacia atrás hasta los 25 kg de peso.
Use siempre la pata de apoyo al instalar la silla Move. La pata de apoyo es un elemento de
seguridad muy importante, diseñada para maximizar la seguridad de su hijo en caso de accidente.
En caso de accidente de tráfico, por pequeño que sea, sustituya siempre la silla de seguridad por
una nueva. La silla podría tener algún daño invisible que no se detecte a simple vista, y de ese modo
poner seriamente en peligro la seguridad de su hijo. Por esta razón Axkid no recomienda adquirir
sillas de seguridad de segunda mano.
Nunca deje al niño solo desatendido en el vehículo.
Asegúrese de que cualquier equipaje o carga que lleve en el vehículo quedan firmemente sujetos.
Así evitará lesiones al niño y a los demás pasajeros en caso de colisión.
Guarde este manual de instrucciones en el bolsillo (O) inferior de Move destinado para ello.
Lea atentamente este manual de instrucciones antes de instalar la silla Move en su vehículo.
Para más información y videos sobre la instalación, visite nuestra web www.axkid.com
Gracias por elegir una silla de seguridad infantil Axkid. El equipo que ha desarrollado Move tiene más de
30 años de experiencia en productos de seguridad infantil, y hemos puesto toda esa experiencia y todo
nuestro esfuerzo en hacer la silla de seguridad Move la más segura posible. La silla Move está testada y
certificada según la norma ECE R44/04, la más reciente norma europea sobre seguridad infantil. Para
maximizar la seguridad de su hijo, recuerde lo siguiente:
Información Importante

28
La silla de seguridad Move puede usarse en cualquier asiento del vehículo que mire hacia delante y
que tenga cinturón de seguridad de tres puntos (i), siempre que el airbag esté desactivado. No usar
nunca Move con un cinturón de seguridad de dos puntos (ii).
IMPORTANTE: Si desea instalar Move en un asiento con airbag, el airbag debe ser desconectado
por un servicio técnico autorizado. Algunos vehículos están equipados con un interruptor que
permite desconectar el airbag manualmente. Es importante comprobar siempre que el indicador
luminoso del vehículo muestre que el airbag está desconectado.
Parts
1
A Reposacabezas K Conector de la almohadilla de protección lateral
B Arnés interno de 5 puntos L Sistema de correas de sujeción (o sistema de
anclaje top tether)
C Broche del arnés interno M Pinza de sujeción del cinturón de seguridad
D Ranura para el cinturón de seguridad del vehículo N Botón gris
E Palanca de ajuste del arnés interno O Bolsillo para guardar el manual de instrucciones
F Correa de ajuste del arnés interno P Cremallera
G Palanca de ajuste de la inclinación de la silla de
seguridad
Q Pata de apoyo
H Almohadilla de protección lateral R Botón de extensión de la pata de apoyo
I Alzas S Horquilla
J Señal de línea vertical
Instalación correcta e incorrecta de la silla de
seguridad Move
Índice
Partes 28
Instalación correcta e incorrecta de la silla de seguridad 28-29
Mirando hacia atrás 9-25 kg con el cinturón de seguridad del vehículo y las
correas de sujeción
Esta instalación puede hacerse cuando el niño pesa entre 9 y 25 kg.
29-33
Cómo quitar y poner las fundas 33-34
Cuidado y mantenimiento 35
Garantía 35
La silla de seguridad infantil Move puede usarse a partir de los seis meses de edad del niño, o desde
que su hijo puede sentarse solo sin apoyo, hasta la edad de seis años aproximadamente. Esta silla de
seguridad SOLO puede ser instalada mirando hacia atrás, es decir, a contramarcha.

29
ADVERTENCIA: No instale nunca Move en un asiento del vehículo con el airbag activado
ADVERTENCIA: No instale nunca Move en asientos que estén mirando en sentido contrario o de
lado
ADVERTENCIA: Los airbags están diseñados para los adultos, y pueden lesionar gravemente al
niño en caso de accidente
Instalación correcta e incorrecta de la silla de seguridad Move:
Asiento delantero o del copiloto (airbag desconectado NO/Si*
Asiento delantero o del copiloto (airbag conectado) NO
Asiento mirando hacia delante con cinturón de seguridad de 3 puntos Si
Asiento con cinturón de seguridad de 2 puntos NO
Asiento mirando de lado NO
Asiento mirando hacia atrás NO
Nunca use la silla de seguridad Move en un asiento del
vehículo que no tenga el cinturón de seguridad de tres puntos
homologado por la norma ECE Reg 16.
Antes de instalar la silla Move, asegúrese de que el reposacabezas está a la altura correcta
para el niño. Cuando el arnés interno de 5 puntos está correctamente instalado, debe ir desde
la parte trasera de la silla hacia la parte delantera, pasando justo por encima de los hombros
del niño.
Para ajustar la altura del reposacabezas y del arnés interno, primero tendrá que cambiar el
arnés interno. Presione la palanca de ajuste del arnés interno (E) y tire de los tirantes (no de
las almohadillas para hombros) hacia la parte delantera de la silla, para soltar el arnés interno
totalmente.
Abra la cremallera (P) en la parte trasera de la funda de la silla.
Desenganche los tirantes de hombros de la horquilla (S) en la parte posterior de Move.
Desabroche el Velcro® y separe las almohadillas para hombros (B) en la parte trasera de Move.
2
3
4
5
6
Ajuste de la altura del reposacabezas y del arnés interno de 5 puntos
Mirando hacia atrás 9-25 kg con el cinturón de
seguridad del vehículo y las correas de sujeción
* El Reglamento General de Circulación en España, en su artículo 117, establece la prohibición de circular con menores de estatura igual o inferior a 135
centímetros situados en los asientos delanteros del vehículo, salvo excepciones.

30
La manera más fácil de instalar la silla Move en el vehículo es metiendo primero el respaldo.
Coloque la silla en el asiento del vehículo de forma que el respaldo de Move mire hacia la parte
delantera del vehículo.
Las alzas (I) de Move deben estar apoyadas sobre el borde del asiento del vehículo. La señal
de línea vertical (J) del alza debe alinearse verticalmente con el extremo del asiento del
vehículo. Si usted tiene un vehículo pequeño, o si su hijo es aún pequeño y no necesita espacio
adicional para las piernas, puede instalar Move con las alzas encima del asiento del vehículo, lo
cual le permitirá además reclinar la silla un poco más.
Nota: Si instala la silla Move en el asiento delantero del vehículo es posible, pero no necesario, que el
respaldo de la silla toque el salpicadero del vehículo.
Cómo instalar la silla de seguridad Move
15
16
Saque los tirantes de las almohadillas para hombros y los tirantes de hombros de la silla Move.
Apriete el clip de plástico y tire suavemente del reposacabezas para moverlo.
De las tres alturas diferentes que tiene el reposacabezas, coloque ahora el reposacabezas en
la altura más adecuada para el niño. Empuje la parte inferior del reposacabezas hasta que el
clip de plástico vuelva a su sitio.
Pase los tirantes del arnés interno de 5 puntos (i) a través de las almohadillas para hombros (ii).
Pase los tirantes del arnés interno y los tirantes de las almohadillas para hombros a través de
los huecos en el reposacabezas hacia la parte trasera de Move, asegurándose de que todos
los tirantes estén a la misma altura. Conecte los dos tirantes de las almohadillas para hombros
usando el Velcro®.
Enganche ahora los tirantes del arnés interno de 5 puntos a la horquilla.
¡IMPORTANTE! Asegúrese de que los tirantes del arnés interno de 5 puntos pasen por los
huecos a la misma altura tanto en el reposacabezas como en la silla Move. ¡IMPORTANTE!
Asegúrese de que el arnés interno es dirigido correctamente desde la silla Move hasta la pata
de apoyo. El arnés interno NO DEBE pasar sobre la barra horizontal de la pata de apoyo (i).
Compruebe que la altura del reposacabezas es correcta sentando al niño en la silla de
seguridad.
¡Atención! Nunca utilice la silla Axkid sin las almohadillas de los hombros del arnés interno.
Las almohadillas de los hombros son una característica de seguridad importante.
11
12
13
14
10
7
8
9
31
Nunca instale la silla de seguridad en el asiento de un
vehículo con el airbag activado.
Abra las pinzas de sujeción del cinturón de seguridad (M) a ambos lados de la silla Move. Tire
del cinturón de seguridad hasta que la cinta tenga como mínimo 70-80 cm de longitud. Pase
el cinturón de seguridad por la ranura para el cinturón de seguridad (D) y empújelo de un lado
a otro por debajo de la tela, en el hueco entre la funda de tela y el chasis de la silla, hasta que salga
por la otra ranura para el cinturón de seguridad, en el otro lado. Si lo prefiere, puede tirar del cinturón
de seguridad y pasarlo de un lado a otro por encima de la tela, hasta llegar a la otra ranura para el
cinturón de seguridad (D) en el otro lado.
Abroche el cinturón de seguridad. Tire con fuerza del cinturón de seguridad para que quede
tenso y no quede flojo ningún tramo del cinturón. A continuación sujete ambos, el cinturón de
cadera y el cinturón de hombro, con la pinza de sujeción más cercana al broche del cinturón de
seguridad del vehículo.
En la pinza de sujeción del lado contrario sólo tiene que sujetar el cinturón de cadera.
18
Cómo abrochar el cinturón de seguridad del vehículo
19
20
Desenganche las correas de sujeción de la silla Move.
Presione el botón gris (N) y tire del extremo hasta conseguir la máxima longitud de la correa.
Para abrochar la correa de sujeción en un punto de anclaje, haga un nudo corredizo en dicho
punto de anclaje y pase el clip de metal a través de la correa. Debe repetir cada paso a ambos
lados, para crear dos puntos de anclaje.
Si instala Move en el asiento trasero del vehículo, inserte el broche de la correa de sujeción bien
en la parte trasera de los rieles de los asientos delanteros (i), bien en el recodo entre la base y el
respaldo del asiento delantero (ii).
Cómo instalar las correas de sujeción
21
22
23
24
Para ajustar el ángulo de inclinación de Move, presione la palanca de ajuste de inclinación (G)
y elija una de entre las dos posibles posiciones de inclinación. El ángulo de inclinación debe
ser el más vertical posible en todo momento, siempre que el niño pueda sujetar su cabeza por
sí solo, y la inclinación debe ser suficiente para que la cabeza del niño no caiga hacia adelante si se
queda dormido. La regla general es que cuanto mayor es el niño, más verticalidad puede tener la silla
de seguridad. Tenga en cuenta que la silla Move se inclinará ligeramente al instalarla y hundirse en el
asiento del vehículo cuando la sujetamos con el cinturón de seguridad y o las correas de sujeción.
17

32
Cómo usar la almohadilla de protección lateral
Si instala Move en el asiento delantero o del copiloto, las correas de sujeción deben ser
sujetadas en el punto de sujeción más cercano (i) que permita tensarlas con total seguridad.
Pueden usarse puntos de anclaje situados más atrás (ii), y si es necesario, las correas pueden
cruzarse (iii) e incluso ser enlazadas (iv).
Vuelva a abrochar los clips metálicos a ambos lados de la silla de seguridad, y tire de los
extremos de las correas de sujeción hasta que estén tensas. Tire una vez más de cada una de
las correas de sujeción todo lo que pueda, para asegurarse de que la instalación es firme.
Despliegue la pata de apoyo (Q) hasta su máximo ángulo. Presione el botón de extensión de la pata de
apoyo (R) y extiéndala hasta que toque el suelo.
Nota: La cinta de la pata de apoyo puede quedar totalmente tensa, aunque no es necesario.
Es importante comprobar que el ángulo de la pata de apoyo respecto al respaldo de Move es
superior a 10º. Puede comprobarlo asegurándose de que la pata de apoyo esté más alejada
del asiento del vehículo que la señal de línea vertical.
Ahora, vuelva a tirar firmemente de las correas de sujeción a ambos lados, para que las correas
se tensen totalmente.
Si ha instalado Move en el asiento trasero del vehículo, ahora puede mover el asiento delantero del
piloto o del copiloto hasta una posición cómoda.
Nota: Es posible, pero no necesario, que al instalar Move en el asiento trasero del vehículo, el
respaldo de Move toque el respaldo del asiento delantero.
29
Aunque su uso es opcional, RECOMENDAMOS usar la almohadilla de protección lateral siempre
que sea posible, para una protección extra en caso de colisión lateral.
Busque el conector de la almohadilla de protección lateral (K) en el lado de Move más cercano
al lateral del vehículo (es decir, más cerca de la puerta).
IMPORTANTE: Compruebe que las dos flechas triangulares (i) en la almohadilla lateral (H) apunten
en la misma dirección que la flecha triangular del conector de la almohadilla lateral (K).
Coloque la parte superior de las dos aberturas ovales en la parte inferior de la almohadilla de
protección lateral sobre el conector de la almohadilla de protección lateral. Empuje la almohadilla
de protección lateral contra el lateral de Move y deslice la almohadilla de protección lateral hacia
arriba hasta el conector. Oirá un ligero clic cuando la almohadilla de protección lateral se acople en la
posición correcta.
Para quitarla: empuje la almohadilla de protección lateral hacia abajo y sáquela.
25
26
27
28
30

33
ADVERTENCIA: Nunca quite la silla de seguridad del vehículo mientras el niño esté aun
sentado en ella.
Abra las pinzas de sujeción del cinturón de seguridad (M) a ambos lados de la silla de
seguridad. Desabroche el cinturón de seguridad del vehículo (i) y retire totalmente el cinturón
de seguridad de la silla. Guarde la pata de apoyo (Q). Desenganche de la silla las correas de
sujeción (L) y saque la silla de seguridad del vehículo. Por último, suelte las correas de sujeción de
los puntos de anclaje en el vehículo y engánchelas en la silla de seguridad.anchor points and then
re-hook the straps on to the child restraint.
PRECAUCIÓN: Nunca use la silla de seguridad infantil Move sin sus fundas. Las fundas son
componentes del sistema de seguridad.
Desenganche las correas de sujeción de la silla Move y quite la almohadilla de protección
lateral (H) si está puesta.
Presione la palanca de ajuste del arnés interno (E) y tire de los tirantes de hombros hacia
delante (no de las almohadillas para hombros), para soltar el arnés completamente.
Presione el botón rojo del broche del arnés interno para desabrochar el arnés interno y quitar la
almohadilla de la entrepierna.
Cómo desinstalar y sacar la silla Move del vehículo
36
37
38
39
Cómo quitar y poner las fundas
Cómo sentar al niño en la silla Move
Presione la palanca de ajuste del arnés interno (E) y tire de los tirantes de hombros hacia delante (no de
las almohadillas para hombros), para soltar el arnés completamente.
Presione el botón rojo del broche del arnés interno y desabroche el arnés.
Siente al niño en la silla de seguridad Move. Coloque los brazos del niño entre los tirantes de los
hombros, de modo que los tirantes cuelguen sobre su pecho y estómago.
Junte los tirantes de los hombros y abróchelos en el broche del arnés, entre las piernas del
niño.
Tire de la correa de ajuste del arnés interno (F). Es importante que al tirar de ella siempre lo
haga en línea recta y horizontal. El no tirar de la correa del arnés correctamente puede hacer
que la correa se atasque en el mecanismo.
Antes de sentar al niño en la silla de seguridad, compruebe que el reposacabezas y el arnés interno han sido
ajustados a la altura más conveniente para el niño (ver pasos 2 a 14).
31
32
33
34
35

34
Abra la cremallera de la funda en la parte posterior de Move. Desenganche los tirantes de
hombros de la horquilla (S) en la parte posterior de Move.
Desabroche el Velcro® y separe las almohadillas para hombros (B) en la parte trasera de Move.
Saque los tirantes de las almohadillas para hombros y los tirantes de hombros de la silla Move.
Presione el clip de plástico y tire suavemente del reposacabezas de Move hasta soltarlo.
Desenganche los enganches elásticos (i) a ambos lados del reposacabezas y quite la funda
del reposacabezas.
Suelte y extraiga la tira de plástico a lo largo de la parte delantera de Move. ¡IMPORTANTE!
Asegúrese de tirar de la tira de plástico y NO tirar de la tela. Guarde la tira de plástico para cuando
necesite volver a colocar la funda de Move. Si pierde la tira de plástico, tendrá que contactar con su
tienda para pedir un recambio.
Desabroche todos los botones de presión (i),(ii), (iii).
Retire con cuidado la funda de Move alrededor de la tapa del dispositivo del arnés interno (i).
Pase todos los tirantes por las ranuras en la funda de Move y quite la funda.
Para colocar la funda, invierta los pasos anteriores, asegurándose de que el arnés interno de 5
puntos y las almohadillas para hombros estén colocados correctamente (ver pasos 9 - 13 para más
información sobre cómo poner el reposacabezas, el arnés interno y las almohadillas para hombros).
40
41
42
43
44
45
46

35
La silla de seguridad infantil Move está cubierta por una garantía de 24 meses desde la fecha
de compra. Guarde el ticket de compra y lleve la silla a la tienda donde la adquirió en caso de
reclamación de la garantía.
La garantía no cubre:
* El desgaste normal del producto.
* Daños producidos por un uso incorrecto del producto, negligencia o accidente.
* Reparaciones hechas por terceras personas.
Cuidado y mantenimiento
La funda de la silla de seguridad Move puede quitarse y lavarse a máquina a 30º C usando el
programa de lavado para prendas delicadas. No use secadora, ya que esto puede dañar el
tejido y hacer que el relleno se separe de la tela.
En nuestra web www.axkid.com puede ver videos explicando cómo quitar y poner la funda.
Los componentes de plástico de la silla Move pueden ser limpiados con agua y detergente
suave. No use para su limpieza productos químicos agresivos que contengan disolventes,
porque estos puede dañar el plástico y comprometer la seguridad de la silla.
Todos los materiales usados en la fabricación de la silla Move son reciclables y deben ser
reciclados y eliminados según su legislación local. Pregunte a su centro de reciclaje más
cercano sobre el reciclaje de este producto.
No haga ninguna reparación ni ajuste a la silla Move, excepto los descritos en este manual
de instrucciones. Siga atentamente las instrucciones de este manual. En caso de reparación,
esta debe ser hecha solo por el fabricante o el distribuidor.
Si tiene que sustituir la funda de la silla de seguridad Move, asegúrese de usar solo productos
originales de Axkid. Si usa productos de otros fabricantes, el sistema de seguridad Move
puede verse afectado, lo que puede ocasionar al niño lesiones graves e incluso la muerte en
caso de accidente.
Todos los materiales usados en la fabricación de la silla Move tienen muy alta resistencia a
la luz ultravioleta UV. Sin embargo, la radiación ultravioleta del sol es muy agresiva y a la larga
puede afectar al color del tejido de la silla. Esto no está cubierto por la garantía, ya que se
considera un desgaste normal del producto.
Garantía

36
Instrukcja obsługi
Tyłem do kierunku jazdy 9-25kg, montowany za pomocą pasów samochodowych i pasów
kotwiczących
Axkid Move
PL
Przeczytaj tę instrukcję uważnie przed montażem fotelika Move. W razie wątpliwości skontaktuj się
ze swoim sprzedawcą w celu demonstracji poprawnego monrażu fotelika. Niepoprawny montaż
może wpłynąć negatywnie na bezpieczeństwo twojego dziecka w trakcie podróży.
Nie używaj fotelika na miejscu z aktywną poduszką powietrza. Jeśli chcesz zamontować fotelik na
tym miejscu, odłącz poduszkę powietrzną w ASO. Niektóre pojazdy wyposażone są w manualny
wyłącznik poduszki powietrznej. Przed każdą podróżą upewnij się, że poduszka nie jest aktywna.
Wieloletnie badanie pokazały, że ryzyko odniesienia poważnych obrażeń lub śmierci w trakcie
wypadku, jest niższe pięciokrotnie jeśli dziecko podróżuje tyłem do kierunku jazdy. Fotelik Move
oferuje możliwość podróżowania tyłem do kierunku jazdy aż do 25kg.
Zawsze używaj nogi stabilizującej w trakcie montażu fotelika. Noga podtrzymująca jest ważnym
elementem fotelika, wpływającym na bezpieczeństwo Twojego dziecka.
W razie kolizji lub wypadku twój fotelik nie powinien być dłużej użytkowany. Jego elementy mogą
być zużyte lub uszkodzone. Czasami uszkodzenia nie są widoczne gołym okiem. Z tego powodu
Axkid nie rekomenduje zakupu fotelików z rynku wtórnego.
Nigdy nie zostawiaj swojego dziecka w samochodzie bez opieki.
Upewnij się, że wszystkie bagaże i luźne przedmioty są odpowiednio zabezpieczone w trakcie
podróży.
Przechowuj tę instrukcję w dedykowanej kieszonce (O) w foteliku.
Przeczytaj poniższą instrukcję przed montażem fotelika Move w twoim samochodzie. W
celu uzyskania bardziej szczegółowych informacji i filmów montażowych wejdź na stronę
internetową Axkid.com
Dziękujemy za wybranie fotelika Move. Nasz zespół ma 30 lat doświadczenia w dziedzinie bezpiecznego
przewożenia dzieci i uczyniliśmy wszystko co w naszej mocy, żeby fotelik Move był tak bezpieczny jak
to tylko możliwe. Fotelik Move posiada certyfikat ECE R44-04, aktualny standard bezpieczeństwa
obowiązujący na terenie Unii Europejskiej.
Ważna informacja

37
Zawartość
Fotelik może być montowany na każdym siedzeniu skierowanym przodem do kierunku jazdy
wyposażonym w trzypunktowe pasy bezpieczeństwa na którym brak aktywnej poduszki powietrznej.
Zabroniony jest montaż fotelika za pomocą dwupunktowego pasa bezpieczeństwa.
WAŻNE: Nie używaj fotelika na miejscu z aktywną poduszką powietrza. Jeśli chcesz zamontować fotelik na tym
miejscu, odłącz poduszkę powietrzną w ASO. Niektóre pojazdy wyposażone są w manualny wyłącznik poduszki
powietrznej. Przed każdą podróżą upewnij się, że poduszka nie jest aktywna.
UWAGA: Nigdy nie montuj fotelika na siedzeniu wyposażonym w aktywną poduszkę powietrzną
UWAGA: Nigdy nie montuj fotelika na siedzeniach skierowanych tyłem lub bokiem do kierunku jazdy
UWAGA: Poduszka powietrzna jest przeznaczona dla dorosłego pasażera i może spowodować
poważny uraz u Twojego dziecka
Elementy
1
A Zagłówek K Łącznik dodatkowej osłony bocznej
B Uprząż wewnętrzna L Pas kotwiczący
C Klamra uprzęży M Blokada pasa samochodowego
D Prowadnica pasa samochodowego N Szary przycisk
E Przycisk regulacji uprzęży O Kieszeń na instrukcję
F Pasek regulacji uprzęży P Zamek błyskawiczny
G Podstawa regulująca kąt pochylenia Q Noga stabilizująca
H Dodatkowa osłona boczna R Przycisk regulacji nogi stabilizującej
I Podstawa S Łącznik uprzęży wewnętrznej
J Znacznik skraju kanapy
Miejsca w których możesz i nie możesz
zamontować fotelik
Elementy 37
Miejsca w których możesz i nie możesz zamontować fotelik 37-38
Tyłem do kierunku jazdy 9-25kg
Ten fotelik może być stosowany dla dzieci od 9 do 25kg
38-41
Zdejmowanie i zakładanie tapicerki 42
Obsługa i konserwacja 43
Gwarancja 43
Fotelik Move jest odpowiedni dla dzieci, które potrafią samodzielnie i stabilnie siedzieć. Posłuży do ok.
6 roku życia. Fotelik Move jest montowany tylko tyłem do kierunku jazdy.
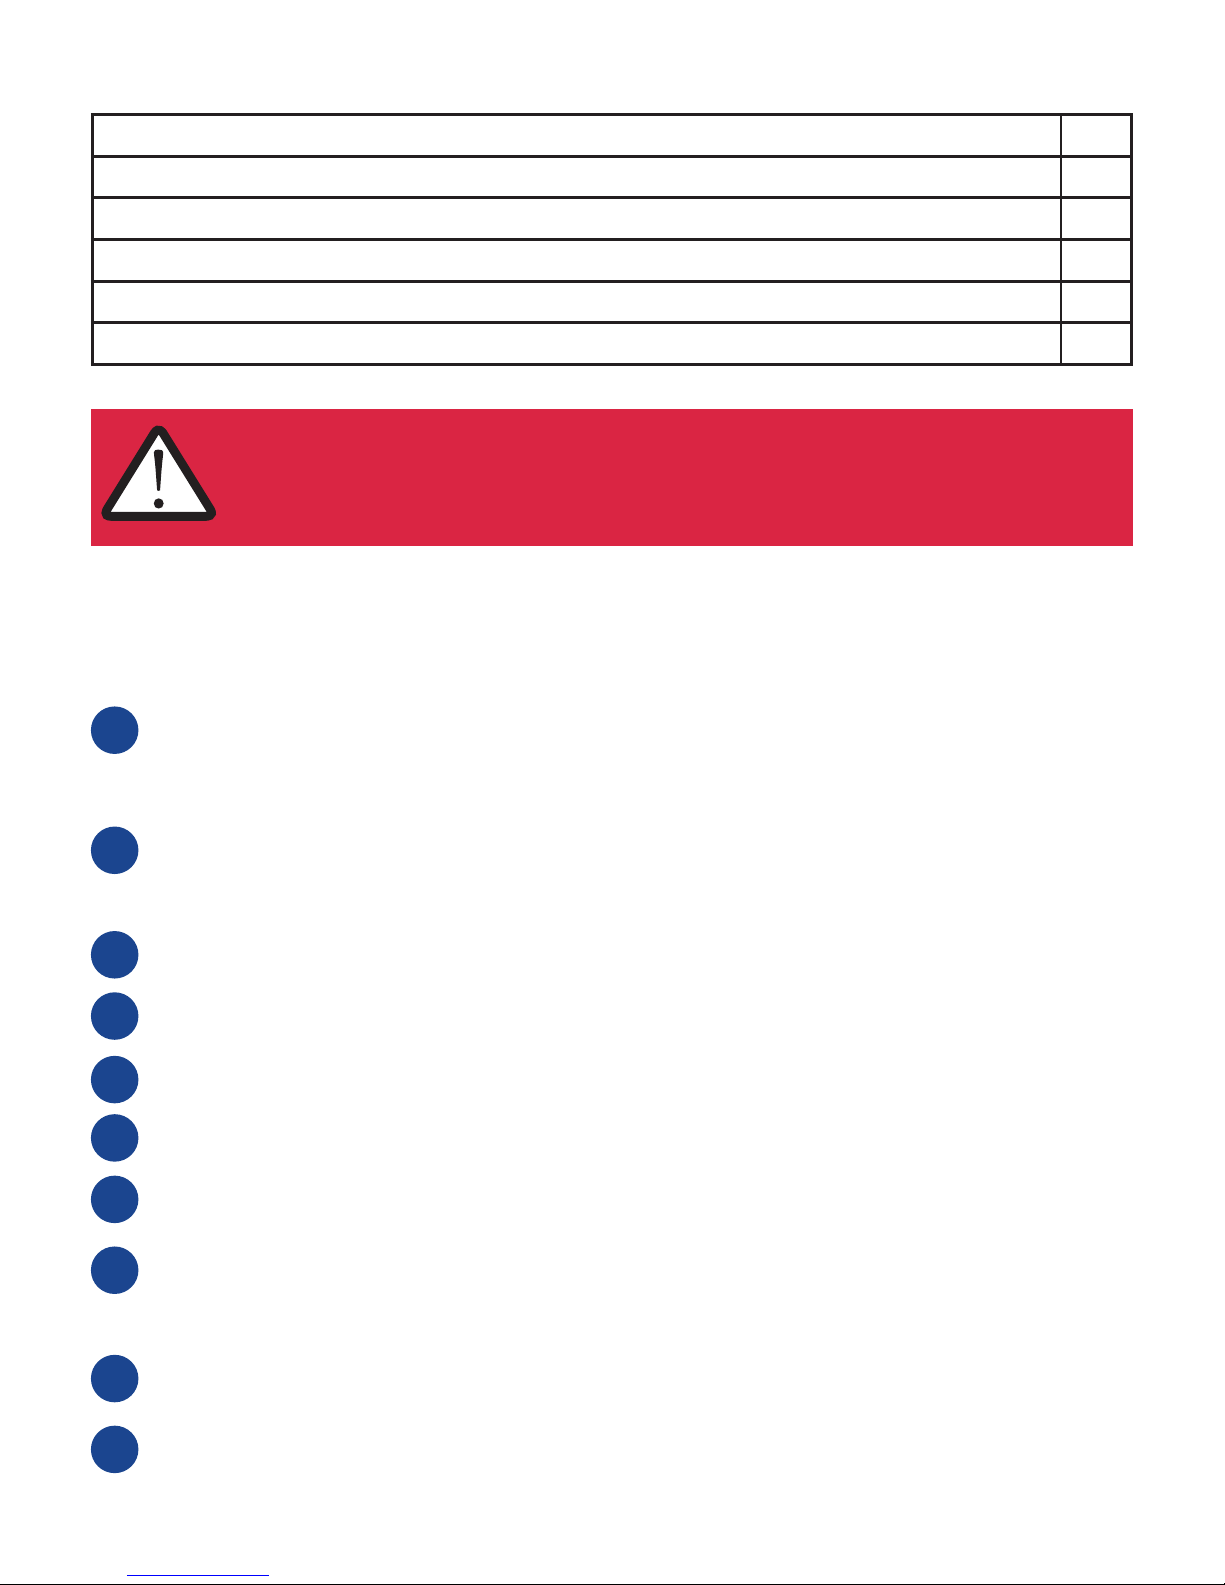
38
Zanim zamontujesz fotelik upewnij się, że zagłówek i uprząż są na odpowiedniej wysokości.
Prawidłowo pozycjonowana uprząż powinna wychodzić z fotelika dokładnie na poziomie
ramion dziecka.
Aby przemieścić zagłówek i uprząż na wyższą pozycję, będziesz musiał najpierw odczepić
uprząż od uchwytu (T). Naciśnij przycisk regulacji uprzęży (E) i pociągnij za pasy (nie za
ochraniacze barkowe) aby całkowicie poluzować uprząż.
Otwórz zamek błyskawiczny (P) z tyłu tapicerki.
Wysuń uprząż z łącznika uprzęży wewnętrznej (S)
Rozepnij klamerkę spinającą ochraniacze barkowe (B)
Wyciągnij uprząż barkową i ochraniacze barkowe z fotelika
Ściśnij plastikowy klips i delikatnie wyjmij zagłówek z uchwytu.
Umieść zagłówek w jednym z trzech dostępnych slotów, najbardziej odpowiadającemu
wysokości Twojego dziecka. Delikatnie dociśnij spód zagłówka aż klips zablokuje się w
uchwycie.
Przewlecz uprząż barkową (i) przez ochraniacze barkowe (ii)
Przewlecz uprząż oraz paski mocujące ochraniacze barkowe przez dostepne otwory
w zagłówku. Upewnij się, że oba są na jednakowej, poprawnej wysokości. Połącz paski
ochraniaczy barkowych klamerką.
2
3
4
5
6
7
8
9
10
11
Miejsca w których możesz i nie możesz zamontować fotelik
Przedni fotel pasażera (nieaktywna poduszka) Ta k
Przedni fotel pasażera (aktywna poduszka) NIE
Fotel pasażera skierowany przodem do kierunku jazdy , z trzypunktowym pasem bezpieczeństwa Ta k
Fotel z dwupunktowym pasem bezpieczeństwa NIE
Fotel skierowany bokiem do kierunku jazdy NIE
Fotel skierowany tyłem do kierunku jazdy NIE
Nigdy nie montuj tego fotelika w aucie niewyposażonym w
trzypunktowe pasy bezpieczeństwa.
Zmiana pozycji zagłówka i uprzęży wewn
Tyłem do kierunku jazdy 9-25kg

39
Nasuń uprząż na łącznik uprzęży.
WAŻNE! Upewnij się, że pasy uprzęży przechodzą przez plecy fotelika na tej samej
wysokości. WAŻNE! Upewnij się, że uprząż jest poprowadzona pomiędzy fotelikiem a nogą
podtrzymującą. Uprząż nie może przechodzić przez nogę (i)
Upewnij się, że wysokość zagłówka jest odpowiednia, poprzez umieszczenie dziecka w foteliku.
UWAGA! Nigdy nie używaj fotelika bez ochraniaczy na pasy. Są one ważnym elementem
odpowiadającym za bezpieczeństwo.
12
13
14
Umieść fotelik na siedzeniu, ustawiając go tyłem do kierunku jazdy.
Podstawa(I) powinna znajdować się na skraju siedzenia. Wskaźnik skraju kanapy (J) powinien
pokrywać się ze skrajem siedzenia pasażera. Jeśli instalujesz fotelik w mniejszym pojeździe lub
jeśli twoje dziecko nie potrzebuje dodatkowego miejsca na nogi, możesz umieścić podstawę
na szczycie siedzenia pasażera, dzięki temu otrzymasz również bardziej odchyloną pozycję
Ważne: Jest wskazane, lecz nie konieczne, aby fotelik zamontowany na przednim siedzeniu
pasażera opierał się o deskę rozdzielczą pojazdu.
Aby regulować pozycję fotelika ustaw podstawę regulującą (G) w jedną z dwóch możliwych
pozycji. Zawsze wybieraj maksymalnie pionową pozycję, jednak Twoje dziecko musi
samodzielnie utrzymać głowę w zagłówku podczas snu.Zgodnie z zasadą, im starsze dziecko
tym bardziej pionowe ustawienie fotelika. Pamiętaj, że po montażu fotelika jego pozycja będzie
bardziej odchylona, gdyż naciągnięte pasy samochodowe oraz pasy kotwiczące docisną fotelik do
siedzenia.
Otwórz blokady pasa samochodowego (M) po obu stronach fotelika. Przeprowadź pas
samochodowy samochodowy przez prowadnicę (D), pod lub nadtapicerką fotelika i przez
prowadnicę po drugiej stronie siedziska.
Wepnij klamrę pasa w zamek pasa bezpieczeństwa. Naciągnij pas samochodowy tak, aby
nie było na nim żadnych luzów. Zapnij pas barkowy i biodrowy w blokadzie (M) bliżej środka
pojazdu.
Blokada od strony drzwi powinna być zatrzaśnięta jedynie na części biodrowej pasa
samochodowego.
18
Montaż pasa samochodowego
Montaż fotelika
15
16
17
Nigdy nie instaluj fotelika na siedzeniu z aktywną
poduszką powietrzną.
19
20

40
Odepnij pasy kotwiczące od fotelika.
Naciśnij szary przycisk (N) i pociągnij za pętlę na końcu aby wydłużyć pas.
Aby przymocować pas przeprowadź go przez wybrany punkt kotwiczenia i przepleć metalowy
zaczep przez pętlę na końcu pasa. Zaciągnij.
Jeśli instalujesz fotelik na siedzeniu z tyłu, pasy kotwiczące powinny być zamocowane do
prowadnic przedniego fotela (i), lub pomiędzy siedziskiem a oparciem przedniego fotela. (ii).
Jeśli instalujesz fotelik na przednim siedzeniu, pasy kotwiczące powinny być zamocowane
do najbliższego dogodnego punktu mocowania (i) Można użyć również bardziej oddalonych
punktów (ii) a pasy kotwiczące mogą być skrzyżowane (iii) lub zamocowane o siebie
nawzajem (iv).
Zamocuj ponownie metalowy zaczep do skorupy fotelika i pociągnij luźną część pasa
kotwiczącego. Ciągnij pas, dopóki nie upewnisz się, że jest on sztywno naciągnięty.
Odciągnij nogę podtrzymującą (Q) to maksymalnego kąta. Naciśnij przycisk wydłużania nogi (R) i
wydłuż nogę tak, aby oparła się na podłodze. Uwaga: Paski ograniczające nogę mogą lecz nie muszą
być maksymalnie napięte.
Ważne jest, aby noga stabilizująca była ustawiona pod kątek ok. 10 stopni względem oparcia
fotelika. Noga powinna opierać się w kierunku maski samochodu, nie zaś jego bagażnika.
Raz jeszcze dociągnij pasy kotwiczące fotelika aby upewnić się, że są odpowiednio
naciągnięte.
Jeśli zamontowałeś fotelik Move na siedzeniu z tyłu pojazdu, możesz teraz przesunąć siedzenie
przed nim do wygodnej pozycji.
WAŻNE: Skorupa fotelika może lecz nie musi opierać się o przedni fotel.
Montaż pasa kotwiczącego
21
22
23
26
27
28
24
25
29

41
Używanie dodatkowej osłony bocznej
Choć osłona jest opcjonalna, ZDECYDOWANIE rekomendujemy jej używanie dla dodatkowej
ochrony przy uderzeniu bocznym.
Umieść łącznik osłony (K) na boku fotelika od strony drzwi pojazdu
WAŻNE: Upewnij się, że dwie strzałki (i) na osłonie (H) wskazują ten sam kierunek co strzałka
umieszczona na łączniku (K).
Umieść dwa owalne otwory na spodniej części osłony nad łącznikiem osłony. Dociśnij osłonę do
łącznika i popchnij ją w górę. Poczujesz delikatne kliknięcie, kiedy osłona wskoczy na swoje miejsce
Aby usunąć osłonę popchnij ją w dół aż do zwolnienia zaczepów. Aby usunąć osłonę popchnij ją w
dół aż do zwolnienia zaczepów.
Zapinanie dziecka w foteliku
Naciśnij przycisk regulacji uprzęży (E) i wyciągnij ją na maksymalną długość.
Naciśnij czerwony przycisk na zamku uprzęży aby rozpiąć uprząż.
Posadź dziecko w foteliku. Umieść uprząż tak, aby przebiegała po barkach oraz biodrach
dziecka.
Połącz obie klamry uprzęży i umieść je w zamku aż usłyszysz charakterystyczne kliknięcie.
Zaciągnij pasek regulacji uprzęży (F). Ważne jest, aby pasek regulacji zaciągać tak, by uprząż
na ramionach dociągała się równomiernie.
Przed umieszczeniem dziecka w foteliku, upewnij się że zagłówek oraz pasy znajdują sie na odpowiedniej
wysokości (Kroki od 2 do 14)
31
32
33
34
35
UWAGA: Nigdy nie demontuj fotelika kiedy twoje dziecko jest w nim zapięte.
Otwórz blokady pasa samochodowego (M) po obu stronach fotelika.Uwolnij klamrę pasa
samochodowego z zamku (i) i usuń pas z prowadnic fotelika. Skróć nogę stabilizującą(Q).
Odepnij pasy kotwiczące(L) i wyjmij fotelik z pojazdu. Na koniec odczep pasy kotwiczące od
punktu kotwiczenia.
Demontaż fotelika z pojazdu
36
30

42
UWAGA: Nigdy nie używaj fotelika bez tapicerki. Tapicerka jest integralną częścią fotelika
Odepnij pasy kotwiczące i usuń osłonę boczną (H)
Naciśnij przycisk regulacji uprzęży (E) i wyciągnij ją na maksymalną długość.
Rozepnij uprząż i usuń osłonkę pasa krokowego
Rozepnij zamek błyskawiczny z tyłu fotelika. Wypleć uprząż z klamry (S) z tyłu fotelika.
Rozepnij klamerkę spinającą ochraniacze barkowe (B)
Wyciągnij uprząż barkową i ochraniacze barkowe z fotelika, ściśnij plastikowy klips i delikatnie
wyjmij zagłówek z fotelika
Wypleć elastyczne pętelki (i) z obu stron zagłówka i usuń tapicerkę zagłówka
Delikatnie podważając wypnij i usuń plastikową listwę (i) w dolnej części frontu fotelika. UWAGA:
upewnij się, że ciągniesz za listwę, nie za materiał tapicerki. Delikatnie wysuń tapicerkę z maskownicy
paska regulacji uprzęży. WAŻNE: zachowaj plastikową listwę w bezpiecznym miejscu do czasu
ponownej instalacji tapicerki, w przypadku zgubienia listwy skontaktuj się ze swoim sprzedawcą.
Odepnij wszystkie napy (i) (ii) (iii)
Delikatnie wysuń tapicerkę spod maskownicy paska regulacji długości uprzęży (i), wysuń
wszystkie pasy z otworów w tapicerce i zdejmij ją.
Aby założyć tapicerkę, wykonaj powyższe czynności w odwrotnej kolejności. Upewnij się, że uprząż i
ochraniacze są poprowadzone poprawnie (patrz krok 9-13)
37
38
39
40
41
42
43
44
45
46
Zdejmowanie i zakładanie tapicerki

43
Obsługa i konserwacja
Tapicerka fotelika może zostać zdjęta i prana w pralce w temperaturze 30st C, w programie
“Delikatne”. Nie umieszczaj tapicerki w suszarce, gdyż może ona ulec uszkodzeniu. Odwiedź
www.axkid.com aby dowiedzieć się, jak odpiąć tapicerkę z fotelika.
Wszystkie plastikowe części fotelika mogą zostać wyczyszczone za pomocą delikatnych
detergentów i wody. Nie używaj mocnej chemii zawierającej rozpuszczalniki itp, może to
spowodować uszkodzenie fotelika i wpłynąć negatywnie na bezpieczeństwo Twojego
dziecka.
Wszystkie materiały z jakich wykonany jest fotelik Move mogą oraz powinny zostać poddane
recyklingowi zgodnie z prawem obowiązującym w twoim kraju. Aby uzyskać wskazówki
dotyczące recyklingu skontaktuj się z najbliższym punktem odbioru odpadów.
Nie dokonuj żadnych modyfikacji fotelika Move, poza dozwolonymi w niniejszej instrukcji.
Zawsze stosuj się do niniejszej instrukcji. Wszelkie naprawy fotelika powinny być dokonane
przez autoryzowany serwis dystrybutora w twoim kraju.
Jeśli tapicerka fotelika będzie wymagała wymiany, upewnij się, że używasz oryginalnych
części od firmy Axkid. Zastosowanie nieoryginalnej tapicerki może wpływać negatywnie na
bezpieczeństwo twojego dziecka.
Wszystkie materiały użyte do produkcji fotelika Move posiadają wysoką wytrzymałość na
promieniowanie UV. Jednakże promieniowanie UV jest bardzo agresywne i z czasem może
doprowadzić do blaknięcia tapicerki. Nie jest to uwzględnione w naszej gwarancji i będzie
rozpatrywane jako zużycie spowodowane normalnym użytkowaniem.
Gwarancja
Otroški avtosedež Move krije 24 mesečna garancija od dneva na kupa. Shranite račun in ga
prinesite vašemu prodajalcu v primeru morebitnih na pak. Garancija ne zajema:
* Normalne obrabe
* Poškodb zaradi nepravilne uporabe, malomarnosti ali nezgode
* Če so bila popravila izvajana s strani nepooblaščene osebe

44
Manual de Instruções
Contra a marcha 9-25 kg com cinto de segurança do veículo e cintas tethers
Axkid Move
PT
Leia este manual de instruções cuidadosamente antes de instalar o sistema de retenção infantil Move. Em
caso de dúvida, entre em contacto com o seu revendedor que pode demonstrar uma instalação correta. Uma
instalação incorreta pode colocar o seu filho em perigo.
Não use um sistema de retenção infantil num assento equipado com um airbag ativo. Se deseja instalar a Move
nesse assento o airbag deve ser desligado numa oficina autorizada. Alguns veículos podem estar equipados
com um botão que permite desligar manualmente o airbag. É importante verificar sempre se a luz indicadora do
veículo mostra que o airbag está desligado.
Uma extensa pesquisa mostrou que o risco de ferimentos graves ou pior é cinco vezes maior para uma criança
numa cadeira-auto no sentido da marcha, em comparação com um sistema de retenção contra a marcha. Com
a Move o seu filho pode viajar voltado para trás até aos 25 kg.
Use sempre a perna de apoio quando instalar a cadeira-auto Move. A perna de apoio é uma característica de
segurança muito importante, projetada para maximizar a segurança do seu filho em caso de acidente.
Em caso de acidente, não importa quão pequeno, o seu sistema de retenção infantil deve ser substituído. Ele
pode ter algum dano indetetável e comprometer seriamente a segurança do seu filho. Por esta razão a Axkid não
recomenda a compra de sistemas de retenção infantil em segunda mão.
Nunca deixe a criança sozinha no carro.
Certifique-se de que qualquer bagagem ou objetos soltos estão seguros no seu veículo, pois podem causar
lesões aos passageiros em caso de colisão.
Guarde este manual de instruções no bolso designado (O) no assento do carro.
Leia este manual de instruções antes de instalar o sistema de retenção infantil Move no seu veículo.
Para mais informações e vídeos de montagem visite www.axkid.com.
Obrigado por escolher uma cadeira-auto Axkid. A nossa equipa tem mais de 30 anos de experiência combinada na
segurança das crianças, e nós fizemos o nosso melhor para tornar a cadeira-auto Move o mais segura possível. O
sistema de retenção infantil Move está aprovado segundo a norma ECE R44/04, a mais recente norma Europeia para a
segurança infantil. Para maximizar a segurança do seu filho, é importante que tenha em mente o seguinte;
Informação importante

45
O sistema de retenção infantil pode ser usado em qualquer assento de passageiro no sentido da marcha
com cinto de segurança de 3 pontos (i), desde que não haja um airbag ativo nesse lugar. O sistema de
retenção infantil não pode ser utilizado com um cinto de segurança de 2 pontos (ii).
IMPORTANTE: Se deseja instalar a sua Move num assento com um airbag instalado, então o airbag deve ser
desligado numa oficina autorizada. Alguns veículos podem estar equipados com um botão que permite desligar
manualmente o airbag. É importante verificar sempre se a luz indicadora do veículo mostra que o airbag está
desligado.
AVISO: Nunca use num assento com um airbag ativo.
AVISO: Nunca utilize em assentos do veículo virados para trás ou para o lado
AVISO: Os airbags são projetados para adultos e podem causar danos sérios ao seu filho num acidente
1
Posições permitidas e não permitidas da
cadeira-auto infantil
Partes
A
Apoio da Cabeça K Conector da Almofada de Impacto Lateral
B
Arnês Integrante L Alças Tether
C
Fivela do Arnês M Sistema de Trancar o Cinto
D
Ranhuras dos Cintos N Botão Cinzento
E
Botão de regulação do Arnês O Bolso para armazenamento do Manual de instruções
F
Alça de regulação do Arnês P Fecho
G
Bloqueador da Reclinação Q Suporte de pernas
H
Almofada de impacto lateral R Botão do entensor de pernas
I
Saltos S União
J Linha Vertical com reentrâncias
Conteúdo
Partes 45
Posições permitidas e não permitidas da cadeira-auto infantil 45-46
Contra a marcha 9-25kg com cinto de segurança do automóvel e cintas tethers
Esta posição pode ser usada para crianças que pesem entre 9-25 kg.
46-49
Remover e posicionar as capas 50
Cuidado e Manutenção 51
Garantia 51
O sistema de retenção infantil Move é adequado para utilização a partir dos seis meses de idade
aproximadamente, ou a partir do momento em que o seu filho se senta sem apoio, até aos seis anos. Este sistema
de retenção pode APENAS ser instalado contra a marcha.

46
Posições permitidas e não permitidas da cadeira-auto infantil.
Assento do passageiro frontal (sem airbag ativo) Sim
Assento do passageiro frontal (airbag ativo) Não
Assento no sentido da marcha com cintos de segurança de 3-pontos Sim
Assento com cintos de segurança de 2-pontos Não
Assentos virados para o lado Não
Assentos virados para trás Não
Nunca utilize esta cadeira-auto num carro que não está equipado
com um cinto de segurança de 3 pontos aprovado com a norma
ECE Reg 16
Regulação do apoio da cabeça e da altura do arnês
Contra a marcha 9-25 kg com cinto de segurança
e cintas tethers
Antes de instalar o sistema de retenção infantil certifique-se que o apoio de cabeça está
na altura correta para a sua criança. O arnês, quando instalado corretamente, deve estar
encaminhado desde as costas da cadeira para a frente e passar mesmo por cima dos ombros
da criança.
No sentido de ajustar a altura do apoio de cabeça e do arnês primeiro necessita destacar o
arnês. Pressione o botão de regulação do arnês (E) e puxe para a frente nas alças dos ombros
(não nas almofadinhas dos ombros) para alargar completamente o arnês.
Abra o fecho (P) na parte de trás da capa da cadeira.
Desaperte o Velcro e solte as almofadinhas do ombro (B) na parte de trás da cadeira.
Solte o Velcro e desprenda as almofadas dos ombros (B) na parte de trás da cadeira.
Puxe as alças das almofadas dos ombros e as almofadas dos ombros da cadeira.
Aperte o clip de plástico e gentilmente solte o apoio de cabeça da cadeira.
Reposicione o apoio de cabeça numa das três alturas que melhor se adequa à sua criança.
Empurre o botão do apoio de cabeça até que o clip de plástico fique preso no sítio.
Passe as alças do arnês (i) através das almofadas dos ombros (ii).
2
3
4
5
6
7
8
9
10

47
Passe as alças do arnês e alças das almofadas dos ombros através dos buracos no apoio de
cabeça na parte de trás da cadeiras assegurando-se que todas as alças estejam à mesma
altura. Junte as duas alças das almofadas dos ombros usando o Velcro.
Volte a juntar as alças do arnês na união.
IMPORTANTE! Assegure-se que as alças do arnês passam através do mesmo buraco de
posição de altura do apoio de cabeça e da cadeira. IMPORTANTE! Assegure-se que o arnês
está posicionado entre a cadeira e o suporte de pernas. O arnês NÃO PODE passar sobre a
barra horizontal do suporte de pernas (i).
Certifique-se que a altura está correta quando posiciona a criança na cadeira.
AVISO! Nunca use esta cadeira de criança sem as almofadas dos ombros. As almofadas dos
ombros são uma característica de segurança importante.
11
12
13
14
A maneira mais fácil para colocar a Move no veículo é com a parte traseira primeiro. Coloque o sistema de
retenção infantil no veículo com a parte de trás da cadeira voltada para a frente do veículo.
Os saltos (I) devem estar sobre a borda do assento do veículo. A linha vertical com reentrâncias (J) do salto
deve alinhar verticalmente com a extremidade do assento do veículo. Se estiver a instalar a cadeira num
veículo pequeno, ou se o seu filho não necessita de espaço para as pernas extra, pode colocar o salto sobre
o banco do veículo, isto também vai conseguir uma posição mais reclinada.
Nota: Ao instalar a Move no banco da frente é possível, mas não fundamental, que a parte de trás da cadeira possa
ter contacto com o painel.
Para ajustar o ângulo do sistema de retenção infantil, rode o bloqueador de rotação (G) para uma das
duas posições de inclinação. Escolha sempre a posição mais vertical possível, no entanto a sua criança
deve conseguir manter a cabeça para cima sozinha, e deve haver reclinação suficiente para garantir que
a cabeça da criança não caia para a frente quando adormece. A regra geral é que quanto mais velha a criança,
o mais vertical pode o assento ser instalado. Tenha em mente que uma vez que a instalação da Move esteja
concluída, ela ficará um pouco mais reclinada, à medida que se afunda no banco do veículo pelo apertar dos cintos
e das cintas tether.
Colocação do sistema de retenção infantil no veículo
15
16
17
Nunca instale um sistema de retenção infantil num assento
de passageiro com um airbag ativo.

48
Abra os clips de bloqueio dos cintos (M) em ambos os lados do sistema de retenção infantil Move. Alargue
totalmente o cinto de segurança até que a parte do colo do cinto tenha pelo menos 70-80cm (27-32
polegadas) de comprimento. Passe o cinto através da ranhura do cinto de segurança (D), entre a capa
da cadeira e o corpo da mesma até que a cinta saia através da ranhura do cinto de segurança, pelo outro lado.
Se preferir, em vez disso pode alimentar o cinto de segurança através da ranhura do cinto de segurança (D), em
seguida, sobre a parte superior da capa do cinto de segurança e, em seguida, através da ranhura do cinto de
segurança, pelo outro lado.
18
Fixação do cinto de segurança do veículo
Solte as alças tether do sistema de retenção infantil.
Pressione o botão cinzento (N) e puxe o laço do fim para fora para maximizar o comprimento da alça.
Para fixar as alças tether ao ponto de ancoragem, coloque a alça em volta do ponto de ancoragem
escolhido e passe o clip de metal pelo laço.
Quando instalar a Move no banco de trás, passe as alças tether através da parte de trás dos trilhos do
banco da frente (i), ou da dobradiça do banco da frente (ii).
Quando instalar a Move no banco de passageiro da frente, as alças tether devem passar à volta do
ponto de ancoragem mais próximo possível (i) o que permitirá que as alças fiquem completamente
tensas. Os pontos de ancoragem posicionados mais atrás (ii) podem ser usados e se necessário as
alças podem ser cruzadas (iii) e mesmo laçadas juntas (iv).
Volte a fixar os clips de metal em cada lado do sistema de retenção infantil e puxe as pontas soltas de
ambas as alças tether até que estejam tensionadas. Puxe cada alça mais uma vez com a máxima
força possível para assegurara que o sistema de retenção infantil esteja firmemente seguro.
Abra o apoio de pernas (Q) para fora para o seu ângulo máximo. Pressione o botão do extensor de
pernas (R) e estique o apoio de pernas até que atinja o chão.
Nota: O cinto do apoio de pernas pode, mas não é preciso, estar tensionado ao máximo.
É importante verificar que a perna de suporte faz um ângulo de mais de 10 graus desde a parte de trás
da cadeira. Pode-se verificar isso, garantindo que a perna de suporte está mais afastada da cadeira do
que da linha vertical.
Agora puxe firmemente as alças em ambos os lados da cadeira para se assegurar que a sua cadeira
está completamente segura.
Se tiver instalado a Move no banco de trás, pode agora mover o banco da frente para uma posição
confortável.
Nota: A parte de trás do sistema de retenção infantil pode, mas não necessita estar em contacto com as
costas do banco da frente.
Fixar as cintas tether
21
22
23
26
27
28
29
24
25

49
Usando a almofada de proteção de impacto lateral
Apesar de opcional nós recomendamos FORTEMENTE o uso da almofada de impacto lateral
sempre que possível para adicionar proteção extra para as colisões laterais.
Localize o conector da almofada de impacto lateral (K) do lado da cadeira mais perto do
veículo (i.e. mais perto da porta)
IMPORTANTE: assegure-se que os dois aros triangulares (i) na almofada de impacto lateral (H)
apontam para a mesma direção que o aro triangular no conector da almofada de impacto lateral (K).
Posicione a parte de cima das duas aberturas ovais na parte de baixo da almofada de impacto lateral
sobre o conector da almofada de impacto lateral. Empurre a almofada de impacto lateral contra o
lado da cadeira auto e deslize a almofada de impacto lateral para cima para o conector da almofada
de impacto lateral. Sentirá um click suave quando a almofada de impacto lateral se prenda no sítio.
Para remover: Empurre a almofada de impacto lateral para baixo para remover.
30
Colocar a sua criança na cadeira
Antes de colocar a sua criança na cadeira, assegure-se que ajustou o apoio de cabeça e o arnês na altura
correta para o seu filho (veja os passos 2 ao 14)
Pressione o botão de regulação do arnês (E) e puxe para a frente nas alças dos ombros (não nas
almofadinhas dos ombros) para alargar completamente o arnês.
Pressione o botão vermelho de libertação do arnês na fivela e desaperte o arnês.
Coloque a criança na cadeira-auto. Coloque os braços do seu filho entre as alças dos ombros de
modo que as alças estejam sobre o peito e estômago.
Puxe as alças juntas e insira as línguas do arnês na fivela, perto das virilhas.
Puxe a alça de regulação do arnês (F). É importante que puxe sempre os cintos a direito e para o
centro quando apertar a alça de regulação. Uma falha a puxar o arnês corretamente pode causar a
compressão da alça no mecanismo.
31
32
33
34
35
ATENÇÃO: Nunca tente remover o sistema de retenção infantil enquanto a sua criança ainda estiver
sentada nele.
Abra os clips de travão do cinto (M) em ambos os lados do sistema de retenção infantil. Solte o cinto da
fivela do assento do veículo (i) e remova completamente o cinto do sistema de retenção infantil. Colapse a
perna de apoio (Q). Solte as alças tether (L) do sistema de retenção infantil e remova o sistema de retenção
infantil do veículo. Finalmente solte as alças tether dos pontos de ancoragem do veículo e depois volte a prender as
alças ao sistema de retenção infantil.
Remover o sistema de retenção infantil do veículo
36

50
AVISO: Nunca use o sistema de retenção infantil sem as suas capas. As capas são uma característica
de segurança integrante.
Solte as alças tether do sistema de retenção infantil e remova a almofada de impacto lateral (H) se estiver
presa.
Pressione o botão de regulação do arnês (E) e puxe para a frente nas alças dos ombros (não nas
almofadinhas dos ombros) para alargar completamente o arnês.
Pressione o botão vermelho para soltar o arnês na fivela para soltar o arnês e remover a almofada das
virilhas
Abra o zip na parte de trás da capa da cadeira. Solte as alças dos ombros da união (S) na parte de trás do
sistema de retenção infantil.
Solte o Velcro e desprenda as almofadas dos ombros (B) na parte de trás da cadeira.
Puxe as alças das almofadas dos ombros e as alças dos ombros para fora da cadeira. Pressione o clip de
plástico e gentilmente puxe o apoio de cabeça para fora da cadeira.
Solte os laços elásticos (i) em ambos os lados do apoio da cabeça e remova a capa do apoio de cabeça.
Solte e remova a fita de plástico através da parte da frente do sistema de retenção infantil. IMPORTANTE!
Assegure-se que puxa a fita de plástico e NÃO puxe o tecido. Guarde a fita de plástico de forma segura
para quando precisar de pôr a capa outra vez. Se perder a fita de plástico precisará de contactar a sua loja
para uma substituição.
Desaperte todos os parafusos (i), (ii), (ii).
Cuidadosamente remova a capa da cadeiradas casas do ajuste do arnês (i). Alimente todas as alças
através das aberturas na capa da cadeira e remova a capa.
Para pôr a capa no sítio, faça o reverso dos passos em cima assegurando-se que o arnês e as almofadas de
ombros estão posicionadas corretamente (veja passos 9-13 para detalhes como prender o apoio de cabeça,
arnês e almoafadas de ombros).
Remover e posicionar as capas
37
38
39
40
41
42
43
45
46
44

51
Cuidado e manutenção
A capa da cadeira pode ser removida e lavada na máquina de lavar a 30º C no programa “ciclo delicado”.
Não coloque a capa numa máquina de secar, porque pode danificar a capa e o enchimento pode separarse do tecido.
Visite www.axkid.com para encontrar vídeos que explicam como remover e colocar a capa.
Todas as peças de plástico da Move podem ser limpas com detergente suave e água. Não utilize produtos
químicos agressivos que contenham solventes, etc., pois isto pode danificar o plástico e comprometer a
segurança do sistema de retenção infantil.
Todos os materiais utilizados no sistema de retenção Move são recicláveis e devem ser reciclados de
acordo com sua legislação local. Pergunte no seu centro de reciclagem local para obter informações sobre
a reciclagem deste produto.
Não faça quaisquer modificações ou alterações no sistema de retenção infantil Move além daqueles
descritos neste manual de instruções. Siga as instruções deste manual cuidadosamente. Qualquer
reparação deve ser realizada pelo fabricante ou agente.
Se as capas da cadeira tiverem de ser substituídas assegure-se que usa apenas produtos originais de
Axkid. Se forem usados outros produtos a segurança da Move pode ser comprometida o que pode levar a
ferimentos graves ou morte em caso de acidente.
Todos os materiais utilizados têm uma elevada classificação de resistência UV. No entanto, a luz UV é
muito agressiva e acabará por levar ao desbotamento da capa da cadeira. Isso não é coberto pela nossa
garantia, pois é considerado desgaste normal.
Garantia
O sistema de retenção infantil Move está coberto por uma garantia de 24 meses a partir da data de
compra. Certifique-se que guarda o seu recibo e que o leva para o revendedor se tiver qualquer problema
com garantia. A garantia não cobre:
* O desgaste normal
* Os danos causados por uso incorreto, negligência ou acidente
* No caso de reparação ter sido efetuada por um terceiro

52
Instruktionsbok
Bakåtvänd fäst med bilbälte och fästremmar 9-25 kg
Axkid Move
SE
Läs instruktionerna noga innan du monterar Move bilbarnstol. Om du är osäker på om du gjort rätt, kontakta din
återförsäljare som kan visa dig korrekt montering. Felaktig montering innebär fara för ditt barn.
Montera aldrig bilbarnstolen på ett säte med aktiv airbag. Om du ändå vill montera Move på platsen måste du
koppla ur airbagen hos en auktoriserad verkstad. Vissa bilar har ett manuellt urkopplingsreglage för airbagen. Det
är viktigt att kontrollera att indikeringslampan i bilen visar att airbagen är urkopplad.
Undersökningar har visat att risken för allvarliga skador och dödsfall är fem gånger högre i en framåtvänd
bilbarnstol jämfört med en bakåtvänd. Med Move kan barnet färdas bakåtvänt upp till 25 kg.
Använd alltid stödbenet när du monterar Move-stolen. Stödbenet är en mycket viktig säkerhetsdetalj som är
utformad för att maximera barnets säkerhet vid en olycka.
Bilbarnstolen ska bytas ut om den varit med om en olycka, oavsett hur liten olyckan än är. Bilbarnstolen kan ha fått
osynliga skador som allvarligt påverkar barnets säkerhet. Därför avråder Axkid alltid från att köpa en begagnad
bilbarnstol.
Lämna aldrig barnet utan uppsikt i bilen.
Se till att eventuellt bagage och lösa föremål är ordentligt fästa i bilen eftersom de kan orsaka personskada vid en
kollision.
Förvara instruktionsboken i förvaringsfickan (O) på bilbarnstolen.
Läs denna instruktionsbok innan du monterar Move bilbarnstol i bilen. Mer information och
monteringsfilmer finns på www.axkid.com,
Tack för att du valt en bilbarnstol från Axkid. Vårt team har över 30 års samlad erfarenhet inom barnsäkerhet, och vi har
gjort vårt yttersta för att Move bilbarnstol ska bli så säker som möjligt. Move bilbarnstol är godkänd enligt ECE R44/04, den
senaste europeiska teststandarden för barnsäkerhet. För maximal säkerhet för barnet är det viktigt att tänka på följande:
Viktig information

53
Bilbarnstolen kan användas på alla framåtvända passagerarsäten med trepunktsbälte (i), under
förutsättning att sätet inte har någon aktiv airbag. Bilbarnstolen får inte användas tillsammans med
tvåpunkts höftbälte (ii).
VIKTIGT! Om du vill använda Move bilbarnstol på en plats med airbag måste denna kopplas ur på en
auktoriserad verkstad. Vissa bilar har ett manuellt urkopplingsreglage för airbagen.Det är viktigt att kontrollera att
indikeringslampan i bilen visar att airbagen är urkopplad.
VARNING! Använd aldrig på ett säte med aktiv airbag
VARNING! Använd aldrig på bakåt- eller sidovända säten
VARNING! Airbagkuddar är utformade för vuxna och kan skada barn allvarligt vid krock
1
Tillåten och otillåten placering av bilbarnstolen
Delar
A Huvudstöd K Fäste för sidokrockskydd
B Bilbarnstolens eget bälte L Fästremmar
C Bältesspänne M Bältesklämmor
D Öppning för säkerhetsbälte N Grå knapp
E Justeringsknapp för bilbarnstolens bälte O Förvaringsficka för instruktionsbok
F Justeringsrem för bilbarnstolens bälte P Dragkedja
G Lutningsblock Q Stödben
H Sidokrockskydd R Justeringsknapp för stödben
I Klackar S Ok
J Markerad lodlinje
Innehåll
Delar 53
Tillåten och otillåten placering av bilbarnstolen 53-54
Bakåtvänd med bilbälte och fästremmar 9-25 kg
Den här monteringen kan användas för barn som väger mellan 9 och 25 kg.
54-57
Ta av och sätta tillbaka klädseln 58
Skötsel och underhåll 59
Garanti 59
Move bilbarnstol är lämplig att använda från ca sex månaders ålder, eller från det att barnet kan sitta själv utan stöd,
och upp till sex år. Den här bilbarnstolen kan ENDAST monteras bakåtvänd.

54
Innan du monterar bilbarnstolen ska du se till att huvudstödet sitter i rätt höjd för barnet. När bilbarnstolens
bälte sitter rätt ska det gå att dra från bilbarnstolens baksida till framsidan och passera precis ovanför barnets
axlar.
För att kunna justera huvudstödets och bältets höjd måste du först lossa bältet. Tryck på justeringsknappen
för bilbarnstolens bälte (E) och dra fram axelremmarna (inte de vadderade axelskydden) maximalt.
Öppna dragkedjan (P) på baksidan av bilbarnstolen.
Lossa axelremmarna från oket (S) på baksidan av bilbarnstolen.
Lossa kardborrebandet och lossa axelskydden (B) på baksidan av stolen.
Dra ut axelskydden och axelremmarna från stolen.
Tryck ihop plastclipset och dra försiktigt huvudstödet upp från bilbarnstolen.
Flytta huvudstödet till den av de tre höjderna som bäst passar ditt barn. Tryck nedtill på
huvudstödet tills plastclipset låser fast.
För in bältesremmarna (i) genom axelskydden (ii).
2
3
4
5
6
7
8
9
10
Tillåten och otillåten placering av bilbarnstolen
Främre passagerarsäte (ingen aktiv airbag) Ja
Främre passagerarsäte (aktiv airbag) NEJ
Framåtvänt säte med trepunktsbälte Ja
Säte med tvåpunktsbälte NEJ
Sidovänt säte NEJ
Bakåtvänt säte NEJ
Använd aldrig denna bilbarnstol i en bil som saknar
trepunktsbälte godkänt enligt ECE Reglemente 16.
Justera huvudstödets och bältets höjd
Bakåtvänd fäst med bilbälte och
fästremmar 9-25 kg

55
Trä bältesremmarna och axelskydden genom hålen i huvudstödet så att de kommer ut på
baksidan av stolen och se till att alla remmar sitter i samma höjd. Fäst axelskyddens remmar
med kardborrebanden.
Sätt tillbaka bilbarnstolens bältesremmar i oket.
VIKTIGT! Kontrollera att hålen som bältesremmarna passerar genom sitter i samma höjd på
huvudstödet och bilbarnstolen. VIKTIGT! Kontrollera att bilbarnstolens bälte har dragits mellan
stolen och stödbenet. Bältet FÅR INTE sitta över stödbenets horisontella stång (i).
Kontrollera att höjden är rätt genom att placera barnet i bilbarnstolen.
Varning! Använd ej bilbarnstolen utan axelremmarna. Axelremmarna är viktiga ur
säkerhetssynpunkt.
11
12
13
14
Move lyfts enklast in i bilen med ryggen först. Placera bilbarnstolen i bilen så att ryggen pekar framåt i bilens
färdriktning.
Klackarna (I) ska sitta över kanten på bilsätet. Markeringen (J) på klacken ska vara lodrätt i linje med kanten
på bilsätet. Om du har en liten bil eller om barnet inte behöver extra benutrymme, kan du istället ställa
bilbarnstolen med klacken uppe på bilsätet och på så sätt också få en mer tillbakalutad vinkel.
Obs! Vid montering i framsätet kan bilbarnstolens ryggstöd ha kontakt med instrumentbrädan, men det är inte
nödvändigt.
Justera bilbarnstolens lutningsvinkel genom att vrida blocket (G) till någon av de båda lutningsvinklarna. Välj
alltid en så upprätt vinkel som möjligt. Barnet ska dock kunna hålla uppe sitt huvud själv, och huvudet ska inte
hänga framåt om barnet sover. Tumregeln är att ju äldre barnet blir desto mer upprätt kan du sätta stolen.
Tänk också på att stolen kommer att luta något mer bakåt när säkerhetsbältena och fästremmarna spänns och
den sjunker ner i sätet.
Placera bilbarnstolen
15
16
Öppna båda bältesklämmorna (M) på bilbarnstolen. Dra ut bilbältet så att höftdelen är minst 70 till 80
centimeter lång. För in bältet genom öppningen (D) och för det under klädseln tills det kommer ut genom
öppningen på andra sidan. Om du vill kan du istället föra in bältet genom öppningen (D) sedan dra bältet över
klädseln och föra in det genom öppningen på andra sidan.
För in bältesspännet i bälteslåset. Dra åt säkerhetsbältet tills det är helt spänt överallt. Fäst både höft- och
axeldelen i bältesklämman som sitter närmast bälteslåset.
18
Fästa bilbältet
17
Montera aldrig bilbarnstolen på ett säte där det finns
en aktiv airbag.
19

56
Lossa fästremmarna från bilbarnstolen.
Tryck på den grå knappen (N) och dra ut änden med öglan så långt som möjligt
Fäst fästremmarna i en förankringspunkt genom att vira remmen runt den valda
förankringspunkten och sedan föra metallclipset genom öglan.
Om stolen monteras i baksätet: vira fästremmarna runt den bakre delen av framsätets skenor
(i) eller framsätets fästpunkt (ii).
Om stolen monteras i det främre passagerarsätet: fästremmarna ska viras runt
närmast lämpliga förankringspunkt (i) som gör det möjligt att sträcka remmarna helt.
Förankringspunkter placerade längre bak (ii) kan användas och vid behov kan remmarna
korsas (iii) eller till och med viras samman (iv).
Sätt tillbaka metallclipsen på båda sidor om bilbarnstolen och dra i fästremmarnas fria
ändar tills du har spänt dem. Dra en gång till i varje rem så hårt du kan för att säkerställa att
bilbarnstolen sitter fast ordentligt.
Fäll ut stödbenet (Q) till dess yttersta läge. Dra ut den övre spärren (R) och dra ner benet tills
det får kontakt med bilens golv. Om stödbenet inte når ned till golvet, upprepa med den nedre
spärren (S).
Det är viktigt att kontrollera stödbenets vinkel, det ska alltid ha minst 10 graders vinkel ut från
stolsryggen. Du kontrollerar detta genom att se till att stödbenet befinner sig utanför stolens
lodlinje.
Dra nu hårt i remmarna på båda sidor om stolen för att se till att bilbarnstolen sitter fast
ordentligt.
Om bilbarnstolen är monterad i bilens baksäte kan bilens framsäte nu flyttas till ett bekvämt läge.
Obs! Bilbarnstolens rygg kan, men måste inte, ha kontakt med det framförvarande ryggstödet.
Fästa fästremmarna
21
22
23
26
27
28
24
25
I bältesklämman på andra sidan ska endast höftdelen fästas.
20
29

57
Använda sidokrockskyddet
Även om det är frivilligt att använda sidokrockskyddet, rekommenderar vi STARKT att det används
för att ge extra skydd vid en sidokrock.
Leta upp sidokrockskyddets fäste (K) på den sida av bilbarnstolen som är närmast bildörren.
VIKTIGT! Kontrollera att de trekantiga pilarna (i) på sidokrockskyddet pekar i samma riktning som
den trekantiga pilen på sidokrockskyddets fäste (K).
Placera den övre av de två ovala öppningarna som sitter nedtill på sidokrockskyddet över fästet.
Tryck sidokrockskyddet mot bilbarnstolen och för det uppåt på fästet. Det hörs ett klickljud när
sidokrockskyddet låser fast.
Ta bort: Tryck sidokrockskyddet nedåt och lyft bort det.
Placera barnet i bilbarnstolen
Innan barnet sätts i bilbarnstolen: kontrollera att du har justerat huvudstödet och bilbarnstolens bälte så att de har
korrekt höjd för barnet (se steg 2 till 14)
Tryck på justeringsknappen för bilbarnstolens bälte (E) och dra fram axelremmarna (inte de vadderade
axelskydden) maximalt.
Tryck på spännets röda frisläppningsknapp och lossa bilbarnstolens bilbälte.
Sätt barnet i bilbarnstolen. För in barnets armar under axelremmarna så att axelremmarna hänger över
bröstet och magen.
För samman axelremmarna och för in bältesändarna i bälteslåset mellan barnets ben.
Dra åt justeringsremmen för bilbarnstolens bälte (F). Det är viktigt att du alltid drar åt bilbarnstolens bälte rakt
framifrån och centrerat. Om du inte drar korrekt kan remmen blockera mekanismen.
31
32
33
34
35
VARNING! Försök aldrig flytta bilbarnstolen när barnet sitter i den.
Öppna bältesklämmorna (M) på båda sidor om bilbarnstolen.
Lossa bilbältets spänne (i) och lossa bilbältet helt från bilbarnstolen. Fäll tillbaka stödbenet (Q).
Lossa fästremmarna (L) från bilbarnstolen och lyft ut den ur bilen. Lossa slutligen fästremmarna från
förankringspunkterna och sätt tillbaka remmarna på bilbarnstolen.
Lyfta ut bilbarnstolen ur bilen
36
30

58
VARNING! Använd aldrig bilbarnstolen utan klädseln. Klädseln är en del av stolens
säkerhetsfunktion.
Lossa fästremmarna från bilbarnstolen och lossa sidokrockskyddet (H) om det är monterat på
stolen.
Tryck på justeringsknappen för bilbarnstolens bälte (E) och dra fram axelremmarna (inte de
vadderade axelskydden) maximalt.
Tryck på bältesremmarnas röda frisläppningsknapp för att lossa bältet och ta av grenskyddet.
Dra upp dragkedjan på baksidan av bilbarnstolen. Lossa axelremmarna från oket (S) på
baksidan av bilbarnstolen.
Lossa kardborrebandet och lossa axelskydden (B) på baksidan av stolen.
Dra ut axelskydden och axelremmarna från stolen. Tryck ihop plastclipset och dra försiktigt
upp huvudstödet från bilbarnstolen.
Lossa de elastiska öglorna (i) på båda sidor av huvudstödet och ta av klädseln.
Lossa och ta av plastbandet som sitter längs framsidan av bilbarnstolen. VIKTIGT! Se till att du drar i
plastbandet och INTE i tyget. Förvara plastbandet på ett säkert ställe tills du ska sätta tillbaka klädseln
igen. Om du tappar bort plastbandet måste du kontakta återförsäljaren för att köpa ett nytt.
Lossa alla tryckknappar (i), (ii), (iii).
Lyft försiktigt av klädseln runt bältesremmarnas fästen (i). För igenom alla remmar genom
hålen i klädseln och lyft av klädseln.
Sätt tillbaka klädseln genom att följa anvisningarna i omvänd ordning, och kontrollera noga att
bältesremmarna och axelskydden sitter korrekt och är korrekt dragna (se steg 9-13 för information
om hur du fäster huvudstödet, bältet och axelskydden).
37
38
39
40
41
42
43
44
45
46
Ta av och sätta tillbaka klädseln

59
Skötsel och underhåll
Barnstolens klädsel kan tas av och tvättas i maskin på 30 °C handtvättsprogram. Torka inte i torktumlare,
det kan skada klädseln och vadderingen kan lossna från tyget.
På www.axkid.com finns filmer som visar hur man tar av och sätter tillbaka klädseln.
Bilbarnstolens plastdelar kan rengöras med milt rengöringsmedel och vatten. Använd inte starka kemikalier
som innehåller lösningsmedel och liknande, eftersom det kan skada plasten och försämra bilbarnstolens
säkerhet.
Alla material som använts i Move bilbarnstol är återvinningsbara och ska återvinnas i enlighet med lokala
bestämmelser. Fråga din kommun om du är osäker på hur du ska återvinna produkten.
Gör inga egna reparationer eller ändringar utöver de som redovisas här. Följ anvisningarna i
instruktionsboken noggrant. Eventuella reparationer måste utföras av tillverkaren eller dess agent.
Om klädseln behöver bytas ut, använd endast originalprodukter från Axkid. Om andra produkter används
äventyras Move säkerhetssystem, vilket kan orsaka allvarlig personskada eller dödsfall vid en olycka.
Alla material har hög motståndskraft mot UV-strålning. UV-strålning från solen är emellertid mycket stark
och gör att tyget bleks. Detta omfattas inte av garantin utan anses vara normalt slitage.
Garanti
Move bilbarnstol omfattas av en 24 månaders garanti från inköpsdatumet. Spara alltid kvittot och ta med
det till återförsäljaren vid eventuell reklamation. Garantin täcker inte:
* Normalt slitage
* Skada till följd av felaktig användning, försummelse eller olycka
* Reparationer som utförts av tredje part
60
Pomembne informacije
Vzvratni sedež 9-25 kg z varnostnim pasom vozila in pritrdilnimi trakovi
Axkid Move
SI
Pred namestitvijo otroškega avtosedeža Move natančno preberite ta navodila za uporabo. V primeru nejasnosti
kontaktirajte svojega prodajalca, ki vam lahko prikaže pravilno namestitev. Nepravilna namestitev lahko ogrozi
vašega otroka.
Nikoli ne namestite otroškega avtosedeža na mesto, kjer je nameščena aktivna zračna blazina. Če želite Move
namestiti na takšno mesto, izklopite zračno blazino na pooblaščenem servisnem centru. Nekatera vozila so lahko
opremljena s stikalom, ki vam omogoča ročni izklop zračne blazine. Pomembno je, da vedno preverite ali je zračna
blazina v avtu izklopljena.
Obsežne raziskave so pokazale, da je tveganje resnih ali usodnih poškodb za mlajše otroke petkrat večje pri
naprej obrnjenem sedežu v primerjavi z vzvratnim. V sedežu Move lahko vaš otrok potuje vzvratno do teže 25 kg.
Pri namestitvi sedeža Move vedno uporabite podporno nogo. Podporna noga je zelo pomembna, saj je
zasnovana za povečanje otrokove varnosti v primeru nesreče.
V primeru, da bi bili vključeni v prometni nesreči, ne glede na to, kako majhni, vedno zamenjajte avtosedež.
Avtosedež je lahko utrpel majhne ali na prvi pogled neopazne poškodbe, ki pa lahko močno vplivajo na varnost
vašega otroka. Zato tudi Axkid ne priporoča nakupa rabljenega avtosedeža.
Nikoli ne puščajte otroka v avtu brez nadzora.
Prepričajte se, da so prtljaga ali drugi predmeti v vozilu pritrjeni, saj lahko povzročijo poškodbe potnikov v primeru
nesreče.
Ta navodila shranite v za to namenjen žep (O) na sedežu.
Pred namestitvijo otroškega avtosedeža Move v vaše vozilo preberite ta navodila za uporabo. Za več
informacij in ogled videoposnetkov namestitve obiščite www.axkid.com.
Zahvaljujemo se vam za izbiro otroškega avtosedeža Axkid. Naša ekipa ima več kot 30 let izkušenj na področju varnosti
otrok v avtomobilu, tako da smo storili vse, da je avtosedež Move čim varnejši. Avtosedež Move je testiran po standardu
ECE R44/04, kar je zadnji evropski standard za varnost otok. Za najvišjo varnost vaših otrok pa je pomembno, da imate v
mislih naslednje;
Pomembne informacije

61
Otroški avtosedež se lahko uporablja na katerem koli naprej obrnjenem potniškem sedežu s 3-točkovnim
varnostnim pasom (i), če le tam ni nameščene aktivne zračne blazine. Otroškega avtosedeža se ne sme
uporabljati z 2-točkovnim pasom v trebušnem delu (ii).
POMEMBNO: Če želite namestiti Move na mestu, kjer je nameščena zračna blazina, potem je zračno blazino
potrebno izklopiti pri pooblaščenem servisnem centru. Nekatera vozila so opremljena s stikalom, ki vam omogoča
ročni izklop zračne blazine. Pomembno je, da vedno preberite, če indikacijska lučka kaže, da je zračna blazina
izklopljena.
OPOZORILO: Nikoli ne uporabljajte na sedežu z aktivno zračno blazino
OPOZORILO: Nikoli ne uporabljajte na vzvratnih ali v stran obrnjenih sedežih vozila
OPOZORILO: Zračne blazine so zasnovane za odrasle in lahko resno poškodujejo vašega otroka v
primeru nesreče
1
Dovoljena in nedovoljena namestitev
otroškega avtosedeža
Deli
A Naslonjalo za glavo K Pritrditev stranskega oblazinjenja
B Notranji pas L Pritrdilni trakovi
C Zaponka pasu M Zaponka pasu
D Vodilo za varnostni pas N Sivi gumb
E Gumb za nastavitev pasu O Žep za shranjevanje navodil za uporabo
F Trak za nastavitev pasu P Zadrga
G Blokada naklona Q Podporna noga
H Stransko oblazinjenje R Gumb za nastavitev podpore za noge
I Pete S Zaponka
J Vdrta navpična linija
Vsebina
Deli 61
Dovoljena in nedovoljena namestitev otroškega avtosedeža 61-62
Vzvratni sedež 9-25kg z varnostnim pasom vozila in pritrdilnimi trakovi
Ta model se lahko uporablja za otroke, ki tehtajo med 9-25 kg.
62-65
Odstranjevanje in nameščanje prevlek 65-66
Skrb in vzdrževanje 67
Garancija 67
Otroški avtosedež Move je primeren za otroke po približno šestih mesecih starosti ali od takrat, ko lahko vaš otrok
samostojno sedi, pa vse do šestih let starosti. Ta otroški avtosedež se lahko namesti SAMO vzvratno.

62
Dovoljena in nedovoljena namestitev otroškega avtosedeža.
Sprednji potniški sedež (brez aktivne zračne blazine) Da
Sprednji potniški sedež (aktivna zračna blazina) NE
Naprej obrnjen sedež s 3-točkovnim varnostnim pasom Da
Sedež z 2-točkovnim varnostnim pasom NE
V stran obrnjeni sedeži NE
Vzvratno obrnjeni sedeži NE
Tega otroškega sedeža nikoli ne uporabljajte v avtu, ki ni opremljen z
ECE Reg 16 odobrenim 3-točkovnim varnostnim pasom.
Pred namestitvijo otroškega avtosedeža se prepričajte, da je naslonjalo za glavo nastavljeno na ustrezno
višino za vašega otroka. Pas, ko je ustrezno nameščen, mora priti izza sedeža naprej in iti tik nad otrokovimi
rameni.
Za nastavitev višine naslonjala in pasu je najprej potrebno odpeti pas.
Pritisnite na gumb za nastavitev pasu (E) in povlecite ramenske trakove naprej (ne ramenskih blazinic), da
popolnoma sprostite pas.
Odprite zadrgo (P) na zadnjem delu prevleke sedeža.
Odstranite naramne pasove iz jermena (S) na hrbtni strani varnostnega pasu za otroke.
Odpnite Velcro® in odstranite ramenske blazine (B) na hrbtni strani sedeža.
Potegnite trakove oblazinjenja za ramena in naramne pasove iz sedeža.
Stisnite plastično zaponko in nežno povlecite naslonjalo za glavo stran od sedeža.
Namestite naslonjalo na eno izmed treh višin, ki najbolje ustreza vašemu otroku. Pritisnite dno naslonjala
dokler se plastična zaponke ne zatakne na svoje mesto.
Napeljite varnostne pasove (i) skozi oblazinjenje za ramena (ii).
Namestite trakove varnostnega pasu in ramenske trakove skozi odprtine v naslonjalu za glavo na hrbtnem
delu sedeža, pri čemer morajo biti vsi pasovi na isti višini. Povežite ramenska pasova s pomočjo Velcro®.
2
3
4
5
6
7
8
9
10
11
Nastavitev naslonjala za glavo in višine pasu
Vzvratni sedež 9-25 kg z varnostnim pasom &
pritrdilnimi trakovi

63
Ponovno napeljite ramenske pasove skozi jermen.
POMEMBNO! Poskrbite, da bodo pasovi napeljani skozi iste višine luknje na naslonu za glavo in sedežu.
POMEMBNO! Prepričajte se, da je pas napeljan med sedežem in podporno nogo. Pas NE SME potekati
preko vodoravnega droga podporne noge (i).
Namestite svojega otroka v sedež, da se prepričate, da je višina ustrezna.
OPOZORILO: Otroški sedež nikoli ne uporabljajte brez zaščitnih ramenskih blazinic. Zaščitne
ramenske blazinice so zelo pomemben varnostni element.
12
13
14
Najlažji način dviga sedeža Move v vozilo je z njegovih zadnjim delom naprej. Postavite otroški avtosedež v
vozilo z zadnjim delom sedeža obrnjenim proti sprednjemu delu vozila.
Pete (I) morajo ležati preko roba sedeža vozila. Vdrta navpična linija (J) na peti mora biti navpično poravnana
s koncem sedeža vozila. Če ga nameščate v manjše vozilo ali če vaš otrok ne potrebuje dodatnega prostora
za noge, lahko namesto tega pete postavite na sedež vozila. Tako boste dobili tudi bolj nagnjen položaj.
Opomba: Pri nameščanju sedeža Move na sprednji sedež je možno, vendar ne ključno, da se zadnji del sedeža
dotika armaturne plošče.
Za nastavitev kota otroškega avtosedeža obrnite blokado (G) v enega izmed dveh položajev nagiba. Vedno
izberite najbolj pokončen možen položaj, vendar pa mora biti dovoljšen nagib, da otrokova glava ne pade
naprej, ko ta zaspi. Ravnajte se po pravilu, da starejši kot je otrok, bolj pokončen sedež lahko namestite.
Vedite, da ko je enkrat namestitev sedeža Move končana, bo ta še nekoliko bolj nagnjen, ko se stisne v sedež vozila
zaradi pričvrstitve varnostnih pasov in pritrdilnih trakov.
Namestitev otroškega avtosedeža
15
16
17
Otroškega avtosedeža nikoli ne namestite na
potniški sedež, kjer je nameščena aktivna zračna blazina.
Odprite zaponke pasu (M) na obeh straneh otroškega avtosedeža Move. Do konca iztegnite varnostni pas
dokler ni del čez trebuh dolg najmanj 70-80cm (27-32 inches). Povlecite varnostni pas skozi odprtino za
varnostni pas (D), med prevleko sedeža in sedežem, dokler pas ne pride ven skozi odprtino za pas na drugi
strani sedeža. Če želite, lahko namesto tega pas povlečete skozi odprtino za varnostni pas (D), nato preko vrha
prevleke sedeža in nato preko odprtine za pas na drugi strani.
Vstavite jezik pasu v zaponko varnostnega pasu vozila. Povlecite varnostni pas dokler ne odpravite
ohlapnost po vsej dolžini pasu. Pričvrstite tako trebušni kot ramenski del pasu v zaklep ki je najbližje zaklepu
varnostnega pasu vozila.
V zaklepu na nasprotni strani je potrebno pričvrstiti le trebušni del pasu.
18
Pritrjevanje varnostnega pasu vozila
19
20

64
Čeprav je neobvezno, močno priporočamo uporabo bočne blazine, kadar je mogoče, da poskrbite za dodatno
zaščito pred stranskimi trki.
Poiščite priključek za bočno zaščitno blazino (K) na otroškem sedežu, ki je najbližje bočni strani vozila (to je
najbližje vratom).
POMEMBNO: Prepričajte se, da sta dve trikotni puščici (i) na bočni zaščitni blazini (H) v isti smeri kot trikotna
puščica na priključku bočne zaščitne blazine (K).
Odstranite trakove iz varnostnega sistema za otroke.
Pritisnite siv gumb (N) in potegnite konec zanke, da povečate dolžino traku.
Za pritrditev pritrdilnih pasov na pritrdilna usešca jih ovijte okoli izbranega usešca in vstavite kovinsko
zaponko skozi zanko.
Za namestitev sedeža Move na zadnji sedež povlecite konec pritrditvenega dela z zaponko skozi zadnji del
vodil sprednjih sedežev (i) ali tečaj sprednjega sedeža (ii).
Pri nameščanju sedeža Move na sprednji potniški sedež je potrebno pritrdilne pasove oviti okrog najbližje
primerne točke (i), ki bo omogočala popolno zategnitev pasov. Uporabi se lahko pritrdilne točke bolj nazaj (ii)
in če je potrebno, lahko pasove prekrižate (iii) in celo zavežete skupaj (iv).
Ponovno pritrdite kovinske zaponke na vsako stran otroškega avtosedeža in povlecite proste dele obeh
pritrdilnih pasov dokler jih ne napnete. Povlecite vsak pas še enkrat kolikor močno se da, da zagotovite
čvrsto pritrjenost otroškega avtosedeža.
Izvlecite podporno nogo (Q) do njenega maksimalnega naklona. Pritisnite gumb za podaljšanje noge (R) in
podaljšajte podporno nogo, dokler ne doseže tal.
Opomba: Pas podporne noge je lahko popolnoma napet, vendar to ni nujno.
Opomba: Pas pasu je lahko, vendar ga ni potrebno, da se popolnoma napenja.
Zdaj pa močno povlecite pasova na obeh straneh, da se prepričate, da je sedež popolnoma pritrjen.
Če ste namestili sedež Move na zadnji sedež, lahko zdaj premaknete sprednji sedež v udobnejši položaj.
Opomba: Zadnji del otroškega avtosedeža je lahko v stiku z zadnjim delom sprednjega sedeža, vendar to ni
potrebno.
30
21
29
22
23
24
25
26
27
28
Uporaba bočne zaščitne blazine
Nameščanje pritrdilnih pasov

65
Položite zgornji dve ovalni odprtini na spodnji strani bočne zaščitne blazine preko priključka bočne blazine. Potisnite
blazino na stran avtomobilskega sedeža ter jo namestite na priključek bočne zaščitne blazine. Začutili boste rahel
klik, ko se bo bočna blazina pritrdila.
Za odstranitev: Bočno zaščitno blazino potisnite navzdol in odstranite.
Pripenjanje otroka v sedež
Pred namestitvijo otroka v sedež se prepričajte, da sta naslonjalo za glavo in pas na ustrezni višini (glejte korake 2 do 14)
Pritisnite gumb za nastavitev pasu (E) in povlecite ramenske trakove naprej (ne ramenskih blazinic) da
popolnoma sprostite pas.
Pritisnite rdeč gumb za sprostitev pasu na zaponki in odpnite pas.
Postavite otroka v avtosedež. Otrokove roke postavite med ramenske trakove, tako da ti visijo preko
prsnega dela in trebuha.
Povlecite ramenske trakove skupaj in vstavite jezičke pasov v zaponko med nogama otroka.
Povlecite trak za nastavitev pasu (F). Pomembno je da pri zategovanju nastavitvenega pasu tega vedno
povlečete naravnost in proti sredini. Če pasu ne zategnete pravilno, se lahko ta zatakne v mehanizmu.
31
32
33
34
35
OPOZORILO: Nikoli ne odstranjujte avtosedeža dokler vaš otrok še vedno sedi v njem.
Odprite zaponke pasu (M) na obeh straneh otroškega avtosedeža.
Sprostite zaponko varnostnega pasu vozila (i) in popolnoma odstranite varnostni pas iz otroškega
avtosedeža. Podrite podporno nogo (Q). Odtaknite pritrdilne pasove (L) z otroškega avtosedeža in ga nato
odstranite iz vozila. Na koncu odvijte pritrdilne pasove s pritrdilnih ušesc v vozilu in ponovno zataknite pasove na
otroški avtosedež.
OPOZORILO: Nikoli ne uporabljajte varnostnega sistema za otroke brez prevlek. Prevleke so sestavni
varnostni element.
Odpnite trakove iz varnostnega sistema za otroke in odstranite stransko blazino (H), če je pritrjena.
Pritisnite gumb za nastavitev pasu (E) in povlecite ramenske trakove naprej (ne ramenskih blazinic), da
popolnoma sprostite pas.
Pritisnite gumb za sprostitev rdečega pasu na zaponki, da odstranite pasove in mednožno blazino.
Odstranjevanje otroškega avtosedeža iz vozila
Odstranjevanje in nameščanje prevlek
36
37
38
39

66
Odprite zadrgo na hrbtni strani pokrivala sedeža. Odstranite ramenske pasove iz jermena (S) na hrbtni strani
varnostnega sistema za otroke.
Odpnite Velcro® in odstranite ramenske blazine (B) na hrbtni strani sedeža.
Potegnite pasove oblazinjenja in ramenske pasove iz sedeža. Stisnite plastično sponko in nežno potegnite
naslon za glavo iz sedeža.
Odpnite elastične zanke (i) na obeh straneh naslona za glavo in odstranite prevleko naslona za glavo.
Sprostite in odstranite plastični trak vzdolž prednjega dela varnostnega sistema za otroke. POMEMBNO!
Poskrbite, da boste potegnili plastični trak in NE vlecite tkanine. Varno shranite plastični trak, ko boste znova
nameščali prevleko sedeža. Če izgubite plastični trak, se morate za zamenjavo obrniti na prodajalca.
Odstranite vse pritrditvene vijake (i), (ii), (iii).
Previdno izvlecite prevleko sedeža okoli ohišja za prilagajanje pasov (i). Vse pasove napeljite skozi reže v
prevleki sedeža in jo odstranite.
Za ponovno nameščanje prevleke sledite zgornjim korakom v obratnem vrstnem redu ter poskrbite, da so pasovi
in ramenske blazine pravilno usmerjeni (glej korake 9-13 za podrobnosti o pritrditvi naslona za glavo, pasov in
ramenskega oblazinjenja).
40
41
42
43
44
45
46

67
Skrb in vzdrževanje
Prevleko sedeža je mogoče odstraniti in oprati v pralnem stroju na 30º C v programu za nežno perilo.
Prevleke ne dajajte v sušilni stroj, saj lahko to poškoduje prevleko in loči podlogo od blaga.
Za ogled videoposnetkov s pojasnilom, kako odstraniti in pritrditi prevleko obiščite www.axkid.com.
Vse plastične dele sedeža Move lahko očistite z nežnim detergentom in vodo. Ne uporabljajte agresivnih
kemikalij, ki vsebujejo topila in podobno, saj lahko te poškodujejo plastiko in poslabšajo varnost otroškega
avtosedeža.
Vse materiale, uporabljene v sedežu Move, je mogoče reciklirati in jih je potrebno reciklirati v skladu z vašo
lokalno zakonodajo. Pozanimajte se pri vašem lokalnem reciklirnem centru glede recikliranja tega izdelka.
Ne opravljajte nikakršnih sprememb ali popravkov na sedežu Move razen tistih, ki so opisani v teh navodilih.
Natančno sledite navodilom. Kakršna koli popravila mora izvesti proizvajalec ali zastopnik.
Če je prevleko sedeža potrebno zamenjati, poskrbite da se uporabijo samo originalni izdelki Axkid. Če so
drugi izdelki uporabljeni, to lahko vpliva na varnostni sistem sedeža Move in lahko vodi v resne poškodbe ali
celo smrt v primeru nesreče.
Vsi uporabljeni materiali imajo zelo visoko odpornost na UV-žarke. Vendar pa so UV-žarki zelo agresivni in
bodo sčasoma vodili k zbleditvi prevleke sedeža. To ni zajeto v garanciji in se šteje kot običajna obraba.
Garancija
Otroški avtosedež Move krije 24 mesečna garancija od dneva nakupa. Shranite račun in ga prinesite
vašemu prodajalcu v primeru morebitnih napak. Garancija ne zajema:
* Normalne obrabe
* Poškodb zaradi nepravilne uporabe, malomarnosti ali nezgode
* Če so bila popravila izvajana s strani nepooblaščene osebe

68
SK
Návod na použitie
Umiestnenie proti smeru jazdy vo váhovej kategórii 9-25 kg pomocou bezpečnostného pásu auta
a upevňovacích pásov
Pred inštaláciou autosedačky Move si starostlivo prečítajte tento návod na použitie. Pokiaľ ste
na pochybách, obráťte sa na svojho predajcu, ktorý vám rád pomôže so správnou inštaláciou.
Nesprávna inštalácia môže ohroziť vaše dieťa.
Nepoužívajte autosedačku na sedadle, kde je aktívny airbag. Ak chcete autosedačku Wolmax
inštalovať na miesto s airbagom, musí sa airbag vypnúť alebo deaktivovať v autorizovanom servise.
Je vždy dôležité sa presvedčiť, že je airbag deaktivovaný, niektoré vozy sú vybavené svetelnou
kontrolkou deaktivácie.
Rozsiahly výskum ukázal, že riziko vážneho zranenia u malých detí je 5krát vyššie pri používaní
autosedačky v smere jazdy, vporovnaní s používaním zádržného systému v polohe proti smeru jazdy.
V autosedačke Wolmax môže vaše dieťa cestovať v polohe proti smeru jazdy až do váhy 25kg.
Pri inštalácii autosedačky Move vždy používajte opornú nohu. Je to dôležitý bezpečnostný prvok,
navrhnutý vzhľadom kčo najvyššej bezpečnosti vášho dieťaťa, ak sa stane dopravná nehoda.
Po dopravnej nehode, aj keď malej, by mal byť váš zádržný systém vymenený. Môžu sa objaviť
nezistiteľné závady, ktoré môžu vážne ohroziť bezpečnosť vášho dieťaťa. To je tiež jeden z dôvodov,
prečo Axkid neodporúča nákup sedačky z druhej ruky.
Nikdy nenechávajte vaše dieťa v aute bez dozoru.
Všetka batožina a nepripevnené predmety sa musia zaistiť, vprípade nehody môžu spôsobiť vážne
zranenia cestujúcim.
Na vašej autosedačke nájdete kapsičku, určenú pre uchovávanie tohto návodu (O).
Pozorne si prečítajte návod na použitie zádržného systému autosedačky Move do vášho
automobilu. Ďalšie informácie a videá k inštalácii nájdete na www.axkid.com.
Ďakujeme vám, že ste si vybrali autosedačku značky Axkid. Náš tým má viac než 30-ročné skúsenosti
voblasti detskej bezpečnosti a všetko naše úsilie sme smerovali k tomu, aby bola autosedačka Wolmax čo
najbezpečnejšia. Autosedačka Wolmax je schválená podľa normy ECE R44/04, najnovšieho európskeho
štandardu pre bezpečnosť detí. Pre maximálnu bezpečnosť vášho dieťaťa, je dôležité dodržovať:
Dôležité informácie
Axkid Move

69
Detský zádržný systém môže byť inštalovaný na akékoľvek sedadlo v automobile, umiestnené v smere
jazdy, ktoré je vybavené 3-bodovým bezpečnostným pásom (i), kde nie je aktívny airbag. Detský zádržný
systém sa nemôže inštalovať na sedadlo, vybavené iba 2-bodovým bezpečnostným pásom (ii).
DÔLEŽITÉ: Ak chcete umiestniť sedačku Move na miesto, vybavené airbagom, airbag sa musí nechať odpojiť
v autorizovanom servise. Niektorá vozidlá disponujú mechanickým vypínačom airbagu – v tom prípade je
možné odpojiť airbag týmto spôsobom – skontrolujte svetelný indikátor, signalizujúci vypnutie airbagu.
VAROVANIE: Nikdy nepoužívajte na sedadle, kde je aktívny airbag.
VAROVANIE: Nikdy nepoužívajte na sedadlách, umiestňovaných v aute proti smeru alebo bokom ku
smeru jazdy.
VAROVANIE: Airbagy sú určené pre dospelých cestujúcich, vašim deťom môžu spôsobiť vážne
zranenia.
Časti
1
A Opierka hlavy K Konektor prídavnej bočnej ochrany
B Integrované popruhy L Upevňovacie pásky
C Upínacia spona popruhov M Zaistenie pásu
D Otvor pre bezpečnostný pás N Sivé tlačítko
E Tlačítko úpravy popruhov O Kapsička na uloženie návodu
F Pás nastavenia popruhov P Zips
G Zabudovaný medzinožník (klin) Q Oporná noha
H Prídavná bočná ochrana R Tlačítko predĺženia opornej nohy
I Patky S Spona
J Zvislá drážka
Povolené a nepovolené spôsoby inštaláce
autosedačky
Obsah
Časti 69
Povolené a nepovolené polohovanie 69-70
Proti-smerné 9-25kg s bezpečnostným pásom auta a páskami
Tento spôsob montáže sa dá použiť pre deti vážiace 9-25 kg.
70-74
Vybratie a nasadenie poťahu 74
Starostlivosť a údržba 75
Záruka 75
Autosedačka Wolmax sa môže používať od cca 6 mesiacov alebo od doby, kedy je dieťa schopné samostatne
sedieť, až do 6 rokov. Tento zádržný systém môžete do auta nainštalovať LEN v polohe proti smeru jazdy.

70
Povolené a nepovolené spôsoby inštalácie detskej autosedačky
Na prednom sedadle spolujazdca (airbag nie je aktívny) áno
Na prednom sedadle spolujazdca (airbag je aktívny) NIE
Sedadlo vybavené 3-bodovým bezpečnostným pásom vsmere jazdy áno
Sedadlo vybavené 2-bodovým bezpečnostným pásom NIE
Sedadlo umiestnené bokom ku smeru jazdy NIE
Sedadlo umiestnené chrbtom ku smeru jazdy NIE
Nikdy nepoužívajte túto autosedačku v aute, ktoré nie je vybavené
schváleným 3-bodovým pásom podľa normy ECE R16.
Prv ako budete inštalovať sedačku do auta, uistite sa, že opierka hlavy je pre vaše dieťa v
optimálnej výške. Popruhy, pokiaľ sú správne nainštalované, sú vedené vzadnej časti sedačky
smerom dopredu a vedú priamo nad ramenami dieťaťa.
Pokiaľ chcete nastaviť výšku opierky hlavy a popruhov, musíte ich najprv odopnúť. Stlačte
tlačítko na úpravu popruhov (E) a vytiahnite ramenné popruhy smerom dopredu (bez
ramenných vypchávok), tým ich úplne povolíte.
Rozopnite zips (P) na zadnej strane poťahu.
Vyháknite ramenné popruhy z miesta uchytenia (S) v zadnej časti detskej autosedačky.
Rozopnite suchý zips a odopnite ramenné vypchávky (B) na zadnej časti sedačky.
Vytiahnite pásky ramenných vypchávok a ramenné popruhy smerom von.
Zatlačte plastové tlačítko a jemne vytiahnite opierku hlavy von zo sedačky.
Nastavte výšku opierky hlavy do jednej z troch možných polôh tak, aby čo najviac vyhovovala
vášmu dieťaťu. Tlačte na kraj opierky, dokiaľ plastové tlačítko nezapadne na zvolené miesto.
2
3
4
5
6
7
8
9
Nastavenie výšky opierky hlavy a popruhov
Proti smeru jazdy 9-25kg s bezpečnostným pásom & upínacími páskami

71
Najjednoduchší spôsob usadenia sedačky Move do auta je chrbtom dopredu. Obráťte
chrbtovú časť autosedačky smerom k prednej časti auta.
Patky (I) by mali byť umiestnené cez okraj sedadla automobilu. Zvislá drážka (J) na patke by
mala byť zároveň s hranou sedadla. Pokiaľ inštalujete sedačku v malom aute alebo pokiaľ
vaše dieťa nepotrebuje extra priestor na nohy, môžete posadiť patku priamo na sedadlo, tým
zároveň získate možnosť väčšieho náklonu autosedačky.
Poznámka: Pokiaľ inštalujete Move na predné sedadlo spolujazdca, je vhodné (ale nie zásadné), aby
sa chrbát sedačky dotýkal palubnej dosky.
Otočením zabudovaného klinu (medzinožník) (G) nastavte jednu z dvoch polôh náklonu
autosedačky. Vždy nastavujte čo najviac vzpriamenú polohu, napriek tomu musí vaše dieťa
byť schopné samo držať hlavičku. Zároveň by malo byť dosť naklonené, keby zaspalo (aby mu
nepadala hlavička dopredu). Čím je dieťa staršie, tým by mala byť sedačka viacej vzpriamená. Myslite
prosím na to, že ako náhle dokončíte inštaláciu Wolmaxu, sedačka sa akoby vtisla do sedadla auta je to spôsobené dotiahnutím popruhov a pások a tým bude ešte o trochu viacej naklonená.
Inštalácia Detskej Autosedačky
15
16
17
Nikdy neinštalujte detskú sedačku na sedadlo auta,
kde je aktívny airbag.
Veďte pásky popruhov (i) cez ramenné vypchávky (ii).
Prevlečte popruhy a pásky ramenných vypchávok cez otvory v hlavovej opierke smerom
dozadu. Obe strany musia byť v rovnakej výške. Pomocou suchého zipsu spojte oba pásky
ramenných vypchávok.
Znovu nasaďte pásky popruhov do miesta uchytenia.
DÔLEŽITÉ! Uistite sa, že pásky popruhov prechádzajú v rovnakej výške na opierke hlavy a
na sedačke. DÔLEŽITÉ! Uistite sa, že popruh je vedený medzi sedadlom a opornou nohou.
Popruh NESMIE prechádzať cez vodorovnú lištu oporné nohy (i).
Posaďte dieťa do autosedačky a overte si, že ste výšku nastavili správne.
VAROVANIE: Nikdy nepoužívajte autosedačku bez ramenných vypchávok. Ramenné
vypchávky sú jedným z dôležitých bezpečnostných prvkov.
11
12
13
14
10

72
Rozopnite upevňovacie klipsy pásu (M) na oboch stranách autosedačky Minikid. Vytiahnite
pás auta do jeho plnej dĺžky alebo aspoň 70-80 cm. Pretiahnite pás otvorom pre bezpečnostný
pás (D), medzi poťahom sedačky a kostrou a vytiahnite von rovnakým otvorom na druhej
strane sedačky. Pokiaľ je to pre vás pohodlnejšie, môžete pretiahnuť pás rovnakým otvorom ako v
predošlom prípade (D), potom vrchom cez poťah sedačky a skrz otvor na druhej strane naspäť.
Zacvaknite jazýček spony do zámku sedadla v aute. Zatiahnite za pás a upravte tesnosť pásu
po celej jeho dĺžke. Upevnite ramennú a bedernú časť pásu vblízkosti zámku bezpečnostného
pásu vozidla.
Pri upevňovaní na opačnej strane sa zamerajte iba na bedernú časť pásu.
18
Upevnenie bezpečnostného pásu auta
19
20
Vycvaknite upevňovacie pásky z detskej autosedačky.
Stlačte sivé tlačidlo (N) a vytiahnite koniec s očkom do maximálnej dĺžky popruhu.
Obtočte pásku okolo zvoleného kotvového bodu a pretiahnite kovovú sponu očkom, tým
knemu upevňovaciu pásku pripevníte.
Ak inštalujete Move na zadné sedadlo, obtočte upevňovacie pásky buďto za zadnú stranu kolajníc
predného sedadla (i), alebo okolo pántu alebo kovovej tyčky uprostred predného sedadla (ii).
Ak inštalujete sedačku na predné sedadlo spolujazdca, dolné kotviace pásky musia byť
obtočené okolo najbližšieho kotviaceho bodu (i), ku ktorému ich bude možné poriadne
dotiahnuť. Kotviace body ďalej vzadu (ii) môžu byť tiež použité a pokiaľ je potreba, pásky sa
môžu krížiť (iii) alebo ich môžete zmotať dokopy(iv).
Znovu pripojte kovové spony na každú stranu sedačky a zatiahnite za volné konce oboch
upevňovacích pásiek a poriadne ich utiahnite. Ešte raz zatiahnite silou za každú pásku, aby byla
sedačka naozaj pevne zaistená.
Vytiahnite opornú nohu (q) von pod maximálnym uhlom. Stlačte tlačidlo predĺženie nohy (R) a
predĺžte opornú nohu tak, aby sa zaprela o podlahu.
Poznámka: Pás oporné nohy môže, ale nemusí byť úplne napnutý.
Je dôležité skontrolovať, že oporná noha zviera schrbátom autosedačky uhol vyšší než 10
stupňov. Môžete si to overiť napríklad tým, že skontrolujete náklon opornej nohy voči sedadlu,
ktorý má byť väčší než kolmý.
Pripojenie upevňovacích pások
21
22
23
26
27
28
24
25

73
Umiestnenie dieťaťa do autosedačky
Použitie prídavnej bočnej ochrany
Stlačte tlačítko úpravy popruhov (E) a vytiahnite ramenné popruhy smerom dopredu (bez ramenných
vypchávok), tým popruhy úplne povolíte.
Stlačte červené tlačítko rozopnutia na upínacej pracke a uvoľníte popruhy.
Umiestnite dieťa do sedačky. Veďte paže dieťaťa pod ramennými popruhmi tak, že popruhy budú visieť
cez hrudník a žalúdok.
Spojte ramenné pásy dohromady a jazýčky spony zacvaknite do pracky medzi nožičkami dieťaťa.
Zatiahnite za pás úpravy popruhov (F). Keď uťahujete popruhy, je dôležité vždy ťahať pás smerom
rovno a do stredu. Pokiaľ neuťahujete správne, môže sa pás v mechanizme zaseknúť.
Prv ako posadíte dieťa do autosedačky, uistite sa, že opierka hlavy a popruhy sú nastavené na správnu výšku
podľa veľkosti vášho dieťaťa (viď kroky 2 až 14)
31
30
32
33
34
35
Znovu silne zatiahnite za pásky na oboch stranách, aby bola autosedačka poriadne upevnená.
Ak ste už autosedačku na zadnom sedadle nainštalovali, môžete posunúť predné sedadlo do
pohodlnej polohy.
Poznámka: Zadná strana autosedačky sa môže, ale nemusí dotýkať zadnej časti predného sedadla.
29
Použitie prídavné bočnej ochrany nie je povinné, ale SILNO odporúčame ju používať, poskytuje
nadštandardnú ochranu pri bočnom náraze.
Nájdite na sedačke miesto pripojenia prídavné bočnej ochrany (K), umiestnené najbližšie k
strane vozidla (tj najbližšie dverí).
DÔLEŽITÉ: Uistite sa, že dve trojuholníkové šípky (i) na prídavné bočné ochrane (H) ukazujú
rovnakým smerom ako trojuholníkové šípky na konektore prídavné bočnej ochrany (K).
Nasaďte horné z dvoch oválnych otvorov na spodnej časti prídavné bočnej ochrany na konektor
prídavné bočnej ochrany. Zatlačte prídavnú bočnú ochranu do boku autosedačky a vsuňte ju
smerom nahor do konektora prídavnej bočnej ochrany. Pocítite jemné zacvaknutie, ako sa bočná
ochrana dostane na správne miesto.
Odobrať: Tlačte prídavnú bočnú ochranu smerom nadol a odstráňte ju.

74
VAROVANIE: Nikdy sa nepokúšajte vytiahnuť autosedačku, pokiaľ v nej sedí dieťa.
Povoľte klipsy, ktoré zabezpečujú pás (L) na obidvoch stranách sedačky.
Vycvaknite tiež pracku bezpečnostného pásu auta (i) a bezpečnostný pás vytiahnite
mimo autosedačku. Zložte opornú nohu (Q). Rozopnite upevňovacie pásky (L) a vyberte
autosedačku z vozidla. Nakoniec dajte dolu upevňovacie pásky z kotviacich bodov v aute a potom
ich znovu zaháknite na autosedačku.
VAROVANIE: Nikdy nepoužívajte detskú autosedačku bez poťahu. Poťah je nedeliteľný
bezpečnostný prvok.
Vycvaknite upevňovacie pásky z detskej autosedačky a zložte prídavnú bočnú ochranu (H), ak je
pripojená.
Stlačte tlačítko úpravy popruhov (E) a vytiahnite ramenné popruhy smerom dopredu (bez ramenných
vypchávok), tým popruhy úplne povolíte.
Stlačte na pracke červené rozopínajúce tlačidlo popruhov, povoľte popruhy a vyberte podložku z
oblasti medzi nožičkami.
Rozopnite zips na zadnej časti poťahu sedačky. Vyháknite ramenné popruhy z miesta uchytenia (S) na
zadnej časti sedačky.
Rozopnite suchý zips a odopnite ramenné vypchávky (B) na zadnej časti sedačky.
Vytiahnite pásky ramenných vypchávok a ramenné popruhy smerom von. Stlačte plastový klip a
jemne vytiahnite opierku hlavy úplne von zo sedačky.
Vyháknite elastická pútka (i) na obidvoch stranách opierky hlavy a dajte z nej dolu poťah.
Uvoľnite a zložte plastový pásik okolo prednej časti detskej autosedačky. DÔLEŽITÉ! Uistite sa, že
vyťahujete len plastový pásik a NIE látku. Uložte si plastový pásik na bezpečné miesto, budete ho
potrebovať pri opätovnom nasadzovaní poťahu. V prípade jeho straty kontaktujte svojho predajcu.
Rozopnite všetky cvočky (i), (ii), (iii).
Opatrne vytiahnite poťah sedačky z oblasti okolo umiestnenia nastavovača (i). Zasuňte všetky
popruhy cez otvory v poťahu sedačky a dajte poťah dolu.
K nasadeniu poťahu vykonajte vyššie uvedené kroky v opačnom poradí. Uistite sa, že ramenné pásy sú
vedené správne (detaily pripojenie opierky hlavy, pásov a ramenných vypchávok - viď kroky 9-13)
Vyberanie autosedačky z auta
36
37
38
39
40
41
42
43
44
45
46
Vybratie a nasadenie poťahov

75
Starostlivosť a údržba
Poťah autosedačky môžete dať dolu a vyprať v práčke na jemný prací program do 30°C.
Nesušte v sušičke! Mohlo by dôjsť k poškodeniu poťahu a vypchávky by sa mohli oddeliť od
látky. Videa, znázorňujúce ako dať dolu a opäť nasadiť poťah nájdete na www.axkid.com.
Všetky plastové časti autosedačky Move môžete čistiť jemným čistiacim prostriedkom a
vodou. Nepoužívajte agresívne chemikálie, obsahujúce rozpúšťadlá apod. Mohlo by dôjsť k
poškodeniu plastov a ohrozeniu bezpečnosti detského zádržného systému.
Všetky materiály, použité na autosedačke Move sú recyklovateľné a mali by preto byť
recyklované v súlade s miestnou legislatívou. Pokiaľ si nie ste istý, požiadajte o radu
najbližšieho odborníka v oblasti recyklácie.
Akékoľvek iné úpravy a modifikácie výrobku, mimo tento návod, sú nepovolené. Starostlivo
sa riaďte uvedenými inštrukciami. Všetky opravy musia byť prevedené výrobcom alebo
predajcom Moveu.
Ak potrebujete vymeniť poťah výrobku, odporúčame použiť originálny poťah od výrobcu,
Axkid. Pokiaľ použijete iný produkt, môže dôjsť ku zníženiu bezpečnosti výrobku a môže to
vprípade dopravnej nehody viesť i k vážnemu zraneniu alebo dokonca k smrti.
Všetky použité materiály sú vysoko odolné voči UV žiareniu. Avšak, toto žiarenie je veľmi
agresívne a môže časom viesť k vyblednutiu farieb na poťahu - na to sa nevzťahuje záruka,
vyblednutie farieb sa považuje za bežné opotrebenie pri používaní.
Záruka
Na autosedačku Minikid poskytuje výrobca záruku 24 mesiacov od dátumu nákupu. Záruka
sa dá uplatniť u vášho predajcu s dokladom o kúpe výrobku. Pokiaľ sa na výrobku vyskytne
závada, kontaktujte vášho predajcu. Doba záruky sa predlžuje o dobu, čo bol výrobok v
servise. Reklamácia sa musí uplatniť čo najskôr po tom, čo sa závada objaví. Prípadné čakanie
môže spôsobiť zhoršenie závady. Tovar kreklamácii predávajte vstave odpovedajúcom
zásadám všeobecnej hygieny. Zjavné vady (chýbajúce časti) je nutné reklamovať ihneď alebo
najneskôr do 10 dní od zakúpenia tovaru. Na neskoršie reklamácie sa nebude brať ohľad.
Záruka sa nevzťahuje na:
* Bežné opotrebenie pri používaní
* Závady spôsobené nesprávnym používaním, zanedbávaním alebo dopravnou nehodou
* Opravy a úpravy sedačky, urobené treťou stranou

Distributed in the UK by
KoolTrade Ltd, Unit 3, Orbital Way, Denton, Manchester,
United Kingdom M34 3QA. Tel: (+44) 0161 335 2500
•
Distribué en France par
KoolTrade Ltd, Unit 3, Orbital Way, Denton, Manchester,
United Kingdom M34 3QA. Tel: (+44) 0161 335 2500
•
Distribuido en España por
Distribuciones Independent Marketing S.L.
Pol. La Léala, Calle Santo Tomas, 8
29631 Arroyo de la Miel, Málaga
Tel:(+34) 902 111 881
•
Distribuído no Portugal por
Distribuciones Independent Marketing S.L.
Pol. La Léala, Calle Santo Tomas, 8
29631 Arroyo de la Miel, Málaga, Espanha
Tel:(+34) 902 111 881
•
Vertrieb in Deutschland durch:
Vital-Innovations (D), Ltd.
Glanstrasse 33
66887 Rammelsbach
Tel. (+49) 06381-4250879
•
Dystrybucja w Polsce:
Junior
ul. Horbaczewskiego 4-6
54-130 Wrocław
+48 713549723
•
Distributer za Slovenijo in Hrvaško
MiniMe d.o.o.; Tbilisijska ulica 59; 1000 Ljubljana;
SI-Slovenija
www.minime.si ; info@minime.si ; 00386 41 760 900
Axkid AB
Odinslundsgatan 17, 412 66 Göteborg, Sweden
www.axkid.com ● info@axkid.com ● +46 511 760 620
 Loading...