


Axkid Modukid Base
Base for Axkid Modukid Modular system
Instruction manual
Important information
Read this instruction manual before installing the Axkid Modukid child car seat in your
vehicle. For more information and installation videos visit www.axkid.com.
Thank you for choosing an Axkid product. Our team has over 30 years combined experience within child
safety, and we have done our utmost to make the Axkid Modukid child car seat as safe as possible. The
Axkid Modukid child car seat is approved according to UN Regulation no 129/02. To maximize your child’s
safety, it is important that you keep the following in mind:
Read this instruction manual carefully before installing the Axkid Modukid Base and Axkid Modukid
car seats. If in doubt, contact your retailer who can demonstrate a correct installation. An incorrect
installation could endanger your child.
Do not use a child car seat in a seating position where an active airbag is fitted. If you still wish to
install the Axkid Modukid car seat in this location the airbag must be switched o according to the
vehicle manufacturers instructions.
Extensive research has shown that the risk of serious injury is five times greater for a young child
when travelling in a forward-facing car seat compared to a rear-facing car seat.
Should you have an accident, no matter how small, your child car seat should always be replaced.
It may have damage that is undetectable and could seriously jeopardize your child’s safety. For this
reason, Axkid does not recommend purchasing second hand car seats.
EN
Never leave your child unattended in the car.
Ensure any luggage or loose objects are secured in your vehicle as they may cause injuries to
passengers in the event of a collision.
Keep this instruction manual for future reference.
Ensure that the child car seat is installed in a way where no parts become trapped by movable
seats, car doors, etc.
The Axkid Modukid Infant is suitable for use from newborn up to when the child can sit steadily,
approximately six to nine months of age.
Never use the child car seat without its textile cover.
This child car seat may ONLY be installed rear-facing.
3

Contents
Parts
The Axkid Modukid Module system
Functions of the Axkid Modukid Base
Allowed and disallowed positioning of the child car seat
Installation in the car
Installing the Axkid Modukid Infant on the base
Installing the Axkid Modukid Seat on the base
Care and maintenance
Warranty
Parts
A Front brace I ISOFIX knob
B Front brace release knob J Support leg installation indicator
C Attachment hooks K Support Leg Knob
D Seat attachment indicator L Support leg parking position
E Seat release handle M Support leg
F ISOFIX arm N Support leg foot
G ISOFIX installation indicator O Support leg installation buzzer
H ISOFIX release button
4
4
5
5
6-7
7
8
9
9
The Axkid Modukid Module system
The Axkid Modukid Module system consists of:
• Axkid Modukid Base – Base for easy installation in vehicles with ISOFIX connection points.
• Axkid Modukid Infant - Infant carrier for children from 40-75cm and up to 13kg.
• Axkid Modukid Seat- Rear-facing car seat for children from 61-105cm and up to 18kg.
WARNING: Only install the Axkid Modukid Infant or the Axkid Modukid Seat on the Axkid Modukid
Base. Trying to use products from other modular systems on this base can result in serious injury in
the event of a collision.
4

Functions of the Axkid Modukid Base
The Axkid Modukid Base can be adjusted to provide more leg space for the child or to provide more
space for the driver or passenger seat in your vehicle. This is done by adjusting the ISOFIX arms and
the front brace.
The ISOFIX arms (F) can be adjusted to dierent lengths to accommodate dierent seating
F1
positions. There are 4 positions, P1-P4. The ISOFIX arms (F) are adjusted by pulling the ISOFIX
knob (I)
The ISOFIX arms (F) locks to the ISOFIX connection points in the vehicle. The ISOFIX arms
can be released from the vehicle connection points by pushing the ISOFIX release button (H).
F2
The ISOFIX installation indicator (G) turns green when there is a secure connection between
ISOFIX arm and ISOFIX connection point.
The front brace (A) is not installed on the base at delivery so it shall be inserted into the base.
The Axkid Modukid Base may not be used without the front bracee. The front brace can
F3
be adjusted to dierent positions to accommodate dierent seating positions. There are 6
positions, P1-P6. The front brace (A) is released by pulling the front brace release knob (B).
Make sure that the front brace release knob (B) clicks into position after adjusting the front brace
The support leg (M) can be folded into a parking position underneath the base. This position of
the support leg should only be used during storage, never when installed in a vehicle. When the
F4
support leg is unfolded the support leg installation buzzer (O) will start beeping. The beeping
will stop after correct installation is completed.
If no sound is emitted from the support leg installation buzzer (O) when the support leg is
folded out, check the battery. The battery is checked by unscrewing the two screws under the
F5
support leg foot (N) and removing the cover. The battery is then accessible. Note that you can
only replace the battery with a CR1632 size battery.
By pulling the seat release handle (E), the attachment hooks (C) will open and enable
F6
attachment or detachment of an Axkid Modukid Infant or Axkid Modukid Seat.
The attachment hooks (C) lock an Axkid Modukid Infant or Axkid Modukid Seat to the base.
F7
WARNING: Never use the Axkid Modukid Base without installing the front brace.
5

Allowed and disallowed positioning of the
baby car seat
The Axkid Modukid Base can be installed on any forward-facing passenger seat which has ISOFIX
connection points
IMPORTANT: If you wish to install your Axkid Modukid car seat in a location where an airbag is fitted,
the airbag must be disconnected at an authorized service center. Some vehicles may be equipped
with a switch which allows you to manually switch the airbag o. It is important to always check if the
vehicle’s indicator light shows that the airbag is turned o.
WARNING: Never use on a seat with an active airbag
WARNING: Never use on rearward or side facing vehicle seats
WARNING: Air bags are designed for adults and can seriously harm your child in a crash
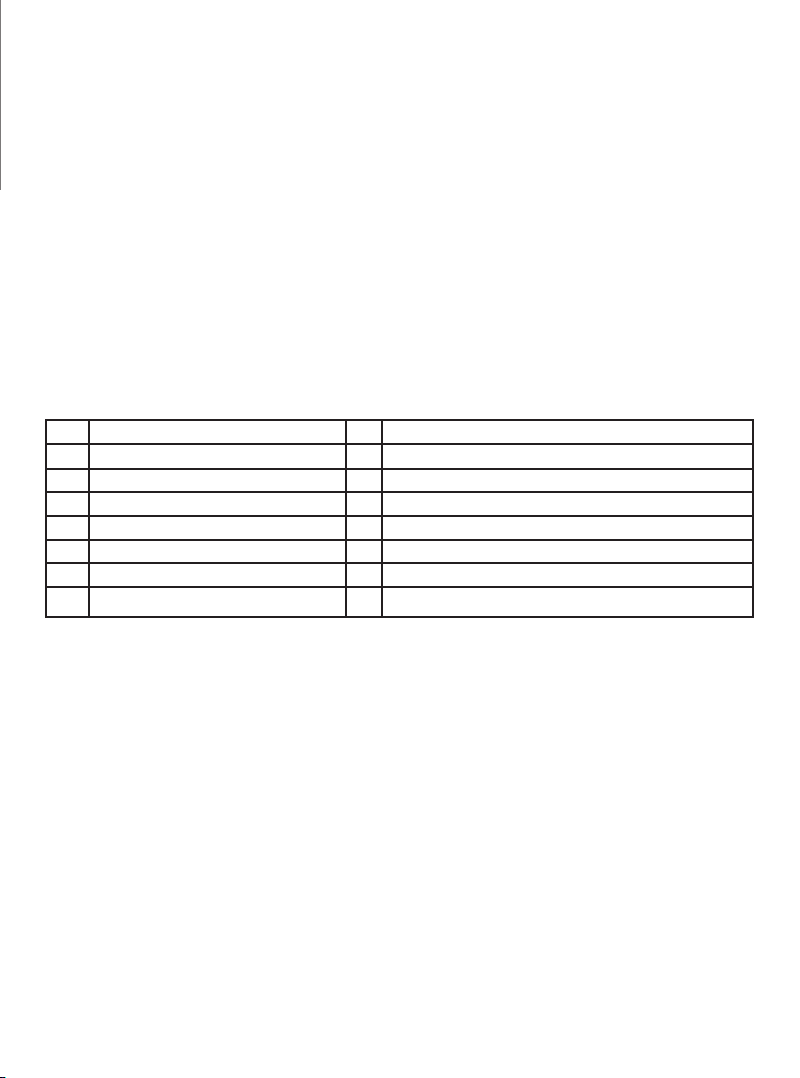
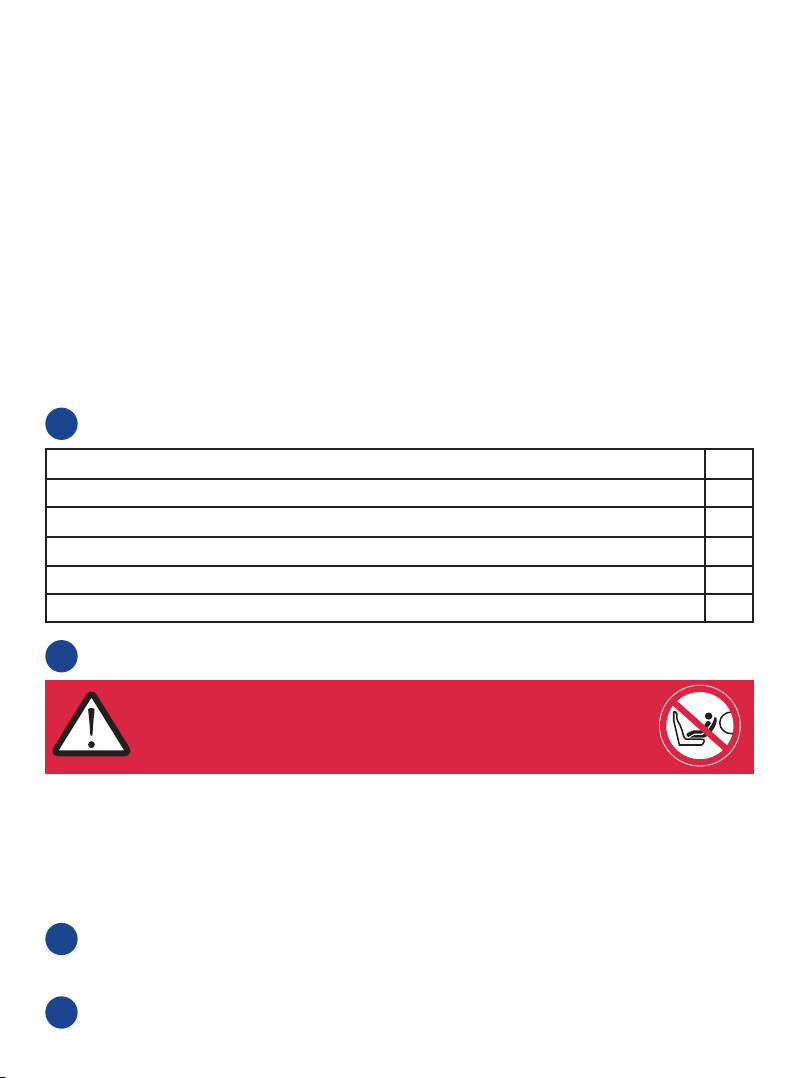
Allowed and disallowed positioning of the child car seat.
1
Front passenger seat (no active airbag) Ye s
Front passenger seat (active airbag) NO
Forward-facing seat with ISOFIX connection points Ye s
Seat without ISOFIX connection points NO
Side facing seats NO
Rear facing seats NO
This base is only allowed to be mounted rear-facing.
2
Never install a child restraint in a passenger seat
where an active airbag is fitted.
Installation in the car
Attach and adjust the front brace (A) to its innermost position. Fold out the support leg (M).
When the support leg is unfolded the support leg installation buzzer (O) will start beeping. The
3
beeping will stop after correct installation is completed.
4
Extend the ISOFIX arms (F) to a suitable position P1-P4.
6

Attach the ISOFIX arms (F) to the vehicle ISOFIX connection points in the correct vehicle seat
5
position, according to (1). You will hear a “click” when the ISOFIX arms lock into position.
Make sure that the ISOFIX installation indicator (G) shows green.
6
Extend the front brace (A) towards the vehicle seat by pulling the front base release knob (B)
and pushing the front brace (A) towards the vehicle seat. Make sure to apply as much pressure
7
as possible and that the front brace release knob (B) clicks into position.
Extend the support leg (M) by pulling the support leg knob (K) to extend the support leg so the
support leg foot (N) is in contact with the vehicle floor. Check that the noise from the support
leg installation buzzer (O) stops, then the installations is done correctly. Make sure that the
8
floor of the vehicle is suited for supporting an i-Size car seat. Check the vehicle manual for
information.
IMPORTANT:
Make sure that all installation indicators shows green.
Installing the Axkid Modukid Infant
on the base
When installing an Axkid Modukid Infant to the base, pull the seat release handle (E) to its
extended position (see F6) and push the infant carrier to the base. The infant carrier shall click
9
into the base.
Ensure that the Axkid Modukid Infant is not in contact with any adjacent vehicle seat and that
the support leg is firmly clamped to the floor and that the support leg installation buzzer (O) has
10
stopped buzzing.
Axkid has equipped the Axkid Modukid Infant with a side impact protection system, ASIP
(Axkid Side Impact Protection). Push the release button and pull the ASIP towards the door of
11
the car until it locks into the outermost position that fits your car.
IMPORTANT:
See your Axkid Modukid Infant manual for full instructions on how to install the product and how to
buckle your child in the seat.
7

Installing the Axkid Modukid Seat
on the base
When installing an Axkid Modukid Seat to the base, pull the seat release handle (E) to its
extended position (see F6) and push the seat to the base. The seat attachment plate shall click
12
into the base.
Ensure that the Axkid Modukid Seat is not in contact with any adjacent vehicle seat and that
the support leg is firmly clamped to the floor and that the support leg installation buzzer (O) has
13
stopped buzzing.
Axkid has equipped the Axkid Modukid Seat with a side impact protection system, ASIP
(Axkid Side Impact Protection). To install the ASIP, locate the side impact pad connector on the
child seat nearest to the side of the vehicle (i.e. closest to the door). Ensure the two triangular
arrows on the side impact pad point in the same direction as the triangular arrow on the side
14
impact pad connector. Place the upper of the two oval openings on the underside of the side
impact pad over the side impact pad connector. Push the side impact pad against the side of
the car seat and slide the side impact pad upwards onto the side impact pad connector. You
will feel a slight click as the side impact pad locks in place. To remove: push the side impact pad
downwards and remove.
IMPORTANT:
See your Axkid Modukid Seat manual for full instructions on how to install the product and how to
buckle your child in the seat.
8
Care and maintenance
The front brace cover can be removed and washed in a washing machine at 30º C on the
“Gentle Cycle” program. Do not put the cover in a dryer as this can damage the cover and the
padding may separate from the fabric.
Any plastic parts of Axkid Modukid Base can be cleaned with mild detergent and water. Do
not use aggressive chemicals containing solvents etc, as this can cause damage to the plastic
and compromise the safety of the child car seat.
All materials used in the Axkid Modukid Base are recyclable and should be recycled as per
your local legislation. Ask your local recycling center for advice when recycling this product.
Do not make any modifications or alterations to the Axkid Modukid child car seat other than
those described in this instruction manual. Follow the instructions in this manual carefully. Any
repairs must be carried out by the manufacturer or agent.
If the seat cover needs replacing, ensure only original products from Axkid are used. If other
products are used, the Axkid Modukid’s safety system may be compromised and could lead
to severe injury in case of an accident.
Warranty
The Axkid Modukid Base is covered by a 24-month warranty from date of purchase. Ensure you save
your receipt and bring it to your place of purchase if you have any warranty issues.
The warranty does not cover:
Normal wear and tear
Damage due to incorrect use, neglect or accident
If repairs have been carried out by a third party
All materials used have a very high UV-resistance rating. However, UV-light is very aggressive
and will ultimately lead to fading of the seat cover. This is not covered by our warranty as it is
considered normal wear and tear.
9
DE
Axkid Modukid Base
Basis für modulares Kindersitzsystem
Bedienungsanleitung
Wichtige Informationen
Lesen Sie diese Bedienungsanleitung, bevor Sie den Axkid Modukid Seat in Ihrem Fahrzeug
installieren. Weitere Informationen und Installationsvideos finden Sie unter www.axkid.com.
Vielen Dank, dass Sie sich für ein Axkid Produkt entschieden haben. Unser Team verfügt über mehr als 30
Jahre Erfahrung auf dem Gebiet der Kindersicherheit, und wir haben keine Mühen gescheut, um den Axkid
Modukid Seat so sicher wie möglich zu machen. Der Axkid Modukid Seat ist nach der UN-Verordnung Nr.
129/02 zugelassen. Um Ihrem Kind größtmögliche Sicherheit zu bieten, sollten Sie Folgendes beachten:
Lesen Sie diese Bedienungsanleitung, bevor Sie die Axkid Modukid Base und den Axkid Modukid
Seat in Ihrem Fahrzeug installieren. Im Zweifelsfall wenden Sie sich bitte an Ihren Händler, der Ihnen
die korrekte Installation vorführen kann. Eine fehlerhafte Installation kann Ihr Kind gefährden.
Verwenden Sie Kindersitze niemals in einer Sitzposition mit aktiviertem Airbag. Wenn Sie den
Axkid Modukid Seat dennoch an dieser Stelle installieren möchten, muss der Airbag nach den
Anweisungen des Fahrzeugherstellers deaktiviert werden.
Zahlreiche Studien haben gezeigt, dass das Risiko schwerer Verletzungen für ein kleines Kind bei
der Fahrt auf einem vorwärtsgerichteten Kindersitz im Vergleich zu einem rückwärtsgerichteten
Kindersitz um das Fünache erhöht ist.
Ersetzen Sie Ihren Kindersitz nach jedem noch so kleinen Unfall. Manche Schäden sind unter
Umständen nicht erkennbar und könnten die Sicherheit Ihres Kindes ernsthaft gefährden. Aus
diesem Grund rät Axkid vom Kauf von gebrauchten Kindersitzen ab.
Lassen Sie Ihre Kinder niemals unbeaufsichtigt im Auto zurück.
Stellen Sie sicher, dass Gepäck oder lose Gegenstände in Ihrem Fahrzeug gesichert sind, da sie bei
einem Zusammenstoß die Passagiere verletzen können.
Bewahren Sie diese Gebrauchsanweisung für ein späteres Nachschlagen auf.
Stellen Sie sicher, dass der Kindersitz so installiert ist, dass keine Teile durch bewegliche Sitze,
Autotüren usw. eingeklemmt werden.
Der Axkid Modukid Infant ist für Neugeborene bis zu einem Alter, ab dem sie stabil sitzen können
(ca. 6. bis 9. Lebensmonat) geeignet.
Verwenden Sie den Kindersitz nie ohne den zugehörigen Textilbezug.
Dieser Kindersitz darf AUSSCHLIESSLICH rückwärtsgerichtet installiert werden.
10
Inhalt
Komponenten
Das Axkid Modukid Modular System
Funktionen von Axkid Modukid Base
Erlaubte und nicht erlaubte Positionierung des Kindersitzes
Installation im Auto
Installation des Axkid Modukid Infant auf der Basis
Installation des Axkid Modukid Seat auf der Basis
Pflege und Instandhaltung
Garantie
Komponenten
A Anti Rebound Bar (ARB), Rückprallschutz I ISOFIX-Knopf
B ARB-Freigabeknopf J Installationsindikator des Stützbeins
C Befestigungshaken K Knopf für Stützbein
D Indikator für Sitzbefestigung L Parkposition Stützbein
E Sitzfreigabegri M Stützbein
F ISOFIX-Arm N Fuß des Stützbeins
G ISOFIX-Installationsindikator O Installationssummer des Stützbeins
H ISOFIX-Freigabeknopf
11
11
12
12
13-14
14
15
16
16
Das Axkid Modukid Baukastensystem
Das Axkid Modukid Baukastensystem besteht aus:
• Axkid Modukid Base – Basis für eine einfache Installation in Fahrzeugen mit ISOFIXAnschlusspunkten.
• Axkid Modukid Infant – Babyschale für Kinder mit einer Größe von 40-75 cm und einem
Gewicht bis zu 13 kg.
• Axkid Modukid Seat – Rückwärtsgerichteter Autositz für Kinder mit einer Größe von 61-105 cm
und einem Gewicht bis 18 kg.
WARNUNG: Installieren Sie nur die Axkid Modukid Infant oder den Axkid Modukid Seat auf der
Axkid Modukid Base. Der Versuch, Produkte aus anderen Baukastensystemen auf dieser Basis zu
installieren, kann bei einer Kollision zu schweren Verletzungen führen.
11

Funktionen von Axkid Modukid Base
Axkid Modukid Base kann so eingestellt werden, dass dem Kind mehr Beinfreiheit zur Verfügung
steht oder mehr Platz für den Fahrer- oder Beifahrersitz geschaen wird. Dies geschieht durch die
Einstellung der ISOFIX-Arme und der Anti Rebound Bar.
Die ISOFIX-Arme (F) können auf unterschiedliche Längen eingestellt werden, um
F1
unterschiedliche Sitzpositionen zu ermöglichen. Es gibt 4 Positionen, P1-P4. Zum Verstellen
der ISOFIX-Arme (F) ziehen Sie am ISOFIX-Knopf (I).
Die ISOFIX-Arme (F) werden an den ISOFIX-Anschlusspunkten des Fahrzeugs befestigt.
Die ISOFIX-Arme können durch Drücken des ISOFIX-Freigabeknopfs (H) von den
F2
Anschlusspunkten des Fahrzeugs gelöst werden. Der ISOFIX-Installationsindikator (G) wird
grün, wenn eine sichere Verbindung zwischen ISOFIX-Arm und ISOFIX-Anschlusspunkt
besteht.
Die Anti Rebound Bar (A) ist bei der Lieferung nicht an der Basis montiert und muss erst noch
eingesetzt werden. Axkid Modukid Base darf nicht ohne die Anti Rebound Bar verwendet
werden. Die Anti Rebound Bar kann an unterschiedliche Positionen angepasst werden, um
F3
unterschiedliche Sitzpositionen zu ermöglichen. Es gibt 6 Positionen, P1-P6. Zum Freigeben
der Anti Rebound Bar (A) ziehen Sie den ARB-Freigabeknopf (B). Achten Sie darauf, dass der
ARB-Freigabeknopf (B) nach dem Einstellen der Anti Rebound Bar einrastet.
Das Stützbein (M) kann in eine Parkposition unter die Basis geklappt werden. Diese Position
des Stützbeins sollte nur bei der Lagerung verwendet werden und niemals im Fahrzeug. Wenn
F4
das Stützbein ausgeklappt wird, beginnt der Installationssummer (O) zu piepen. Das Piepen
endet, nachdem die korrekte Installation abgeschlossen ist.
Wenn der Installationssummer des Stützbeins (O) keinen Piepton abgibt, während das
Stützbein ausgeklappt ist, überprüfen Sie die Batterie. Zum Überprüfen der Batterie
F5
müssen Sie die beiden Schrauben unter dem Fuß des Stützbeins (N) abschrauben und die
Abdeckung entfernen. Anschließend haben Sie Zugang zur Batterie. Beachten Sie, dass Sie
die Batterie nur durch eine Batterie der Größe CR1632 ersetzen können.
Durch Ziehen des Sitzfreigabegris (E) önen sich die Befestigungshaken (C) und
ermöglichen die Befestigung oder das Lösen eines Axkid Modukid Infant oder Axkid Modukid
F6
Seat.
Mithilfe der Befestigungshaken (C) wird der Axkid Modukid Infant oder der Axkid Modukid
F7
Seat an der Basis befestigt.
WARNUNG: Verwenden Sie Axkid Modukid Base niemals ohne installierte Anti Rebound Bar.
12

Erlaubte und nicht erlaubte Positionierung
des Kindersitzes
Axkid Modukid Base kann auf jedem vorwärtsgerichteten Beifahrersitz mit ISOFIXAnschlusspunkten installiert werden.
WICHTIG: Wenn Sie Ihren Axkid Modukid Seat an einer Stelle mit Airbag installieren wollen, müssen Sie
den Airbag in einem autorisierten Servicecenter deaktivieren lassen. Manche Fahrzeuge können mit
einem Schalter ausgestattet werden, mit dem der Airbag manuell ausgeschaltet werden kann. Überprüfen
Sie unbedingt jedes Mal, ob die entsprechende Kontrollleuchte des Fahrzeugs anzeigt, dass der Airbag
ausgeschaltet ist.
WARNUNG: Verwenden Sie das Produkt niemals auf einem Sitz mit aktiviertem Airbag
WARNUNG: Verwenden Sie das Produkt niemals auf einem rückwärtsgerichteten oder zur Seite
gerichteten Sitz
WARNUNG: Airbags sind für Erwachsene konzipiert und können Ihrem Kind bei einem Unfall ernste
Verletzungen zufügen
Erlaubte und nicht erlaubte Positionierung des Kindersitzes.
1
Beifahrersitz (kein aktiver Airbag) Ja
Beifahrersitz (aktiver Airbag) NEIN
Vorwärtsgerichteter Sitz mit ISOFIX-Anschlusspunkten Ja
Sitz ohne ISOFIX-Anschlusspunkte NEIN
Zur Seite gerichtete Sitze NEIN
Rückwärtsgerichtete Sitze NEIN
Diese Basis darf ausschließlich rückwärtsgerichtet montiert werden.
2
Verwenden Sie den Kindersitz niemals auf
Sitzplätzen mit aktiven Airbags.
Installation im Auto
Befestigen und justieren Sie die Anti-Rebound-Bar (A) in ihrer innersten Position. Klappen Sie
das Stützbein (M) aus. Wenn das Stützbein ausgeklappt wird, beginnt der Installationssummer
3
(O) zu piepen. Das Piepen endet, nachdem die korrekte Installation abgeschlossen ist.
4
Verlängern Sie die ISOFIX-Arme (F) auf eine geeignete Position P1-P4.
13

Befestigen Sie die ISOFIX-Arme (F) an den ISOFIX-Anschlusspunkten des Fahrzeugs in der
5
korrekten Position, gemäß (1). Sie hören ein „Klicken“, wenn die ISOFIX-Arme einrasten.
Achten Sie darauf, dass der ISOFIX-Installationsindikator (G) grün leuchtet.
6
Verlängern Sie die Anti Rebound Bar (A) in Richtung Fahrzeugsitz, indem Sie den ARBFreigabeknopf (B) ziehen und die Anti Rebound Bar (A) in Richtung Fahrzeugsitz schieben.
7
Achten Sie darauf, so viel Druck wie möglich auszuüben und dass der ARB-Freigabeknopf (B)
einrastet.
Verlängern Sie das Stützbein (M), indem Sie den Stützbein-Knopf (K) ziehen. Der Fuß des
Stützbeins (N) muss Kontakt zum Fahrzeugboden haben. Achten Sie darauf, ob das vom
Installationssummer des Stützbeins (O) ausgegebene Geräusch endet, wenn alles korrekt
8
installiert wurde. Achten Sie darauf, dass der Boden des Fahrzeugs geeignet ist, um einen
i-Size-Autositz zu stützen. Informationen hierzu finden Sie im Fahrzeughandbuch.
WICHTIG:
Achten Sie darauf, dass alle Installationsindikatoren grün sind.
Installation des Axkid Modukid Infant auf
der Basis
Wenn Sie den Axkid Modukid Infant auf der Basis installieren, ziehen Sie den Sitzfreigabegri (E) in
seine verlängerte Position (siehe F6) und drücken Sie die Babyschale in die Basis. Die Babyschale
9
muss in die Basis einrasten.
Stellen Sie sicher, dass der Axkid Modukid Infant nicht mit einem angrenzenden Fahrzeugsitz
in Kontakt kommt und dass das Stützbein fest auf den Boden geklemmt ist und dass der
10
Installationssummer des Stützbeins (O) kein Geräusch mehr ausgibt.
Axkid hat den Axkid Modukid mit einem Seitenaufprallschutzsystem, ASIP (Axkid Side Impact
Protection), ausgestattet. Drücken Sie den Freigabeknopf und ziehen Sie das ASIP in Richtung
11
Fahrzeugtür, bis es in der äußersten Position einrastet, die in Ihrem Auto möglich ist.
WICHTIG:
Ausführliche Informationen zur Installation des Axkid Modukid Infant und zum Anschnallen Ihres
Kinds am Sitz finden Sie in der zugehörigen Bedienungsanleitung.
14

Installation des Axkid Modukid Seat auf der
Basis
Wenn Sie den Axkid Modukid Seat auf der Basis installieren, ziehen Sie den Sitzfreigabegri
(E) in seine verlängerte Position (siehe F6) und drücken Sie den Sitz in die Basis. Die
12
Sitzbefestigungsplatte muss in die Basis einrasten.
Stellen Sie sicher, dass der Axkid Modukid Seat nicht mit einem angrenzenden Fahrzeugsitz
in Kontakt kommt und dass das Stützbein fest auf den Boden geklemmt ist und dass der
13
Installationssummer des Stützbeins (O) kein Geräusch mehr ausgibt.
Axkid hat den Axkid Modukid Seat mit einem Seitenaufprallschutzsystem, ASIP (Axkid Side
Impact Protection), ausgestattet. Zum Installieren des ASIP suchen Sie den Anschluss für den
Seitenaufprallschutz an der Seite des Kindersitzes, die der Fahrzeugseite am nächsten ist (d.
h. sich am nächsten zur Fahrzeugtür befindet). Achten Sie darauf, dass die beiden dreieckigen
Pfeile auf dem Seitenaufprallschutz in die gleiche Richtung wie der dreieckige Pfeil auf dem
Anschluss für den Seitenaufprallschutz zeigen. Platzieren Sie die obere der beiden ovalen
14
Önungen an der Unterseite des Seitenaufprallschutzes über dem SeitenaufprallschutzAnschluss. Drücken Sie den Seitenaufprallschutz gegen die Seite des Autositzes und
schieben Sie ihn nach oben auf den Anschluss. Sie werden ein leichtes Klicken hören, wenn
der Seitenaufprallschutz einrastet. Zum Entfernen drücken Sie den Seitenaufprallschutz nach
unten und entfernen ihn.
WICHTIG:
Ausführliche Informationen zur Installation des Axkid Modukid Seat und zum Anschnallen Ihres
Kinds am Sitz finden Sie in der zugehörigen Bedienungsanleitung.
15
Pflege und Instandhaltung
Der Bezug der Anti Rebound Bar kann entfernt und in der Waschmaschine (30 °C,
Schonwaschgang) gewaschen werden. Geben Sie den Bezug nicht in einen Trockner, da dies
den Bezug beschädigen und die Polsterung sich vom Sto lösen kann.
Sämtliche Kunststoteile der Axkid Modukid Base können mit mildem Reinigungsmittel und
Wasser gereinigt werden. Verwenden Sie keine aggressiven Chemikalien, die Lösungsmittel
usw. enthalten, da dies zu Schäden am Kunststo führen und die Sicherheit des Kindersitzes
beeinträchtigen kann.
Sämtliche Materialien, die in der Axkid Modukid Base verwendet werden, sind recyclingfähig
und gemäß der lokalen Gesetzgebung zu recyceln. Informationen zum Recycling dieses
Produkts erhalten Sie bei Ihrem lokalen Wertstozentrum.
Nehmen Sie nur solche Änderungen am Axkid Modukid Seat vor, die in dieser
Bedienungsanleitung beschrieben werden. Befolgen Sie sorgfältig die Anweisungen in
diesem Handbuch. Reparaturen müssen vom Hersteller oder dessen Vertreter durchgeführt
werden.
Wenn der Sitzbezug ausgetauscht werden muss, müssen Sie sicherstellen, dass nur
Originalprodukte von Axkid zum Einsatz kommen. Wenn andere Produkte verwendet werden,
wird das Sicherheitssystem von Axkid Modukid möglicherweise beeinträchtigt, was bei
Unfällen ernsthafte Verletzungen zur Folge haben kann.
Garantie
Für den Axkid Modukid Base gewähren wir eine 24-monatige Garantie ab Kaufdatum. Achten
Sie darauf, dass Sie Ihren Kassenbeleg aufbewahren, damit Sie diesen im Garantiefall am Kaufort
vorlegen können.
Die Garantie gilt nicht für:
Normalen Verschleiß
Beschädigung aufgrund von fehlerhafter Verwendung, Nachlässigkeit oder Unfall
Nach Reparaturen durch Dritte
Sämtliche verwendeten Materialien bieten eine sehr hohe UV-Beständigkeit. UV-Licht
ist jedoch sehr aggressiv und führt letztlich zum Ausbleichen des Sitzbezugs. Dies gilt als
normaler Verschleiß und fällt somit nicht unter unsere Garantie.
16
ES
Axkid Modukid Base
Base para el sistema modular de la silla infantil para coche
Manual de instrucciones
Información importante
Lea este manual de instrucciones antes de instalar la silla infantil para coche Axkid Modukid
en su vehículo. Para obtener más información y vídeos sobre la instalación, visite www.
axkid.com.
Gracias por elegir un producto de Axkid. Nuestro equipo cuenta en su haber con más de 30 años de
experiencia combinada en el ámbito de la seguridad infantil y nos hemos esforzado al máximo para hacer
que la silla infantil para coche Axkid Modukid sea lo más segura posible. La silla infantil para coche Axkid
Modukid está homologado de acuerdo con el Reglamento n.º 129/02 de la ONU. Con el fin de maximizar la
seguridad de su hijo(a), es importante que tenga lo siguiente en cuenta:
Lea este manual de instrucciones con atención antes de instalar Axkid Modukid Base. En caso de
duda, póngase en contacto con su distribuidor, quien le enseñará cómo instalarlas correctamente.
Una instalación incorrecta podría poner en peligro a su hijo(a).
No utilice una silla infantil para coche en posición sentada cuando haya instalado un airbag activo. Si
todavía desea instalar la silla para coche Axkid Modukid en ese sitio, se debe desactivar el airbag de
acuerdo con las instrucciones del fabricante del vehículo.
Exhaustivas investigaciones han demostrado que el riesgo de sufrir lesiones graves en un(a)
niño(a) es cinco veces mayor cuando viaja en una silla para coche orientada hacia delante, en
comparación con una silla para coche orientada hacia atrás.
Si tuviese un accidente, por pequeño que fuese, la silla infantil para coche se debe cambiar siempre.
Puede tener daños indetectables y podría poner en peligro seriamente la seguridad de su hijo(a).
Por este motivo, Axkid no recomienda la compra de sillas para coche de segunda mano.
No deje nunca a su hijo(a) sin vigilar dentro del coche.
Asegúrese de que el equipaje o los objetos sueltos estén fijados en su vehículo, ya que pueden
causar lesiones a los pasajeros en caso de producirse una colisión.
Guarde este manual de instrucciones para consultarlo en el futuro.
Asegúrese de que la silla infantil para coche esté instalada de manera que ninguna pieza quede
atrapada por asientos móviles, puertas del coche, etc.
La silla infantil para coche de Axkid Modukid Infant es apta para su uso con niños desde recién
nacidos hasta cuando el/la niño(a) pueda sentarse recto(a), aproximadamente 6-9 meses de edad.
No utilice nunca una silla infantil para coche sin la cubierta textil.
Esta silla infantil para coche SOLO se puede instalar orientada hacia atrás.
17
Índice
Partes
El sistema Axkid Modukid Module
Funciones de Axkid Modukid Base
Colocación permitida y no permitida de la silla infantil para coche
Instalación en el coche
Instalación de Axkid Modukid Infant en la base
Instalación de la Axkid Modukid Seat en la base
Cuidado y mantenimiento
Garantía
Partes
A Barra anti-rebote (ARB) I Palanca ISOFIX
B Palanca para soltar la ARB J Indicador de instalación de la pata de apoyo
C Ganchos de acoplamiento K Palanca de la pata de apoyo
D Indicador de acoplamiento de la silla L Posición de estacionamiento de la pata de apoyo
E Asa para soltar la silla M Pata de apoyo
F Brazo ISOFIX N Pie de la pata de apoyo
G Indicador de instalación ISOFIX O Indicador acústico de instalación de la pata de apoyo
H Botón de liberación ISOFIX
18
18
19
19
20-21
21
22
23
23
El sistema modular Axkid Modukid
El sistema modular Axkid Modukid está compuesto por lo siguiente:
• Axkid Modukid Base – Una base para instalar de manera sencilla en vehículos con puntos de
conexión ISOFIX.
• Axkid Modukid Infant - Portabebés para niños desde 40-75 cm y hasta 13 kg.
• Axkid Modukid Seat - Silla para coche orientada hacia atrás para niños desde 61-105 cm y hasta
18 kg.
ADVERTENCIA: Instale Axkid Modukid Infant o Axkid Modukid Seat solo en Axkid Modukid Base.
Si intenta utilizar productos de otros sistemas modulares con esta base, los niños pueden sufrir
lesiones graves en caso de producirse una colisión.
18

Funciones de Axkid Modukid Base
Axkid Modukid Base se puede ajustar para proporcionar al niño(a) más espacio para las piernas o
para proporcionar más espacio para el asiento del conductor del pasajero o del acompañante dentro
del vehículo. Para ello, debe ajustar los brazos ISOFIX y la barra anti-rebote.
Los brazos ISOFIX (F) se pueden ajustar en diferentes longitudes para posibilitar diferentes
posiciones de sentado. Hay 4 posiciones, P1-P4. Los brazos ISOFIX (F) se ajustan tirando de la
F1
palanca ISOFIX (I)
Los brazos ISOFIX (F) se bloquean en los puntos de conexión ISOFIX del vehículo. Los
brazos ISOFIX se pueden soltar de los puntos de conexión del vehículo pulsando el botón de
F2
liberación ISOFIX (H). El indicador de instalación ISOFIX (G) se pone de color verde cuando
hay una conexión segura entre el brazo ISOFIX y el punto de conexión ISOFIX.
La barra anti-rebote (A) no está instalada en la base cuando se entrega el producto, por lo que
se deberá insertar en la base. Axkid Modukid Base no se puede utilizar sin la barra anti-rebote.
La barra anti-rebote se puede ajustar en diferentes posiciones para posibilitar diferentes
F3
posiciones de sentado. Hay 6 posiciones, P1-P6. La barra anti-rebote (A) se suelta tirando de la
palanca de liberación de la ARB (B). Asegúrese de que la palanca de liberación de la ARB (B)
encaje en su sitio y haga clic después de ajustar la barra anti-rebotes.
La pata de apoyo (M) se puede doblar y meter en una posición de estacionamiento debajo
de la base. Esta posición de la pata de apoyo solo se debe utilizar durante el almacenamiento,
F4
nunca cuando se instala en un vehículo. Cuando se despliega la pata de apoyo, el indicador
acústico de la instalación de la pata de apoyo (O) comenzará a pitar. El pitido se detendrá
después de haber completado la instalación correcta.
Si el indicador acústico de instalación de la pata de apoyo (O) no emite ningún sonido cuando
la pata de apoyo está desplegada, compruebe la batería. Para comprobar la batería, tiene que
desatornillar los dos tornillos que hay debajo del pie de la pata de apoyo (N) y quitar la tapa.
F5
Entonces podrá acceder a la batería. Tenga en cuenta que solo puede reemplazar la batería
por una batería de tamaño CR1632.
Si tira del asa para soltar la silla (E), se abrirán los ganchos de acoplamiento (C) y podrá acoplar
F6
o desacoplar un Axkid Modukid Infant o una Axkid Modukid Seat.
Los ganchos de acoplamiento (C) bloquean un Portabebés Axkid Modukid o una Silla Axkid
F7
Modukid en la base.
ADVERTENCIA: No utilice nunca la Axkid Modukid Base sin instalar la barra anti-rebotes.
19
Colocación permitida y no permitida de la
silla infantil para coche
Axkid Modukid Base se puede instalar en cualquier asiento de acompañante orientado hacia
delante que tenga puntos de conexión ISOFIX
IMPORTANTE: Si desea instalar su silla para coche Axkid Modukid en un lugar donde hay instalado un
airbag, el airbag se debe desconectar en un centro de puesta a punto autorizado. Algunos vehículos pueden
estar equipados con un interruptor que le permite desconectar manualmente el airbag. Es importante
comprobar siempre si la luz indicadora del vehículo indica que el airbag está apagado.
ADVERTENCIA: No la utilice nunca en un asiento con un airbag activo
ADVERTENCIA: No la utilice nunca en asientos del vehículo orientados hacia atrás o hacia un lado
ADVERTENCIA: Los airbags están diseñados para los adultos y pueden dañar seriamente a su
hijo(a) en un accidente
Colocación permitida y no permitida de la silla infantil para coche.
1
Asiento delantero del acompañante (sin airbag activo)
Asiento delantero del acompañante (airbag activo) NO
Asiento orientado hacia delante con puntos de conexión ISOFIX
Asiento sin puntos de conexión ISOFIX NO
Asientos orientados hacia un lado NO
Asientos orientados hacia delante NO
Esta base solo se puede montar orientada hacia atrás.
2
Nunca instale la silla de seguridad en el asiento de un
vehículo con el airbag activado.
Instalación en el coche
Acople y ajuste la barra anti-rebote (A) en su posición más interna. Despliegue la pata de
apoyo (M). Cuando se despliega la pata de apoyo, el indicador acústico de la instalación de la
3
pata de apoyo (O) comenzará a pitar. El pitido se detendrá después de haber completado la
instalación correcta.
Extienda los brazos ISOFIX (F) hasta una posición adecuada P1-P4.
4
Sí
Sí
20

Acople los brazos ISOFIX (F) a los puntos de conexión ISOFIX del vehículo en la posición
correcta del asiento del vehículo, según (1). Oirá un «clic» cuando los brazos ISOFIX se
5
bloqueen en su posición.
Asegúrese de que el indicador de instalación ISOFIX (G) aparezca de color verde.
6
Extienda la barra anti-rebote (A) hacia el asiento del vehículo tirando de la palanca para soltar
la ARB (B) y empujando la barra anti-rebote (A) hacia el asiento del vehículo. Asegúrese de
7
aplicar la mayor presión posible y de que la palanca para soltar la ARB (B) encaje en su sitio y
oiga un «clic».
Extienda la pata de apoyo (M) tirando de la palanca de la pata de apoyo (K) para extender la
pata de apoyo de manera que el pie de la pata de apoyo (N) esté en contacto con el suelo del
vehículo. Compruebe que el indicador acústico de instalación de la pata de apoyo (O) deja de
8
emitir un ruido. Entonces la instalación se habrá realizado correctamente. Asegúrese de que el
suelo del vehículo sea adecuado para soportar una silla para coche de tamaño i. Para obtener
información, consulte el manual del vehículo.
IMPORTANTE :
Asegúrese de que todos los indicadores de instalación aparezcan de color verde.
Instalación del Axkid Modukid Infant en la
base
Cuando vaya a instalar un Axkid Modukid Infant en la base, tire del asa de liberación de la silla
(E) hasta su posición extendida (vea F6) y empuje el portabebés hasta la base. El portabebés
9
deberá encajar en la base y emitir un «clic».
Asegúrese de que el Axkid Modukid Infant no esté en contacto con ningún asiento adyacente
en el vehículo, que la pata de apoyo esté firmemente sujeta al suelo y que el indicador acústico
10
de instalación de la pata de apoyo (O) haya dejado de emitir un ruido.
Axkid ha dotado a la silla para coche Axkid Modukid de un sistema de protección lateral contra
impactos, ASIP (Axkid Side Impact Protection). Pulse el botón de liberación y tire del ASIP
11
hacia la puerta del coche hasta que se bloquee en la posición más externa que se adapte a su
coche.
IMPORTANTE:
Consulte el manual del Axkid Modukid Infant para obtener instrucciones completas sobre cómo
instalar el producto y cómo abrochar a su hijo(a) en la silla.
21

Instalación de la Axkid Modukid Seat en la
base
Cuando vaya a instalar de Axkid Modukid Seat en la base, tire del asa de liberación de la
silla (E) hasta su posición extendida (vea F6) y empuje la silla hasta la base. La placa de
12
acoplamiento de la silla deberá encajar en la base y oirá un «clic».
Asegúrese de Axkid Modukid Seat no esté en contacto con ningún asiento adyacente en el
vehículo, que la pata de apoyo esté firmemente sujeta al suelo y que el indicador acústico de
13
instalación de la pata de apoyo (O) haya dejado de emitir un ruido.
Axkid ha dotado a la Axkid Modukid Seat de un sistema de protección lateral contra impactos,
ASIP (Axkid Side Impact Protection). Para instalar el ASIP, localice el conector de la almohadilla
contra impactos laterales en la silla infantil que esté más cerca del lateral del vehículo (es
decir, el que esté más cerca de la puerta). Asegúrese de que las dos flechas triangulares de la
almohadilla contra impactos laterales apunten en la misma dirección que la flecha triangular
del conector de la almohadilla contra impactos laterales. Coloque la parte superior de las dos
14
aperturas ovaladas en la parte inferior de la almohadilla contra impactos laterales sobre el
conector de la almohadilla contra impactos laterales. Empuje la almohadilla contra impactos
laterales contra el costado del asiento del coche y deslice la almohadilla contra impactos
laterales hacia arriba en el conector de la almohadilla contra impactos laterales. Sentirá un
ligero «clic» cuando la almohadilla contra impactos laterales se bloquee en su sitio. Para
quitarlo: empuje la almohadilla contra impactos laterales hacia abajo y quítela.
IMPORTANTE:
Consulte el manual de la Axkid Modukid Seat para obtener instrucciones completas sobre cómo
instalar el producto y cómo abrochar a su hijo(a) en la silla.
22
Cuidado y mantenimiento
La cubierta de la barra anti-rebote se puede quitar y lavar en la lavadora a 30 °C en el
programa «Ciclo suave». No meta la cubierta en la secadora, ya que ello puede dañarla y el
acolchado se puede desprender de la tela.
Todas las piezas de plástico de la Axkid Modukid Base se pueden limpiar con detergente
suave y agua. No utilice productos químicos agresivos que contengan disolventes, etc., ya que
esto puede provocar daños en el plástico y poner en peligro la seguridad de la silla infantil para
coche.
Todos los materiales empleados en la Axkid Modukid Base son reciclables y se deberían
reciclar siguiendo su legislación local. Asesórese en su centro de reciclaje local a la hora de
reciclar este producto.
No realice modificaciones ni alteraciones en la silla infantil para coche Axkid Modukid, excepto
las descritas en este manual de instrucciones. Siga atentamente las instrucciones de este
manual. Cualquier reparación la debe realizar el fabricante o el agente.
Si la cubierta de la silla necesita reemplazarse, asegúrese de utilizar únicamente productos
originales de Axkid. Si se utilizan otros productos, el sistema de seguridad de Axkid Modukid
puede verse en peligro y podrían desembocar en lesiones graves en caso de producirse un
accidente.
Garantía
La Axkid Modukid Base está cubierta por una garantía de 24 meses a partir de la fecha de compra.
Asegúrese de guardar su tique y llevarlo al lugar en el que realizó la compra en caso de tener algún
problema con la garantía.
La garantía no cubre:
El desgaste normal
Los daños causados por un uso incorrecto, negligencia o accidente
Si las reparaciones las ha realizado un tercero
Todos los materiales usados tienen una clasificación muy alta de resistencia a los rayos
ultravioleta. Sin embargo, la luz UV es muy agresiva y, en última instancia, hará que la cubierta
de la silla de decolore. Esto no está cubierto por nuestra garantía, ya que se considera un
desgaste normal.
23

Axkid Modukid Base
Alusta turvaistuimen moduulijärjestelmään
Käyttöohje
Tärkeää tietoa
Lue nämä käyttöohjeet ennen kuin kiinnität Axkid Modukid -turvaistuimen autoon.
Lisätietojaja kiinnitysvideoita osoitteessa www.axkid.com.
Kiitos, että valitsit Axkid-tuotteen. Työryhmällämme on yli 30 vuotta kokemusta lasten
turvallisuustuotteiden valmistuksesta, ja me olemme tehneet kaikkemme tehdäksemme Axkid Modukid
-turvaistuimesta niin turvallisen kuin mahdollista. Axkid Modukid -turvaistuin on hyväksytty UNECE-
säädöksen nro 129/02 mukaisesti. Lapsesi turvallisuuden maksimoimiseksi on tärkeää huomioida
seuraavat asiat:
Lue nämä käyttöohjeet ennen kuin kiinnität Axkid Modukid Base ja Axkid Modukid Seat
-turvaistuimen autoon. Jos epäröit, ota yhteyttä jälleenmyyjään, joka voi näyttää oikean
kiinnitystavan. Väärin asennettu istuin voi asettaa lapsesi vaaraan.
Älä käytä turvaistuinta penkillä, jossa on kytketty turvatyyny. Jos kuitenkin haluat asentaa Axkid
Modukid -istuimen tälle paikalle, turvatyyny on kytkettävä pois päältä ajoneuvon valmistajan
ohjeiden mukaan.
Pidä lapsesi selkä menosuuntaan niin pitkään kuin mahdollista. Tutkimusten mukaan kohtalokkaan
onnettomuuden riski on viisinkertainen, jos lapsesi istuu istuimessa kasvot menosuuntaan.
FI
Turvaistuin on aina vaihdettava uuteen mahdollisen auto-onnettomuuden sattuessa, vaikka
onnettomuus olisikin pieni. Pienikin onnettomuus saattaa vaurioittaa turvaistuinta ja vaikuttaa
lapsesi turvallisuuteen. Tästä syystä Axkid ei suosittele käytetyn turvaistuimen ostamista.
Älä koskaan jätä lastasi vartioimatta autoon.
Varmista, että kaikki matkatavarat tai irralliset esineet on kiinnitetty autossa, koska ne voivat
aiheuttaa törmäystilanteessa vammoja matkustajille.
Säilytä tämä ohjekirja myöhempää tarvetta varten.
Varmista, että turvaistuin on kiinnitetty siten, että mitkään osat eivät jää kiinni siirrettävien istuinten
alle, oven väliin jne.
Axkid Modukid Infant -turvaistuin sopii vastasyntyneestä siihen asti, kun lapsi osaa istua tukevasti,
noin kuuden tai yhdeksän kuukauden ikäiseksi asti.
Älä koskaan käytä turvaistuinta ilman kangaspäällistä.
Tämä turvaistuin voidaan asentaa VAIN selkä menosuuntaan.
24

Sisältö
Osat
Axkid Modukid Module -järjestelmä
Axkid Modukid Base toiminnot
Turvaistuimen sallittu ja kielletty sijoittaminen
Kiinnittäminen autoon
Axkid Modukid Infant -kaukalon asentaminen alustaan
Axkid Modukid Seat -istuimen asentaminen alustaan
Hoito-ohjeet
Takuu
Osat
A Anti Rebound Bar (ARB) I ISOFIX-säätönuppi
B ARB:n vapautuskahva J Tukijalan asennusilmaisin
C Kiinnityskoukut K Tukijalan kahva
D Istuimen kiinnitysilmaisin L Tukijalan säilytysasento
E Istuimen vapautuskahva M Tukijalka
F ISOFIX-kisko N Tukijalan terä
G ISOFIXin asennusindikaattori O Tukijalan asennussummeri
H ISOFIXin vapautuspainike
25
25
26
26
27-28
28
29
30
30
Axkid Modukid Module -järjestelmä
Axkid Modukid Module -järjestelmä koostuu seuraavista:
• Axkid Modukid Base – alusta, jonka avulla turvaistuin on helppo asentaa autoihin, joissa on
ISOFIX-kiinnityspisteet.
• Axkid Modukid Infant - turvakaukalo 40-75 cm:n pituisille ja korkeintaan 13 kg painaville lapsille.
• Axkid Modukid Seat - Selkä menosuuntaan asennettava turvaistuin 61-105 cm:n pituisille ja
enintään 18 kg painaville lapsille.
VAROITUS: Asenna Axkid Modukid Base -alustaan vain Axkid Modukid Infant -kaukalo tai Axkid
Modukid Seat -istuin. Jos alustan kanssa yrittää käyttää muita moduulijärjestelmiä, kolarin sattuessa
saattaa aiheutua vakavia vammoja.
25

Axkid Modukid Base toiminnot
Axkid Modukid Base voidaan säätää siten, että lapsen jaloille jää enemmän tilaa tai annetaan
enemmän tilaa edessä olevalle kuljettajan tai matkustajan penkille. Alustaa säädetään ISOFIXkiskoista ja Anti Rebound Bar -kahvasta.
ISOFIX-kiskot (F) voidaan säätää eripituisiksi, jotta ne mahtuvat erilaisiin istuma-asentoihin.
F1
Asentoja on 4, P1-P4. Isofix-kiskoja (F) säädetään vetämällä Isofix-säätönupista (I)
ISOFIX-kiskot (F) lukkiutuvat ajoneuvon ISOFIX-kiinnityspisteisiin. ISOFIX-kiskot voidaan
vapauttaa ajoneuvon kiinnityspisteistä painamalla ISOFIX-vapautuspainiketta (H). ISOFIX-
F2
asennusindikaattori (G) muuttuu vihreäksi, kun ISOFIX-kiskot ja ISOFIX-kiinnityspisteet on
turvallisesti yhdistetty.
Anti Rebound Bar (A) ei ole valmiiksi asennettu alustaan toimitettaessa, joten se on kiinnitettävä
siihen. Axkid Modukid Base -alustaa ei saa käyttää ilman Anti Rebound Bar -kahvaa. Anti
Rebound Bar voidaan säätää eri asentoihin, jotta se mahdollistaisi erilaiset istuma-asennot.
F3
Asentoja on 6, P1-P6. Anti Rebound Bar (A) vapautuu vetämällä ARB:n vapautuskahvasta (B).
Varmista, että ARB-vapautuskahva (B) napsahtaa paikalleen, kun olet säätänyt Anti Rebound
Bar -kahvan.
Tukijalan (M) voi taittaa säilytysasentoon alustan alle. Tukijalkaa saa pitää tässä asennossa
vain säilytyksen aikana, ei koskaan silloin, kun se on asennettu ajoneuvoon. Kun tukijalka
F4
on avattuna, tukijalan asennussummeri (O) alkaa piipata. Piippaus pysähtyy, kun jalka on
asennettu oikein.
Jos tukijalan asennussummerista (O) ei kuulu ääntä, kun tukijalka on taitettu auki, tarkista
paristo. Pariston voi tarkistaa irrottamalla tukijalan (N) pohjassa olevat kaksi ruuvia ja
F5
poistamalla kannen. Silloin paristo on saatavilla. Huomaa, että voit vaihtaa paristoksi ainoastaan
CR1632-pariston.
Vetämällä istuimen vapautuskahvasta (E) kiinnityskoukut (C) avautuvat ja voit kiinnittää tai
F6
irrottaa Axkid Modukid Infant -kaukalon tai Axkid Modukid Seat -istuimen.
Kiinnityskoukut (C) lukitsevat Axkid Modukid Infant -kaukalon tai Axkid Modukid Seat -istuimen
F7
alustaan.
VAROITUS: Älä koskaan käytä Axkid Modukid Base -alustaa ilman Anti Rebound Bar -kahvaa.
26

Turvaistuimen sallittu ja kielletty sijoittaminen
Axkid Modukid Base voidaan asentaa mihin tahansa eteenpäin suunnattuun matkustajan penkkiin,
jossa on ISOFIX-kiinnityspisteet
TÄRKEÄÄ: Jos haluat asentaa Axkid Modukidin paikkaan, jossa on turvatyyny, turvatyynyn tulee olla
kytketty pois päältä valtuutetun huoltoliikkeen toimesta. Joissain autoissa voi olla avain, jolla turvatyynyn voi
manuaalisesti kytkeä pois päältä. Varmista auton merkkivalosta, onko turvatyyny kytketty pois päältä.
VAROITUS: Älä koskaan käytä istuinta, kun turvatyyny on kytketty päälle
VAROITUS: Älä käytä koskaan taakse tai sivulle suunnatuilla auton istuimilla
VAROITUS: Turvatyynyt on suunniteltu aikuisille, ja ne voivat vakavasti vahingoittaa lastasi kolarissa
Turvaistuimen sallittu ja kielletty sijoittaminen.
1
Etuistuin (ei päälle kytkettyä turvatyynyä) Kyllä
Etuistuin (päälle kytketty turvatyyny) EI
Eteenpäin oleva istuin, jossa on ISOFIX-kiinnityspisteet Kyllä
Istuin ilman ISOFIX-kiinnityspisteitä EI
Sivulle suunnattu istuin EI
Taaksepäin suunnattu istuin EI
Tämän alustan saa asentaa ainoastaan selkä menosuuntaan.
2
Älä koskaan asenna turvaistuinta penkille, jossa on
kytketty turvatyyny.
Kiinnittäminen autoon
Kiinnitä ja säädä Anti Rebound Bar (A) sen sisimpään asentoon. Taita tukijalka auki (M). Kun
3
tukijalka on avattuna, tukijalan asennussummeri (O) alkaa piipata. Piippaus lakkaa, kun jalka on
asennettu oikein.
Levitä ISOFIX-kiskot (F) sopivaan asentoon P1-P4.
4
27

Kiinnitä ISOFIX-kiskot (F) ajoneuvon ISOFIX-kiinnityspisteisiin, kun ajoneuvon penkki on
oikeassa asennossa, kohdan 1 mukaisesti. Kuulet “napsahduksen”, kun ISOFIX-kiskot lukittuvat
5
paikoilleen.
Varmista, että ISOFIX-asennusindikaattori (G) näyttää vihreää.
6
Laajenna Anti Rebound Baria (A) kohti ajoneuvon penkkiä vetämällä ARB:n vapautuskahvasta
(B) ja työntämällä Anti Rebound Baria (A) kohti ajoneuvon penkkiä. Varmista, että käytät
7
mahdollisimman paljon painetta ja että ARB:n vapautuskahva (B) napsahtaa paikalleen.
Pidennä tukijalkaa (M) vetämällä tukijalan kahvasta (K), jotta tukijalan terä (N) on kosketuksissa
ajoneuvon lattiaan. Tarkista, että tukijalan asennuspainikkeen summeri (O) sammuu, jotta
8
tiedät, että asennus on tehty oikein. Varmista, että ajoneuvon lattia tukee i-Size-istuinta. Katso
lisätietoja ajoneuvon käyttöoppaasta.
TÄRKEÄÄ:
Varmista, että asennusindikaattorit näyttävät vihreää.
Axkid Modukid Infant -kaukalon
asentaminen alustaan
Kun asennat Axkid Modukid Infant -kaukalon alustaan, vedä vapautuskahvaa (E) uloimpaan
9
asentoon (katso F6) ja työnnä turvakaukalo alustaan. Turvakaukalon tulee napsahtaa alustaan.
Varmista, että Axkid Modukid Infant ei ole kosketuksissa mihinkään viereiseen istuimeen ja
että tukijalka on tiukasti kiinnitetty lattiaan ja että tukijalan asennussummeri (O) on lopettanut
10
piippauksen.
Axkid Modukid Infant -turvakaukalossa on ASIP-sivutörmäyssuoja (Axkid Side Impact
Protection). Työnnä vapautuspainiketta ja vedä ASIPia kohti auton ovea, kunnes se lukittuu
11
uloimpaan, autoosi sopivaan asentoon.
TÄRKEÄÄ:
Katso Axkid Modukid Infant käyttöoppaasta täydelliset ohjeet siitä, miten asennat tuotteen ja miten
kiinnität lapsesi istuimeen.
28

Axkid Modukid Seat -istuimen
asentaminen alustaan
Kun asennat Axkid Modukid Seat -istuimen alustaan, vedä istuimen vapautuskahvaa (E)
uloimpaan asentoon (katso F6) ja työnnä turvaistuin alustaan. Istuimen kiinnityslevyn tulee
12
napsahtaa kiinni alustaan.
Varmista, että Axkid Modukid Seat ei ole kosketuksissa mihinkään viereiseen istuimeen ja
että tukijalka on tiukasti kiinnitetty lattiaan ja että tukijalan asennussummeri (O) on lopettanut
13
piippauksen.
Axkid Modukid Seat -turvaistuimessa on ASIP-sivutörmäyssuoja (Axkid Side Impact
Protection). Kun asennat ASIP:n, sijoita turvaistuimessa oleva sivutörmäyssuojan liitin
lähimmäksi auton ovea. Varmista, että sivutörmäyssuojan kaksi kolmiomaista nuolta
osoittavat samaan suuntaan kuin sivutörmäyssuojan liittimen kolmiomainen nuoli. Aseta
14
sivutörmäyssuojan pohjassa olevista kahdesta ovaalista aukosta ylempi sivutörmäyssuojan
liittimen päälle. Paina sivutörmäyssuojaa istuimen reunaa vasten ja liu’uta sivutörmäyssuojaa
ylöspäin sivutörmäyssuojan liittimeen. Tunnet pienen napsahduksen, kun sivutörmäyssuoja
lukittuu paikalleen. Irrottaminen: työnnä sivutörmäyssuojaa alaspäin ja irrota.
TÄRKEÄÄ:
Katso Axkid Modukid Seat käyttöoppaasta täydelliset ohjeet siitä, miten asennat tuotteen ja miten
kiinnität lapsesi istuimeen.
29

Hoito-ohjeet
Anti Rebound Barin päällysteen voi irrottaa ja pestä pesukoneessa 30 ºc:ssa
käsinpesuohjelmalla. Älä laita päällystettä kuivausrumpuun, koska se saattaa vahingoittaa
päällystettä ja pehmuste saattaa irrota kankaasta.
Axkid Modukid Base muoviosat voi puhdistaa miedolla puhdistusaineella ja vedellä. Älä käytä
syövyttäviä kemikaaleja sisältäviä pesuaineita jne, koska ne saattavat vahingoittaa muovia ja
vaikuttaa istuimen turvallisuuteen.
Kaikki Axkid Modukid Base käytetyt materiaalit ovat kierrätettäviä, ja ne tulee kierrättää
paikallisen lainsäädännön mukaisesti. Kysy paikalliselta kierrätyskeskukseltasi neuvoja
tuotteen kierrättämiseen.
Älä tee mitään sellaisia säätöjä tai korjauksia Axkid Modukid -turvaistuimeen, joita ei tässä
ohjekirjassa mainita. Noudata tämän käyttöohjeen ohjeita huolellisesti. Valmistajan tai
valmistajan edustajan on tehtävä kaikki korjaukset.
Jos kaukalon päällyste on vaihdettava, varmista että siihen käytetään ainoastaan Axkidin
alkuperäisiä tuotteita. Muutoin Axkid Modukidin turvajärjestelmä ei ehkä toimi oikein, ja lapsesi
turvallisuus vaarantuu ja saattaa johtaa vakavaan vammaan onnettomuuden sattuessa.
Takuu
Axkid Modukid -turvaistuimella on 24 kuukauden takuu ostopäivästä alkaen. Säilytä ostokuitti ja ota
se mukaan ostopaikkaan takuuasioiden hoidon yhteydessä.
Takuu ei kata:
Normaalia kulumista
Vahinkoa, joka on aiheutunut virheellisestä käytöstä, laiminlyönnistä tai onnettomuudesta
Jos kolmas osapuoli on tehnyt istuimeen korjauksia
Kaikki istuimessa käytetyt materiaalit kestävät erittäin hyvin UV-säteilyä. UV-säteily on
kuitenkin erittäin voimakasta ja johtaa lopulta päällyskankaan haalistumiseen. Takuu ei kata
tällaista kulumista, koska sitä pidetään normaalina kulumisena.
30

FR
Axkid Modukid Base
Base pour système modulaire de siège auto pour enfant
Manuel d’utilisation
Informations importantes
Lisez ce Manuel d’utilisation avant d’installer le siège auto pour enfant Axkid Modukid dans
votre véhicule. Pour plus d’informations et des vidéos d’installation, consultez www.axkid.
com.
Merci d’avoir choisi un produit Axkid. Notre équipe a plus de 30 ans d’expérience combinée en matière
de sécurité des enfants et nous avons fait tout notre possible pour que le siège auto pour enfant
Axkid Modukid soit aussi sûr que possible. Le siège auto pour enfant Axkid Modukid est homologué
conformément au règlement n° 129/02 de l’ONU. Pour maximiser la sécurité de votre enfant, il est important
que vous gardiez ce qui suit à l’esprit :
Lisez ce Manuel d’utilisation avant d’installer Axkid Modukid base et le siège auto pour enfant Axkid
Modukid. En cas de doute, contactez votre détaillant qui peut démontrer une installation correcte.
Une installation incorrecte pourrait mettre votre enfant en danger.
N’utilisez pas de siège auto pour enfant dans une position assise quand un airbag actif est installé. Si
vous souhaitez toujours installer le siège auto pour enfant Axkid Modukid à cet endroit, l’airbag doit
être désactivé selon les instructions du fabricant du véhicule.
Des recherches approfondies ont montré que le risque de blessures graves est cinq fois plus élevé
pour un jeune enfant lorsqu’il voyage dans un siège auto orienté vers l’avant par rapport à un siège
auto orienté vers l’arrière.
En cas d’accident, aussi bénin soit-il, votre siège auto pour enfant doit toujours être remplacé. Il peut
présenter des dommages indétectables qui pourraient compromettre sérieusement la sécurité de
votre enfant. Pour cette raison, Axkid ne recommande pas d’acheter des sièges auto d’occasion.
Ne laissez jamais votre enfant sans surveillance dans la voiture.
Assurez-vous que les bagages ou les objets en vrac sont attachés dans votre véhicule car ils
peuvent causer des blessures aux passagers en cas de collision.
Conservez ce Manuel d’utilisation pour référence ultérieure.
Assurez-vous que le siège auto pour enfant est installé de manière à ce qu’aucune pièce ne soit
enfermée par des sièges mobiles, portières de voiture, etc.
Le siège auto pour Axkid Modukid Infant est adapté pour les nouveau-nés et jusqu’à ce que l’enfant
puisse s’asseoir de manière stable, soit environ de six à neuf mois d’âge.
N’utilisez jamais le siège auto pour enfant sans sa housse en tissu.
Ce siège auto pour enfant ne peut être installé QUE vers l’arrière.
31

Contenu
Pièces
Le système modulaire Axkid Modukid
Fonctions de la base Modukid Axkid Base
Positionnement autorisé et interdit du siège auto pour enfant
Installation dans la voiture
Installation d’Axkid Modukid Infant sur la base
Installation du Axkid Modukid Seat sur la base
Soins et entretien
Garantie
Pièces
A Barre anti-rebond (ARB) I Bouton ISOFIX
B Bouton de libération pour ARB J Indicateur d'installation de la jambe de force
C Boucles d’attache K Bouton de la jambe de force
D Indicateur de fixation du siège L Position de stationnement de la jambe de force
E Poignée de libération du siège M Jambe de force
F Bras ISOFIX N Pied de la jambe de force
G Indicateur d'installation ISOFIX O Sonnerie d'installation de la jambe de force
H Bouton de libération ISOFIX
32
32
33
33
34-35
35
36
37
37
Le système modulaire Axkid Modukid
Le système modulaire Axkid Modukid est constitué des éléments suivants :
• Axkid Modukid Base – Base pour une installation aisée dans les véhicules équipés de points de
d’attache ISOFIX.
• Axkid Modukid Infant - Porte-bébé pour enfants de 40 à 75 cm et de moins de 13 kg.
• Axkid Modukid Seat - Siège auto orienté vers l’arrière pour enfants de 61 à 105 cm et de moins
de 18 kg.
AVERTISSEMENT: Installez uniquement le siège Axkid Modukid Infant ou le siège Axkid Modukid
Seat sur la base Axkid Modukid Base. Essayer d’utiliser des produits provenant d’autres systèmes
modulaires sur cette base peut entraîner des blessures graves en cas de collision.
32

Fonctions de la base Modukid Axkid Base
La base Axkid Modukid Base peut être ajustée pour fournir plus d’espace aux jambes de l’enfant ou
pour plus d’espace pour le conducteur ou le siège passager de votre véhicule. Ceci est fait en réglant
les bras ISOFIX et la barre anti-rebond.
Les bras ISOFIX (F) peuvent être ajustés à diérentes longueurs pour s’adapter à diérentes
F1
positions assises. Il y a 4 positions, P1-P4. Pour ajuster les bras ISOFIX (F), tirez le bouton
ISOFIX (I)
Les bras ISOFIX (F) se verrouillent sur les points d’attache ISOFIX du véhicule. Les bras ISOFIX
peuvent être libérés des points d’attache du véhicule en poussant le bouton de libération
F2
ISOFIX (H). L’indicateur d’installation ISOFIX (G) devient vert lorsque la connexion entre le bras
ISOFIX et le point d’attache ISOFIX est sécurisée.
La barre anti-rebond (A) n’étant pas installée sur la base à la livraison, elle doit être insérée
dans la base. La base Axkid Modukid Base ne peut pas être utilisée sans la barre anti-rebond.
La barre anti-rebond peut être réglée sur diérentes positions pour s’adapter à diérentes
F3
positions assises. Il y a 6 positions, P1-P6. La barre anti-rebond (A) est libérée en tirant sur le
bouton de libération ARB (B). Assurez-vous que le bouton de libération ARB (B3) s’enclenche
en position après avoir ajusté la barre anti-rebond.
La jambe de force (M) peut être pliée en position de stationnement sous la base. Cette
position de la jambe de force ne doit être utilisée que pendant l’entreposage, jamais lorsqu’elle
est installée dans un véhicule. Lorsque la jambe de force est dépliée, la sonnerie d’installation
F4
de la jambe de force (O) commence à émettre un bip. Le bip s’arrête une fois l’installation
correcte terminée.
Si aucun son n’est émis par la sonnerie d’installation de la jambe de force (O) lorsqu’elle est
dépliée, vérifiez la batterie. Pour contrôler la batterie, dévissez les deux vis sous le pied de la
F5
jambe de force (N) et retirez le couvercle. La batterie est alors accessible. Notez que vous ne
pouvez remplacer la batterie que par une batterie de taille CR1632.
En tirant la poignée de libération du siège (E), les boucles d’attache (C) s’ouvrent et permettent
F6
ainsi d’attacher ou de détacher un siège Axkid Modukid Infant ou Axkid Modukid Seat.
Les boucles d’attache (C) verrouillent un siège Axkid Modukid Infant ou Axkid Modukid Seat à
F7
la base.
AVERTISSEMENT: N’utilisez jamais la base Axkid Modukid Base sans la barre anti-rebond.
33

Positionnement autorisé et interdit du
siège auto pour enfant
La base Axkid Modukid Base peut être installée sur n’importe quel siège passager orienté vers l’avant
comportant des points d’attache ISOFIX
IMPORTANT: Si vous souhaitez installer votre siège auto Axkid Modukid dans un endroit où un airbag
est installé, l’airbag doit être déconnecté dans un centre de service agréé. Certains véhicules peuvent être
équipés d’un interrupteur qui vous permet de désactiver manuellement l’airbag. Il est important de toujours
vérifier que le voyant du véhicule indique que l’airbag est bien désactivé.
AVERTISSEMENT: N’utilisez jamais sur un siège avec un airbag actif
AVERTISSEMENT: N’utilisez jamais sur des sièges orientés vers l’arrière ou le côté du véhicule
AVERTISSEMENT: Les airbags sont conçus pour les adultes et peuvent blesser gravement votre enfant en
cas d’accident
Positionnement autorisé et interdit du siège auto pour enfant
1
Siège passager avant (sans airbag actif) Oui
Siège passager avant (avec airbag actif) NON
Siège orienté vers l'avant avec points d’attache ISOFIX Oui
Siège sans points d’attache ISOFIX NON
Sièges orientés vers le côté NON
Sièges orientés vers l’arrière NON
Cette base est seulement autorisée à être montée orientée vers l’arrière.
2
Ne jamais installer un siège-auto sur un siège
passager où un airbag est activé.
Installation dans la voiture
Fixez et ajustez la barre anti-rebond (A) sur sa position la plus intérieure. Déliez la jambe de
force (M). Lorsque la jambe de force est dépliée, la sonnerie d’installation de la jambe de force
3
(O) commence à émettre un bip. Le bip s’arrête une fois l’installation correcte terminée.
4
Allongez les bras ISOFIX (F) à une position appropriée P1-P4.
34

Attachez les bras ISOFIX (F) aux points d’attache ISOFIX du véhicule dans la position correcte
du siège du véhicule, selon (1). Vous entendez un « clic » lorsque les bras ISOFIX se verrouillent
5
en position.
Assurez-vous que l’indicateur d’installation ISOFIX (G) est vert.
6
Allongez la barre anti-rebond (A) vers le siège du véhicule en tirant le bouton de libération ARB
(B) et en poussant la barre anti-rebond (A) vers le siège du véhicule. Assurez-vous d’appliquer
7
autant de pression que possible et vérifiez que le bouton de libération ARB (B) s’enclenche en
position.
Allongez la jambe de force (M) en tirant le bouton de la jambe de force (K) afin de sortir la jambe
de force pour que son pied (N) soit en contact avec le plancher du véhicule. Vérifiez que le bruit
de la sonnerie (O) d’installation de la jambe de force s’arrête indiquant que l’installation a été
8
eectuée correctement. Assurez-vous que le plancher du véhicule est adapté pour soutenir un
siège auto i-Size. Consultez le manuel du véhicule pour plus d’informations.
IMPORTANT:
Assurez-vous que tous les indicateurs d’installation sont verts.
Installation d’Axkid Modukid Infant sur la
base
Pour installer un Axkid Modukid Infant sur la base, tirez la poignée de libération du siège
(E) sur sa position sortie (voir F6) et poussez le porte-bébé sur la base. Le porte-bébé doit
9
s’encliqueter dans la base.
Vérifiez que le siège Axkid Modukid Infant n’est pas en contact avec un siège adjacent du
véhicule, que la jambe de force est fermement fixée au sol et que la sonnerie d’installation de la
10
jambe de force (O) a cessé de retentir.
Axkid a équipé le siège auto pour enfant Axkid Modukid d’un système de protection contre les
chocs latéraux, ASIP (Axkid Side Impact Protection). Poussez le bouton de libération et tirez
11
le système ASIP vers la porte de la voiture jusqu’à ce qu’il s e verrouille dans la position la plus
extérieure acceptée par votre voiture.
IMPORTANT:
Consultez le manuel de votre Axkid Modukid Infant pour obtenir des instructions complètes sur la
façon d’installer le produit et la manière d’attacher votre enfant dans le siège.
35

Installation du siège Axkid Modukid Seat
sur la base
Pour installer un siège Axkid Modukid Seat sur la base, tirez la poignée de libération du siège
(E) sur sa position sortie (voir F6) et poussez le siège sur la base. La plaque de fixation du siège
12
doit être s’encliqueter dans la base.
Vérifiez que le siège Axkid Modukid Seat n’est pas en contact avec un siège adjacent du
véhicule, que la jambe de force est fermement fixée au sol et que la sonnerie d’installation de la
13
jambe de force (O) a cessé de retentir.
Axkid a équipé le siège Axkid Modukid Seat d’un système de protection contre les chocs
latéraux, ASIP (Axkid Side Impact Protection). Pour installer le système ASIP, repérez le
connecteur du coussin d’impact latéral sur le siège enfant le plus près du côté du véhicule
(c’est-à-dire le plus près de la porte). Vérifiez que les deux flèches triangulaires sur le coussin
d’impact latéral pointent dans la même direction que la flèche triangulaire sur le connecteur du
coussin d’impact latéral. Placez la partie supérieure des deux ouvertures ovales sur le dessous
14
du coussin d’impact latéral sur le connecteur du coussin d’impact latéral. Poussez le coussin
d’impact latéral vers le côté du siège de la voiture et faites glisser le coussin d’impact latéral vers
le haut dans le connecteur du coussin d’impact latéral. Vous entendrez un léger clic lorsque le
coussin d’impact latéral se verrouille en place. Pour retirer : poussez le coussin d’impact latéral
vers le bas et retirez-le.
IMPORTANT:
Consultez le manuel de votre Axkid Modukid Seat pour obtenir des instructions complètes sur la
façon d’installer le produit et la manière d’attacher votre enfant dans le siège.
36

Soins et entretien
La housse la barre anti-rebond peut être retirée et lavée en machine à laver à 30 ºC sur le
programme « Lavage délicat ». Ne séchez pas la housse dans un séchoir car elle risque d’être
endommagée et le rembourrage de se détacher du tissu.
Toutes les pièces en plastique de la base Axkid Modukid Base peuvent être nettoyées avec
un détergent doux et de l’eau. N’utilisez pas de produits chimiques agressifs contenant des
solvants, etc., car ils peuvent endommager le plastique et compromettre la sécurité du siège
auto pour enfant.
Tous les matériaux utilisés dans Axkid Modukid Base sont recyclables et doivent être recyclés
selon votre législation locale. Demandez conseil à votre centre de recyclage local pour le
recyclage de ce produit.
N’eectuez aucune modification ou altération du siège auto pour enfant Axkid Modukid,
autres que celles décrites dans ce manuel d’instructions. Suivez attentivement les instructions
de ce manuel. Toute réparation doit être eectuée par le fabricant ou l’agent.
Si la housse du siège a besoin d’être remplacée, assurez-vous que seuls des produits
originaux Axkid sont utilisés. Si d’autres produits sont utilisés, le système de sécurité d’Axkid
Modukid peut être compromis et entraîner des blessures graves en cas d’accident.
Garantie
Le Axkid Modukid Base est couvert par une garantie de 24 mois à compter de la date d’achat.
Conservez votre reçu et apportez-le à votre lieu d’achat pour toute question ou réclamation relative à
la garantie.
La garantie ne couvre pas:
Usure normale
Dommages dus à une mauvaise utilisation, une négligence ou un accident
Des réparations eectuées par une tierce partie
Tous les matériaux utilisés ont une très haute résistance aux UV. Cependant, la lumière UV
est très agressive et va conduire finalement à une décoloration de la housse du siège. Cette
décoloration n’est pas couverte par notre garantie car elle est considérée comme une usure
normale.
37

Axkid Modukid Base
Base per sistema modulare per seggiolini auto
Istruzioni per l’uso
Informazioni importanti
Leggere le presenti istruzioni per l’uso prima di installare il seggiolino auto per bambini
Axkid Modukid nel veicolo. Maggiori informazioni e i video per l’installazione sono
disponibili al sito www.axkid.com.
Grazie per aver scelto un prodotto Axkid. Il nostro team vanta oltre 30 anni di esperienza nel campo della
sicurezza dei bambini e ha profuso ogni impegno per rendere il seggiolino auto Axkid Modukid il più sicuro
possibile. Il seggiolino auto per bambini Axkid Modukid è omologato ai sensi del Regolamento n. 129/02
della Commissione economica per l’Europa delle Nazioni Unite (UN/ECE). Per la massima sicurezza del
bambino, è importante ricordare quanto segue:
Leggere attentamente le presenti istruzioni per l’uso prima di installare la Axkid Modukid Base il
seggiolino auto Axkid Modukid. Per qualsiasi dubbio rivolgersi al rivenditore, che può mostrare la
procedura di installazione corretta. L’installazione errata potrebbe mettere a repentaglio la sicurezza
del bambino.
Non utilizzare il seggiolino auto in un sedile con airbag attivo. Se si desidera installare comunque il
seggiolino auto Axkid Modukid in questa posizione, disattivare l’airbag seguendo le istruzioni del
produttore del veicolo.
Secondo una ricerca approfondita, un bambino che viaggia in un seggiolino auto rivolto in avanti
è esposto a un rischio di lesioni personali gravi cinque volte maggiore rispetto a un bambino che
viaggia su un seggiolino orientato all’indietro.
IT
Il seggiolino auto per bambini deve sempre essere sostituito in caso di incidente, anche se di lieve
entità. Potrebbe riportare danni non visibili e compromettere seriamente la sicurezza del bambino.
Per questo motivo, Axkid sconsiglia di acquistare seggiolini auto di seconda mano.
Non lasciare mai il bambino incustodito a bordo.
Fissare sempre bagagli o altri oggetti liberi nel veicolo, in quanto potrebbero ferire i passeggeri in
caso di collisione.
Conservare le presenti istruzioni per l’uso per riferimento futuro.
Installare sempre il seggiolino auto per bambini in modo che nessuna parte rimanga schiacciata da
sedili scorrevoli, portiere ecc.
Il seggiolino auto Axkid Modukid Infant è indicato per i neonati da 0 a circa 6-9 mesi, età in cui
riescono a mantenere la posizione seduta.
Non utilizzare mai il seggiolino auto senza il rivestimento in tessuto.
Questo seggiolino auto deve SEMPRE essere orientato all’indietro.
38

Contents
Parti
Il sistema modulare Axkid Modukid
Funzioni di Axkid Modukid Base
Posizionamento consentito e vietato del seggiolino auto per bambini
Installazione a bordo dell’auto
Installazione di Axkid Modukid Infant sulla base
Installazione di Axkid Modukid Seat sulla base
Cura e manutenzione
Garanzia
Parti
A Barra anti rimbalzo (ARB) I Manopola ISOFIX
B Manopola di sblocco ARB J Indicatore di installazione della gamba di supporto
C Ganci di fissaggio K Manopola della gamba di supporto
D Indicatore di fissaggio del seggiolino L Posizione di parcheggio della gamba di supporto
E Impugnatura di sblocco del seggiolino M Gamba di supporto
F Braccio ISOFIX N Piedino della gamba di supporto
G Indicatore di installazione ISOFIX O Cicalino di installazione della gamba di supporto
H Pulsante di sblocco ISOFIX
39
39
40
40
41-42
42
43
44
44
Il sistema modulare Axkid Modukid
Il sistema modulare Axkid Modukid è costituito da:
• Axkid Modukid Base - Base che si installa facilmente sui veicoli dotati di punti di ancoraggio
ISOFIX.
• Axkid Modukid Infant - Porta bebè per bambini da 40-75 cm fino a 13 kg.
• Axkid Modukid Seat - Seggiolino auto orientato all’indietro per bambini da 61-105 cm fino a 18 kg.
AVVERTENZA: Installare solamente Axkid Modukid Infant o Axkid Modukid Seat su Axkid Modukid
Base. Utilizzando prodotti di altri sistemi modulari su questa base, sussiste il rischio di gravi lesioni
personali in caso di collisione.
39

Funzioni di Axkid Modukid Base
Axkid Modukid Base può essere regolata in modo da aumentare lo spazio per le gambe del bambino
oppure lo spazio per il sedile del conducente o del passeggero. A tal fine, si regolano i bracci ISOFIX e
la barra anti rimbalzo.
I bracci ISOFIX (F) possono essere regolati su diverse lunghezze a seconda delle posizioni di
F1
seduta. Sono disponibili 4 posizioni: P1-P4. I bracci ISOFIX (F) si regolano tirando la manopola
ISOFIX (I)
I bracci ISOFIX (F) si fissano ai punti di ancoraggio ISOFIX nel veicolo. I bracci ISOFIX possono
essere sganciati dai punti di ancoraggio nel veicolo premendo il pulsante di sblocco ISOFIX
F2
(H). L’indicatore di installazione ISOFIX (G) diventa verde quando il braccio ISOFIX è fissato
saldamente al punto di ancoraggio ISOFIX.
La barra anti rimbalzo (A) non è installata sulla base alla consegna, quindi è necessario inserirla
nella base. Non è consentito utilizzare Axkid Modukid Base senza barra anti rimbalzo. La
barra anti rimbalzo può essere regolata a seconda delle posizioni di seduta. Sono disponibili 6
F3
posizioni: P1-P6. La barra anti rimbalzo (A) si sgancia tirando la manopola di sblocco ARB (B).
Verificare che la manopola di sblocco ARB (B) scatti in posizione dopo aver regolato la barra
anti rimbalzo.
La gamba di supporto (M) può essere ripiegata in posizione di parcheggio sotto la base.
Questa posizione della gamba di supporto deve essere utilizzata solamente per il rimessaggio,
mai quando il prodotto è installato nel veicolo. Quando la gamba di supporto è estratta, il
F4
relativo cicalino di installazione (O) inizia a emettere dei bip. I bip si interrompono una volta
completata la corretta installazione.
Se il cicalino di installazione (O) non emette alcun suono quando si estrae la gamba di
supporto, controllare la batteria. La batteria si controlla svitando le due viti sotto il piede (N)
F5
della gamba di supporto e rimuovendo il coperchio. A questo punto è possibile accedere alla
batteria. La batteria può essere sostituita solamente con una batteria CR1632.
Tirando l’impugnatura di sblocco del seggiolino (E), i ganci di fissaggio (C) si aprono
F6
consentendo di fissare o staccare Axkid Modukid Infant o Axkid Modukid Seat.
I ganci di fissaggio (C) ancorano Axkid Modukid Infant o Axkid Modukid Seat alla base.
F7
AVVERTENZA: Non utilizzare mai Axkid Modukid Base senza installare la barra anti rimbalzo.
40

Posizionamento consentito e vietato del
seggiolino auto per bambini
È possibile installare Axkid Modukid Base su qualsiasi sedile passeggero rivolto in avanti dotato di
punti di ancoraggio ISOFIX.
IMPORTANTE : Se si desidera installare il seggiolino auto Axkid Modukid su un sedile con airbag, l’airbag
deve essere scollegato da un centro di assistenza autorizzato. Alcuni veicoli presentano un interruttore che
permette di disattivare manualmente l’airbag. È importante verificare sempre se la spia nel veicolo indica che
l’airbag è disattivato.
AVVERTENZA: Non utilizzare mai su un sedile con airbag attivo
AVVERTENZA: Non utilizzare mai su sedili orientati all’indietro o lateralmente
AVVERTENZA: Gli airbag sono progettati per gli adulti e possono ferire gravemente il bambino in
caso di incidente.
Posizionamento consentito e vietato del seggiolino auto per bambini.
1
Sedile passeggero anteriore (senza airbag attivo) Sì
Sedile passeggero anteriore (con airbag attivo) NO
Sedile rivolto in avanti con punti di ancoraggio ISOFIX Sì
Sedile senza punti di ancoraggio ISOFIX NO
Sedili orientati lateralmente NO
Sedili orientati all’indietro NO
Questa base deve sempre essere montata orientata all’indietro.
2
Non installare mai un bambino su un sedile del
passeggero in cui è installato un airbag attivo.
Installazione a bordo dell’auto
Fissare e regolare la barra anti rimbalzo (A) nella posizione più interna possibile. Estrarre
la gamba di supporto (M). Quando la gamba di supporto è estratta, il relativo cicalino di
3
installazione (O) inizia a emettere dei bip. I bip si interrompono una volta completata la corretta
installazione.
Estendere i bracci ISOFIX (F) in posizione corretta (P1-P4).
4
41

Fissare i bracci ISOFIX (F) ai punti di ancoraggio ISOFIX del veicolo nel sedile corretto, per le
5
posizioni adatte vedere (1). Quando i bracci ISOFIX si bloccano in posizione si sente un “clic”.
Verificare che l’indicatore di installazione ISOFIX (G) sia verde.
6
Tirare la manopola di sblocco ARB (B) e spingere la barra anti rimbalzo (A) verso il sedile del
veicolo per estenderla. Accertarsi di spingere a fondo e che la manopola di sblocco ARB (B)
7
scatti in posizione.
Estendere la gamba di supporto (M) tirando la relativa manopola (K) in modo che il piede (N)
della gamba di supporto sia a contatto con il pavimento del veicolo. Verificare che il suono
8
del cicalino di installazione (O) della gamba supporto si interrompa. In tal caso, l’installazione
è stata eseguita correttamente. Verificare che il pavimento del veicolo sia compatibile con i
seggiolini auto i-Size. Per informazioni, consultare il manuale del veicolo.
IMPORTANTE:
Verificare che l’indicatore di installazione sia verde.
Installazione di Axkid Modukid Infant sulla
base
Per installare Axkid Modukid Infant sulla base, tirare l’impugnatura di sblocco del seggiolino (E)
in posizione estesa (vedere F6) e spingere il porta bebè sulla base. Il porta bebè deve fissarsi
9
alla base con un “clic”.
Verificare che Axkid Modukid Infant non entri in contatto con i sedili adiacenti del veicolo, la
gamba di supporto sia fissata saldamente al pavimento e il cicalino di installazione (O) della
10
gamba di supporto non emetta più alcun suono.
Il seggiolino auto Axkid Modukid è dotato di un sistema di protezione dagli impatti laterali, ASIP
(Axkid Side Impact Protection). Premere il pulsante di sblocco e tirare il sistema ASIP verso la
11
portiera dell’auto finché non si blocca nella posizione più esterna possibile.
IMPORTANTE:
Per le istruzioni complete per l’installazione del prodotto e su come allacciare il bambino sul
seggiolino, consultare il manuale di Axkid Modukid Infant.
42

Installazione di Axkid Modukid Seat sulla
base
Per installare Axkid Modukid Seat sulla base, tirare l’impugnatura di sblocco del seggiolino (E)
in posizione estesa (vedere F6) e spingere il seggiolino sulla base. La piastra di fissaggio del
12
seggiolino deve fissarsi alla base con un “clic”.
Verificare che Axkid Modukid Seat non entri in contatto con i sedili adiacenti del veicolo, la
gamba di supporto sia fissata saldamente al pavimento e il cicalino di installazione (O) della
13
gamba di supporto non emetta più alcun suono.
Axkid Modukid Seat è dotato di un sistema di protezione dagli impatti laterali, ASIP (Axkid Side
Impact Protection). Per installare il sistema ASIP, individuare il connettore della protezione
antiurto laterale sul seggiolino per bambini più vicino al lato del veicolo (cioè alla portiera).
Verificare che le due frecce triangolari sulla protezione antiurto laterale siano rivolte nella stessa
direzione della freccia triangolare sul connettore della protezione. Posizionare l’apertura ovale
14
superiore sul lato inferiore della protezione antiurto laterale sul connettore della protezione.
Spingere la protezione antiurto laterale contro il lato del seggiolino auto e far scorrere la
protezione verso l’alto sul relativo connettore. Quando la protezione antiurto laterale si blocca in
posizione, si sente un leggero “clic”. Smontaggio: spingere la protezione antiurto laterale verso il
basso e rimuoverla.
IMPORTANTE:
Per le istruzioni complete per l’installazione del prodotto e su come allacciare il bambino sul
seggiolino, consultare il manuale di Axkid Modukid Seat.
43

Cura e manutenzione
Il rivestimento della barra anti rimbalzo può essere rimosso e lavato in lavatrice a 30ºC con
un programma “delic ato”. Non asciugare il rivestimento in asciugatrice, in quanto potrebbe
danneggiarsi e l’imbottitura potrebbe staccarsi dal tessuto.
Tutte le parti in plastica di Axkid Modukid Base possono essere pulite con detergente neutro
e acqua. Non utilizzare sostanze chimiche aggressive contenenti solventi ecc. in quanto
potrebbero danneggiare la plastica e ridurre la sicurezza del seggiolino auto per bambini.
Tutti i materiali utilizzati in Axkid Modukid Base sono riciclabili e devono essere riciclati nel
rispetto delle leggi locali. Per informazioni sul riciclaggio del prodotto, rivolgersi al centro di
riciclaggio locale.
Non modificare né alterare il seggiolino auto per bambini Axkid Modukid adottando procedure
diverse da quelle descritte nelle presenti istruzioni per l’uso. Attenersi scrupolosamente alle
presenti istruzioni. Eventuali riparazioni devono essere eettuate dal produttore o dall’agente.
Se è necessario sostituire il rivestimento del seggiolino, utilizzare esclusivamente prodotti
originali Axkid. L’utilizzo di altri prodotti potrebbe compromettere il sistema di sicurezza di
Axkid Modukid, causando gravi lesioni personali in caso di incidente.
Garanzia
Axkid Modukid Base è coperto da una garanzia di 24 mesi a partire dalla data di acquisto.
Conservare sempre la ricevuta e consegnarla al punto di acquisto in caso di problemi in garanzia.
La garanzia non copre:
Normale usura
Danni dovuti a uso improprio, negligenza o incidente
Riparazioni eettuate da terzi
Tutti i materiali utilizzati presentano un’altissima resistenza ai raggi UV. Tuttavia, i raggi UV
sono estremamente aggressivi e comportano il graduale scolorimento del rivestimento del
seggiolino. Tale scolorimento non è coperto da garanzia, in quanto è considerato normale
usura.
44

NO
Axkid Modukid Base
Base til modulsystem for bilstol
Bruksanvisning
Viktig informasjon
Les denne bruksanvisningen før du monterer bilstolen Axkid Modukid i kjøretøyet. Du finner
mer informasjon og monteringsvideoer på www.axkid.com.
Takk for at du valgte et produkt fra Axkid. Vi har mer enn 30 års erfaring med sikkerhet for barn, og vi har
gjort vårt ytterste for å gjøre bilstolen Axkid Modukid så trygg som mulig. Bilstolen Axkid Modukid er
godkjent i henhold til FN-forskriften 129/02. For at barnet skal være maksimalt beskyttet er det viktig å
huske følgende:
Les denne bruksanvisningen før du monterer Axkid Modukid Base og Axkid Modukid-bilstolen.
Hvis du er i tvil, kan du kontakte forhandleren for å få en demonstrasjon av riktig montering. Feil
montering kan være farlig for barnet.
Ikke bruk bilstolen i et sete som har en aktiv kollisjonspute. Hvis du likevel ønsker å montere Axkid
Modukid i dette setet, må kollisjonsputen deaktiveres i henhold til bilprodusentens anvisninger.
Omfattende forskning har vist at risikoen for alvorlige skader eller dødsfall er fem ganger større for et
lite barn som sitter i en forovervendt bilstol enn i en bakovervendt bilstol.
Hvis du blir utsatt for en ulykke, må bilstolen alltid skiftes ut uansett hvor alvorlig ulykken er. Den kan
ha fått skader som ikke kan oppdages og som kan sette barnets sikkerhet i fare. Derfor anbefaler
ikke Axkid at du kjøper brukt bilstol.
Ikke la barnet sitte uten tilsyn i bilen.
Sørg for at all bagasje og alle løse gjenstander er sikret i kjøretøyet, ettersom de kan skade
passasjerer i en eventuell kollisjon.
Ta vare på denne bruksanvisningen for fremtidig bruk.
Sørg for å montere bilstolen slik at ingen deler kan sette seg fast i regulerbare seter, bildører og
lignende.
Bilstolen Axkid Modukid Infant egner seg fra barnet er nyfødt til det kan sitte stabilt, altså når barnet
er rundt seks til ni måneder gammelt.
Bilstolen skal aldri brukes uten stotrekket.
Denne bilstolen skal BARE monteres bakovervendt.
45

Innhold
Deler
Modulsystemet Axkid Modukid
Axkid Modukid Base – funksjoner
Tillatt og forbudt plassering av bilstolen
Montering i bilen
Montere Axkid Modukid Infant på basen
Montere Axkid Modukid Seat på basen
Vedlikehold
Garanti
Deler
46
46
47
47
48-49
49
50
51
51
A Anti Rebound Bar (ARB), anti-til-
bakeslagsstang
B ARB-frigjøringsknapp J Monteringssummer for støttebein
C Festekroker K Knapp til støttebein
D Indikator for setefeste L Parkeringsstilling støttebein
E Setefrigjøringshåndtak M Støttebein
F ISOFIX-arm N Støttebein nedre del
G ISOFIX-monteringsindikator O Monteringssummer for støttebein
H ISOFIX-frigjøringsknapp
I ISOFIX-knapp
Modulsystemet Axkid Modukid
Modulsystemet Axkid Modukid består av:
• Axkid Modukid Base – Base for enkel montering i kjøretøy med ISOFIX-koblingspunkter.
• Axkid Modukid Infant – Babystol til barn fra 40-75 cm og opptil 13 kg.
• Axkid Modukid Seat – Bakovervendt bilstol for barn fra 61-105 cm og opptil 18 kg.
ADVARSEL: Bare Axkid Modukid Infant eller Axkid Modukid Seat kan monteres på Axkid Modukid
Base (basen). Forsøk på å bruke produkter fra andre modulsystemer på denne basen kan medføre
alvorlige skader i en eventuell kollisjon.
46

Axkid Modukid Base – funksjoner
Axkid Modukid Base kan justeres for å gi mer beinplass til barnet eller mer plass til fører- eller
passasjersetet i kjøretøyet. Det gjør du ved å justere ISOFIX-armene og anti-tilbakeslagsstangen
(ARB).
Lengden på ISOFIX-armene (F) kan justeres for å passe til ulike setestillinger. Det er 4 stillinger
F1
å velge mellom, P1-P4. ISOFIX-armene (F) justeres ved å trekke ISOFIX-knappen (I) ut
ISOFIX-armene (F) låser fast ISOFIX-koblingspunktene i kjøretøyet. ISOFIX-armene kan
løsnes fra kjøretøyets tilkoblingspunkter ved å trykke på ISOFIX-frigjøringsknappen (H).
F2
ISOFIX-monteringsindikatoren (G) blir grønn når ISOFIX-armen er forsvarlig koblet til ISOFIXkoblingspunktet.
Anti-tilbakeslagsstangen (A) er ikke montert på basen ved levering, så den må stikkes
inn i basen. Axkid Modukid Base må ikke brukes uten anti-tilbakeslagsstangen. Antitilbakeslagsstangen kan justeres i ulike stillinger for å passe til ulike setestillinger. Det er 6
F3
stillinger å velge mellom, P1-P6. Anti-tilbakeslagsstangen (A) frigjøres ved å trykke på ARBfrigjøringsknappen (B). Kontroller at ARB-frigjøringsknappen (B) smetter på plass med et klikk
etter justering av anti-tilbakeslagsstangen.
Støttebeinet (M) kan slås sammen i parkeringsstilling under basen. Denne stillingen på
støttebeinet skal bare brukes under oppbevaring og aldri når stolen er montert i kjøretøyet.
F4
Når støttebeinet slås ut, begynner støttebeinets monteringssummer (O) å pipe. Pipelyden
opphører når støttebeinet er korrekt montert.
Hvis støttebeinets monteringssummer (O) ikke avgir lyd når støttebeinet slås ut, må du
kontrollere batteriet. Batteriet kontrolleres ved å løsne de to skruene under foten til støttebeinet
F5
(N) og fjerne dekselet. Batteriet er da tilgjengelig. Merk at batteriet bare må skiftes ut med et
batteri i størrelse CR1632.
Når du trekker i setefrigjøringshåndtaket (E), åpner festekrokene (C) slik at du kan feste eller
F6
løsne Axkid Modukid Infant eller Axkid Modukid Seat.
Festekrokene (C) låser Axkid Modukid Infant eller Axkid Modukid Seat fast til basen.
F7
ADVARSEL: Bruk aldri Axkid Modukid Base uten at anti-tilbakeslagsstangen er montert.
47

Tillatt og forbudt plassering av bilstolen
Axkid Modukid Base kan monteres på alle forovervendte passasjerseter som har ISOFIXkoblingspunkter
VIKTIG: Hvis du vil montere bilstolen Axkid Modulkid på et sted med kollisjonspute, må kollisjonsputen
deaktiveres ved et autorisert verksted. Noen biler har en bryter som gjør at du kan deaktivere kollisjonsputen
manuelt. Det er viktig å kontrollere at indikatorlampen i kjøretøyet viser at kollisjonsputen er deaktivert.
ADVARSEL: Må aldri brukes på et sete som har en aktiv kollisjonspute
ADVARSEL: Må aldri brukes på bakovervendte eller sidevendte bilseter
ADVARSEL: Kollisjonsputer er beregnet for voksne og kan påføre barnet alvorlige skader i en
eventuell krasj
Tillatt og forbudt plassering av bilstolen.
1
Passasjersete foran (uten aktiv kollisjonspute) Ja
Passasjersete foran (med aktiv kollisjonspute) NEI
Forovervendt sete med ISOFIX-koblingspunkter Ja
Sete uten ISOFIX-koblingspunkter NEI
Sidevendt sete NEI
Bakovervendt sete NEI
Denne basen kan bare monteres bakovervendt.
2
Sett aldri barn i et passasjersete der en aktiv airbag
er montert.
Montering i bilen
Fest og juster anti-tilbakeslagsstangen (A) i innerste stilling. Slå ut støttebeinet (M). Når
støttebeinet slås ut, begynner støttebeinets monteringssummer (O) å pipe. Pipelyden
3
opphører når støttebeinet er korrekt montert.
4
Trekk ISOFIX-armene (F) ut til en passende stilling; P1-P4.
48

Fest ISOFIX-armene (F) til kjøretøyets ISOFIX-koblingspunkter i riktig setestilling i henhold til
5
punkt 1. Du vil høre et klikk når ISOFIX-armene er låst i stilling.
Kontroller at ISOFIX-monteringsindikatoren (G) viser grønt.
6
Trekk ut anti-tilbakeslagsstangen (A) mot kjøretøyets sete ved å trekke ARBfrigjøringsknappen (B) ut og trykke stangen (A) mot kjøretøyets sete. Sørg for å trykke så hardt
7
som mulig og kontroller at ARB-frigjøringsknappen (B) smetter på plass med et klikk.
Trekk ut støttebeinet (M) ved å trekke i støttebeinskappen (K) for å trekke ut støttebeinet
så foten (N) til støttebeinet er i kontakt med gulvet i kjøretøyet. Kontroller at pipelyden fra
8
støttebeinets monteringssummer (O) opphører; da vet du at monteringen er korrekt utført.
Kontroller at gulvet i kjøretøyet egner seg for å bære en bilstol av i-størrelse. Du finner
opplysninger i kjøretøyets instruksjonsbok.
VIKTIG:
Kontroller at alle monteringsindikatorer viser grønt.
Montere Axkid Modukid Infant på basen
For å montere Axkid Modukid Infant på basen trekker du setefrigjøringshåndtaket (E) helt ut
9
(se F6) og trykker babystolen ned på basen. Babystolen skal klikke på plass i basen.
Sørg for at Axkid Modukid Infant ikke er i kontakt med andre seter i kjøretøyet, at støttebeinet er
10
forsvarlig festet i gulvet og at støttebeinets monteringssummer (O) har sluttet å summe.
Axkid har utstyrt bilstolen Axkid Modukid Infant med en sidekollisjonsbeskyttelse, ASIP (Axkid
11
Side Impact Protection). Trykk på frigjøringsknappen og trekk ASIP mot bildøren til den låses i
den ytterste stillingen som passer til bilen.
VIKTIG:
Se bruksanvisningen til Axkid Modukid Infant for fullstendige instruksjoner om hvordan du monterer
produktet og hvordan du spenner barnet fast i stolen.
49

Montere Axkid Modukid Seat på basen
For å montere Axkid Modukid Seat på basen trekker du setefrigjøringshåndtaket (E) helt ut (se
12
F6) og trykker stolen ned på basen. Setets festeplate skal klikke på plass i basen.
Sørg for at Axkid Modukid Seat ikke er i kontakt med andre seter i kjøretøyet, at støttebeinet er
13
forsvarlig festet i gulvet og at støttebeinets monteringssummer (O) har sluttet å summe.
Axkid har utstyrt Axkid Modukid Seat med en sidekollisjonsbeskyttelse, ASIP (Axkid
Side Impact Protection). For å montere ASIP finner du festet til sidekollisjonsbeskyttelsen
på den siden av bilstolen som er nærmest bildøren. Sørg for at de to trekantede pilene
på sidekollisjonsbeskyttelsen peker i samme retning som den trekantede pilen på
14
sidekollisjonsbeskyttelsens feste. Plasser den øverste av de to ovale åpningene nederst på
sidekollisjonsbeskyttelsen over festet. Trykk sidekollisjonsbeskyttelsen mot bilstolen og før
den oppover på festet. Du hører et lite klikk når sidekollisjonsbeskyttelsen er låst på plass. For å
fjerne: Trykk sidekollisjonsbeskyttelsen nedover og løft den av.
VIKTIG:
Se bruksanvisningen til Axkid Modukid Seat for fullstendige instruksjoner om hvordan du monterer
produktet og hvordan du spenner barnet fast i stolen.
50

Vedlikehold
Trekket til anti-tilbakeslagsstangen kan tas av og vaskes i maskin på 30 ºC. Bruk et skånsomt
program. Trekket må ikke tørkes i tørketrommel. Det kan skade trekket og gjøre at polstringen
løsner fra stoet.
Alle plastdelene til Axkid Modukid Base kan rengjøres med mild såpe og vann. Ikke bruk
kraftige kjemikalier som inneholder løsemidler eller lignende, da det kan skade plasten og
gjøre bilstolen mindre sikker.
Alle materialer som er brukt i Axkid Modukid Base, kan resirkuleres og bør leveres til
miljøstasjon. Kontakt nærmeste miljøstasjon for å få råd om resirkulering av produktet.
Du må ikke foreta andre endringer på eller modifikasjoner av bilstolen Axkid Modukid enn
dem som er beskrevet her. Følg instruksjonene i denne bruksanvisningen nøye. Eventuelle
reparasjoner skal utføres av produsenten eller forhandleren.
Hvis setetrekket må byttes, må du bare bruke originale produkter fra Axkid. Bruk av andre
produkter kan skade sikkerhetssystemet til Axkid Modukid og forårsake alvorlige skader i en
eventuell ulykke.
Garanti
Axkid Modukid Base har 2 års garanti fra kjøpsdatoen. Ta vare på kvitteringen, og ta den med til
forhandleren ved en eventuell reklamasjon.
Garantien dekker ikke:
Normal slitasje
Skader som skyldes feil bruk, forsømmelser eller ulykker
Reparasjoner som er utført av tredjepart
Alle materialer som er brukt, er meget UV-bestandige. Men UV-lys er svært aggressivt, og vil
til slutt føre til at setetrekket falmer. Dette dekkes ikke av garantien, ettersom det regnes som
normal slitasje.
51

PL
Axkid Modukid Base
Podstawa dla fotelika samochodowego dla dziecka - system modułowy
Instrukcja obsługi
Ważne informacje
Przed zainstalowaniem fotelika samochodowego Axkid Modukid w samochodzie należy
przeczytać niniejszą instrukcję obsługi. Aby uzyskać więcej informacji i zapoznać się z
materiałem filmowym dotyczącym instalacji, odwiedź stronę www.axkid.com.
Dziękujemy za wybranie produktu Axkid. Nasz zespół ma ponad 30-letnie doświadczenie w zakresie
bezpieczeństwa dzieci i zrobiliśmy wszystko, aby fotelik samochodowy Axkid Modukid był jak
najbezpieczniejszy. Fotelik samochodowy Axkid Modukid został zatwierdzony zgodnie z rozporządzeniem
ONZ nr 129/02. Aby zmaksymalizować bezpieczeństwo dziecka, ważne jest, aby pamiętać o
następujących sprawach:
Przed zainstalowaniem podstawy Axkid Modukid Base i fotelika samochodowego Axkid
Modukid Seat w samochodzie należy uważnie przeczytać niniejszą instrukcję obsługi. W razie
wątpliwości należy skontaktować się ze sprzedawcą, który może pokazać prawidłową instalację.
Nieprawidłowa instalacja może zagrozić dziecku
Nie należy używać fotelika samochodowego w miejscu pasażera, w którym zamontowana jest
aktywna poduszka powietrzna. Jeśli nadal chcesz zainstalować fotelik samochodowy Axkid
Modukid w tym miejscu, należy wyłączyć poduszkę powietrzną zgodnie z instrukcją producenta
pojazdu.
Rozległe badania wykazały, że ryzyko poważnych obrażeń jest pięć razy większe dla dziecka
podczas podróży w foteliku skierowanym do przodu w porównaniu z fotelikiem skierowanym do
tyłu.
W razie wypadku, nawet niegroźnej kolizji, fotelik samochodowy należy zawsze wymienić. Może
bowiem wystąpić uszkodzenie, które jest niewykrywalne, a które może poważnie zagrażać
bezpieczeństwu dziecka. Z tego powodu Axkid nie zaleca kupowania używanych fotelików
samochodowych.
Nigdy nie zostawiaj dziecka bez opieki w samochodzie.
Upewnij się, że bagaż lub luźne przedmioty są zabezpieczone w pojeździe, ponieważ mogą
spowodować obrażenia pasażerów w przypadku kolizji.
Należy zachować niniejszą instrukcję do późniejszego wykorzystania.
Upewnić się, że fotelik samochodowy jest zamontowany w taki sposób, by żadne części nie zostały
zablokowane przez ruchome siedzenia, drzwi samochodu itp.
Fotelik samochodowy Axkid Modukid Infant nadaje się do użytku od noworodka do momentu,
kiedy dziecko może siedzieć stabilnie: w przybliżeniu szóstego-dziewiątego miesiąca życia.
Nigdy nie używaj fotelika samochodowego bez pokrowca tekstylnego.
Fotelik samochodowy może być montowany TYLKO tyłem do kierunku jazdy.
52

Zawartość
Części
System modułowy Axkid Modukid
Funkcje Axkid Modukid Base
Dozwolone i niedozwolone umieszczenie fotelika samochodowego dla
dziecka
Instalacja w samochodzie
Instalacja fotelika Axkid Modukid Infant na podstawie
Instalacja fotelika Axkid Modukid Seat na podstawie
Pielęgnacja i konserwacja
Gwarancja
Części
A Pasek stabilizatora (ARB) I Pokrętło ISOFIX
B Pokrętło zwalniające ARB J Wskaźnik instalacji wspornika
C Haki mocujące K Pokrętło wspornika
D Wskaźnik zamocowania siedziska L Pozycja parkingowa wspornika
E Uchwyt zwalniający siedzisko M Noga wspierająca
F Ramię ISOFIX N Podstawa wspornika
G Wskaźnik instalacji ISOFIX O Sygnał dźwiękowy instalacji wspornika
H Przycisk zwalniający ISOFIX
53
53
54
54
55-56
56
57
58
58
System modułowy Axkid Modukid
System modułowy Axkid Modukid składa się z następujących elementów:
• Axkid Modukid Base – podstawa do łatwego montażu w pojazdach z punktami
przyłączeniowymi ISOFIX.
• Axkid Modukid Infant – fotelik dla niemowląt przeznaczony dla dzieci od 40 do 75 cm i do 13 kg.
• Axkid Modukid Seat – mocowany tyłem do kierunku jazdy fotelik samochodowy dla dzieci od
61 do 105 cm i do 18 kg.
OSTRZEŻENIE: Foteliki Axkid Modukid Infant i Axkid Modukid Seat należy instalować tylko na
podstawie Axkid Modukid Base. Próba użycia produktów z innych systemów modułowych na tej
podstawie może spowodować poważne obrażenia w przypadku kolizji.
53

Funkcje Axkid Modukid Base
Axkid Modukid Base można regulować, aby zapewnić więcej miejsca na nogi dla dziecka lub
zapewnić więcej miejsca na fotelu kierowcy lub pasażera w samochodzie. Odbywa się to poprzez
regulację ramion ISOFIX oraz paska stabilizatora.
Długość ramion ISOFIX (F) można regulować w celu dostosowania do różnych miejsc
siedzących. Istnieją 4 pozycje, P1-P4. Ramiona ISOFIX (F) reguluje się poprzez wyciągnięcie
F1
pokrętła ISOFIX (I)
Ramiona ISOFIX (F) zatrzaskują się w punktach mocowania ISOFIX w pojeździe. Ramiona
ISOFIX można zwolnić z punktów mocowania w pojeździe, wciskając przycisk zwalniający
F2
ISOFIX (H). Wskaźnik instalacji ISOFIX (G) zmienia kolor na zielony, gdy nastąpi bezpieczne
połączenie między ramieniem ISOFIX a punktem mocowania ISOFIX.
Pasek stabilizatora (A) nie jest zamontowany fabrycznie w podstawie, należy go więc
wsunąć w podstawę. Podstawa Axkid Modukid Base nie może być używana bez paska
stabilizatora. Pasek stabilizatora można ustawić w różnych pozycjach w celu dostosowania do
F3
różnych miejsc siedzących. Istnieje 6 pozycji, P1-P6. Pasek stabilizatora (A) zwalnia się przez
pociągnięcie pokrętła zwalniającego ARB (B). Upewnij się, że pokrętło zwalniające ARB (B)
zatrzaskuje się we właściwej pozycji po dopasowaniu paska stabilizatora.
Wspornik (M) można złożyć w pozycji zaparkowanej pod podstawą. Ta pozycja wspornika
powinna być używana tylko podczas przechowywania, nigdy po zamontowaniu w pojeździe.
F4
Po rozłożeniu wspornika odzywa się sygnał dźwiękowy instalacji wspornika (O). Sygnał
dźwiękowy wyłącza się po prawidłowym zakończeniu instalacji.
W przypadku, gdy po rozłożeniu wspornika nie odzywa się sygnał dźwiękowy instalacji
wspornika (O), należy sprawdzić baterię. W celu sprawdzenia baterii należy odkręcić dwie
F5
śruby pod podstawą wspornika (N) i zdjąć pokrywę. Bateria jest wtedy dostępna. Należy
pamiętać, że bateria może być wymieniana tylko na nową baterię typu CR1632.
Po pociągnięciu dźwigni zwalniającej fotelik (E) następuje otwarcie zaczepów mocujących
(C) i możliwe jest zamontowanie lub wymontowanie fotelika Axkid Modukid Infant, bądź Axkid
F6
Modukid Seat.
Zaczepy mocujące (C) ryglują fotelik Axkid Modukid Infant lub Axkid Modukid Seat w
F7
podstawie.
OSTRZEŻENIE: Nigdy nie należy używać podstawy Axkid Modukid Base bez zainstalowania paska
stabilizatora.
54

Dozwolone i niedozwolone umieszczenie
fotelika samochodowego dla dziecka
Podstawa Axkid Modukid Base może być zamontowana na każdym skierowanym do przodu
siedzeniu pasażera, który ma punkty mocowania ISOFIX.
WAŻNE: Jeśli chcesz zainstalować fotelik samochodowy Axkid Modukid w miejscu, w którym
zamontowana jest poduszka powietrzna, poduszka powietrzna musi być odłączona w autoryzowanym
serwisie. Niektóre pojazdy mogą być wyposażone w wyłącznik, który umożliwia ręczne wyłączenie poduszki
powietrznej. Ważne jest, aby zawsze sprawdzić, czy lampka kontrolna pojazdu pokazuje, że poduszka
powietrzna jest wyłączona.
OSTRZEŻENIE: Nigdy nie używaj fotelika na siedzeniu z aktywną poduszką powietrzną
OSTRZEŻENIE: Nigdy nie używaj fotelika na siedzeniach pojazdu skierowanych do tyłu lub w bok
OSTRZEŻENIE: Poduszki powietrzne są przeznaczone dla dorosłych i stanowią poważne
zagrożenie dla dziecka w razie wypadku
Dozwolone i niedozwolone umieszczenie fotelika samochodowego dla dziecka.
1
Przedni fotel pasażera (bez aktywnej poduszki powietrznej) Ta k
Przedni fotel pasażera (z aktywną poduszką powietrzną) NIE
Fotel skierowany do przodu z punktami mocowania ISOFIX Ta k
Fotel bez punktów mocowania ISOFIX NIE
Siedzenia skierowane w bok NIE
Siedzenia skierowane do tyłu NIE
Ta podstawa może być zamontowana tylko w stronę przeciwną do kierunku jazdy.
2
Nigdyniemontujfotelikanamiejscu wyposażonymw
aktywną poduszkę powietrzną.
Instalacja w samochodzie
Zamocuj pasek stabilizatora (A) i ustaw w najbardziej wewnętrznej pozycji. Rozłóż wspornik
(M). Po rozłożeniu wspornika odzywa się sygnał dźwiękowy instalacji wspornika (O). Sygnał
3
dźwiękowy wyłącza się po prawidłowym zakończeniu instalacji.
4
Rozłóż ramiona ISOFIX (F) do odpowiedniej pozycji P1-P4.
55

Zamocuj ramiona ISOFIX (F) do punktów mocowania ISOFIX w pojeździe w prawidłowym
położeniu na siedzeniu pojazdu, zgodnie z (1). Po zablokowaniu ramion ISOFIX na swoim
5
miejscu usłyszysz „kliknięcie”.
Upewnij się, że wskaźnik instalacji ISOFIX (G) pokazuje kolor zielony.
6
Wysuń pasek stabilizatora (A) w kierunku siedzenia pojazdu, pociągając za dźwignię
zwalniającą ARB (B) i przesuwając pasek (A) w kierunku siedzenia pojazdu. Upewnij się,
7
że nacisk jest możliwie największy i że pokrętło zwalniające ARB (B) zatrzasnęło się we
właściwym położeniu.
Rozłóż wspornik (M), pociągając za uchwyt (K), aby rozłożyć wspornik w taki sposób, by
podstawa wspornika (N) zetknęła się z podłogą pojazdu. Sprawdź, czy brzęczyk instalacji
8
wspornika (O) przestał emitować sygnał dźwiękowy - jeśli tak, instalacja jest prawidłowa.
Upewnij się, że podłoga pojazdu nadaje się do podparcia fotela w rozmiarze i-Size. Informacje
WAŻNE:
Upewnij się, że wszystkie wskaźniki instalacji pokazują kolor zielony.
Instalacja fotelika Axkid Modukid Infant na
podstawie
Przy instalacji fotelika Axkid Modukid Infant na podstawie należy pociągnąć uchwyt zwolnienia
fotelika (E) do położenia maksymalnie wysuniętego (patrz F6) i wepchnąć fotelik na podstawę.
9
Fotelik dla niemowlęcia powinien kliknąć po zablokowaniu na podstawie.
Upewnij się, że fotelik Axkid Modukid Infant nie dotyka znajdującego się obok fotela w
pojeździe, wspornik jest pewnie zamocowany do podłogi oraz że brzęczyk instalacji wspornika
10
(O) przestał emitować sygnał dźwiękowy.
Firma Axkid wyposażyła fotelik samochodowy Axkid Modukid Infant w boczny system
ochrony przed uderzeniami, ASIP (Axkid Side Impact Protection). Wciśnij przycisk zwalniający
11
i pociągnij ASIP w kierunku drzwi samochodu, aż zablokuje się w najbardziej oddalonej pozycji,
która pasuje do Twojego samochodu.
WAŻNE:
Zapoznaj się z instrukcją obsługi fotelika Axkid Modukid Infant w celu uzyskania kompletnych
wskazówek na temat instalacji fotelika oraz przypinania dziecka w foteliku.
56

Instalacja fotelika Axkid Modukid Seat na
podstawie
Przy instalacji fotelika Axkid Modukid Seat na podstawie należy pociągnąć uchwyt zwolnienia
fotelika (E) do położenia maksymalnie wysuniętego (patrz F6) i wepchnąć fotelik na podstawę.
12
Płytka mocująca fotelika powinna się zablokować w podstawie.
Upewnij się, że fotelik Axkid Modukid Seat nie dotyka znajdującego się obok fotela w pojeździe,
wspornik jest pewnie zamocowany do podłogi oraz że brzęczyk instalacji wspornika (O)
13
przestał emitować sygnał dźwiękowy.
Firma Axkid wyposażyła fotelik Axkid Modukid Seat w boczny system ochrony przed
uderzeniami, ASIP (Axkid Side Impact Protection). Aby zainstalować ASIP, Znajdź boczne
złącze pad Impact na foteliku dziecięcym znajdującym się najbliżej boku pojazdu (tj. najbliżej
drzwi). Upewnij się, że dwie trójkątne strzałki na bocznej poduszce udarowej wskazują ten
sam kierunek, co trójkątna strzałka na przyłączu bocznej poduszki udarowej. Umieść górny
14
z dwóch owalnych otworów na spodniej stronie bocznej poduszki udarowej nad przyłączem
bocznej poduszki udarowej. Wciśnij boczną poduszkę udarową w kierunku boku fotela
pojazdu, a następnie przesuń boczną poduszkę udarową do góry na przyłącze bocznej
poduszki udarowej. W momencie zablokowania bocznej poduszki udarowej na swoim miejscu
słychać lekkie kliknięcie. W celu wyjęcia: wciśnij boczną poduszkę udarową do dołu i wyjmij.
WAŻNE:
Zapoznaj się z instrukcją obsługi fotelika Axkid Modukid Seat w celu uzyskania kompletnych
wskazówek na temat instalacji fotelika oraz przypinania dziecka w foteliku.
57

Pielęgnacja i konserwacja
Osłonę paska stabilizatora można zdjąć i wyprać w pralce w temperaturze 30 ºC w programie
„łagodny cykl”. Nie umieszczać osłony w suszarce, gdyż może to uszkodzić osłonę, a
wyściółka może się oddzielić od tkaniny.
Wszelkie plastikowe części podstawy Axkid Modukid Base można czyścić przy użyciu
łagodnego detergentu i wody. Nie stosować agresywnych chemikaliów zawierających
rozpuszczalniki itp., ponieważ może to spowodować uszkodzenie tworzywa sztucznego i
narazi na szwank bezpieczeństwo gwarantowane przez fotelik samochodowy.
Wszystkie materiały użyte w podstawie Modukid Axkid Base podlegają recyklingowi
i powinny zostać poddane recyklingowi zgodnie z lokalnymi przepisami. Aby uzyskać
informacje dotyczące recyklingu produktu, należy zwrócić się do lokalnego centrum
recyklingu.
Nie wolno wprowadzać żadnych modyfikacji ani zmian w foteliku samochodowym Axkid
Modukid innych niż te opisane w niniejszej instrukcji obsługi. Należy dokładnie przestrzegać
wskazówek zawartych w niniejszej instrukcji. Wszelkie naprawy może przeprowadzać tylko
producent lub autoryzowany przedstawiciel.
Jeśli pokrywa fotelika wymaga wymiany, należy upewnić się, że używane są tylko oryginalne
produkty Axkid. W przypadku użycia innych produktów naruszony może zostać system
bezpieczeństwa Axkid Modukid, co może spowodować poważne obrażenia w razie
wypadku.
Gwarancja
Fotelik samochodowy Axkid Modukid Base jest objęty 24-miesięczną gwarancją od daty zakupu.
Zachowaj dowód zakupu, ponieważ w razie skorzystania z gwarancji należy go okazać w miejscu
zakupu. Gwarancja nie obejmuje:
Gwarancja nie obejmuje:
Normalnego zużycia
Uszkodzeń spowodowanych nieprawidłowym użyciem, zaniedbaniem lub wypadkiem
Jeżeli naprawy zostały przeprowadzone przez stronę trzecią,
Wszystkie użyte materiały mają bardzo wysoki współczynnik odporności na promieniowanie
UV. Jednak promieniowanie UV jest bardzo agresywne i ostatecznie prowadzi do wypłowienia
pokrycia fotelika. Nie jest to objęte gwarancją, ponieważ jest uważane za normalne zużycie.
58

Axkid Modukid Base
Base para o sistema modular de assento automóvel para criança
Manual de instruções
Informação importante
Leia este manual de instruções antes de instalar o assento para crianças Axkid Modukid no
seu veículo. Para mais informação e vídeos de instalação visite www.axkid.com.
Obrigado por escolher um produto da Axkid. A nossa equipa tem mais de 30 anos de experiência
combinada em segurança infantil e fizemos o nosso melhor para tornar o assento automóvel infantil Axkid
Modukid o mais seguro possível. O assento automóvel infantil Axkid Modukid é aprovado de acordo com
o Regulamento n.º 129/02 da ONU. Para maximizar a segurança do seu filho, é importante ter em mente o
seguinte:
Leia atentamente este manual de instruções antes de instalar a Axkid Modukid Base e o Axkid
Modukid Seat. Em caso de dúvida, contacte o revendedor, que pode demonstrar uma instalação
correta. Uma instalação incorreta pode colocar em risco seu filho.
Não use um assento infantil numa posição onde esteja instalado um airbag ativo. Se ainda deseja
instalar o assento automóvel Axkid Modukid neste local, o airbag deve ser desligado de acordo
com as instruções do fabricante do veículo.
Uma extensa pesquisa mostrou que o risco de lesões graves é cinco vezes maior para uma criança
pequena quando viaja num assento automóvel voltado para a frente em comparação com um
assento de carro voltado para trás.
PT
Se tiver um acidente, não importa quão pequeno, o seu assento de carro infantil deve sempre ser
substituído. Pode ter danos indetectáveis e comprometer seriamente a segurança do seu filho. Por
esta razão, a Axkid não recomenda a compra de assentos automóvel em segunda mão.
Nunca deixe seu filho sozinho no carro.
Assegure-se de que qualquer bagagem ou objetos soltos estejam presos no veículo, pois podem
causar ferimentos aos passageiros em caso de colisão.
Guarde este manual de instruções para referência futura.
Assegure-se de que o assento infantil esteja instalado de maneira a que nenhuma parte fique presa
por assentos móveis, portas de carros, etc.
O Axkid Modukid SInfant é adequado para utilização desde recém-nascidos até quando a criança
pode sentar-se regularmente, aproximadamente dos seis aos nove meses de idade.
Nunca utilize o assento infantil sem a capa de tecido.
Este assento automóvel só pode ser instalado virado para trás.
59

Conteúdo
Peças
O sistema do módulo Axkid Modukid
Funções Axkid Modukid Base
Posicionamento permitido e não permitido do assento infantil automóvel
Instalação no carro
Instalar a Axkid Modukid Infant na base
Instalar o Axkid Modukid Seat na base
Cuidado e manutenção
Garantia
Peças
A Barra antirressalto (ARB) I Botão ISOFIX
B Botão de libertação ARB J Indicador de instalação da perna de fixação
C Ganchos de fixação K Botão apoio de perna
D Indicador de fixação da cadeira L Apoio da posição de colocação das pernas
E Alavanca de libertação da cadeira M Perna de fixação
F Braço ISOFIX N Painel de apoio do pé
G Indicador de instalação ISOFIX O Sinal sonoro de instalação da perna de fixação
H Botão de libertação ISOFIX
60
60
61
61
62-63
63
64
65
65
O sistema do módulo Axkid Modukid
O sistema do Módulo Axkid Modukid consiste em:
• Axkid Modukid Base- Base para fácil instalação em veículos com pontos de conexão ISOFIX.
• Axkid Modukid Infant - Infantil para crianças de 40 a 75 cm e até 13 kg.
• Axkid Modukid Seat - Assento de carro voltado para trás para crianças de 61 a 105 cm e até 18
kg.
AVISO: Instale somente o Axkid Modukid Infant ou o Axkid Modukid Seat na Axkid Modukid base.
Tentar utilizar produtos de outros sistemas modulares nesta base pode resultar em ferimentos
graves em caso de colisão.
60

Funções da Axkid Modukid Base
A Axkid Modukid Base ser ajustada para proporcionar mais espaço para as pernas da criança ou
para proporcionar mais espaço para o condutor ou passageiro do seu veículo. Isso é feito ajustando
os braços ISOFIX e a barra antirressalto.
Os braços ISOFIX (F) podem ser ajustados em diferentes comprimentos para acomodar
F1
diferentes posições de assento. Existem 4 posições, P1-P4. Os braços ISOFIX (F) são
ajustados puxando o botão ISOFIX (I)
Os braços ISOFIX (F) bloqueiam os pontos de conexão ISOFIX no veículo. Os braços ISOFIX
podem ser libertados dos pontos de conexão do veículo pressionando o botão de libertação
F2
ISOFIX (H). O indicador de instalação ISOFIX (G) fica verde quando há uma conexão segura
entre o braço ISOFIX e o ponto de conexão ISOFIX.
A barra antirressalto (A) não é instalada na base no ato da entrega, portanto deve ser inserida
na base. A Axkid Modukid Base não pode ser utilizada sem a barra antirressalto. A barra
antirressalto pode ser ajustada em diferentes posições para acomodar diferentes posições
F3
de assento. Existem 6 posições, P1-P6. A barra antiressalto (A) é libertada puxando o botão
de libertação do ARB (B). Certifique-se de que o botão de libertação do ARB (B) se encaixe na
posição após ajustar a barra antirressalto.
A perna de apoio (M) pode ser dobrada numa posição de estacionamento por baixo da base.
Esta posição da perna de apoio só deve ser usada durante o armazenamento, nunca quando
F4
instalada no veículo. Quando a perna de suporte é desdobrada, a campainha de instalação da
perna de suporte (O) começa a soar. O bip para após a conclusão da instalação correta.
Se nenhum som for emitido da campainha de instalação da perna de suporte (O) quando a
perna de apoio estiver desdobrada, verifique a bateria. A bateria é verificada desaparafusando
F5
os dois parafusos sob o pé da perna de suporte (N) e removendo a tampa. A bateria é, então,
acessível. Observe que só pode substituir a bateria por uma bateria de tamanho CR1632.
Puxando o manípulo de desbloqueio do Assento (E), os ganchos de Fixação (C) abrem-se e
F6
permitem a fixação ou separação de um Axkid Modukid Infant ou Axkid Modukid Seat.
Os ganchos de fixação (C) travam um Axkid Modukid Infant ou Axkid Modukid Seat na base.
F7
AVISO: Nunca utilize a Axkid Modukid Base sem instalar a barra antirressalto.
61

Posicionamento permitido e não permitido
do assento infantil automóvel
A Axkid Modukid Base pode ser instalada em qualquer assento de passageiro voltado para a frente
que tenha pontos de conexão ISOFIX.
IMPORTANTE : Se quiser instalar o seu assento de carro Axkid Modukid num local onde exista um airbag
instalado, o airbag deve ser desativado no centro de serviço autorizado. Alguns veículos podem estar
equipados com um interruptor que lhe permite desligar manualmente o airbag. É importante sempre verificar
se a luz indicadora do veículo mostra que o airbag está desligado.
AVISO: Nunca utilize em assento com airbag ativo
AVISO: Nunca utilize em assentos de veículos voltados para trás ou lateralmente
AVISO: Os airbags são concebidos para adultos e podem prejudicar seriamente seu filho em caso de
acidente
Posicionamento permitido e não permitido do assento infantil.
1
Banco do passageiro dianteiro (sem airbag ativo) SIM
Banco do passageiro dianteiro (airbag ativo) NÃO
Assento voltado para frente com pontos de conexão ISOFIX SIM
Assento sem pontos de conexão ISOFIX NÃO
Assentos voltados para o lado NÃO
Assentos voltados para trás NÃO
Esta base só pode ser montada na traseira.
2
Nunca instale um sistema de retenção infantil num
assento de passageiro equipado com um airbag ativo.
Instalação no carro
Anexe e ajuste a barra anti-ressalto (A) na sua posição mais interna. Desdobre a perna de
fixação (M). Quando a perna de suporte é desdobrada, a campainha de instalação da perna
3
de suporte (O) começa a soar. O bip para após a conclusão da instalação correta.
4
Estenda os braços ISOFIX (F) para uma posição adequada P1-P4.
62

Fixe os braços ISOFIX (F) aos pontos de conexão ISOFIX do veículo na posição correta do
assento do veículo, de acordo com (1). Irá ouvir um “clique” quando os braços do ISOFIX se
5
travarem na posição.
Certifique-se de que o indicador de instalação ISOFIX (G) está verde.
6
Estenda a Barra Antirressalto (A) em direção ao assento do veículo, puxando o botão de
libertação do ARB (B) e empurrando a Barra Antirressalto (A) em direção ao assento do
7
veículo. Certifique-se de que aplica a maior pressão possível e de que o botão de libertação do
ARB (B) se encaixa na posição.
Estenda a perna de fixação (M) puxando o Botão da Perna de Fixação (K) para estender a
mesma de modo a que o pé da perna de fixação (N) esteja em contato com o piso do veículo.
Verifique se o ruído da campainha de instalação da perna de fixação (O) para e, em seguida, as
8
instalações são feitas corretamente. Certifique-se de que o piso do veículo é adequado para
suportar um assento de carro i-Size. Verifique o manual do veículo para mais informações.
IMPORTANTE:
Certifique-se de que todos os indicadores da instalação apresentam a cor verde.
Instalar a Axkid Modukid Infant na base
Ao instalar a Axkid Modukid Infant na base, puxe a alavanca de desengate do banco (E) para
a sua posição estendida (ver F6) e puxe a cadeira para criança para a base. A cadeira para
9
criança deve encaixar na base.
Garanta que a Axkid Modukid Infant não entra em contacto com qualquer assento de veículo
adjacente e que a perna de apoio está firmemente fixa no piso e que o sinal sonoro de
10
instalação da perna de apoio (O) parou de tocar.
(11) A Axkid equipou o Axkid Modukid Infant com um Sistema de proteção contra impacto
lateral, ASIP (Axkid Side Impact Protection). Puxe o botão de desbloqueio e puxe o ASIP na
11
direção da porta do carro até que se encaixe na posição mais afastada que se adequa ao seu
car ro.
IMPORTANTE:
Consulte o seu manual da Axkid Modukid Infant para instruções completas sobre como instalar o
produto e como prender o seu filho no banco.
63

Instalar o Axkid Modukid Seat na base
Ao instalar a Axkid Modukid Seat na base, puxe a alavanca de desengate do banco (E) para
a sua posição estendida (ver F6) e puxe a cadeira para a base. A placa de fixação da cadeira
12
deve encaixar na base.
Garanta que a Axkid Modukid Seat não entra em contacto com qualquer assento de veículo
adjacente e que a perna de apoio está firmemente fixa no piso e que o sinal sonoro de
13
instalação da perna de apoio (O) parou de tocar.
A Axkid equipou a Axkid Modukid Seat com um Sistema de proteção contra impacto lateral,
ASIP (Axkid Side Impact Protection). Para instalar o ASIP, localize o conector de bloco de
impacto lateral na cadeira para criança, o mais próximo da lateral do veículo (ou seja, o
mais próximo da porta). Garanta que as duas setas triangulares no bloco de impacto lateral
apontam na mesma direção que a seta triangular no conector de bloco de impacto lateral.
14
Coloque a parte superior das duas aberturas ovais na parte inferior do bloco de impacto lateral
por cima do conector de bloco de impacto lateral. Empurre o bloco de impacto lateral contra
a lateral da cadeira para carro e deslize o bloco de impacto lateral para cima, no conector de
bloco de impacto lateral. Irá sentir um leve clique enquanto o bloco de impacto se encaixa.
Para remover: empurre o bloco de impacto lateral para baixo e remova.
IMPORTANTE:
Consulte o seu manual da Axkid Modukid Seat para instruções completas sobre como instalar o
produto e como prender o seu filho no banco.
64

Cuidado e manutenção
A cobertura da barra contra ricochete pode ser removida e lavada numa máquina de lavar a
30 ºC no programa de ciclo suave. Não coloque a cobertura numa máquina de secar, uma
vez que isto pode danificar a cobertura e o enchimento pode ser separado do tecido.
Quaisquer peças de plástico da Axkid Modukid Base podem ser limpas com detergente
suave e água. Não use produtos químicos agressivos com solventes, etc., uma vez que isso
pode causar danos no plástico e comprometer a segurança da cadeira para criança.
Todos os materiais usados na Axkid Modukid Base são recicláveis e devem ser reciclados de
acordo com a sua legislação local. Peça informações ao seu centro de reciclagem local sobre
a reciclagem deste produto.
Não realize quaisquer modificações ou alterações à cadeira de carro para criança Axkid
Modukid que não as descritas neste manual de instruções. Siga cuidadosamente as
instruções neste manual. Quaisquer reparações devem ser realizadas pelo fabricante ou pelo
agente.
Se for necessário substituir o revestimento do banco, garanta que são apenas utilizados
produtos da Axkid. Se forem utilizados outros produtos, o sistema de segurança da Axkid
Modukid pode ficar comprometido e conduzir a ferimentos graves em caso de acidente.
Garantia
O Axkid Modukid Base está abrangido por uma garantia de 24 meses após a data de compra.
Garanta que guarda o seu recibo e que o transporta consigo para o seu local de comprar se tiver
algum problema relativamente à garantia. A garantia não abrange:
A garantia não abrange:
Utilização e desgaste normais
Danos devido a utilização incorreta, negligência ou acidente
Se tiverem sido realizadas reparações por terceiros
Todos os materiais utilizados têm uma classificação de resistência UV muito elevada. No
entanto, a luz UV é muito agressiva e irá acabar por desvanecer o revestimento do banco. Isto
não é abrangido pela nossa garantia pois é considerado utilização e desgaste normais.
65

Axkid Modukid Base
Bas för bilbarnstol modulsystem
Instruktionsbok
Viktig information
Läs denna instruktionsbok innan du monterar bilbarnstolen Axkid Modukid i bilen. Mer
information och monteringsfilmer finns på www.axkid.com.
Tack för att du valt en produkt från Axkid. Vårt team har över 30 års erfarenhet inom barnsäkerhet, och vi
har gjort vårt yttersta för att bilbarnstolen Axkid Modukid ska bli så säker som möjligt. Bilbarnstolen Axkid
Modukid är godkänd i enlighet med FN-föreskrift nr 129/02. För att maximera säkerheten för barnet är det
viktigt att tänka på följande:
Läs denna instruktionsbok noggrant innan du monterar Axkid Modukid Base och bilbarnstolen
Axkid Modukid. Om du är osäker på om du gjort rätt, kontakta din återförsäljare som kan visa dig
korrekt montering. Felaktig montering kan innebära fara för ditt barn.
Använd inte en bilbarnstol på ett säte med aktiv airbag. Om du trots allt vill montera bilbarnstolen
Axkid Modukid på denna plats måste airbagen kopplas ur enligt fordonstillverkarens anvisningar.
Omfattande undersökningar har visat att risken för allvarliga skador är fem gånger större i en
framåtvänd bilbarnstol jämfört med en bakåtvänd.
Bilbarnstolen ska bytas ut om den varit med om en olycka, oavsett hur liten olyckan än är.
Bilbarnstolen kan ha fått osynliga skador som allvarligt påverkar barnets säkerhet. Därför avråder
Axkid alltid från att köpa en begagnad bilbarnstol.
SE
Lämna aldrig barnet utan uppsikt i bilen.
Se till att eventuellt bagage och lösa föremål är ordentligt fästa i bilen eftersom de kan orsaka
personskada vid en kollision.
Spara denna instruktionsbok för framtida bruk.
Se till att bilbarnstolen är monterad så att inga delar kan fastna i rörliga säten, bildörrar osv.
Axkid Modukid Infant är lämplig att använda från att barnet är nyfött och upp till när det kan sitta
stadigt, runt sex till nio månaders ålder.
Använd aldrig bilbarnstolen utan dess tygklädsel.
Denna bilbarnstol får ENDAST monteras bakåtvänd.
66

Innehåll
Delar
Modulsystemet Axkid Modukid
Axkid Modukid Base - funktioner
Tillåten och otillåten placering av bilbarnstol
Montering i bilen
Montera Axkid Modukid Infant på basen
Montera Axkid Modukid Seat på basen
Skötsel och underhåll
Garanti
Delar
67
67
68
68
69-70
70
71
72
72
A Anti rebound bar (ARB), anti-rotations-
bågen
B ARB-frisläppningsknopp J Monteringssummer för stödben
C Fästkrokar K Knopp för stödben
D Indikator för sitsfästning L Parkeringsposition stödben
E Frisläppningshandtag för sits M Stödben
F ISOFIX-arm N Stödben fot
G ISOFIX-monteringsindikator O Monteringssummer för stödben
H ISOFIX- frisläppningsknapp
I ISOFIX-knopp
Modulsystemet Axkid Modukid
Modulsystemet Axkid Modukid består av:
• Axkid Modukid Base – Bas för enkel montering i fordon med ISOFIX-kopplingspunkter.
• Axkid Modukid Infant − Babyskydd för barn från 40−75 cm och upp till 13 kg.
• Axkid Modukid Seat − Bakåtvänd bilstol för barn från 61−105 cm och upp till 18 kg.
VARNING: Endast Axkid Modukid Infant (babyskydd) och Axkid Modukid Seat (bilbarnstol) får
installeras på en Axkid Modukid Base (bas). Om du använder produkter från andra modulsystem på
denna bas kan det leda till allvarliga skador i händelse av en kollision.
67

Axkid Modukid Base-funktioner
Axkid Modukid Base kan justeras för att ge mer benutrymme åt barnet eller för mer utrymme åt
föraren eller passagerarsätet i ditt fordon. Detta gör du genom att justera ISOFIX-armarna och Antirotationsbågen (ARB)
ISOFIX-armarna (F) kan längdjusteras för att passa olika sittlägen. Det finns 4 lägen, P1-P4.
F1
ISOFIX-armarna (F) justeras genom att du drar ut ISOFIX-knoppen (I)
ISOFIX-armarna (F) låser fast ISOFIX-kopplingspunkterna i fordonet. ISOFIX-armarna kan
lossas från fordonets kopplingspunkter genom att du trycker på ISOFIX-frisläppningsknoppen
F2
(H). ISOFIX-monteringsindikatorn (G) blir grön när anslutningen mellan ISOFIX-armen och
ISOFIX-kopplingspunkten är säker.
Anti-rotationsbågen (A) är inte monterad på basen vid leverans så den skall föras in i basen.
Axkid Modukid Base får inte användas utan Anti-rotationsbågen. Anti-rotationsbågen kan
lägesjusteras för att passa olika sittlägen. Det finns 6 lägen, P1-P6. Anti-rotationsbågen (A)
F3
lossas genom att du drar ut ARB-frisläppningsknoppen (B). Var uppmärksam på att ARBfrisläppningsknoppen (B) avger ett klickljud när du har justerat Anti-rotationsbågen. Då vet ut
att den sitter korrekt.
Stödbenet (M) kan fällas in i ett parkeringsläge under basen. Det här läget för stödbenet bör
endast användas vid förvaring, aldrig när basen sitter monterad i ett fordon. När stödbenet
F4
fälls ut börjar stödbenets monteringssummer (O) att pipa. Pipsignalen tystnar efter att korrekt
montering har utförts.
Om inget ljud hörs från stödbenets monteringssummer (O) när stödbenet fälls ut ska du
kontrollera batteriet. Kontrollera batteriet genom att skruva loss de två skruvarna under
F5
stödbenets fot (N) och ta bort locket. Sedan är batteriet tillgängligt. Observera att du bara kan
byta ut batteriet mot ett batteri med CR1632-storlek.
När du drar i sitsens frisläppningshandtag (E) öppnar sig fästkrokarna (C) så att du kan sätta
F6
fast eller lossa Axkid Modukid Infant eller Axkid Modukid Seat.
Fästkrokarna (C) låser fast Axkid Modukid Infant eller Axkid Modukid Seat i basen.
F7
VARNING: Använd aldrig Axkid Modukid Base utan att montera Anti-rotationsbågen.
68

Tillåten och otillåten placering av bilbarnstol
Axkid Modukid Base kan monteras på alla framåtriktade passagerarsäten som har ISOFIXkopplingspunkter
VIKTIGT: Om du vill använda bilbarnstolen Axkid Modukid på en plats med airbag måste denna
kopplas ur på en auktoriserad verkstad. Vissa bilar har ett manuellt urkopplingsreglage för airbagen.
Det är viktigt att kontrollera att indikeringslampan i bilen visar att airbagen är urkopplad.
VARNING: Använd aldrig på ett säte med aktiv airbag
VARNING: Använd aldrig på bakåt- eller sidovända säten
VARNING: Airbagkuddar är utformade för vuxna och kan skada barn allvarligt vid krock
Tillåten och otillåten placering av bilbarnstolen
1
Främre passagerarsäte (utan aktiv airbag) Ja
Främre passagerarsäte (med aktiv airbag) NEJ
Framåtvänt säte med ISOFIX-kopplingspunkter Ja
Säte utan ISOFIX-kopplingspunkter NEJ
Sidovända säten NEJ
Bakåtvända säten N EJ
Denna bas får endast monteras bakåtvänd.
2
Montera aldrig bilbarnstolen på ett säte där det finns
en aktiv airbag.
Montering i bilen
Fäst och justera Anti-rotationsbågen (A) vid dess innersta position. Fäll ut stödbenet (M). När
stödbenet fälls ut börjar stödbenets monteringssummer (O) att pipa. Pipsignalen tystnar efter
3
att korrekt montering har utförts.
4
Dra ut ISOFIX-armarna (F) till ett lämpligt läge; P1-P4.
69

Fäst ISOFIX-armarna (F) i fordonets ISOFIX-kopplingspunkter i rätt sätesposition enligt punkt 1.
5
Du kommer att höra ett ”klick” när ISOFIX-armarna låses på plats.
Kontrollera att ISOFIX-monteringsindikatorn (G) visar grönt.
6
Dra ut Anti-rotationsbågen (A) mot fordonssätet genom att dra ut ARB-frisläppningsknoppen
(B) och föra Anti-rotationsbågen (A) mot fordonssätet. Se till att tillämpa så mycket tryck som
7
möjligt och att ARB-frisläppningsknoppen (B) avger ett klickljud.
Dra ut stödbenet (M) genom att dra i stödbensknoppen (K) för att dra ut stödbenet så att
stödbenets fot (N) har kontakt med fordonets golv. Kontrollera att pipet från stödbenets
8
monteringssummer (O) tystnar; då vet du att installationen är korrekt utförd. Se till att golvet
i fordonet är lämpligt för att bära upp en i-Size-bilbarnstol. Se fordonets instruktionsbok för
information.
VIKTIGT:
Kontrollera att alla monteringsindikatorer visar grönt.
Montera Axkid Modukid Infant på basen
När du monterar Axkid Modukid Infant på basen, dra sitsens frisläppningshandtag (E) till det
9
yttre läget (se F6) och sätt babyskyddet på basen. Babyskyddet ska klicka på plats i basen.
Se till att Axkid Modukid Infant inte är i kontakt med något annat fordonssäte samt att
10
stödbenet är stadigt förankrat i golvet och stödbenets monteringssummer (O) har tystnat.
Axkid har utrustat bilbarnstolen Axkid Modukid Infant med ett sidokrockskydd, ASIP (Axkid
sidokrockskydd). Tryck på frigöringsknoppen och dra ASIP mot bilens dörr tills den låses i det
11
yttersta läget som passar din bil.
VIKTIGT:
Se bruksanvisningen för Axkid Modukid Infant för fullständiga instruktioner om hur du monterar
produkten och spänner fast ditt barn i sätet.
70

Montera Axkid Modukid Seat på basen
När du monterar Axkid Modukid Seat på basen, dra sitsens frisläppningshandtag (E) till dess
yttersta läge (se F6) och tryck fast sitsen på basen. Sitsens fästplatta ska klicka på plats i
12
basen.
Se till att Axkid Modukid Seat inte är i kontakt med något annat fordonssäte och att stödbenet
13
är stadigt förankrat i golvet och att stödbenets monteringssummer (O) har tystnat.
Axkid har utrustat Axkid Modukid Seat med ett sidokrockskydd, ASIP (Axkid sidokrockskydd).
För att montera ASIP, leta upp sidokrockskyddets fäste på den sida av bilbarnstolen som är
närmast bildörren. Kontrollera att de trekantiga pilarna på sidokrockskyddet pekar i samma
riktning som den trekantiga pilen på sidokrockskyddets fäste. Placera den övre av de två ovala
14
öppningarna som sitter nedtill på sidokrockskyddet över fästet. Tryck sidokrockskyddet mot
bilbarnstolen och för det uppåt på fästet. Det hörs ett klickljud när sidokrockskyddet låser fast.
För att ta bort det: Tryck sidokrockskyddet nedåt och lyft bort det.
VIKTIGT:
Se bruksanvisningen för Axkid Modukid Seat för fullständiga instruktioner om hur du monterar
produkten och spänner fast ditt barn i sätet.
71

Skötsel och underhåll
Anti-rotationsbågens klädsel kan tas av och tvättas i maskin på 30 °C handtvättsprogram.
Torka inte i torktumlare, det kan skada klädseln och vadderingen kan lossna från tyget.
Alla plastdelar på Axkid Modukid Base kan rengöras med milt rengöringsmedel och vatten.
Använd inte starka kemikalier som innehåller lösningsmedel och liknande, eftersom det kan
skada plasten och försämra bilbarnstolens säkerhet.
Alla material som använts i Axkid Modukid Base är återvinningsbara och ska återvinnas
i enlighet med lokala bestämmelser. Fråga din kommun om du är osäker på hur du ska
återvinna produkten.
Gör inga egna reparationer eller ändringar på bilbarnstolen Axkid Modukid annat än de som
redovisas här. Följ anvisningarna i instruktionsboken noggrant. Eventuella reparationer måste
utföras av tillverkaren eller dess agent.
Om klädseln behöver bytas ut, använd endast originalprodukter från Axkid. Om andra
produkter används äventyras säkerhetssystemet hos Axkid Modukid, vilket kan orsaka
allvarlig personskada eller dödsfall vid en olycka.
Garanti
Axkid Modukid Base omfattas av en 24 månaders garanti från inköpsdatumet. Spara alltid kvittot och
ta med det till återförsäljaren vid eventuell reklamation.
Garantin täcker inte:
Normalt slitage
Skada till följd av felaktig användning, försummelse eller olycka
Reparationer som utförts av tredje part
Alla material har hög motståndskraft mot UV-strålning. UV-strålning från solen är emellertid
mycket stark och gör att tyget bleks. Detta omfattas inte av garantin utan anses vara normalt
slitage.
72
 Loading...