

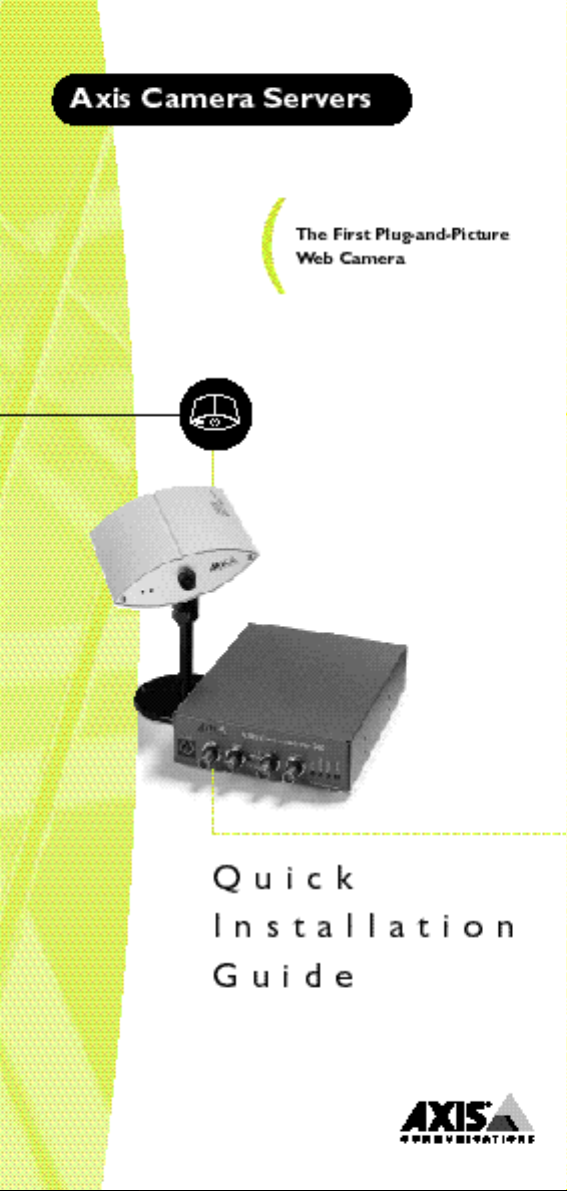
Page 1
Page 2
Quick Installation Guide
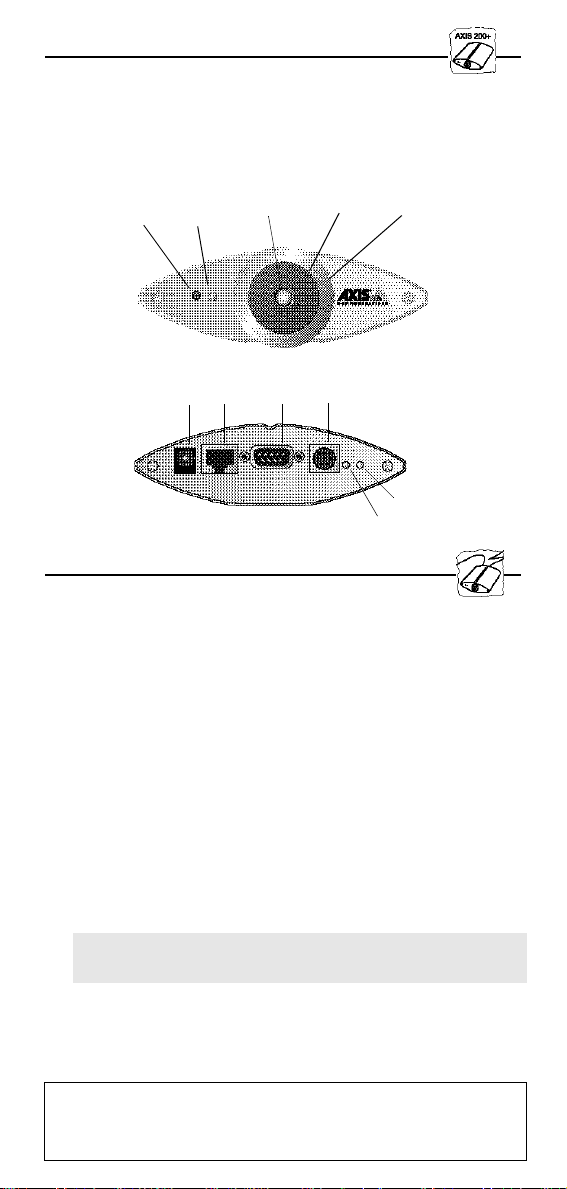
Power indicator
This guide covers the installation and basic setup procedures for your
AXIS 200+. Should you require more detailed instructions, please
refer to the AXIS 200+ User’s Manual available via the Axis WWW
Home Page at http://www.axis.com/salessupport/manuals.html, or
http://www.se.axis.com/products/documentation/manuals.html
Control Snapshot Camera lens
button
indicator
Front view
Power
Ethernet
supply
10baseT
RS232
I/O
Installing the AXIS 200+
Follow these instructions to install your AXIS 200+:
1. Record the serial number of your AXIS 200+. Please note that the
serial number is identical to the Ethernet address of the unit.
2. Connect your AXIS 200+ to the network using an Ethernet
10baseT connector.
3. Connect the external power supply (Axis type PS-D), to the
AXIS 200+ and check that the Power indicator is lit.
4. Acquire an unused Internet address for your AXIS 200+.
5. Assign the Internet address to your AXIS 200+ using the method
appropriate for your network environment as detailed below:
Lock ringCS ring
Net indicator
Windows 95, Windows NT
Start a DOS window and type the following commands:
arp -s <Internet address> <Ethernet address>
ping <Internet address>
Example:
arp -s 192.168.3.191 00-40-8c-10-00-86
ping 192.168.3.191
When using the Windows 95 implementation of ARP you must
first, if you have an empty ARP table (seen with
arp -a), ping an
existing unit on your network before setting the Internet address.
Page 3

UNIX
Type the following commands:
arp -s <Internet address> <Ethernet address> temp
ping <Internet address>
Example:
arp -s 192.168.3.191 00:40:8c:10:00:86 temp
ping 192.168.3.191
6. Access the AXIS 200+ by entering its Internet address (URL) into
the location field of your Web browser.
Example:
http://192.168.3.191/
7. The AXIS 200+ is delivered in approximate focus position, with
focus set to infinity. If you need to fine adjust to close focus,
carefully turn the smaller lens. If you cannot obtain a sharp
picture, loosen the lock ring and bring the camera into focus by
turning the larger lens.
Tighten the lock ring afterwards. Reload
your Web browser to test your adjustments.
The installation is complete and you can now include snapshots
taken by the camera into your own applications.
Taking Snapshots
To trigger a camera snapshot, simply enter the URL of your camera
into the location field of your Web browser.
These snapshot types are available within the AXIS 200+:
File name Size
(pixels)
fullsize.jpg 352x288
30 kbytes
halfsize.jpg 176x144
15 kbytes
lastshot.jpg 352x288
or
176x144
hugesize.jpg 704x576 The highest resolution snapshot
zoom.jpg 352x288 Derived from the from the center of
Description
Full size JPEG snapshot. Generation
time = 0.5 sec
Half size JPEG snapshot. Generation
time = 0.3 sec
The last snapshot taken by the
camera, either “full size” or “half
size”.
available. As opposed to the ‘fullsize’
and ‘halfsize’ images, this type of
snapshot is software generated.
Generation time = 18 sec
‘hugesize’. Generation time = 8 sec
Page 4

To integrate live snapshot images into your own applications and
web pages, refer to the target snapshot type as detailed below:
Example:
http://192.168.3.191/fullsize.jpg
Example: ( Adding an HTML reference)
<IMG SRC=”http://192.168.3.191/fullsize.jpg” ALT=”A
fullsize JPEG Image from AXIS 200+”>
The CRON Script
The AXIS 200+ includes a CRON script service that facilitates
periodic command execution. It allows you to program event and/or
time triggered functions within the AXIS 200+.
From the AXIS 200+ Home Page, you can access an on-line editor
for generating the CRON script file. Alternatively, you can use a
common text editor and download the file via ftp.
For example, you can program the AXIS 200+ to store a new fullsize
image on an ftp server every 5 minutes.
The AXIS 200+ can also be activated by logical transitions on its
input ports. Thus, by connecting a digital microcircuit to an
entrance door, the AXIS 200+ could be triggered to take a snapshot
on each occasion the door opens and then, for example, send an
e-mail with the snapshot to an operator.
Refer to the AXIS 200+ User’s Manual for more information.
EyeGet - the JPEG Script
When using the AXIS 200+ over the Internet, we recommend that it
is accessed over an assisting web server and not directly. This is
because the AXIS 200+ has limited capacity for handling the extra
amount of buffering that the Internet may generate.
Axis has developed a JPEG collector program that periodically
collects JPEG snapshots from your AXIS 200+ and writes them to a
local file on your web server for later retrieval.
The program is called EyeGet and is available in both Windows and
UNIX versions. You can download EyeGet free of charge from
http://www.axis.com/products/axis_neteye_200/scripts.shtml
Page 5

Point to Point Protocol (PPP)
PPP support allows you to use your AXIS 200+ remotely, just as if it
were on your local network. Any PPP capable host can be used to
dial into the AXIS 200+.
PPP configuration for a Windows 95 host
Please refer to the AXIS 200+ web pages should you wish to use
PPP from another host, i.e. Windows NT or UNIX.
Follow these instructions to configure PPP from a Windows 95 host:
1. Connect the remote modem to the serial port of the AXIS 200+
(US Robotics modem recommended).
2. From the Windows desktop, double-click on the My Computer
icon and then open Dial-Up Networking.
3. Double-click on Make New Connection. From within this
dialog, define a <name> that describes the connection you are
creating in the ‘Type name for the computer you are using’ field.
Select a local modem from the displayed modem list.
4. Click on the Configure button to enter the modem Properties
page. Accept all default settings, but ensure that modem speed is
compatible with your modem and does not exceed 38,400 bps,
which is the maximum serial port speed for the AXIS 200+.
5. Click the Connection tab and then click the Advanced button.
Check the Hardware (RTS/CTS) radio button. Click OK to
return to the ‘Make new connection’ dialog.
6. Enter the relevant phone number information for the remote
modem connected to your AXIS 200+. Click Next.
7. Click Finish. The system then proceeds to build the Driver
information database and your connection dialog will then
subsequently appear in the Dial-Up Networking dialog.
Accessing the remote AXIS 200+
Follow this procedure to dial out to a remote AXIS 200+.
1. Double-click on the newly created icon to establish a modem
connection for your remote AXIS 200+.
2. Enter your User name and Password an then click Connect. The
status dialogs "dialing" and "logging onto the network" are
presented prior to the display of a Connected to <name> dialog
that will confirm a successful connection.
3. You can now access the AXIS 200+ by entering its Internet
address (URL) into the location field of your Web browser.
Please ensure that you are not using a a proxy server (Netscape:
Options menu\Select Network\Proxies).
Please refer to your Windows 95 user documentation if your
computer does not have dial up networking installed.
Page 6

AXIS 200+ Quick Installation Guide
Part No: 15846
Revision: 1.0, Date: February 1998
Copyright © Axis Communications AB, 1996-1998
Axis Communications
URL:www.axis.com
Lund
Phone: +46 46 270 18 00
Boston
Phone: +1-800-444-AXIS, +1 (781) 938 1188
Paris
Phone: +33 1 49 69 15 50
London
Phone: +44 1753 714310
München
Phone: +49 89 95 93 96 0
Tokyo
Phone: +81 3 3545 8282
Singapore
Phone: +65 250 8077
Hong Kong
Phone: +852 2836 0813
Beijing
Phone: +86 10 6510 2705
Shanghai
Phone: +86 21 6445 4522
Taipei
Phone: +886 2 8780 5972
Seoul
Phone: +82 2 780 9636
 Loading...