

Page 1
A
RETURN
Turn the flywheel and press
the 8.1 button at the same
time for 10-15 seconds;
Stop rotation and use a pencil
to check whether a slight burr
has formed on the blade edge;
Turn the flywheel again and
press the 8.2 button for 2-3
seconds;
Return the sharpener to its
original position.
Lubrication
dd one or two oil drops at the
points as shown.
Use only the oil supplied with
the machine
After lubrication, clean
carefully and remove the extra
oil if necessary.
8.1
FLYWHEEL
8.2
SLICER
F300 VO
-8-
USE AND
MAINTENANCE
10-02
-1-
Page 2

Technical features
Blade diameter ....................................................................................300 mm
Cut thickness ......................................................................................0÷2 mm
Cut:
-Width .................................................................................................230 mm
-Height ................................................................................................190 mm
Maximum overall dimensions
(values in mm)
580
720
Extract the waste tray 13; wash, dry
and pt it again in its seat.
13
Remove the tray 12 after
loosening the two fixing screws.
To clean only use a cloth
dampened with water and normal
dishwashing liquid soap.
12
50
Overall dimensions and weight
Length .................................................................................................720 mm
Width ...................................................................................................560 mm
Height ..................................................................................................580 mm
Weight .................................................................................................. 45,5 kg
Distance between the feet .......................................................... 400x340 mm
-2-
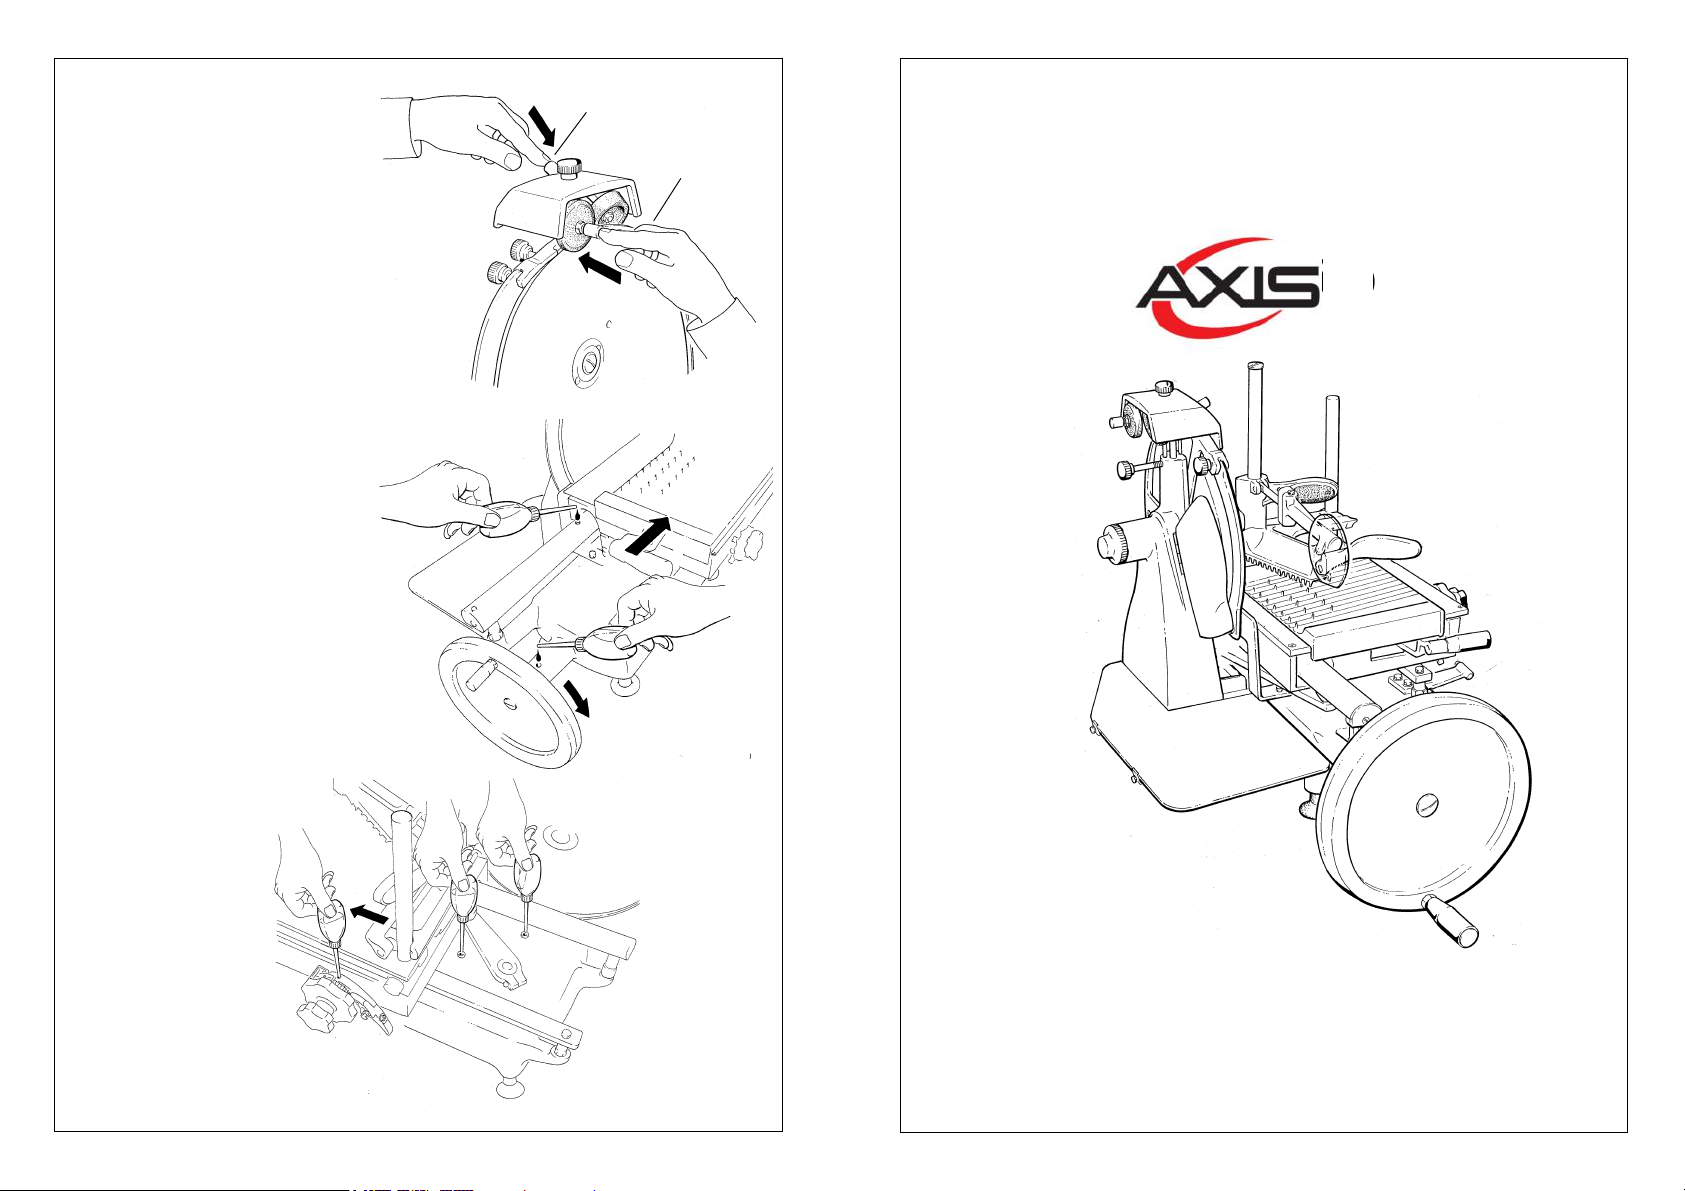
Sharpening the blade
Loosen the sharpener (8) locking
knob;
Pull the sharpener up and turn it by
180°;
8
8
16
Lower the sharpener 8 back
carefully, the blade will be
automatically centered between the
two grinding wheels.
Lock up the knob.
-7-
Page 3

Extract the tray 6;
Clean the its lower part and the carriage 3 surface
carefully;
Clean the blade 9 as shown in
the image, with great care and
starting from the center to the
edge;
10
9
3
Open the slice guide 11 and clean
inside carefully;
11
Remove the blade protection 10 after
loosening the locking knob.
WARNING: Danger of cuts!
After cleaning, reassemble the blade
protection immediately.
-6-
8
9
3
10
7
6
6
15
3
12
2
4
1
5
15
14
13
8
7
16
1. Flywheel
2. Handle
3. Carriage
4. Slice thickness gauge
5. Tray fast travel lever
6. Product tray
11
3
6
14
5
7. Product grip
8. Blade sharpener
9. Lama
10. Blade protection
11. Slice guide
12. Slice receiving tray
13. Waste tray
14. Tray slow travel
12
15. Tray locking knob
16. Blade sharpener locking knob
1
2
-3-
Page 4

7
3
1
Place the product to be sliced on
the tray 6;
Machine operation
Turn the flywheel 1 drawing the
carriage 3 (towards the operator);
Pull up the product grip 7;
6
Lower the product grip 7 to hold
the product;
Lower the lever 5 and move it to
draw the product near the blade
9;
Drawing the product near the
blade or away can be carried out
more precisely using the knob
14;
Set up the slice thickness
desired by operating the
graduated knob 4 (0÷2 mm);
Turn the flywheel 1 to start
slicing and placing the slides on
the tray 12.
Cleaning the machine
Warning:
scratch and anti-skid protection
gloves when carrying out the
operations described above.
Always operate with great care
and avoid any distraction.
DANGER OF CUTS!
Always wear non-
12
9
7
1
3
5
14
4
6
-4-
Remove the product from the
tray 6;
Turn the flywheel 1 by drawing
the carriage 3 near the
operator;
Press the lever 5 down and at
the same time to the right;
Unscrew the locking knob 15
as shown in the image;
15
5
1
-5-
 Loading...