

Page 1

Page 2
Quick Installation Guide
This guide covers the installation and basic setup procedures for your
AXIS StorPoint HD. If you need more detailed instructions, e.g.
regarding Configuration and Management of the server, please refer
to the AXIS StorPoint HD User’s Manual.
Basic Installation
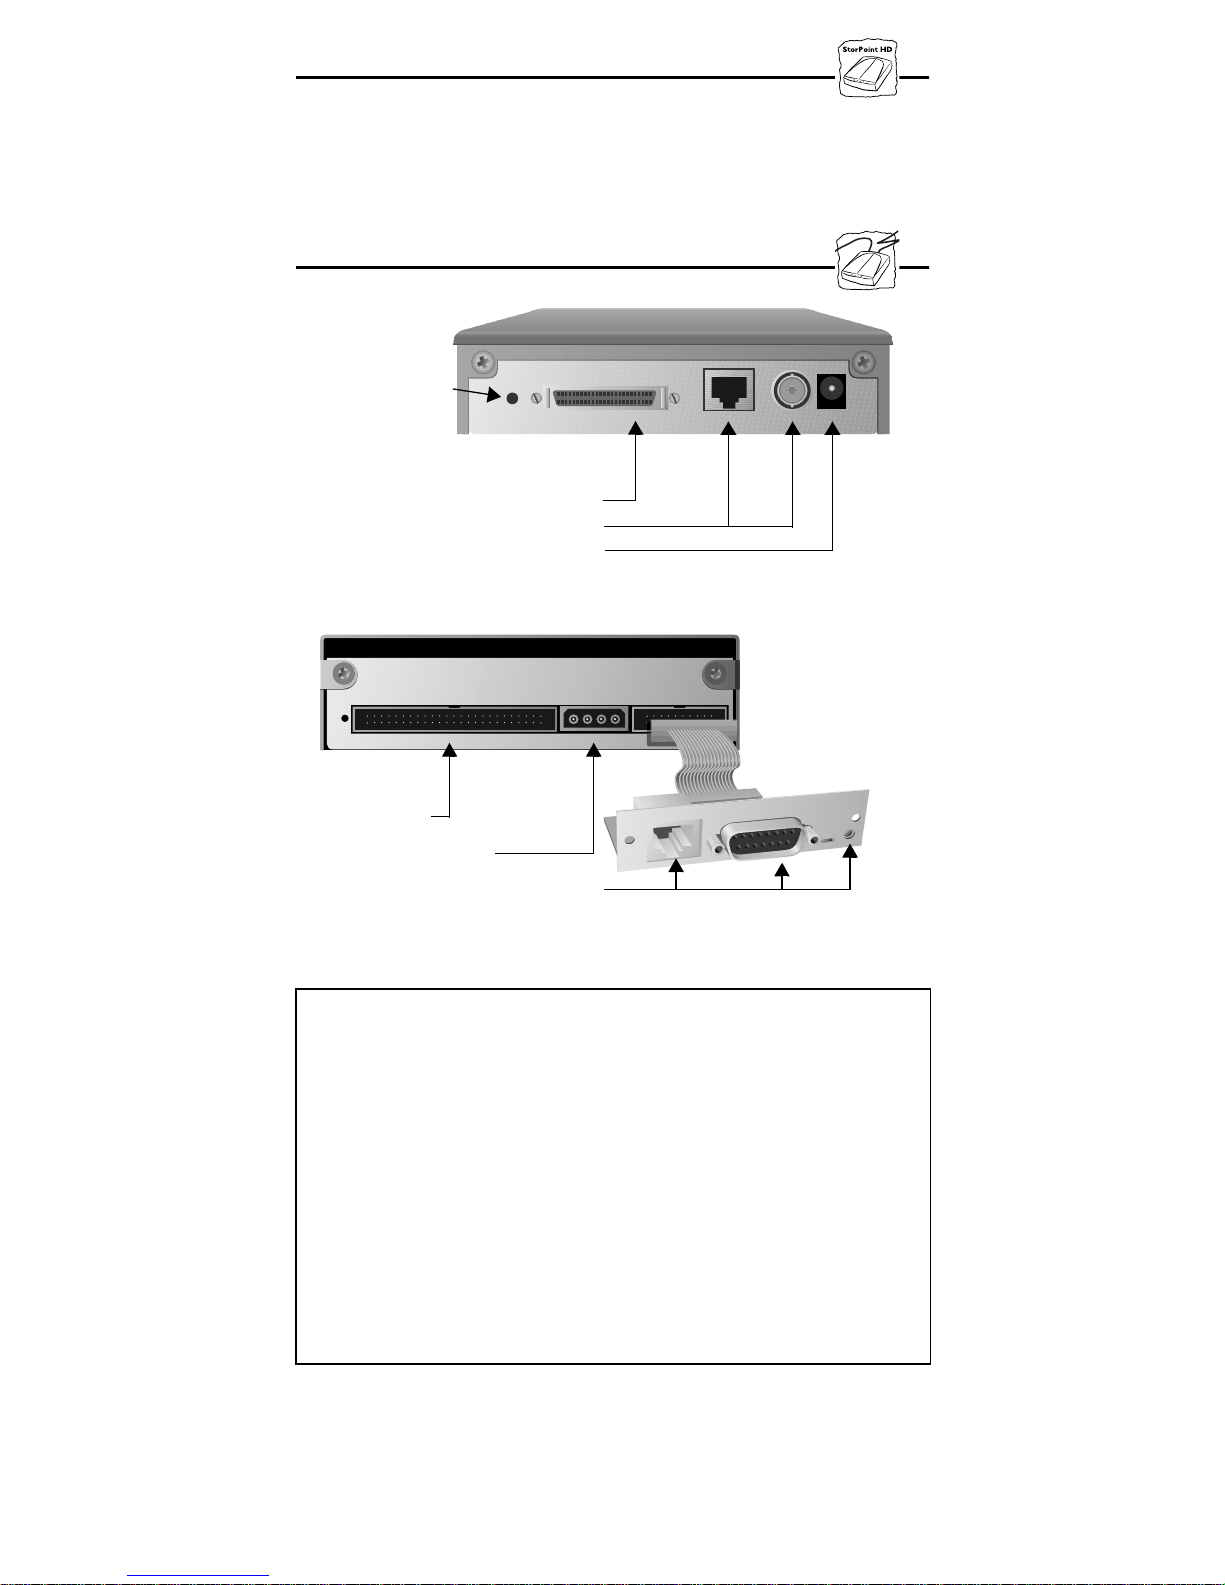
(black push button)
SCSI connector
Power supply connector
Network connectors and push button
Reset
SCSI connector
Network connectors
Power supply connector
Rear view of the standalone version AXIS StorPoint HD
Rear view of the tower module AXIS StorPoint HD/T
Before you begin:
• Standalone version only: Check that the power supply (PS-C,
12V DC) is marked with the correct mains voltage.
• Make sure that power is not connected to the StorPoint HD
server or any of the Jaz drives. The SCSI bus may be damaged
if you connect or disconnect any units when the power is on.
• Make sure that your network is ready to accept a new node.
• Any network configuration should always involve the
Network Administrator.
• Record the StorPoint HD server serial number. You will need
this number when installing the StorPoint HD server. The
number is found on the underside label of the server.
Connecting Jaz disk drives to the StorPoint HD Server
Up to seven SCSI Jaz disk drives can be serviced by a single Axis
StorPoint HD Server. The drives are connected using the appropriate
SCSI cable, which must be ordered separately
.
Page 3
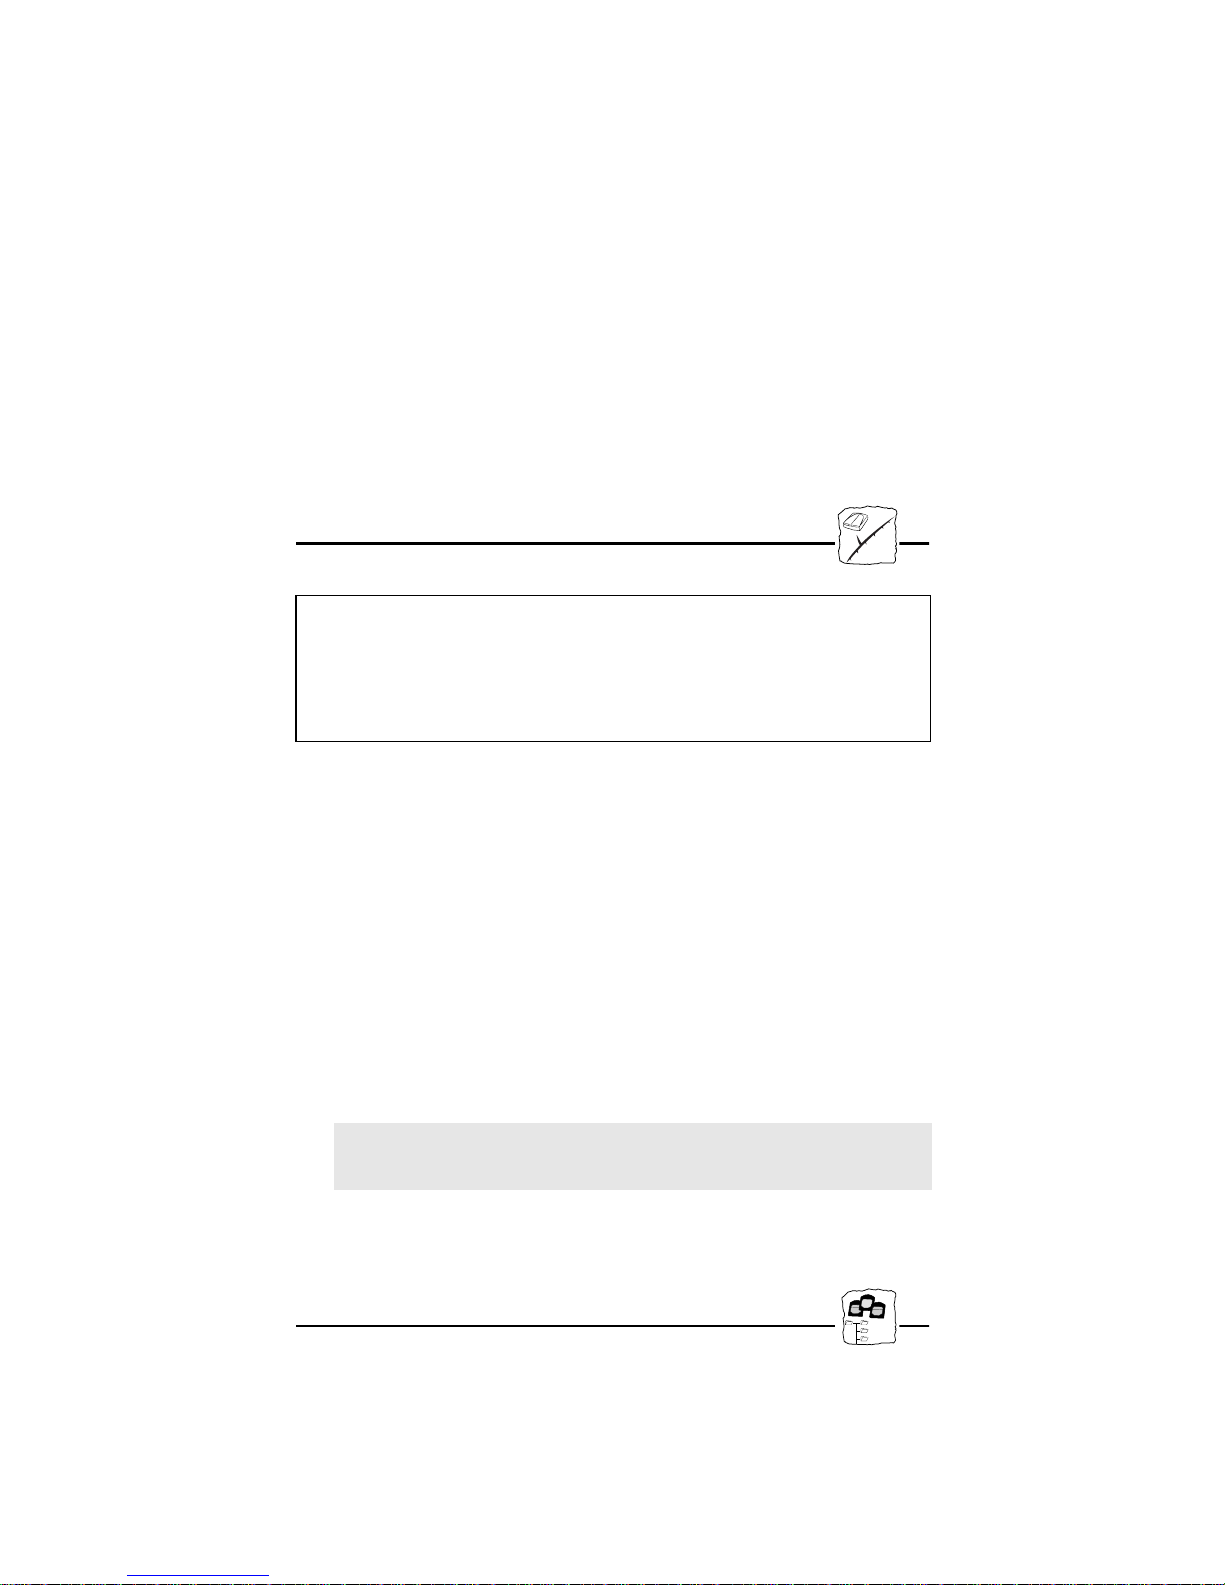
1. Connect the SCSI cable to the SCSI connector on the StorPoint.
2. Connect the SCSI cable to the Jaz disk drive(s).
3. Set the SCSI address of the Jaz disk drives. Each connected drive
must have a unique SCSI address. SCSI addresses 0 through 6
may be used.
4. The last drive in the SCSI chain must be terminated. No other
Jaz disk drive should be terminated.
Connecting the StorPoint HD server to the network
1. Connect the network cable to the appropriate connector.
2. Power up the StorPoint HD server and the Jaz drives. If installing
the standalone version, make sure all the drives are powered up
before the server. When the STATUS indicator stops flashing
and remains unlit, the StorPoint HD server is ready for use.
Network Configuration
Before you begin:
• The configuration described below applies to Windows NT
systems only.
• You will need administrator privileges on the NT server for
the configuration.
Windows NT
Note: Setting the Internet address is not needed for SMB over
NetBIOS/NetBEUI or NetWare.
On Windows NT systems follow the steps below to set the Internet
address.
1. Find an unused Internet address for your StorPoint HD server.
2. Send the Internet address to the StorPoint HD server. The
Ethernet address or node address is your StorPoint HD server
serial number divided into six groups of two digits each. (See
example below.)
arp -s <Internet address> <Ethernet or node address>
ping <Internet address>
Example: (Use the Internet address from step 1.)
arp -s 192.36.253.80 00-40-8c-10-00-86
ping 192.36.253.80
Accessing Jaz drives
The AXIS StorPoint HD is integrated into your network operating
system just like any other file server and you use the same commands
to access it. To be able to access the Jaz disks from your Windows
applications, you need to make them available to your system, i.e.
“mount” the StorPoint HD server. On PC systems this is typically
done by mapping the server to a drive letter.
Once the StorPoint HD server has been mounted, you access it just
Demo hd
hd
Images
Music 1
Page 4
as any other disk drive or file server connected to your system. Select
the appropriate procedure for mounting the StorPoint HD server
from the following sections:
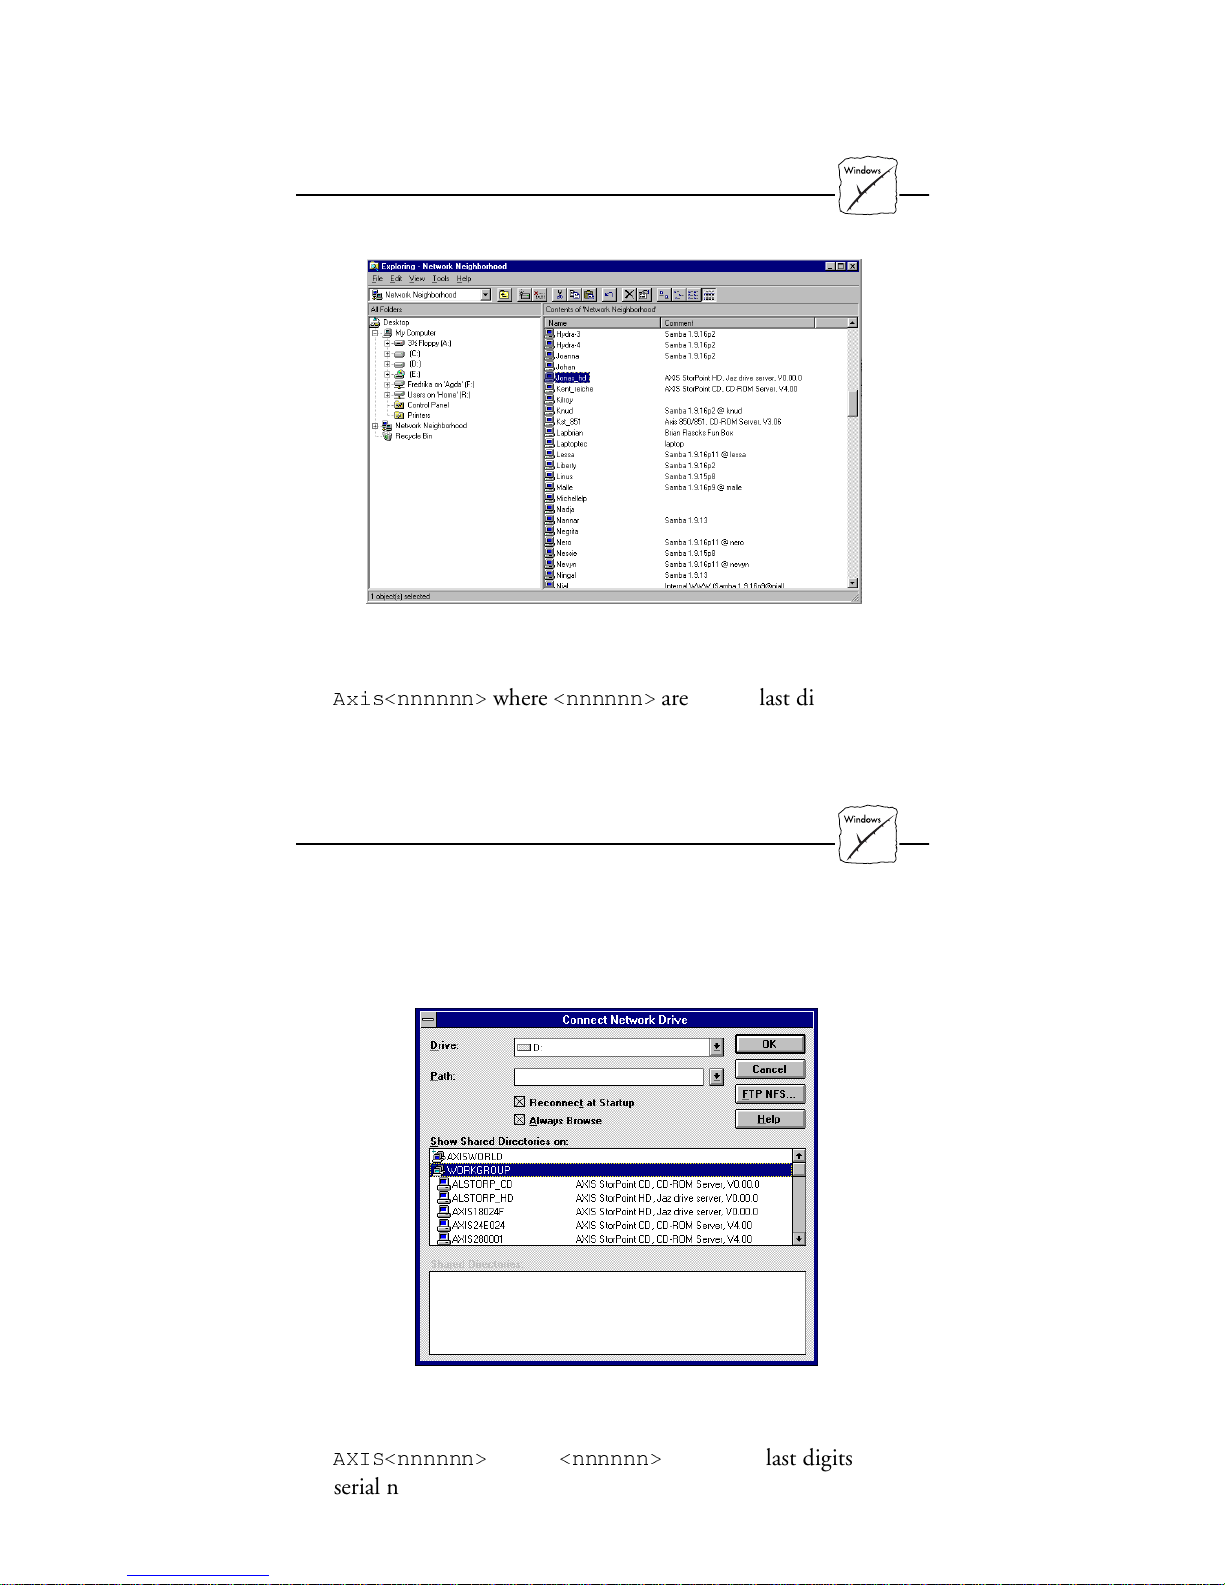
Windows 95 & NT 4.x (SMB)
1. Start the Windows Explorer from the Start/Programs Menu.
2. In the Network Neighborhood locate your Axis StorPoint HD
Server under Entire Network/ Workgroup. The default name is
$[LVQQQQQQ!
where
QQQQQQ!
are the six last digits of the
serial number.
3. Right-click the Jaz folder to map the server.
Windows 3.x (SMB)
1. Start the File Manager.
2. Select Connect Network Drive… in the Disk menu. The
Connect Network Drive dialog is shown. You may have to click
the Browse>> button to see the complete dialogue.
3. Double-click Workgroup in the top listing and double-click the
entry for your new StorPoint HD server. The default name is
$;,6QQQQQQ!
serial number.
4. From the bottom listing, select the Jaz folder and click OK.
, where
QQQQQQ!
are the six last digits of the
Page 5
OS/2 (SMB)
1. Open an OS/2 window.
2. At the OS/2 prompt, type:
QHW XVH GULYH! ??$;,6QQQQQQ!?KG
QQQQQQ!
are the last six digits of the serial number.
where
,
Example: (StorPoint HD server serial no. = 00408C18025C.)
net use E: \\AXIS18025C\hd
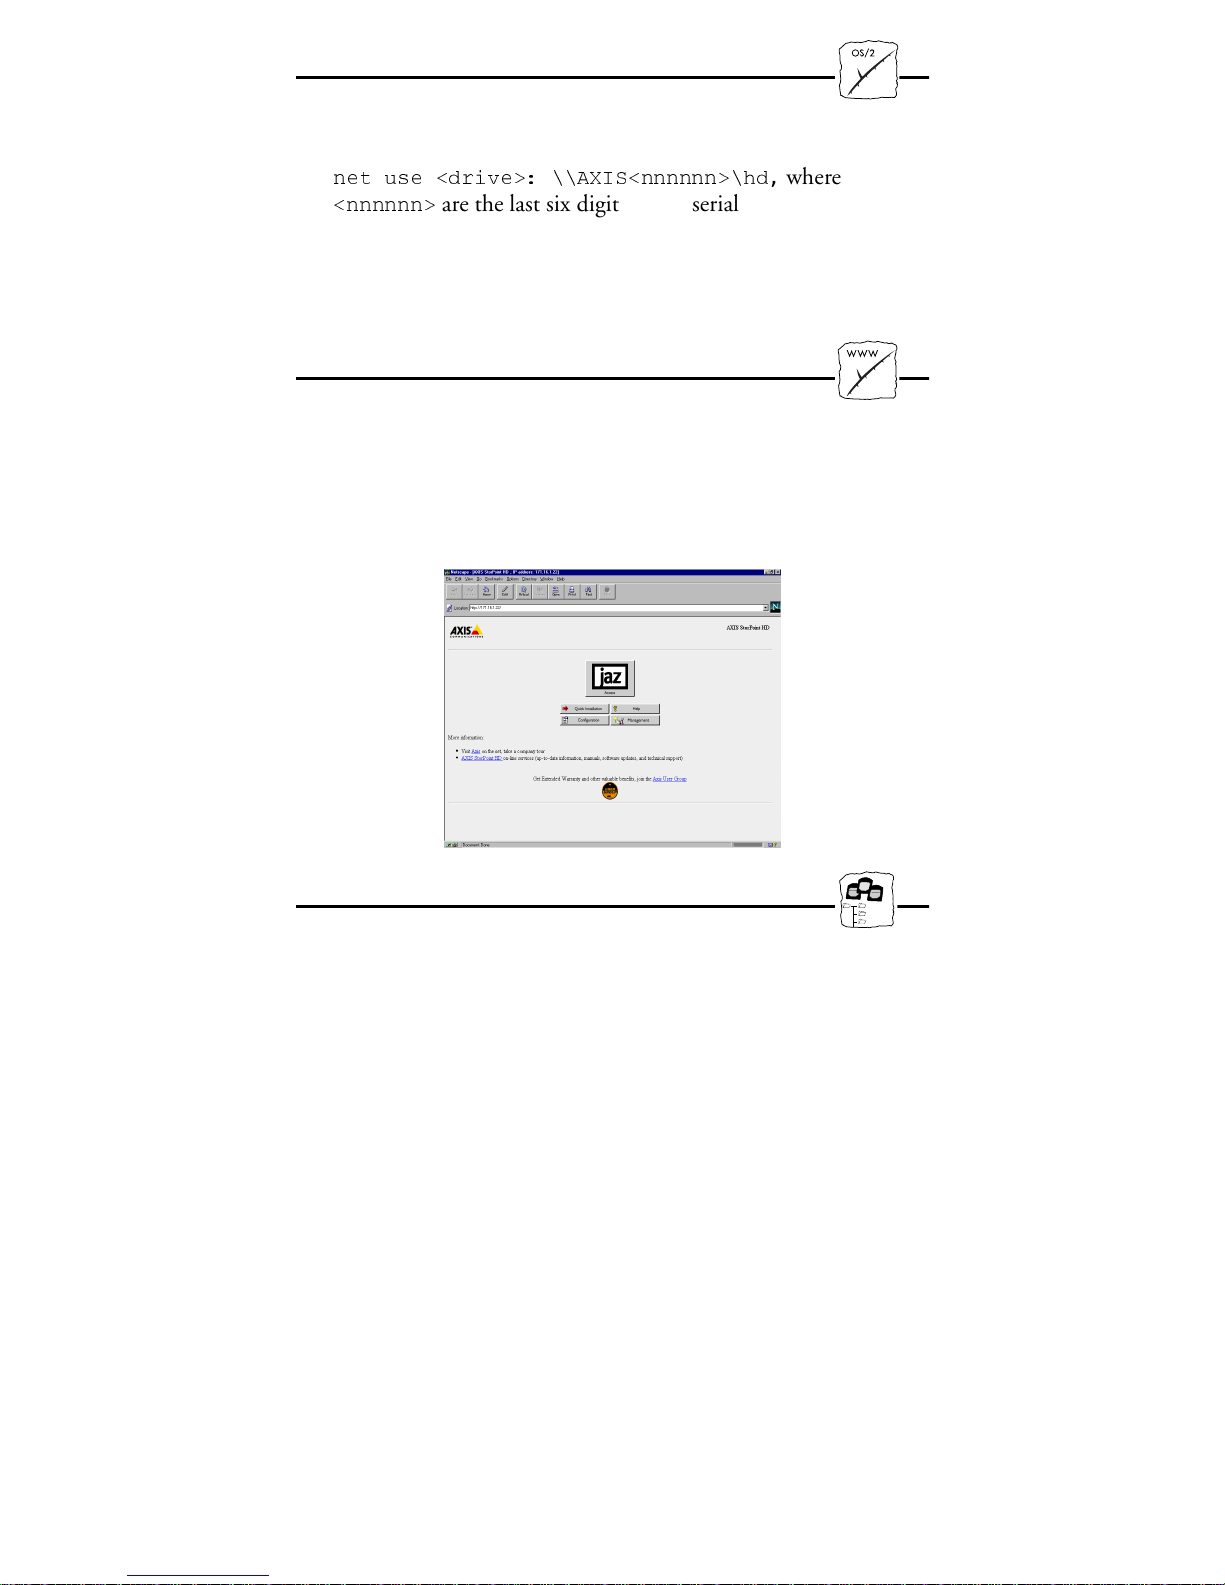
Web browsers (HTTP)
1. Start the Web browser, e.g. Netscape Navigator.
2. Select Open Location from the File menu and enter the URL of
the StorPoint HD server, i.e. the Internet address or host name.
3. Click Open. At the StorPoint HD server home page shown
below click Jaz. Select Add Bookmark in the Bookmarks menu.
Accessing a new Jaz Disk
Demo hd
hd
Images
Music 1
When you insert a Jaz disk into any connected drive, a directory is
created on the server. The directory name is the Jaz disk volume
name, or nnnnnnnn
, where nnn
nnnnn
The Jaz disk data is accessed through this directory. Some disk
software requires that the Jaz disk is assigned an individual drive
letter in Windows. Please refer to the User’s Manual, Section 4 for
details.
is a unique 8 digit number.
Page 6

AXIS StorPoint HD Quick Installation Guide
Part No: 15542
Revision: 1.0 Date: October1997
Copyright © Axis Communications AB, 1997
Axis Communications
URL: http://www.axis.com/
Lund
Phone: +46 46 270 18 00
Boston
Phone: +1 800 444 AXIS
Paris
Phone:+33149691550
London
Phone: +44 1753 714310
München
Phone: +49 89 95 93 960
To k yo
Phone: +81 3 3545 8282/8
Singapore
Phone: +65 250 8077
Hong Kong
Phone: +852 2836 0813
Beijing
Phone: +86 10 6510 2705
Shanghai
Phone: +86 21 6445 4522
Ta i p ei
Phone: +886 2 8780 5972
Seoul
Phone: +82 2 780 9636
 Loading...