

Page 1
The AXIS EVI-D30/31 - Installation Guide
Connecting and Installing the AXIS EVI-D30/31
To assign an IP address for the AXIS 2400/2401, please refer to the installation instructions in the AXIS 2400
& 2401 Administration Manual.
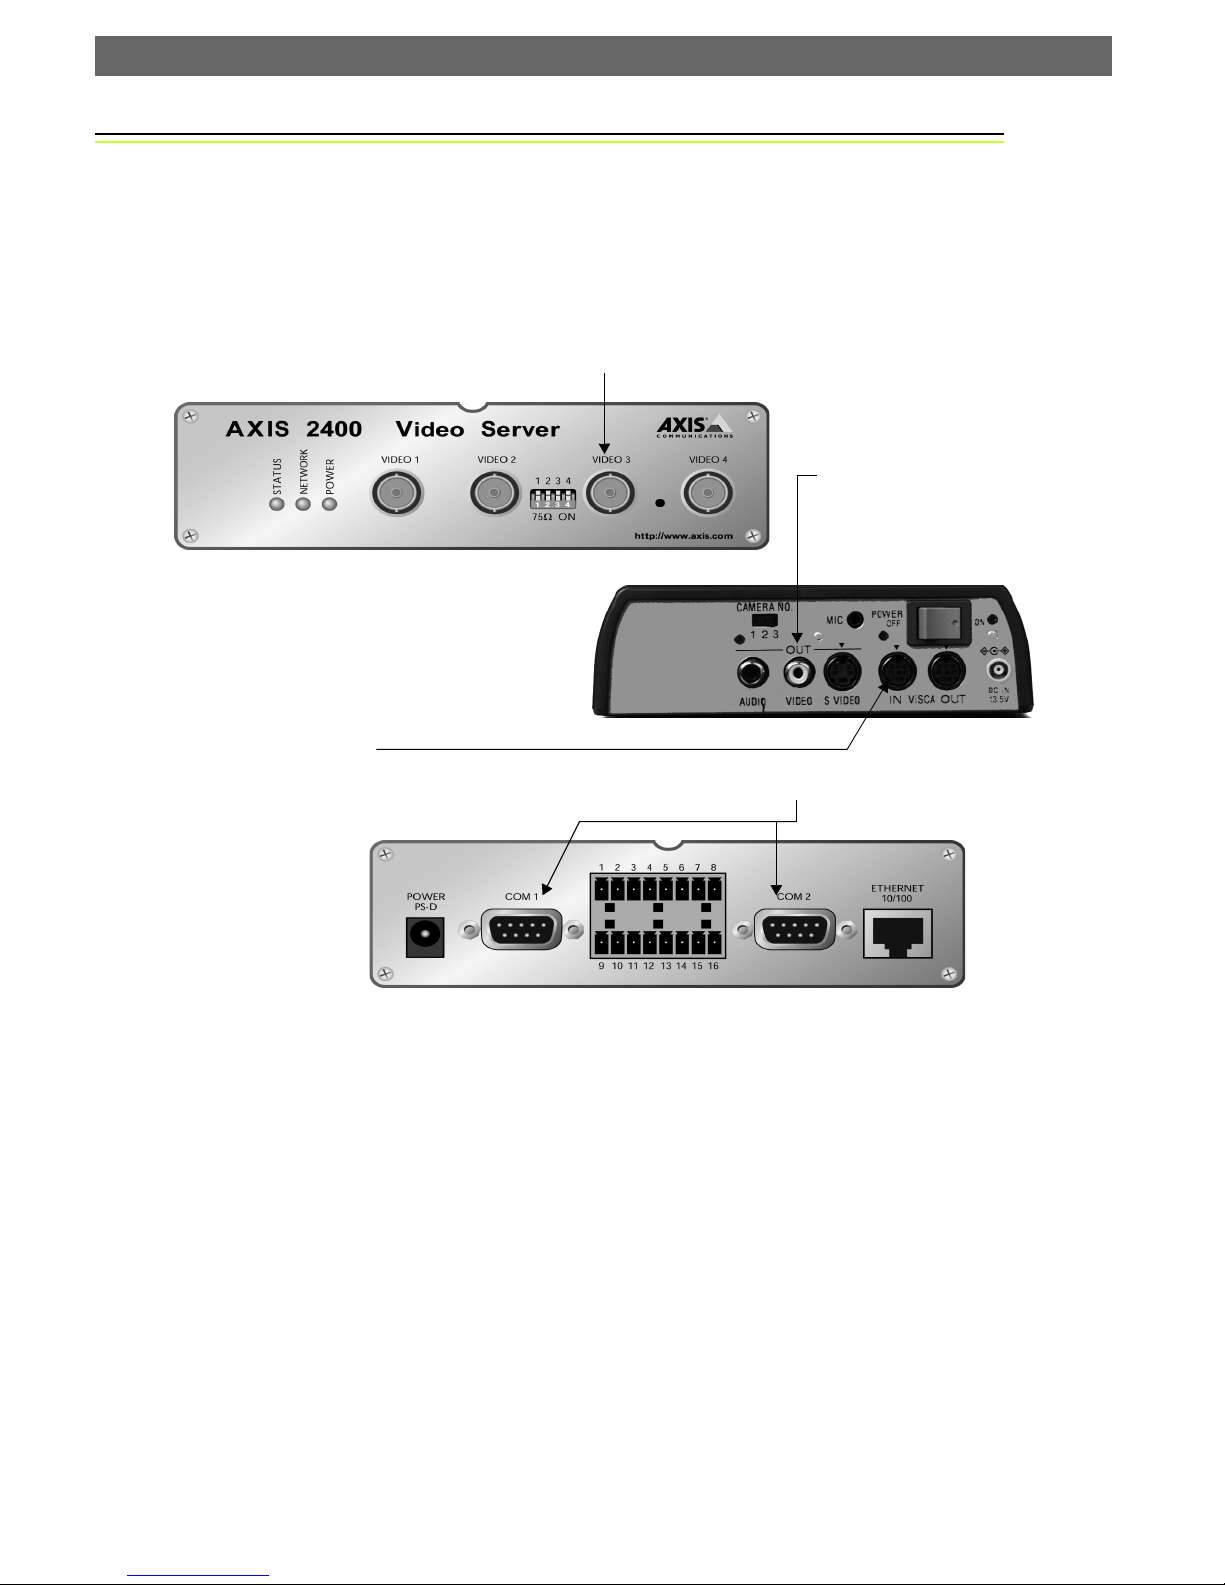
Connecting the EVI-D30/31 Video source to the AXIS 2400/2401
1. Attach the supplied BNC/RCA converter to a Video-IN port on the front panel of the AXIS 2400/2401.
2. Attach the supplied video cable
to the converter and plug the
other end of the cable into the
Video-OUT port of your AXIS
EVI-D30/D31 PTZ camera.
Connecting and Installing the Pan/Tilt
device
3. Connect the round connector of the supplied
VISCA cable to the VISCA-IN socket on the
AXIS EVI-D30/31 camera.
4. Connect the other end of the cable (9-pin D-Sub) to one of the COM-ports on the rear panel of the AXIS
2400/2401 Video server.
5. Open a browser window
and go to the AXIS
2400/2401 Home Page
by entering the IP
number you assigned to
the server. Click Admin.
You will now need to
provide your Admin password.
6. Click the icon for the COM-port you connected your AXIS EVI-D30/31 camera to. Now set the Purpose of
the port as Pan Tilt and then click the Save button.
7. Click the Pan Tilt icon that now appears under the COM-port.
8. Select the driver for the EVI-D30/D31 from the drop-down list and click Save.
9. Click the icon for the video input that will use the selected driver. Under Pan Tilt Serial Port, select the
COM-port you configured in steps 6 to 8.
10. Click View Application and verify the PTZ functionality by performing a few PTZ operations.
For more information about Pan/Tilt/Zoom operations, please see the AXIS 2400 & 2401 Administration
Manual.
Copyright Axis Communications AB 2001. Part No. 18675. v1.0
 Loading...