

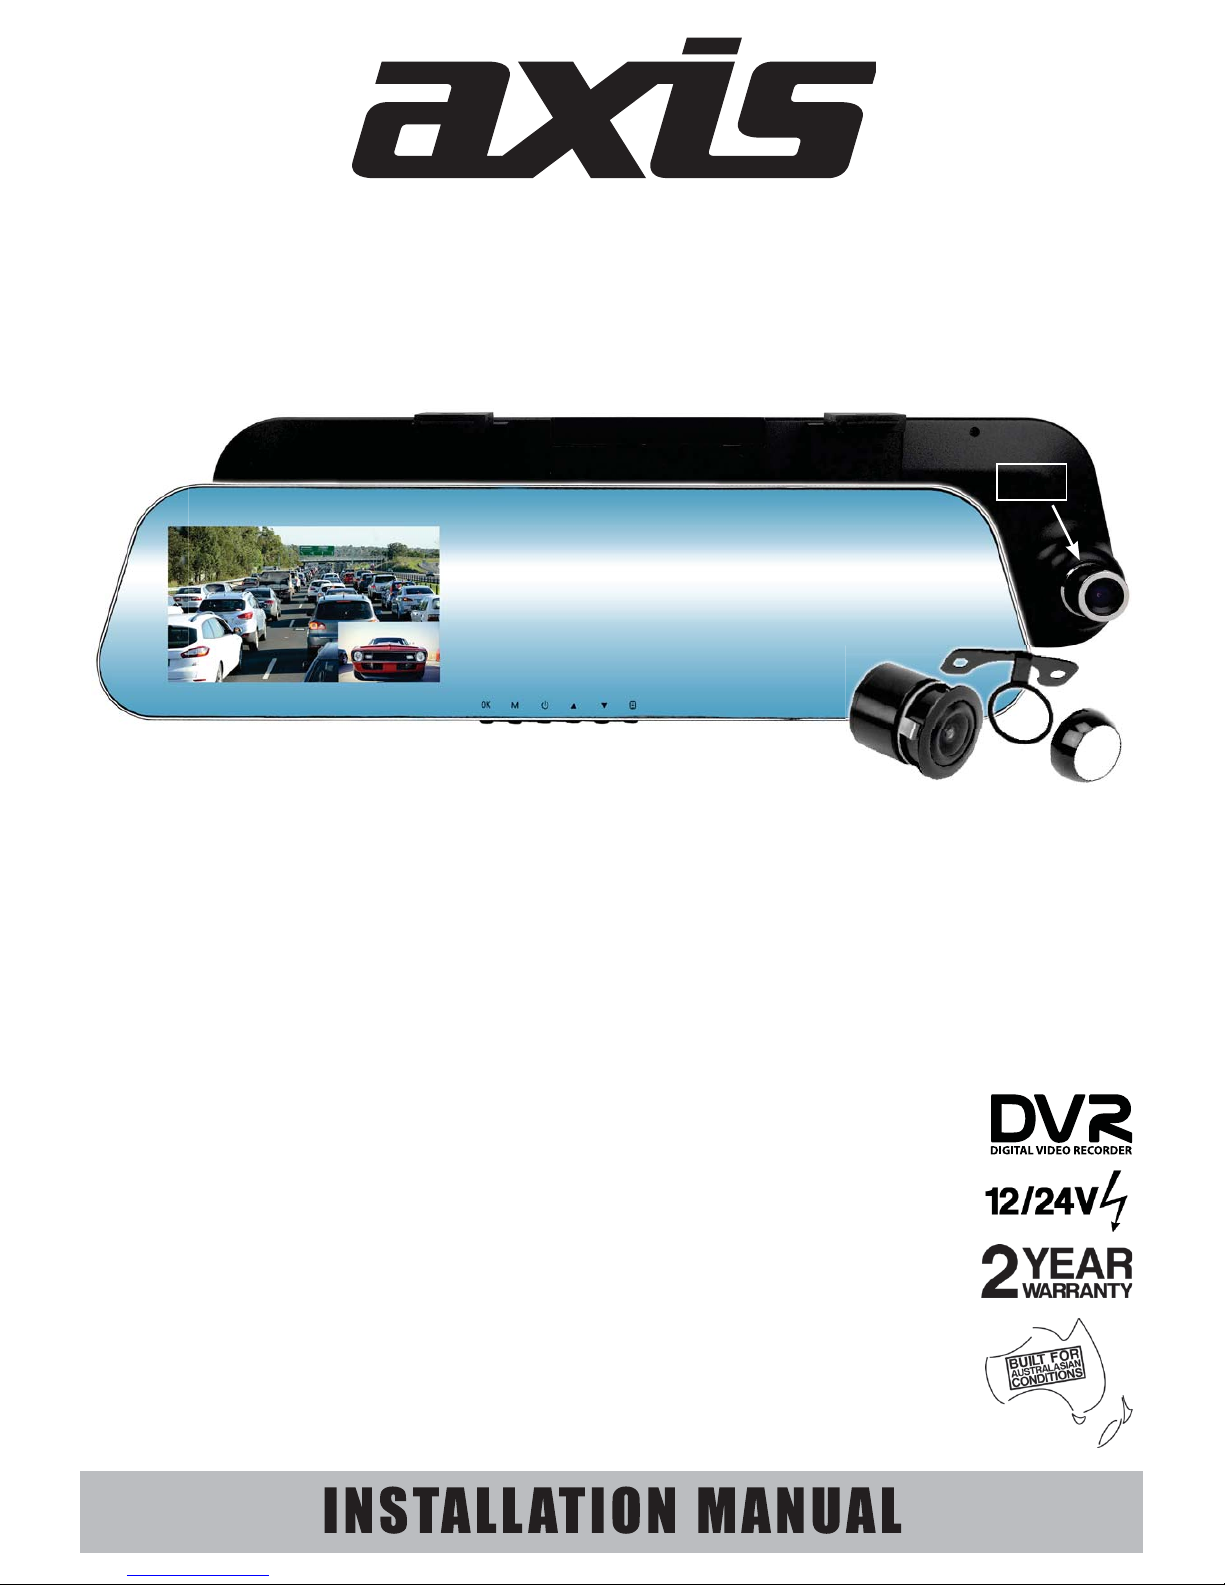
Page 1
SPECIFICATIONS
BLACK BOX RECORDER
• Camera: (Forward) OV9712 - 3 MP High Definition
• Lens Angle: 140° Wide Angle
• Solution: NT96220
• Inbuilt Monitor: 4.3” Professional LCD Digital
• Video Record Format: .MOV (Front Camera) .AVI (Rear Camera)
• Video Resolution: 1920*1080P (Front Camera) 1280*720P/640*480P (Rear Camera)
• Micro SD Card Capacity: Supports up to 32GB (Minimum Class 6) (Not Supplied)
• USB Interface: USB 2.0
• Recording: Cycle Recording
• G-Sensor: Detects crashes and sudden changes in force
MIRROR
• Surface: Specialised metallic mirror. Anti-Glare/Anti-Fatigue
• Design: Slimline. Stealth touch buttons
• Mounting: Universal Clip On to Original Factory Mirror
• Interface: USB2.0 (DC5V 1.5A)
• Battery: 300mAh 3.7V Polymer Lithium
• Power: DC5V 1.5A (12/24V Cig Power Plug Reducer)
• Dimensions: 317W x 80H x 12D mm
REAR CAMERA (C20A):
• Lens: 1/4” CMOS Imaging Clip
• Sensor: PC1089 Quality Sensor Chip
• Viewing Angle: 170° Wide View
• Video System: PAL - Mirror Image
• Protection: IP66 - Water & Dust Ingress
• Installation: 1. Butterfly mount to number plate, boot lid or other surface
2. Insert to bumper
• Power Source: 12 Volt DC from Reversing Light circuit
• Connections: 6M Video Cable from Camera to Monitor
3.4m Power Cable
MOBILE SAFETY
DVR1543K
CLIP ON REARVIEW MIRROR KIT with 4.3-INCH LCD MONITOR
FRONT & REAR CAR CAMCORDER with
DUAL MOUNTING REVERSING CAMERA
REARVIEW MIRROR CAR DRIVING RECORDER KIT
3.0
CAMERA
MEGA
PIXEL
Page 2
Product Introduction
This 4.3 Inch Rear View mirror with DVR is a multifunctional product that is equipped with Dual High
Denition cameras, Video Recording, Audio Recording, Web Camera, Video Out, G-Sensor and Rear
Camera In.
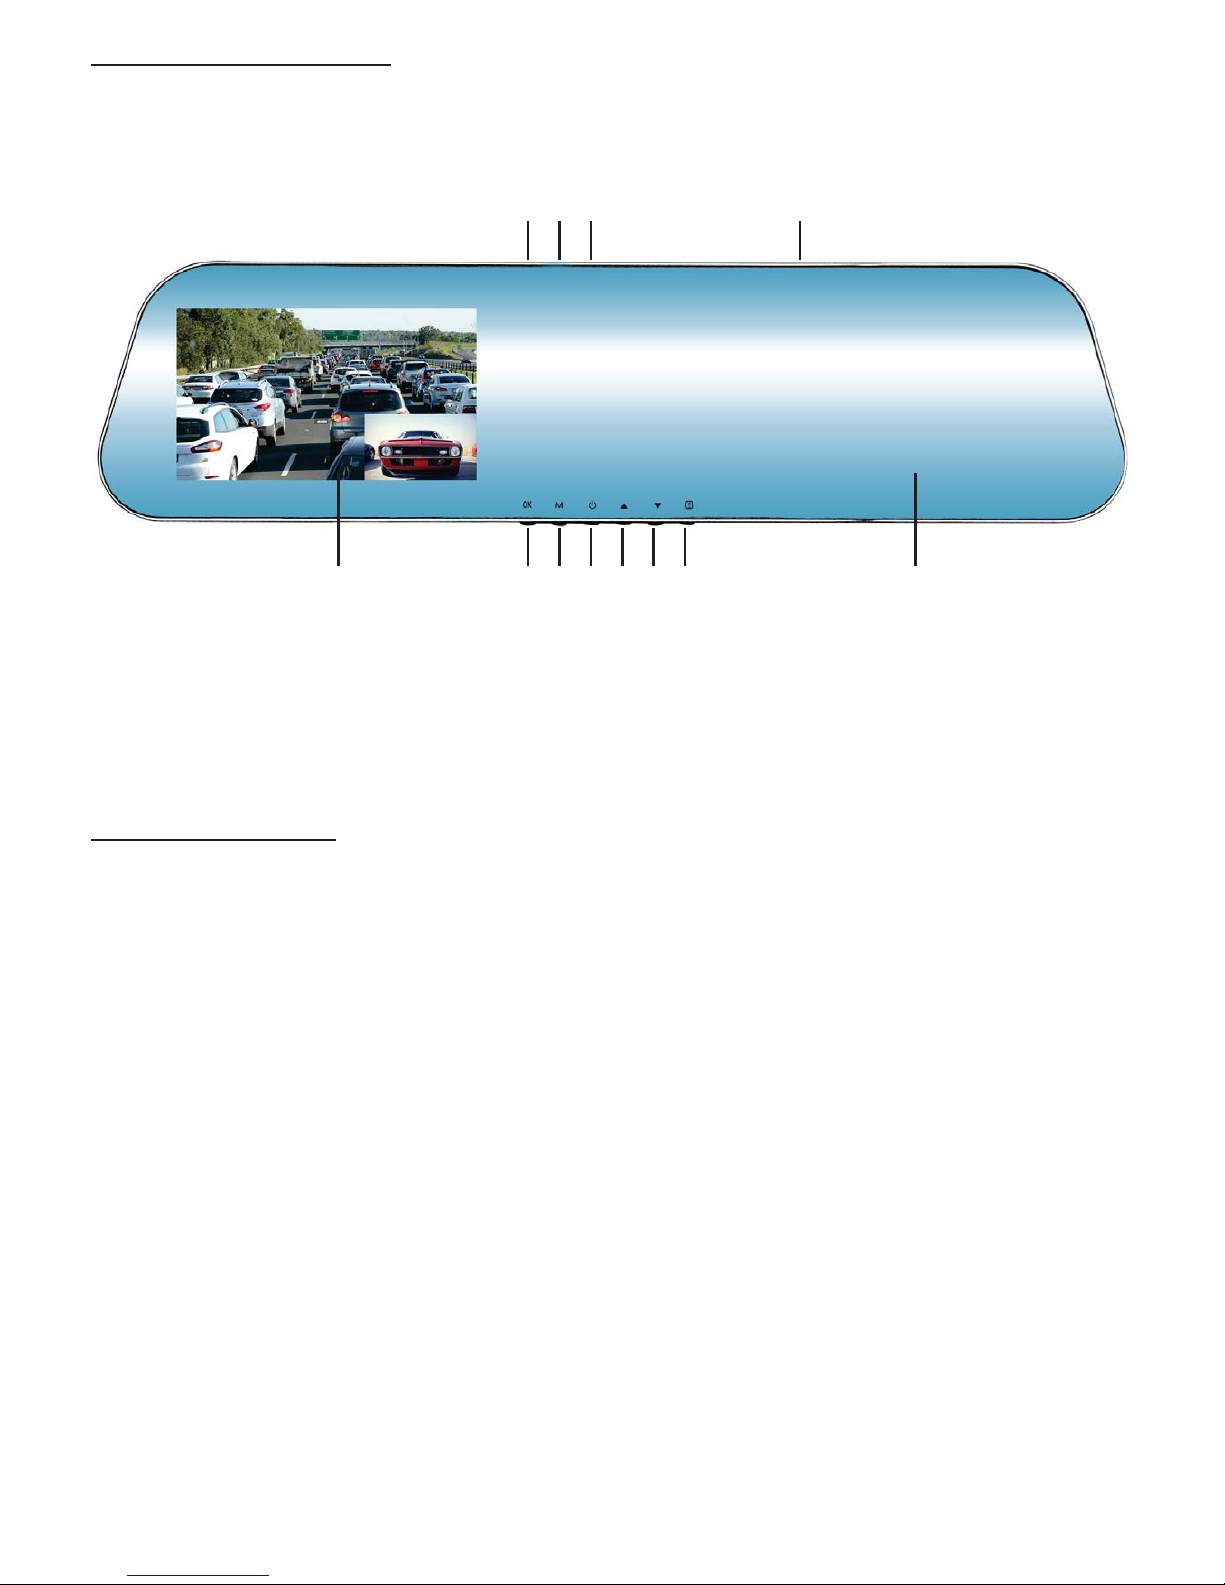
Function Buttons
1. OK
2. Mode
3. Power
Function Buttons
Menu: In video standby mode, press to enter menu and system menu setting.
In the photograph mode, press to enter photograph menu and system menu setting.
In the le playback mode, press to delete le and exit system menu settings.
Mode Key: Under the video record standby mode, press to enter photograph mode. Click again to enter
le playback mode. Press again to return to video standby mode.
ON/OFF: Press to turn on the unit. Hold down for 3 seconds to turn o. Press to enter screen save mode.
Press any button to awaken the screen.
Up: In the menu setting and le select mode, press to select up. In standby mode, press to select view on
screen of front camera, rear camera or front & rear cameras.
Down: In the menu setting and le select mode, press to select down. Press to select option to record
front camera, rear camera or front & rear cameras.
OK: In standby mode, press to start recording. Press again to stop recording.
In menu setting and le playback mode, press to enter or play the le.
In photo mode, photograph shutter function. Used to conrm a menu selection.
2.
112 13
728
3
10
^
9
41156
4. Up
5. Down
6. Menu
7. Micro USB Power Input
8. Micro SD Card Slot
9. AV-In
10. Indicator Light
11. Reset
12. Monitor
13. Rearview Mirror
Page 3

Function Buttons continued...
Micro SD Card Slot: Put a Micro SD card (not supplied) into the slot with the pin surface facing down.
A “click” sound will be heard.
Reset: In any mode of power on, click to restart the unit. All settings will restore to factory defaults.
Menu Function
USB Mode: There are three modes when the unit is connected to a computer
1. USB_Disk:
This allows user to transfer data from an SD card to the computer.
2. PC_Camera:
This allows the DVR1553K to be used as a webcam.
3. RC_Mode:
This allows the DVR1553K to be used as a video recorder.
Resolution: You can set the quality of video recording and digital photographs. The resolution for
video recordings are VGA (640*480P) & 1080P (1920*1080P). The resolution for digital photography is 1
megapixel (1280*960), 2 megapixels (1600*1200) & 3 megapixels (2048*1536). Lower resolutions allow
for more videos or images to be stored but the quality is less. Higher resolution requires larger storage
capacity, but the image quality should be better.
Recording Time: The recording time can be set to record in 1, 2 and 5 minute increments.
Recording Mode: This allows the choice of selecting front camera only, rear camera only or front & rear
camera recording options.
Settings
In this area, you can select the following options:
Brightness: To vary the eect of white light. There are 5 dierent options: Automatic, sunny, ourescent,
cloudy & incandecent light.
Exposure: To adjust the lighting strength. There are 6 dierent options:
-3, -2, -1, 0, 1, 2, 3.
Colour: To adjust the appearence of the video and picture. There are 5 dierent options:
Standard, monchrome, negative, retro, green.
Watermark: To select imprinting the time on the pictures and video.
Auto Detect: To assure that the camera can detect movement and begin recording.
This is helpful when vehicle is parked.
Auto Recording: This unit will begin recording as soon as the car is turned on.
3.
Page 4

Settings continued...
Language: There are 6 dierent options: English, Chinese Traditional, Chinese Simplied, Korean, Japanese
and Russian.
Frequency: To select various light frequencies. There are 2 dierent options:
50Hz and 60Hz.
Voice Recording: To select either record with or without sound.
NOTE: While the unit is recording, press MODE button to switch on or o.
Auto O: The unit will power down when car is turned o. There are 5 delay options:
30 seconds, 45 seconds, 1 minute, 2 minutes and 5 minutes.
Saver Setting: Screen will power o after a specied time. There are 6 options:
Immediately, 15 seconds, 30 seconds, 45 seconds, 1 minute and 2 minutes.
G-Sensor: This is Gravity Sensing. The unit can sense an accident.
There are 3 options: High, Medium and Low.
Date Set: To set the clock manually.
Format: To format all data on the SD Card. You will be prompted to conrm your decision with YES or NO.
Default Set: The unit can be reset to the original settings. Use this option when all functions freeze or
there are errors.
Software Version: This will outline the current software version in use.
Record: Insert card and turn on the unit. It will automatically record and the blue indicator will ash.
Click the OK button to stop recording. The green indicator will always stay on.
Photograph: In video standby mode, press the MODE button to enter photograph mode.
Press the OK button to take a photo and save.
File Playback: In standby mode, press the MODE button twice to enter the le playback mode. Press UP/
DOWN button to select le. Press OK button to open the le, then press the OK button to play the le.
Press the UP/DOWN button to go forward or backward.
SOS: In normal video recording, press the MENU button to save the current le and make sure the le is
protected and not recorded over. The screen will show a lock symbol.
HDMI: In standby mode, connect it to TV or other video signal (the signal source should be
set to video).
The TV screen will show le selection play mode.
4.
Page 5

Cycle Recording
This operation can be set for cycle recording from the video menu (eg: 5 minutes).
Each video can be saved every 5 minutes. When the card is full, it will record over any
unprotected le according to the principle of rst in, rst out.
eg: Set up loop recording for 5 minutes:
Press the MENU button to enter menu mode. Use the UP/DOWN buttons to select
cycle recording. Press OK button to enter cycle mode selection - (“close: 1 minute,
2 minutes, 5 minutes” are available). Select “5 minutes” by using the UP/DOWN button.
Then press the OK button to return to main menu. Press the MENU button to return to standby mode.
Battery Charging
The red indicator will be on when plugged into an external power supply. This indicates that
the battery is being charged. When the red indicator light glows darker, the battery has been
fully charged. The battery symbol display will show in the upper right corner of the screen.
Note:
When the unit stops working, use a small pointed object to press the RESET button.
The unit should restore to factory settings.
5.
Page 6

Rearview Camera System Operation
Attention:
1. Please use power adapter supplied. Substitute adapters may damage the unit.
2. Do not operate in damp or high temperature environments.
3. Please keep the lens clean for clear camera resolution.
4. Please strictly abide by relevant state laws for operating this device in an automobile.
General:
This DVR/Rearview system discreetly clips over the existing mirror of the vehicle with the
forward facing camera capturing images of the road ahead. Also, the independant rear camera
will display events behind the vehicle when reverse gear is selected. In addition to recording,
this provides a clear image for the driver and protects children, pedestrians etc from injury
and avoids costly repairs for dents and other damage when reversing.
Parking Camera:
The DUAL HEAD system included with your purchase allows for exible installation options,
either surface mount (eg number plate or boot lid) or stealth insert mount (eg bumper).
The video cable simply connects with the mirror monitor supplied.
CAUTION:
Carefully check the +/- wiring sequence during installation.
Ensure safety when installing wires near the fuel tank.
Installation:
Monitor Installation
1) Simply clip over the original mirror.
2) Carefully run wiring loom around windscreen or hood lining.
3) Connect rear camera extension cable (3.5mm plug) to input on mirror monitor.
4) Connect Cig Power Plug to monitor.
Note: Cig Power Plug can connect to any matching 12 or 24V socket. As this power plug
contains circuitry to reduce voltage to DC 5V, DO NOT CUT OFF.
Rear Camera Installation
1) Determine installation location (usually the centre-rear of vehicle).
a) Buttery Type - Mount on surface using double-sided tape or screws.
b) Insert Type - Carefully drill hole in bumper and insert camera.
4) Connect RED cable to 12V+ power cable of Reversing Light circuit.
(If 24V vehicle, a power adaptor will be required)
5) Connect BLACK cable to ground.
6) Connect 6m signal extension cable to monitor.
6.
Page 7

Camera Assembly Options:
The C20A Camera is supplied with Dual Mounting Heads:
See diagram below:
Cable Connections:
See wiring diagram below:
Mirror Monitor Connections:
See wiring diagram below:
D:LQJ%XWWHUÀ\$VVHPEO\
E%XPSHU)LW$VVHPEO\
Rearview Camera System Operation continued...
7.
Video Cable
Mini USB Input
Page 8

DVR1543K
 Loading...