

Page 1
1
2
WARRANTY
YEAR
GENERAL
- Display: 3” HD LCD
- Chipset: Novatek 96223
- Image Sensor: SC1143, 1.0M CMOS
- Outputs: USB
- PC Interface: USB
- Power Supply: 12/24V Cig. Lead Charger
- Input Power: 5V DC
- Battery: 200mAh
- Chassis: Alloy Metal
- Mounting: Suction Bracket
- Dimensions: 88W x 56H x 35Dmm
DVR
- Resolution: HD 720p / 1080p Upscaling
- Viewing Angle: 120° (Diagonal)
- Memory Support: Up to 32GB Micro SD Card (Not included)
- Video Format: AVI
- G-Sensor: Yes
- Motion Detection: Yes
- Parking Monitoring: Yes
- Loop Recording: Yes
- Auto Record: Yes- After Power On
CAMERA
- 12MP Photo Resolution
- ISO Adjust
- Exposure Adjust
- White Balance Adjust
- Sharpness Adjust
- Colour Adjust
- Zoom Function
- Anti-shake
- Capture Timer
- Consecutive Capture
- Web Camera via USB
INCLUDED
- Suction Bracket
- 12/24V Cig. Lead
- USB Lead
- Instruction Manual
- 2 Year Warranty
(Battery - 12 Months)
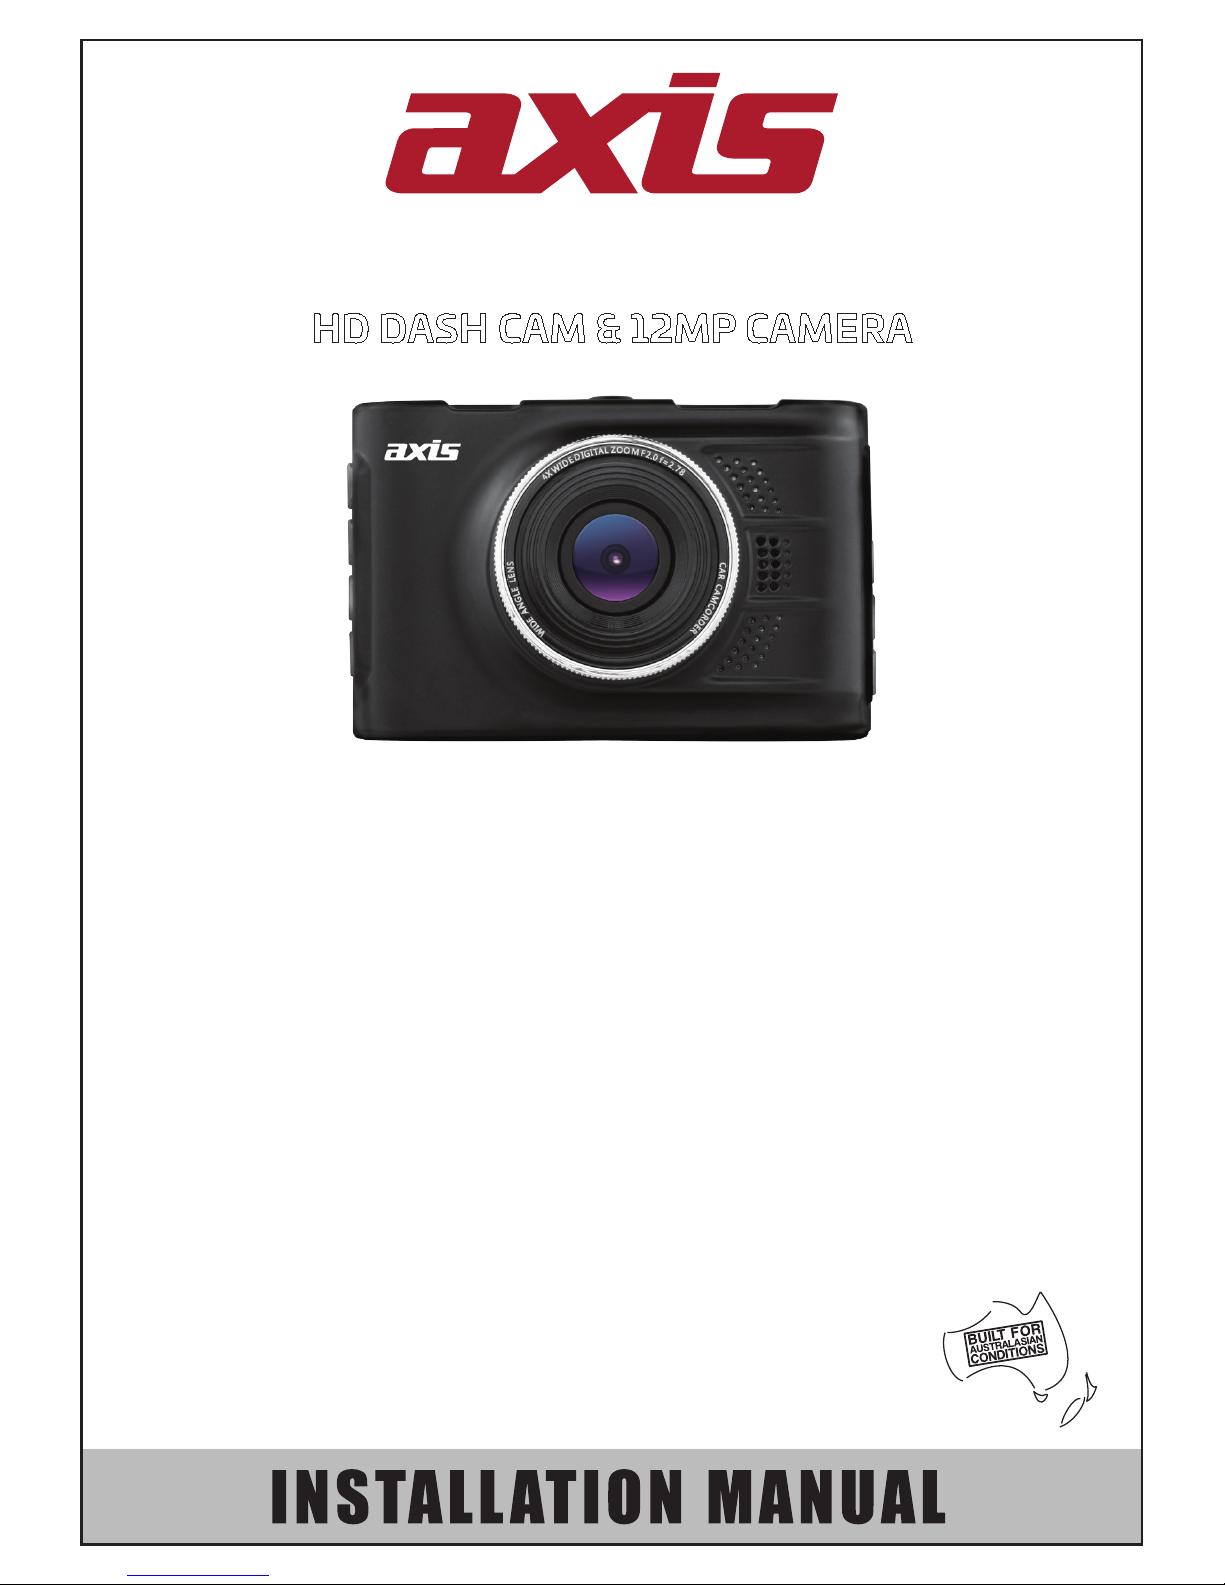
DVR101
HD DASH CAM & 12MP CAMERA
Page 2

2
Preface
• Thank you for purchasing the Axis DVR101 Digital Video Recorder.
• This manual will detail how to install, operate the unit and highlight matters
needing attention. Please read it carefully before use and keep it handy for
future reference.
• Due to factory improvements and/or rmware updates, the manual may dier to
the actual unit. The manufacturer reserves the right to make changes without
prior notice.
Accessories
Included accessories are as pictured below. If there is any items missing or
damaged, please contact your place of purchase immediately.
Accessories check
The following standard list and selection list. If there is any missing or damaged items, please contact your
dealer immediately.
Suction bracket Car charger
USB Instructions for use
Standard
USB
Instructions for use
Installation Notes
• In order to get the best recording view, install the unit near the rear view mirror.
• Do not touch the lens with your ngers. Fingerprints may aect the video
or photographic clarity. Clean the lens regularly with a soft, dry, cloth.
• Use the original car charger.
• Do not dismantle the unit or the charger. This will void the warranty.
Page 3
3
Installation
1) Insert a class 10 or better Micro SD memory card.
Take care to insert it in the right direction and in the correct slot (8).
Push the card all the way in and then release. You will feel a light click.
To remove the memory card, press down on the memory card and release. The card
will pop up to make removal easier.
Note: Please format the card in the unit before use. See “Format” in the menu.
Note: Do not remove the memory card while recording or playing as this could dam-
age the card and not save the current le.
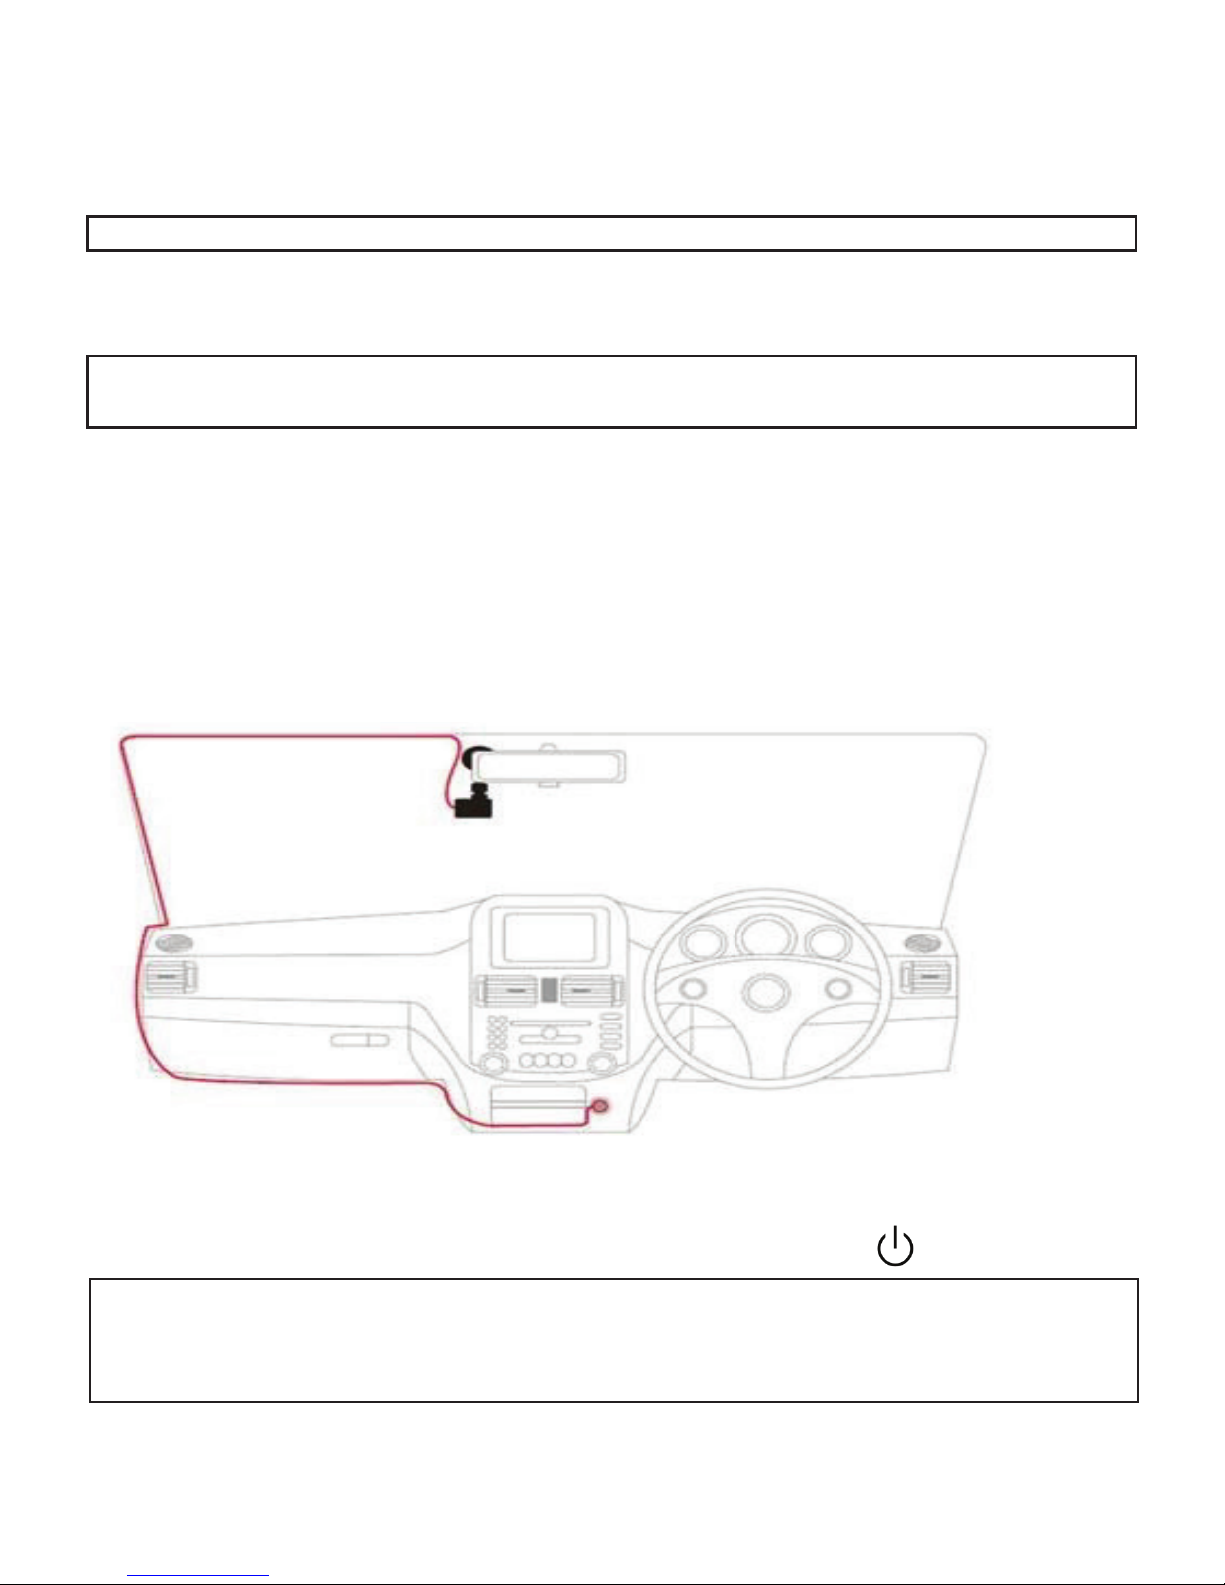
2) Mount the unit near the rear view mirror to achieve the best recording view.
Make sure that the windscreen is clean and free from residue or dust.
Make sure that the suction cup is in a released state, then push the suction cup
up against the screen so that it has a tight seal. While pushing it against the
screen, push the leaver towards the screen to secure it.
3) Connect the supplied 12/24v cig. lead charger into the USB port (9).
4) The unit will automatically turn on and start recording with the vehicle’s
accessories. Turning o the accessory circuit will stop the unit from recording
and save the le. Manually turn the unit on/o by pressing the button.
Note: Some vehicles will continue to supply power from the cig. power plug even
when the vehicle accessory is o. If you encounter this, manually turn the unit
o/on or unplug the unit from the car charger.
Page 4

4
Display Interface Icons
1. Video icon indicates Video mode.
Camera icon indicates camera mode
Playback icon, indicating the playback mode
2. Flashing red indicates that the unit is recording.
Yellow dot blinking indicates motion detection mode in standby
3. Gravity sensor icon. If G-Sensor is set to “on”, this icon will be
displayed on the screen.
4. Lock icon is displayed when the current video le is locked.
5. 5.00:15:30 White Font - memory card’s remaining recording time.
Red Font - current segment recording time.
6. Displays selected le time
7. WDR shows that the WDR option is on and the image will automatically
adjust the brightness so that dark areas can be seen clearer.
8. EV exposure compensation icon indicates the currently selected
exposure parameters.
9. Motion detection icon will appear, indicating that the feature is activated.
Page 5

5
10. Audio Recording function is on.
Audio recording function is o.
11. AAAAAA License plate display. Can be set in the menu.
12. 1080FHD Video resolution icons: Display the currently selected video
resolution.
13. Parking guard icon will display if turned on.
14. Memory card icon is displayed if a card is inserted.
15. Battery level icon will shows the current charge:
Fully charged Lower power consumption Low power consumption Flat battery
Charging time is approximately 180 minutes. The red charging indicator light will
automatically turn o after charging is completed.
16. 00:00:01 Shows the current time once set in the menu.
17. 2014/01/01 Shows the current date once set in the menu.
Note: This unit can continue recording on battery power if the vehicle’s ignition has
been turned o. Battery use time is dependent on recording resolution and
settings selected.
Page 6

6
Menu settings
1. If the unit is recording, press the button (1) to stop recording.
2. Press the menu button (6) to bring up the setup menu.
3. Press the ▲ (5) or ▼ (7) button to scroll up or down the menu items.
4. Select the settings to be changed by pressing the button (1).
5. Press the menu button (6) to exit the menu.
Functions
Number Icon Name Operating Instructions
1 OK Press the OK button to turn on the camera. Press again to
turn o the camera.
In menu mode, to conrm. In Photo mode, press this key to
take photos.
2 MODE For selection of video, picture, or playback function.
3 Lock In video mode, press this button to lock on the current
video le. The locked le will not be recorded over.
4 ON/OFF Press & Hold the button for On / O.
5 Up In Menu mode, press to scroll up. Zoom in Photo mode.
6 Menu Press to enter menu.
(Note: Menu will dier in Video, Photo or Playback modes)
7 On the turn key In Menu mode, press to scroll down. Zoom in Photo mode.
8 TF card slot TF memory card slot, please install in the correct direction.
9 USB interface Use to connect the PC for data transmission. Use to con-
nect the cig. lead power supply.
10 Not applicable to this model.
11 reset button System restart / reset button.
12 microphone Audio receiving port.
Page 7

7
Options Explanation Available options
Resolution Set the video resolution 1080FHD 1920x1080,
1080p 1440x1080, 720P,
WVGA 848x480, VGA
640x480, QVGA 320x240.
Loop recording Setting up video le length O, 1 minute, 3 minutes,
5 minutes. If you choose
“o”, the card will not
automatically cycle. i.e.
the unit will stop recording
once full.
Exposure Determines how light or
dark an image will appear
+2/3, +1/3, +0.0, -1/3,
-2/3, -1.0, -4/3, -5/3, -2.0
Record Audio Recording audio is turned
on or o
On, O
Motion Detection Can be set to start
recording when the lens
detects motion
On, O
Date Stamp Date will display on the
screen and watermark
video recording
On, O
WDR Wide Dynamic Range
automatic brightness
adjustment.
On, O
G-sensor G force setting to save
and lock video le
O, Low, Medium, High
Parking guard Unit will automatically turn
on and start recording
if external vibration is
sensed
On, O
Settings in Video Mode
Page 8

8
Options Explanation Available options
Date / Time Date and Time To set the year, month,
day, hour, minute, seconds
Auto Power O Set automatic turn o time O, 30 seconds , one
minute, 3 minutes
Beep Sound Sound with button press On, O
Language Select menu language English, Spanish, French,
Dutch, Italian, Traditional,
Simplied Chinese,
Russian, Japanese,
German, Korean,
Portuguese
Frequency Refresh rate 50HZ, 60HZ
Screen Saver Display standby time O, 3 minutes, 5 minutes,
10 minutes
Car Plate Enter the Vehicle license
plate or vehicle number.
This will show on the
video le
A00000
Format Format the Memory card
or delete memory card
data
Cancel, OK
Default setting Restore factory settings Cancel, OK
Version Shows rmware version
Additional Settings in Video Mode
Press the menu button (6), then press menu again to bring up the additional
menu.
Page 9

9
Options Explanation Available options
Capture Mode Capture mode/timer Single, 2sec timer, 5sec
timer, 10ses timer
Resolution Set photo capture resolu-
tion
12M 4032x3024,
10M 3648x2736,
8M 3264x2448, 5M
2591x1944, 3m
2048x1536, 2MDH
1980x1080, 1.3M
1280x960, VGA 640x480
Sequence Takes 3 consecutive
photos
On, O
Quality Set detail Fine, Normal, Economy
Sharpness Set image sharpness Strong, Normal , Soft
White Balance Set according to environ-
ment
Auto, Daylight, Cloudy,
Tungsten, Fluorescent
Color Set color choice Color, Black & White,
Sepia
ISO Set light sensitivity Auto, 100, 200, 400
Exposure Determines how light or
dark an image will appear
+2/3, +1/3, +0.0, -1/3,
-2/3, -1.0, -4/3, -5/3, -2.0
Anti-Shaking Helps to prevent blur from
moving the camera
On, O
Quick Review Slide show settings O, 2 seconds, 5 seconds
Date Stamp Choose Time/ Date
stamping on image
O, Date, Date/Time
Options Explanation Available options
Delete Delete recordings/photos Delete Current,
Delete All
Protect Lock or unlock les Lock Current,
Unlock Current, Lock All,
Unlock All
Slide Show Playback settings 2 seconds, 5 seconds,
8 seconds
Settings in Camera Mode
Page 10

10
Video Operations
1. Press the Mode Button (2) to switch to video recording mode. A video
icon in the upper left corner of the screen will display.
2. Set the time and date in the menu. Select “Date Stamp” on or o as
desired in the menu.
3. The unit will automatically save video les. Under “Loop Recording” in the
menu, select if you prefer o, 1, 3, or 5 minute video les.
4. The videos or photos will be saved on the inserted and formatted memory
card. If a memory card is full, the oldest le is automatically overwritten.
5. Emergency / SOS le save can be done by pressing the lock button (3).
6. G-Sensor sensitivity can be set in the menu. If a G-force greater than the setting
selected is sensed, the unit will lock the video le. It cannot be automatically
overwritten.
Camera Operations
1. Press the Mode button (2) to switch to camera mode. A camera icon in
the upper left corner of the screen will display.
2. Press the button to take pictures. The screen ashes to indicate
camera shot is complete.
3. Press ▲ button (5) to zoom in and ▼ button (7) to zoom out.
Video / Photo Playback Operations
1. If the unit is recording, press the button (1) to stop recording.
2. Press the Mode button (2) to switch to the playback mode.
The upper left corner of the screen to display the playback icon.
3. Press ▲ up or ▼down to select the desired le.
4. Press the OK button to play the selected video le.
Press again to pause playback.
Special features
G-Sensor
• If a G-force greater than the setting selected is sensed, the unit will lock the video
le. It cannot be automatically overwritten.
• The G-Sensor can be adjusted in the menu - High, Medium or Low (Medium setting
is the factory default).
Motion Detection
If motion detection is turned on in the menu, the unit will start recording automatically
when motion is detected. The dot on the upper left corner of the screen will ash
yellow. When an object is detected moving, the unit will start recording and the dot
becomes red. After motion has stopped, the unit returns to standby mode.
Page 11

11
Parking Guard (Parking Monitoring)
• If in stand-by, and the unit senses external vibration, the unit will turn on
automatically and start recording. The le is automatically locked.
• To activate Parking Guard, select “On” in the menu.
• After approximately 10-15 seconds, the unit will stop recording and shut down.
USB mode
Connect a USB cable from the front of the unit to a computer. The USB menu will
appear with the following options:
1. Memory
In this mode, the video le or photo les can be accessed.
2. Camera
Selecting this mode will bring up the USB video device. It can be used as a real-time
network camera or as a video chat PC camera.
NOTE: The motion detection and parking guard function will only work if the unit is
on. In stand-by mode this function will not work if the internal battery has
drained or the unit has been manually turned o.
Unable to turn on • Check that the charger is connected.
• Check if battery level is too low.
• Press reset button.
Automatically stops
recording
• Not enough space on the memory card.
• Memory card is not class 10 or higher.
• Memory card has not been formatted in the unit.
• Loop recording is set to o. If o, please change
setting.
• All les are locked.
Record time is dierent to
“On” time
• If Motion detection mode is set “On” , the unit will
only record if motion is sensed in the camera view.
Video and/or Camera
images are not clear
• Clean lens with soft, dry cloth.
• Check that the resolution in the menu are set
correctly.
• Check that the ISO, Exposure, Color, Brightness etc.
settings are correct.
Images have streaking
interference
• Check frequency rate- 50 or 60Hz.
• Possible interference from orescent lighting
Unit’s functions are frozen Press reset button
Troubleshooting
Page 12

DVR101
 Loading...