

Page 1

SPECIFICATIONS
- Image Device: 1/3” PC3089 Sensor
- Viewing Angle: 120°
- Signal System: PAL
- Effective Pixels: 756 x 504
- Sensing Area: 4.80mm x 3.78mm
- Image Mode: Mirror/Normal Selectable
- Scanning System: 2:1 Interlace
- Sync System: Internal
- Horizontal Sync Frequency: 15.625 KHz
- Vertical Sync Frequency: 50 Hz
- Video Output: 1.0Vp-p, 75 Ohm
- S/N Radio: Better than 46.5dB
- White Balance: Auto
- Electronic Shutter: 1/50 (PAL) ~1/100,000 seconds
- Operating Frequency: 2.4 ~ 2.4835 GHz
- Receiving Sensitivity: -89 dBm
- Line of Sight Range: 120 metres
- Compression Format: MPEG4
- Frame Rate: 25f/s
- Transmit Output Power: 17 dBm
- RF Bit Rate: 4Mbps
- Minimum Illumination: 0 Lux (12 IR LEDs)
- Night Vision Distance: 10m
- Audio: Yes
- Ingress Protection: IP69K
- Power Supply: DC 8-36V
2
WARRANTY
YEAR
CC007W
WIRELESS REVERSING CAMERA
WORKS WITH JS007WQK & JS056WK
INSTRUCTION MANUAL
CONTINUOUS OPERATION
ENGINEERED FOR
Page 2
7/17
WATERPROOF CAMERA
ASSEMBLY
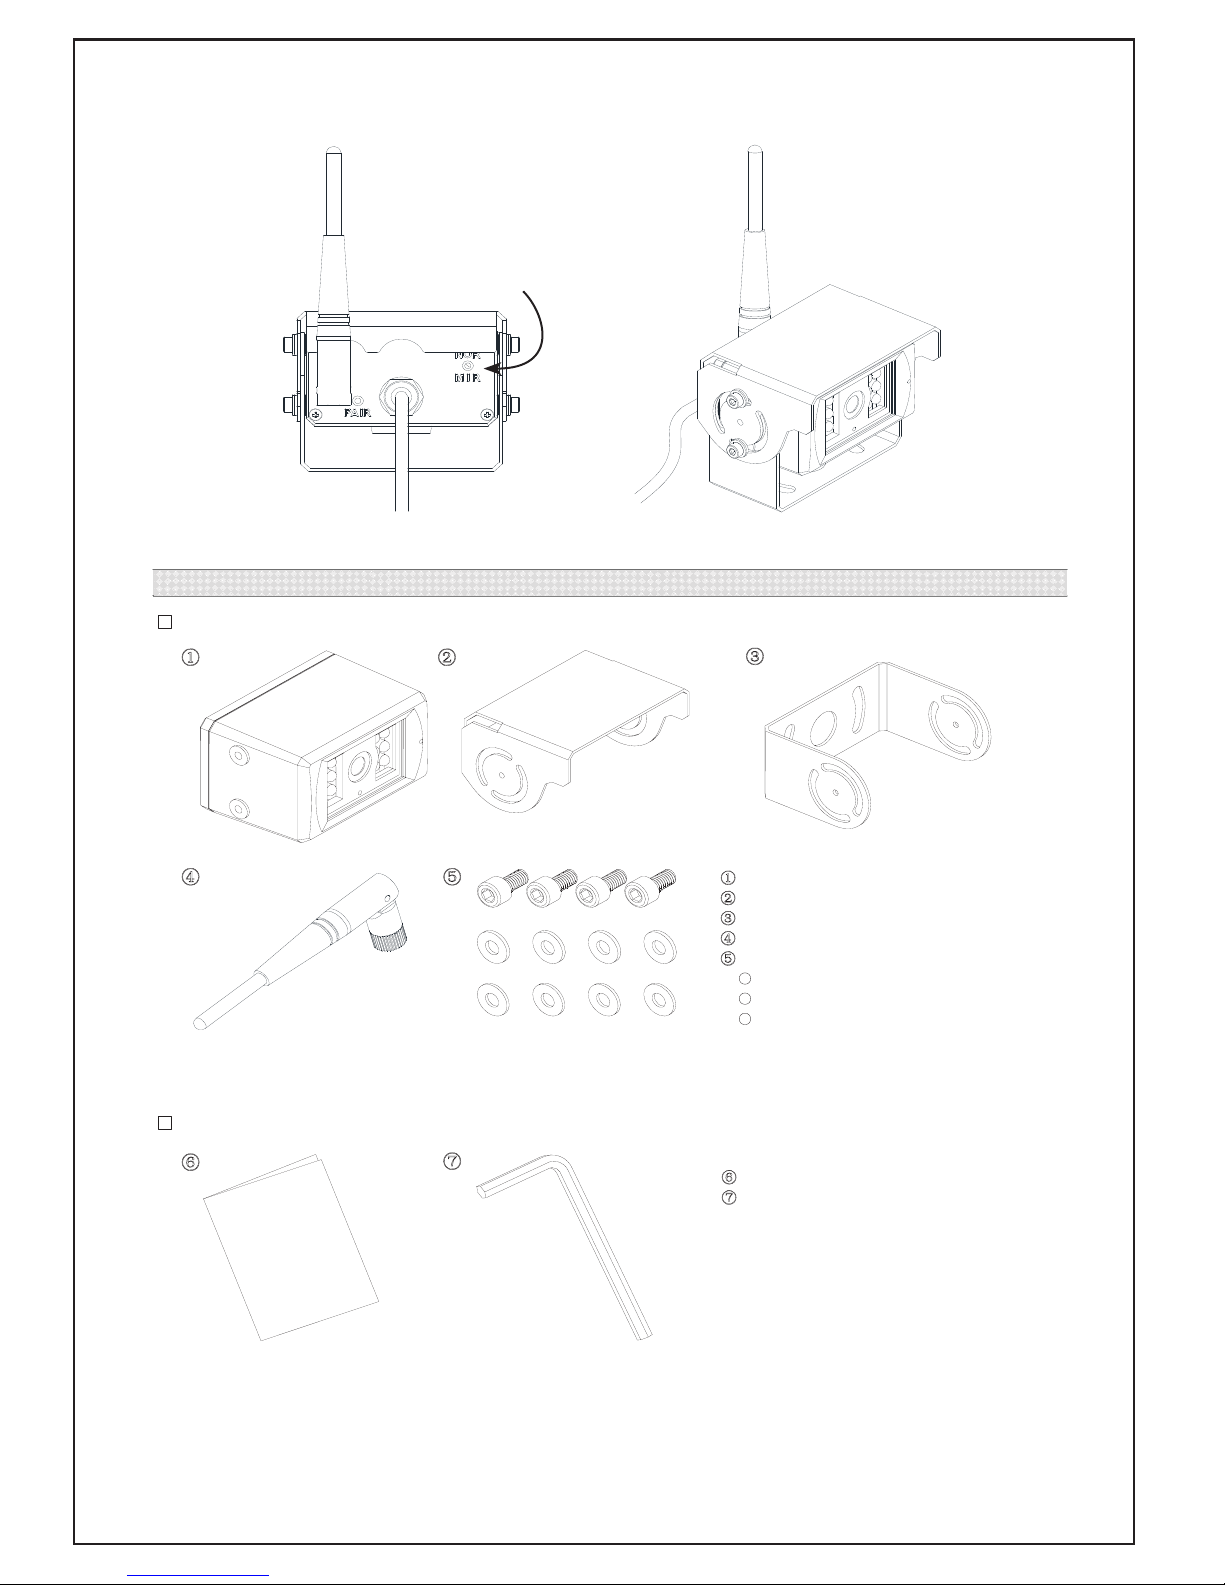
Ƶ CAMERA
ķ
ĸ
ĺ
Ƶ ACCESSORIES
ķ Camera (undetachable)
ĸ
Sunshield for camera
Ĺ
U-bracket for camera
ĺ
Antenna
Ļ
Assembly parts for U-bracket
ƽ
Washer (nylon)
ƽ
Washer (stainless steel)
ƽ
Hex head screw (stainless steel)
X1
X1
X1
X1
X4
X4
X4
ļ
Operating instruction
Ľ
Screw driver for hex head screw
X1
X1
Ļ
ļ
Ľ
Ĺ
Mirror/Normal Image
Adjustment*
* Tight: Normal
Loose: Mirror
Page 3

7/17
INSTALLATION
(1) Find an appropriate location for installation (Illustration 1).
(2) Drill holes according to the size of U-bracket as illustration 3 and fix the U-bracket as illustration 2.
(Illustration 1)
ĭ20 hole
(Illustration 2)
Camera
U-bracket
(Illustration 3)
(Illustration 4)
Camera
Hex head screw (stainless steel)
Washer (stainless steel)
Washer (nylon)
(5) Connect the camera tail and the DC Power cable inside the car (Illustration 5).
Illustration 6
Back of Vehicle Body
Bumper
Monitor Image
Angle of the Lens
Vehicle Body
(6) Loosen the screw between the camera and the fixed U-bracket and adjust the cam era to a best viewing angle (Illustration 6).
(3) Drill a ĭ20mm next to the U-bracket (Illustration 2).
(4) Fix the camera to the U-bracket (illu stration 4).
Rubber Grommet
DC Power Cable
Camera Tail
(Illustration 5)
Page 4

7/17
CC007W
 Loading...