

Page 1

Preface
About Axis
Thank you for purchasing the AXIS AFP IOP Printer Interface. Our goal
in developing this product is to enable you to connect your Lexmark
Optra series of printers or the 4039 series of printer to your IBM IPDS
environment, allowing you to take full advantage of both the IPDS
functions and your printer capabilities.
Axis Communications, founded in 1984, is one of the world’s fastest
growing companies in the printer interface and network print server
market. The head quarters are located in Lund, Sweden, with subsidiaries
in Boston, Tokyo, and Hong Kong.
Axis Communications has a distributor network operating in more than
60 countries world-wide, marketing three product lines:
Network CD-
ROM Servers
Network Print
Servers
IBM Mainframe
and S/3x – AS/400
Printer Interfaces
CD-ROM servers provide a flexible and cost-efficient solution for sharing
CD-ROMs across the network. They are available in Ethernet (AXIS 850/
851) and Token Ring (AXIS 950/951) versions, with or without built in
drive option.
These intelligent Ethernet and Token Ring print servers support a wide
range of LAN protocols. The AXIS NPS 530, 532, 550 and AXIS 150 are
Ethernet print servers, and the AXIS NPS 630, 632 and 650 are Token
Ring print servers.
These products include a wide range of plug-in interfaces and free standing
box products such as the Cobra+ and the AFP IPDS-to-PostScript
converter.
AXIS AFP IOP User’s Manual Revision 1.0
Part No: 14363 Dated: October 1995
Copyright © Axis Communications AB, 1995
AXIS AFP IOP User’s Manual i
Page 2

About this manual
This manual will guide you through a simple step-by-step installation and
setup procedure. It is divided into six sections:
General
Information
Front Panel
Operation
About the AXIS AFP IOP Printer Interface, how it works, where to use it,
and its main features.
How to operate the Lexmark printer’s front panel when the AXIS AFP
IOP is installed.
Utility Program The tool for reconfiguring and upgrading the software in the AXIS AFP
IOP.
Configuration
Parameters
A complete listing of the parameters available for configuration of the
AXIS AFP IOP.
Download/Upload Downloading the configuration program and the fonts to the AXIS AFP
IOP, as well as uploading the current configuration.
Program Setup Setup of the Utility Program output function.
The manual applies to the AXIS AFP IOP with firmware release 1.00 and
subsequent releases until otherwise notified.
This manual primarily describes operation of the AXIS AFP IOP installed
in Lexmark Optra series of printers. The AXIS AFP IOP also supports
Lexmark 4039 and 4039 Plus series of printers, with some minor
differencies in the front panel operation.
Every care has been taken in the preparation of this manual; if you detect
any inaccuracies or omissions, please inform us at the address on the back
cover. Axis Communications AB cannot be held responsible for any
technical or typographical errors and reserves the right to make changes to
the product and manuals without prior notice.
ii AXIS AFP IOP User’s Manual
Page 3

Emission notices
USA This equipment generates, uses, and can radiate radio frequency energy and if not installed and
used in accordance with the instruction manual, may cause interference to radio communications.
It has been tested and found to comply with the limits for a Class A computing device pursuant to
Subpart B of Part 15 of FCC rules, which are designed to provide reasonable protection against
such interference when operated in a commercial environment. Operation of this equipment in a
residential area is likely to cause interference in which case the user at his own expense will be
required to take whatever measures may be required to correct the interference. Shielded cables
should be used with this unit to ensure compliance with the Class A limits.
Europe This digital equipment fulfils the requirements for radiated emission according to limit B of
EN55022/1987, and the requirements for immunity according to EN50082-1/1992 residential,
commercial, and light industry. (Compliance is not valid for unshielded network and printer
cables.)
Trademark acknowledgements
Lexmark, Optra, PCL and IBM are registered trademarks of the respective holders.
AXIS AFP IOP User’s Manual iii
Page 4

iv AXIS AFP IOP User’s Manual
Page 5

Table of contents
Preface i
About Axis i
Network CD-ROM Servers i
Network Print Servers i
IBM Mainframe and S/3x – AS/400 Printer Interfaces i
About this manual ii
General Information ii
Front Panel Operation ii
Utility Program ii
Configuration Parameters ii
Download/Upload ii
Program Setup ii
Emission notices iii
Trademark acknowledgements iii
Table of contents v
1
General Information 7
Product Overview 7
Contents of This Delivery 8
IPDS 9
The Distinction between AFP and IPDS 9
Fonts 9
The Lexmark IOP Port 10
AFP IOP Serial
I/O Port 10
2
Front Panel Operation 11
AFP IOP menus 11
Opening Screen (Main IOP Menu) 12
Local Setup Menu 14
3
Utility Program Operation 15
Setup for PC Configuration 16
Handling Config Files 16
AXIS AFP IOP User’s Manual v
Page 6

Open Config File (read from PC harddisk/floppy drive) 16
Making Changes to Config File Options 17
Save Config File (to PC harddisk/floppy drive) 18
4
IPDS Parser Function 19
Using the IPDS Parser 19
Syntax 19
Example 1 20
Example 2 20
Option strings 20
5
Configuration Parameters 21
Coax/Twinax Options Front Panel Menus 22
Coax Options 23
Note: 23
C01 23
C02 24
C03 24
C04 24
C06 26
C08 26
C09 26
C10 27
C11 27
C12 27
C13 28
C14 28
C15 29
C16 29
C17 30
C18 30
C19 30
C20 31
C21 31
C22 31
C23 31
C24 32
C25 32
C26 32
vi AXIS AFP IOP User’s Manual
Page 7

C27 33
C28 33
C29 34
C30 34
Twinax Options 35
Note: 35
C01 35
C02 36
Note: 36
Twinax Address 37
Note: 37
Printer Option Front Panel Menu 38
Margins 38
Printer Options 40
Note: 40
Top Margin 40
Left Margin 40
Top Margin Back Side 41
Left Margin Back Side 41
Top Margin Envelope 41
Left Margin Envelope 42
Number of trays 42
Cassette Function 43
Paper Size, Top Cassette 44
Paper Size, Bottom Tray 45
Paper Size, Manual Feed 46
Paper Size, Envelope Feed 47
Manual Feed Support 47
Envelope Feed Support 48
Skip Blank Pages 48
Interface Release Time Out 49
Error Beep Control 49
Full Page Printing 50
Test Page 50
IPDS Options Front Panel Menu 51
IPDS Options 52
Note: 52
IPDS Emulation 52
Codepage Version 52
IPDS Exception Reporting Control 53
AXIS AFP IOP User’s Manual vii
Page 8

IPDS Stacked Page Counter 53
Resource memory 54
Duplex Support 54
4028 Printable Area 55
Set Factory Default 56
6
Download/Upload 57
Download/Upload Procedure 57
Download All 59
Download/Upload Configuration (*.CFN files) 59
Download Program (Main AFP IOP Firmware) 59
Download Font (Resident Font Resources) 60
7
Program Setup 63
Output 63
A
Printing a Status Sheet 65
AFP IOP Testpage 65
Lexmark Printer Settings Printout 66
B
IPDS Font Summary 67
IBM 3812 Emulation Fonts (240 dpi) 67
IBM 4028 Emulation Fonts (300 dpi) 69
C
Technical Specifications 71
Printers supported 71
Physical attachments 71
Attachments 71
Emulations 71
IPDS Features Supported 72
IPDS Fonts 72
General Hardware Features 72
Examples of supported software 72
Product Certificates 73
Safety 73
Environment 73
viii AXIS AFP IOP User’s Manual
Page 9

D
IBM Cabling System 75
E
Installation 77
Installation on Lexmark Optra and 4039 77
F
How to contact Axis 85
Internet and World Wide Web 85
The Axis offices 85
G
H
Related Publications 87
Cable Specifications 89
Index xci
AXIS AFP IOP User’s Manual ix
Page 10

x AXIS AFP IOP User’s Manual
Page 11

Section 1: General Information
Section 1
General Information
Product Overview • This interface has full support for the IPDS features of the correspond-
ing IBM 3812, IBM 3816 and IBM 4028 printers and is 100% plug
compatible with these printer types.
• Emulation selection (3812/16 or 4028) is easily done from the front
panel control.
• Hardware installation is easily done by the user. The only tool needed
is a screwdriver for mounting one single screw. The interface consists
only of two parts: -The AFP IOP main board and the externally
attached Twinax or Coax patch cable. The interface only takes posses-
sion of the internal optional port of the printer and allows dynamic
sharing with the existing input ports of the printer.
• The interface connects to the IOP input port of the Lexmark printer
allowing maximum utilization of the performance of the high speed
RISC processor on the AFP IOP interface.
• Best performance is obtained by using the Lexmark Optra series, which
is built around a new Graphics Engine based on an object oriented
design. The AXIS AFP IOP creates an HP PCL5 raster image for each
page to ensure 100% compatibility with the AFP architecture, and the
new Graphics enterpreter of the Lexmark Plus series can maintain full
printspeed during processing of complex graphics jobs.
AXIS AFP IOP User’s Manual 7
Page 12

Section 1: General Information
Contents of This
Delivery
Twinax 1 x Twinax DB9 Twinax T-bar cable AFP IOP (Part no: 14382).
Coax 1 x Coax cable AFP IOP (Part no: 14384).
The AXIS AFP IOP interface package consists of these parts:
1 x AXIS AFP IOP interface main board (Part no: 0055-3).
An interface which connects to the IBM 3270 environment by Coax
cabling or the IBM 5250 environment by Twinax cabling. The inter-
face contains by default both 3816 and 4028 emulations together with
the Twinax and the Coax software. The interface is delivered with a
factory setting which combines the most important default settings of
the corresponding 3812/3816/4028 IBM printers.
The Twinax or Coax cable is for connecting to the 9 pole Dsub con-
nector on the AXIS AFP IOP backplate. The interface automatically
detects which patch cable is mounted.
1 x Mounting screw (Part no: 11998).
1 x 3,5" floppy disk (Part no: 14355).
The disk contains a PC-based utility program P11-XXXX for reconfig-
uring the interface through the Serial link cable.
1 x Serial link cable (Part no: 14387).
The cable is for option configuration and software upgrade of the
AXIS AFP IOP through the PC utility program. The Serial link cable
connects to the interface via the same 9 pole connector as the Coax and
Twinax patch cables.
1 x AXIS AFP IOP User’s Manual (Part no: 14363).
1 x A DC/DC converter module, if specifically ordered (Part no: 14409).
Note DC/DC converter required only for the 4039 10 and 12 page printer
models.
8 AXIS AFP IOP User’s Manual
Page 13

Section 1: General Information
IPDS The Intelligent Printer Data Stream (IPDS) is the host-to-printer data
stream for Advanced Function Printing (AFP) subsystems. It is part of
IBM's System Application Architecture (SAA).
The IPDS architecture is functionally divided into eight towers of
command sets, each representing a major printer capability. Five data
towers: Text, IM Image, IO Image, Graphics and Bar Code; and three
resource towers: Page Segment, Overlay and Loaded Font.
With IPDS it is possible to:
• use the all-points-addressable printing capability of the page printer to
print text, graphics, images or bar codes at any point on the page.
• use images and vector graphics to print line drawings, pie charts, bar
charts, graphics, logos, signatures etc.
• combine all kinds of data on the same page.
The Distinction
between AFP and
IPDS
Fonts The AFP IOP contains a total of 32 resident 300 dpi (dots per inch) fonts
• print in all rotations either on separate pages or on the same page.
• electronically store and later print forms and letterheads.
• electronically store and later print host fonts.
In general AFP is the entire SAA print concept, whereas the AFP Data
Stream (AFPDS) represents closed page definition files which have
information of various resources (e.g. the coordinates of a line and where
to place a logo). The resources, not already resident in the printer (e.g. the
logo), are picked up in the PSF libraries and incorporated in the IPDS
format representing the final formated output, which communicates
bidirectionally between the PSF and the printer. This interaction ensures
for instance that the logo is loaded into the printer only when needed (first
time and after an error situation), and deleted only when other resources
need the space.
(4028 emulation) and 35 resident 240 dpi fonts (3812 emulation). The
fonts are functionally equivalent to the standard IBM 4028 AS1/NS1 and
the IBM 3812 Model 2 fonts. Refer to Appendix B IPDS Font Summary
for a full listing of the resident fonts.
AXIS AFP IOP User’s Manual 9
Page 14

Section 1: General Information
The Lexmark IOP
Port
AFP IOP Serial
I/O Port
The Lexmark IOP port allows a network interface to send data to the
Lexmark PCL and PostScript interpreter with an extensively higher speed
than possible through a parallel PC cable. Additionally the IOP port
provides information of various hardware and software states to the AFP
IOP interface. With a unique native IOP language defined by Lexmark it
is possible to program the front panel push buttons and display to allow
front panel controlled user setup of the interface connected to the IOP
port. The native Lexmark settings are altered by means of the PJL
language invented by Hewlett Packard. The IOP port on the 4039 10 and
12 page printers does not deliver the appropriate voltage to the interface
card unless a DC/DC converter is installed in the 5 pole socket above the
interface.
The serial I/O port on the AFP IOP allows easy software upgrade of the
interface through a menu/mouse controlled PC utility program. The same
utility program can be used for setting up the front panel configurable
options also. The only benefit of using the utility program for setting up
the options is that instead of changing them one by one, they can all be
overwritten by a complete configuration file in one download operation.
The serial I/O port can also be used as a trace output port for dumping
system data sent from the HOST onto a serial attached PC. Contact your
local dealer/distributor for more information.
10 AXIS AFP IOP User’s Manual
Page 15

Section 2
Front Panel Operation
The AFP IOP adds a complete set of interface menus to the existing
Lexmark front panel menu structure, thus allowing all interface settings to
be altered by an easy self explanatory user interface. Menu settings relating
to Coax and Twinax change according to the cable connected to the AFP
IOP.
Note: Changed settings will only have effect at the next Power on.
Section 2: Front Panel Operation
The Optra front panel will not indicate the presence of the AFP IOP
when it is Online (Ready). When printing from the AFP IOP the
frontpanel will display "AXIS AFP"(Only on Optra and 4039 Plus
printers) and "NET" as the source, instead of parallel or serial.
Note: When the AFP IOP becomes ready after power on a "beep" is made from
the interface. This indicates that the communication processor is ready,
which is the last check in the power on sequence.
AFP IOP menus The AFP IOP menus are entered by the following keystrokes when
entering [MENUS]:
Optra and 4039
series:
4039 series: Enter the submenu [SETUP] and press [MORE] until the submenu
Plus
Enter [MORE] until [Network Menux] is displayed. Enter this menu
by pressing the button next to this menu item.
[Network Setup] is displayed. Enter this menu by pressing the button next to this menu item.
AXIS AFP IOP User’s Manual 11
Page 16
Section 2: Front Panel Operation
Opening Screen (Main IOP Menu)
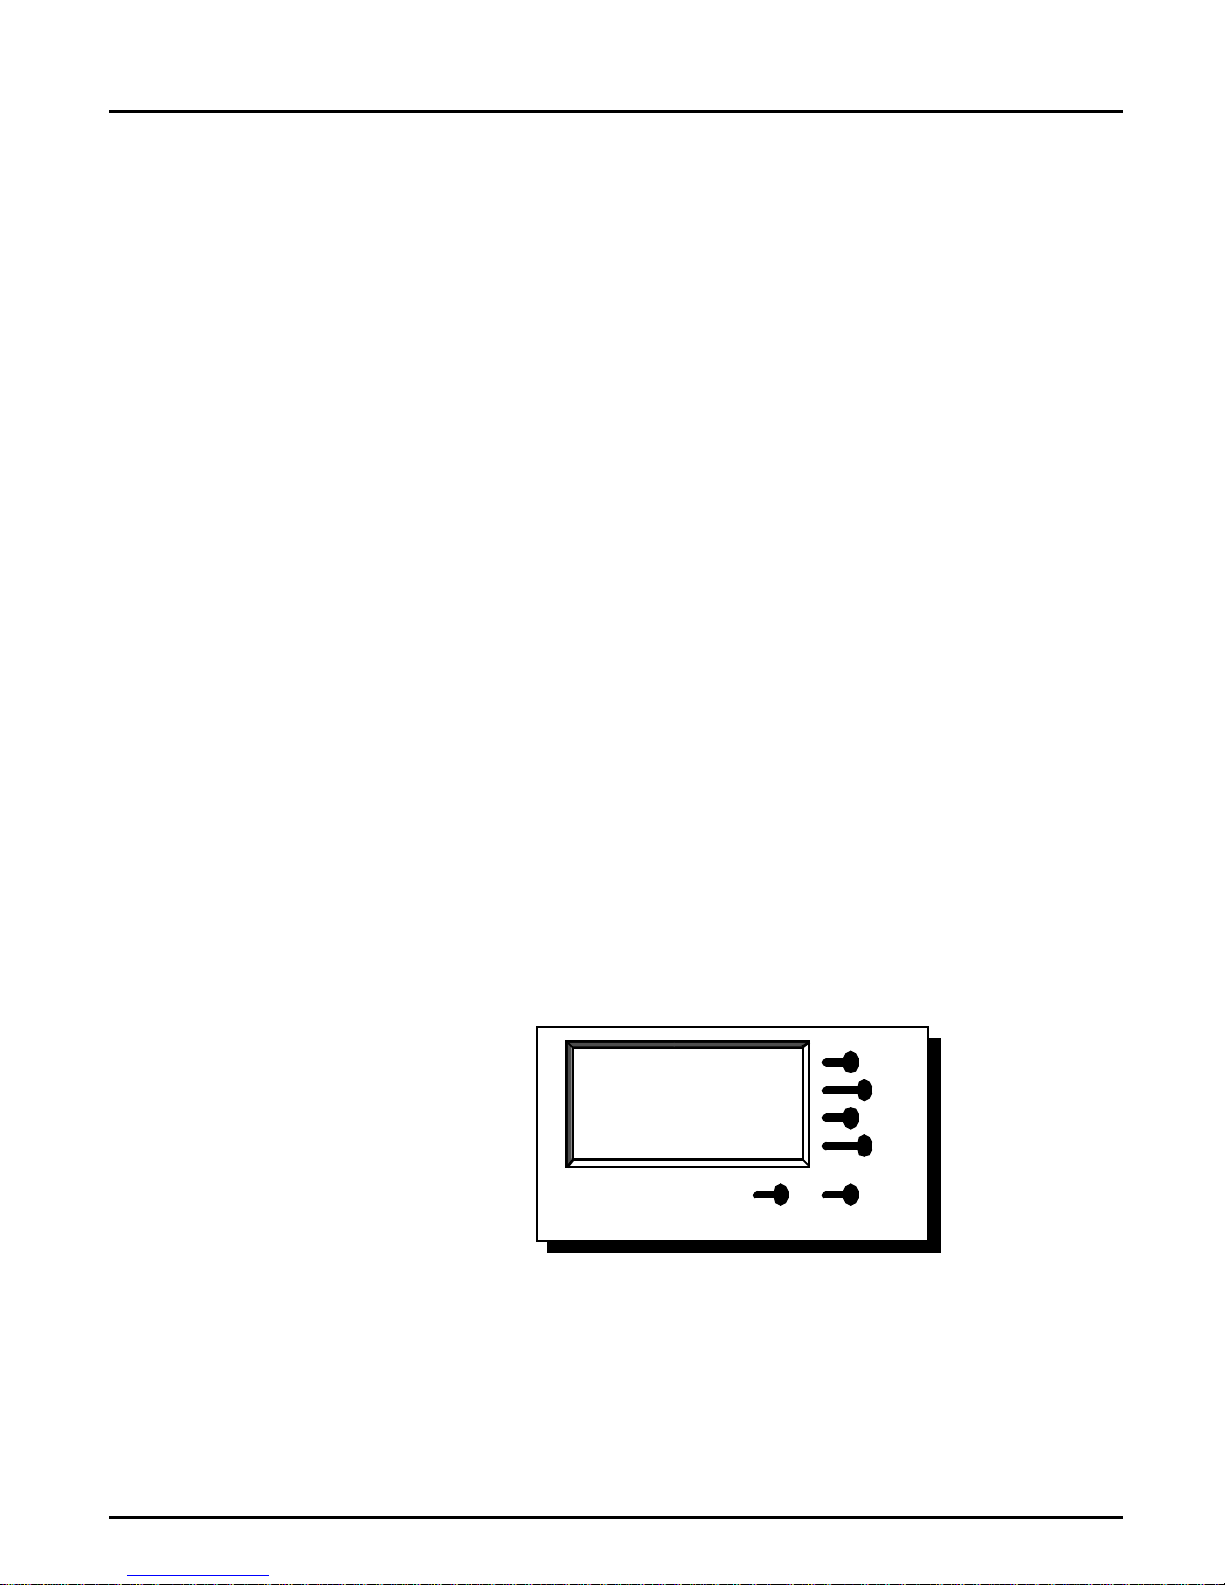
The first display under [Network Menu] is shown in figures 1 and 2.
Notice the following about the displays:
1. The detected cable type -Coax or Twinax is displayed in the upper left
corner. However if no cable is connected, the display will indicate
“Twinax”.
2. Synchronization with the Coax or Twinax Control Unit is displayed as
"CU". However the display does not operate in real time mode, but is
only updated when entering [Network Menu]. This means unsteady
lines or later disconnection will not be indicated, and the CU indica-
tion is not a guarantee for a proper connection.
3. The emulation indication in the lower left corner shows the power on
emulation. If the emulation is changed in the [IPDS Options] menu
the display will show the previous emulation until next power on.
4. The "D" next to the emulation indicates if a duplex unit has been
detected or if duplex has been enabled in the [Duplex Support] menu.
This detection only works on Optra and 4039 Plus models.
Note: The "D" indication will also be displayed in 4028 emulation, even though
an original IBM 4028 does not support duplex (The AFP IOP can print
IPDS duplex in all emulations).
Coax
CU
3816D
Local Setup
Remote Setup
Test Options
Ready
Return
Figure 1.
12 AXIS AFP IOP User’s Manual
Page 17
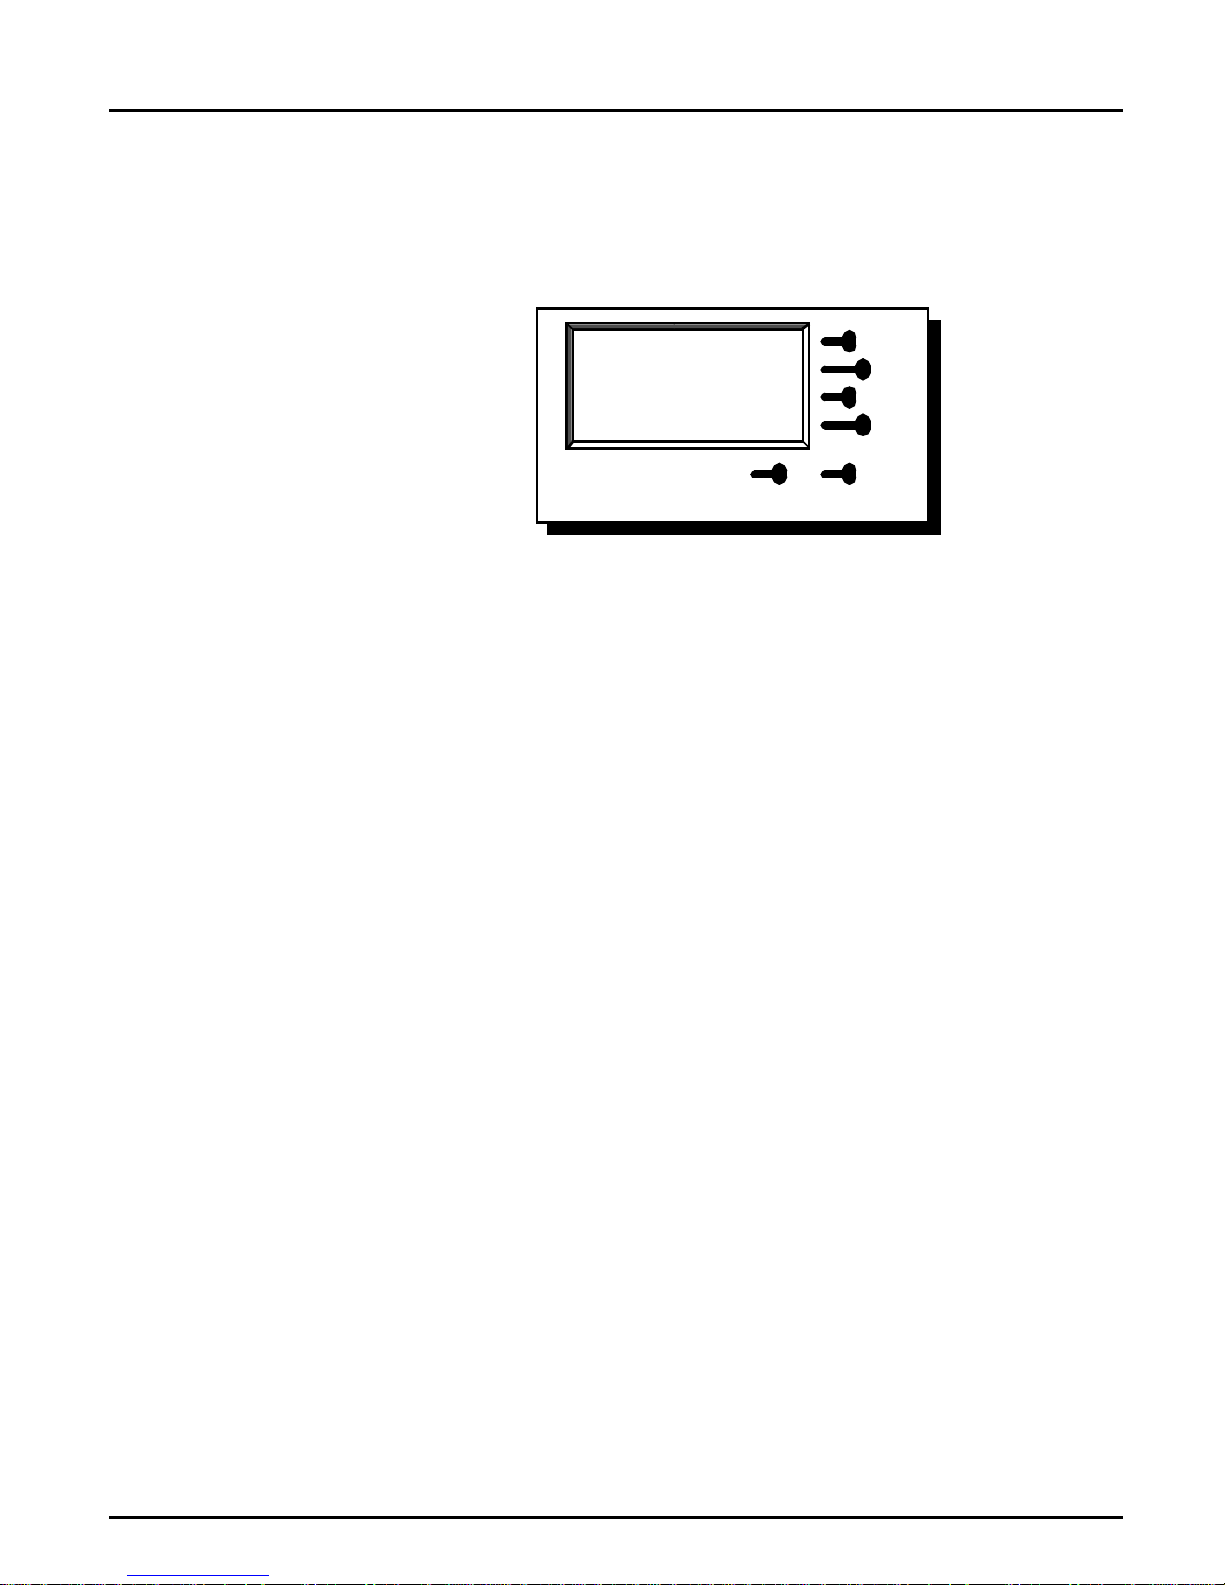
Section 2: Front Panel Operation
5. The [2] displayed next to the emulation in figure 2 indicates the
Twinax Station Address. This indication is only shown in Twinax
mode. For more information on setting the Twinax address refer to
page 37.
Twinax Local Setup
Remote Setup
Test Options
4028 [2]
Ready Return
Figure 2.
AXIS AFP IOP User’s Manual 13
Page 18

Section 2: Front Panel Operation
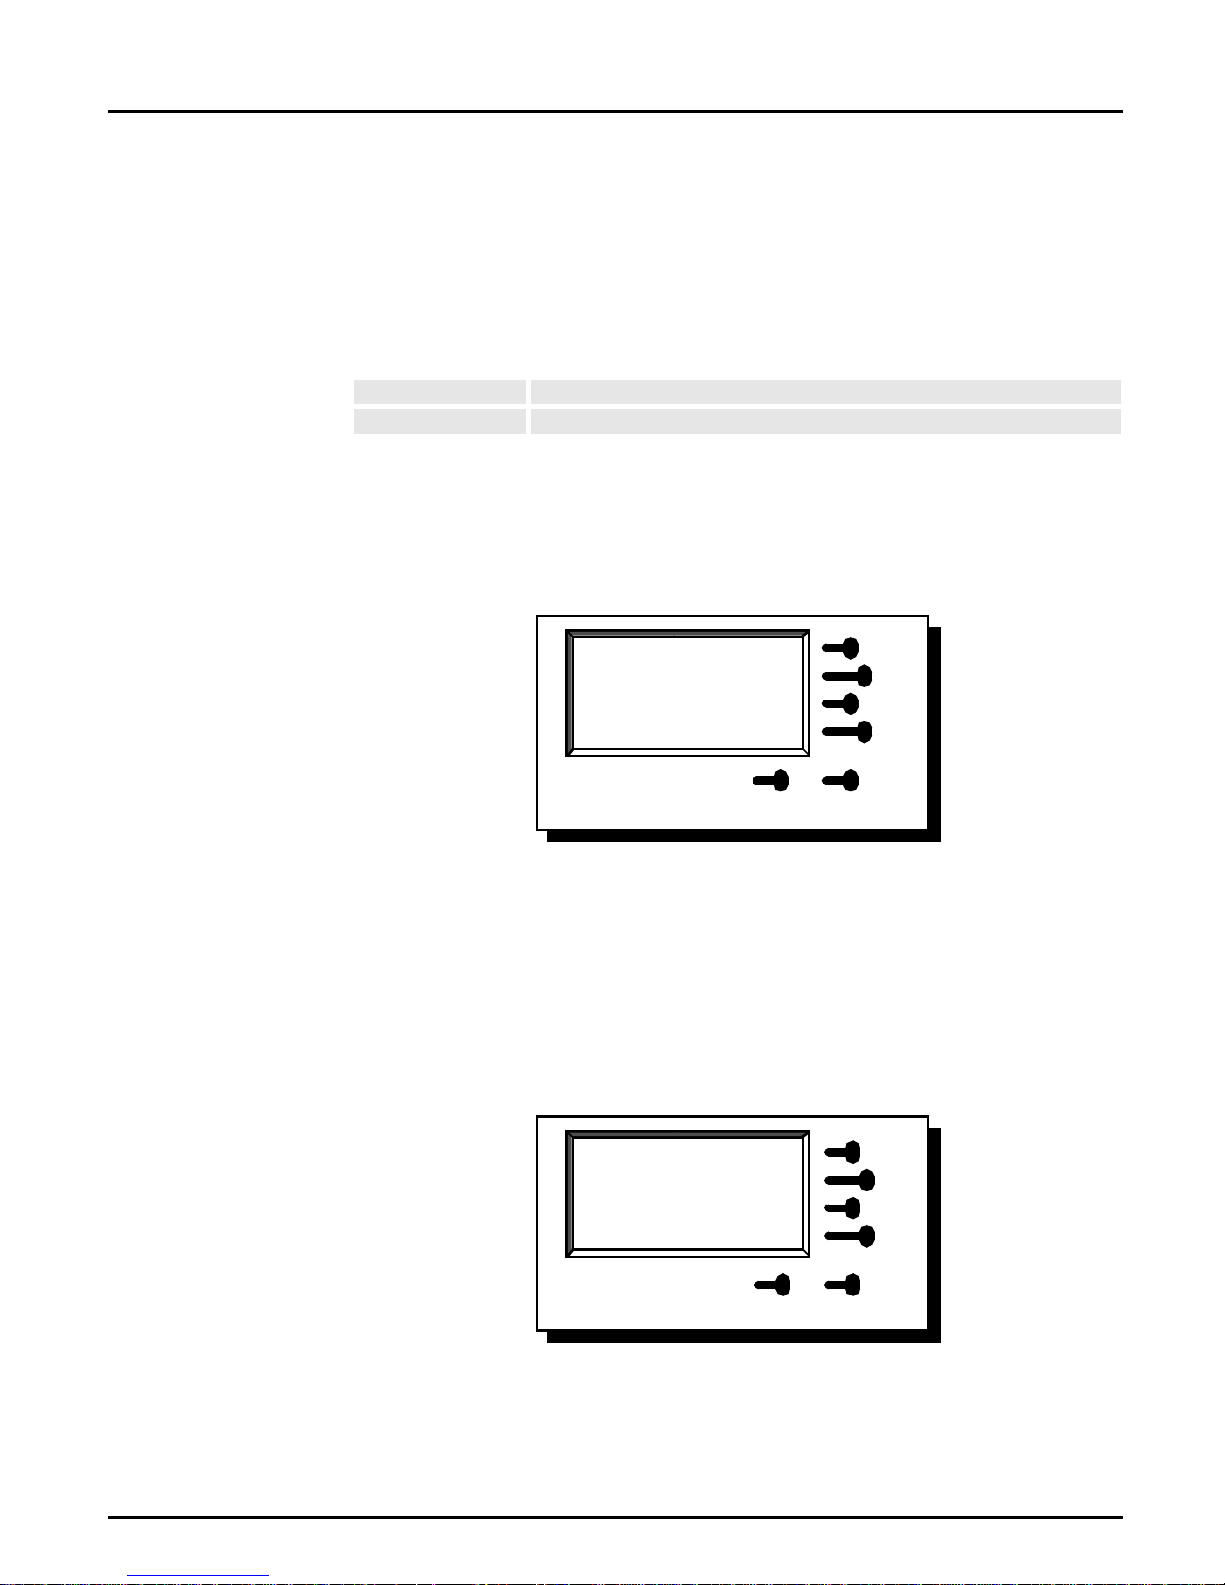
Local Setup Menu
The local setup menu contains the 4 submenus shown in figure 3. Note
that menu point number 3 changes according to the cable attached. "Coax
Options" is shown if the Coax patch cable is connected, and "Twinax
Options" is shown if the Twinax T-cable or NO cable is connected.
Printer Options
IPDS Options
Coax Options
Set Factory default
Ready Return
Figure 3
For more information on the [Remote Setup] refer to page 57. For more
information on [Test Options] refer to page 60 and page 66.
For more information on the [Trace Facility], contact your local dealer/
distributor.
14 AXIS AFP IOP User’s Manual
Page 19

Section 3
Utility Program Operation
The AFP utility program is a tool for reconfiguring and upgrading the
software in your AFP IOP interface which enables you to :
1. Upgrade main program and fonts in the interface. (Note that the
standard package does not contain the software files for the main program and font upgrade. Contact your local dealer for further information).
Section 3: Utility Program Operation
2. Change or create complete setups related to the host and to the
printer, and save/restore setup files on disk (user and application tailored configurations).
3. Change single settings related to the host and for the printer.
Note: All these settings can be changed from the Lexmark front panel or by
using the IPDS Parser function as well.
The program consists of two files:
IOPUTI.EXE (Main program)
IOPUTI.HLP (Help file used by the program)
The files can be copied onto the PC harddisk in a directory made for the
purpose, for instance C:\IOPUTI, or the program can be run directly
from the floppy disk. The only PC-requirement is a 9 pole serial output
and preferably a mouse.
The program is started from the DOS prompt and will present itself with
the opening screen. (The same window is displayed when selecting the
menu [Info])
Note: The online help screens can be accessed anytime during program
operation by pressing the <F1> key.
AXIS AFP IOP User’s Manual 15
Page 20

Section 3: Utility Program Operation
Setup for PC Configuration
To configure or upgrade the AXIS AFP IOP using the AFP utility
program, the PC must be connected to the printer. Follow these steps:
Important 1. Switch off both the PC and the printer!
2. Connect the serial link cable which is supplied in the delivery. Attach
the connector marked PC to the PC, and the connector marked IOP
to the AXIS AFP IOP in the printer.
3. Switch on the printer and the PC.
Handling Config Files
To make changes to a config file you must either load a premade config
file from your PC or upload a configuration file from the AFP IOP
interface. Alternatively you can enter settings according to the IOP status
page taken from the frontpanel of the Lexmark printer. All configuration
files have the extension *.CFN.
Note: If no config file has been loaded prior to selecting this item, a default
config file setting is used.
Press <ALT> C, or use the mouse to select [Config file].
Open Config File (read from PC harddisk/floppy drive)
When the screen Open Config File appears press <TAB> and use the
arrow keys to move the cursor bar to the appropriate CFN file. Now press
<TAB> again and the [OPEN] field will highlight. Press <ENTER>. You
will now be in the main menu again. The config file is now read into the
memory.
16 AXIS AFP IOP User’s Manual
Page 21

Making Changes to Config File Options
In the Main Menu, press <Alt> C to select menu [Config file] and move
down with the arrow keys to select between [Coax options], [Twinax
options], [Printer options], [Serial options] and [IPDS options].
As an example [Printer options] is selected. To change the number of
input trays press the arrow down key to [number of cassettes]. Press
<TAB> and the zero in [Option values] will highlight. Change value to
two, and press <TAB> again. The [Accept] field is now highlighted. Press
<ENTER> and the above screen is displayed, or press <TAB> if other
printer options must be changed. Follow the same procedure to change
other options.
Note: If this utility program option window is closed by pressing <ESC>, Cancel
or clicking on the upper left window close square, the changes made to the
config data will be lost.
Section 3: Utility Program Operation
It is possible to change only a single option on the AFP IOP and then
download the option directly from the option screen by pushing
[Download Option]. The word Downloading will flash a couple of times
in the lower right corner of the screen until the download is completed.
Important In order to download or upload, make sure the Lexmark printer has been
set into remote setup mode by pressing the two [OK] buttons in the
[Remote Setup] menu in the IOP front panel menu. Alternatively the
download sequence in the utility program can be activated before the
printer is powered ON. This way the interface will detect the data at its
serial port as the first step in the power ON routine, and only run in
upgrade mode. Note that the printer will display an error message after a
while as the interface only communicates with the serial port and not with
the IOP port. This does not affect the download.
AXIS AFP IOP User’s Manual 17
Page 22

Section 3: Utility Program Operation
Save Config File (to PC harddisk/floppy drive)
From the main menu select the [Config file] by pressing <Alt> C. Then
select the menu [Save config file]. Type in a file name and press
<ENTER>, or press <TAB> and arrow keys to select a file you want to
overwrite, and press <TAB> to highlight [SAVE]. Press <ENTER> and
you are back in the main screen and the file is saved.
Important If an option window is closed by pressing <ESC>, [Cancel] or clicking on
the upper left window close square, the changes made to the config data
will be lost. Use <TAB> to select Accept and press <ENTER> or use the
mouse to click on [Accept] to keep the changes.
18 AXIS AFP IOP User’s Manual
Page 23

Section 4
IPDS Parser Function
The IPDS Parser is a function for configuring the AFP IOP remotely from
a Sys370 (Coax) or AS/400 (Twinax) host environment. In this way you
do not need to use the front panel or the Utility Program to configure the
AFP IOP. The parser is valid in both 4028 and 3816 emulation mode, no
matter if it is connected by Coax or Twinax.
Using the IPDS Parser
Section 4: IPDS Parser Function
To configure the AFP IOP, you send the configuration data (according to
the syntax instructions below) as text to the AFP IOP. The following rules
apply for configuration data:
• Send the data as text (PT2 tower) using an EBCDIC based codepage.
Sending the programming sequence in normal SCS/DSC format will
have no effect.
• All scanned data will be printed as normal, ie the AFP IOP will show
no indication of the configuration options being interpreted correctly.
• All non-printable characters (eg space) and positioning commands are
ignored within the programming sequence.
• All option settings with syntax or range error will be ignored.
Syntax To activate configuration mode, send the following lead-in string:
&%OPT_=;
To end configuration mode, send the following trailer string:
&%
This causes changed options to be saved. Turn the printer Off and On to
AXIS AFP IOP User’s Manual 19
Page 24

Section 4: IPDS Parser Function
activate the new options.
All options have the following format:
option string = number
All configuration options must be separated by a semi-colon; line feed,
form feed etc. are ignored.
Example 1 &%OPT_=;
DEFAULT_CODEPAGE = 8;
FRONT_TOP_MARGIN = -100;
&%
Example 2
Note Turn the printer Off and On to activate the new options.
Option strings
&%OPT_=;COAX_C04=5;COAX_C17=1;&%
All supported parameters, their option strings and valid numbers are listed
in the section Configuration Parameters.
20 AXIS AFP-IOP User’s Manual
Page 25

Section 5
Configuration Parameters
The following chapters describe the AFP IOP configuration parameters.
The parameters are split into the following groups:
Coax and Twinax Options
Printer Options
IPDS Options
Set Factory default
Section 5: Configuration Parameters
Each chapter is introduced by a short presentation of some important
features of the corresponding Lexmark menu.
AXIS AFP IOP User’s Manual 21
Page 26
Section 5: Configuration Parameters
Coax/Twinax
Options Front
Panel Menus
The detected cable type (Coax or Twinax) is displayed in the upper left
corner of the AFP IOP frontpanel menu. However if no cable is
connected, the display will always indicate "Twinax". Only the menu
corresponding to the detected cable will be accessible. However two
options share the same position in the configuration storage area. These
options are:
Coax Option: C04 Country Code
Twinax Option: C01 Country Code
This means if Coax option "C04" is changed then the Twinax option
"C01" is changed accordingly. Examples of the menus are shown in
figures 4 and 5.
C03 APO
C04 Country Cod e
C05 Reserved
More
Figure 4.
C04 Country Cod e
[@1-USA/Ca nada ]
2-Reserved
Ready Return
up
Down
Save
Ready Return
Figure 5.
22 AXIS AFP IOP User’s Manual
Page 27

Coax Options
Note: In the following an asterisk "*" will indicate the factory setting. The
Section 5: Configuration Parameters
This group of options corresponds to the C00..C27 options available on
the 3812-2 Coax printer. Most of these are related to non IPDS
configuration (SCS). However the default code page (C04), IR timeout
(C17) and cassette linking (C27) are used in IPDS as well. Furthermore,
options C28..C30 are equivalent to options (D - parameters) found on the
4028 Coax printer.
number in the first column indicates the value to use in the utility
program or the IPDS parser, and the text in angular brackets
indicates the printer front panel value for the options. The values can
be text or numbers. The printer front panel menu texts are indicated
in angular brackets in the option headlines.
C01 Primary Cassette Print Orientation...........................[c01 Prim. Cassette]
Controls how to print when using the primary cassette in all non IPDS
Coax modes.
Primary cassette can be either the top or the bottom drawer. See Cassette
function for details.
•0 [COR] Printing using landscape orientation and a reduction of the output to
around 70%.
1 [Portrait] Portrait mode. No reduction.
2 [Landscape] Landscape mode. No reduction.
IPDS Parser syntax (with default setting):
COAX_C01 = 0;
AXIS AFP IOP User’s Manual 23
Page 28

Section 5: Configuration Parameters
C02 Alternate Cassette Print Orientation ............................[c02 Alt. Cassette]
Controls how to print when using the alternate cassette in all non IPDS
Coax modes.
Alternate cassette can either be the top or the bottom drawer. See Cassette
function for details.
•0 [COR] Printing using landscape orientation and a reduction of the output to
1 [Portrait] Portrait mode. No reduction.
2 [Landscape] Landscape mode. No reduction.
IPDS Parser syntax (with default setting):
COAX_C02 = 0;
C03 Automatic Print Orientation ................................................... [c03 APO]
around 70%.
When automatic page orientation is enabled, the printer checks the paper
size, and rotates the print, if the print data does not fit the default page
size. Used in all non IPDS Coax modes.
• 0 [Enable] APO enable
1 [Disable] APO disable
IPDS Parser syntax (with default setting):
COAX_C03 = 0;
C04 Country Character Sets and Code Pages .................. [c04 Country Code]
This option controls the default code page for all Coax modes incl IPDS.
(The table is continued on next page.)
0 [0-Intern.set5] 500 International Set 5
•1 [1-USA/Canada 37 USA/Canada - English
2 [2-Reserved ] 500 Reserved
3 [3-Reserved ] 500 Reserved
4 [4-Can.French ] 260 Canadian French
5 [5-Aus/Germany] 273 Austria/Germany
6 [6-Belgium ] 274 Belgium
7 [7-Brazil ] 275 Brazil
8 [8-Denmark/Nor] 277 Denmark/Norway
9 [9-Finland/Swe] 278 Finland/Sweden
24 AXIS AFP IOP User’s Manual
Page 29
Section 5: Configuration Parameters
10 [10-Italy ] 280 Italy
11 [11-Japan/Engl] 281 Japan-English
12 [12-Portugal ] 282 Portugal
13 [13-Span.speak] 284 Spanish-Speaking
14 [14-UK ] 285 United Kingdom
15 [15-Aus/Ger .2] 286 Alternate Austria/Germany
16 [16-Den/Nor .2] 287 Alternate Denmark/Norway
17 [17-Fin/Swe .2] 288 Alternate Finland/Sweden
18 [18-Spain .2] 289 Alternate Spain
19 [19-Japan/Kata] 290 Japan-Katakana
20 [20-APL (293) ] 293 APL
21 [21-France ] 297 France
22 [22-Reserved ] 500 Reserved
23 [23-Int.Typogr] 361 International Typographic
24 [24-PC (437) ] 437 Personal Computer
25 [25-Portugal.2] 37 Alternate Portugal
26 [26-Iceland ] 871 Iceland
27 [27-OCRA (892)] 892 OCR-A
28 [28-OCRB (893)] 893 OCR-B
29 [29-Arabic (420)] 420 Arabic
30 [30-Reserved ] 500 Reserved
31 [31-Canada.bil] 37 Canadian Bilingual
32 [32-Swiss.bil ] 500 Swiss Bilingual
33 [33-Spanish ] 284 Spanish
34 [34-Reserved ] 500 Reserved
35 [35-Reserved ] 500 Reserved
36 [36-Reserved ] 500 Reserved
37 [37-Turk(1026)] 1026 Turkish
38 [38-Reserved ] 500 Reserved
39 [39-Turk (905)] 905 Turkish
40 [40-Latin 2] Latin 2
41 [41-Greek (423)] 423 Greek
42 [42-Greek (875)] 875 Greek
(The table is continued from previous page.)
IPDS Parser syntax (with default setting):
COAX_C04 = 1;
AXIS AFP IOP User’s Manual 25
Page 30

Section 5: Configuration Parameters
C06 Line Spacing ...............................................................[c06 Line Spacing]
Controls line spacing for non-IPDS Coax modes. In LU-1 mode the line
spacing can be changed by commands from the host.
• 0 [Single Space] Single-line spacing
1 [Double Space] Double-line spacing
IPDS Parser syntax (with default setting):
COAX_C06 = 0;
C08 Monocase/Dualcase...............................................[c08 Mono/Dual-case]
Use this option to force upper case printing.
Used in DSC/DSE modes only.
• 0 [Dualcase] Normal dualcase printing.
1 [Uppercase] Always use upper case.
IPDS Parser syntax (with default setting):
COAX_C08 = 0;
C09 Lines Per Inch (LPI)..................................................[c09 Lines per Inch]
Selects how many lines to print per inch. In LU1-1 mode this sets the
default power on value. In DSC/DSE modes this setting cannot be
overwritten.
•0 [6 LPI] 6 LPI(8.57 LPI when COR active)
1 [8 LPI] 8 LPI(11.43 LPI when COR active)
2 [6.5 LPI] 6.5 LPI
IPDS Parser syntax (with default setting):
COAX_C09 = 0;
26 AXIS AFP IOP User’s Manual
Page 31

Section 5: Configuration Parameters
C10 Screen Copy Screen Size...........................................[c10 LC Screen Size]
Select screen size for local copy operation. For some controllers this value
must be correct for the communication to start.
Used in DSC/DSE modes only.
0 [960] 960 bytes
1 [1920] 1920 bytes
2 [2560] 2560 bytes
• 3 [3440] 3440 bytes
4 [3564] 3564 bytes
IPDS Parser syntax (with default setting):
COAX_C10 = 3;
C11 Extended Attribute Buffer (EAB) ............................... [c11 EAB Control]
Extended attribute buffer is used for character attributes, APL printing
etc.
Used in DSC/DSE modes only.
• 0 [Enable] Yes. Enable extended attribute buffer.
1 [Disable] No. Do not use extended attribute buffer.
IPDS Parser syntax (with default setting):
COAX_C11 = 0;
C12 Characters Per Inch (CPI)......................................... [c12 Char.per Inch]
Selects how many characters to print per inch and the default font. In
LU1-1 mode this sets the default power on value. In DSC/DSE modes
this setting cannot be overwritten.
• 0 =[10 CPI] 10-pitch Courier (13-pitch, Gothic-text when COR active).
1 =[12 CPI] 12-pitch Prestige (15-pitch, Gothic-text when COR active).
2 =[15 CPI] 15-pitch Gothic-text (20-pitch, Gothic-text when COR active).
3 =[17 CPI] 17-pitch Courier (27-pitch, Gothic-text when COR active).
IPDS Parser syntax (with default setting):
COAX_C12 = 0;
AXIS AFP IOP User’s Manual 27
Page 32

Section 5: Configuration Parameters
C13 Maximum Page Length (MPL) ............................[c13 Max Page Length]
In DSC/DSE and LU-1 modes the Maximum Page Length value defines
the length of the page in lines. In DSC/DSE modes this value cannot be
overwritten. In LU-1 mode this defines the power on value. If set to 0 or
to a value larger than the physical page length, the maximum becomes the
default. Paper size, C01, C02 and C03 are used to determine the
maximum page length. The range is 0..999. The normal value for this field
is 66.
• 66 [0..999] MPL
IPDS Parser syntax (with default setting):
COAX_C13 = 66;
C14 Maximum Print Position (MPP)..............................[c14 Max Print Pos.]
In DSC/DSE and LU-1 modes the Maximum Print Position value defines
the width of the page in characters. In DSC/DSE modes this value cannot
be overwritten. In LU-1 mode this defines the power on value. If set to 0
or to a value larger than the physical page width, the maximum will be
used. Paper size, C01, C02 and C03 are used to determine the maximum
page width. The range is 0..999. The normal value for this field is 132.
• 132 [0..999] MPP
IPDS Parser syntax (with default setting):
COAX_C14 = 132;
28 AXIS AFP IOP User’s Manual
Page 33

Section 5: Configuration Parameters
C15 Early Print Complete Response Timing ......................[c15 Print Release]
This is used to control when the printer will acknowledge a Form Feed
(both an automatic FF and a valid FF control code). This option is only
valid for non-IPDS mode.
Note: This option is inverted compared to the 3812/3816 printers. On the
3812/3816 C15 = 0 means that the FF will not acknowledge until
printing is physically completed.
• 0 [Processing] The FF will be acknowledged when the page has been transferred
to the page buffer in the printer. With this setting you can achieve
the maximum throughput, but you may lose data on an IR or if the
printer loses power.
1 [Printing] For DSC/DSE print the FF will not be acknowledged until the print
is physically completed. For LU-1 (SCS) print the printer will function as if this option was set to zero provided that the chaining
techniques are not used (Please refer to PCIA address X'0017' Bit
number 1 & 2). However, if the FF (automatic or as control code)
is found in a
until the print is physically completed.
Last
or
segm ent, the FF will not be acknowledged
Only
IPDS Parser syntax (with default setting):
COAX_C15 = 0;
C16 Automatic Function at End of OILC Job............... [c16 At end of OILC]
Used in DSC/DSE modes only.
• 0 [No Auto Func.] The setting of C24 controls how the printer handles the end of
a print-order.
1 [Auto Function] Form feed is executed after the print buffer has completed a
local copy job.
IPDS Parser syntax (with default setting):
COAX_C16 = 0;
AXIS AFP IOP User’s Manual 29
Page 34

Section 5: Configuration Parameters
C17 Suppress Timeout on No-Data-Loss IR.........................[c17 IR Control]
This option controls how to report special conditions such as paper-out,
toner-low etc. in DSC/DSE, LU-1 and IPDS modes.
Note: Enabling this option will force reporting of Stacked Page Counter after
pages have been printed, i.e. operation will proceed as if IPDS Stacked
Page Counter was enabled.
•0 [Disable] No IR is sent on No-Data-Loss conditions.
1 [Enable] Send Intervention Required to the host after some time if the con-
IPDS Parser syntax (with default setting):
COAX_C17 = 0;
or
INTERVENTION_REPLY = 0
dition continues.
C18 Automatic New Line at MPP+1 ....................... [c18 Auto NL at MPP+1]
Used in DSC/DSE modes only.
0 [No] No. When carriage return is executed at MPP+1, no automatic
New Line is executed. New print position is at the beginning of the
current line.
•1 [Yes] Yes. A carriage return on MPP+1 position causes a New Line to be
executed. New print position is at the beginning of the next line.
IPDS Parser syntax (with default setting):
COAX_C18 = 1;
C19 Additional New Line at MPP+1....................... [c19 Add. NL at MPP+1]
0 [No] No. When New Line is executed at MPP+1, then no automatic
New Line is executed. New print position is at the beginning of the
next line.
•1 [Yes] Yes. When New Line is executed at MPP+1, then an extra New
Line is executed. New print position is at the beginning of the line
which follows the next line. Used in DSC/DSE modes only.
IPDS Parser syntax (with default setting):
COAX_C19 = 1;
30 AXIS AFP IOP User’s Manual
Page 35

Section 5: Configuration Parameters
C20 Form Feed within the Print Buffer........................[c20 FF within Buffer]
Used in DSC/DSE modes only.
• 0 [Pos2 after FF] No. Next print position will be next form, line 1, position 2.
1 [Pos1 after FF] Yes. Next print position will be next form, line 1, position 1.
IPDS Parser syntax (with default setting):
COAX_C20 = 0;
C21 Form Feed at end of Print Buffer ...........................[c21 FF at EO Buffer]
Used in DSC/DSE modes only and when C16 is set to 0.
0 [No] No. Automatic New Line at print-order completion will be sup-
pressed.
•1 [Yes] Yes. Automatic New Line at print-order completion will be exe-
cuted.
IPDS Parser syntax (with default setting):
COAX_C21 = 1;
C22 Null Suppression.................................................. [c22 Null Suppression]
Used in DSC/DSE modes only.
•0 [Yes] Yes. Suppress lines with only non printable characters.
1 [No] No. Do not suppress printing of lines with only non printable char-
acters.
IPDS Parser syntax (with default setting):
COAX_C22 = 0;
C23 Form Feed Command Position .....................................[c23 FF Position]
Used in DSC/DSE modes only.
• 0 [Pos1 & MPP+1] No. Execute FF only if it occurs first on the line or at the
MPP+1 position.
1 [Whenever] Yes. Execute FF always.
IPDS Parser syntax (with default setting):
COAX_C23 = 0;
AXIS AFP IOP User’s Manual 31
Page 36

Section 5: Configuration Parameters
C24 Automatic Function after EOB ................................[c24 EOB Function]
Used in DSC/DSE modes only and when C16 is set to 0.
• 0 [No Function] No. If form feed is the last character in the print order execute
1 [Execute a FF] Yes. Automatic Form-Feed after End of print order will be exe-
IPDS Parser syntax (with default setting):
COAX_C24 = 0;
C25 Left Binding Margin ............................................[c25 Left Bind Margin]
Use this option to increase the left margin in all non-IPDS Coax modes.
The value must be specified in 1/100 inches. The range is 0..999.
according to switch C21. Otherwise execute NL at end of print
order if not at column 1.
cuted if position is not currently at top of form.
• 0 [0..999]
IPDS Parser syntax (with default setting):
COAX_C25 = 0;
C26 Top Binding Margin........................................... [c26 Top Bind Margin]
Use this option to increase the top margin in all non-IPDS Coax modes.
The value must be specified in 1/100 inches. The range is 0..999.
• 0 [0..999]
IPDS Parser syntax (with default setting):
COAX_C26 = 0;
32 AXIS AFP IOP User’s Manual
Page 37

Section 5: Configuration Parameters
C27 Cassette Link Control ................................................ [c27 Tray Linking]
This option can not be controlled by the AFP IOP interface, but has to be
activated in the Lexmark [PAPER SETUP] Menu under [Tray Linking].
The paper in the two trays must be the same size in order for the linking to
function.
Note: On Optra and 4039 Plus series printers a new feature called [Tray Protect]
has been introduced. If this feature is enabled for a particular tray then the
tray linking will skip this tray, even though the paper type installed is the
same as for the other tray.
Refer to the Lexmark User manuals for more information.
C28 Coax Time Out....................................................... [c28 Coax TimeOut]
This option controls when a non-IPDS job without End of Job or Form
Feed information are forced to be printed. The value stated in the Interface
Release Time Out will always have higher priority if C28 has a value equal
to or higher than the Release Time Out. The range is from 15-255
seconds.
• 30 [15..255] Coax Time Out
IPDS Parser syntax (with default setting):
COAX_C28 = 30;
AXIS AFP IOP User’s Manual 33
Page 38

Section 5: Configuration Parameters
C29 Horizontal Output Reduction................................[c29 Horizontal Red.]
With this COAX option it is possible to activate Horizontal Output
Reduction for SCS and DSC/DSE (non-IPDS) printing. All movements
in the horizontal level of the physical paper are reduced with the
percentage stored in this option. The physical horizontal level runs along
the short side of the paper regardless of print orientation. Reduction only
affects movements, not image (like font images), i.e. it only affects nonIPDS printing. The range is from 0 - 5 reduction, which equals 0% to 5%
reduction.
• 0 [0% .. 5%]
IPDS Parser syntax (with default setting):
COAX_C29 = 0;
C30 SCS Page Format .................................................[c30 SCS Page Format]
This option controls the page format in SCS and DSC/DSE (non-IPDS)
mode.
Note: On the 3812/3816 emulation options 0 and 1 are identical.
• 0 [Print Page] Print page. Logical page is equal to the printable area of the emu-
lated printer.
1 [Whole Page] Whole page. Logical page is equal to the paper size.
2 [Compress] Compressed line spacing. Line spacing is reduced so lines close to
the paper edge can be printed without clipping.
IPDS Parser syntax (with default setting):
COAX_C30 = 0;
34 AXIS AFP IOP User’s Manual
Page 39

Twinax Options
Note: In the following an asterisk "*" will indicate the factory setting. The
Section 5: Configuration Parameters
According to the SAA standard, it is not possible to run SCS and DSC/
DSE (non-IPDS) on IBM 3812/3816/4028 printers when operating in
the Twinax environment (AS/400,S/36,S/38). Therefore only two IPDS
related options are available in Twinax.
number in the first column indicates the value to use in the utility
program or the IPDS parser, and the text in angular brackets
indicates the printer front panel value for the options. The values can
be text or numbers. The printer front panel menu texts are indicated
in angular brackets in the option headlines.
C01 Country Character Sets and Code Pages .................. [c01 Country Code]
This option controls the default code page for IPDS.
(This table is continued on next page.)
0 [0-Intern.set5] 500 International Set 5
•1 [1-USA/Canada 37 USA/Canada - English
2 [2-Reserved ] 500 Reserved
3 [3-Reserved ] 500 Reserved
4 [4-Can.French ] 260 Canadian French
5 [5-Aus/Germany] 273 Austria/Germany
6 [6-Belgium ] 274 Belgium
7 [7-Brazil ] 275 Brazil
8 [8-Denmark/Nor] 277 Denmark/Norway
9 [9-Finland/Swe] 278 Finland/Sweden
10 [10-Italy ] 280 Italy
11 [11-Japan/Engl] 281 Japan-English
12 [12-Portugal ] 282 Portugal
13 [13-Span.speak] 284 Spanish-Speaking
14 [14-UK ] 285 United Kingdom
15 [15-Aus/Ger .2] 286 Alternate Austria/Germany
16 [16-Den/Nor .2] 287 Alternate Denmark/Norway
17 [17-Fin/Swe .2] 288 Alternate Finland/Sweden
18 [18-Spain .2] 289 Alternate Spain
19 [19-Japan/Kata] 290 Japan-Katakana
20 [20-APL (293) ] 293 APL
AXIS AFP IOP User’s Manual 35
Page 40

Section 5: Configuration Parameters
21 [21-France ] 297 France
22 [22-Reserved ] 500 Reserved
23 [23-Int.Typogr] 361 International Typographic
24 [24-PC (437) ] 437 Personal Computer
25 [25-Portugal.2] 37 Alternate Portugal
26 [26-Iceland ] 871 Iceland
27 [27-OCRA (892)] 892 OCR-A
28 [28-OCRB (893)] 893 OCR-B
29 [29-Arabic (420)] 420 Arabic
30 [30-Reserved ] 500 Reserved
31 [31-Canada.bil] 37 Canadian Bilingual
32 [32-Swiss.bil ] 500 Swiss Bilingual
33 [33-Spanish ] 284 Spanish
34 [34-Reserved ] 500 Reserved
35 [35-Reserved ] 500 Reserved
36 [36-Reserved ] 500 Reserved
37 [37-Turk(1026)] 1026 Turkish
38 [38-Reserved ] 500 Reserved
39 [39-Turk (905)] 905 Turkish
40 [40-Latin 2] Latin 2
41 [41-Greek (423)] 423 Greek
42 [42-Greek (875)] 875 Greek
(This table is continued from previous page.)
IPDS Parser syntax (with default setting):
TWINAX_C01 = 1;
C02 Cassette Link Control ................................................ [c02 Tray Linking]
This option can not be controlled by the AFP IOP interface, but has to be
activated in the Lexmark [PAPER SETUP] Menu under [Tray Linking].
The paper in the two trays must be the same size in order for the linking to
function.
Note: On Optra and 4039 Plus series printers a new feature called [Tray Protect]
has been introduced. If this feature is enabled for a particular tray then the
tray linking will skip this tray, even though the paper type installed is the
same as for the other tray.
Refer to the Lexmark User manuals for more information.
36 AXIS AFP IOP User’s Manual
Page 41

Section 5: Configuration Parameters
Twinax Address Twinax Address.............................................................. [Device Address]
Note: This option is not found in the utility program but only in the
Lexmark frontpanel menu !
This option selects the device address. This address should be determined
by the system administrator before the AFP IOP is connected to the
system. The address can be in the range from 0-6.
•0 [0..6]
IPDS Parser syntax (with default setting):
TWINAX_ADDRESS = 0;
AXIS AFP IOP User’s Manual 37
Page 42

Section 5: Configuration Parameters
Printer Option Front Panel Menu
The Printer Options are common for both Coax and Twinax mode and
relates to Printer Specific features such as physical printable area and paper
tray actions. Certain features of the printer can automatically be detected
on the Optra and 4039 Plus models, and be reported back to the system
in an IPDS reply. The options can however be set to override this feature.
The automatic detection in "Printer Options" applies to the following
features:
Number of Trays
Envelope Feed support
Paper Size, for Tray 1, 2 and Envelope feed
Duplex support
Margins The margin settings are used for adjusting the position of the printable
area. All data are affected by this set of margins, which could be compared
to movements of the tractor feeder and paper knob of a matrix printer. An
example of the menu operation for changing margins is shown in figure 6.
Top Margin
adjusting 1/ 300”
= -10
+
Save
Ready Return
Figure 6.
The interface has been preset with all margins at zero. This adjustment
corresponds to the center position of a page printed on an IBM 3816
printer. However, the AFP IOP is limited by the Lexmark Optra and
4039 logical page area in PCL mode, which means the printable area is
truncated by 50 pels for all four sides of the paper. The example in figure
6 shows a negative adjustment of 1/30", i.e. all print data coming from the
AFP IOP will be printed with this displacement. However the negative
adjustment might cause the top area of the printout to be truncated.
38 AXIS AFP IOP User’s Manual
Page 43

Section 5: Configuration Parameters
It is recommended to base future applications upon the 4028 emulation,
as this emulation is developed on basis of a Lexmark engine, and therefore
has a similar reduced printable area, for which most applications have
compensation. For more information on logical page areas, refer to the
Lexmark "Technical Reference" under "PCL5 Emulation Printable and
Unprintable Areas".
AXIS AFP IOP User’s Manual 39
Page 44

Section 5: Configuration Parameters
Printer Options
Use these options to change printer related items in the loaded config data.
Printer related items are margins, number of trays etc.
Note: In the following an asterisk "*" will indicate the factory setting. The
number in the first column indicates the value to use in the utility
program or the IPDS parser, and the text in angular brackets
indicates the printer front panel value for the options. The values can
be text or numbers. The printer front panel menu texts are indicated
in angular brackets in the option headlines.
Top Margin Top Margin ....................................................................... [Top Margin]
Top margin must be in the range -128 to 127. Unit is 1/300 of an inch.
Negative values indicates less top margin.
• 0 [-128..+127]
IPDS Parser syntax (with default setting):
FRONT_TOP_MARGIN = 0;
Left Margin Left Margin.........................................................................[Left Margin]
Left margin can be adjusted in 1/300 of an inch, and a range of -128 to
127 units is allowed. Left margin is always located at the edge of the paper
to the left of the leading edge.
• 0 [-128..+127]
IPDS Parser syntax (with default setting):
FRONT_LEFT_MARGIN = 0;
40 AXIS AFP IOP User’s Manual
Page 45

Section 5: Configuration Parameters
Top Margin Back
Side
Left Margin Back
Side
Top Margin Back Side ...............................................[Top Margin Back]
Top margin must be in the range -128 to 127. Unit is 1/300 of an inch.
Negative values indicate less top margin. This setting only affects duplex
printing.
• 0 [-128..+127]
IPDS Parser syntax (with default setting):
BACK_TOP_MARGIN = 0;
Left Margin Back Side................................................ [Left Margin Back]
Left margin can be adjusted in 1/300 of an inch, and a range of -128 to
127 units is allowed. Left margin is always located at the edge of the paper
to the left of the leading edge. This setting only affects duplex printing.
• 0 [-128..+127]
IPDS Parser syntax (with default setting):
Top Margin
Envelope
BACK_LEFT_MARGIN = 0;
Top Margin Envelope ......................................... [Top Margin Envelope]
Top margin must be in the range -128 to 127. Unit is 1/300 of an inch.
Negative values indicate less top margin.
• 0 [-128..+127]
IPDS Parser syntax (with default setting):
ENVELOPE_TOP_MARGIN = 0;
AXIS AFP IOP User’s Manual 41
Page 46

Section 5: Configuration Parameters
Left Margin
Left Margin Envelope ..........................................[Left Margin Envelope]
Envelope
Left margin can be adjusted in 1/300 of an inch, and a range of -128 to
127 units is allowed. Left margin is always located at the edge of the paper
to the left of the leading edge.
• 0 [-128..+127]
IPDS Parser syntax (with default setting):
ENVELOPE_LEFT_MARGIN = 0;
Number of trays Number of trays ..........................................................[Number of Trays]
Number of trays is used to control how many trays can be selected on the
printer. If a value of 1 is chosen and the printer is equipped with 2 trays, all
HOST prints addressing tray 2 will be printed from the physical tray 1. If
a value of 2 is selected and the printer only has one tray, all HOST prints
addressing tray 2 will be printed from the available physical tray. Manual
feed does not count as an input tray. With a value of zero, automatic
cassette detection will take place.
• 0 [Autodetect] Auto detect (Optra and 4039
1 [One] One cassette
2 [Two] Two trays
IPDS Parser syntax (with default setting):
NUMBER_OF_CASSETTES = 0;
series only).
Plus
42 AXIS AFP IOP User’s Manual
Page 47

Section 5: Configuration Parameters
Cassette Function Cassette Function............................................................. [Tray function]
If the printer has two input trays the Cassette Operation field can be used
to control the operation of these trays.
Note: If the Trays have been reversed in the Lexmark native setup menu under
[PAPER SETUP] then the following selections will have the opposite
meaning.
Note: On Optra and 4039 Plus series printers a new feature called [Tray Protect]
has been introduced. This feature has to be enabled for the [Tray
function] to work properly. Refer to the Lexmark User manuals for more
information.
• 0 [1.Prim/2.Alt.] Normal mode. Top cassette is primary, bottom is alternate.
1 [1.Alt/2.Prim.] Inverted mode. Top cassette is alternate, bottom is primary.
2 [1.Prim & Alt.] The top cassette will always be used.
3 [2.Prim & Alt.] The bottom cassette will always be used.
IPDS Parser syntax (with default setting):
CASSETTE_FUNCTIONS = 0;
AXIS AFP IOP User’s Manual 43
Page 48

Section 5: Configuration Parameters
Paper Size, Top
Cassette
Note: If actual paper size is smaller than the one selected, empty or misaligned
Paper Size, Top Cassette ............................................ [Paper Size Tray 1]
Use this option to select size of paper in the top tray.
pages will be printed.
• 0 [Autodetect] AUTO Detect (Optra and 4039
1 [A4] A4 297 x 210 mm.
2 [B5] B5 257 x 182 mm
3 [Letter] Letter 11 x 8.5 inch
4 [Legal] Legal 14 x 8.5 inch
5 [Executive 1] Executive 1 10.5 x 7.00 inch
6 [Executive 2] Executive 2 10.5 x 7.25 inch
7 [Executive 3] Executive 3 10.5 x 7.50 inch
8 [Monarch] Monarch 3.875 x 7.5 inch
9 [Com-10] COM10 4.125 x 9.5 inch
10 [DL] DL 4.33 x 8.66 inch
11 [C5] C5 6.38 x 9.01 inch
12 [A5] A5 5.83 x 8.27 inch
series only!)
Plus
IPDS Parser syntax (with default setting):
PAPER_SIZE_1ST_CASSETTE = 0;
44 AXIS AFP IOP User’s Manual
Page 49

Section 5: Configuration Parameters
Paper Size, Bottom
Tray
Note: If actual paper size is smaller than the one selected, empty or misaligned
Paper Size, Bottom Tray ............................................ [Paper Size Tray 2]
Use this option to select size of the paper in the bottom.
pages will be printed.
• 0 [Autodetect] AUTO Detect (Optra and 4039
1 [A4] A4 297 x 210 mm.
2 [B5] B5 257 x 182 mm
3 [Letter] Letter 11 x 8.5 inch
4 [Legal] Legal 14 x 8.5 inch
5 [Executive 1] Executive 1 10.5 x 7.00 inch
6 [Executive 2] Executive 2 10.5 x 7.25 inch
7 [Executive 3] Executive 3 10.5 x 7.50 inch
8 [Monarch] Monarch 3.875 x 7.5 inch
9 [Com-10] COM10 4.125 x 9.5 inch
10 [DL] DL 4.33 x 8.66 inch
11 [C5] C5 6.38 x 9.01 inch
12 [A5] A5 5.83 x 8.27 inch
13 [Com-9] COM9 3.875 x 8.875 inch
series only!)
Plus
IPDS Parser syntax (with default setting):
PAPER_SIZE_2ND_CASSETTE = 0;
AXIS AFP IOP User’s Manual 45
Page 50

Section 5: Configuration Parameters
Paper Size,
Manual Feed
Note: If actual paper size is smaller than the one selected, empty or misaligned
Paper Size, Manual Feed ...........................................[Paper Size Manual]
This option is to be used to select size of the paper in the manual feed.
pages will be printed. The standard logical page number for manual feed
(63H) can be used in the IPDS to select the manual feed.
•1 [A4] A4 297 x 210 mm.
2 [B5] B5 257 x 182 mm
3 [Letter] Letter 11 x 8.5 inch
4 [Legal] Legal 14 x 8.5 inch
5 [Executive 1] Executive 1 10.5 x 7.00 inch
6 [Executive 2] Executive 2 10.5 x 7.25 inch
7 [Executive 3] Executive 3 10.5 x 7.50 inch
8 [Monarch] Monarch 3.875 x 7.5 inch
9 [Com-10] COM10 4.125 x 9.5 inch
10 [DL] DL 4.33 x 8.66 inch
11 [C5] C5 6.38 x 9.01 inch
12 [A5] A5 5.83 x 8.27 inch
13 [Com-9] COM9 3.875 x 8.875 inch
IPDS Parser syntax (with default setting):
PAPER_SIZE_2ND_CASSETTE = 1;
46 AXIS AFP IOP User’s Manual
Page 51

Section 5: Configuration Parameters
Paper Size,
Envelope Feed
Note: If actual paper size is smaller than the one selected, empty or misaligned
Paper Size, Envelope Feed ...................................... [Paper Size Envelope]
This option is used to select size of the paper in the envelope feed.
pages will be printed.
• 0 [Autodetect] AUTO Detect (Optra and 4039
1 [A4] A4 297 x 210 mm.
2 [B5] B5 257 x 182 mm
3 [Letter] Letter 11 x 8.5 inch
4 [Legal] Legal 14 x 8.5 inch
5 [Executive 1] Executive 1 10.5 x 7.00 inch
6 [Executive 2] Executive 2 10.5 x 7.25 inch
7 [Executive 3] Executive 3 10.5 x 7.50 inch
8 [Monarch] Monarch 3.875 x 7.5 inch
9 [Com-10] COM10 4.125 x 9.5 inch
10 [DL] DL 4.33 x 8.66 inch
11 [C5] C5 6.38 x 9.01 inch
12 [A5] A5 5.83 x 8.27 inch
13 [Com-9] COM9 3.875 x 8.875 inch
series only!)
Plus
Manual Feed
Support
IPDS Parser syntax (with default setting):
PAPER_SIZE_ENVELOPE = 0;
Manual Feed Support...........................................[Manual Feed Support]
This option is used to enable manual feed support.The standard logical
page number for manual feed (63H) can be used in the IPDS to select the
manual feed.
•0 [No] No
1 [Yes] Yes
IPDS Parser syntax (with default setting):
MANUAL_CASSETTE_ENABLE = 0;
AXIS AFP IOP User’s Manual 47
Page 52

Section 5: Configuration Parameters
Envelope Feed
Envelope Feed Support ..............................................[Envelope Support]
Support
Set this option to one if the printer supports envelope feed.
• 0 [Autodetect] AUTO Detect (Optra and 4039
1 [Yes] Yes
2 [No] No
series only)
Plus
IPDS Parser syntax (with default setting):
ENVELOPE_SUPPORT = 0;
Skip Blank Pages Skip Blank Pages......................................................... [Skip Blank Pages]
When setting the Skip blank page option to 1, all completely blank pages
are not printed.
•0 [No] Print blank pages
1 [Yes] Skip blank pages
IPDS Parser syntax (with default setting):
BLANK_PAGE_SKIP = 0;
48 AXIS AFP IOP User’s Manual
Page 53

Section 5: Configuration Parameters
Interface Release
Time Out
Note: This option is only used on the Optra and 4039 Plus series of printe rs.
Interface Release Time Out............................... [IOP Release Time-Out]
On non-Plus 4039 printers use the printer option [Print Timeout].
Refer to the Lexmark User manuals for more information.
The Release Timeout options control how long time must pass after the
interface has used the IOP port until the other input ports (serial or
parallel) can be used on the printer.
This time must be set large enough to ensure that for example an IPDS
job can be printed without pages from the parallel or serial ports being
inserted between the IPDS pages.
If a partial non-IPDS Coax page exists in the printer buffer, this page will
be printed and the timer will be restarted before exit from IOP mode. This
option has higher priority than option C28 Coax Time Out.
The normal printer FF-timeout controls the time for switching to IOP
mode. The range is from 15-255 seconds.
• 30 [15..255] Interface Time Out in seconds
IPDS Parser syntax (with default setting):
PORT_TIMEOUT = 0;
Error Beep Control Error Beep Control ................................................. [Error Beep Control]
This option can be enabled to detect different kinds of errors. The beep
pattern is always 6 beeps consisting of short and long beeps.
Please note, disabling only affects beeping on software errors. Hardware
error signaling can not be disabled. In case of hardware error signals refer
to Appendix F - Customer Support.
•0 [No] No beep.
1 [On] Burst of 6 beeps on user errors.
2 [Continous] Beep while error persists.
IPDS Parser syntax (with default setting):
ERROR_BEEP = 0;
AXIS AFP IOP User’s Manual 49
Page 54

Section 5: Configuration Parameters
Full Page Printing Full Page Printing ..................................................... [Full Page Printing]
This option makes it possible to use the so called “Edge to edge” printing
facility.
•0 [No] This setting gives the same printout as with older versions. If you
have an Optra printer and if your printer has RIP code level 31.01
or higher (also known as Base Code), and engine code 43.42, you
may find this option useful.
1 [Yes] The AFP IOP interface will use the so called “Edge to edge” facility,
which means that you will get a printout with 1/10 of an inch
unprintable margin around the page and that the contents of the
page will be compressed about 2% in all directions..
IPDS Parser syntax (with default setting):
FULL_PAGE_PRINTING = 0;
Test Page Test Page............................................................[Testpage at Power ON]
Note: This option is only located under "Printer Options" in the utility
program. In the Lexmark front panel menu the same option is found
under [TEST PAGE] in the [TEST OPTIONS] menu.
Setting the Start Testpage option to one will enable printing of a test page
each time the interface is turned on.
•0 [Disable] No test pages.
1 [Enable] Print test page at start.
IPDS Parser syntax (with default setting):
TEST_PAGE = 0;
Note: The frontpanel menu [Test Page] has as an additional item:
[Continuous Test Page].
This value can only be selected from the front panel as it is disabled at
power OFF.
50 AXIS AFP IOP User’s Manual
Page 55

IPDS Options Front Panel Menu
The IPDS Option menu consists mainly of settings which relate to the
IPDS to host replies from the interface. Two options are to be considered
at first time installation: The [IPDS Emulation] and the [Duplex
Support]. Changing the IPDS emulation will not only affect the reply to
the host, but it will also cause a completely different program to be loaded
from the Flash memory into the DRAM area of the AFP IOP interface.
The IPDS graphics features and the fonts are not only running in a
different resolution (4028 = 300dpi, 3812/16 = 240dpi),- the font sets are
completely different from each other.
The duplex feature is automatically detected on Optra and 4039 Plus
models (only) and reported to the host. The "D" indication in the AFP
IOP main menu will be displayed if the duplex is automatically detected or
if duplex has been enabled be stating "yes" in the "Duplex Support"
option.
Section 5: Configuration Parameters
AXIS AFP IOP User’s Manual 51
Page 56

Section 5: Configuration Parameters
IPDS Options
This group of options changes the way IPDS operates. These options are
not available on the original IBM 3812-2 printer.
Note: In the following an asterisk "*" will indicate the factory setting. The
number in the first column indicates the value to use in the utility
program or the IPDS parser, and the text in angular brackets
indicates the printer front panel value for the options. The values can
be text or numbers. The printer front panel menu texts are indicated
in angular brackets in the option headlines.
IPDS Emulation IPDS Emulation ......................................................... [IPDS Emulation]
Note that the 3812 and 3816 replies are identical. If for instance duplex is
enabled this will be reported to the host independently of the emulation.
0 [3812/3816] IBM 3812/16.
• 1 [4028] IBM 4028.
2 [3916] IBM 3912/16 (3112/16)
IPDS Parser syntax (with default setting):
IPDS_EMULATION = 1;
Codepage Version Codepage Version ..................................................... [Codepage Version]
Note: The codepages differ on some special characters. Refer to IBM font
reference manual for details.
•0 [Version 1] Use standard codepage version 1 for codepages close to 37 or 500
(non typographic standard codepages).
1 [Version 0] Special. Use old codepage version 0.
IPDS Parser syntax (with default setting):
CODEPAGE_VERSION = 0;
52 AXIS AFP IOP User’s Manual
Page 57

Section 5: Configuration Parameters
IPDS Exception
Reporting Control
IPDS Stacked Page
Counter
IPDS Exception Reporting Control ..........................[Exception Control]
It is often practical to suppress exception reporting on undefined
characters and position errors (printing outside valid printable area).
This option overrides the EHC control in the IPDS data stream.
• 0 [No Exceptions] No suppression of exceptions.
1 [Outside VPA] Exception reporting for position errors (Outside VPA) is sup-
pressed.
2 [Undef Char] Exception reporting, when an undefined character is found, is
suppressed.
3 [UVPA & UDEFC] Both position errors and undefined character exceptions are
suppressed.
IPDS Parser syntax (with default setting):
EXCEPTION_OVERRIDE = 0;
IPDS Stacked Page Counter..................................[Page Counter update]
If the interface updates the page counter after the page has been processed,
the printer could in some cases lose pages if it is turned off while printing.
However, the printer recovers correctly from jam and cover open errors.
Note: If Coax option C17 Intervention Required is enabled, reporting of
Stacked Page Counter after pages have been printed will be forced
regardless of the setting of this option.
• 0 [Processing] Report stacked counter after pages have been processed.
1 [Printing] Report stacked counter after pages have been printed (see Note
below!).
2 [Transfer] Report stacked counter after pages have been transferred from the
AFP IOP to the Lexmark printer.
Note: The value “1=Printing” only works on Optra and 4039 Plus series printers.
A value of 1 on printers other than the 4039 Plus series will result in
operation as described under value “2=Transfer”.
IPDS Parser syntax (with default setting):
INCREMENT_PAGE_COUNTER = 0;
AXIS AFP IOP User’s Manual 53
Page 58

Section 5: Configuration Parameters
Resource memory Resource memory..........................................................[IPDS Resources]
With this option it is possible to control the allocation of memory between
the IPDS resource memory and the output buffer used for pages ready for
print.
Increasing output memory can sometimes improve speed because
transmission and printing time are better used. Increasing memory for
resource is sometimes a good idea, if printing large IPDS jobs with many
downloaded fonts, page segments or overlays.
• 0 [Normal] Normal split of memory.
2 [Less] Allocate less resource memory but more to output buffer.
3 [More] Allocate more resource memory but less to output buffer.
IPDS Parser syntax (with default setting):
RESOURCE_MEMORY = 0;
Duplex Support Duplex Support ............................................................[Duplex Control]
This option determines if the AFP IOP should report to the host that this
option is installed.
• 0 [Autodetect] AUTO Detect (Optra and 4039
1 [Disable] Duplex not installed.
2 [Enable] Duplex installed.
series only)
Plus
IPDS Parser syntax (with default setting):
DUPLEX_PRINT = 0;
54 AXIS AFP IOP User’s Manual
Page 59

Section 5: Configuration Parameters
4028 Printable
Area
Note: This option is only used in 4028 emulation and is recommended to be
4028 Printable Area ........................................................ [Printable Area]
This option controls what printable area is reported in the 0b Printer
Characteristics reply on the 4028 emulation.
enabled.
• 0 [3812/3816] Normal. Printable area and paper size is the same
1 [4028] 4028 compatible. Printable area is smaller than the paper size.
Thereby allowing Host compensation of the reduced printable area
found on most laser printers.
2 [Print Page] Supports 4028 Print Page option. This option causes the upper left
corner (0,0) of the Logical page to be forced inside the 4028 Printable area.
IPDS Parser syntax (with default setting):
4028_PRINTABLE_AREA = 0;
AXIS AFP IOP User’s Manual 55
Page 60

Section 5: Configuration Parameters
Set Factory Default
This menu selection makes it possible to reset the AFP IOP to the factory
defaults setting.
Press OK buttons
simultaneo usly to
restore factory
settings...
OK
OK
Ready Return
Figure 7.
When you enter this menu, you will be asked if you really want to restore
factory default settings.
Note: The current configuration will be overwritten.
56 AXIS AFP IOP User’s Manual
Page 61

Section 6
Download/Upload
Both the configuration, program and fonts can be downloaded to the
AXIS AFP IOP interface via the serial cable delivered with the interface.
Furthermore the configuration can be uploaded from the AFP IOP.
However all configuration settings can be altered from the Lexmark
frontpanel as well. The serial COM output used must be set in the
program [Setup] menu.
Note: The interface automatically detects the baud rate selected in the utility
program. The baud rate is controlled by direct hardware access, i.e.
running the utility program under Windows could cause problems, as
Windows controls the serial ports in protected mode.
Section 6: Download/Upload
Download/Upload
Procedure
Important In order to download or upload, the PC must be connected to the printer
Download/Upload Procedure...........................................[Remote Setup]
using the supplied serial cable (see Section Utility Program). Also make
sure the Lexmark printer has been set into remote setup mode by enabling
[Remote Setup] from the IOP front panel menu.This is accomplished by
pressing the [OK] buttons simultaneously.
Remote Setup .
Warning: The Host
session will be
terminated.
OK
OK
Ready Return
Figure 8.
AXIS AFP IOP User’s Manual 57
Page 62

Section 6: Download/Upload
When the Interface has been set into upgrade mode in the [Remote Setup]
menu (fig. 8), it will start searching for a serial signal (fig 9). Note that the
host session is determined when setup mode is activated. The host session
will not be established again until the next Power ON.
Figure 9.
Remote Setup
Looking for
Remote Maste r.
Ready Return
The desired download or upload should now be selected by the utility
program menus [Download] or [Upload]. The COM port and baudrate
should have been set prior to this operation in the utility program [Setup]
menu under [Ouput]. The baud rate is by default set to 19200 which
most PC's should be able to run. However, most modern PC's can handle
baud rates up to 57600. This value of course gives the fastest download.
Remote Setup .
Link established
At 57600 Baud.
Ready Return
Figure 10.
When the Download or the Upload operation is activated the interface
will establish the link and display the detected baudrate (fig. 10). If
communications problems occur during download and upload then check
that the PC and the Printer use a common ground (not through the serial
cable). If not, then connect the devices to a common ground or select a
baudrate of 19200 or lower.
58 AXIS AFP IOP User’s Manual
Page 63

Section 6: Download/Upload
Note Alternatively, the download sequence in the utility program can be
activated before the printer is powered ON. This way the interface will
detect the data at its serial port as the first step in the power ON routine,
and only run in upgrade mode.
Note The printer will display an error message after a while as the interface
only communicates with the serial port and not with the IOP port.
This does NOT affect the download.
Download All Download All...................................................................[Remote Setup]
When selecting [Download All] the program will ask for the appropriate
files by showing a disk directory with the possible choices of files. The user
is prompted as explained under [Download Configuration], [Download
Program] and [Download Fonts].
Download/Upload
Configuration
(*.CFN files)
Download/Upload Configuration (*.CFN files)...............[Remote Setup]
Any given configuration file with the file extension *.CFN can be
downloaded by using the [Download Configuration] option (or by
selecting Download All). A configuration can be uploaded from the
interface by selecting [Upload Configuration] in the [Upload] menu. If
changes have been made to the configuration file currently loaded into
memory, the program will automaticallly display a disk structure in order
to have the configuration saved before downloading. The file must have
the extension ".CFN". If no changes are made to a CFN file previously
loaded with [Open config file] the program will download this file. If no
CFN file has been loaded or no options have been changed prior to
selection of [Download Configuration], then the program will prompt for
a *.CFN file by showing a disk structure from where the file can be
selected. It is recommended to use the file DEFAULT.CFN. This file will
be created by the program if it does not exist in the same directory as the
AFPUTI.EXE program. If changes are made and saved into
DEFAULT.CFN, the factory setting can always be restored by deleting or
renaming this file and letting the utility program create a new file.
Download
Download Program (Main AFP IOP Firmware) ..............[Remote Setup]
Program (Main
AFP IOP
Firmware)
AXIS AFP IOP User’s Manual 59
It is possible to download main program code to the interface using the
[Download Program] menu selection (or by selecting [Download All]).
Page 64

Section 6: Download/Upload
The program code file for the AFP IOP has the name:
The utility program will show a disk directory structure from where the
desired mainfile can be selected. Note that upgrading a mainfile may in
some cases require upgrade of the fontfiles as well.
K10-XXXX.BIN
Download Font
(Resident Font
Resources)
Download Font (Resident Font Resources) ......................[Remote Setup]
A fontfile can be downloaded to the interface by selecting [Download
Font] (or by selecting [Download All]). The font file is named:
F07-XXXX.BIN
This file contains both the 4028 and the 3812/16 emulated fonts. The
utility program will show a disk directory structure from where the desired
fontfile can be selected. Note that upgrading a fontfile may in some cases
require upgrade of the mainfile as well.
In the Lexmark AFP IOP front panel menu [TEST OPTIONS] is a
menupoint called [FIRMWARE INFORMATION]. Selection of this
feature will show a list of active firmware revisions (fig. 10). This feature
corresponds to the menupoint [Upload Versions] under [Upload] in the
utility program, though the versions are displayed on the PC screen
instead.
Figure 11.
Note that the "fonts" indicated are specific for the emulation currently
active. In the example (fig. 11) the font F05-3351 is shown. This is a 4028
font set. The corresponding 3812/16 fontset is called F03-XXXX. The
file F07-XXXX indicates the combined file containing both fontfiles.
60 AXIS AFP IOP User’s Manual
Version Information.
Overall : 1.00-4281
IPDS : 1.1-50
Fonts : F05-3351
Ready Return
Page 65

Section 6: Download/Upload
Note The last 4 digits can be different in the three file numbers, e.g. the fontfile
for 4028 may be newer than the 3812 fontfile and vice versa.
AXIS AFP IOP User’s Manual 61
Page 66

Section 6: Download/Upload
62 AXIS AFP IOP User’s Manual
Page 67

Section 7
Program Setup
The menupoints under menu [SETUP] relate mainly to the setup of the
program in combination with the PC. Only option under [SETUP]
affecting the AFP IOP interface is found under [Output].
Output Output.....................................................................................................
Download is only supported on a serial COM port. In the [Output]
selection in the [Setup] menu a COM port from 1-4 can be selected. If a
port is selected which is not available on the PC used, an error message
window will appear on the screen. Also the baud rate for communicating
with the AFP IOP is selected under [Output]. The AFP IOP
automatically detects the selected baud rate. The default baud rate is
19200 and the highest baud rate is 57600 which should work on most
modern PC's. If communications problems occur during download and
upload then check that the PC and the Printer uses a common ground
(not through the serial cable). If not, then connect the devices to a
common ground or select a baud rate of 19200 or lower. If baud rate is
changed after linking with the AFP IOP has been established, the printer
has to be restarted and the [Remote Setup] activated before a new
download/upload is performed.
Section 7: Program Setup
AXIS AFP IOP User’s Manual 63
Page 68

Section 7: Program Setup
64 AXIS AFP IOP User’s Manual
Page 69

Appendix A
Printing a Status Sheet
Two different status sheets can be printed on the printer from the front
panel menu:
AFP IOP Testpage
Appendix A: Printing a Status Sheet
1. Enter [MENUS].
a) Optra and 4039 Plus series:
Enter [MORE] until [Network Menu] is displayed. Select this menu
by pressing the button next to this menu text.
b) 4039 series:
Enter [MORE] until [Setup] is displayed. Enter [MORE] until [Network Menu X] is displayed. Select this menu by pressing the button
next to this menu text.
2. Select [Test Options] and select [Test Page].
3. Select [Single Testpage].
4. Press [Ready] to print.
AXIS AFP IOP User’s Manual 65
Page 70

Appendix A: Printing a Status Sheet
Lexmark Printer Settings Printout
1. Enter [MENUS]
2. Enter [MORE] (only on Optra and 4039 Plus models)
3. Enter [TEST MENU]
4. Enter [MORE]
5. Enter [PRINT MENUS].
66 AXIS AFP IOP User’s Manual
Page 71

Appendix B
IPDS Font Summary
IBM 3812 Emulation Fonts (240 dpi)
no. IBM font ID subs/bold ID Equivalent IBM font
1 3 OCR-B
2 5 Orator 10
3 11 Courier 10
12 s 11 Prestige 10
13 s 11 Artisan 10
4 18 Courier Italic 10
5 19 OCR-A
20 s 12 Pica 10
26 s 40 Matrix Gothic 10
30 s 11 Math-symbol 10
38 b 5 Orator bold 10
39 b 40 Gothic-text bold 10
6 40 Gothic-text 10
41 s 40 Roman-text 10
42 s 40 Serif-text 10
43 s 68 Serif-text Italic 10
7 44 Katakana-gothic 10
8 45 APL 10
46 b 11 Courier bold 10
60 b 12 Prestige bold 10
9 66 Gothic-text 12
10 68 Gothic-text Italic 12
69 b 66 Gothic-text bold 12
70 s 66 Serif-text 12
71 s 68 Serif-text Italic 12
72 s 69 Serif-text bold 12
80 s 86 Math-symbol 12
11 84 Script 12
12 85 Courier 12
13 86 Prestige 12
14 87 Letter-gothic 12
91 s 112 Light-Italic 12
Appendix B: IPDS Font Summary
AXIS AFP IOP User’s Manual 67
Page 72

Appendix B: IPDS Font Summary
no. IBM font ID subs/bold ID Equivalent IBM font
15 112 Prestige Italic 12
16 155 Boldface Italic
17 160 Essay
18 162 Essay Italic
19 173 Essay light
20 175 Document
21 204 Gothic-text 13
22 230 Gothic-text 15
23 244 Courier 5
24 252 Courier 17
25 254 Courier 17ss
26 280 APL 20
27 281 Gothic-text 20
28 290 Gothic-text 27
29 751(4407/54) Sonoran serif 8pt
30 1051(4407/66) Sonoran serif 10pt
31 1053(4427/66) Sonoran serif bold 10pt
32 1056(4535/66) Sonoran serif Italic10pt
33 1351(4407/78) Sonoran serif 12pt
34 1653(4427/108) Sonoran serif bold 16pt
35 2103(4427/162) Sonoran serif bold 24pt
107 s 85 12 Pitch
108 b 85 Courier bold 12
110 b 87 Letter-gothic bold 12
111 b 86 Prestige bold 12
158 s 175 Modern
159 b 175 Boldface
163 b 160 Essay bold
176 s 159 Boldface
177 s 155 Boldface Italic
221 s 230 Prestige 15
222 s 230 Gothic 15
223 s 230 Courier 15
225 s 86 Math-symbol 15
229 s 230 Serif 15
245 b 244 Courier bold 5
253 b 252 Courier bold 17
b - created by bolding algorithm, s - simulated by substitution
68 AXIS AFP IOP User’s Manual
Page 73

Appendix B: IPDS Font Summary
IBM 4028 Emulation Fonts (300 dpi)
Axis font IBM font ID CPI Point Size Equivalent IBM font
OCR-B 3 10 12 OCR-B
Courier 11 10 12 Courier
Prestige Pica 12 10 12 Prestige Pica
Courier Italic 18 10 12 Courier Italic
OCR-A 19 10 12 OCR-A
Courier Bold 46 10 12 Courier Bold
APL 76 12 10 APL
Courier 85 12 10 Courier
Prestige Elite 86 12 10 Prestige Elite
Courier Italic 92 12 10 Courier Italic
Prestige Elite Bold 111 12 10 Prestige Elite Bold
Prestige Elite Italic 112 12 10 Prestige Elite Italic
Boldface 159 PS 12 Boldface
Prestige 164 PS 12 Prestige
Prestige 221 15 9 Prestige
Courier 223 15 9 Courier
Courier 254 17.1 8.5 Courier
Prestige 256 17.1 8.5 Prestige
Letter Gothic 281 20 7.5 LetterGothic
Nimbus Roman 5687 Typo 6 Times Roman
Nimbus Roman 5687 Typo 8 Times Roman
Nimbus Roman 5687 Typo 10 Times Roman
Nimbus Roman 5687 Typo 12 Times Roman
Nimbus Roman Bold 5707 Typo 10 Times Roman Bold
Nimbus Roman Bold 5707 Typo 12 Times Roman Bold
Nimbus Roman Bold 5707 Typo 14 Times Roman Bold
Nimbus Roman Bold 5707 Typo 18 Times Roman Bold
Nimbus Roman Bold 5707 Typo 24 Times Roman Bold
Nimbus Roman Italic 5815 Typo 10 Times Roman Italic
Nimbus Roman Italic 5815 Typo 12 Times Roman Italic
Nimbus Roman Bold Italic 5835 Typo 10 Times Roman Bold Ital.
Nimbus Roman Bold Italic 5835 Typo 12 Times Roman Bold Ital.
PS - Proportional Spaced Typeface, Typo - Typographical Typeface
Times Roman is a registered trademark of Linotype AG and/or its subsidiaries. Nimbus Roman is
a functional equivalent of Times Roman.
AXIS AFP IOP User’s Manual 69
Page 74

Appendix B: IPDS Font Summary
70 AXIS AFP IOP User’s Manual
Page 75

Appendix C
Technical Specifications
Printers supported • Lexmark Optra (all models)
• IBM/Lexmark 4039 (all models)
Appendix C: Technical Specifications
Physical
attachments
Attachments • 3174 Control Unit, Configuration Support A, Release 3.0 or Later.
• IBM 3270 Coax. (Twisted pair is possible by connecting a balun)
• IBM 5250 Twinax cable
• 3274 Control Unit, Configuration Support D, Release 65.1 or Later.
• 9370 WSA Control Unit.
• IBM AS/400
•IBM S/36
•IBM S/38
• IBM 5294 Remote Controller
• IBM 5394 Remote Controller
• IBM 5494 Remote Controller
Emulations • IBM 3812-2
• IBM 3816-1S
• IBM 3816-1D
• IBM 4028-NS1 (IBM 3912/16, 3112/16)
• IBM 4028-AS1 (IBM 3912/16, 3112/16)
AXIS AFP IOP User’s Manual 71
Page 76

Appendix C: Technical Specifications
IPDS Features
Supported
• All IBM DATA Towers
Text
IM Image
IO Image
Graphics
Bar Codes
•IBM Resource Towers
Page Segments
Overlay
Loaded Fonts
• IPDS Exception Reporting
IPDS Fonts • 35 resident fonts functional equivalent to the IBM 3812/3816 stand-
ard fonts
• 32 resident fonts functional equivalent to the IBM 4028 standard
fonts
General Hardware
Features
Examples of
supported software
• AM29200 RISC Processor
•8 MIPS performance
•4 MBytes RAM
• 1 Mbyte FLASH Eproms for software and font storage
• IBM 3270
GDDM Release 1, Modification 1
DW/370, Release 2 (when used with GDDM)
PSF/MVS, Release 2.1
PSF/VM, Release 1.1
• IBM 5250
System/36 Release 5.1 or later
System/38 release 8 or later
OS/400 Release 2 or later
72 AXIS AFP IOP User’s Manual
Page 77

Appendix C: Technical Specifications
Product Certificates • CE EN55022/1987, EN50082-1/1992.
FCC Class A.
Safety • All safety regulations according to Lexmark Printer Specification.
Environment • Temperature: 5 – 40°C / 40 – 105°F
• Humidity: 10 - 90% RGH non-condensing.
Technical specification information is subject to change without notice.
AXIS AFP IOP User’s Manual 73
Page 78

Appendix C: Technical Specifications
74 AXIS AFP IOP User’s Manual
Page 79

Appendix D
IBM Cabling System
When using the AXIS AFP IOP on an IBM cabling system, the twinax
lines are terminated in the cross field. In this case you will need a dummy
twinax plug so that the auto-termination T-cable will not terminate.
This plug is available from your local dealer/distributor.
Appendix D: IBM Cabling System
AXIS AFP IOP User’s Manual 75
Page 80

Appendix D: IBM Cabling System
76 AXIS AFP IOP User’s Manual
Page 81

Appendix E: Installation
Appendix E
Installation
First, check the contents of your AFP IOP delivery, according to the
checklist in Section General.
Installation on Lexmark Optra and 4039
IMPORTANT 1. Try to take antistatic precautions. If a wriststrap is not available, then
touch something grounded (a radiator or a PC cabinet) before handling
the PCB board.
2. Switch OFF the Lexmark Printer, and remove the Power Cord.
3. Open the top cover and open the right side cover.
Note 4. For 4039 printers only:
Press the two blue metal pips on the lower part of the metal cover, and
pull out to loosen the cover. Push up the metal cover, push the cover
to the left and pull down gently. The Lexmark main board is now visible.
Note 5. For all 4039 printers EXCEPT model 16L and 16L Plus:
Attach the DC/DC converter to the system board by plugging it into
the 5 pole connector at the top right corner of the Lexmark main
board. It is recommended to do this before installing the AFP IOP
AXIS AFP IOP User’s Manual 77
Page 82

Appendix E: Installation
board. See figure 12.
Figure 12.
6. Mount the AFP IOP card to the IOP connector on the Lexmark
printer. Fit the holes on the interface to the two white plastic pins on
the main board. See figures 13 (4039) and 14 (Optra).
Note The plastic pins can be a little tight at first time installation
78 AXIS AFP IOP User’s Manual
Page 83

Appendix E: Installation
4039 printer
Plastic
Posts
Holes
Network Option
Connector
Network Card
Connector
Figure 13. 4039 printer.
AXIS AFP IOP User’s Manual 79
Page 84

Appendix E: Installation
System Board
Connector
Network Board
Connector
Optra printer
Pin
Holes
Figure 14. Optra printer.
7. Mount the Screw from the AFP IOP delivery into the the hole on the
lower part of the AFP IOP board. See figures 15 (4039) and 16
(Optra).
80 AXIS AFP IOP User’s Manual
Page 85

4039 printer
Appendix E: Installation
Figure 15. 4039 printer.
AXIS AFP IOP User’s Manual 81
Page 86

Appendix E: Installation
Optra printer
Thumb screw
Figure 16. Optra printer.
Note 8. 4039 printers only:
Mount the metal cover for the Lexmark mainboard. First lift the cover
to fit the two pips up into the holes on the main board metal frame.
Slide the metal cover to the right and press on the lower part of the
cover to click it in above the two metal pips.
9. Close the right side cover and close the top cover. Connect the power
cord and power ON the printer.
10.Select [MENUS] on the frontpanel. Step true the menus until the submenu [NETWORK MENU] appears and press the button next to this
menu text.
Note On non-Optra and non-4039 Plus models this menu is found under the
submenu [SETUP].
11.Enter the [LOCAL SETUP] menu and select [IPDS OPTIONS].
Select the desired IPDS emulation and press [SAVE]. Press
<RETURN> twice and select [TWINAX OPTIONS]. Enter the [C01
Country Code] option and select your national country code. Press
[SAVE] and press <RETURN> once.
82 AXIS AFP IOP User’s Manual
Page 87

Appendix E: Installation
Altering the country code under Twinax options will change the C04
country code option in Coax as well.
12.Twinax:
Press [MORE] and select [Device Address]. Set this address to a device
address given by the AS/400 system administrator.
Note Do NOT connect the printer to the system until this address has been
determined.
13.Twinax:
Press <READY>, power the printer OFF and mount the Twinax Tcable to the 9 pole connector on the back of the printer.
Coax:
Press <READY>, power the printer OFF and mount the Coax cable to
the 9 pole connector on the back of the printer.
14.Connect the printer to the host system and power the printer ON.
When the printer displays [READY] and the AFP IOP gives a beep signal indicating that the communication processor is ready, the printer is
now ready for host data.
AXIS AFP IOP User’s Manual 83
Page 88

Appendix E: Installation
84 AXIS AFP IOP User’s Manual
Page 89

Appendix F
How to contact Axis
If you need technical support, please contact your dealer. If they can’t
help you, they will forward your request through the appropriate
channels.
Internet and World Wide Web
Appendix F: How to contact Axis
The Axis offices
Europe, Middle
East, South
America, Africa,
Australia
If you are connected to Internet, have a look at the Axis WWW Home
Page at http://www.axis.se/. Here you can find information about the
company and our products. You can also down-load on-line manuals,
tools such as the Acrobat Reader for different platforms, and the latest
versions of the software utilities.
You can also get files and information through anonymous ftp: log in to
ftp.axis.se and go to the /pub/axis directory.
If you want to contact an Axis office, choose the one nearest to your
region:
Axis Communications AB
Scheelevägen 16
S-223 70 Lund, Sweden
Phone: +46 46 19 18 00
Fax: +46 46 13 61 30
Email: info@axis.se
AXIS AFP IOP User’s Manual 85
Page 90

Appendix F: How to contact Axis
North & Central
America
Japan Axis Communications KK
Hong Kong, Asia
(except Japan &
Middle East)
Axis Communications Inc.
4 Constitution Way, Woburn, MA 01801-1030, USA
Phone: 1-800-444-AXIS, (617) 938-1188
Fax: (617) 938-6161
Email: info@axisinc.com
8th Center Plaza 5F, 1-10-16 Nihombashi Horidome-cho,
Chuo-ku, Tokyo 103, Japan
Phone: +8 13 3663 8801
Fax: +8 13 3663 8802
Email: info@axiscom.co.jp
Axis Communications LTD
Room 602 Asian House, 1 Hennessy Road, Wanchai, Hong Kong
Phone: +852 2836 0813
Fax: +852 2573 5935
Email: info@axis.com.hk
86 AXIS AFP IOP User’s Manual
Page 91

Appendix G
Related Publications
For additional information please refer to the following publications:
Title Par t n o.
IBM Intelligent Printer Data Stream Reference S544-3417
Using the IBM LaserPrinter 4028 Model AS/1 with the Application AS/400
and System/36
IBM LaserPrinter 4028 Model AS/1 IPDS Handbook S544-4260
Using the IBM Pageprinter 3812 with an IBM System/36 or S/38 S544-3343
IBM Pageprinter 3812 IPDS Handbook S544-3102
IBM 3812 and 3816 Page Printers Font Reference GA34-2111
The Lexmark 4039 series manuals
The Lexmark Optra series manuals
Appendix G: Related Publications
S544-4262
AXIS AFP IOP User’s Manual 87
Page 92

Appendix G: Related Publications
88 AXIS AFP IOP User’s Manual
Page 93

Appendix H
Cable Specifications
Appendix H: Cable Specifications
PC
Female DB9
1
RXD
TXD
GND
Figure 17. AFP IOP Serial Cable
.
2
3
4
5
6
7
8
9
GND
Copper
Silver
Interface
Female DB9
1
RXD
2
TXD
3
4
5
6
GND
7
8
9
Female DB9
1
2
3
4
5
6
7
GND
8
9
Twinax
Figure 18. AFP IOP Twinax Cable.
AXIS AFP IOP User’s Manual 89
Page 94

Appendix H: Cable Specifications
Figure 19. AFP IOP Coax Cable.
Coax - Female DB9
1
2
3
4
5
6
7
8
9
90 AXIS AFP IOP User’s Manual
Page 95

Index
Index
A
Alternate Cassette Print Orientation 24
Anonymous FTP 85
Automatic Print Orientation 24
Axis offices 85
C
Coax Options 23
Code Page 24
Config files
Parameters
Contents of this delivery 8
Country Character 24
21
D
Dynamic Sharing 7
F
Factory Setting 23, 35, 40, 52
Font Summary 67
IBM 3812 67
IBM 4028 69
Front Panel 11
R
Resident Fonts 9
S
Serial I/O Port 10
T
Technical Specifications 71
U
Utility Program 8
W
World Wide Web 85
I
IBM 3270 environment 8
IBM 5250 environment 8
IBM Cabling System 75
Internet 85
IPDS 9
L
Lexmark Front Panel 11
P
Primary Casette Print Orientation 23
Product Overview 7
AXIS AFP IOP User’s Manual xci
 Loading...