

Page 1

rBOX111-FL Quick Installation Guide
©Copyright 2012 Axiomtek Co., Ltd.
Version A1 November 2012
Printed in Taiwan
9416M111010E
4
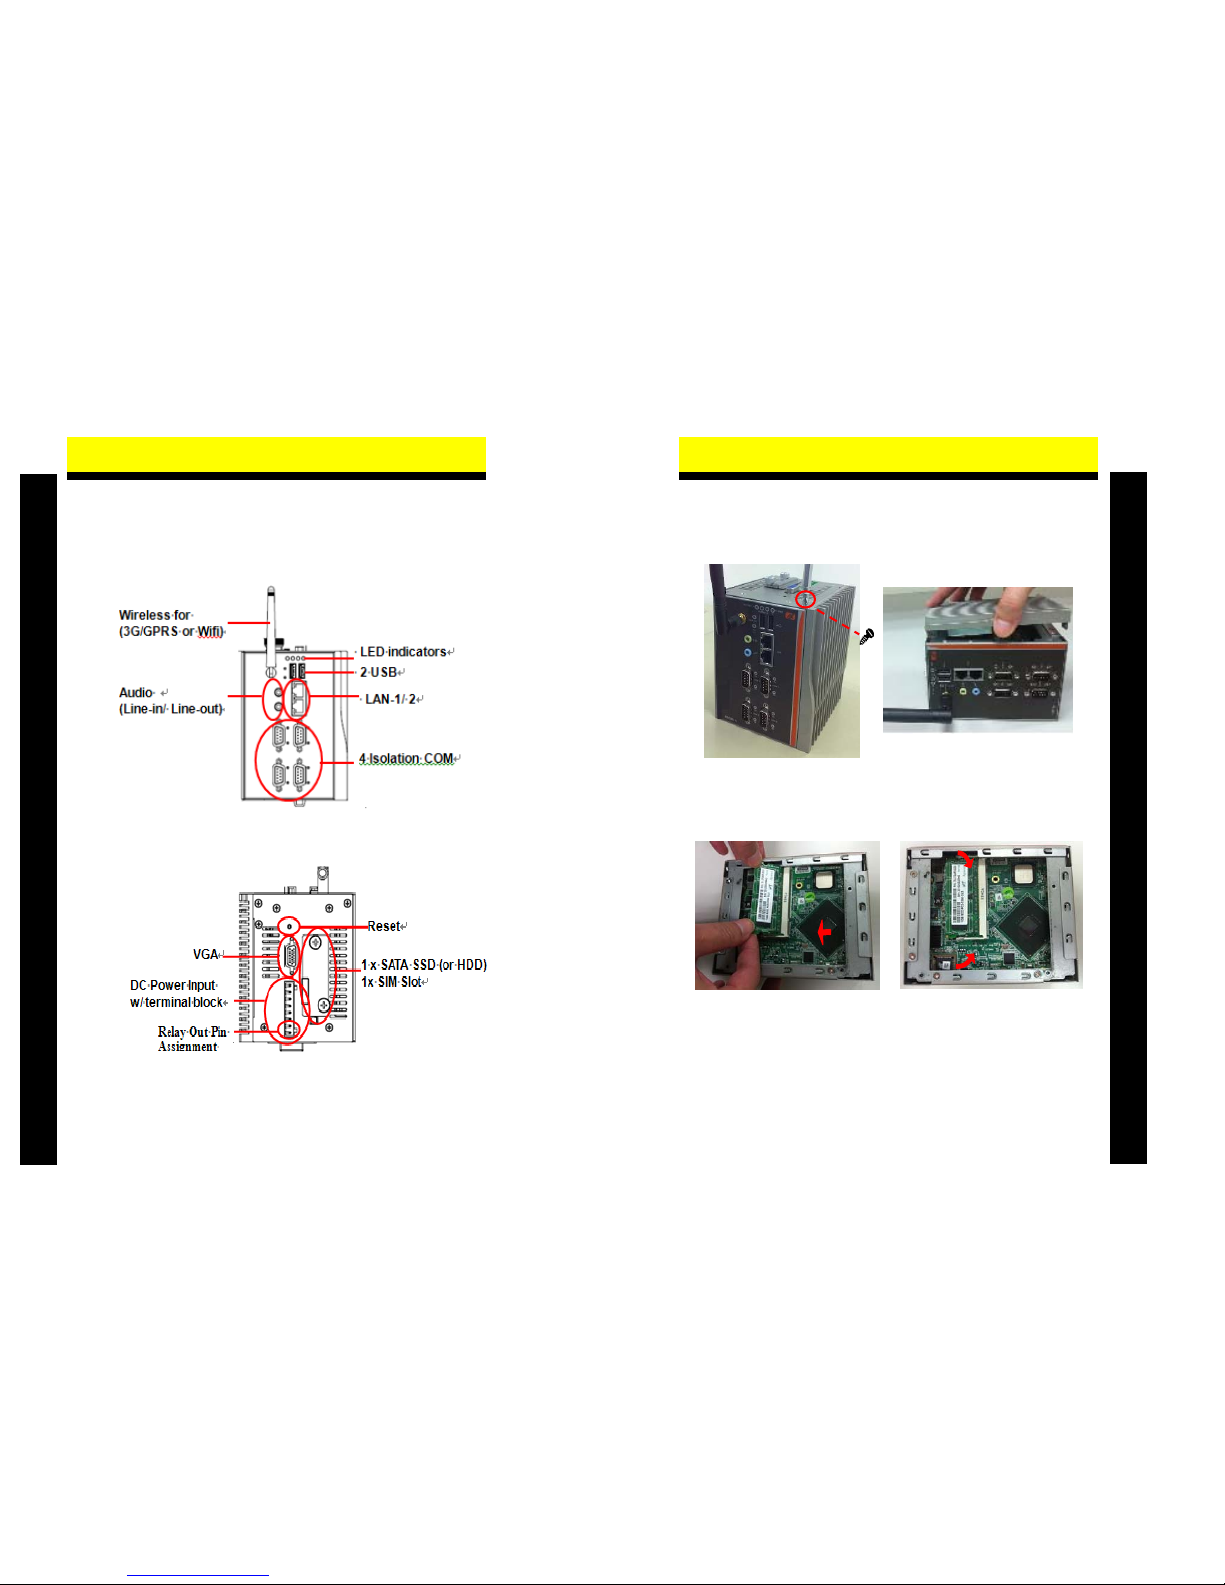
V. Installing the Hard Disk Drive
Step 1 Turn off the system.
Step 2 Loosen these screws, and remove the cover from the system.
Step 3 Loosen these screws and remove the Hard Disk Drive fixing
bracket.
Step 4 Insert the Hard Disk Drive into the socket until it is firmly seated.
Put the Hard Disk Drive fixing bracket back to the system, and
fasten screws tight close the Hard Disk Drive fixing bracket.
Step 5 Put th e cover back to the system , and fasten screws tight close the
chassis.
All Components are fragile and sensitive. If you need to replace or return any components for repair, you must
contact authorized technicians for a professional handling.
rBOX111-FL Quick Installation Guide
©Copyright 2012 Axiomtek Co., Ltd.
Version A1 November 2012
Printed in Taiwan
9416M111010E
1
I. Packing List
9 rBOX111-FL System Unit x 1 9 Power terminal block
9 rBOX111-FL Quick Installation
Guide x 1
9 CD x 1 (for Driver and
User’s Manual)
9 Screws
9 Din-rail Kit x1
II. Dimensions
There is a User’s Manual CD-ROM for the CPU card installed in your rBOX111-FL system. Please consult your local
vendor for assistance if you have any difficulties in installing.
the system.
Page 2
rBOX111-FL Quick Installation Guide
©Copyright 2012 Axiomtek Co., Ltd.
Version A1 November 2012
Printed in Taiwan
9416M111010E
2
III. I/O Outlets
The following figures show you I/O outlets on front view and top view
of the rBOX111-FL.
z Front View
z Top V iew
All Components are fra g ile and sensitive. If you n eed to replace or return any co m p onents for repair, you mu s t
contact authorized technicians for a professional handling.
rBOX111-FL Quick Installation Guide
©Copyright 2012 Axiomtek Co., Ltd.
Version A1 November 2012
Printed in Taiwan
9416M111010E
3
IV Installing the Memory Module
Step 1 Turn off the system.
Step 2 Loosen these screws, and remove the top cover from the system.
Step 3 Hold one side of the module, and insert the gold colored contact
into the socket. Push the module down. The memory module is
locked by two latches on the sides.
Step 4 Close the cover to the ch assis, and fasten all screws.
There is a User’s Manual for the Memory & Compact Flash Card installed in your rBOX111-FL system.
Please consult your local vendor for assistance if you have any difficulties in installing.
the system.
 Loading...