

Axesstel PG130 User Manual
User’s Manual
PG130
1

INTRODUCTION
The Fixed Wireless phone operates through a wireless connection instead of a landli ne
phone cable, enabling the subscriber to set up the phone at any where wireless service
is available.
Axesstel GSM/GPRS Quad Band Fixed Wireless Phone provides high quality and
superior performance with many features such as excellent voice quality, data service,
caller ID, three-way calling, call waiting, short message service, speaker phone etc.
A large 3-line monochrome graphic liquid crystal display pr ovides user-friendly interface
for quick and easy-to-understand information display.
FEATURES
1. GSM 850/900/1800/1900MHz Quad Band
2. Fast GPRS Connection, Class B, Multislot 10
3. Speaker Phone with Hands-Free Dialing
2. Signal Strength Indicator
3. Redial
4. Volume Control
5. Dust-proof Laminate Keypad
6. Battery Power Backup
7. LCD Backlit
8. One-touch, Two-touch Dialing
9. Automatic Sending
10. Phone Book
11. Short Message Service
12. Data & Fax Call via CSD & GPRS
2

TABLES OF CONTENTS
Safety Precautions……………….…..........4 Advanced Features
Checking Parts .……………………..….…5 Changing Greeting Message..................31
Setting up Your Phone ……….…….....…6 System Reset…………………………….31
Getting to Know Your Phone …………...10 Res tricting Use of the Phon e…………..32
Display Icons………………………..…..….11 Locking / Unlocking the Phone………...33
Function Keys……....……………..…….....12 Changing the Lock Code…………...…..33
Language………………………………...33
Basic Operation
Making Calls ...…….……………...…….. 14 Optional Features
Redial…………………………...…………. 15 C a ll D i v e r t… … ……………………35
Receiving Calls ……………..….……….. 15 Call Waiti ng……… …………… …………35
Adjusting Volumes …………..….………. 16 Three-Way Calling………………....……35
Choosing the Ring Tone …………...…... 16 Dat a and Fax Call Service……….……35
Message Service ......…………………… 17
Miscellaneous
Internal Phone Book Menu Table………………………………37
Internal Phone Book ……………............ 21 Sp eci fic ati on… ………… ……… ……… ..3 8
Storing in phonebook ……..……………. 21 Conformance Statements………..………..39
Searching for Entries in Phonebook ..…22 How To Setup Data Connection .……… 41
Erasing An Entry in Phonebook ….…... 24
Erasing All Entries in Phonebook ....…24
One-Touch Dialing ………………….… 24
Useful Features
Call History.......................................... 26
Mute………………………………..…27
Selecting Time Mode……………………27
Setting the Alarm………………………...29
Checking and Clearing Call Times .......29
3

SAFETY PRECAUTIONS
1. Avoid placing the phone in a dusty location, or near a source of gas or fire.
2. Don't Shake, hit or drop the phone.
3. To clean the outside of the phone, use only a soft, dry cloth. The chemicals
in alcohol, benzene or acetone can damage the surface of the phone.
4. Do not twist or pull the cord out of the phone.
5. Do not disassemble the phone.
6. Do NOT use the power adaptor if:
- The power cord is damaged.
- The phone has been dropped or damaged in any way.
7. Use only the AXESSTEL provided adaptor for the phone. Do not use the AXESSTEL
adaptor for any other purpose.
8. Use only the AXESSTEL provided antenna. Do not use the antenna for any
other purpose.
9. Frequency and length of use can affect the life of the self-charging battery.
Contact your customer service if the battery is not operating properly.
10. Use only the designated self-charging battery. Dispose of exhausted batteries
properly. Never discard a battery in or near fire or flame.
11. Do not place the telephone near water, for example, near a bathtub, sink, wet
basement, or swimming pool.
NOTE 1: The input and output voltages are indicated on the adapter.
(Input: AC 100~240V, 50~60 Hz, Output: DC 5V, 600mA)
NOTE 2: Do not insert or eject SIM card while the phone is powered on.
4
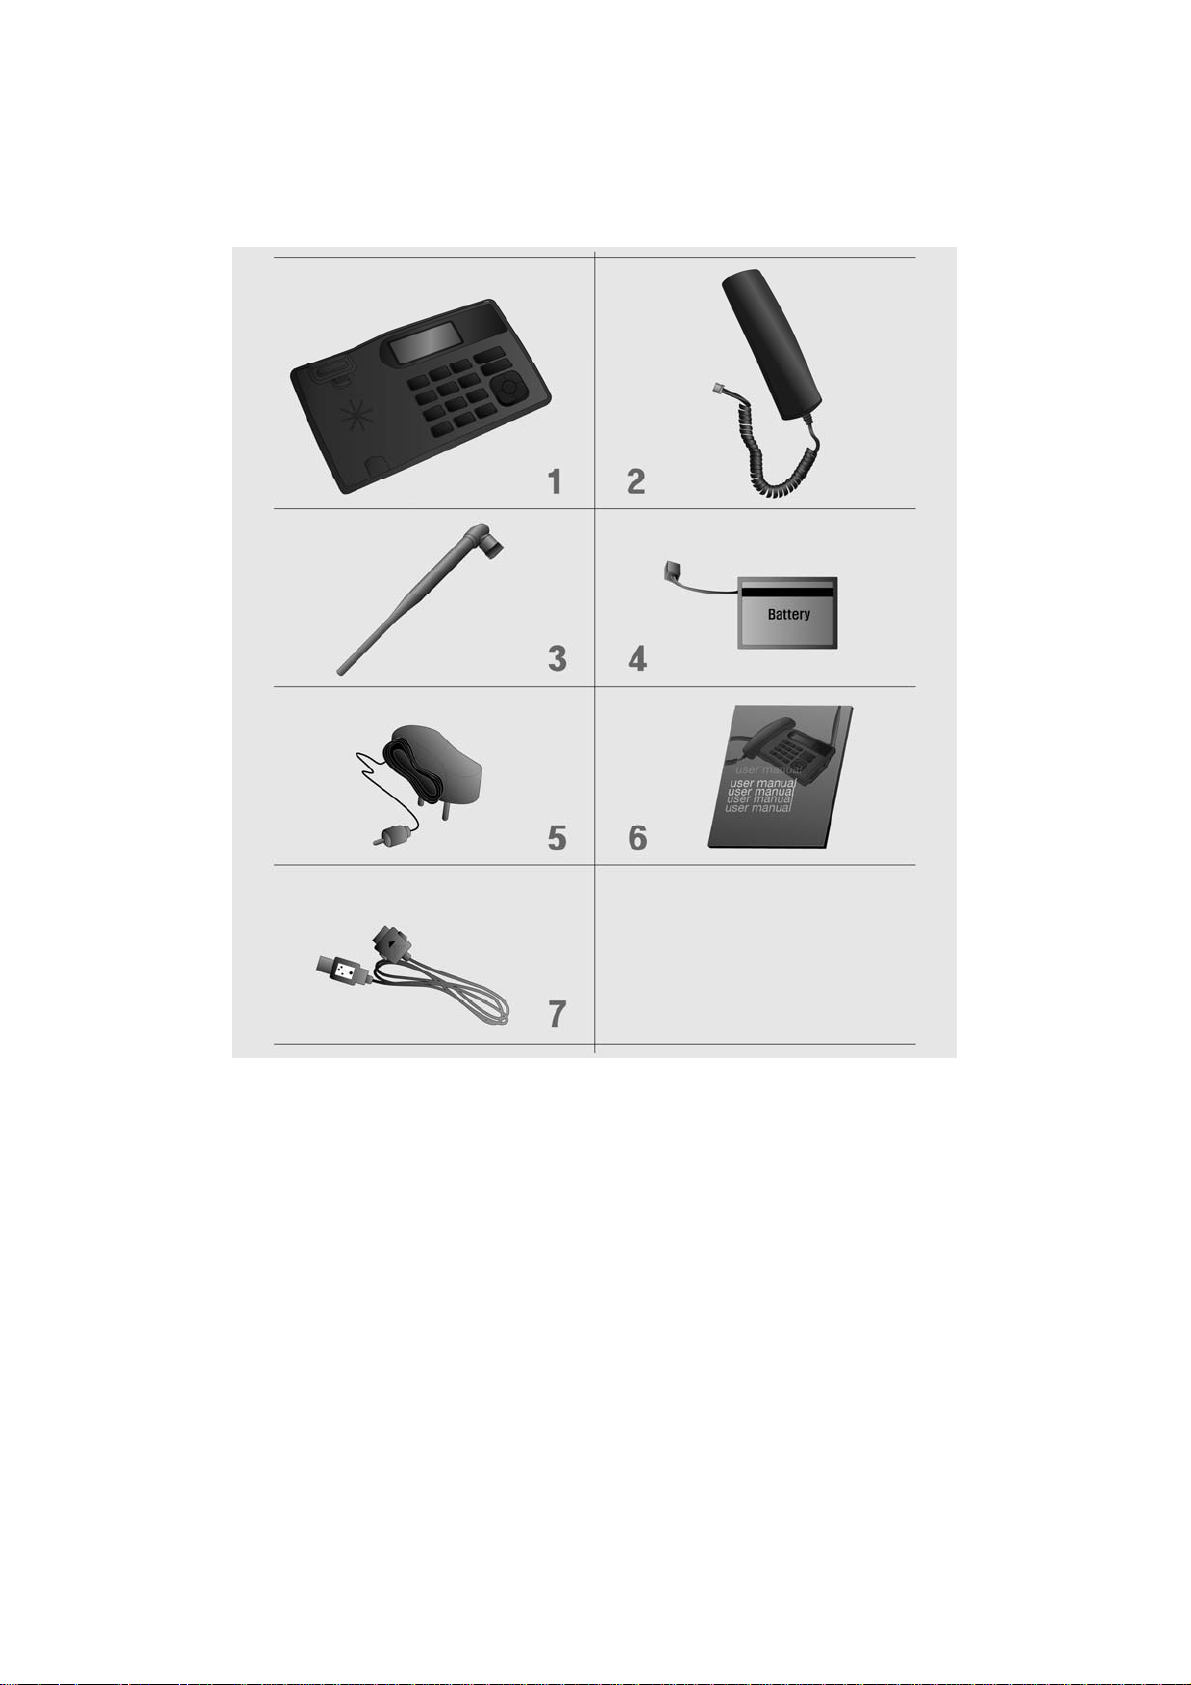
CHECKING THE PARTS
After unpacking your phone, make sure that you have all the parts shown below.
If any piece is missing or broken, please call your customer service center.
1. Main Unit 2. Handset
3. Antenna 4. Battery
5. Power Adaptor 6. Manual
7. Data Cable
5
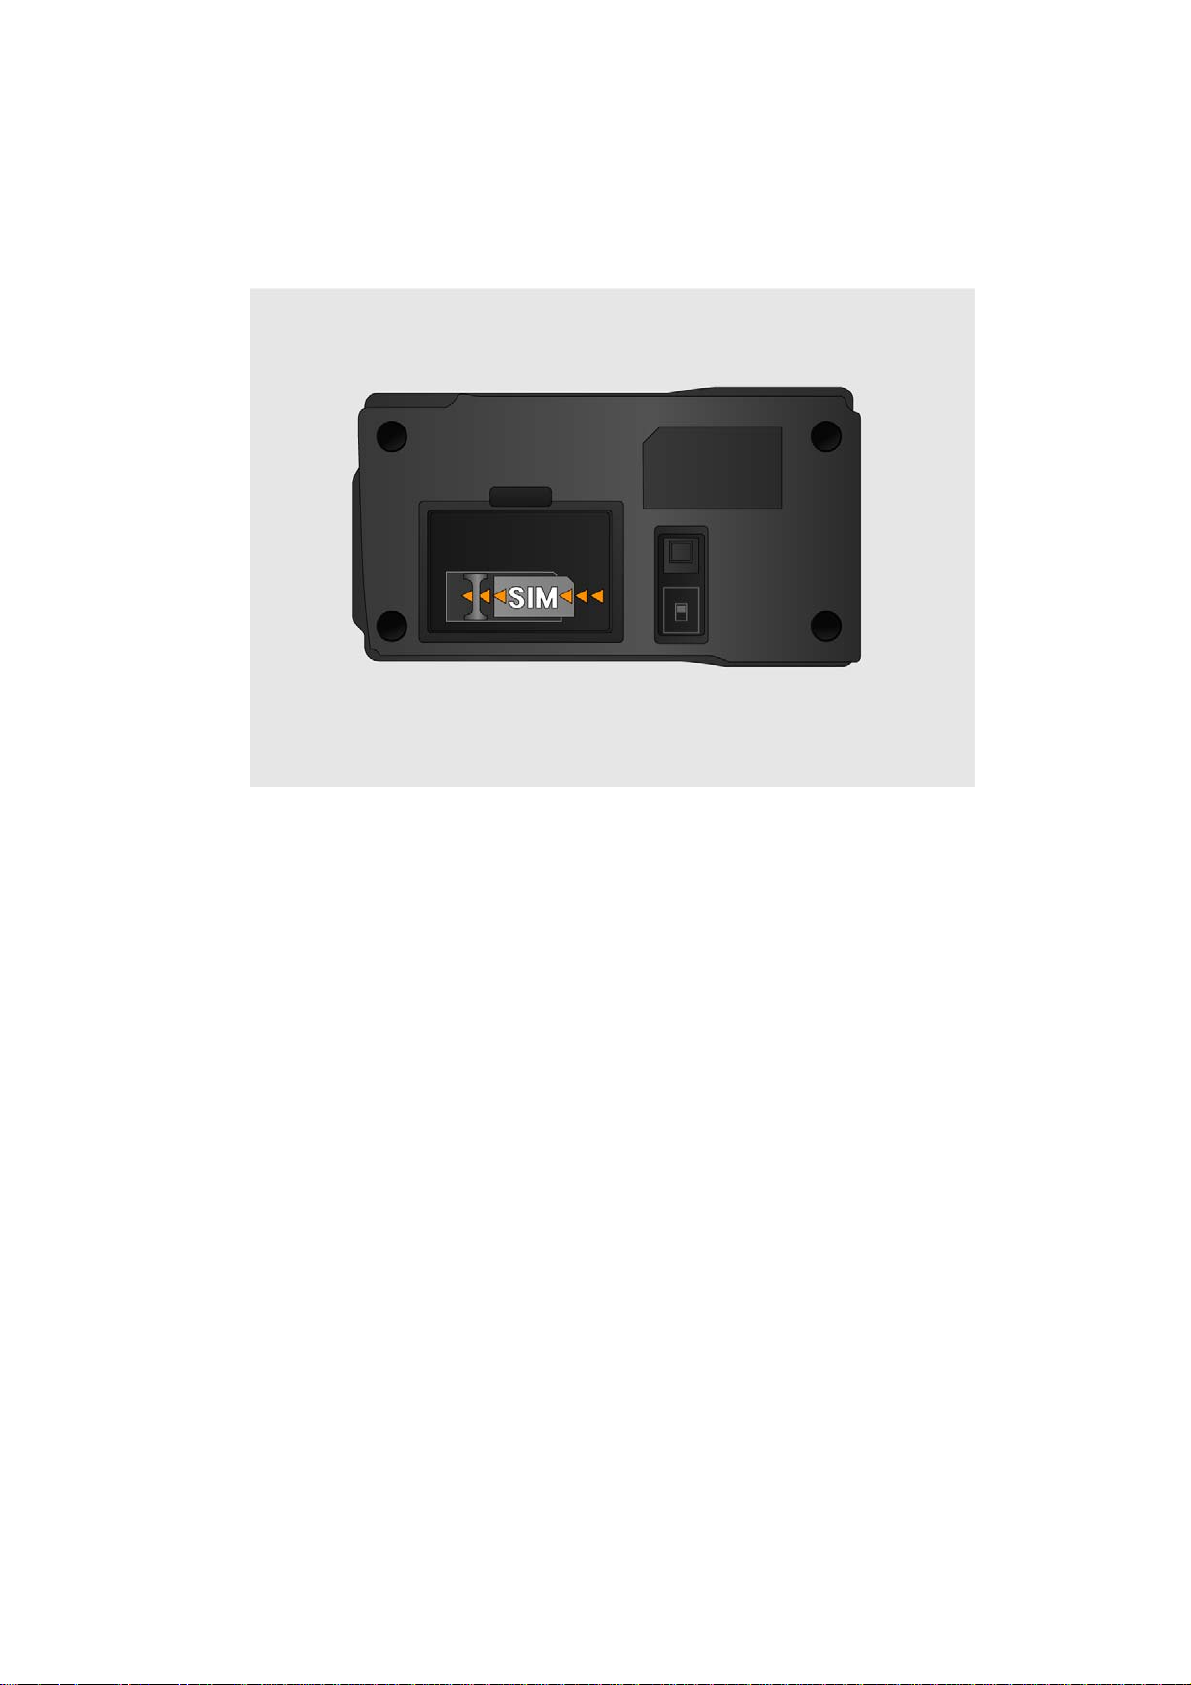
SETTING UP YOUR PHONE
Installing SIM card
1. Remove SIM bracket cover.
2. Lift SIM bracket by pulling.
3. Insert proper SIM card.
4. Put the bracket back in place.
5. Close the cover.
6

USING SIM CARD FOR THE FIRST TIME
1. Entering PIN code.
NOTE1: The PIN feature function can be set on/off in
PIN setup menu.
NOTE2: PIN code can be changed in PIN setup menu.
2. If an incorrect PIN code is entered, an error message
displays.
NOTE: There are 3 chances to enter the correct
PIN code. If incorrect PIN codes are entered
3 times, the SIM card will be locked. To unlock
the SIM card, contact your service provider.
3. The phone is ready to use after entering the correct
PIN code.
* Default PIN code is provided by your service provider.
7
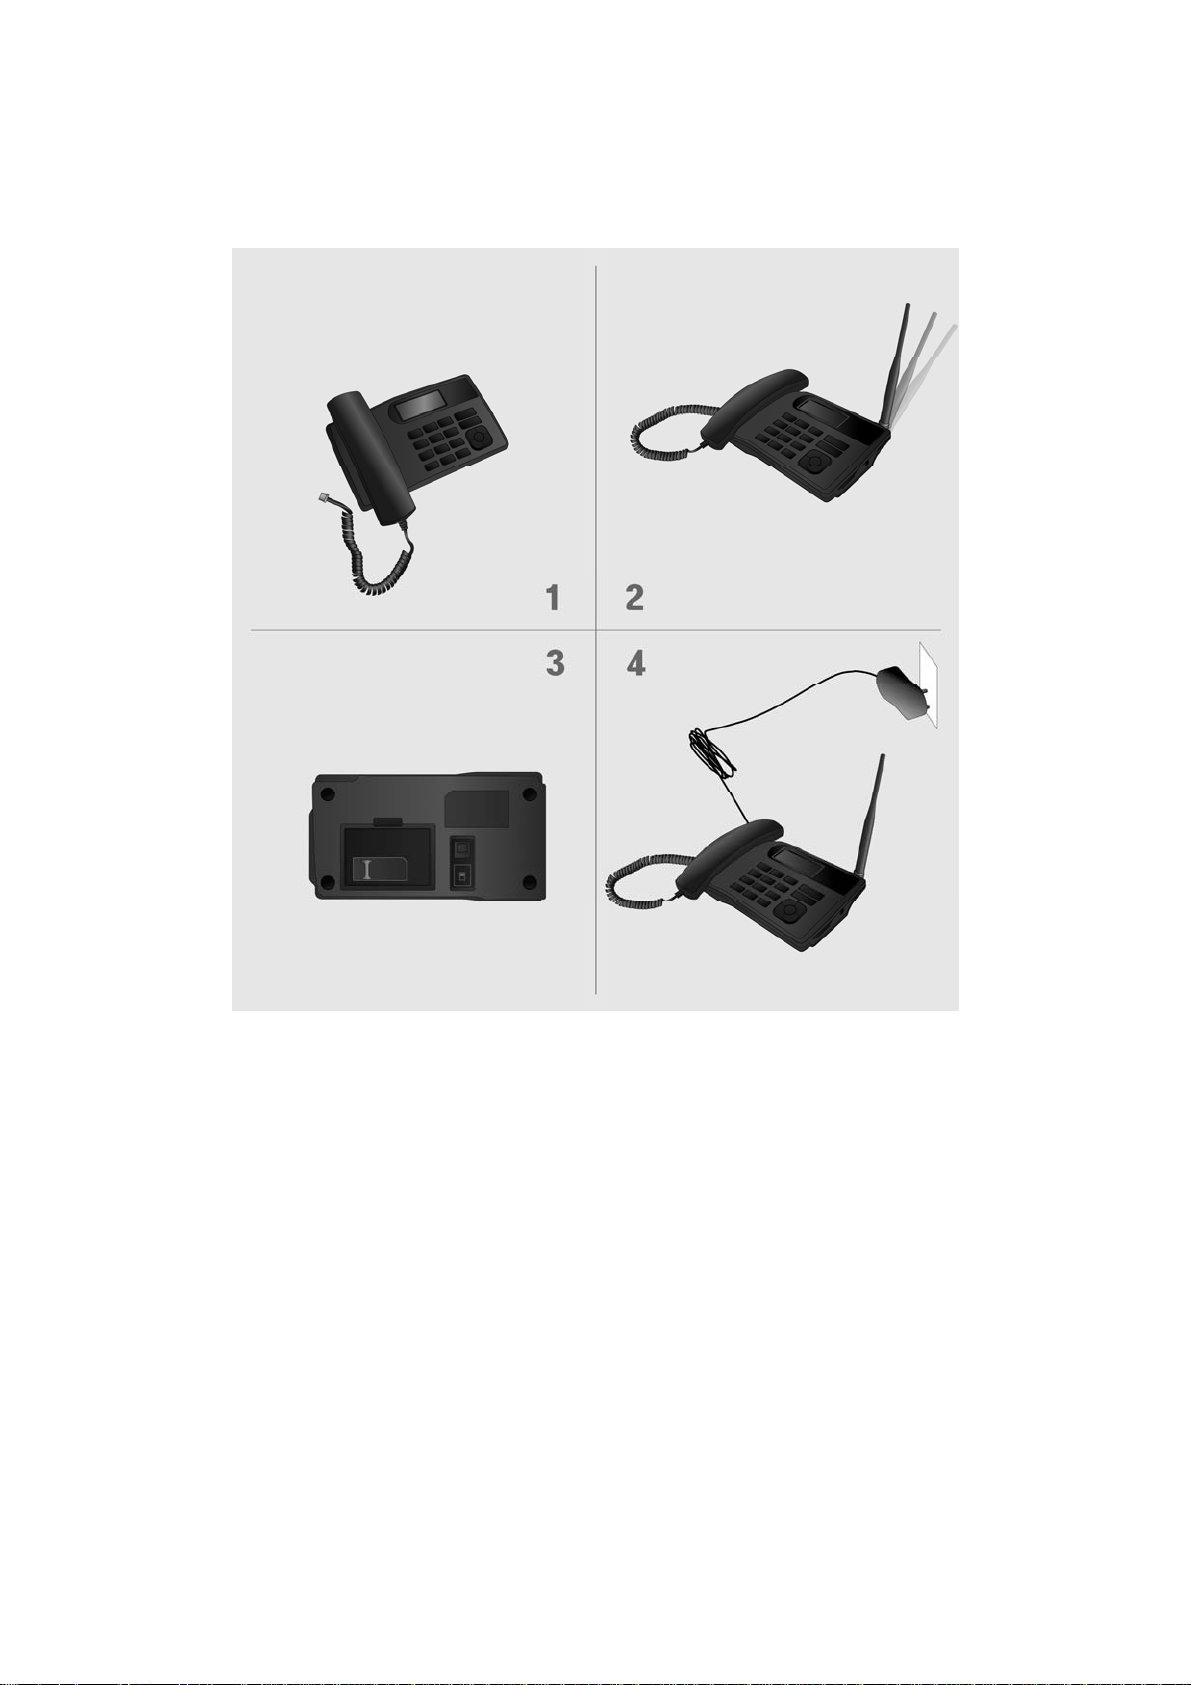
Installing the phone
This phone operates by receiving DC power from the AXESSTEL power adaptor,
which connects to an electrical outlet. The phone is equipped with a rechargeable
battery as a back up in case of an AC power failure.
Desktop installation
ON/OFF power switch is located
on the bottom side of the phone.
Please turn on the power switch to
"ON" for operation
Connect the antenna Attach the handset
Plug the Power adaptor into an
appropriate Wall outlet
8

Service Status Check
Display in the Service Area
When the phone’s power is turned on, LCD will display
POWER ON Image while the phone loads information from
SIM card. After the loading is finished, LCD will display
Greeting with date and time. The number of bars of signal
strength indicator (antenna icon) indicates the strength of service
signal of the area.
Display in area with no service
When there is no service signal detected in your area,
no antenna bar appears. Contact your service provider
for the coverage area information.
Also check if the antenna is connected.
9
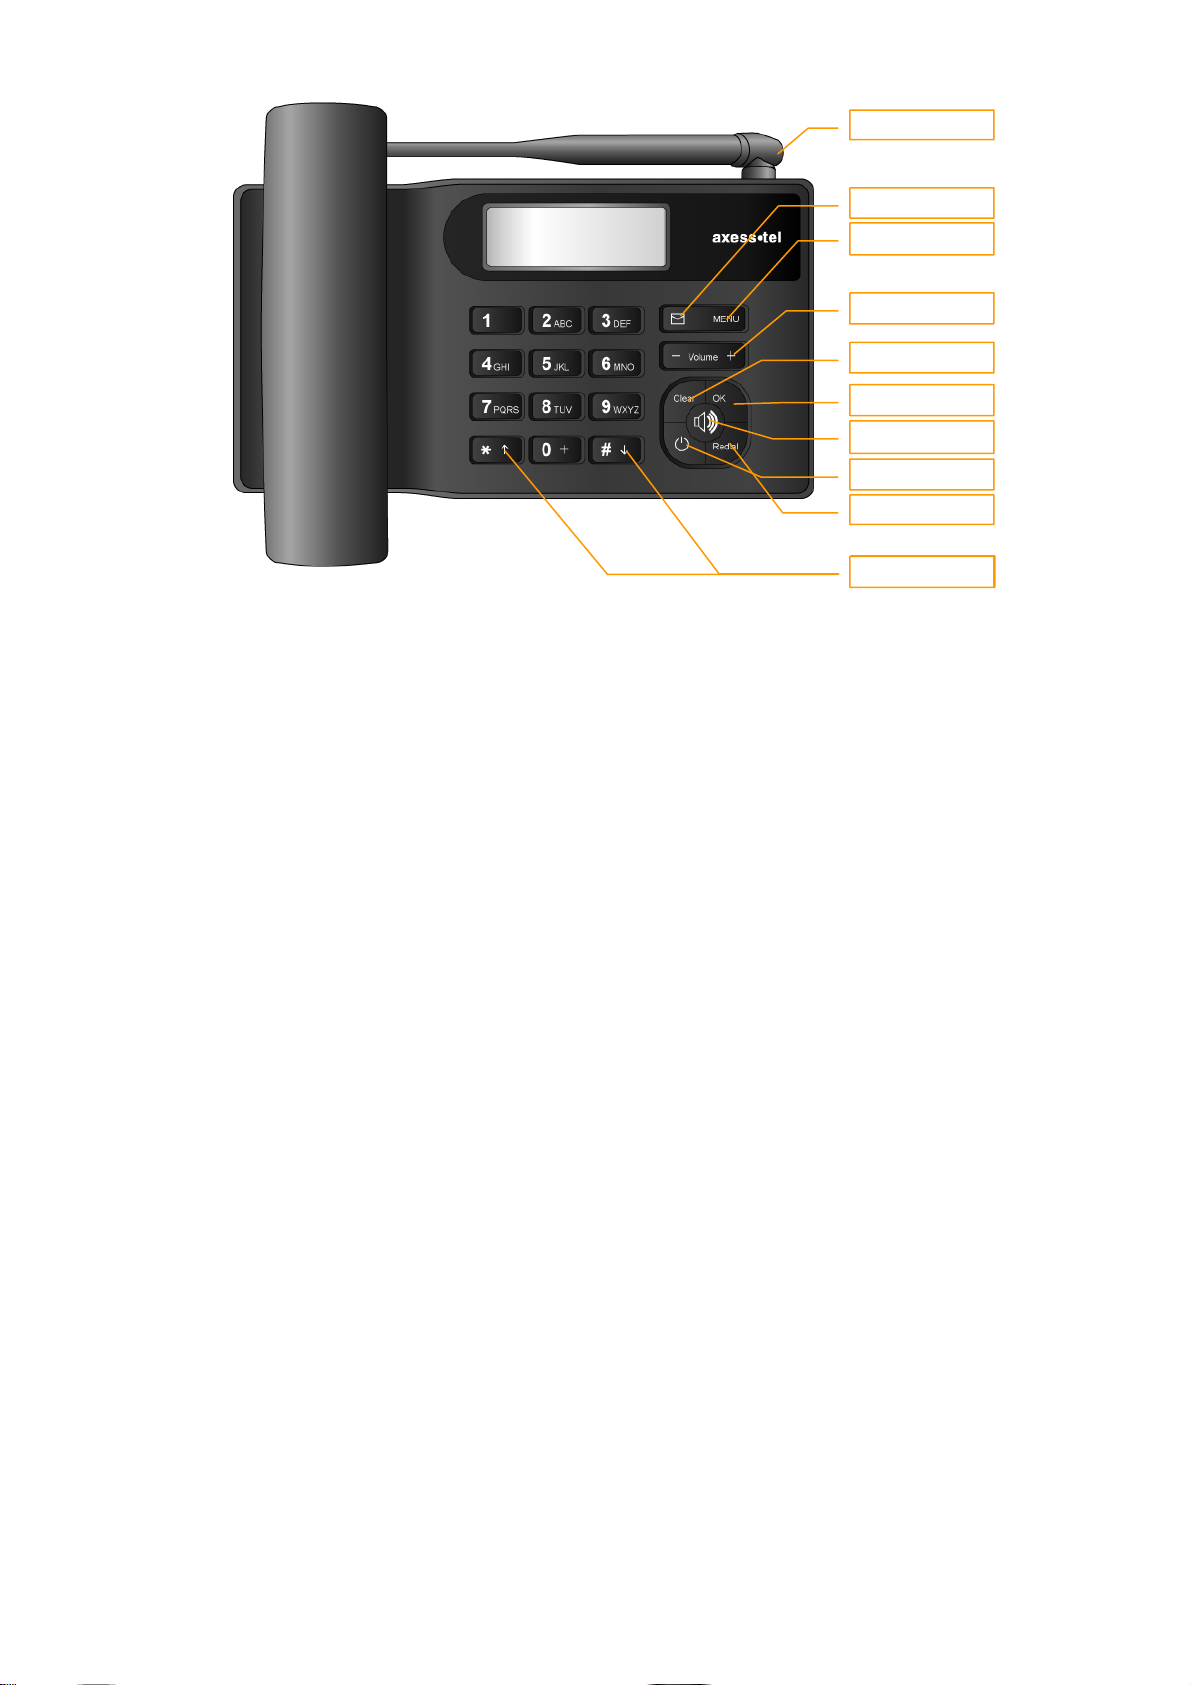
GETTING TO KNOW YOUR PHONE
3. Menu
4. Volume
6. OK
7. Speaker
8. Power
8. Power
1. Antenna: Adjusting the position of antenna improves the sound quality of the call.
2. Message: Press to access message related menus.
3. MENU: Press to access the phone's menus.
4. Volume Up/Down: Lets you adjust sound levels and scroll through the menu options
and displays.
5. Clear: Lets you clear your last entry.
6. OK: Stores phone numbers, and any settings you select in the menu with in the
phone's memory.
7. Speaker: Allows you to place or receive a call without using the handset.
8. Power: End or reject the call and Turn On or Off the phone.
9. Redial: Allows you to redial the last.
10. Scroll: Lets you scroll through the menu options and displays.
10. Scroll
10
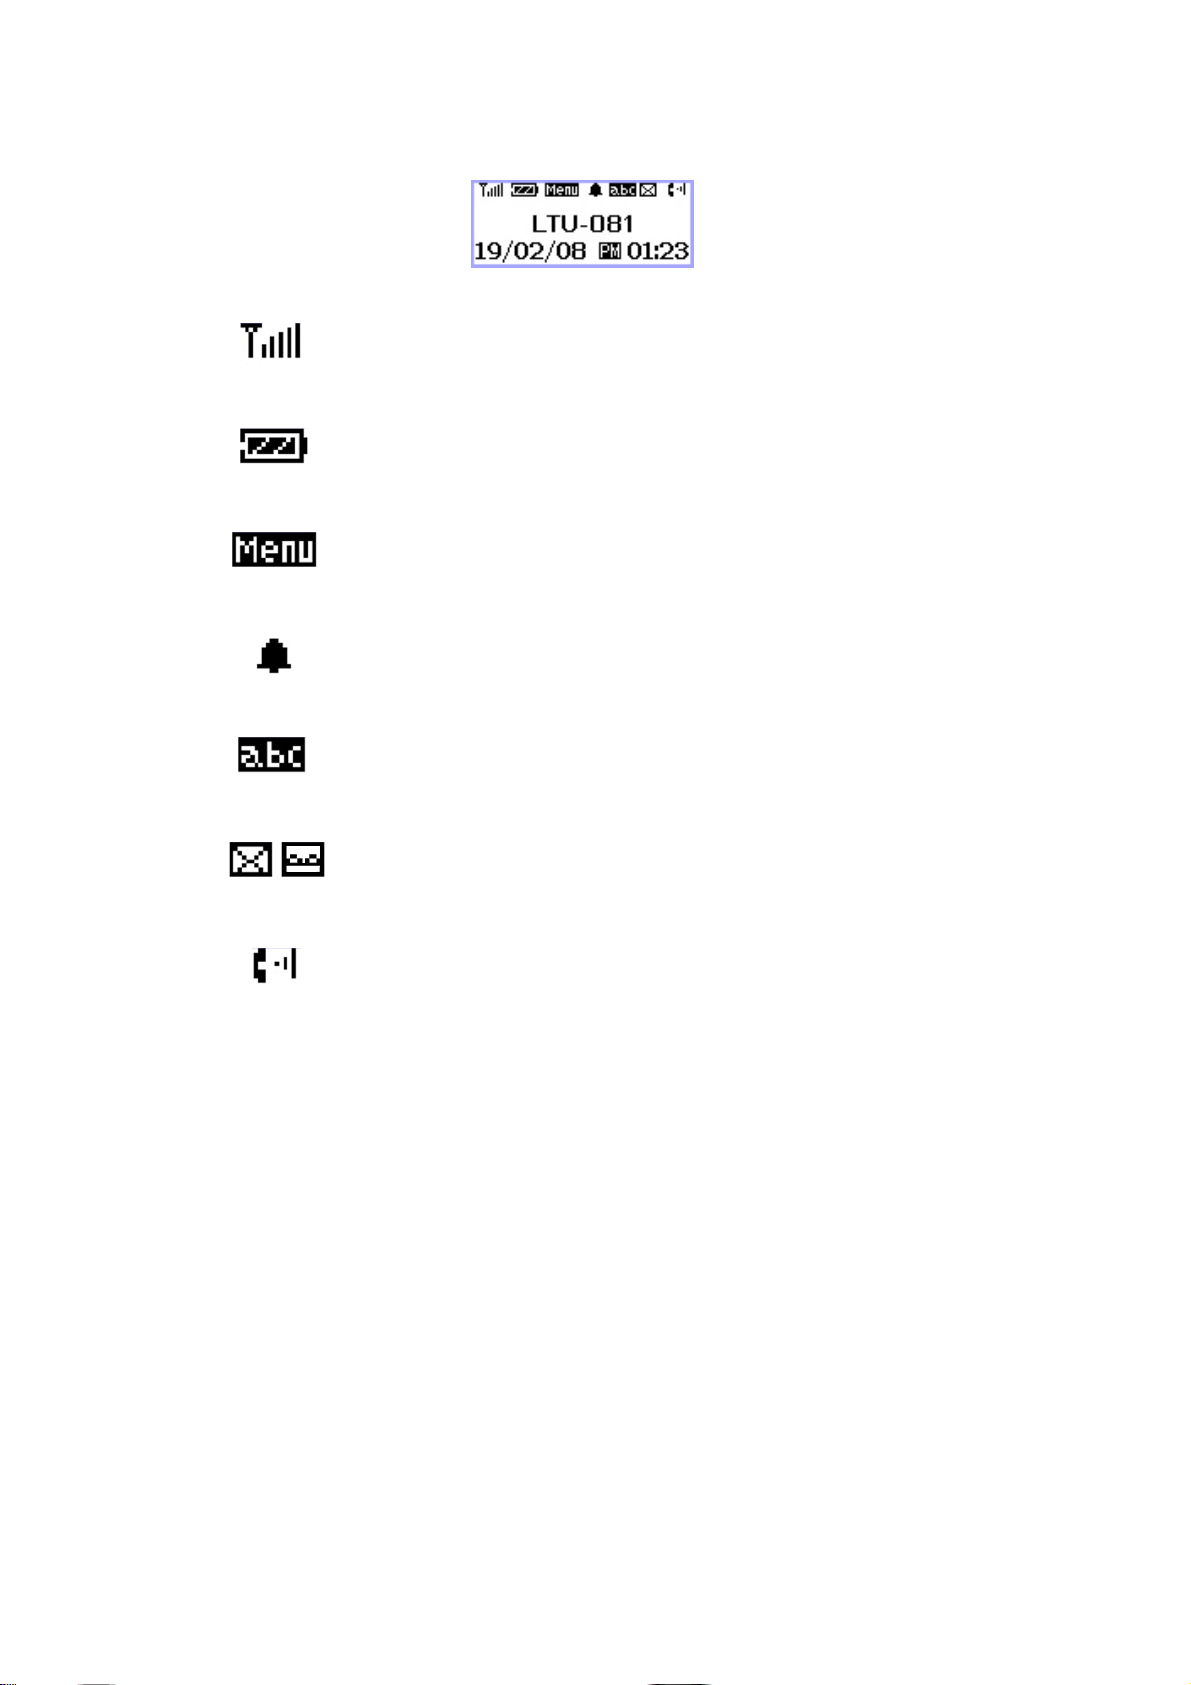
DISPLAY ICONS
Icons display on the screen to indicate what features you are using, signal strength
and battery status etc...
Indicate the strength of the signal. More bars indicates stronger
signal.
Indicates the level of battery power. The more bars, the more
power. When the battery is low, the icon blinks, and an alert
tone sounds.
Indicates that you are using the phone's menu.
Indicates that the alarm has been set.
Indicates that you are in the Phonebook menu.
Indicates that you have text message or a voice mail
message.
Indicates that a voice or data call is in progress.
11
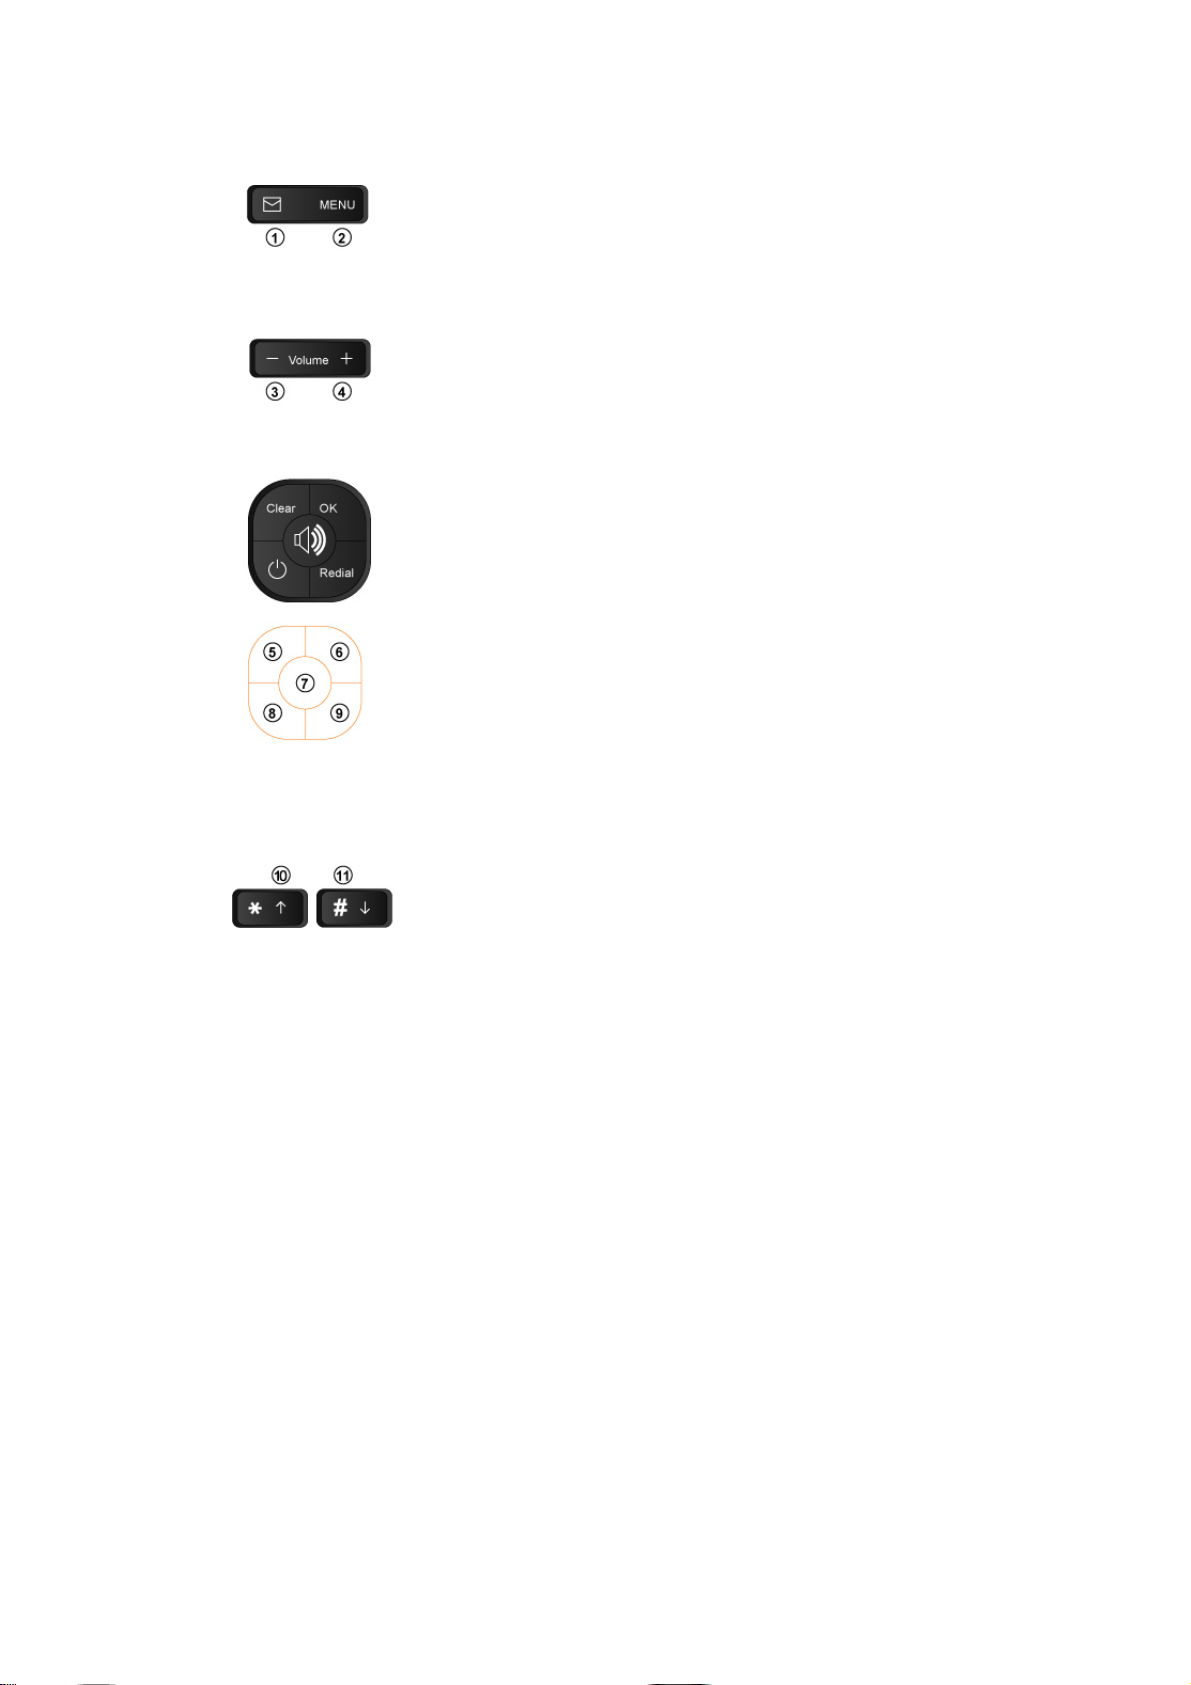
FUNCTION KEYS
1. Press this key to retrieve messages.
2. Press this key to display the phone's main menu.
3/4. Press this key to control the volume of keypad, earpiece
And speaker. In the menu mode, use this key to scroll through
The menu items.
5. Clears information from display screen.
- To erase one character from the display screen, press it once.
- To erase all characters on the screen, press and hold.
- To go back one step in the menu mode, press it once
6. Press this key to store a phone number in the phone book,
to save menu settings.
7. The Speaker button is used to place or receive a call without
using the handset. The integrated microphone and speaker on the
Main unit allows hands free conversation.
8. Press this key to turn ON or OFF the phone
9. Press this key to redial the last number called or to connect a
call right after dialing the number without waiting until the call
is connected automatically.
10/11. Press this key to control the volume of keypad, earpiece
And speaker. In the menu mode, use this key to scroll through
The menu items. In the edit mode, use this key for special characters
12

Basic Operation
Making Calls
Redial
Receiving Calls
Adjusting Volumes
Choosing the Ring Tones
Message Service
13

MAKING CALLS
1. Make sure your phone is turned on.
2. Pick up the handset to hear a dial tone.
When the phone fails to acquire service signal, you will
hear "No Service" tone (intermittent tone).
3. Dial the number to call. The LCD window displays
the number.
4. Wait for a moment for auto calling or press <Redial> .
5. When the other person answers, begin conversation.
6. To end the call, replace the handset on the main unit.
NOTE1: Modifying a phone number while dialing.
- To erase the last digit entered: Press <Clear> .
- To erase the entire number: Press <Clear> and hold.
NOTE2: Automatic calling
The phone was set to places a call automatically 3~9 seconds
after last digit entry. To disable automatic calling or change time.
setting, access “Auto send time” menu to change settings.
1. Press <MENU> , <5> (Configuration) , <5> (Auto send time).
14
REDIAL
Redial the last number you dialed.
1. Pick up the handset or press <SPEAKER> key.
2. Press <Redial>.
NOTE: You may not redial when there is no last number dialed stored
in the memory. "Log empty!" message is displayed on the LCD.
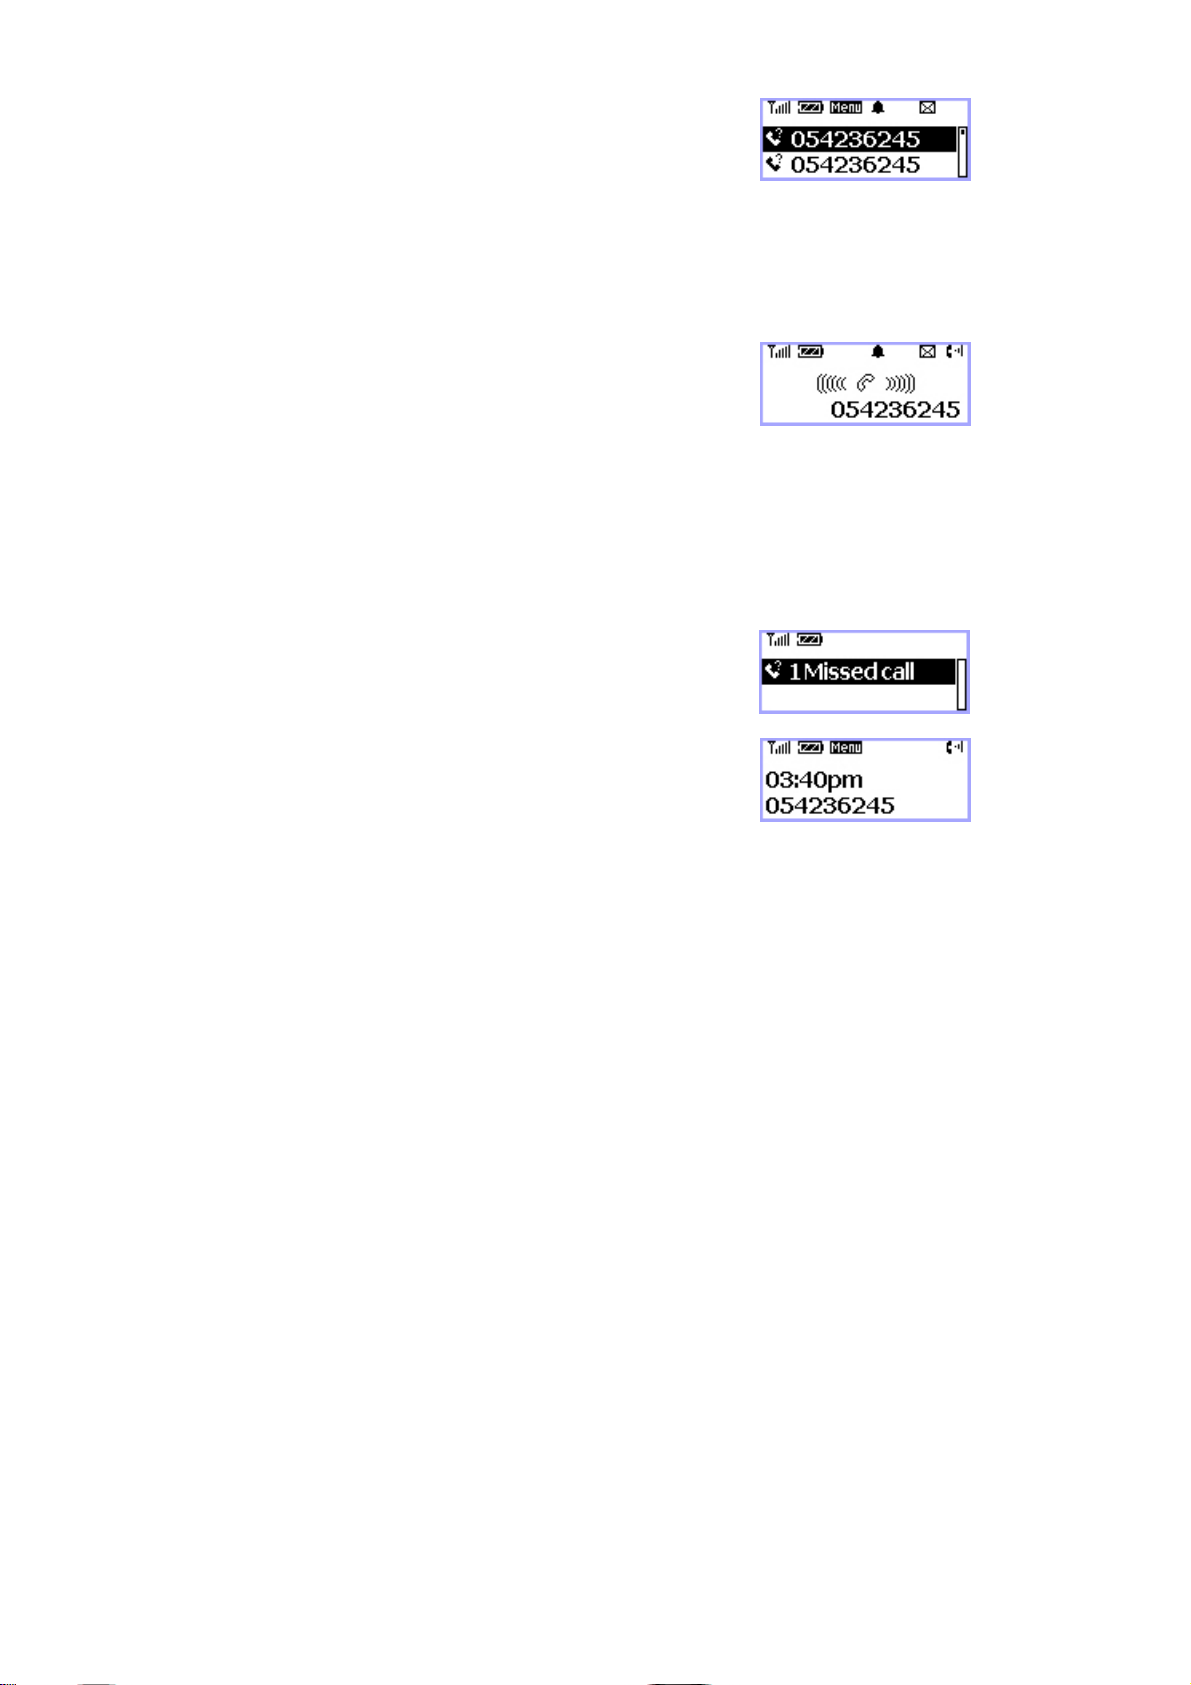
RECEIVING CALLS
When there is an incoming call, the phone rings blinks
"Incoming Call" message on the display.
1. Simply pick up the handset or press <SPEAKER> key to
answer the call.
2. To disconnect, replace the handset or press <SPEAKER> key.
NOTE: When the ringer volume is set to 'Silent', the
phone does not ring. Only the "Incoming Call“
message blinks.
When the Caller ID service is activated.
Call ID Display
The Caller ID feature displays the caller's number when the
phone receives a call. If the caller's name and number are
stored together in the phone book, the caller's name is
displayed. Contact your service provider to activate this
feature.
NOTE: If the call is not answered, the phone displays the
“Missed Call" message with the call arrival date and
time.
15
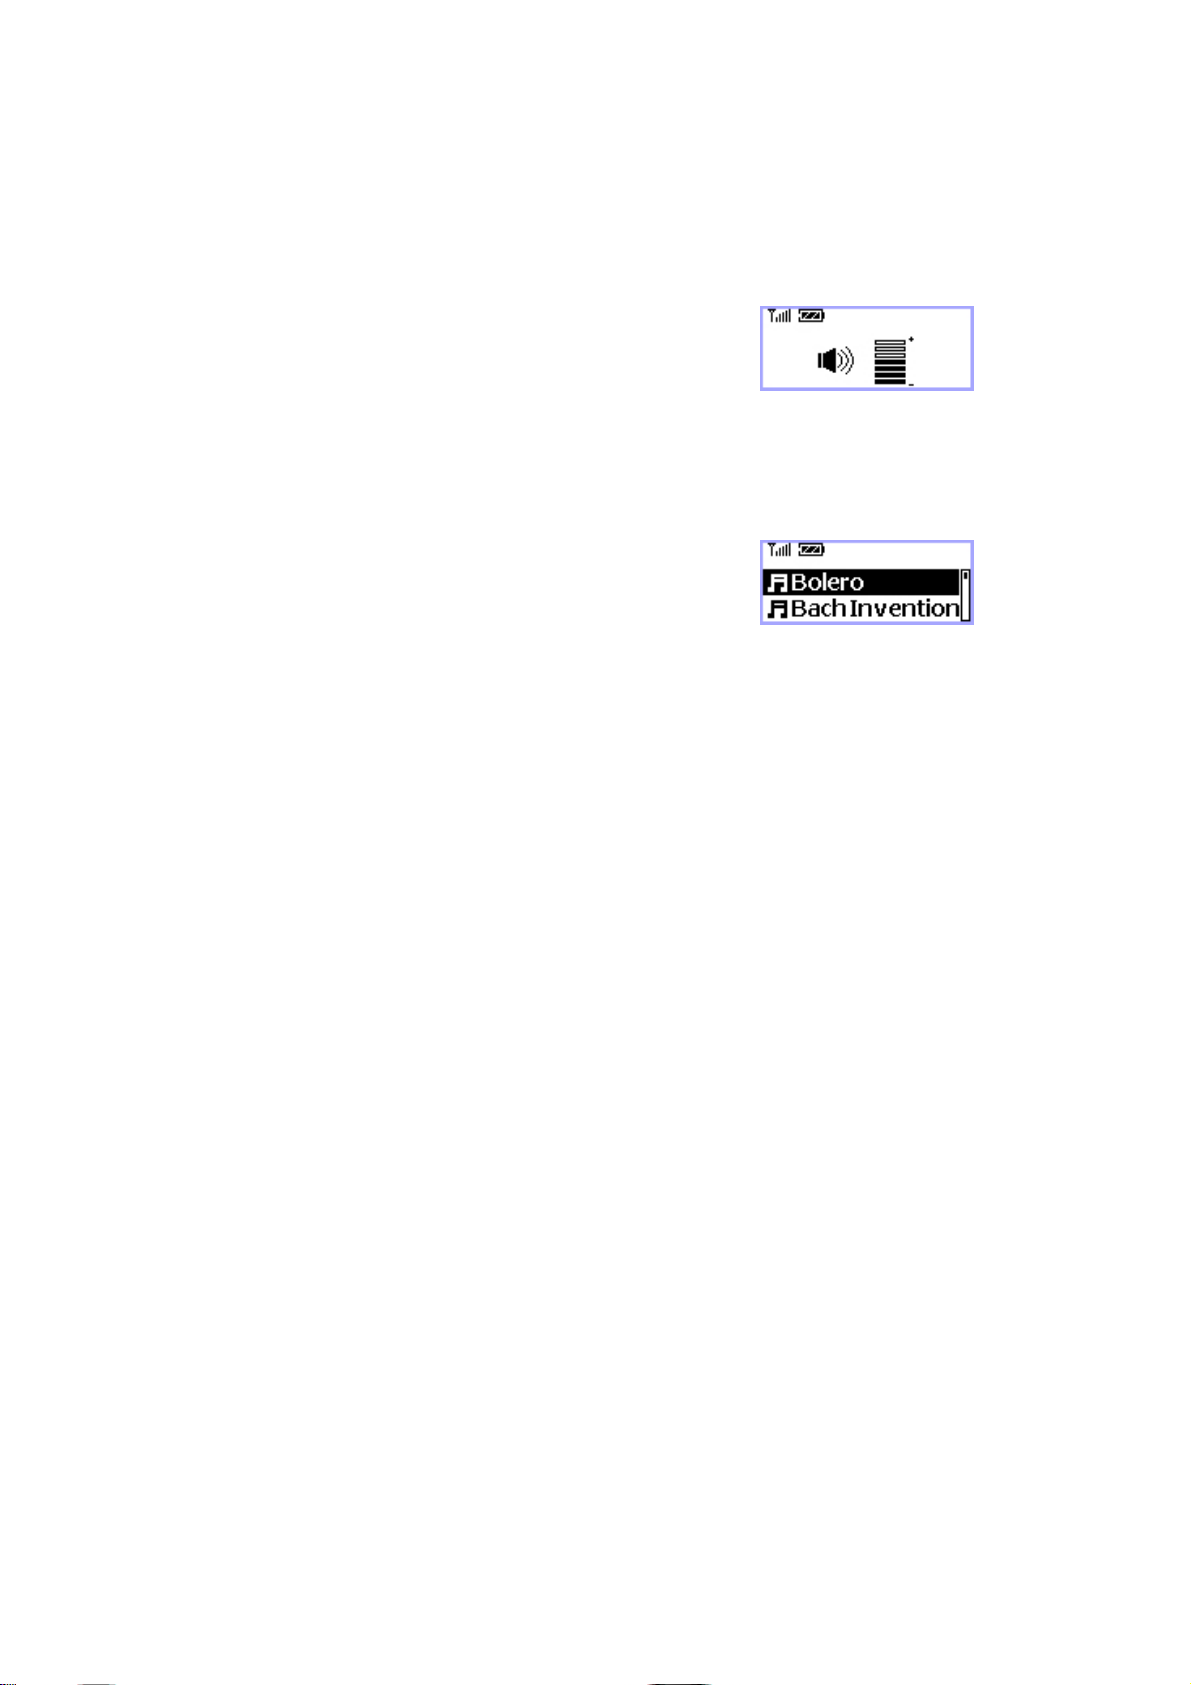
ADJUSTING VOLUMES
You can control the sound volumes including the key tone,
Earpiece, speaker and the ringer
Adjusting earpiece volume
Pick up the handset and press <Volume> repeatedly during
a phone call to adjust earpiece volume.
Adjusting ring volume
1. Press <MENU> , <4> (Sound) , <4> (Ring Volume)
2. Press <Volume> to adjust ringer volume.
3. Press <OK> to save.
NOTE: If 'Silent' is selected, the phone does not ring
when an incoming call comes in. Only the
"INCOMING CALL" message blinks on the
display.
CHOOSING THE RING TONES
You can choose from eight different ring tones.
1. Press <MENU> , <4> (Sound) , <1> (Ringing tone).
2. Press <Volume> (or <*>, <#> ) to select ring type.
3. Press <OK> to save.
16
MESSAGE SERVICE
Message service is a network dependent feature and is available only when your
service provider supports it. Make sure your service provider is providing message
service before using this function.
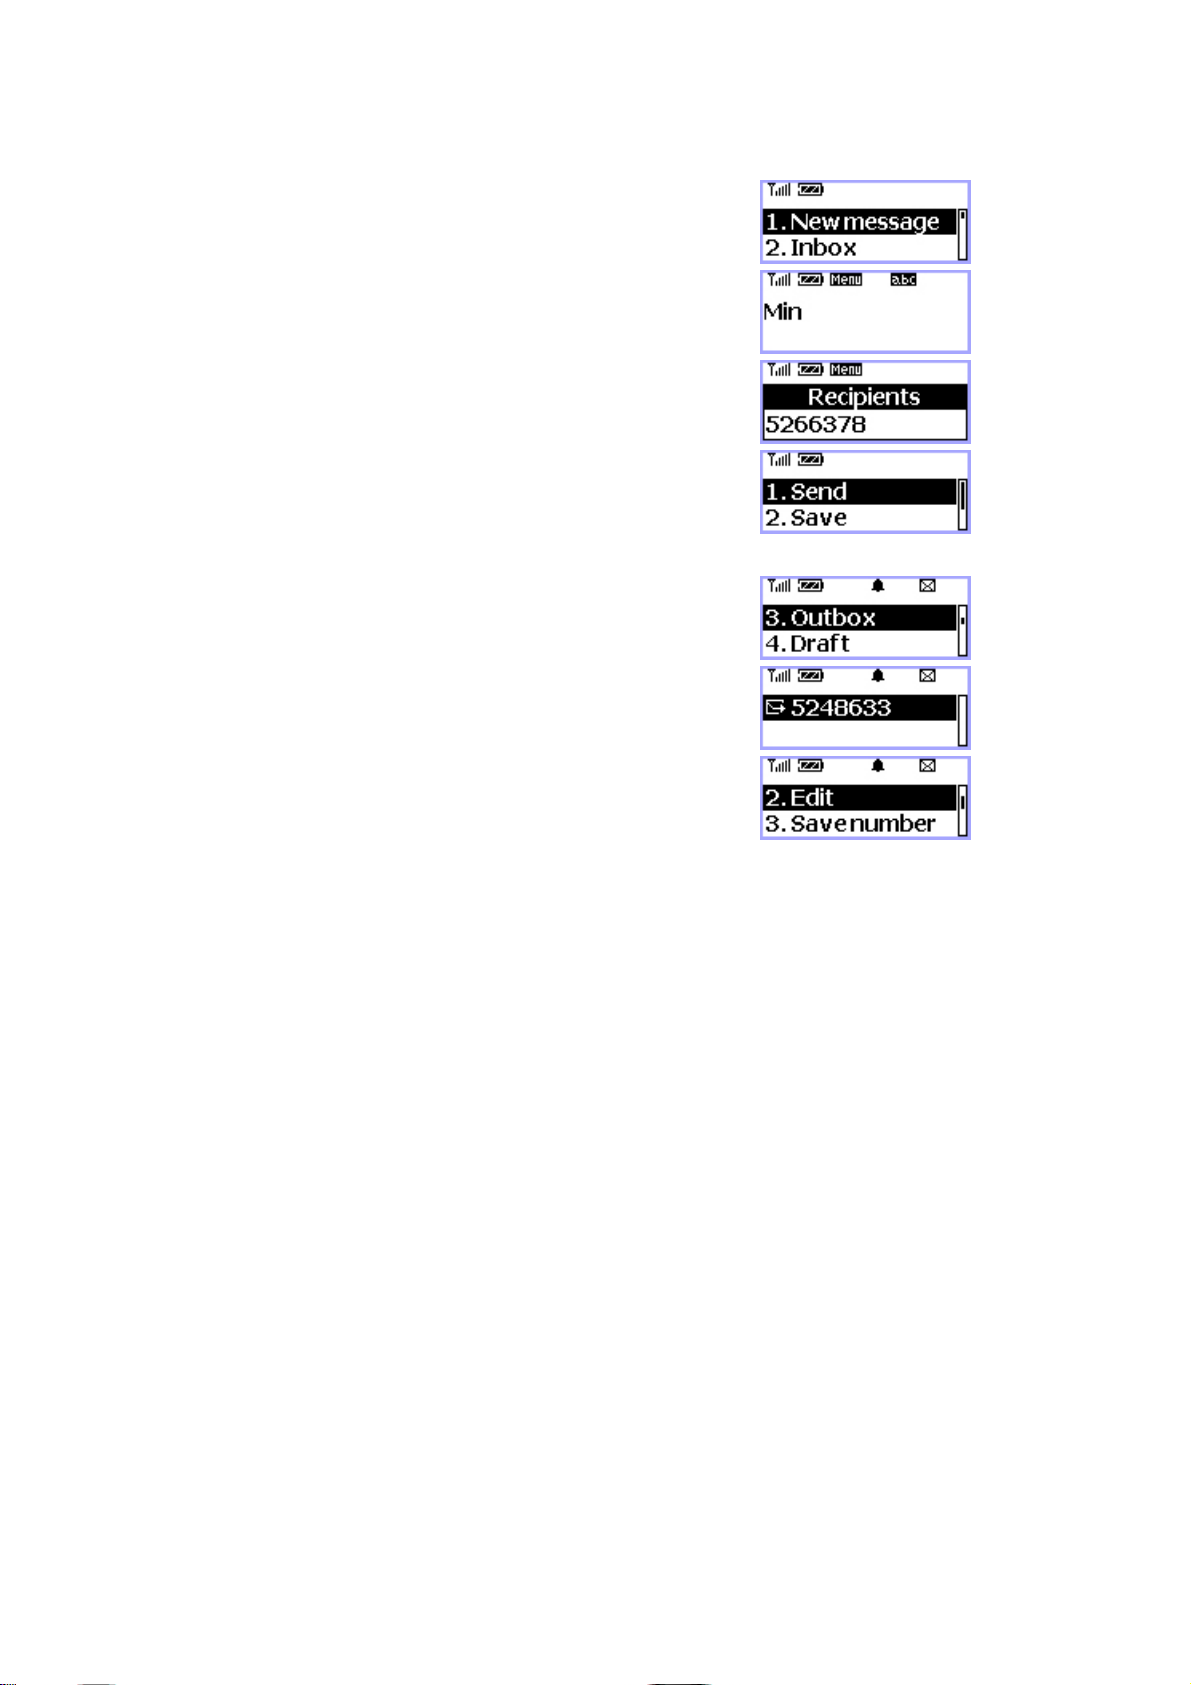
Sending New Text Messages
1. Press <MESSAGE> key, <1>(New message).
2. Write message using the keypad. Toggle between
Uppercase, lowercase, and numeric by
pressing <#>. Press <OK> when finished.
3. Enter the destination number and press <OK>.
3. Select <Send> to send message or <Save> to save
message.
NOTE: See page 21 for more information on text edit.
Sending Saved Text Messages
1. Press <MESSAGE> key, <3>(Outbox).
2. Select message to resend with <Volume> (or <*>, <#>)
and press <OK>.
3. Review the content of the message and press <MENU> to
select Options
4. Select <2>(Edit) to edit if needed and select <1>(Send) to
send.
17
 Loading...