

Page 1
General Safety
Wa rn i n g
Always follow these instructions to avoid the risk of injury to
yourself or damage to your equipment.
Unplug the receiver from the AC power outlet before cleaning.
Use only a damp cloth for cleaning the exterior of the re c e i v e r.
Do not use accessories or attachments not recommended by the receiver manufacture r
as they may cause problems to the equipment and will void the warr a n t y.
Do not place the receiver on an unstable cart, stand, tripod, bracket, or table.
The receiver may fall, causing serious personal injury and damage to the re c e i v e r.
Do not block or cover the slot opening in the re c e i v e r.
These are provided for ventilation and protection from overh e a t i n g .
Never place the receiver near or over a radiator or any heat sourc e .
Do not place the receiver in an enclosure such as a cabinet without proper ventilation
Do not stack the receiver on top of or below other electronic devices.
The apparatus shall not be exposed to dripping or splashing and with no object filled with liquids,
such as vases, shall be placed on the apparatus.
General Safety
Route power supply cord so that are not likely to be walked on or pinched by items
placed upon or against them. Pay particular attention to the cords that plugs in the convenience receptacles,
and the point where they exit from the unit.
Use an outlet that contains surge suppression or ground fault protection.
For added protection during a lightning storm, or when the receiver is left unattached
and unused for long periods of time, unplug it from the wall outlet and disconnect
the lines between the receiver and the antenna. This will provide some protection
against electrical damage caused by lightning or power line surg e s .
S e rv i c i n g
Do not attempt to service the receiver yourself, as opening or
removing covers may expose you to dangerous voltage,
and will void warr a n t y.
Refer all servicing to authorized service personnel.
Operate the receiver using only the type of power source indicated on the marking label.
Unplug the receiver power cord by gripping the power plug, not the cord .
Page 2
Digital TERRESTRIAL Receiver
O w n e r’s Manual
Simple & Speedy
O P E R ATION HANDBOOK
B e f o re operation,
Please read the entire manual thoroughly
and retain it for future re f e re n c e .
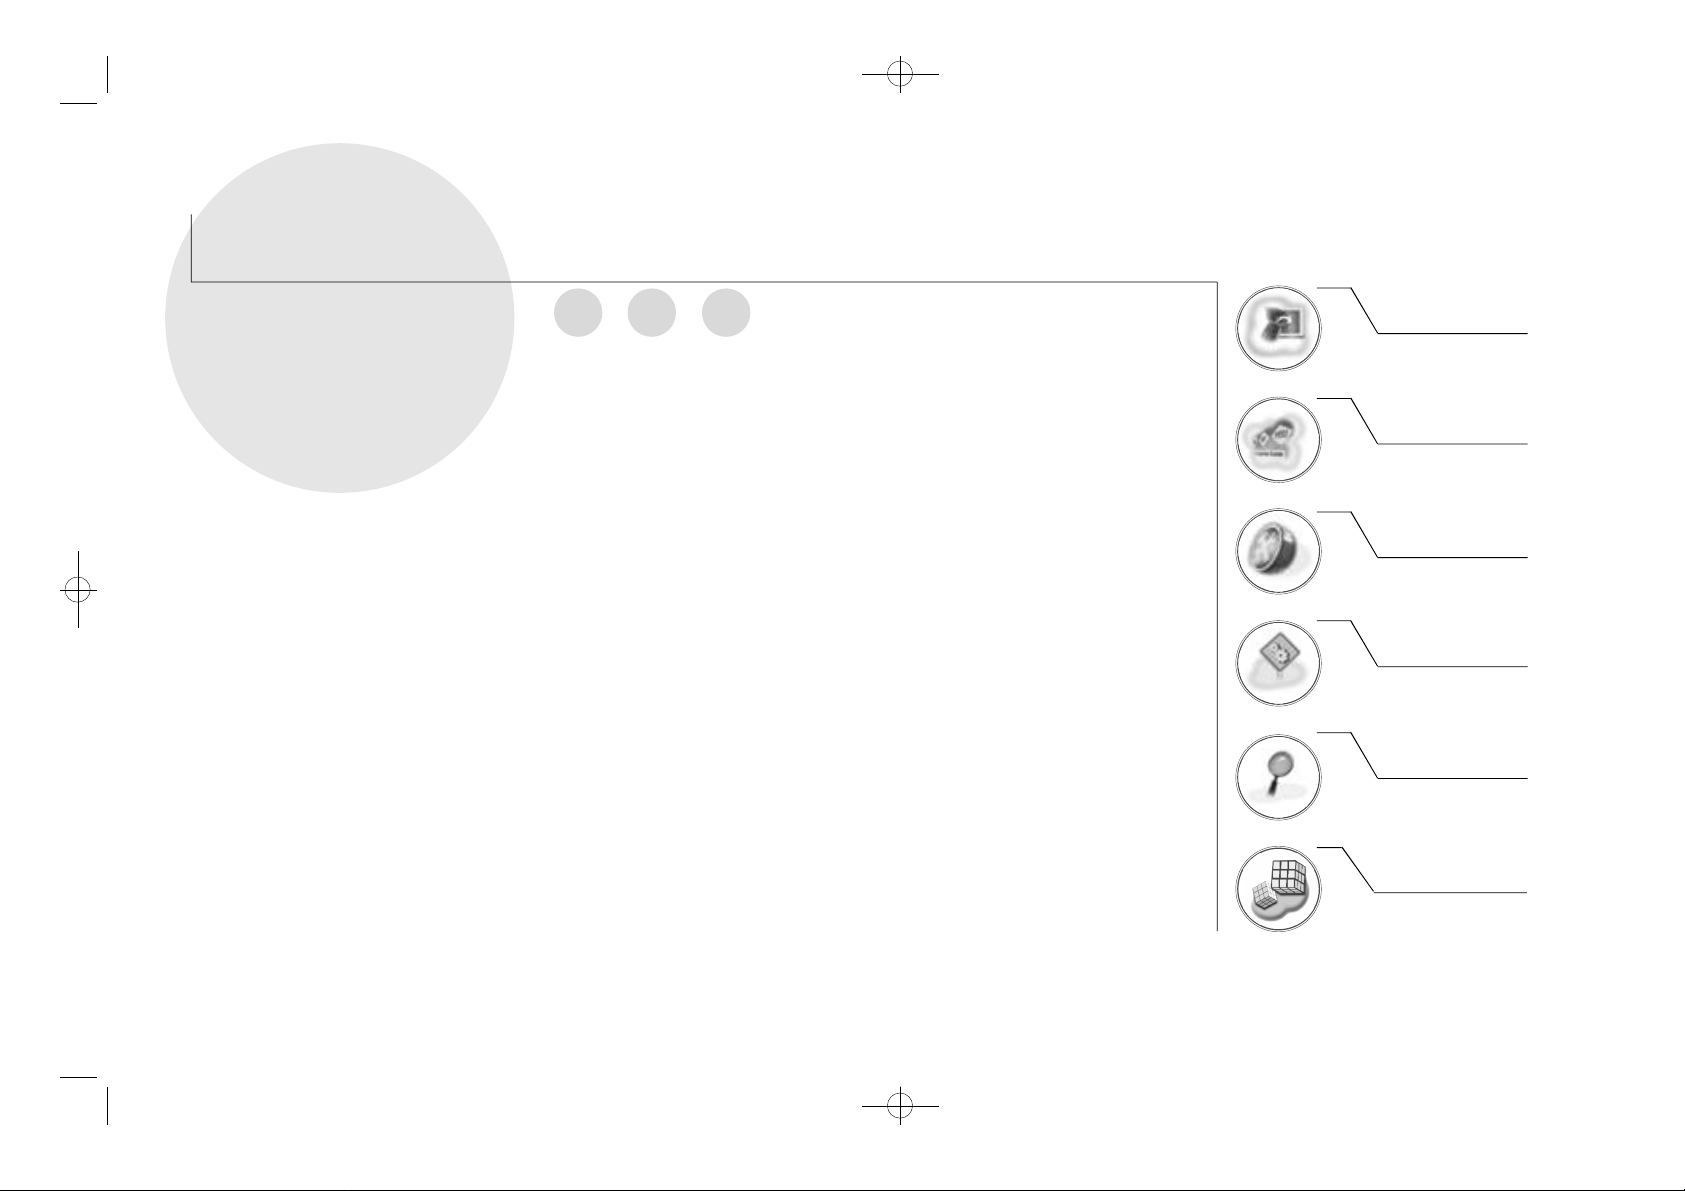
Edit Channel List
Program Guide
System Setting
Automatic Search
Manual Search
Utility (Option)
Page 3
RECEIVER
C o n t e n t sC o n t e n t s
DIGITAL TRRESTRIALRECEIVER DIGITAL TRRESTRIAL
1
Page 4
RECEIVER
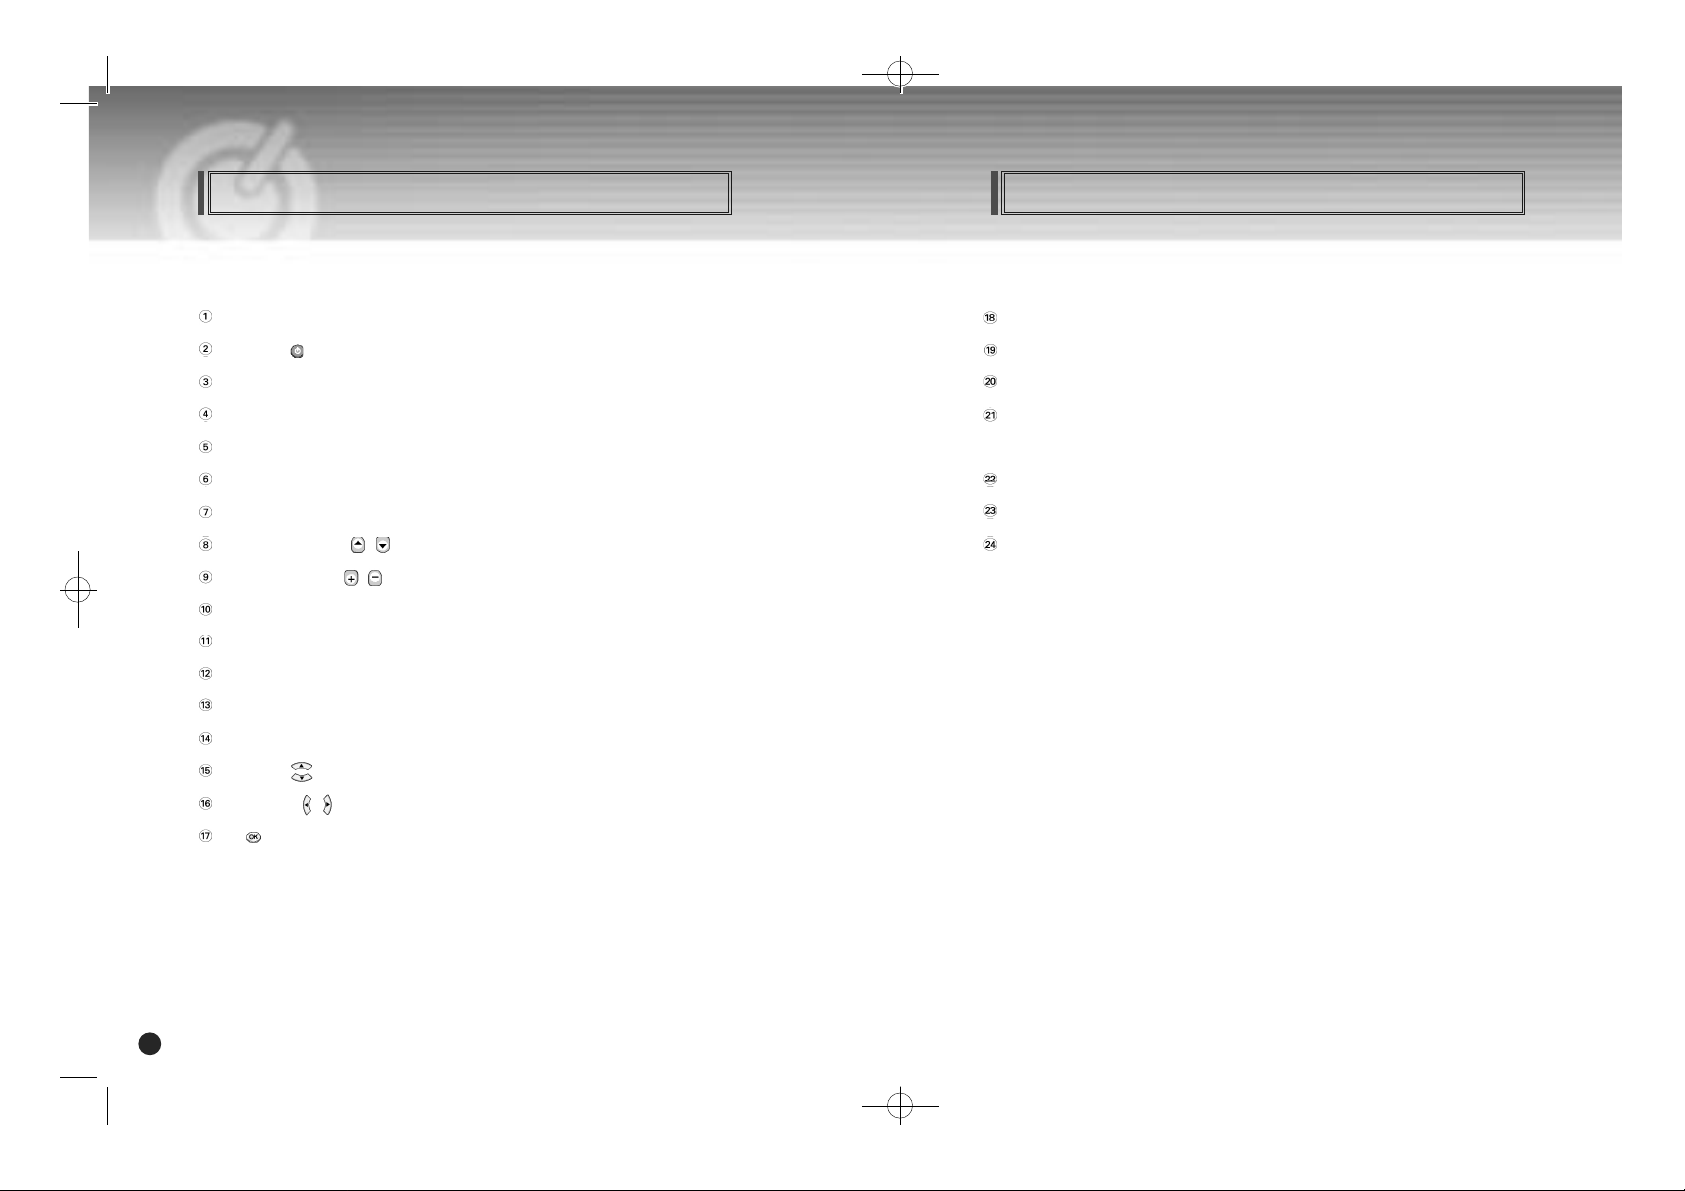
Remote Control Unit Remote Control Unit
Note! 1: When inserting batteries, make sure that the polarity (+/–) is corre c t .
Note! 2: The design of the Remote Control Unit may be changed without any
notice in advance.
S U B T I T L E (R E D) To enable or disable subtitle.
G R E E NB U T T O N To see the now-information banner in Channel Banner.
I N F O (B L U E) To display the information box on the scre e n .
YELLOW B U T T O N To sort channel list.
To display the re s e rved list.(Option)
S L E E P To select a present time interval for automatic shut off .
NUMERIC BUTTONS To select the channel and enter the channel edit and PIN code .
PAUSE To pause or play video.
FAV Favorate channel
M U T E To enable or disable audio.
S TAND BY ( ) To switch between operation and stand by mode.
T V / S T B To switch between TV and STB receive mode.
T V / R A D I O To switch between TV and Radio.
P. S T D To change picture standard.(Option) Resolation
P. S I Z E To change screen size.
A . L / R To select the sound mode.(Mono, Left, Right, Stere o )
CHANNEL UP/DOWN( / ) To change channel up and down.
VOLUME UP/DOWN( / ) To increase or decrease the volume.
A . L A N G To select the audio language.
R E C A L L To re t u rn to the previous channel.
E P G To display the TV/Radio program guide.
M E N U To display the Main Menu on the screen or re t u rn to the previous menu.
E X I T To re t u rn the normal viewing mode form a menu.
UP/DOWN ( ) To move up or down on the menu.
LEFT/RIGHT ( / ) To move left or right on the menu.
OK ( ) To confirm your choice.
DIGITAL TRRESTRIALRECEIVER DIGITAL TRRESTRIAL
3
Page 5

RECEIVER
Rear PanelF ront Panel
① ①② ②③ ③④ ④⑤ ⑤ ⑧⑦ ⑦⑥ ⑥
1. POWER SUPPLY 90 ~ 250VAC, 50/60Hz.
1. POWER Switch the receiver power “O N” or “O F F” .
2. CH Up/Down Channel Up/Down or select item of sub-menu.
3. VOL Up/Down Volume Up/Down or select item of sub-menu.
4. OK Select a program, a highlighted line or parameter value.
5. EXIT Exit from parameter and cancel selected function.
6. MENU To see main menu.
7. SEG. DISP. 4-digit 7-segment display channel inform a t i o n .
DIGITAL TRRESTRIALRECEIVER DIGITAL TRRESTRIAL
5
2. S/PDIF Output for connection to a digital amplifier.
3. VIDEO Video connection port to the TV or other equipment.
4. AUDIO Audio connection port to the TV or other equipment.
5. RS-232 To connect to a personal computer for software upgrade.
6. ANT- I N To connect to television antenna input.
7. RF OUT Used to connect a RF signal from the STB to either the RF
input jack on your television or to the STB (RF Loop In).
8. RGB/DVI&YPbPr The switch for selecting a video output
Page 6
RECEIVER
Connecting Your Equipment Connecting Your Equipment
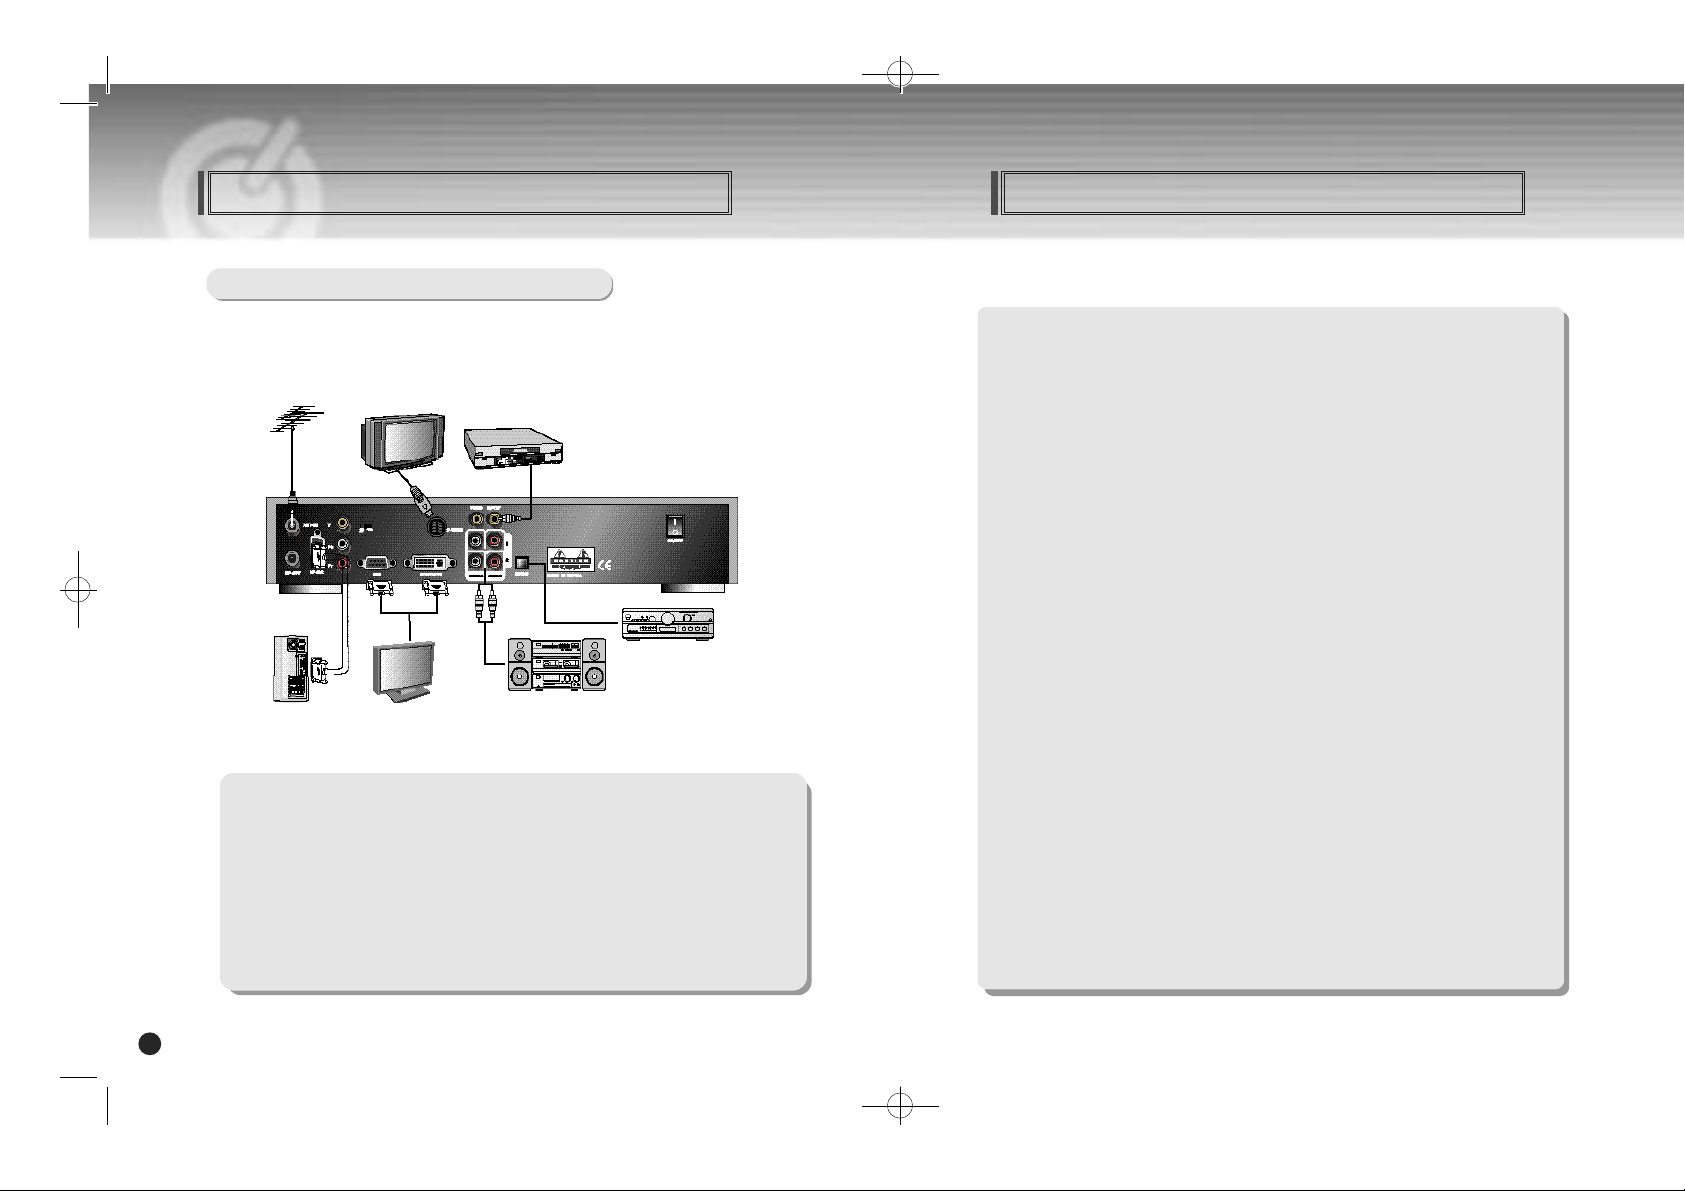
How to connect your STB to various systems
T h e re are several ways of connecting the STB to your TV, VCR and/or Hi-Fi SYSTEM. Consult your local
supplier for assistance in setting-up your system that is best suited to your re q u i re m e n t s .
1. Connect STB to a TV set
Connect your STB to a TV set with SCART, if your TV set is equipped for it.
A l t e rnatively you can use A/V, TV out (UHF) or S/Video jacks.
2. Connect STB to a VCR
Connect the SCART jack from the VCR to the back of your STB.
A l t e rnatively you can use A/V, TV out (UHF) or S/Video jacks.
3. Connect STB to a Hi-Fi System
Connect a RCA stereo cable from the AUDIO L/R jacks, S/PDIF on your STB to the LINE,
AUX, SPARE or EXTRA input jacks on your Hi-Fi System.
4. Connect STB to a Digital Audio System and Optical SDDIF
If you have a DAC with S/PDIF coaxial cable input, you can connect the STB with it to enjoy
higher quality sound. Connect S/PDIF coaxial cable to a digital amplifier.
5. Loop Thro u g h
If you have another analogue or digital STB and you wish to use the same Signal then you can
connect it via the loop through. Connect one end of the coaxial cable to the Loop Through on the
STB and connect the other end to the ANTENNA IN on your second STB.
DIGITAL TRRESTRIALRECEIVER DIGITAL TRRESTRIAL
7
Page 7

RECEIVER
Connecting Your Equipment
KEY & DISPLAY The message of the 7-segment LED (Light-Emitting Diode) on the STB
and keys are explained as below.
F ront Panel Display Message
Automatic / Manual Channel Searc h
Automatic Channel Search for Television Serv i c e s
Standby Mode
System Booting
Power Off
MICOM Version
Current Program Number on TV List
Current Program Number on Radio Location
Current Video formant 1080i
Current Video formant 720p
Current Video formant 576p
C o n n e c t i o n
Power On
Main Menu/
Automatic Searc h
♦ Connect your STB to all peripheral devices.
♦ Tu rn on the power of your STB and other devices.
♦ Select Automatic Search in Main.
♦ P ress O K( ) button, and then you can select All channel search or
Open channel searc h .
♦ STB will automatically search All or Open TV/Radio
channels and save them into the channel list.
Manual Channel Search for Television Serv i c e s
You can search and save all TV, Radio channels manually as follows
Main Menu/
Manual Searc h
♦ Select Manual Search in Main Menu.
♦ Select the Television Service you want to search by pressing
the U P / D O W N( ) b u t t o n s .
♦ You can select detected information in each M U X.
♦ P ress Red button to start search, and then S T Bwill search All or Open
TV/Radio channels and save them into the channel list.
DIGITAL TRRESTRIALRECEIVER DIGITAL TRRESTRIAL
9
Page 8

RECEIVER
g
i n f o rm a t i o n .
6. Volume Control/Mute
1. To control audio volume, press Volume / Volume b u t t o n s .
2. Volume control bar will be appeared in bottom of the TV scre e n
3. After time-out in 1 second, volume control bar will disappear.
To temporarily stop the volume, press the M U T Eb u t t o n .
To cancel mute, press the M U T E button again or press
the Volume / Volume b u t t o n s .
Basic Operation
Basic Function
1. Program Information
After the television channels have been programmed, you will
see the information box each time you change the channels.
1. Every time you change channels you will receive program information for a
few seconds. (In the “Banner Ti m e” menu you can select how long this
i n f o rmation will be shown.)
2. You may change channel lists with the U P or D O W N button.
You can get “Info Banner” on the bottom of the scre e n .
3. When you press the C O L O R button, you can use banner as a simple channel
operation. In this case, you can get a simple EPG on right view.
2. Favorite Banner
1. During “Info Banner” is appearing, when you press S U B - T ( R E D )
Button, you can get “Favorite Banner” and “Lock Banner” .
2. If you already made your favorite channel in “Channel Contro l” menu,
you can get favorite channel on this view.
3. The banner will disappeared automatically after banner-time out.
3. Now-Information Banner
1. During “Info Banner” is appearing, when you press G R E E N
Button, you can get “N o w - I n f o rmation Banner” .
2. Using “N o w - I n f o rmation Banner”, you can get a simple EPG of
“N o w - I n f o rm a t i o n” .
Basic Operation
Basic Function
4. Next-Information Banner
1. During “Info Banner” is appearing, when you press Y E L L O W Button,
you can get “N e x t - I n f o rmation Banner”
2. Using “N e x t - I n f o rmation Banner”, you can get a simple EPG of
“N e x t - I n f o rm a t i o n” .
5. Channel-Information Banner
1. During “Info Banner” is appearing, when you press I N F O (B L U E) Button,
you can get “C h a n n e l - I n f o rmation Banner” .
2. Using “C h a n n e l - I n f o rmation Banner”, you can get a detailed channel listin
DIGITAL TRRESTRIALRECEIVER DIGITAL TRRESTRIAL
1 1
Page 9

RECEIVER
1 3
DIGITAL TRRESTRIALRECEIVER
Basic Operation
7. Teletext
1. Press the R E D button, popup window will be displayed on the screen.
2. Select the off, then subtitle function is off .
3. Select the Subtitle, then you can see the Subtitle language.
4. Select the Teletext, then you can see the Teletext language.
8. Timer
The user can re s e rve a desired program at a desired time by using the Ti m e r f u n c t i o n .
1. Once, Daily, Weekly Reserv a t i o n .
♦ Use the U P / D O W N( ), L E F T / R I G H T
( / )
buttons in the Timer
Setting screen to select the date and time.
♦ P ress the O K( ) button to save the selected time on the Disk icon.
The program will re c o rd at each and every selected time.
O n c e : once D a i l y : daily We e k l y : weekly O ff : off
2. Reservation from EPG (Option).
♦ Selects the desired program to be re s e rved from the EPG scre e n .
P ressing the Y E L L O W button will open the Ti m e r Wi n d o w.
Basic Operation
Basic Function
Basic Function
10. Soundtrack
1. When you want to change the Audio Language of current channel,
p ress the A . L A N Gbutton on the remote contro l .
The on-screen menu is displayed on the left side of the screen.
2. Use U P / D O W N( ) buttons to choose the audio you want.
3. To cancel or exit, press the A . L A N Gbutton again.
You can change a default audio language in the system setting menu
m o d e .
9. Simple Channel List
1. When you press O K( ) button during receiving service stream,
you can get “Channel List” view.
2.
Using U P / D O W N( ) buttons in “Channel List” view, you can choose another channel.
3. After moving highlight on a channel, then press O K( ) button.
4. Press S U B - T ( R E D ) button to change channel listing.
5. To get the channel sort list, press the Y E L L O W button.
Pop up window will be displayed on the scre e n .
When you press Y E L L O W button, the sort popup window will be displayed
6. Select the sort list you want with U P / D O W N( ) buttons and then
p ress O K( ) button to get it.
11. To change the audio output
1. Press the A . L / R button on the remote control unit to change
the output.
2. Then on-screen menu is displayed on the top right side of the scre e n .
3. Press the A . L / R button repeatedly to change the sound mode.
(Mono, Left, Right, Stere o )
12. Video format
1. When you press FORMAT button on remote control, you can change video
f o rmat to 1080p or 576p.
13. P.size
1. To change picture size as Full, Narro w, Wide or Cinema, press P. S I Z E
※Fav : It supports direct move to favorite channel list pressing FAV
button on remote control.
DIGITAL TRRESTRIAL
Page 10

RECEIVER
1 5
DIGITAL TRRESTRIALRECEIVER
Menu Guide
Before you can view the television or radio program, you must
perform the installation procedure first.
Therefore you will see only “Easy Installation Menu” at first
when you plug in your system.
The Easy Installation gives you the convenience of selecting
various languages, adjusting the time and
channel search.
1. Automatic Installation by “Easy Installation”
The Installation Wi z a rd is user friendly to assure easy set-up of
the receiver by the new user.
2. System Connection
Connect STB to all peripheral devices such as TV, Audio, Video etc..
3. Power On
Tu rn on the STB power and other devices.
4. Power Off
When you press the STAND BY button again.
The STB will display “OFF”.
Easy Installation
Menu Guide
Easy Installation
L a n g u a g e
The first option is “Language Select” to select the desired language of
the Menu, Audio, or Subtitle.
Place the cursor on the sub menu by pressing the keys and press
the O K( ) button to change language.
The Language of Menu, Audio, or Subtitle will be changed to the selected
l a n g u a g e .
Local Ti m e
You can set your local time according to your location.
To set the local time, press N U M E R I C b u t t o n s .
Channel Search
You can automatically search All or Open TV/ Radio channels.
DIGITAL TRRESTRIAL
Page 11

RECEIVER
1 7
DIGITAL TRRESTRIALRECEIVER
Menu Guide
Press the MENU button on the remote control unit.
You will see the “Main Menu” on the screen.
1. You can move into the desired submenu using U P / D O W N( ) buttons.
2. You should enter the PIN code 0000 in order to move into the corresponding
submenu in case of “Edit Channel List” or System Setting
3. Press O K( ) button to confirm your selection.
4. Press the M E N U button to re t u rn to previous menu.
Or press the E X I T button to quit the Menu system completely.
Edit Channel List : E d i t s favorite 1 ~ 4, Lock, Skip, Delete, Move.
P rogram Guide : Shows Now, Next, Weekly program guide.
System Setting : Set Menu Language, Audio Language,
Subtitle Language, Banner Time, Local Time,
Menu Tr a n s p a re n c y, Change RIN code, Parental
Lock, Receiver Lock, Menu Lock,Digital Audio,
Auto Power, Factory Reset, System Inform a t i o n .
Automatic Searc h : Search channels automatically.
Manual Searc h : Search channels manually.
Utility (Option) : Demonstration, Calendar, Calculator.
e
1. Select “Edit Channel List” in the main menu with U P / D O W N( ) butto
and press O K( ) button.
2. At the request window, Input P I N code.
If you have not entered your own PIN code, then the
PIN code 0 0 0 0applies, which was set at the factory.
3. Press the S U B - T ( R E D ) button to change edit list and press the O K( ) b
to add.
4. Among the all channel list, the selected channel can be
moved to the right folder of favorite 1~4, lock, skip, delete, or move.
5. To remove the channel list from edit list at right folder, press O K( ) button
The edited list will be re m o v e d .
6. To rename the channel, press YE L L O W b u t t o n .
7. To confirm the channel list, press the M E N U button or E X I T b u t t o n .
The request window will be displayed on the scre e n ,
P ress O K( ) button to save or E X I T button to exit this menu.
1. Favorite 1 ~ 4 ( o p t i o n )
1. You can edit favorite TV and Radio list.
This enables you to create the 4 favorite TV and Radio lists.
2. Select the channel you want to edit favorite list and press O K( ) button.
N o t e : To rename the Favorite channel, press I N F O ( B L U E ) button.
2. Lock
1. From here you can lock channels in any of the list in order to prevent
(e.g. your children from watching.)
2. Select the channel you want to lock and press O K( ) button.
3. Repeat the pro c e d u re for each channel you want to lock.
When you lock a channel in any list, the channel will be
locked automatically in all other lists.
Main Menu
Menu Guide
Edit Channel List
From these menus,
You can edit favorite lists, lock, skip, delete, or move chann
DIGITAL TRRESTRIAL
Page 12

RECEIVER
1 9
DIGITAL TRRESTRIALRECEIVER
Menu Guide
Edit Channel List
t
the programs you go through the display window :
1. Select a program with U P / D O W N( ) buttons, you can get the list at
right-side view.
2. Use the S U B - T ( R E D )button to change the channel list.
3. After selecting the program you want, press O K( ) button.
You can see the detailed information.
4. If you want to change program guide, press I N F O ( B L U E )button.
2. Weekly Program Guide
Shows the information of program that will be played for a week.
1. When you press I N F O ( B L U E )button, you can alternatively select Now,
Next or Weekly EPG.
2. To see more information about the program you want on the weekly EPG, move the
highlighted channel by pressing L E F T / R I G H T( / ), U P / D O W N( ) buttons
and then press O K( ) button.
3. EPG Information
1. To view the Program Guide, press the E P Gbutton on the remote control unit.
The EPG information will be displayed on the bottom of the scre e n .
2. Each press of U P / D O W N( ) buttons will change the displayed EPG information by one hour.
3. Each press of L E F T / R I G H T( / ) buttons will change the displayed EPG information
by one day.
4. If there is available EPG information, it will be displayed on the EPG information bar.
5. Press the EPG button again, and the Program Guide menu will be displayed.
Menu Guide
P rogram Guide
3. Delete
1. You can delete TV or Radio channel from the current list.
2. Select the channel you want to delete and press O K( ) button.
4. Skip
1. You can skip TV or Radio channel from the current list.
2. Select the channel you want to skip and press O K( ) button.
Skipped channel will be by passed while scrolling on the TV or RADIO
channel list.
3. To recover the skipped channel, press the O K( ) button from edit list.
5. Move
1. You can change the position of the channel you want on the
TV/Radio/All channel lists.
2. Select the channel you want to move to desired channel and press
the O K( ) button.
3. And press the I N F O ( B L U E ) button to change the position of
the channel you want.
4. Using U P / D O W N( ) buttons, select the channel you want to move
and press O K( ) button.
5. The position of the channel will be moved.
The program guide supplies information such as program listings and
ending times for all available programs.
1. Select “P rogram Guide” in the main menu with U P / D O W N( ) buttons and
p ress O K( ) button. In the viewing program, when you press the EPG button,
you can get this view.
N o t e : The Program Guide information may not be supplied by service providers.
1. Now/Next Program Guide
Shows the information of Present/Following program on different channels. To wa
DIGITAL TRRESTRIAL
Page 13

RECEIVER
2 1
DIGITAL TRRESTRIALRECEIVER
Menu Guide
You will be asked to enter your PIN code before you can enter
this menu. The PIN code preset to 0000 from the factory.
The code can be changed from the “
Change PIN Code” menu.
Refer to page 26.
If you want to customize the system to suit you better, you can
specify some settings from the submenus in the “System Setting”
menu.
1. Select “System Setting” in the main menu with U P / D O W N( ) buttons and
p ress O K( ) button.
2. Select sub menu you want in System Setting with U P / D O W N( ) buttons.
The sub menu will be shown at the right side of the scre e n .
3. Using button to move the cursor on sub menu or re t u rn to
“Setup List” using button.
1. Menu Language
Here you may select in which language the menus will be shown.
1. Use the U P / D O W N( ) buttons to move to the language you want and
then press O K( ) button.
You can choose the language from a selection of E n g l i s h, E s p a ñ o l, S u o m i,
N o r s k, S v e n s k a, D e u t s c h ,F r a n ç a i s, T ü r k ç e,
Italiano, Slovenski,
,
, c e s k y, , , , D a n s k,
, , S r b s k l, N e d e r l a n d s, M a g y a r, s h q i p. ( O p t i o n )
The selected menu language will be applied on whole menu.
S l o v e n i a n
U k r a i n i a n, R u s s i a n, C z e c h, L a t v i a n, A r a b i c, F a r s i,D a n i s h, B u l g a r i a n,
R o m a n i a n, S e r b i a n, D u t c h, H u n g a r i a n, A l b a n i a n.( O p t i o n )
3. Subtitle Language
In this menu You can change default language for subtitle
when changing services.
1. Use the U P / D O W N( ) buttons to move to language you want and
then press O K( ) button.
You can choose the language from a selection of E n g l i s h, S p a n i s h,
F i n n i s h, N o rw e g i a n, S w e d i s h, G e rm a n, F re n c h, Tu r k i s h, I t a l i a n, S l o v e n i a n
U k r a i n i a n, R u s s i a n, C z e c h, L a t v i a n, A r a b i c, F a r s i,D a n i s h, B u l g a r i a n,
R o m a n i a n, S e r b i a n, D u t c h, H u n g a r i a n, A l b a n i a n.( O p t i o n )
N o t e : If you cancel the subtitle function, select the off. (Option)
4. Banner Ti m e
When you switch channels, an information banner will be
shown for a few seconds.
You can select for how long the banner will be shown.
1. Select the banner time you want and then press O K( ) button.
2. Each selectable time items has meaning of the interval time during a channel
banner stays on changed channel screens.
The time ranges 1, 3, 6, 9 12 and 15 seconds.
System Setting
Menu Guide
System Setting
2. Audio Language
In this menu You can change default language for audio
when changing services.
1. Use the U P / D O W N( ) buttons to move to language
you want and then press O K( ) button.
You can choose the language from a selection of E n g l i s h,S p a n i s h,
F i n n i s h, N o rw e g i a n, S w e d i s h, G e rm a n, F re n c h, Tu r k i s h, I t a l i a n,
DIGITAL TRRESTRIAL
Page 14

RECEIVER
2 3
DIGITAL TRRESTRIALRECEIVER
Menu Guide
7. Change PIN Code
From here you can change the PIN code from the standard 000
DO NOT FORGET IT!Without it, you are not able to access to
any of the functions where the code is required.
You can change password for Parental Lock and Receiver Lock
s i m u l t a n e o u s l y.
1. Input the current PIN code using numeric button on the remote contro l .
2. In the highlighted new PIN code, input a new PIN code.
3. To verify the new PIN code, re-enter a new PIN code in the highlighted
c o n f i rm PIN code.
If the PIN code is correct, the message “S u c c e s s” will be displayed on
the display window.
N o t e: If you forget the PIN code, press the RGYB(Color) button in sequence.
(i.e. Red -> Green -> Yellow -> Blue button)
The PIN code will be changed to ‘0000’
8. Parental Lock
When you change “Parental Lock” to “On” or “Off”, service channel c
get or not from that set values. If you select “On”, you may need PIN
code every time you select the lock channel program as you set in the
channel control.
If you select “Off”, you can see all channels without PIN code.
System Setting
Menu Guide
System Setting
5. Local Ti m e
You can set your local time according to your location.
1. To set year, month and date, press U P / D O W N( ) buttons.
The Calendar pop up window will be displayed.
Select year using S U B - T ( R E D )and G R E E N button.
Select month using Y E L L O W and I N F O ( B L U E ) b u t t o n .
Select date using U P / D O W N( ) or L E F T / R I G H T( / ) buttons.
2. Adjust hour and minute with U P / D O W N( ) buttons and move the field
with L E F T / R I G H T( / ) buttons.
3. When the O K( ) button is pressed, the selected time applies.
6. Menu Tr a n s p a r e n c y
From 20% to 100% will give the variable transparency on Video
and OSD screen.
Select on menu blending ratio and press OK button
The transparency will be applied on the screen
The menu transparency ranges 20, 40, 60, 80, and 100%
DIGITAL TRRESTRIAL
Page 15

RECEIVER
2 5
DIGITAL TRRESTRIALRECEIVER
Menu Guide
12. Auto Power (option)
1. If the Auto Power is set to On and power is off, the Set turns on automatically
and turns into the channel mode which you were watching before power
b reakdown.
2. If the Auto Power is set to Off and power is off, the Set turns into the
standby mode.
13. Factory Reset
Use this option only if you have to start the complete
installation procedure from scratch. If you continue from here,
all your previous settings and all channels will be cleared !
The default data will be loaded.
If you press O K( ) button, it asks for your confirmation.
If you want to reset, press O K( ) button, or press E X I T button to
exit this menu.
14. System Information
Displays the system information :
M O D E L name, Last Update, S/W, H/W, Loader version
Menu Guide
System Setting
9. Receiver Lock
If you select “On”, you will have to enter the PIN code every
time you start the receiver from standby.
10. Me n u L o c k
If you select “On”, you will have to enter the PIN code every
time when you enter the Channel Search Menu and Channel
List Menu
System Setting
11. Digital Audio
You can hear digital audio of the Dolby 5.1 channel using S/PDIF
O u t p u t .
1. When selecting PCM, the unzipped digital audio is output through S/PDIF.
2. When selecting Dolby Digital, if the current channel is dolby audio channel,
the zipped dolby stream is output through S/PDIF.
R E A R
( Z O O MI N )
DIGITAL TRRESTRIAL
Page 16

RECEIVER
2 7
DIGITAL TRRESTRIALRECEIVER
Menu Guide
Manual Searc h
,
Menu Guide
Automatic Searc h
In this menu,You can set channel automatically.
1. Select “Automatic Searc h ”in main menu and press O K( ) button.
2. At the pop up window, select all channel or open channel search.
3. After moving highlight on automatic search and press O K( ) button to get
the channel.
To stop search, press M E N U b u t t o n .
4. Press O K( ) button to exit this menu.
In this menu,You can set channel manually.
Manual search is more convenient to search a specific M U X.
This menu searches also all channels broadcasted over a
specific MUX using its detected information.
1. Select “Manual Searc h” in main menu and press O K( ) button.
2. Press the U P / D O W N( ) buttons to select the M U X No. you want to find
and then press O K( ) button to add or remove from the search list.
3. If you press the R I G H T( ) button, you can change the hierarchic priority.
4. To start search, press the S U B - T ( R E D ) b u t t o n .
5. At the pop up window, select all channel or open channel search
and press O K( ) button.
6. Press O K( ) button to save and exit the data.
DIGITAL TRRESTRIAL
Page 17

RECEIVER
2 9
DIGITAL TRRESTRIALRECEIVER
1. Demonstration
Select “D e m o n s t r a t i o n” in the Utility menu with U P / D O W N( ) buttons and
p ress O K( ) button, you can see the Automatic Operation Function.
P ress the E X I T button to quit the Automatic Operation Function completely.
Menu Guide
Utility (option)
2. Calendar
Select “C a l e n d a r” in the Utility menu with U P / D O W N( ) buttons and
p ress O K( ) button, you can see the Calendar.
3. Calculator
Select “Calculator” in the Utility menu with UP/DOWN( ) buttons and
p ress OK( ) button, you can see the Calculator.
Tro u b l e s h o o t i n g
P ro b l e m
No display LED on the front panel.
No power supply
No Picture
Poor picture quality
No Sound
Remote Control does not operate
Service is not running or scrambled.
You have forgotten your secret PIN code.
S o l u t i o n
Power cord plug in correctly.
Ensure that the STB is switched on.
Check connection and correct.
Check channel and video output and correct
Check the signal level, if this is low then try adjusting the
alignment of your dish.
Check the volume level of the TV and STB.
Check the mute status of the TV and STB.
Check the connection of audio cord.
Point remote control directly towards the receiver.
Check and replace batteries.
Check that nothing blocks the front panel.
Check the whether the Common Interface module and
smart card is correctly inserted.
Check that the smart card is appropriate for the selected
service.
Refer to 11. change PIN code(Page 26) of
this owner’s manual.
DIGITAL TRRESTRIAL
Page 18

RECEIVER
3 1
DIGITAL TRRESTRIALRECEIVER
Technical Specifications
RCA/Cinch, Video Output(CVBS)/SCART(CVBS, RGB)
RCA/Cinch Volume & Mute Control
(Resolution: 20 bits DAC, Max 2Vr m s )
S/PDIF of Dolby Digital Bitstream Out
Transfer rate 115Kbps, 9 P I ND-Sub Ty p e
1Mbyte, 2Mbytes (Option)
128Mbytes
T h - 9 5 5 S H
AC 90 to 250V, 50/60Hz
Max. 30W
Separate Internal Fuse
S M P S
340 × 60 × 2 5 0 ( m m )
2 . 5 k g
0°C ~ 50°C
- 2 0°C ~ 60°C
HD RGB
HD Y Pb Pr
Vi d e o
A u d i o
R S - 2 3 2 C
System Resourc e s
Flash Memory
DDR SDRAM
Main CPU MPEG Chip
Power Supply
Input Vo l t a g e
Power Consumption
P r o t e c t i o n
Ty p e
Physical Specification
Size(W ×H × D )
Net We i g h t
Operating Te m p e r a t u r e
Storage Te m p e r a t u r e
A/V & Data Input/Output
Digital DVI
Technical Specifications
Tu n e r
Guard Interval Modes
FEC Modes Rate
Input Connector
Frequency Range
D e m o d u l a t i o n
Channel Bandwidth
MPEG TS A/V Decoder
Video Resolution
Input Bit Rate
Transport Stream
Audio Decoding
Audio Mode
1/32, 1/16, 1/8, 1/4
Active symbol duration
1/2, 2/3, 3/4, 5/6, 7/8
IEC 169-2, Female
A u s t r a l i a (UHF: 520 ~ 820MHz)
(VHF: 174 ~ 230MHz)
COFDM 2K/8K-Carrier
7MHz (for A u s t r a l i a )
SD : 576i / HD : 1080i, 720P, 576P
Max. 90 Mbit/s
MPEG-2 ISO/IEC 13818-1
MPEG/Musicam Layer 1 & 2
Single / Dual Channel
Dolby Digital(AC3)
DIGITAL TRRESTRIAL
Page 19

RECEIVER
3 3
DIGITAL TRRESTRIALRECEIVER
Menu Map
M E M O
Main Menu
Edit Channel List
Program Guide
System Setting
Automatic Search
Menual Search
Menu Language
Audio Language
Subtitle Language
Local Time
Menu Transparency
Change PIN Code
Parental Lock
Receiver Lock
Menu Lock
Digital Audio
Auto Power
Factory Reset
System Information
Utility (Option)
DIGITAL TRRESTRIAL
 Loading...