

Page 1
User Manual
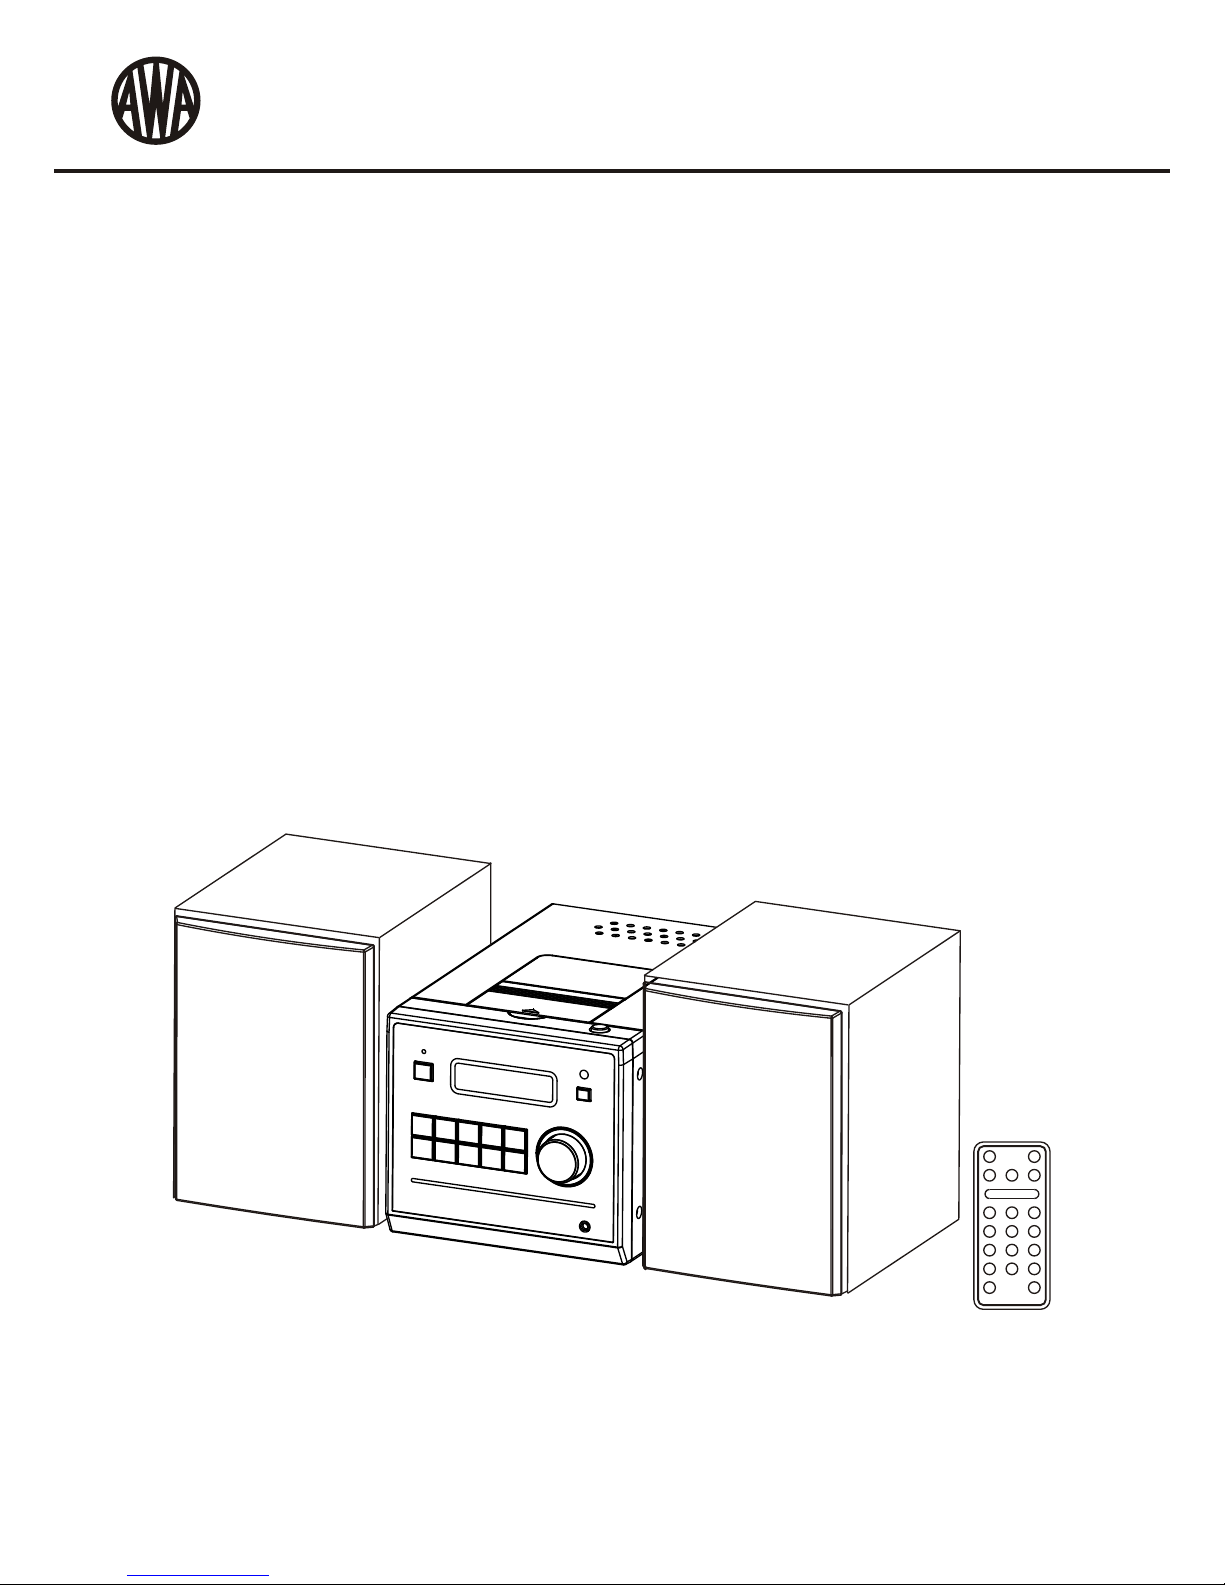
NE-3277
Integrated DAB+/DAB/FM & CD/MP3 Micro System
w/ Universal iPod & iPhone Docking Station
NE-3277- Integrated DAB+/DAB/FM & CD/MP3 Micro System w/ Universal iPod & iPhone Docking Station
Page 2
Should you encounter any problems, please contact the help line
before you return this product back to the place of purchase.
Contact our Toll Free Warranty Support Help Line
1300 366 144
Email: warrantyhelp@awa.com.au
Visit our web site for FAQ's or request for service
www.awa.com.au
Page 3
SAFETY PRECAUTIONS
Important Notes
No naked flame sources such as lighted candles should be placed on the unit.
Attention should be drawn to the environmental aspects of battery disposal.
D
CAUTION:
DANGEROUS VOLTAGE
ATTENTION
Note:
To achieve the utmost in enjoyment and performance, and in order to become familiar with its features, please read this manual
carefully before attempting to operate the unit.
This safety and operating instruction should be retained for future reference.
Avoid installing the unit in locations described below:
* - Places exposed to direct sunlight or close to heat radiating appliances such as electric heaters, on top of other stereo
equipment that radiate too much heat.
* - Places blocking ventilation or dusty places.
* - Places subject to constant vibration, humid or moist places.
Make sure not to obstruct the ventilation openings, a minimum of 10cm should be kept around the apparatus for ventilation.
The ventilation should not be impeded by covering the ventilation openings with items such as newspaper, table-cloths, curtains,
etc. Use apparatus in moderate climates only.
Operate tuning controls and switches as instructed in the manual.
Before turning on the power for the first time, make sure the power cord is properly installed.
Store your CD in a cool area to avoid damage from heat.
o not attempt to remove any screws, or open the casing of the unit; there are no user serviceable parts inside, refer all servicing
to qualified service personnel.
TO REDUCE THE RISK OF ELECTRIC SHOCK DO NOT REMOVE COVER (OR BACK), NO USER
SERVICEABLE PARTS INSIDE, REFER SERVICING TO QUALIFIED SERVICE PERSONNEL.
Conductor dangerous voltage, that may be of sufficient magnitude to constitute a risk of electric shock to persons
is present within this product's enclosure.
The owner's manual contains important operating and maintenance instructions, for your safety, it is necessary to
refer to the manual.
WARNING :TO PREVENT FIRE OR SHOCK HAZARD, DO NOT EXPOSE THIS APPLIANCE TODRIPPING OR SPLASHING.
This unit will become warm when used for a long period of time. This is normal and does not indicate a problem with the
unit. This unit includes micro-processors which may malfunction as a result of external electrical interference/noise or
electrostatic discharge . If the unit is not working properly, disconnect the power source and then reconnect it.
The apparatus shall not be exposed to dripping or splashing and no objects filled with liquids, such as vases, shall be placed on
apparatus.
The mains plug is used as the disconnect device and it must remain readily operable. To completely disconnect the power input,
the mains plug of the apparatus must be disconnected from the mains.
The normal function of the product may be disturbed by Strong Electro Magnetic Interference. If so, simply reset the product to
resume normal operation by following the instruction manual. In case the function could not resume, please use the product in
other location.
UK-1
FE AT UR ES AN D CON TROLS
21 22
23 24
1 234 5 6 7 8 91011
12 13 14 15 16 17
18
19
20
Page 4

REM O TE CO N T RO L
1. STANDBY BUTTON
2. iPod/CD BUTTON
3. SELECT/REPEAT BUTTON
4. SCROLL BUTTON
5. MENU/PS/FOLDER - BUTTON
6. PROGRAM BUTTON
7. X-BASS BUTTON
8. VOLUME - BUTTON
9. MUTE BUTTON
10. DAB/FM BUTTON
I◀◀/ ▼
LI STENI NG TO YOUR RAD IO
Hints for better reception
This unit is fitted with a single lead wire DAB/FM antenna, to obtain the best performance, you should fully extend the
wire antenna an d adjust th e position as well as th e direction unt il you find the best rec ep ti on . For ide al DAB
reception, always maintain t he l ea d wi re a nt en na in a vertical position (holding it upward or downward behind the
unit) is highly recommended.
Getting started DAB mode
When the unit is powered up for the first time, it will be in standby mode. The display will show “00:00”. Press the
STANDBY button once to s wi tc h t he unit on, it will automatically enter into the D AB mod e and perform full scan
function. During the scan the display will s ho w “Scanning …” together with a slide bar that in di ca te s the progress of
the scan and the amount of stations that have been found so far. (F. 1) (F. 2) (F. 3)
Once the scan has finished, t he radio will s el ec t the first al ph an um er ic al ly found station. You can now rotate the
VOL/SKIP/SCROLL control or p re ss the SCROLL ▲ or ▼ bu tt on s to explore the found st at io ns and then press on
the SELECT control to select listening to the station.
Note: If there is no stations found a ft er full scan, the radio will enter into the Tune S el ec t Me nu and you can now
press the SCROLL ▲ or ▼ buttons followed by pr es si ng on the S EL EC T control to select “Manual tune” or “Full
scan” for stations.
Clock setting
The c lo ck wil l only set and be updated if y ou can receive DAB signals in your location. In o rd er for the clock to
synchronise to the cu rr en t local time yo u must leave it one DA B station for a short period. Manual clock se tt in g is not
PUT T I NG TH E B AT TER Y INT O THE RE M OT E C O NTR O L UNIT
UK-2
11. AUX BUTTON
12. SCROLL BUTTON
13. PLAY/PAUSE BUTTON
14. MENU/PS/FOLDER + BUTTON
15. STOP/MENU BUTTON
16. RANDOM BUTTON
17. BACKLIGHT BUTTON
18. DISPLAY/INFO BUTTO N
19. EQ BUTTON
20. VOLUME + BUTTON
▶▶I / ▲
FE AT UR ES AN D CON TROLS
1.
2. Place the battery (CR2032) into the battery compartment according to the
polarity marking, with the “+” sign facing up.
3.
Note: Remove the battery from the remote control if not in used for a long period
of time. Do not mix normal batteries with rechargeable batteries. When the battery
becomes weak, the remote control will not be functioned properly, replace with
new battery if that happened.
1.
2.
3.
4.
Press down of the compartment cover, and slide the cover off open the
compartment.
Place the cover over the compartment, press down lightly, and push it upward
until it snaps on.
BATTERY PRECAUTIONS
Warning - Danger of explosion if battery is incorrectly replaced. Replace only
with the same or equivalent type.
Use only the size and type of battery specified.
Be sure to follow the correct polarity when installing the battery as indicated in
the battery compartment. A reversed battery may cause damage to the device.
Battery shall not be exposed to excessive heat such as sunshine, fire or the like.
** Battery Included **
1
2
3
4
5
6
7
8
9
10
12
11
13
14
15
17
18
20
16
19
F2
F3
F1
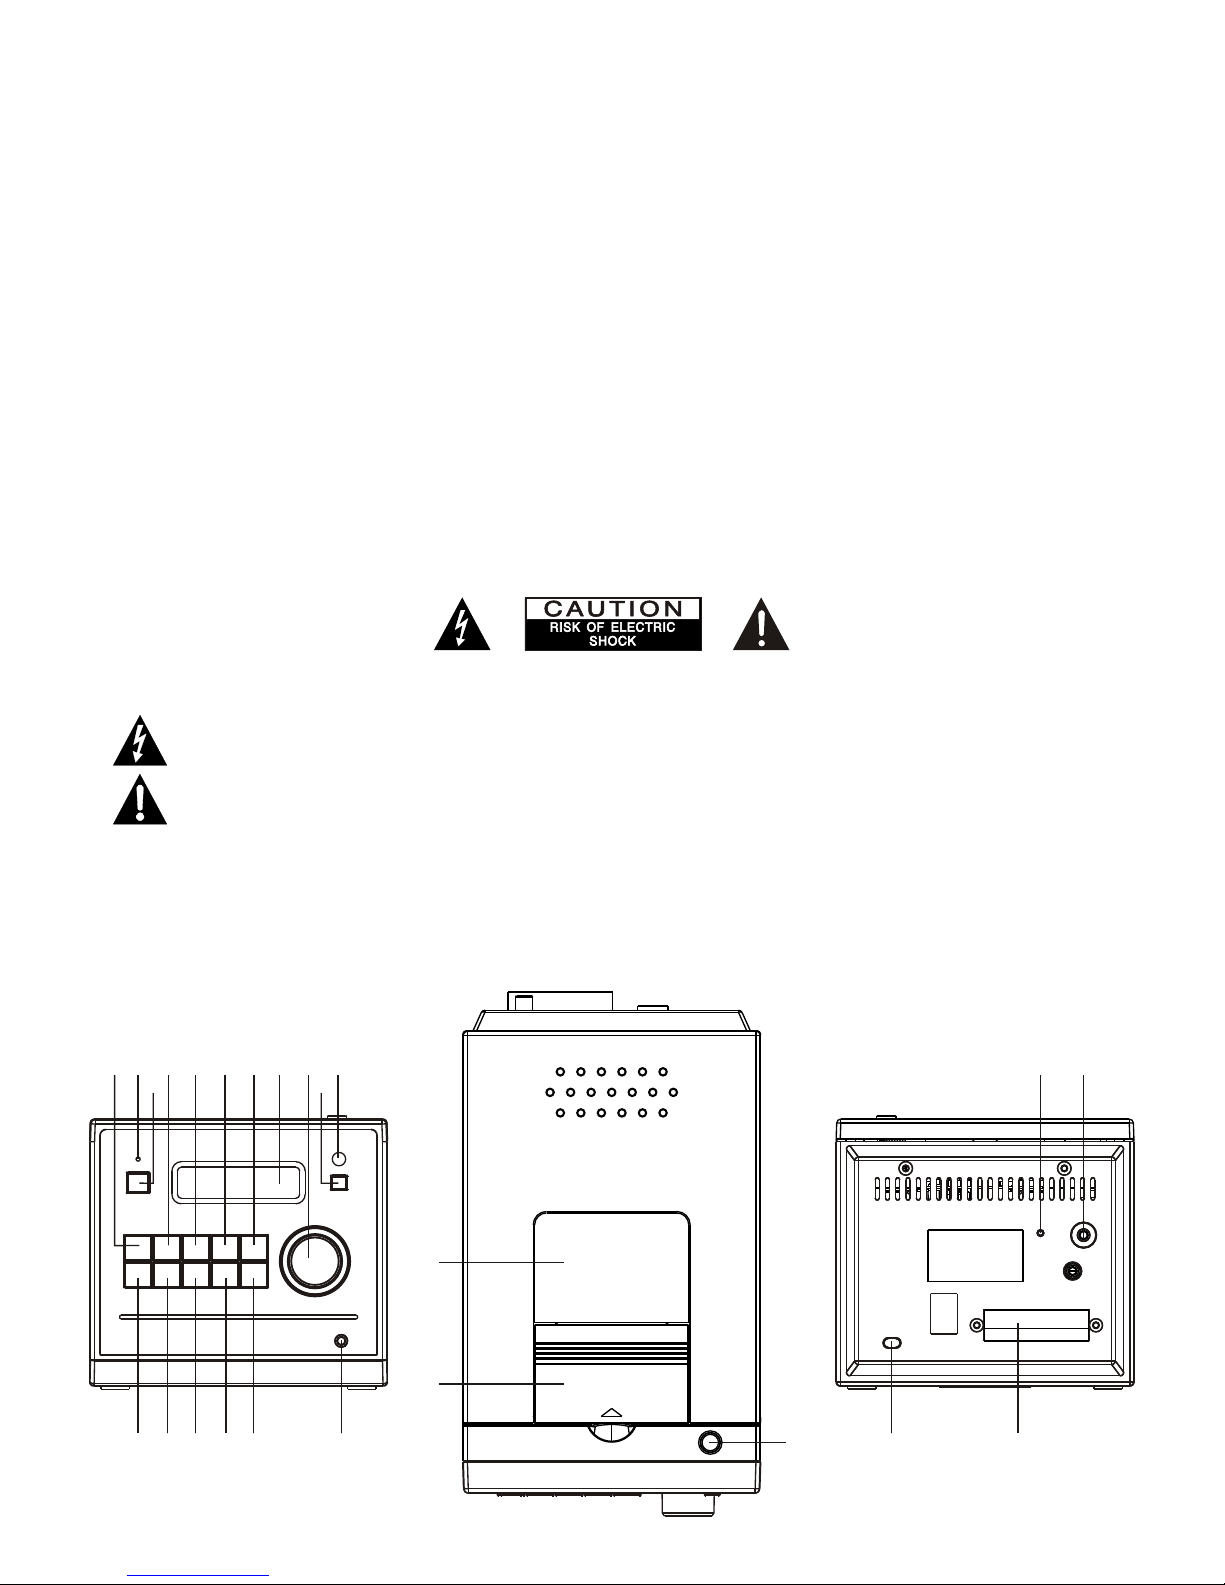
1. iPod/CD BUTTON
2. STANDBY INDICATOR
3. STANDBY BUTTON
4. DAB/FM BUTTON
5. AUX BUTTON
6. SCROLL BUTTON
7. SCROLL BUTTON
8. LCD DISPLAY
I◀◀/ ▼
▶▶I / ▲
9. VOL/SKIP/SCROLL CO NT RO L
& JOG MODE/SELECT BUTTO N
10. BACKLIGHT BUTTON
11. IR SENSOR
12. DISPLAY/INFO BUTTO N
13. TIMER BUTTON
14. SLEEP BUTTON
15. STOP/MENU BUTTON
16. PLAY/PAUSE BUTTON
17. HEADPHONE JACK
18. CD DOOR
19. iPod DOCKING STATIO N DO OR
20. OPEN BUTTON
21. ANTENNA
22. AUX IN JACK
23. AC CORD
24. SPEAKER TERMINALS
Page 5

DAB full scan
The full scan will search fo r the entire DAB Band III c ha nn el s. After the scan has finished, th e first alphanumerically
found station will be automatically selected.
1. To activate full scan, f ir st press the M EN U button to enter into the Tune Se le ct Menu, then press the SCROLL
▲ or ▼ bu tt on to select “Full scan”, finally press o n the SELECT control to confirm, t he display will show
“Scanning …” and a progressing slide bar. (F.4) (F.5)
2. All the stations t ha t have been found will be stored automatically, to explore and s el ec t listening to the found
stations, rotate the VOL/SKIP/SCROLL control or press the SCROLL ▲ or ▼ buttons followed by pressing on
the SELECT control.
DAB manual tune
1. To select manual tune, first press the MENU button to enter into the Tune Se le ct M en u, t he n pr es s th e SC RO LL
▲ or ▼ buttons to select “Manual tune”, finally press on the SELECT control to confirm. (F. 6)
2. Rotate the VOL/SKIP/SCROLL control or press the S CR OL L ▲ or ▼ buttons t o mov e through the DAB
channels, the display will show “5A to 13F” and their associated frequencies. (F. 7)
3. When y ou r desired frequency appears i n the display, press on th e SELECT control to c on fi rm . The name of the
station group (ensemble/multiplex) will be displayed.
4. To listen to the station selected, again press on the SELECT control once.
DAB secondary services
On some occasions you will see a “>” symbol directly after the name of the station, this indicates that there a re
secondary services available to that station. These secondary services contain extra services that relate to the
primary station. E.g. a s po rt s station may want to add e xt ra commentaries. The secondary s er vi ce s are inserted
directly after the primary station.
DAB display modes
Every time you press the DISPLAY/I NF O bu tt on , th e di sp la y wi ll c yc le t hr ou gh t he f ol lo wi ng d is pl ay m od es :
Time and date
The time and date will be automatically u pd at ed by the broadcasted information; it is no need to set the clock
manually. In the unlikely event that no clock information is received, the display will show “[No Time]”.
Frequency
The frequency of the present station will be displayed.
Audio bit rate
The display will show the digital audio bit rate being received.
Signal strength
The display will show a slide bar to indicate the signal strength, the stronger the signal, the longer the bar will be from
left to right.
DLS
DLS stands for Dynamic Label Segment which is a s cr ol li ng message that the broadcaster may include in their
transmissions. The message usually includes information such as programme details …etc.
Programme type
This describes the style of the programme that is being broadcast. If the information is n ot available, the di sp la y will
show “[No PTY]”.
Ensemble/Multiplex (Group name)
The Ensemble/Multiplex is a collection of radio stations that are bu nd le d and transmitted together in a single
frequency. There are national and local multiplexe s, l oc al o ne s co nt ai n st at io ns t ha t ar e sp ec if ic t o th at a re a.
Note: P re ss and hold the DISPLAY/INFO button for longer than 2 s ec on ds , the software version number will be
displayed.
UK-3
F4
F6 F7
F5
Time/Date
Ensemble/Multiplex (Group name)
Frequency
Audi o Bit Rate
Sign al strength
DLS
Prog ramme Type
Page 6

FM radio
1. To select FM, press the DAB/FM button, the FM frequency will be
displayed. (F. 8)
2. To activate auto search, press and hold the I◀◀ or ▶▶I buttons until it
starts to scan down or up the frequency band, it will stop automatically
once a station has been found.
3. To activate manual search, repeatedly press the I◀ ◀ or ▶ ▶ I button; Or you can press on the VOL/SKIP/
SCROLL control once and when the display shows “<Tuning>”, rotate the VOL/SKIP/SCROLL control for your
desired frequency.
4. To select audio mode, press the PLAY/PAUSE button to toggle between the “Auto” or “Mono” selection.
Note: The radio will automatically switch between stereo and mono mode, but you can override this and switch this
function manually which is helpful for poor signal reception.
STO RING AND RECALLING PRESET STATIONS (remote control only)
In either DAB or FM, you can store up to 10 stations to the favourite presets; this will enable you to get direct access to
your favourite stations.
1. To store a preset, first tune to your desired station, then press and hold the PROGRAM button on the remote until
the display shows the preset number and flash. (F. 9)
2. Press the SCROLL ▲ or ▼ button to select your desired station preset number.
3. Finally press the PROGRAM button again to confirm your selection, the display will show “Preset # stored”. (F.10)
4. To recall a preset station that you have stored, press the MENU/PS/FOLDER +/- buttons on the remote, the
display will show the preset number and the associated information. It would tune to the station in one second after
the buttons are released. (F.11)
FACTORY RESET
When you move the system to another part of the country, your pre-tuned and stored DAB stations may no longer be
available. If this is the case then you will need to reset your system back to its original factory settings; to perform a
factory reset, please do the following:
1. Connect the unit to mains and press the STANDBY button once to turn the unit on.
2. Ensure the unit is in DAB mode, then press and hold the MENU button until the display shows “Press SELECT to
confirm reset”.
3. Release the MENU button and press on the SELECT control once, the display will show “Restarting…” and then
perform full scan function.
4. After the scan has finished, the radio will select and display the first alphanumerically found station.
Note: All of your stored DAB & FM presets will be lost once the reset has taken place.
LISTENING TO YOUR COMPACT DISCS
NOTE : Although this CD/MP3 player can read CD-R and CD-RW discs in addition to normal CDs, the playability of CDR and CD-RW discs may be affected by the type of software that was used to create the discs, as well as the quality and
condition of the blank media you are using, 100% playability cannot be guaranteed. This is not an indication of a
problem with the player.
Playing the entire CD
1. When the unit is ON, repeatedly press the iPod/CD button to select CD function. The display will first show “CD”
and then finally “NO DISC”. (F.12) (F.13)
2. Press the OPEN button on the top panel to open the CD door, load the disc with the printed label side facing up and
then close the CD door. The display will first show “READING” and then the total track number and time. (F.14)
3. To start playback from the beginning, press the PLAY/PAUSE button, the display will show the current track
number and the elapsed time. (F.15)
4. If a CD/MP3 disc is being played, the display will show “MP3” together with the current folder and track number. To
see the ID3 tag if available, press the DISPLAY/INFO button.
5. To interrupt playback, press the PLAY/PAUSE button once, the display will show “ II ”. (F.16)
6. To resume playback, press the PLAY/PAUSE button again.
7. To stop playback, press the ■ button.
UK-4
F8
F11
F10
F9
F12 F13 F14
F15 F16
Page 7

Selecting a different track during play
1. To select a different track duri ng p la y, press the I◀◀ o r ▶▶I buttons u nt il y ou r ea d yo ur d es ir ed t ra ck n um be r
in the display, then release the button, and playback will be started from this track.
2. To select other folders in the MP3 disc, press the MENU/PS/FOLDER +/- buttons on the remote.
3. To play the next track, press the ▶▶I b ut to n on ce .
4. To play the current track again from the beginning during play, press the I◀ ◀ button once.
5. To play the previous track, press the I◀◀ b ut to n tw ic e.
Repeat play (remote control only)
During normal playback, you can press the REPEAT button on the remote control to select the repeat play function:
1. To repeat the same track, press REPEAT bu tt on o nc e, t he d is pl ay w il l sh ow “ 1 ” ( F. 17)
2. To repeat the entire disc, press the REPEAT button again, the display will show “ ”. (F. 18)
3. If you are playing a MP3 disc, an additional “ ” option will appear. This will repeat the current folder. (F. 19)
4. To cancel repeat play, repeatedly press the REPEAT bu tt on u nt il t he r ep ea t ic on d is ap pe ar s in t he d is pl ay.
Random play (remote control only)
1. During CD o pe ra ti on , press the RANDOM bu tt on to start random pl ay, t he display will show “R AN DO M” and the
tracks will be started playing randomly. (F.20)
2. To r es um e normal playback, press th e RANDOM button again and “RANDOM” will be disappeared in the
display.
3. To cancel random play, press the ■ button.
Program play (remote control only)
You c an use the program pl ay feature to play up to 20 tracks o n a disc in a ny desired order. You may also program a
particular track to play several times within a programmed sequence.
1. Load your disc as usual and wait until the display shows the total number of tracks on the disc.
2. Ensue it is i n CD stop mode, press the PROGROM button on the remote control once, th e display will show
“MEM” and “P-01”.(F.21)
3. Press the I◀ ◀ or ▶ ▶ I bu tt on to select the first track n um be r t o be programmed. When the desired trac k
number appears in the display, pr es s the PRO GR AM button to confirm and the first track t o play is
programmed. The program memory number will advance to “P-02” and ready for the next entry.
4. If a MP3 disc is being loaded, press the MENU/PS/FOLDER +/- buttons to select the folder.
5. Repeat the above steps to program other tracks, a maximum number of 20 tracks can be programmed. When
you have com pl et ed programming, press the PLAY/PAUSE button to begin p ro gr am play, pla yb ac k will be
started on the first track you programmed and will continue until the last programmed track has played.
6. When the program play is c om pl et ed , the player stops and “PROG” will be displayed. The p la ye r remains in the
program play mode. Press the PLAY/PAUSE button will play the programmed sequence again.
7. To erase the program, in CD stop mode, press the ■ button once; in CD play mode, press the ■ button twice.
“PROG” will disappear in the display.
Repeat program play (remote control only)
You may use the program play and the repeat play features t og et he r to c on ti nu ou sl y repeat a programmed playback.
First pr og ra m the desired playback sequence, then p re ss t he REPEAT button to select repeating the c ur re nt t rack or
the entire programmed sequence.
LI STENI NG TO YOUR iPod & iP hone
This unit incorporates an iPod/iPhone d oc ki ng function, your favourite songs in the iP od /i Ph on e can be playback
through this unit.
1. To select iPod operation, repeatedly press the iPod/CD button until the display shows “Insert iPod”.
2. Lift up the door of iP od /i Ph on e docking station located on the top f ro nt , install the adaptor which matches y ou r
iPod/iPhone model into the docking tray.
3. insert your iPod/iPhone into the docking tray, the display will show “iPod” and now you can start your i Po d
operation.
4. To interrupt or start playback, press the ►II button.
5. To skip forward or back to other tracks during playback, press the ▶ ▶I or I◀ ◀ bu tt on .
6. To select “iPod Menu”, press the MENU button.
7. To scroll up or down in the “iPod Menu”, press the MENU/PS/FOLDER +/- buttons on the remote.
8. To confirm the selection in the “iPod Menu”, press the SELECT button on the remote.
CH ARGING UP YO UR iPod & iPh one
You can c ha rg e your iPod or IPhone via the docking tray i n either standby or under operation, the iP od or i Ph on e will
be automatically charged when it is docked.
UK-5
F20
F19F18F17
F21
Page 8

AUX IN PUT
A 3.5mm stereo AUX IN socket is located at the back of the unit, analogue audio sound signals from other sources
can be input to the system through this socket.
1. Use a cable with 3.5mm jack to connect the input to other analogue audio source.
2. Press the AUX button to select the AUX input function, the display will show “AUX”. Also the clock will be
displayed.
3. Adjust the volume control for your desired sound output level.
TI MER FUN CTION
You can set the timer to switch on the syste m at y ou r de si re d ti me , li st en in g mo de a nd v ol um e le ve l.
1. Pr es s the TIMER button to t og gl e the timer function between “On” and “Off”, the display will show the timer
on/off status, the timer on mode and the time.(F.22)
2. To se t the timer, ensure the u ni t is in standby mode, press a nd hold the TIMER button u nt il the display shows
“Timer Set” and the “hour” digit of t he t im er c lo ck i n th e di sp la y wi ll f la sh . (F.2 3)
3. Press the ▲ or ▼ buttons to set the time and pr es s the TIMER b ut to n to confirm, first set th e hour and then the
minute.
4. When the time to s wi tc h on th e system is set, you will continue to go for the t im er on m od e selection, press the
▲ or ▼ buttons to select the m od e - FM/DAB/CD/iPod, then press the TIMER b ut to n to confirm and the timer
on mode is set.
5. The display will show the vo lu me level and flash, press the ▲ or ▼ buttons to select t he timer on volume level,
then press the TIMER button to confirm and the timer setting is now completed.
SL EEP FUN CTION
This function allows you to program the system to switch off itself after a set period of time.
1. To activate the sleep function, repeatedly press the SLEEP button, the sleep time in the display will change in
sequence on every press:
2. When the display shows your desired sleep time, release the button, the sl ee p t im er is n ow act iv at ed . The
display will show “ # ” in which the number is to indicate the sleep time in terms of x10 minutes.
3. To cancel the sleep function, repeatedly press the SLEEP button until the display shows “Sleep Off”.
PR ESET EQ ( rem ote con trol on ly)
Press the EQ button o n the remote c on tr ol to select different preset EQ mode, the d is pl ay will show i n sequence of
every press:
X- BA SS FUNC TION (r emo te cont rol o nly)
Press th e X-BASS button on the remote c on tr ol w ill toggle this function between on a nd off. Th e display will show “XBASS ON” or “X-BASS OFF”. When the X-BASS is on, the bass sound is enhanced.
MU TE FUNC TION (r emo te cont rol onl y)
Press th e MUTE b utton on the remote control w il l stop the sound from the speakers te mp or ar il y, the di sp la y will show
“MUTE” an d flash. To c an ce l mute and restore th e sound, press the MU TE button again or th e VOLUME +/- button,
the “MUTE” will disappear in the display.
BACK LIGHT F UNCTI ON
During unit on and s ta nd by, press the BACKLIGHT button will toggle the front panel backlight between on and off.
The backlight will go to off every time the unit enters into the standby mode.
HE ADPHO NE JAC K
A 3.5mm type stereo he ad ph on e jack is located on the front panel. Connect a set of stereo he ad ph on es (not
included) to this jack fo r private listening without disturbing ot he rs . The e xt er na l speakers are a ut om at ic al ly
disconnected when the headphones are in use.
IMPORTANT: When using h ea dp ho ne s always set the volume t o a low level before yo u put the headphones on. Then
insert the headphones and gradually increase the volume to a comfortable listening level.
UK-6
90 80
70 60 30 10
Off
F22 F23
Page 9

SP ECI FI CATI ON
POWER SUPPLY: 100-240V~ 60/50Hz
OUTPUT POWER: 5W X2
UNIT DIMENSION: 145
SPEAKER DIMENSION: 130
WEIGHT: 2.90 kg
** SPECIFICATION SUBJECT TO CH AN GE W IT HO UT F UR TH ER N OT IC E
(L) x 235 (W) x 130 (H) mm
(L) x 165 (W) x 170 (H) mm
RADIO SECTION
FREQUENCY RANGE: DAB 174 - 240 MHz
FM 87.5 – 108 MHz
COMPACT DISC SECTION
CD MEDIA: CD-DA, CD-ROM, CD-R, CD-RW
DISC FORMATS: CD-DA Digital Au di o, I SO9660 (CD-R), ISO13346UDF (CD-RW)
Mixed mode and Enhanced CD
MP3/WMA SECTION
BIT RATE: MP 3: 3 2- 12 8k bp s, W MA : 32 , 48 -1 92 kb ps ,
Constant & VBR (Variable Bit Rate)
DISPLAY: MP3/WMA Ta g (V 1. 0, V 1. 1& V 2. 3) – Ti tl e, Ar ti st , Alb um
(Up to 32 characters displayed for each tag)
TOTAL NO. OF TRACKS /AL BU M: 9 99
AUX INPUT
INPUT VOLTAGE RANGE: 350-500mV
IMPEDANCE: 47KΩ
1. Alwa ys use compact discs be aring the mark as shown .
2. Not es on handling discs
Removing the disc from its st orage case.
* Do not touch the reflective r ecorded surface.
* Do not stick paper or write any thing on the
surface.
* Do not bend the disc.
3. Storage
* Store the disc in its case.
* Do not expose discs to direct s unlight or high tempe ratures, high humid ity or dusty places.
4. Cle aning a disc
* Should the disc become soil ed, wipe off dust,
dirt and fingerprints with a soft cloth.
* The disc shoul d be cleaned from the centre
to the edge.
* Never use benzene, thinne rs, record cleaner fl uid or anti static spray.
* Be sure to close the CD door so the l ens is not contaminat ed by dust.
* Do not touch the lens.
CORRECT
INCORRECT
FROM THE CENTRE TO THE EDGE
CO MPACT DISC
UK-7
Page 10

Product Warranty
Subject to the warranty repair conditions below, in addition to any applicable statutory warranties this
product is warranted for 12 months from the original date of purchase covering both parts and labour.
The benefits conferred by this warranty are in addition to and not in derogation of all rights and remedies in respect of this
product which the consumer has under the Trade Practices Act and other State and Territory laws.
Warranty Repair Conditions
A. This Product Warranty only applies provided the product:-
Has been purchased in Australia and sold by Authorised Distributors or Dealers and only where the products are
used and serviced within Australia
Is taken for service when required to an Authorised Service Agent, together with written instructions indicating
specific problem or function requiring investigation.
Has valid proof of purchase and presented when warranty service is requested.
Has only been used in a domestic application.
Has been installed and operated in accordance as noted in the operating instructions under normal use and
reasonable care (in the opinion of the Service Centre).
Has not been damaged by the use of accessories which in the opinion of the Service Centre are defective or
incompatible with the product.
Has not been tampered with or repaired (including unauthorised alterations) by anyone other than the AWA
Service Centre or an Authorised Service Centre.
B. This Product Warranty does not cover:-
Damage, malfunction or failure resulting from use of incorrect voltages, incorrect installation, accidental damage,
misuse, neglect, build-up of dirt or dust abuse, wear and tear, maladjustment of customer controls, mains supply
problems, thunderstorm activity or Acts of God, pixel error, infestation by insects or vermin, exposure to
abnormally corrosive conditions or any foreign object or matter having entered the product.
Mileage or travelling time in respect of service outside the authorised AWA Service Centre nor pick up and
delivery cost incurred.
Service calls arising from failure to correctly operate the product or to observe noted instructions, or repair which
reveals the product is in normal working order.
Cabinet parts, user replacement batteries or leads unless the defective items are reported at the time of
purchase.
C. Service calls only apply to Television display devices (CRT, LCD, Plasma) with screen sizes greater than 68cm in
the major metropolitan areas of Australia or the normal operating areas of the nearest Authorised Service Centers.
D. Requested service visits to the customer premises will be made during normal working hours of the customary
working week upon request by the customer. Where such a visit is made on a day arranged by the customer and
the service technician is unable to obtain access to the product, the Service Centre will be entitled to make a
separate charge for service call fee, time and distance travelled.
E. The AWA Service Centre and its Authorised Service Centres may charge for work done where the product is found
to be in good working order. Example, charges may be made where the problem is found to be due to incorrect
setting of customer controls, use of poor associated equipment (e.g. poor antenna systems) or the inability of the
product to operate with faulty or incompatible equipment.
F. If the product is sent to an Authorised Service Centre, the owner is responsible for the cost of transport to and from
the Service Centre. In addition, the product is at the owners risk while in transit to and from the authorised Service
Centre.
G. No person is authorised to make or give any assertions, statements or undertakings, whether expressed or implied
about the product other than or additional to the terms of this warranty.
Please read instruction manual carefully
Should you encounter any problems?
Please contact Telefix for Warranty Support
1300 366 144
Email: warrantyhelp@awa.com.au
The original proof of purchase must be kept and produced for service requirements under this Product Warranty.
 Loading...