

Page 1

STANDBY/ON
USER MANUAL
MODEL: DS-A335
DS-A335
USB
Page 2

TABLE OF CONTENTS
SAFETY PRECAUTIONS
IMPORTANT SAFETY INSTRUCTIONS
NOTICE
PLAYABLE DISC TYPE
PLAYABLE FILE TYPE
ACCESSORIES and PANEL
BASIC CONNECTION
REMOTE CONTROL
BASIC PLAYBACK
ADVANCED PLAYBACK
SPECIAL FUNCTION PLAYBACK
SYSTEM SETUP
TROUBLE SHOOTING
SPECIFICATIONS
01
03
04
05
06
07
08
10
11
12
13
16
20
21
Should you encounter any problems, please contact the help line before
you return this product back to the place of purchase.
Contact our Toll Free Warranty Support Help Line
1300 366 144
Email: warrantyhelp@awa.com.au
Visit our web site for FAQ's or request for service
www.awa.com.au
Page 3
SAFETY PRECAUTIONS
The lightning flash with arrowhead symbol, within an equila-
teral triangle, is intended to alert the user to the presence
of uninsulated "dangerous voltage " within the product's en-
closure that may be of sufficient magnitude to constitute a
risk of electric shock to persons.
The exclamation point within an equilateral triangle is
intended to alert the user to the presence of important
operating and maintenance (servicing) instructions in the
literature accompanying the appliance.
The symbol for CLASS II (Double Insulation).
WARNING:
CAUTION:
TO REDUCE THE RISK OF FIRE OR ELECTRIC SHOCK, DO NOT EXPOSE THIS
APPLIANCE TO RAIN OR MOISTURE, DANGEROUS HIGH VOLTAGES ARE
PRESENT INSIDE THE ENCLOSURE. DO NOT OPEN THE CABINET, REFER
SERVICING TO QUALIFIED PERSONNEL ONLY.
When replace the direct plug in power supply or a separable, cord-connected power
supply, the replacement must be exact duplicate, or one recommended by the manu-
facturer.
TO PREVENT ELECTRIC SHOCK, MATCH WIDE BLADE OF PLUG TO WIDE
SLOT, FULLY INSERT.
This product utilizes a laser.
Use of controls or adjustments or performance of procedures other than those
specified here in may result in hazardous radiation exposure.
Do not open the cover and do not repair yourself. Refer servicing to
qualified personnel.
DANGER: Visible and invisible laser radiation when open and interlock failed or
defeated. Avoid direct exposure to beam.
01
Page 4

SAFETY PRECAUTIONS
This item incorporates copy protection technology that is protected by U.S. patents
and other intellectual property rights of Rovi Corporation. Except as otherwise required
by law which cannot be excluded, reverse engineering and disassembly are prohibited.
Manufactured under license from Dolby Laboratories. Dolby and the double-D symbol
are trademarks of Dolby Laboratories.
02
Page 5

CAUTION: PLEASE READ AND OBSERVE ALL WARNINGS AND INSTRUCTIONS GIVEN IN THIS MANUAL AND
THOSE MARKED ON THE UNIT. RETAIN THIS BOOKLET FOR FUTURE REFERENCE.
This set has been designed and manufactured to assure personal safety. Improper use can result in electric shock or fire
hazard. The safeguards incorporated in this unit will protect you if you observe the following procedures for installation,
use and servicing. This unit is fully transistorized and does not contain any parts that can be repaired by the user.
DO NOT REMOVE THE CABINET COVER OR YOU MAY BE EXPOSED TO DANGEROUS VOLTAGE. REFER
SERVICING TO QUALIFIED SERVICE PERSONNEL ONLY.
on a bed,
03
Page 6
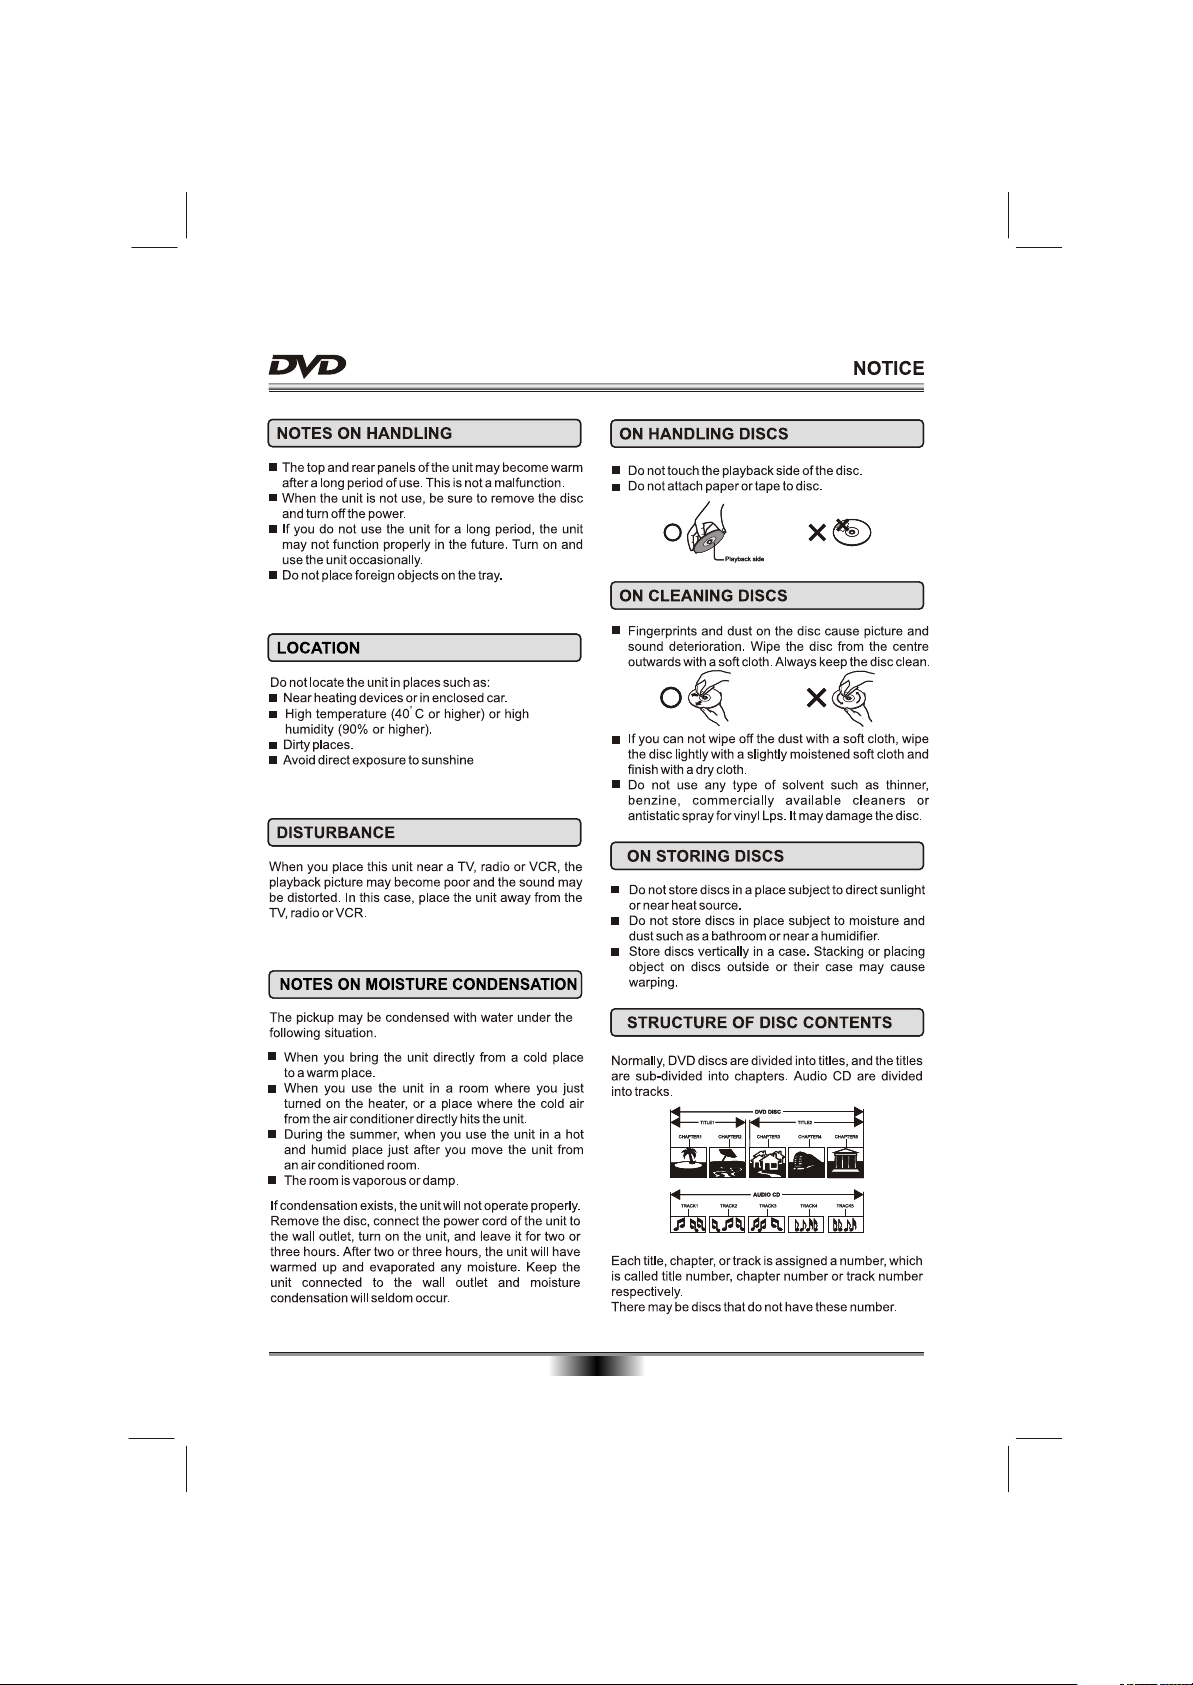
04
Page 7
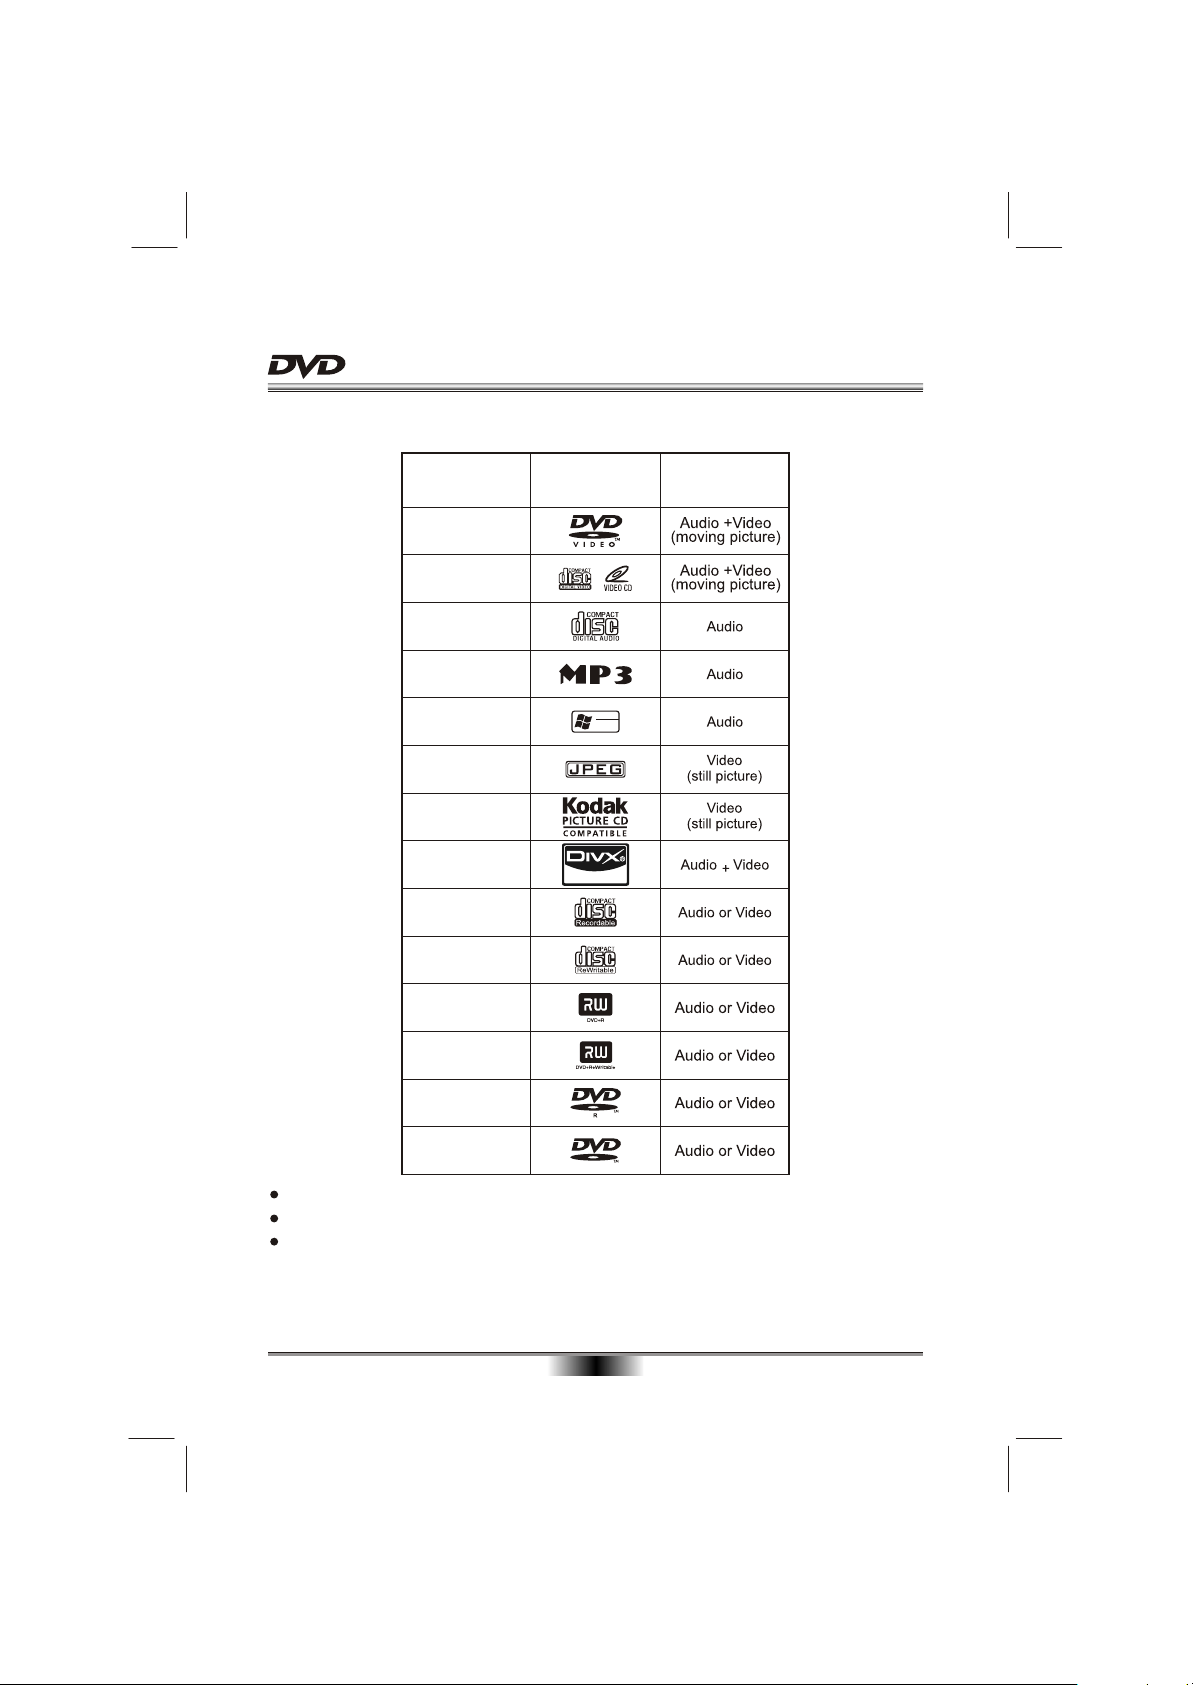
Playable Disc Type:
PLAYABLE DISC TYPE
Disc Types Disc Logo
DVD VIDEO
VIDEO-CD
(VCD)
AUDIO CD
MP3
Designed for
Windows
WMA
JPEG
KODAK
PICTURE CD
DivX
CD-R
CD-RW
DVD+R
DVD+RW
TM
TM
Media
Contents
DVD-R
DVD-RW
RW
Discs other than those listed above can not be played.
Non-standardized discs, even if they may be labeled as above cannot be played.
Some discs feature both Dolby Digital and DTS soundtracks. There is no analogue
audio output when DTS is selected. To listen to the DTS soundtrack, connect this
DVD player to a DTS decoder or AV amplifier receiver with built-in DTS decoder via
the "Coaxial output" or "HDMI output". See Page 9 for details.
05
Page 8

PLAYABLE FILE TYPE
Playable files formats
Supported video file formats
DivX
Video Files with following extensions can be
played.: .avi, .divx, .AVI, .DIVX.
DivX Video(Codec) Format: DivX 3.11,DivX 4.x,
DivX 5.x(without QPEL and GMC),DivX 6.x.
DivX Audio(Codec) Format: MP3,MPEG1 Audio
Layer 2, AC3.
Supported subtitle file formats: .smi, .srt, .sub,
.psb.
Maximum resolution: 720x480@30fps
720x576@25fps
Minimum resolution: 16x16.
Maximum frame rate for progressive source: 30
frames per second.
Maximum field rate for interlace source: 60 fields
per second.
You cannot play back a disc with a resolution
greater than 720 x 576 pixels.
Supported image file formats
JPEG
Resolution: Up to 3 072 x 2 048 pixels
This player supports baseline JPEG.
This player supports Exif Ver.2.2.
This player supports JPEG HD. Images are
output with a high resolution of 720p or 1 080i.
Supported audio file formats
This player does not support VBR
(Variable Bit Rate).
This player does not support lossless encoding.
Windows Media Audio (WMA)
Sampling frequencies: 32 kHz, 44.1 kHz and
48 kHz.
Bit rate: Up to 192 kbps
This player supports files encoded using
Windows Media Player Ver.7/7.1, Windows
Media Player for Windows XP and Windows
Media Player 9 Series.
MPEG-1 Audio Layer 3(MP3)
Sampling frequencies: 32 kHz, 44.1 kHz and
48 kHz.
Playable file extensions
Video files
.divx .avi .xvid
Files not containing DivX video signals cannot be
played, even if they have the extension “.avi”.
Image files
.jpg
Audio files
.wma .mp3
06
Page 9

ACCESSORIES
Audio/Video cable .................... 1
User Manual............................... 1
Remote control ......................... 1
Batteries..................................... 2
FRONT PANEL
STANDBY/ON
ACCESSORIES and PANEL
V.MODE
3
1 2
OSD
5
6
4
SUBTITLE
7 8 9
SEARCH
TITLE/PBC
0 10+
PAL/NTSC
REPEAT A-B RPT
CLEAR
MENU
SETUP
ZOOM
USER MANUAL
PROG
F.FWDF.REV NEXTPREV
DVD/USBPAUSE/STEP
STOP
AUDIO
MUTE
VOLUME
ANGLE
DS-A335
DS-A335
1. STANDBY/ON
2. POWER INDICATOR
3. TRAY
4. REMOTE CONTROL SENSOR
5. LED SCREEN
LED DISPLAY of DVD
3
1 2
6
1.
Play display
2.
DVD disc indicator
3.
Pause display
4. VCD disc indicator
5. DTS digital
6. CD disc indicator
7
8 10
07
6. OPEN/CLOSE
7. USB
8. PLAY/PAUSE
9. STOP
5
4
9
11
7. Rotate playback indicator
8
. Hour display
9. Minute display
10.Second display
11
. Dolby flag
USB
Page 10

REAR PANEL OUTPUT
SL
FL
110V-240V~ 50/60Hz
4
CENTER
N294
SR
SUB-WOOFER
FR
5.1-CH AUDIO OUT
HDMI
Y CB / PB
DIGITAL AUDIO OUT / VIDEO OUT
BASIC CONNECTION
5.1 DVD player with HDMI
MODEL: DS-A335
CR / PR
S-VIDEO
VIDEOCOAXIAL
AC: 110V-240V~ 50/60Hz
POWER: 12W
MADE IN CHINA
S/N:
Imported by Big W, 1 Woolworths Way, Bella Vista,
NSW 2153 Australia
U.S. Patent Nos. 6,836,549; 6,381,747;
7,050,698; 6,516,132; and 5,583,936.
Dolby and the double-D symbol are
registered trademarks of Dolby Laboratories.
CAUTION
RISK OF ELECTRIC SHOCK
DO NOT OPEN
CLASS 1 LASER PRODUCT
1 564 7
2
1. POWER LINE INPUT
2. 5.1 CHANNELS AUDIO OUTPUT
3. HDMI OUTPUT
3
5. VIDEO OUTPUT
6. Y, CB/PB, CR/PR OUTPUT
7. S-VIDEO OUTPUT
4. COAXIAL OUTPUT
BASIC CONNECTION
Connecting to a devices with HDMI faucet
Easy DVD hook-up guide: For the best possible picture, simply follow these guidelines and use the best
cables your TV accepts: Normal: Composite video Good: S-video
Better: Component video Best: HDMI video
HD DVD playback: Enjoy your entire DVD collection in brilliant high definition format. This DVD player
upconvert DVDs to your HDTV's native resolution, whether it's 480p, 720p, 576p, 1080i and 1080p.
HDMI output: Use this output for HD conversion and experience stunning HD images and crisp digital
audio.
Connecting to a TV with Audio/Video cable
To video input(yellow)
To audio inputs(red, white)
To S-video input
If the TV has an S-video input, connect the DVD player with an S-video cable.
When using an S-video cable, do not connect the yellow video cable.
08
To S-video
output
Page 11

BASIC CONNECTION
Connecting to a audio system and TV equipped with YUV video input
To Y video output
To CB/PB video output
To CR/PR video output
To CR/PR video input
To audio inputs of the amplifier
Connecting to an amplifier equipped with a digital audio input and TV
To CB/PB video input
To Y video input
To COAXIAL
type digital
audio input
To Y video output
Coaxial cable
To CR/PR video output
To CB/PB video output
To CR/PR video input
To CB/PB video input
To Y video input
Connecting to an amplifier equipped with 5.1ch audio input and TV
To 5.1ch audio inputs
To 5.1ch
audio outputs
Audio cable
To video output
To video input (yellow)
Connecting to an amplifier equipped with HDMI audio input and TV
09
Page 12

REMOTE CONTROL
REMOTE CONTROL
V.MODE
OSD
SUBTITLE
TITLE/PBC
REPEAT A-B RPT
SETUP
ZOOM
MUTE
1 2
4
7
SEARCH
F.FWDF.REV NEXTPREV
DVD/USBPAUSE/STEP
STOP
ANGLE
DS-A335
5
8 9
0 10+
CLEAR
VOLUME
PAL/NTSC
Function
3
6
1. OPEN/CLOSE DISC TRAY
2. V.MODE
3. OSD (On Screen Display)
4. SUBTITLE
MENU
5. TITLE/PBC
6. SEARCH
7. REPEAT
PROG
8. A-B REPEAT
9. SETUP
AUDIO
10. ENTER/PLAY
11. ZOOM
12. FAST REVERSE
13. FAST FORWARD
14. PAUSE/STEP
15. STOP
Function
16. MUTE
17. ANGLE
18. STANDBY
19. DIGITS AND 10+ BUTTONS
20. PAL/NTSC
21. CLEAR
22. MENU
23. CURSOR
24. PROGRAM
UP
LEFT RIGHT
DOWN
25. NEXT
26. PREVIOUS
27. AUDIO
28. DVD/USB
29. VOLUME +
30. VOLUME -
10
Page 13

BASIC PLAYBACK
Preparations
When you want to view a disc, turn on the TV and
select the video input connected to the DVD player.
Basic playback
1. Press STANDBY/ON in the front panel, the DVD
player turns on and the TV screen will display
the start logo. If a disc is already in the tray, it
will begin to play once the power is on.
Note: Different status for LED display and power
indicator light of front panel:
Under working mode: , power
indicator light is off;
Under standby mode: no display in LED, power
indicator light is red;
Power is not connected: no any display in LED
or power indicator light.
2. Press OPEN/CLOSE to open the disc tray,
LED displays "OPEN", place a disc on the disc tray.
There are two different disc sizes. Place the
disc in the correct guide on the disc tray. If the
disc is out of the guide, it may damage the disc
and cause the DVD player to malfunction.
Do not place a disc which is unplayable in this
DVD player.
3. Press OPEN/CLOSE to close the disc tray, LED
displays "CLOSE", the playback will automatically
start.
Some discs may not playback automatically,
you can press ENTER/PLAY button to start
playback.
4. Some discs may start playback with a menu,
use the cursor button on the remote control to
select menu options and press ENTER/PLAY
to start, or press digits to select a menu options
directly.
Pause/step playback
1. Press PAUSE/STEP first time to pause play-
back (still mode). The sound will be muted during
still mode.
2. Press PAUSE/STEP continuous to single
step forward to the next frame in the video.
3. Press ENTER/PLAY to resume normal playback.
Stop playback
1. Press STOP button to go to stop mode, the TV
screen will show the start logo.
types, such as DVD, the player can resume from
the point where it was stopped.
2. Press ENTER/PLAY to resume playback from the
location where playback is stopped or from the
beginning of the disc.
3. Press STOP twice to stop completely.
With certain disc
Previous and Next
During playing, press PREV key can back to start
of the previous chapter, then each press this key
the start of the
go to the start of the previous chapter
disc.
Each press of NEXT key during playing will skip
the current chapter and play the next one.
Fast forward and Fast reverse
1. Press F.FWD to fast forward through the disc.
Each time the F.FWD button is pressed, the
fast forward motion speed changes.
2. Press ENTER/PLAY to resume normal playback.
3. Press F.REV to fast reverse through the disc.
Each time the F.REV button is pressed, the
fast reverse motion speed changes.
4. Press ENTER/PLAY to resume normal playback.
NOTES:
1.
will
11
Page 14

ADVANCED PLAYBACK
IMPORTANT NOTE:
THE FOLLOWING FUNCTIONS ARE APPLICABLE ONLY TO DVD DISCS. IF OTHER DISC FORMATS ARE
PLAYED, SCREEN DISPLAY AND OPERATION WILL BE DIFFERENT.
V.MODE
This button can set VIDEO output among "CVBS" or
"YUV". You need to select CVBS when using S-video
out and select YUV when using component video
output.
Note: The screen disappear when press this button,
press this button continuously until the screen turn
normal.If there are picture interferences or no picture,
please press "V.MODE" to correct it.
OSD
Press this button and the screen will display some
information about disc, such as : " Title Elapsed " ,
" Title Remain ", " Chapter Elapsed ", " Chapter
Remain " and " Display Off ".
SUBTITLE
Press this button and the screen will display "SUBTITLE 01/XX XXXXX", "01" indicates the ordinal
number of this language; "XX" indicates total number
of language; "XXXXXX" indicates the language of
country. (The number of language depends on disc).
TITLE/PBC
According to some DVD discs, press this button will
display "Title Menu", the unit will play from the disc
head or you can use digits to select tracks preferred.
According to some VCD, following the menu screen
on the TV screen, On this playing, the user can use
the digits buttons enter, during PBC playback.
ZOOM
Press this button to zoom into the picture.
Each time the button is pressed, the magnification
level will change.
CLEAR
This button can be used to clear any incorrect
information that may have been input.
PAL/NTSC
Press this button will switch among NTSC, PAL.
SEARCH
Press this button one time, the screen will display
search menu, the second will cancel. in search menu,
you can use UP/DOWN cursor button to select item
what you wanted, Then press ENTER/PLAY button to
confirm.
REPEAT
Press REPEAT and Chapter repeat will be
displayed on screen, the second press will display
Title repeat, the third press will display All repeat,
the four press will cancel repeating.
A-B REPEAT
Press " A-B RPT " to begin start-point, press again
to set an end point and complete setting. The
selected section A-B will be repeated. The third
press will cancel this function.
MENU
Press this button to display root menu, select item
according to your preference. (This key is valid to
DVDs possessing multi-layer menu.)
PROGRAM
Press this button and the screen will display info
window , press digits button to input the program
number what you want, when finished, move the
cursor to select the " Start " logo, at this time the unit
will start program playback and the screen will display
"Program" logo.
If you want to cancel this function, press " STOP "
and then press ENTER/PLAY .
Press this button and the screen will swap from "file list
view" to the "folder view" when you are playing MP3 or
WMA files in disc or USB drive."
ANGLE
For discs with this feature, pressing this key to view
action from different angles.(Depending on the DVD)
DVD/USB
Switch to play DVD disc or read USB.
Note: please don't pull out the USB when reading
in order to avoid damage.
12
Page 15

SPECIAL FUNCTION PLAYBACK
VOLUME and MUTE
Press " + " at the right of VOLUME to increase
volume, " - " to decrease to volume. Pressing MUTE
once will display MUTE (no voice), the second press
will return to normal playback.
Some discs feature both Dolby Digital and DTS soundtracks. There is no analogue audio output when DTS is
selected. To listen to the DTS soundtrack, connect this DVD player to a DTS decoder or AV amplifier receiver
with built-in DTS decoder via the "Coaxial output" or "HDMI output". See Page 9 for details.
AUDIO CHANNEL CHOOSE
Press this button on remote control to change the
mode of audio.
For example: Audio 1/2: Dolby D 2 CH English
Audio 2/2: 5.1 CH English
Note: You must wait 3 seconds before choosing a
another selection
Dolby D
HDMI FUNCTION
HDMI, High Definition Digital Multimedia Interface supports EDID and DDC2B. This connection operates quickly
and conveniently, providing the best in both audio and video playback.
HDMI can transfer uncompressed, high-resolution picture and multi-channel audio digitally up to speeds of
5 GBps. HDMI can support all ATSC HDTV standards not only meet resolution 1080i/1080p, which can supply
the highest picture quality, but also support DVD Audio. You only need one HDMI line connected, relieve audio
connected. At the same time, the spare space which HDMI standard supplied can apply in the video updating.
HDMI can collocate with HDCP (High-bandwidth Digital Content Protection), avoid copyright film being copied
without authorization.
JPEG DISC PLAYBACK
When playing JPEG disc, a navigation menu will be displayed automatically if the disc is loaded in succession.
In the menu, use UP or DOWN in the cursor to select a file, then press ENTER/PLAY, the file will begin with
a slide-show. Press PREV or NEXT to select the previous or the next picture. Press to pause
the current picture for enjoying, when press ENTER/PLAY, it will return to normal playing.
PAUSE/STEP
USB FUNCTION INTRODUCTION
USB device available on sale now are version 1.1 & 2.0.This DVD player mainly supports 2.0 versions but can
be compatible with old version 1.0 & 1.1 also. But some cases non-compatibility may happen due to different
format of data.
Due to various compact format and parameter without a standard, it may cause malfunction or may get hanged.
WMA format is exclusive to Windows media player; the compressed data can be played in this device.
1.Connect the USB mass storage Device to the Player after the player has read the Disc at least once as the
system will detect DVD as default mode.
2.Select the USB mode by pressing DVD/USB key followed by navigation key from remote control.
3.The player will start showing the Menu with USB read contents.
4.The USB menu will have similar Menu as .WMA/.AVI/.JPG/.MP3.
5.Select the desired tracks of Music to be played through remote navigation key
6.Press enter for the selection made; the player will now start playing.
7.To stop playing, press stop button & to see the content files, press menu
8.It is recommended for transfer function, use USB device 2.0 having data storage capacity up to 2GB for
smooth operation & it is recomended to use only multimedia files not other compressed data files.
9.To switch over to DVD player mode, Press DVD/USB key in the remote control.
Caution: Some time due to different USB media, set may go to standby or hanging, to restore, power button
need to be pressed to bring back the normal operation .
The DVD units can only support up to a maximum of 131 folders and 10000 files.
Only support maximum 11 characters for folder name and 9 characters for file name.
Copy protected files will not be playable in this unit.
13
Page 16

SPECIAL FUNCTION PLAYBACK
CD RIPPING FUNCTION INTRODUCTION
This function allows user to copy the files of CD to a USB mass
storage device. When playing an Audio CD, insert a USB drive,
then press the CD ripping key (Subtitle key in remote), immediately
a dialog box will appear in the screen.
Procedure of CD ripping:
speed
bitrate
create ID3
device
Selected track 0
1) Insert Audio CD in the DVD Player.
2) Connect USB storage device in the DVD player.
3) Press subtitle button in the remote control, immediately CD ripping dialog box will display on the screen.
4) In the dialogue box of the screen, left side will be the options & right side will be the CD track nos.
5) There are two types of ripping options, one is normal mode & another one is speed ripping mode.
6) In the normal mode ripping both songs play & copy action performs simultaneously, in the Speed ripping
mode only CD copy action performs fast.
7) After ripping mode selection the Bit rate mode selection to be done, the Bit rate speed is provided from
96kbps to 320kbps by using navigation selection key & followed by enter key.
8) Next create ID3 should be selected YES.
9) The USB device by default as target file destination for converting the CD songs file to MP3 format.
10) In the dialogue Box right side TRACK selection will be provided, Press enter key to select & unselect tracks
to be copied.
11) Start Key: By using navigation key of the remote control, press enter key to start copying the tracks in the
above procedure. The copy progress & copy completion will be displayed on the TV screen. After completion
of the ripping action the copied songs will be stored in the USB mass device in the form of MP3 format.
12) To stop the function, select exit in the dialogue box by using navigator key in the remote control.
13) To play the copied MP3 songs from the USB mass storage, press DVD/USB button, select only USB thro ugh MEDIA selection, the copied songs will be displayed. Select the songs ,then press enter to perform
play action.
Note: Ripping or Copy action only provided for Audio CD & target file as MP3 only in this DVD player.
Caution: When ripping action is in progressed mode & cancel button is pressed, then the incomplete MP3 songs
in target folder of USB mass storage may not perform properly either play or fast forward operation. To achieve
good performance of copied songs, ripping action should be completed properly. also during ripping, do not
open the CD tray.
OPTIONS
SUMMARY
start
time 00 00Selected
Normal
128kbps
Yes
USB
exit
CD RIP
TRACK
track 01 05:28
track 02 08:11
track 03 05:40
track 04 05:43
track 05 05:55
track 06 05:05
track 07 01:46
select All select none
MPEG4 DISC FUNCTION INTRODUCTION
MPEG-4 is the forth video and audio encoding standard released by
MPEG (The abbreviation of " Moving Pictures Experts Group"). VCD is
based on MPEG-1 technology and DVD is based on MPEG-2. MPEG-4
takes advantage of narrow bandwidth, pursue the best picture quality by
compress and transmit the data in frame reconstruct technology. The
audio data is compressed by WMA standard. MPEG-4 is the most
advanced compression technology standard in AV field. It has the
highest compression rate. By MPEG-4 technology, we can encode and compress a DVD film into one or two
CD-R disc with pretty good picture quality, or can burn several films that has same quality as VCD into one
CD-R disc, or can burn several films that has similar quality to DVD into DVD-ROM disc.
Note:
1. The MPEG-4 discs in market now have many different formats, such as XVID, AVI, DIVX, RM etc. But
some discs with "MPEG4" logo in market are not encoded by MPEG technology. It is normal that some of
the discs can't be played well in this player because of the incorrect encoding standard.
2. The MPEG-4 files are displayed as a list in the screen, choose the icon by the cursors and press ENTER/
PLAY button to playback the movie.
14
00:00 00:00
001/010
AVi_1
AVi_2
AVi_3
AVi_4
AVi_5
AVi_6
Page 17

SPECIAL FUNCTION PLAYBACK
Kodak Picture CD Playback
Playback (Normal)
When a Kodak Picture CD is inserted on the unit, an automatic slide show is launched. Each picture in the
Kodak Picture CD will be displayed consecutively in a slide-show fashion and will be scaled to fit in the whole
TV screen. Some slide-show transition modes are provided, use "PROG" key to select. Customer can set
transition effects for each picture.
To display an image indefinitely, press the "PAUSE" key. To view the next or previous picture, press "NEXT" or
"PREV" key. To resume the slide-show, press the "ENTER/PLAY" key.
Image Rotation
There are four modes to rotate a picture: "Invert", "Mirror", Left", and "Right". These operations are allowed
only when a picture is being displayed normally and will be cancelled automatically when a new picture is
displayed. The arrow key is used to select the different rotation modes:
Up - Invert/Normal Left - Turn left
Down - Mirror/Normal Right - Turn right
Zoom
The "ZOOM" key is used to turn on or off this function. When this mode is on, any picture will be displayed at
the last ratio selected by the user. A message on the screen will indicate the current zoom ratio.
If zoom mode is on, "F.FWD" and "F.REV" key are used to control the ratio of zoom in/out. With ZOOM mode
off, a picture is scaled to fit the whole TV screen.
Notes: During zoom function, slide-show transition and image rotation are disabled. To cancel the zoom
function press the "ZOOM" key again to resume the slide-show.
Digest
The "STOP" key is used to display thumbnail size pictures. After it is enabled, some scaled-down thumbnail
pictures will be displayed on the screen. The "NEXT" and "PREV" keys can be used to display the next/prev
pictures in the Kodak Picture CD.
You can select any of the displayed thumbnails by using the Arrow Keys and pressing the "ENTER/PLAY" key.
The thumbnail will be enlarged to fit the TV screen and the slide show will start. To view the next or previous
picture press "NEXT" or " PREV" key. To resume the slide show press the "ENTER/PLAY" key.
IMPORTANT NOTE: Quality of pictures displayed on the screen is highly dependent on the viewing device.
15
Page 18

SYSTEM SETUP
When you press SETUP key on the remote control,
the setup menu will be displayed.
1.Within the setup menu, you can use UP, DOWN,
LEFT and RIGHT buttons on the remote control
to move the cursor, and then press the
button to make your selection.
PLAY/ENTER
Press LEFT can return the previous menu.
2.To exit setup menu, you can press SETUP
menu.
1. GENERAL SETUP PAGE
Setup TV screen format, video type and all DVD
functions.
Dolby D
Audio
General
General Setup Page
TV Display
Angle Mark
Osd Lang
Captions
Screen Saver
Last Memory
Go To General Setup Page
PS
On
Eng
Off
On
Off
1.1 TV DISPLAY
The TV Display which select the different ratio of
display format and the screen of TV, There are
various types of display on screen for different
matches between Disc and TV .
Note:
No matter which display format is selected, a
picture recorded in standard 4:3 format always
displays in the 4:3 aspect ratio.
The display format of DVD titles may vary; please
refer to the information that accompanies your
specific DVD title.
If the DVD title is recorded in 16:9 wide display
format while the TV is a standard 4:3 screen,
horizontal compression of the image will result.
Some DVD titles may be recorded in special
formats. In such cases, the DVD titles will always
appear on the screen in their original format,
regardless of which TV display format you select.
Video
Preferen
1.2 ANGLE MARK
ANGLE MARK: Users can select a particular camera
angle when playing a DVD that offers multiple angles.
1.3 OSD LANGUAGE
On Screen Display (OSD) Language: Users can
select the whole setup menu and on-screen display
language.
1.4 CAPTIONS
CAPTIONS: For hearing-impaired people.
The program can be displayed with recorded
explanatory captions.
Note: This is valid for a disc that has captions.
1.5 SCREEN SAVER
SCREEN SAVER: If the screen saver is on,then there
will be an animated picture on the screen whenever
the DVD player is idle for a certain time.
1.6 LAST MEMORY
LAST MEMORY: This function is convenient when
you want to continue viewing a disc from the point
where you were watching before. Unlike the resume
function, the Last Memory function is effective even
the DVD is removed from the player.
When Last Memory is ON. Each time when you
open the tray to remove the disc or stop playing to
standby, the player memory the point where you
stop and continuously play again from the point.
It will play from where it stops when power off after
re-start the unit.
2. AUDIO SETUP PAGE
Dolby D
Audio
General
Audio Setup Page
Speaker Setup
Spdif Setup
Equalizer
Go To Audio Setup Page
Video
Preferen
16
Page 19

SYSTEM SETUP
2.1 SPEAKER SETUP PAGE
2.1.1 DOWNMlX SETUP
DOWNMIX MODE: sets front speakers to Lt/Rt
STEREO, V SURR or 5.1CH.
The first 3 settings ( Lt/Rt, STEREO, V SURR)
downmix the sound Signal for 2-Speakers. This
setting allows you to enjoy a surround sound effect
with onIy two speakers. For this reason a setup for
additional speakers ( described in the following
sections) is disabled when DOWNMlX MODE is
set to these settings.
You have to set the DOWNMlX MODE to 5.1CH if
you have selected the Dolby Digital connection
and you would like to enjoy true Dolby Digital sur round sound. In this setting, the CENTER, REAR
speakers is active.
Dolby D
Audio
General
Speaker Setup Page
Downmix
Front Speaker
Center Speaker
Rear Speaker
Subwoofer
Test Tone
Dialog
Post DRC
Set Downmix Mode
Lt/Rt
LRG
LRG
LRG
On
Off
00
Auto
2.1.2 FRONT SPEAKER
FRONT SPEAKER: Sets front speakers volume
Large, Small.
2.1.3 CENTER SPEAKER
CENTER SPEAKER: Sets center speakers volu-
me Large, Small or Off.
2.1.4 REAR SPEAKER
REAR SPEAKER: Sets rear speakers volume
Large, Small or Off.
2.1.5 SUBWOOFER SPEAKER
SUBWOOFER SPEAKER: Sets subwoofer spea-
kers On or Off.
2.1.6 TEST TONE
TEST TONE: This can test each speaker one by
one.
2.1.7 DIALOG SETUP
DIALOG SETUP: the setup can enhance the
voice of the speaker.
2.1.8 POST DRC
POST DRC (Dynamic Range Compression); the
setup can select the quiets loud explosions and
increases dialogue.
Video
Lt/Rt
Stereo
V SURR
5.1 CH
Preferen
2.2 SPDIF SETUP PAGE
2.2.1 SPDlF OUTPUT
SPDlF OUTPUT MODE: Sets the audio outputs.
General
Spdif Setup Page
Spidf Output
Lpcm Out
Setup Spdif
Audio
48k
Video
Spdif Off
Spdif/Raw
Spdif/Pcm
Preferen
Dolby D
This DVD player includes three kinds of audio output:
1. SPDlF OFF: An analog surround sound format is
output through the back-paneI connections for L, R.
LS, RS, and Center speakers, and the Subwoofer
simulation.
2. SPDIF/RAW or SPDIF/PCM: This surround sound
format is output to a Dolby Digital / DTS decoder
through the coaxial connector on the back panel
of the product.
Note:
Some discs feature both Dolby Digital and DTS soundtracks. There is no analogue audio output when DTS
is selected. To listen to the DTS soundtrack, connect
this DVD player to a DTS decoder or AV amplifier receiver with built-in DTS decoder via the "Coaxial output" or "HDMI output". See Page 9 for details.
2.2.2 LPCM OUTPUT
LPCM (Linear Pulse Code Modulation) OUTPUT:
Includes LPCM 48K , LPCM 96K for audio format.
2.3 EQUALIZER SETUP PAGE
2.3.1 EQ TYPE
EQ TYPE: Set the audio output to simulate the
various kinds of music effect.
Dolby D
Audio
General
Equalizer Page
EQ Type
Bass Boost
Super Bass
Treble Boost
Select Equalizer Type
None
Off
Off
Off
Video
None
Rock
Pop
Live
Dance
Techno
Classic
Soft
Preferen
17
Page 20

SYSTEM SETUP
2.3.2 BASS BOOST
BASS BOOST: Enhance the bass degree.
2.3.3 SUPER BASS
SUPER BASS: Enhance the super bass degree.
2.3.4 TREBLE BOOST
TREBLE BOOST: Enhance the Treble boost
degree.
3. DOLBY DIGITAL SETUP PAGE
Dolby D
Audio
General
Dolby Digital Setup
Dual Mono
DRC
Go To Dolby Digital Setup
3.1 DUAL MONO
DUAL MONO: If your amplifier / decoder has
Dolby Digital output, you may select stereo, left
mono, right mono, or mixed mono mode for your
amplifier decoder.
3.2 DRC
DRC: This function is generally used when
playing high volume programs at night, in order
to minimize disturbances . This setting can dynamically lower the volume and still keep the original
tone quality. This is the range, measured in decibels(dB), between the loudest and the quietest
sound registers in a soundtrack.
Video
Preferen
4. VIDEO SETUP PAGE
Audio
General
Video Setup Page
Video Output
Resolution
Quality
HDMI Setup
Go To Video Setup Page
CVBS
Dolby D
Video
Preferen
4.1 VIDEO OUTPUT
VIDEO OUT : Set the video output.
4.2 RESOLUTION SETUP PAGE
RESOLUTION: You can select the resolution output
of the player to match your TV.
4.3 VIDEO QUALITY SETUP PAGE
4.3.1 SHARPNESS
SHARPNESS: Set the sharpness level of video
output.
Dolby D
Audio
General
Video Quality Setup
Sharpness
Brightness
Contrast
Gamma
Hue
Saturation
Luma Delay
Sharpness
MID
00
00
None
00
00
1 T
4.3.2 BRlGHTNESS
BRIGHTNESS: Set the brightness level of video
output.
Press right button the TV will display a value.
Press LEFT/RIGHT button to adjust, then press
PLAY/ENTER
button to confirm and return upon
menu.
4.3.3 CONTRAST
CONTRAST: Set the contrast level of Video output.
Press right button the TV will display a value. Press
LEFT/RIGHT button to adjust, then press
button to confirm and return upon menu.
ENTER
4.3.4 GAMMA
GAMMA: Set the gamma value of the Video.
4.3.5 HUE
HUE: Set the hue value of the Video.
Press right button the TV will display a value. Press
LEFT/RIGHT button to adjust, then press
button to confirm and return upon menu.
ENTER
4.3.6 SATURATION
SATURATION: set the saturation of the video.
Press right button the TV will display a value. Press
LEFT/RIGHT button to adjust, then press
button to confirm and return upon menu.
ENTER
Video
High
Medium
Low
Preferen
PLAY/
PLAY/
PLAY/
18
Page 21

SYSTEM SETUP
4.3.7 LUMA DELAY
LUMA ( Luminance ) DELAY: Set the luminance
delay of video output depend on the TV's brightness,
color. It sets 1T commonly for DVD.
4.4 HDMI SETUP PAGE
4.4.1 HDMI
HDMI: You can turn HDMI On or Off.
General
HDMI Setup
HDMI Setup
Audio Source
HDMI Setup
Audio
On
Auto
Video
On
Off
Preferen
Dolby D
4.4.2 AUDIO SOURCE
AUDIO SOURCE: Audio source can be selected Auto
or PCM.
5. PREFERENCE SETUP PAGE
The preference setting is only active with no disc,
and the setting is effective on each time power on
till exchanging the saved setting.
Dolby D
Audio
General
Preference Page
Tv Type
Pbc
Audio
Subtitle
Disc Menu
Parental
Password
Default
Go To Preference Page
PAL
On
Eng
Eng
Eng
5.1 TV TYPE
TV TYPE: This player supports different TV output,
including NTSC and PAL systems.
If your TV support only NTSC or PAL and you have
inadvertently selected the wrong TV type, the TV
image will flicker and become black-and-white.
In this case, you should press the SETUP button
to set as following Note.
Video
Preferen
5.2 PBC
PBC MODE: Sets the PBC (Playback Control) to be
on or off .
5.3 AUDIO
AUDIO: Set the preferred audio language as the
default when playing DVD. (If the DVD supports the
languages)
5.4 SUBTITLE
SUBTITLE: Set the preferred subtitle language as
the default when playing DVD.( If the DVD supports
the languages)
5.5 DISC MENU
DISC MENU: Set the preferred menu language as
the default when playing DVD. (If the DVD supporst
the languages)
5.6 PARENTAL
PARENTAL: The parental control function works in
conjunction with the different censorship classes
assigned to DVDs. These classes help to control the
types of DVDs that the family watches, There are up
to 8 censorship classes for DVDs.
Note: If you change this set, you must input password.
(Initial password : 136900)
5.7 PASSWORD MODE
PASSWORD CHANGE: You can change the pass-
word, please type 6 numerals as new password.
Note: (Initial password : 136900)
Be sure remember new password. When set parental
control function you must input new password .
5.8 DEFAULT
DEFAULT: Reset to all the manufacturer's original
settings for this DVD player Press to
perform the reset.
PLAY/ENTER
19
Page 22

TROUBLE SHOOTING
Please check the following guide for the possible cause and solution for a problem before contacting the
nearest service center or dealer for repairs.
SYMPTOMS AND CORRECTIONS
SYMPTOMS CORRECTIONS
No power
No picture
No sound
Check to make sure that the power connection is secure.
Make sure the connection between the player and the TV is secure.
Make sure that the TV is in good working condition.
Please press "V.MODE" button continuously until the picture returns
to normal.
Make sure the connection between the player and other devices
are secure.
Make sure that the TV and AMP are in good working condition
and setup properly.
Failed to Play
Failed to respond to
remote control
Picture Disturbance
Failed to work
with keys
Check that the disc is properly inserted.
Clean the disc.
Remove obstacles between remote control and unit.
Aim remote control at the sensor on the front panel.
Check batteries and replace them if necessary.
Check the disc for dirt and scratches. Clean or replace disc.
Shut down the unit, wait ten seconds, and restart the unit.
Power surges or other electrical phenomena.
Shut down the unit, wait ten seconds, and restart the unit.
20
Page 23

System and Outputs
SPECIFICATIONS
VF Signal
system
Frequence
response
Audio S/N ratio
Video/Picture
Audio
Audio output
(analog audio)
Audio output
(digital audio)
Video output
S-Video output
Component video
(Y, CB,CR)
General
Power
Power
consumption
Product
Dimensions
NTSC/PAL
CD: 20Hz-20KHz(EIAJ)
DVD:
20Hz-44KHz(96KHz)(Sample result)
20Hz-22KHz(48KHz)(Sample result)
> 90 dB
MPEG1 V2.0; MPEG2
MPEG LAYER2 standard
Electric level output: 1.8 0.2V Impedance: 10Kohm
Electric level output: 0.5Vp--p : 75ohmImpedance
Electric level output: (1.0 0.2)Vp--p : 75ohm Unbalanced negativeImpedance
Electric level output: Brightness(Y)1.0Vp--p,
Chrominance (C): 0.286Vp--p, : 75ohm
Electric level output: 0.7Vp--p, Impedance: 75ohm
110V - 240V ~ 50/60Hz
12W
L: 360mm W:215mm H: 41mm
+
Impedance: 75ohm
Impedance
Weight
Operating
temperature
Operating
humidity
Note: We reserve the right to modify the design without advice!
1.4kg
oooo
5 C to 35 C (41 F to 95 F)
5% to 90%
21
Page 24

Video Output Capabilities
SPECIFICATIONS
Video Output
HDMI
Component video
(Y, CB,CR)
Composite video
S-video
Audio Output Capabilities
Audio Output
HDMI
Coaxial
Resolutions Supported
(NTSC Models)
1080p
1080i
720p
480p
480i
1080i
720p
480p
NTSC SD(480i)
NTSC SD(480i) PAL SD(576i)
NTSC SD(480i) PAL SD(576i)
Supported Audio Technology
Resolutions Supported
(PAL Models)
PAL SD(576i)
Dolby Digital
PCM
DTS
Dolby Digital
PCM
DTS
1080p
1080i
720p
576p
576i
1080i
720p
576p
Any selected digital track will be decoded,
5.1 audio output
Note: Some discs feature both Dolby Digital and DTS soundtracks. There is no analogue audio
output when DTS is selected. To listen to the DTS soundtrack, connect this DVD player to a DTS
decoder or AV amplifier receiver with built-in DTS decoder via the Coaxial output" or "HDMI output".
See Page 9 for details.
mixed with effects and converted to
analogue.
"
22
Page 25

Product Warranty
Subject to the warranty repair conditions below, in addition to any applicable statutory warranties this
product is warranted for 12 months from the original date of purchase covering both parts and labour.
The benefits conferred by this warranty are in addition to and not in derogation of all rights and remedies in respect
of this product which the consumer has under the Trade Practices Act and other State and Territory laws.
Warranty Repair Conditions
A. This Product Warranty only applies provided the product:-
§ Has been purchased in Australia and sold by Authorised Distributors or Dealers and only where the products
are used and serviced within Australia
§ Is taken for service when required to an Authorised Service Agent, together with written instructions indicating
specific problem or function requiring investigation.
§ Has valid proof of purchase and presented when warranty service is requested.
§ Has only been used in a domestic application.
§ Has been installed and operated in accordance as noted in the operating instructions under normal use and
reasonable care (in the opinion of the Service Centre).
§ Has not been damaged by the use of accessories which in the opinion of the Service Centre are defective or
incompatible with the product.
§ Has not been tampered with or repaired (including unauthorised alterations) by anyone other than the AWA
Service Centre or an Authorised Service Centre.
B. This Product Warranty does not cover:-
§ Damage, malfunction or failure resulting from use of incorrect voltages, incorrect installation, accidental
damage, misuse, neglect, build-up of dirt or dust abuse, wear and tear, maladjustment of customer controls,
mains supply problems, thunderstorm activity or Acts of God, pixel error, infestation by insects or vermin,
exposure to abnormally corrosive conditions or any foreign object or matter having entered the product.
§ Mileage or travelling time in respect of service outside the authorised AWA Service Centre nor pick up and
delivery cost incurred.
§ Service calls arising from failure to correctly operate the product or to observe noted instructions, or repair
which reveals the product is in normal working order.
§ Cabinet parts, user replacement batteries or leads unless the defective items are reported at the time of
purchase.
C. Service calls only apply to Television display devices (CRT, LCD, Plasma) with screen sizes greater than 68cm
in the major metropolitan areas of Australia or the normal operating areas of the nearest Authorised Service
Centers.
D. Requested service visits to the customer premises will be made during normal working hours of the customary
working week upon request by the customer. Where such a visit is made on a day arranged by the customer
and the service technician is unable to obtain access to the product, the Service Centre will be entitled to make
a separate charge for service call fee, time and distance travelled.
E. The AWA Service Centre and its Authorised Service Centres may charge for work done where the product is
found to be in good working order. Example, charges may be made where the problem is found to be due to
incorrect setting of customer controls, use of poor associated equipment (e.g. poor antenna systems) or the
inability of the product to operate with faulty or incompatible equipment.
F. If the product is sent to an Authorised Service Centre, the owner is responsible for the cost of transport to and
from the Service Centre. In addition, the product is at the owners risk while in transit to and from the authorised
Service Centre.
G. No person is authorised to make or give any assertions, statements or undertakings, whether expressed or
implied about the product other than or additional to the terms of this warranty.
Please read instruction manual carefully
Should you encounter any problems?
Please contact Telefix for Warranty Support
1300 366 144
Email: warrantyhelp@awa.com.au
The original proof of purchase must be kept and produced for service requirements under this Product Warranty.
Page 26

P
1-3090-A658-0000
N
 Loading...