

Page 1

User’S Manual
81cm PDP TV
Page 2

Contents
Warnings and Cautions 2
IMPORTANT SAFEGUARDS ................................ 2
Front/Back Panel Diagram 5
OSD Button Position ............................................. 5
Back Panel and I/O Ports ...................................... 5
Remote Control 6
Teletext Functions ................................................. 6
Systems Connection 7
Component 1 and AV Output ................................ 7
S-Video and AV1 Input .......................................... 7
Component 2 and AV2 Input ................................. 8
PC INPUT ............................................................. 9
HDMI INPUT and EARPHONE ............................. 9
Basic Operation 10
Turning the TV On/Off ........................................... 10
Select Input Source ............................................... 10
Select Menu Language ......................................... 10
Program selection ................................................10
Volume Adjustment .............................................. 10
Mute Function ....................................................... 10
Picture Setting 11
Changing Picture Mode ........................................ 11
Color Temperature Setting .................................... 11
Advance Picture Adjust ......................................... 12
Audio Setting 12
Setting the TV 13
Region Selection ................................................... 13
Channel Searching ................................................ 13
Fine Tuning ...........................................................13
Program Edit .........................................................13
Function Setting 14
Auto Sleep ............................................................ 14
Time Setting ......................................................... 14
Blue Mute .............................................................. 14
Parental ................................................................. 14
Default ................................................................... 14
Setting the PC 15
Auto Setting ........................................................... 15
Manual Setting ...................................................... 15
Manual Setting (Display Adjustment) .................... 15
Supporting Resolution 15
VGA ....................................................................... 15
HD(Component) ................................................... 15
HDMI ..................................................................... 15
Trouble Shooting 16
Specification 16
1
Page 3
Warnings and Cautions
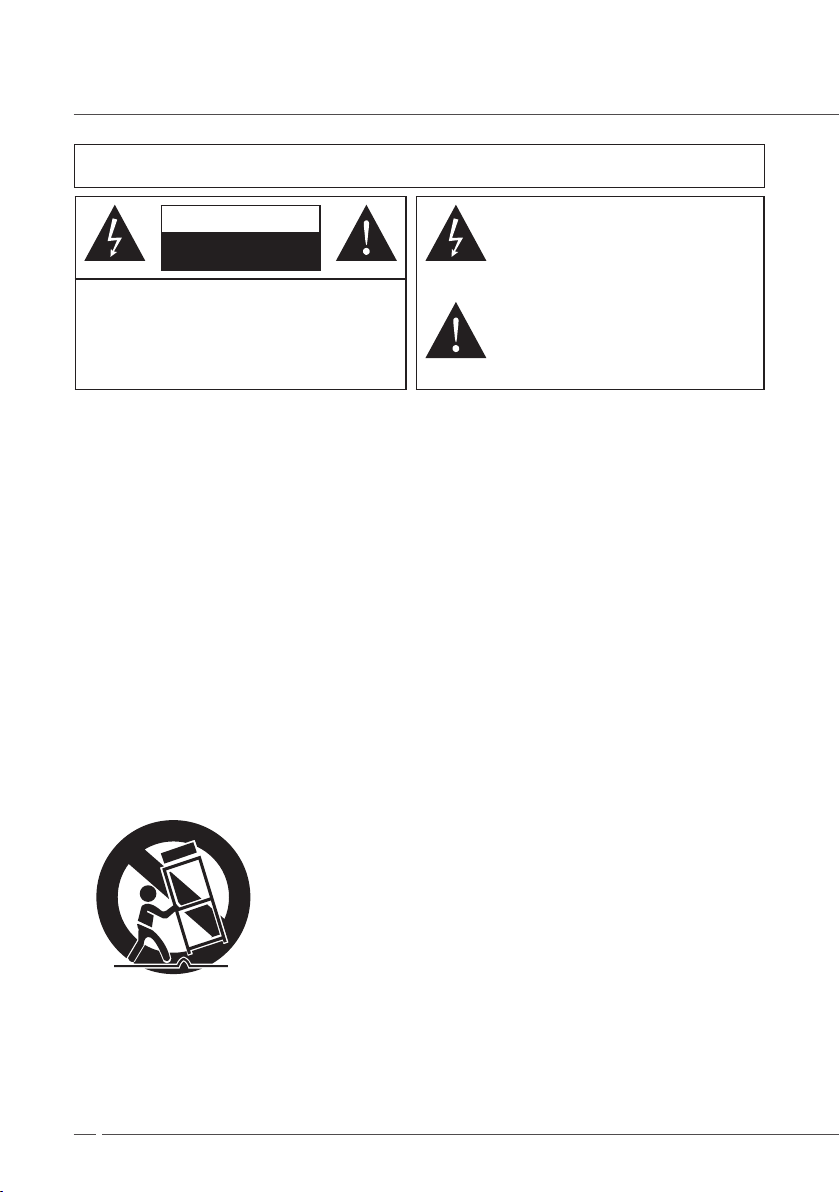
WARNING : TO REDUCE THE RISK OF FIRE OR ELECTRIC SHOCK, DO NOT EXPOSE THIS
CAUTION : TO REDUCETHE RISK OF ELECTRIC
SHOCK, DO NOT REMOVE COVER (OR BACK).
NO USER SERVICEABLE PARTS INSIDE. REFER
SER VICING TOQUALIFIED SERVICE PERSONNEL
APPLIANCE TO RAIN OR MOISTURE.
CAUTION
RISK OF ELECTRIC SHOCK
DO NOT OPEN
THIS SYMBOL INDICATES THAT
DANGEROUS VOLTAGE CONSTITUTINGA
RISK OF ELECTRIC SHOCKIS PRESENT
WITHIN THIS UNIT.
THIS SYMBOL INDICATES THAT THERE
ARE IMPORTANT OPERATINGAND
MAINTENANCE INSTRUCTIONS IN THE
MAINTENANCE INSTRUCTIONS IN THE
LITERATURE ACCOMPANYING THE
APPLIANCE.
IMPORTANT SAFEGUARDS
1. READ INSTRUCTIONS
All the safety and operating instructions should be read before the unit is operated.
2. RETAIN INSTRUCTIONS
The safety and operating instructions should be retained for future reference.
3. HEED WARNINGS
All warnings on the unit and in the operating instructions should be adhered to.
4. FOLLOW INSTRUCTIONS
All operating and use instructions should be followed.
5. CLEANING
Unplug this unit from the wall outlet before cleaning. Do not use liquid cleaners or aerosol cleaners.
6. ATTACHMENTS
The manufacturer of this unit does not make any recommendations for attachments, as they may cause hazards.
7. WATER AND MOISTURE
Do not use this unit near water. For example, near a bathtub, washbowl, kitchen sink, laundry tub, in a wet basement, or
near a swimming pool.
8. ACCESSORIES
Do not place this unit on an unstable cart, stand, tripod, bracket, or table. The unit may fall,causing serious injury, and
serious damage to the unit.
S3126A
(Symbol provided by RETAC)
8A. An appliance and cart combination should be moved with care. Quick stops, excessive force,and uneven
surfaces may cause the appliance and cart combination to overturn.
2
Page 4

Warnings and Cautions
9. VENTILATION
Slots and openings in the cabinet back or bottom are provided for ventilation, and to ensure reliableoperation of the
unit, and to protect it from overheating. These openings must not be blocked orcovered, The openings should never be
blocked by placing the unit on a bed, sofa, rug, or othersimilar surface. This unit should never be placed near or over a
radiator or heat source. This unitshould not be placed in a built-in installation such as a bookcase or rack unless proper
ventilation isprovided or the manufacturers instructions have been adhered to.
10. POWER SOURCE
This unit should be operated only from the type of power source indicated on the rating plate lf youare not sure of the
type of power supply to your home, consult your appliance dealer or local powercompany. For units intended to operate
from battery power, or other sources, refer to the respectivepages in this Owners Manual for their operating instructions.
11. GROUNDING OR POLARIZATION
This unit is equipped with a polarized altemating-current line plug (plug having one blade widerthan the other). This plug
will t into the power outlet only one way. This is a safety feature. If you areunable to insert the plug fully into the outlet,
try reversing the plug. If the plug should still fail to t,contact your electrician to replace your obsolete outlet, Instead of
the polarized alternating-currentline plug, your unit may be equipped with a 3-wire grounding-type plug (a plug having
a third grounding) pin). This plug will only t into a grounding-type power outlet. This too, is a safety feature. If you are
unable to insert the plug into the outlet, contact your electrician to replace yourobsolete outlet. Do not defeat the safety
purpose of the grounding-type plug.
12. POWER-CORD PROTECTION
Power-supply cords should be routed so that they are not likely to be walked on or pinched by itemsplaced upon or
against them, paying particular attention to cords at plugs, convenience receptacles,and the point where they exit from
the appliance.
13. LIGHTNING
To protect your unit from a lightning storm, or when it is left unattended and unused for long periodsof time, unplug it
from the wall outlet and disconnect the antenna or cable system. This will preventdamage to the unit due to lightning
and power ling surges.
14. POWER LINES
An outside antenna system should not be located in the vicinity of overhead power lines or otherelectric light or power
circuits, or where it can fall onto or against such power lies or circuits. Wheninstalling an outside antenna system,
extreme care should be taken to keep from touching suchpower lines or circuits, as contact with them might be fatal.
15. OVERLOADING
Do not overload wall outlets and extension cords, as this can result in a risk of re or electric shock.
16. OBJECT AND LIQUID ENTRY
Do not push objects through any openings in this unit, as they may touch dangerous voltage pointsor short out parts
that could result in re or electric shock. Never spill or spray any type of liquid intothe unit.
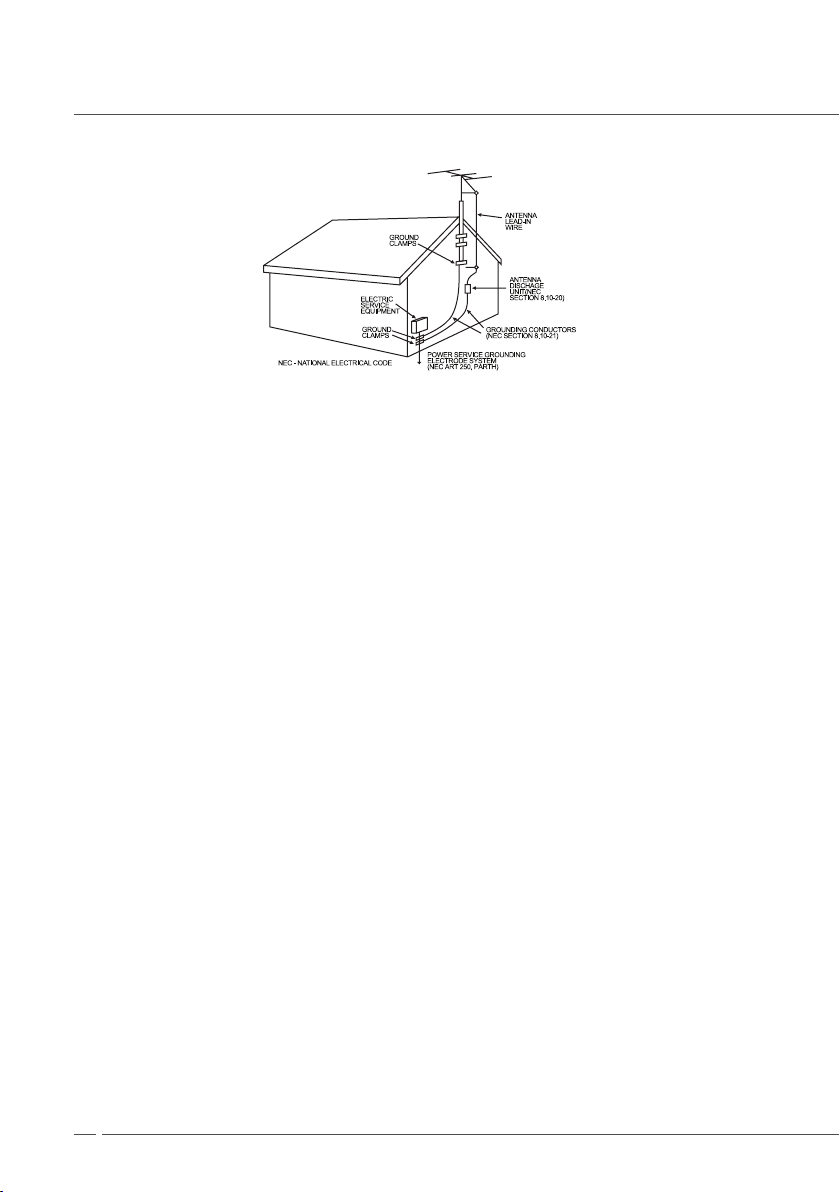
17. OUTDOOR ANTENNA GROUNDING
If an outside antenna or cable system is connected to the unit, be sure the antenna or cable systemis grounded to
provide some protection against voltage surges and built-up static charges, Section8 10 of the National Electrical Code
(NEC), ANSI/NFPA 70, provides information with respect toproper grounding of the mast and supporting structure,
grounding of the lead-in wire to an antenna discharge unit, size of grounding conductors, location of antenna discharge
unit, connection togrounding electrodes, and requirements for the grounding electrode. See gure below.
3
Page 5
Warnings and Cautions
EXAMPLE OF ANNTENNA GROUNDING AS PER NATIONAL ELECTRICAL CODE
18. SERVICING
Do not attempt to service this unit yourself as opening or removing covers may expose you todangerous voltage or
other hazards. Refer all servicing to qualied service personnel.
19. DAMAGE REQUIRING SERVICE
Unplug this unit from the wall outlet and refer servicing to qualied service personnel under thefollowing conditions:
a. When the power-supply cord or plug is damaged.
b. If liquid has been spilled, or objects have fallen into the unit.
c. If the unit has been exposed to rain or water.
d. If the unit does not operate normally by following the operating instructions. Adjust only those controls that are
covered by the operating instructions, as an improper adjustment of other controls may result in damage and
will often require extensive work by a qualied technician to restore the unit to its normal operation.e. If the unit
has been dropped or the cabinet has been damaged.
f. When the unit exhibits a distinct change in performance, this indicates a need for service.
20. REPLACEMENT PARTS
When replacement parts are required, be sure the service technician uses replacement partsspecied by the manufacturer or those that have the same characteristics as the original part.Unauthorized substitutions may result in re,
electric shock or other hazards.
21. SAFETY CHECK
Upon completion of any service or repairs to this unit, ask the service technician to perform safetychecks to determine
that the unit is in proper operating condition.
22. HEAT
The product should be situated away from heat sources such as radiators, heat registers, stoves, orother products
(including ampliers)that produce heat.
23. CONNECTING
When you connect the product to other equipment, turn off the power and unplug all of the equipment from the wall
outlet. Failure to do so may cause an electric shock and serious personalinjury, Read the owner s manual of the other
equipment carefully and follow the instructions whenmaking any connections.
24. SOUND VOLUME
Reduce the volume to the minimum level before you turn on the product. Otherwise, sudden highvolume sound may
cause hearing or speaker damage.
25. SOUND DISTORTION
Do not allow the product output distorted sound for a longtime. If may cause speaker overheatingand re.’
26. APPARATUS SHALL NOT BE EXPOSED TO DRIPPING OR SPLASHING AND NO OBJECTS FILLED WITH LIQUIDS, SUCH AS VASES, SHALL BE PLACED ON THE APPARATUS.
4
Page 6
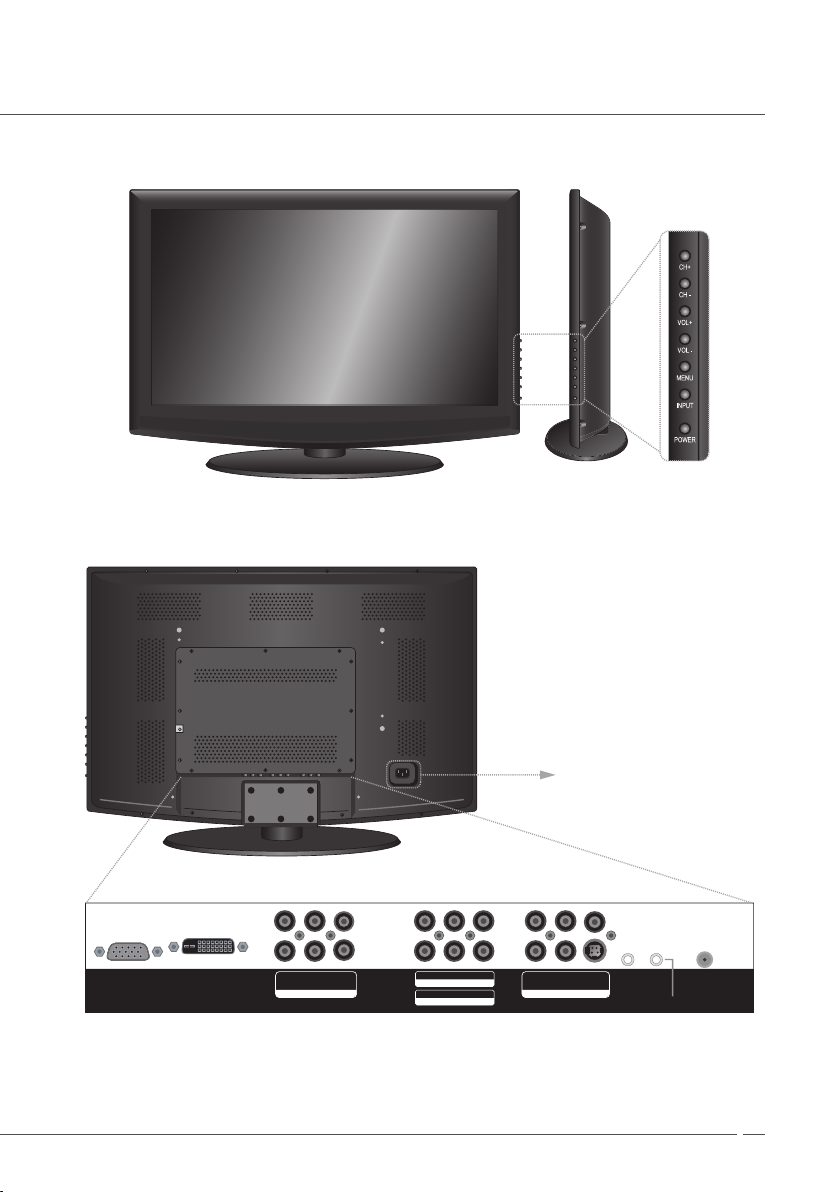
Front/Back Panel Diagram
HDMI INPUT VGA INPUT
PC INPUT
EVRPHONE
ANT 75˟
Y2
AV2
Pb2R2Pr2
L2
INPUT
RRLLAV
S-VIDEO
INPUT
Y Pb Pr
INPUT
AV R L
OUTPUT
OSD Button Position
Back Panel and I/O Ports
Power Socket
5
Page 7

Remote Control
1
4
5
7
8
3
6
9
10
12
13
14
19
20
22
21
23
24
15
16
18
17
2
11
1. (Power)
Switch the set on from standby
2. (Sleep)
Set the sleep timer
3. MUTE
Switch the sound on or off
4. NUMBER BUTTONS
Switch the set on from standby and selects a programme
5.
One/two/three-digit channel selection
6. RETURN
Return to previous TV channel
7. SP
Smart Picture (Picture Mode)
Sports → Vivid → High-Bright → User
8. NICAM
Recall your preferred sound setting
( MONO, STEREO, DUAL1/2).
9. DIS
Display previous input source
(VGA → VIDEO → SVIDEO → YPbPr → TV → HDMI)
10. INPUT
Switch the input source
11. CH+/CH-
Increase and decrease TV channel
12. MENU
Select a menu
13. (VOL-/VOL+)
Adjust the volume
14. PICTURE SIZE
You can press the key to select picture size (4 : 3, 16, 9, NORMAL, FULL)
15. ENTER
When you make sure one function, please press this key
Teletext Functions
16. Teletext Page Up
17. Teletext Page Down
18. Teletext Functions
19. Teletext Reveal(REVEAL)
20. Teletext Size(SIZE)
21. Teletext Hold(STOP)
22. Teletext Index(INDEX)
23. Teletext On/Off(ON/MIX/OFF)
24. Teletext Subpage(SUB.PG)
6
Page 8

Systems Connection
POWER ON/OFF HDMI INPUT VGA INPUT
PC INPUT
EVRPHONE
ANT 75˟
110V~
60Hz, 160W
Y2
AV2
Pb2R2Pr2
L2
INPUT
RRLLAV
S-VIDEO
INPUT
Y Pb Pr
INPUT
AV R L
OUTPUT
V R S
Y Pb Pr
POWER ON/OFF HDMI INPUT VGA INPUT
PC INPUT
EVRPHONE
ANT 75˟
110V~
60Hz, 160W
Y2
AV2
Pb2R2Pr2
L2
INPUT
RRLLAV
S-VIDEO
INPUT
Y Pb Pr
INPUT
AV R L
OUTPUT
R L AV1 L R S-VIDEO
Note
Please connect properly. Be sure that the plug is fully inserted.
This picture is for your reference only.
Component 1 and AV Output
AV Output
S-Video and AV1 Input
Press the SOURCE button select INPUT mode.
Component Input
AV1 Input S-VIDEO, AUDIO
OUTPUT
7
Page 9

POWER ON/OFF HDMI INPUT VGA INPUT
PC INPUT
EVRPHONE
ANT 75˟
110V~
60Hz, 160W
Y2
AV2
Pb2R2Pr2
L2
INPUT
RRLLAV
S-VIDEO
INPUT
Y Pb Pr
INPUT
AV R L
OUTPUT
Y Pb Pr R L AV2
Systems Connection
Component 2 and AV2 Input
Press the SOURCE button select INPUT mode.
Y Pb Pr OUTPUT AV2 & Audio Input
8
Page 10

POWER ON/OFF HDMI INPUT VGA INPUT PC INPUT
EVRPHONE
ANT 75˟
110V~
60Hz, 160W
Y2
AV2
Pb2R2Pr2
L2
INPUT
RRLLAV
S-VIDEO
INPUT
Y Pb Pr
INPUT
AV R L
OUTPUT
POWER ON/OFF HDMI INPUT VGA INPUT
PC INPUT
EVRPHONE
ANT 75˟
110V~
60Hz, 160W
Y2
AV2
Pb2R2Pr2
L2
INPUT
RRLLAV
S-VIDEO
INPUT
Y Pb Pr
INPUT
AV R L
OUTPUT
Systems Connection
PC INPUT
Press the SOURCE button select INPUT mode.
VGA OUTPUT
DVD VGA
OUTPUT
PC AUDIO
OUTPUT
HDMI INPUT and EARPHONE
Output Press the SOURCE button select INPUT mode.
HDMI OUTPUT Stereo Earphone
9
Page 11

Basic Operation
Turning the TV On/Off
Press the POWER on the remote control. The TV will turn on and you will be ready to use its features. You can also
use the POWER button on the front panel.
Select Input Source
Press INPUT button to select input source.
(VGA → AV1 → AV2 → S-VIDEO → Component1 → Component2 → TV → HDMI)
Select Menu Language
1. Press MENU to enter menu.
2. Press / (VOL-/VOL+) to select language, then
press ▲/▼ (CH+/CH-) and / (VOL-/VOL+)
button to select language.
Language English
Auto Sleep Off
Timer Out Off
Blue Mute On
Parental
Time
Default
Misc Enter
ENTER Select / Exit MENU
Program selection
Preset to the TV mode by INPUT, then you can select a program with ▲/▼ (CH+/CH-) or number button.
Volume Adjustment
Press / (VOL-/VOL+) to adjust the volume.
Mute Function
Press the MUTE button, then the sound is switch off. You can cancel it by pressing MUTE or / (VOL-/VOL+) button.
10
Page 12

Picture Setting
Changing Picture Mode
You can change Contrast, Brightness, Saturation, Sharpness, Color Temperature and Advance Picture Adjust.
1. Press MENU to enter menu.
2. Press ▲/▼ (CH+/CH-) to select Picture Mode.
3. Press / (VOL-/VOL+) to select.
Sport Vivid Hi-Bright User
●
4. Being adjustment done, press MENU to exit and
press again to go back to the previous menu.
The adjustment of Contrast, Brightness,
●
Saturation, Hue, Sharpness, Color Temperature
can be done in User mode.
- Contrast sets difference between bright and
dark area of picture.
- Brightness sets brightness of picture.
- Saturation sets richness of color
- Sharpness sets vividness of picture.
Color Temperature Setting
Your TV has 4 color temperature mode.
1. Press MENU and ▲/▼ (CH+/CH-) to select Color
Temperature.
2. Press / (VOL-/VOL+) to select the Kinds of color.
User Cool Middle Warm
●
3. Press the ENTER and / (VOL-/VOL+) to adjust.
Picture Mode User
Contrast 37
Brightness 49
Saturation 11
Hue
Sharpness 10
Color Temperature User
Advance Picture Adjust
Video Enter
Picture Mode User
Contrast 37
Brightness 49
Saturation 11
Hue
Sharpness 10
Color Temperature User
Advance Picture Adjust
ENTER Select / Exit MENU
Video Enter ENTER Select / Exit MENU
11
Page 13

Picture Setting
Advance Picture Adjust
1. Press MENU and ▲/▼ (CH+/CH-) to select Ad-
vance Picture Adjust.
2. Press MENU to select to enter it.
3. Adjust correlative function.
Black Level Extender
●
DNR (Digital Noise Reduction)
●
White Peak Limitator
●
CTI
●
Flesh Ton
●
Adaptive Luma Control
●
Picture Mode User
Contrast 37
Brightness 49
Saturation 11
Hue
Sharpness 10
Color Temperature User
Advance Picture Adjust
Video Enter ENTER Select / Exit MENU
Black Level Extender On
DNR Off
White Peak Limitator Off
CTI Middle
Flesh Ton On
Adaptive Luma Control Off
Audio Setting
You can adjust Bass, Treble, Balance, Surround, Reverb and select equalizer.
1. Press the MENU, / (VOL-/VOL+) and ▲/▼
(CH+/CH-) button to select Bass, Treble, Balance,
Surround, Reverb and Equalizer.
2. Press / (VOL-/VOL+) to adjust them.
3. Being adjustment done, press MENU button to exit
and press again to go back to the previous menu.
12
Video Enter
Bass 41
Treble 50
Balance 0
Surround Off
Reverb Off
Equalizer Soft
Audio Enter
ENTER Select / Exit MENU
ENTER Select / Exit MENU
Page 14

Setting the TV
Region Selection
1. Press the MENU, / (VOL-/VOL+) and ▲/▼
(CH+/CH-) button to select Region Selection.
2. Press / (VOL-/VOL+) to select your country.
3. Press MENU to return the previous menu.
Channel Searching
1. Press the MENU, / (VOL-/VOL+) and ▲/▼ (CH+/CH-) button to select Auto Search or Manual Scan.
2. Press / (VOL-/VOL+) to search channel.
3. Press MENU to stop searching and to return the previous menu.
Fine Tuning
1. Press the MENU, / (VOL-/VOL+) and ▲/▼ (CH+/CH-) button to select Fine Tuning.
2. Press ENTER and / (VOL-/VOL+) to ne tune for the best picture and sound effect.
Program Edit
1. Press the MENU, / (VOL-/VOL+) and ▲/▼
(CH+/CH-) button to select Program Edit.
2. Press ENTER to edit the current channel.
3. Press MENU to return the previous menu.
Region Selection Australia
Color System
Sound System
Fine Tuning
Auto Search
Manual Scan
Update Search
Skip On
Program Edit
TV Enter
PR Freq System Name Skip
1- 2- 3- 4- 5- 6- 7- 8- 9- 10- -
Swap Insert Copy Delete
Select
ENTER Select / Exit MENU
Program Edit
- - - - - - -
- - - - - - -
- - - - - - -
- - - - - - -
- - - - - - -
- - - - - - -
- - - - - - -
- - - - - - -
- - - - - - -
- - - - - - -
ENTER
Edit
On
On
On
On
On
On
On
On
On
On
13
Page 15

Function Setting
Auto Sleep
1. Press the MENU, / (VOL-/VOL+) and ▲/▼
(CH+/CH-) button to select Auto Sleep.
2. Press / (VOL-/VOL+) to cycle through the preset
time intervals.
15 Min → 30 → 60 → 90 → 120 → 180 → 240
●
3. To disable the sleep timer function, please select
OFF.
Language English
Auto Sleep Off
Timer Out Off
Blue Mute On
Parental
Time
Default
Misc Enter
Time Setting
1. Press the MENU, / (VOL-/VOL+) and ▲/▼
(CH+/CH-) button to select Time.
2. Press ENTER to edit the current channel.
3. Press MENU to return the previous menu.
Blue Mute
1. Press MENU, / (VOL-/VOL+) and ▲/▼ (CH+/CH-) button to select the Blue Mute.
2. Press / (VOL-/VOL+) to control blue screen.
Parental
1. Press MENU, / (VOL-/VOL+) and ▲/▼ (CH+/CH-) button to select the Parental.
2. Press ENTER to control.
Initial setting code : 0000
●
Default
1. Press MENU, / (VOL-/VOL+) and ▲/▼ (CH+/CH-) button to select the Default.
2. Press ENTER to reset.
ENTER Select / Exit MENU
Timer 02:29:30
Start Time 15:15:15
Stop Time 00:00:00
Channel 001
Activate On/Off
Conrm On/Off
14
Page 16

Setting the PC
Auto Setting
1. Press INPUT to switch the input source to VGA.
2. Press the MENU, / (VOL-/VOL+) and ▲/▼
(CH+/CH-) button to select Auto Setting.
3. Press ENTER to set.
Manual Setting
1. Press INPUT to switch the input source to VGA.
2. Press MENU, / (VOL-/VOL+) and ▲/▼ (CH+/CH-) button to select Contrast, Brightness, Color Temperature,
Phase or Manual clock.
3. Press / (VOL-/VOL+) to adjust and press MENU to return the previous menu.
Manual Setting (Display Adjustment)
1. Press MENU, / (VOL-/VOL+) and ▲/▼ (CH+/CH-) button to select Display Adjustment.
2. Press MENU, / (VOL-/VOL+) and ▲/▼ (CH+/CH-) button to select H position or V position, then press /
(VOL-/VOL+) to adjust the screen position.
3. Press MENU to return the previous menu.
Contrast 55
Brightness 50
Color Temperature Cool
Auto Setting
Phase 0
Manual Clock 128
Display Adjustment
Geometric Enter ENTER Select / Exit MENU
Supporting Resolution
VGA
Resolution 640 x 480 800 x 600 1024 x 768
Vertical Frequency (Hz) 60 60 60
HD(Component)
Resolution 480i 480p 576i 576p 720p 1080i
Vertical Frequency (Hz) 60 60 50 50 60 60
HDMI
Resolution 480i 480p 576i 576p 720p 1080i
Vertical Frequency (Hz) 60 60 50 50 60 60
15
Page 17

Trouble Shooting
Before your call a service technician, please scan this list of problems and possible solutions.
Problem Quick Action for Possible Solution
No picture & No sound Check whether the TV is turned on
Picture OK & No sound Press the Volume button
Remote Control does not work Check to see if there is any object at the front of IR receiver
No or poor color or poor picture Keep a certain distance between the TV and the VCR
Too light or too dark Adjust the brightness or contrast ratio
No sound from one side Adjust balance in the audio menu
Strange sound from TV Typical sound due to normal TV operation, TV is not faulty
●
Check for correct setting for brightness and contrast ratio
●
●
Check the audio input signal
●
●
Check to see if the batteries are installed with the correct polarities
●
●
Check that the TV and the source are plugged in and turned on
●
●
●
●
Specification
Screen
Video Input
Input Port
Output Port Composite x 1 ( with R, L audio output )
TV
Others
Size 81 Cm ( 16:9 )
Resolution 852 x 480
TV PAL-B/G, PAL-D/K, Pal-I
CVBS, Y/C PAL, SECAM, NTSC
Component 480i/p, 576i/p, 720p, 1080i
VGA VGA
HDMI 480i/p, 576i/p, 720p, 1080i
TV IEC Type x 1, Component x 2, Composite x 2, S-VIDEO x 1
RGB D-Sub 15 Pin x 1, HDMI x 1, PC Audio In x 1, Earphone x 1
Video PAL, SECAM
Sound B/G, D/K, I, L
TV Tuning Auto, Manual search, Channel Name Edit
Sound Setting Bass/Treble/Balance/Surround
Dimension/Weight 824.1 (W) x 602 (H) x 232.5(D) / 22Kg
Power Consumption AC 100~240V, 50/60Hz, 220W
Audio Output 8W + 8W
16
 Loading...