

Page 1
Micro System with iPod Dock
Instruction Manual
MODEL: CM-200
READ THIS INSTRUCTION MANUAL BEFORE OPERATING THE APPLIANCE.
SAVE THIS MANUAL FOR FUTURE REFERENCE.
Page 2
Contents
06
08
11
12
12
13
16
21
23
23
25
26
02
Page 3
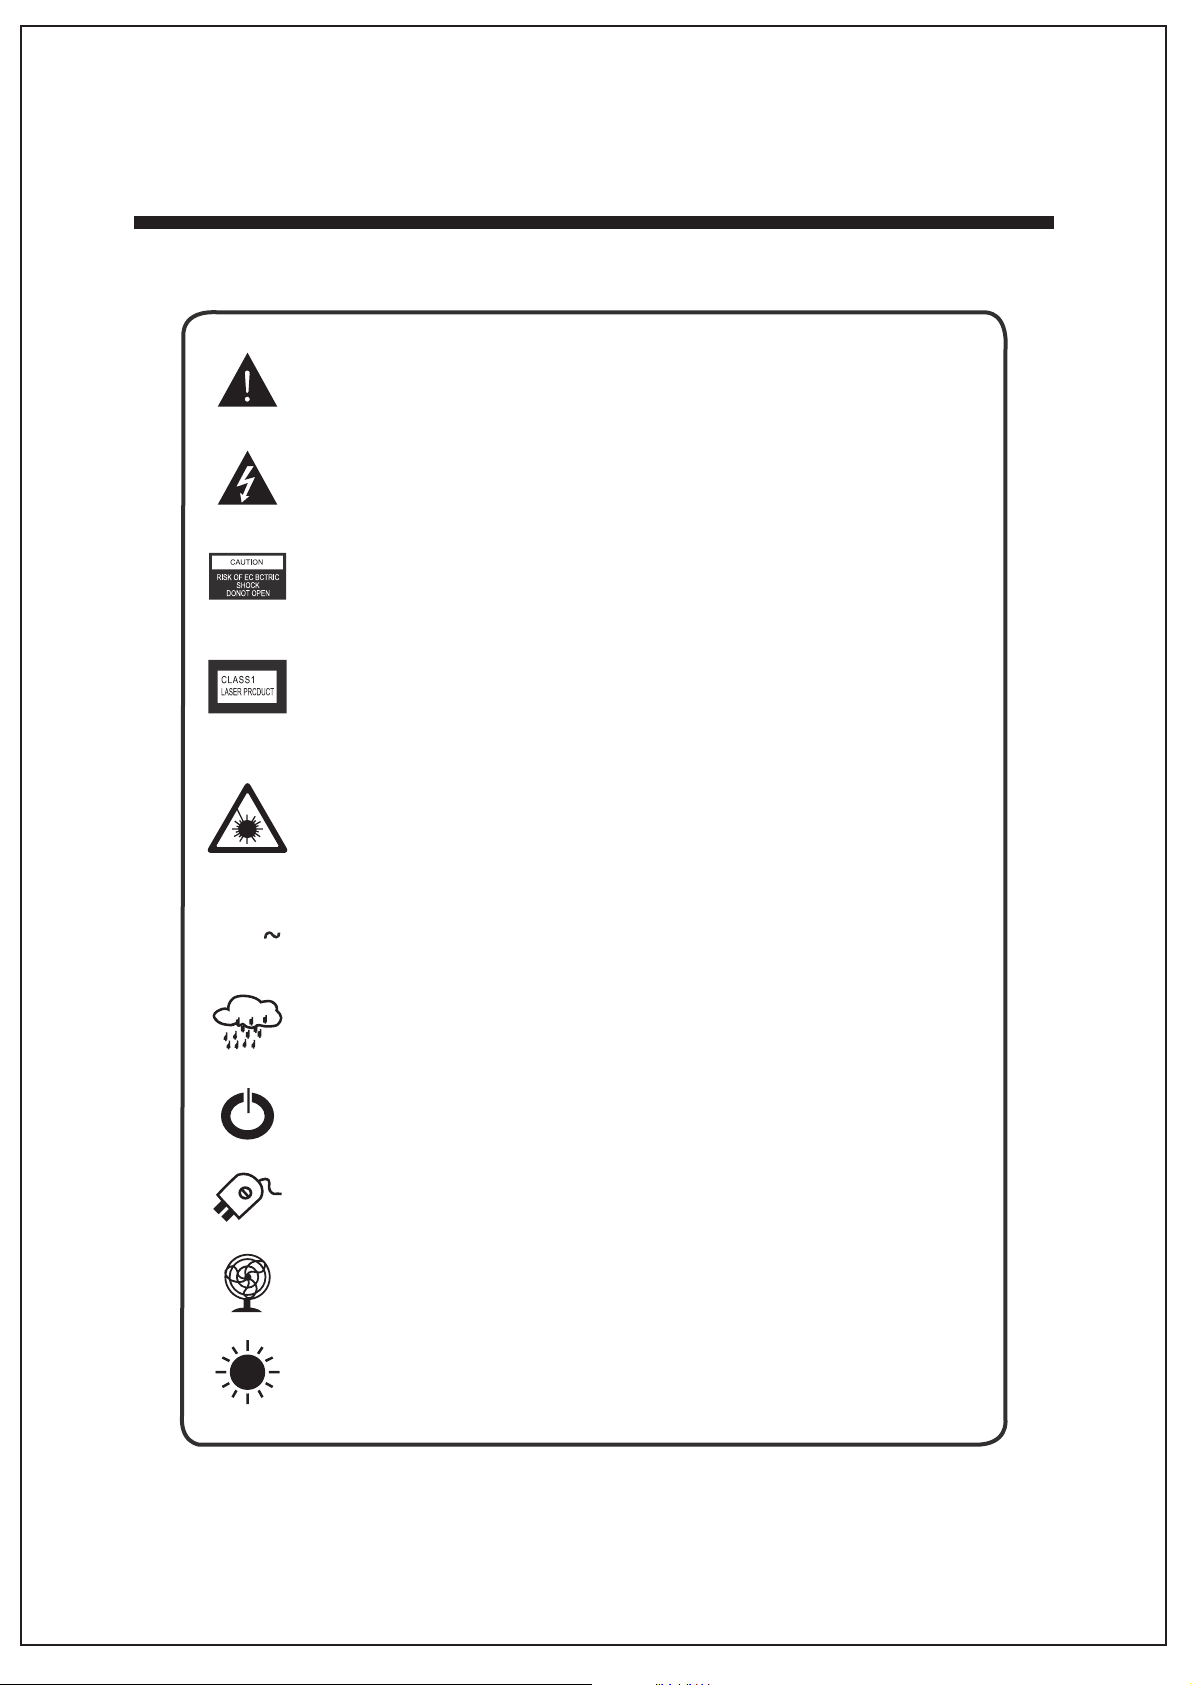
Warnings
The exclamation point within the triangle is a warning sign alerting
the user of important instructions accompanying the product.
The lightening flash with arrowhead symbol within the triargle is a
warning sign alerting the user of “dangerous voltage” inside the unit.
To reduce the risk of electric shock, do not remove the cover. No
user serviceable parts inside the unit. Refer all servicing to qualified
personnel.
This unit empolys a laser.Only a qualified service person should
remove the cover or attempt to service this device,due to possible
eye injury.
240
Invisible laser radiation when the unit is opened or interlocks
defeated. Avoid exposure to laser beam. Use of controls,
adjustments or procedures other than those specified herein may
result in hazardous radiation exposure.
This unit operates on 240V~50Hz. If the unit is not used for a long
period of time,remove the plug from the AC mains.
The apparatus shall not be exposed to dripping or splashing and no
objects filled with liquids,such as vases,shall be placed near the
product.
The power switch in this unit is mounted on the secondary circuit and
does not disconnect the whole unit from the mains in OFF position.
Ensure all connections are properly made before operating the unit.
This unit should be positioned so that it is properly ventilated. Avoid
placing it for example, close to curtains, on the carpet or in a built-in
installation such as a bookcase.
Do not expose this unit to direct sunlight or heat radiating sources.
03
Page 4

Caution
TO PREVENT FIRE OR SHOCK HAZARD,DO NOT USE THIS PLUG WITH AN
EXTENSION CORD, RECEPTACLE OR OTHER OUTLET UNLESS THE BLADES CAN
BE FULLY INSERTED TO PREVENT BLADE EXPOSURE.TO PREVENT FIRE OR
SHOCK HAZARD, DO NOT EXPOSE THIS APPLIANCE TO RAIN OR MOISTURE.
THE LIGHTNING FLASH WITH
ARROWHEAD SYMBOL, WITHIN
AN EQUILATERAL TRIANGLE IS
INTENDED TO ALERT THE USER TO
THE PRESENCE OF INSULATED
‘DANGEROUS VOLTAGE’ WITHIN
THE PRODUCT’S ENCLOSURE THAT
MAY BE OF SUFFICIENT
MAGNITUDE TO CONSTITUTE A
RISK OF ELECTRIC SHOCK TO
PERSONS.
WARNING: TO REDUCE THE RISK
OF ELECTRIC SHOCK DO NOT
REMOVE COVER (OR BACK) , NO
USER SERVICEABLE PARTS INSIDE
REFER SERVICING TO QUALIFIED
SERVICE PERSONNEL.
Important Safety Instructions
THE EXCLAMATION POINT WITHIN
AN EQUILATERAL TRIANGLE IS
INTENDED TO ALERT THE USER TO
THE PRESENCE OF IMPPORTANT
OPERATING AND MAINTENANCE
(SERVICING) INSTRUCTIONS IN
THE LITERATURE ACCOMPANYING
THE APPLIANCE.
1.) Read these instructions.
2.) Keep these instructions.
3.) Follow all instructions.
4.) Do not use this apparatus near water.
5.) Clean only with dry cloth.
6.) Do not block any ventilation openings. Install in accordance with the
manufacturer’s instructions.
04
Page 5

7.) Do not install near any heat sources such as radiators, heat registers,
stoves,or other apparatus (including amplifiers) that produce heat
.
8.) Do not defeat the safety purpose of the plug. If the provided plug does
not fit into your outlet, consult an electrician for replacement of the
obsolete outlet
.
9.) Protect the power cord from being walked on or pinched particularly
at plugs, convenience receptacles,and the point where they exit from
the apparatus
.
10.) Only use attachments / accessories specified by the manufacturer
11.) Unplug this apparatus during lightning storms or when unused for
long periods of time
.
12.) Refer all servicing to qualified service personnel.Servicing is required
when the apparatus has been damaged in any way,such as power
.
supply cord or plug is damaged, liquid has been spilled or objects have
fallen into the apparatus, the apparatus has been exposed to rain or
moisture, does not operate normally,or has been dropped
.
13.) This appliance shall not be exposed to dripping or splashing water an
no object filled with liquids such as vases shall be placed on the
apparatus
.
d
14.) Do not overload wall outlet. Use only power source as indicated
15.) Use replacement parts as specified by the manufacturer
.
16.) The product may be mounted to a wall only if recommended by the
manufacturer
.
.
17.) Upon completion of any service or repairs to this product,ask the service
technician to perform safety checks
18.) Attention should be drawn to the environmental aspects of batter
disposal
.
.
y
19.) To be completely disconnected the power input, the mains plug of
apparatus shall be disconnected from the mains.
20.) The mains plug of apparatus should not be obstructed OR should be
easily accessed during intended use.
05
Page 6
Preparation For Use
UNPACKING AND SETUP
Carefully remove all the components from the display carton and verify
that you have all the necessary components before you dispose of the
display carton.
Remove all packing materials from the individual components.Remove
any descriptive labels that may be attached to the front panel of the
main unit.Do not remove any labels or stickers on the back panels of
the main unit or the speakers.
Place all the components in the desired location.This system is designed
to be used on level,stable,flat surface such as a table,desk,shelf,or stand,
convenient to an AC outlet,out of direct sunlight, and away from sources
of excess heat,dust,moisture, or vibration.
Unwind the AC power cord on the back of the unit and extend the cord
to its full length.
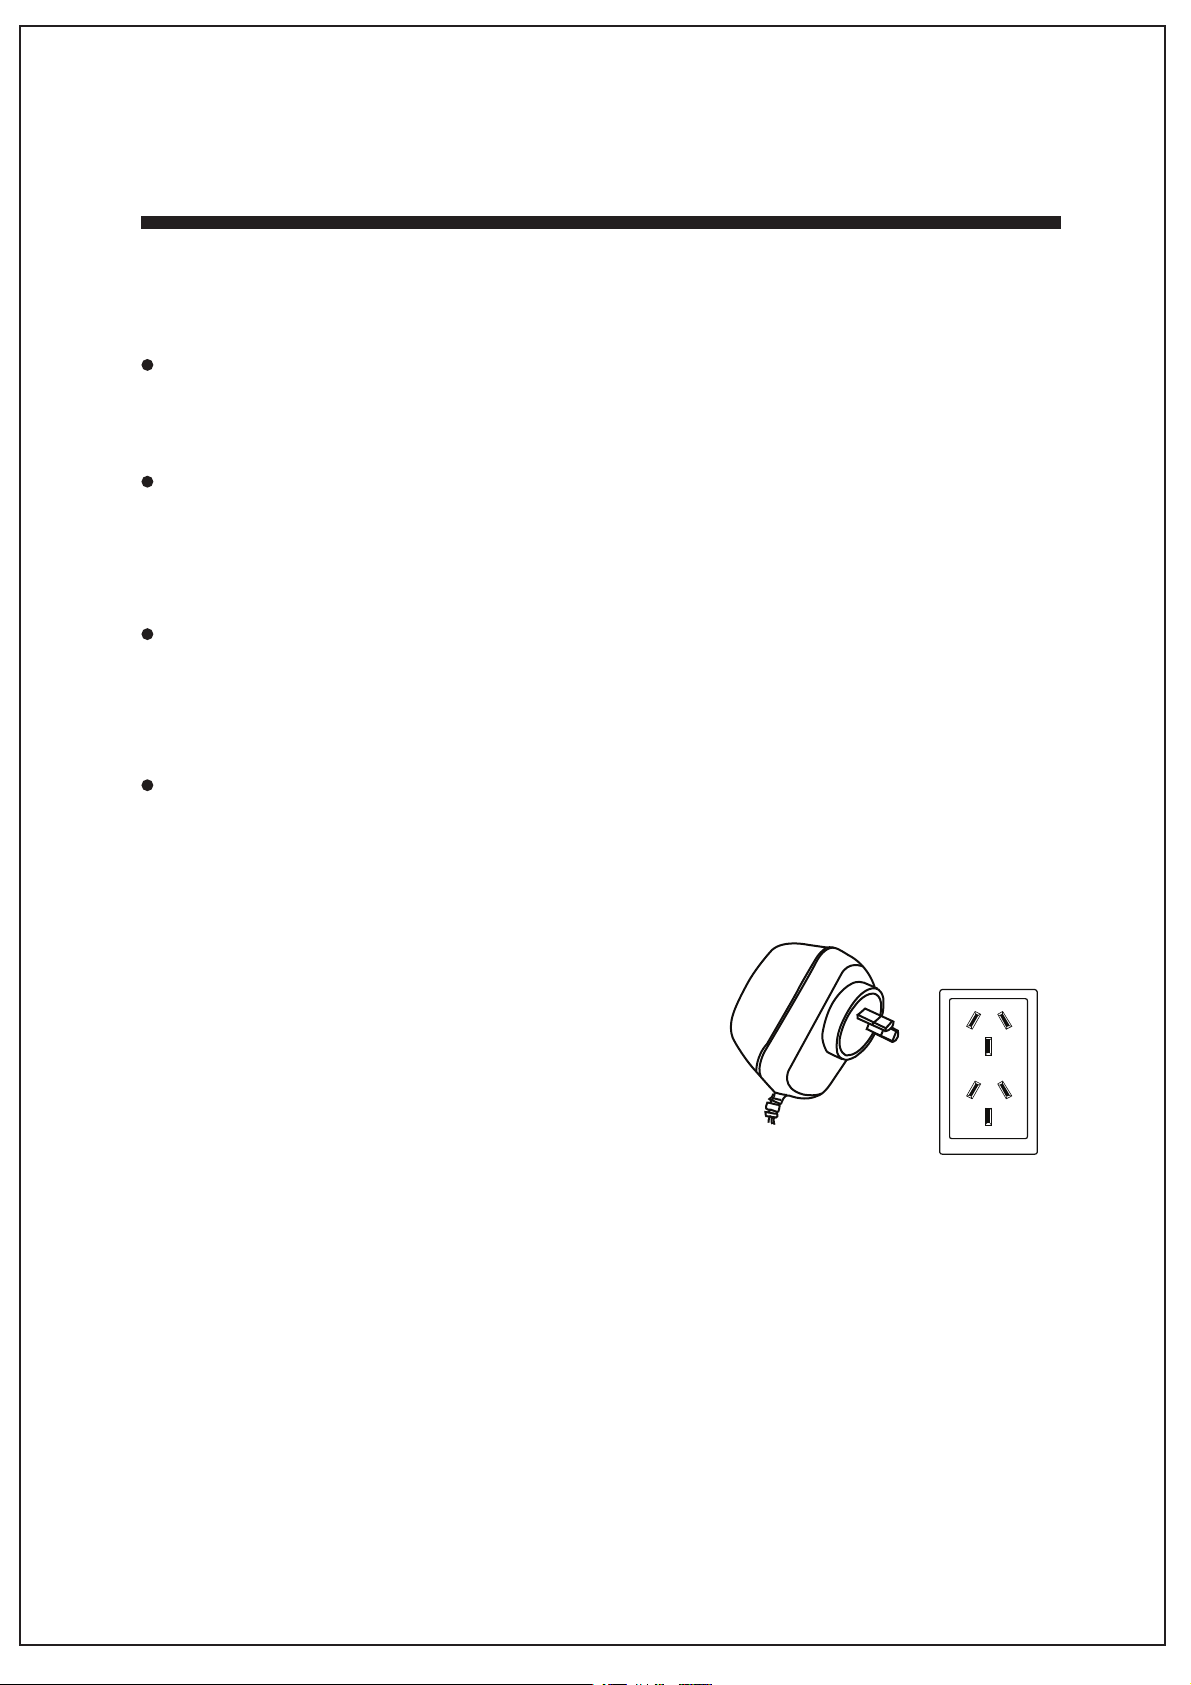
POWER SOURCE
This system is designed to operate on 240V AC
50Hz house current only. Connecting this
system to any other power source may cause
damage to the system and such damage is not
covered by your warranty.
Note:
The system has an AC plug and will only fit into matching AC outlets.This
is a safety feature to reduce the possibility of electric shock.If the plug will
not fit in your AC outlets,you should have the outlet changed by a qualified,
licensed electrician.Do not use an adapter to make the plug fit into your
outlet.This defeats the safety feature and could expose you to electric shock.
06
Page 7
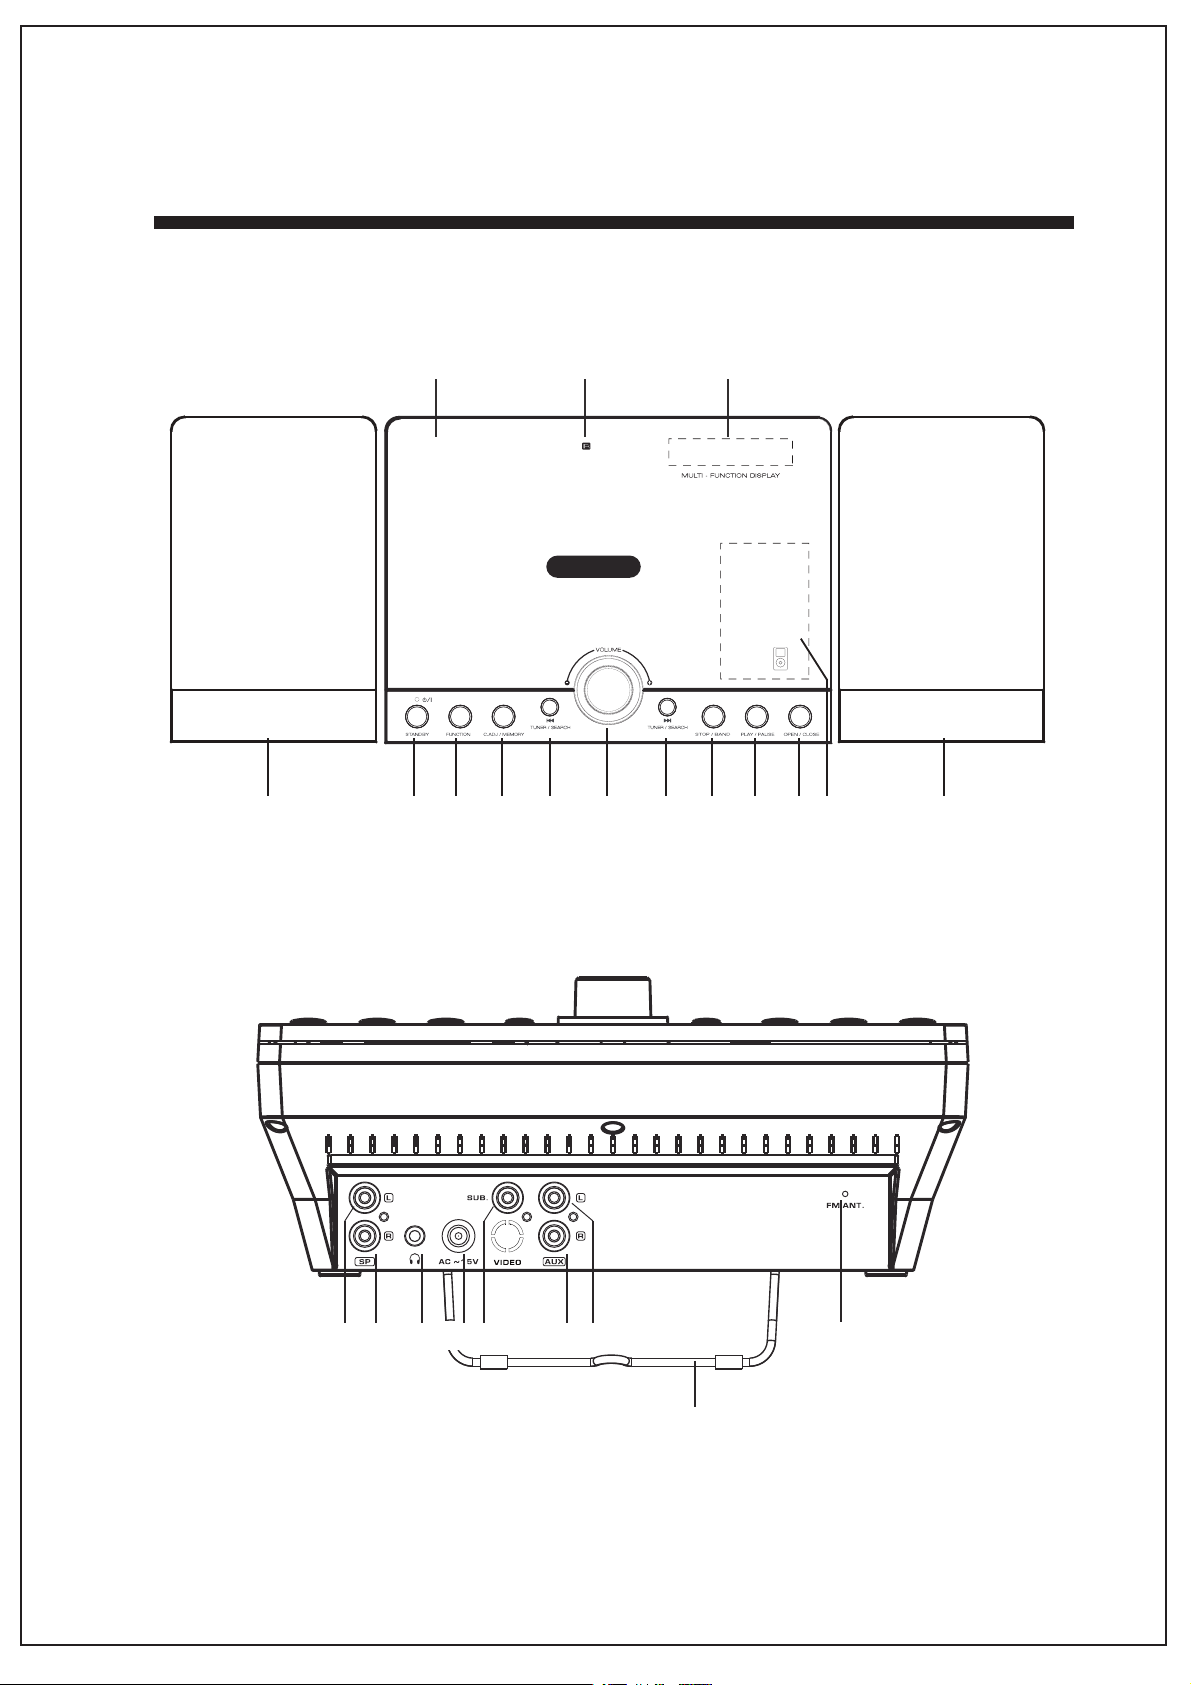
CM-200
FRONT PANEL
12
111 2 3 4 6 7 8 9 10 11
13
5
14
TOP PANEL
18
22212019171615
23
07
Page 8

Location Of Controls And Indicators
1) STANDBY Button
2) FUNCTION Button
3) C.ADJ / MEMORY Button
4) SKIP / TUNE Button
5) VOLUME CONTROL
6) SKIP / TUNE Button
7) STOP/BAND Button
8) PLAY/PAUSE Button
9) OPEN / CLOSE Button
10) iPod Compartment
11) SPEAKER UNIT
12) CD Door
13) IR Sensor
14) LCD Display
15) SPEAKER Output L
16) SPEAKER Output R
17) Earphone Jack
18) DC Input 15V
19) SUBWOOFER Output
20) AUX Input R
21) AUX Input L
22) FM ANTENNA
23) Holding stand
08
Page 9

Set Up Method Of Holding Stand
When you are placing the unit on the desk,extend the holding stand which
located at the back cabinet of the unit in order to hold the unit firmly.
When the unit is mounting on the wall,return the holding stand back to its
original position.
09
Page 10

Remote Control
1) STOP/BAND Button
2) STANDBY Button
3) OPEN / CLOSE Button
4) FILE +10 /iPod UP Button
5) PLAY/PAUSE Button
6) MENU / INFO Button
7) SKIP / TUNE Button
8) SKIP / TUNE Button
9) FILE-10 /iPod DOWN Button
10) FUNCTION Button
11) ENTER / FOLDER + Button
12) CLK-ADJ. / MEMORY Button
13) M-DOWN / REPEAT Button
14) M-UP / RANDOM Button
15) PRESET EQ Button
1
2
4
5
7
9
10
12
15
18
19
3
6
8
11
13
14
16
17
20
16) TIMER Button
17) SLEEP Button
18) VOLUME - Button
19) MUTE Button
20) VOLUME+Button
10
Page 11

Remote Control Battery
The remote control requires one“ button-type ”3-volt lithium battery,
included. To extend the life of the original battery,we have inserted a small
clear plastic spacer tab between the lithium battery and the battery terminal.
You must remove this battery spacer tab before you can use the remote
control . To remove the tab,pull it in the direction of the arrow in the
illustration as shown.
CR2025
3V
+
Remove
before use
CR2025
3V
+
Remove
before use
When the operation of the remote control becomes intermittent or
unsatisfactory,replace the original battery with a new 3-volt lithium
battery.
1. Slide out the battery holder from the remote control case.
2. Place one 3V CR2025 battery in the battery holder,observing the
positive (+) direction. If the battery is placed incorrectly,the remote control
will not work.
CAUTION:
Danger of explosion if the battery is replaced incorrectly.Replace only with
the same or equivalent type.
3. Insert the battery holder into the battery slot.
Notes:
Use a well-known brand of cell battery for longest life and best performance.
When the remote operation becomes intermittent,replace the battery.
11
Page 12

Connecting To Power
Before switching on make sure that the voltage of your electricity supply is
the same as that indicated on the rating plate.
For your own safety read the following instructions carefully before
attempting to connect this unit to the mains.
MAINS (AC) OPERATION
This unit is designed to operate on AC 240V 50Hz current only.Connecting it
to other power sources may damage the unit.
CAUTION
To prevent electric shock,disconnect from the mains before removing cover.
No user serviceable parts inside.Refer servicing to qualified service personnel.
Power Supply
Remove the unit carefully from the box,retaining the packaging for future use.
AC POWER OPERATION
Connect the plug to a mains power inlet 240V AC~50Hz,the unit will be in
STANDBY mode.
12
Page 13

Listen To AM / FM Radio
OPERATION
-
Press the STANDBY Button on the main unit or remote control to power
on the unit.
- Select FUNCTION Button on the unit or on the remote control to choose
the Tuner mode.
- Select the desired frequency band by pressing the STOP/BAND Button.
- Tune to the desired radio station by pressing the SKIP/TUNE & SKIP
/TUNE Buttons.
- To turn off the unit,press the STANDBY Button.
MANUAL/AUTOMATIC TUNING
-
To tune a station,press and release the SKIP/TUNE & SKIP/TUNE
Buttons.
- To activate the automatic tuning,press and hold the SKIP/TUNE &
SKIP/TUNE .
- Buttons for more than 2 seconds.The unit will automatically search for
the first available broadcast of sufficient strength it can receive, and
stop there.
MEMORIZING PRESET STATIONS (Remote Control Only)
You can store up to 40 radio stations into the memory:20 for FM and 20 for
AM. To memorize preset stations:
- Press the STANDBY button on the main unit or remote control.
- Press FUNCTION button on the unit or on the remote control to
choose the Tuner mode.
- Select the desired frequency band by pressing the STOP/BAND Button.
The desired band appears on the display.
- Tune to the desired station by pressing the SKIP/TUNE & SKIP/TUNE
buttons on the main unit or remote control.
13
Page 14

- Press the MEMORY button on the remote control,“ MEMORY ”will flash
in the display and a preset number “ 1 ” will also appear on the display.
- Press the M-UP & M-DOWN buttons on the remote control to select the
desired preset station number.
- Press the MEMORY button again to memorize the station into the chosen
preset number.
- Repeat the above mentioned steps until all desired presets are
programmed.
LISTENING PRESET STATION
- Press the STANDBY button on the main unit remote control.
- Press FUNCTION button on the unit or on the remote control to choose
the Tuner mode.
- Select the desired frequency band by pressing the STOP/BAND button.
The desired band appears on the display.
ANTENNA
- For FM reception there is a built-in FM antenna wire at the rear side of
the unit. Move the wire around to obtain the best reception.
- The AM ferrite bar antenna is inside the main unit.If AM reception is
unsatisfactory,you may have to turn the main unit slightly until you find
the position that provides the best reception.
14
Page 15

FM & FM-STEREO RECEPTION
- When in FM mode and the station is preset to broadcasting in Stereo,
“ STEREO ”appears on the LCD display.
- When FM stations are weak and are disturbed,listening can be improved
by selecting the FM Mono with the ST./MO Button on the remote control.
Reception will then be in MONO.
LISTEN TO iPOD
INSERTION AND REMOVAL OF iPod
- Press the STANDBY Button on the main unit or Remote Control.
- Press the FUNCTION Button on the main unit or Remote Control to select
iPod mode.
- Press OPEN/CLOSE Button on the main unit or Remote Control to open
the CD door.
- Insert your iPod into the ipod universal well(30pins)with supplied
different type of cradles, with the iPod socket section downward.
- When finished,press OPEN/CLOSE Button on the main unit or Remote
Control to close the CD door.
Note:
Always ensure care is taken when inserting or removing your iPod from the
connector.
PLAYBACK & CHARGING
Select IPOD with FUNCTION Button on the unit or on the remote control
-
to choose iPod mode.
- Insert your iPod unit, press PLAY/PAUSE button to activate playback.
- Use the PLAY/PAUSE Button whenever you want to suspend playback.
- When the iPod is docked in the unit,the battery can be charged in ALL
FUNCTION mode except during AUX and Radio playback.
To Use iPod Menu Function Key
- Select iPod with FUNCTION Button on the unit or on the remote control to
choose iPod mode.
- Insert your iPod unit.
- Press MENU Button once on the remote control so as control the iPod
MENU of your iPod unit;
- Press “ ”,“ ”,“ ”,and“ ”on the remote control to control the iPod
MENU of your iPod unit;
- Press “ ENTER ” Button on the remote control to confirm your selection.
15
Page 16

Compact Disc / MP3 Operation
LOADING AND UNLOADING COMPACT DISCS
- Press the STANDBY button to turn on the unit.
- Select CD with the Function Button on the unit or on the remote control
to choose the CD/MP3 mode.
- Open the disc compartment by pressing the OPEN/CLOSE button on the
main unit or remote control.
- When the disc compartment has opened,remove a disc from its case and
place it carefully in the compartment with the label side facing up.Locate
smaller,3 ”discs,in the centre depression of the compartment.
- Press the OPEN/CLOSE Button on the main unit or remote control to
close the disc compartment.When the compartment is fully closed,the
disc will start turning automatically. The total number of tracks of the CD
will appear on the LCD display.
CAUTION
- Do not put anything except a compact disc into the compartment.
Foreign objects can damage the mechanism.
- Keep the disc compartment closed when not in use to prevent dirt and
dust from entering the mechanism.
- Never place more than one disc into the disc compartment at any time.
- If the disc is correctly loaded,the following information will be displayed:
Total number of tracks on the disc total playing time.
Notes:
After the disc compartment is fully closed,the disc information may not
appear on the display, This means that the disc is improperly loaded (most
likely it is upside down). To check,open the disc compartment again and
reload the disc.
16
Page 17

LISTENING TO COMPACT DISC AND MP3 DISC (CD)
- Select CD with the Function Button on the unit or on the remote control
to choose the CD/MP3 mode.
A) In the CD mode
This unit can read CD, CD-R, CD-RW.
B) In the MP3 mode
This unit can also read as below:
1. It can be reading as"8cm"and"Multi Section"of MP3 DISC.
2. It can be"Playback Transfer Rate in 56 - 256 kbps".
3. It can be"999 songs & 99 Folders instead of 999 Files & 99 Folders".
4. It can be"Support Version 1.1" in "ID3"mode.
LISTENING TO COMPACT DISC (CD) PLAYING THE CD
1. Select CD with the Function Button on the unit or on the remote control
to choose the CD/MP3 mode.
2. Press the PLAY/PAUSE button on the unit or remote control once to start
playing the CD from the first track,the track no & counter will appear on
the display.
3. Press the PLAY/PAUSE button once again to pause playing the CD,and
the counter no will flash on the display.
4. To resume playback,press the PLAY/PAUSE button again.
5. To stop playback,press the STOP button.
SELECTING A DIFFERENT TRACK DURING CD PLAYBACK
- Press the SKIP / TUNE & SKIP/ TUNE buttons on the unit or on
remote control, the required track number appears on the display.
- Press the PLAY/PAUSE button on the unit or remote control to start
playback with the track that is currently selected.
LISTENING TO MP3 DISC (CD)PLAYING THE MP3
- Select CD with the Function Button on the unit or on the remote control
to choose the CD/MP3 mode,the total file no.& track no of the disc will
appear on the display.
17
Page 18

- Press the PLAY/PAUSE button on the unit or remote control once to start
playing the MP3 from the first track,the track no & counter will appear on
the display.
- Press the PLAY/PAUSE button again to pause playing the MP3,and the
counter no will flash on the display.
- To resume playback,press the PLAY/PAUSE button once more again.
- To stop playback,press the STOP button.
SKIP/SEARCH MODE FOR CD/MP3 DISC(For Remote Control Only)
Press “ /FILE + 10 ” Button, the track no. will increase + 10 track.
-
- Press “ /FILE - 10 ” Button, the track no. will crease - 10 track.
- Press “ ENTER/FOLDER + " Button, the Album no. will change.
- Press " SKIP/TUNE & SKIP/TUNE button, the Track no. will change.
- When the desired track is being selected, press the " PLAY/PAUSE " button
to start playback.
ID3 TAG(TRACK/ALBUM/TITLE)FUNCTION FOR MP3 DISC
Press the " MENU/INFO ” Button during play mode, the song title will be
-
displayed. Press the " MENU/INFO " Button again to disable the function.
REMARK:
- In case of no name on the disc, " NO INFO " will be displayed.
- The LCD Display supports only ENGLISH Language only.
MP3 TRACK FORMAT REQUIREMENT:
BIT rate: 64 KBPS~320 KBPS, Sampling Rate: 32KHZ,44.1KHZ and 48 KHZ
-
decodable.
REPEAT PLAY IN CD(For Remote Control Only)
- When playing the CD, if you desire to repeat the same track only, press
the REPEAT button on the remote control once and the “REPEAT.” display
will light up.
- To repeat all disc,press the REPEAT button twice and the " REPEAT ALL "
display will light up.
- To cancel repeat play, press the STOP button or press the REPEAT button
until the repeat indicator disappeared.
Note:
If in " REPEAT ALL " mode, the normal & program playing will also effect in
this function.
18
Page 19

REPEAT PLAY IN MP3 DISC (For Remote Control Only)
- When playing the MP3, if you desire to repeat the same track only, press
the REPEAT button on the remote control once and the " REPEAT " display
will light up.
- To repeat all disc, press the REPEAT button twice and the " REPEAT ALL "
display will light up.
- To repeat Album,press the REPEAT button thrice and the " REPEAT ALBUM "
display will light up.
- To cancel repeat play, press the STOP button or press the REPEAT button
until the repeat indicator disappeared.
Note:
If in " REPEAT ALL " mode,the normal & program playing will also effect
in this function.
RANDOM PLAY FOR CD/MP3 (For Remote Control Only)
In PLAY mode press the RANDOM button on the remote control once,
-
the " RANDOM " indicator will light up, and the tracks will be played
randomly.
- To cancel random play, press the STOP button or press the RANDOM
button until the random indicator disappears.
PROGRAMMED DISC PLAY
It is not possible to enter programs during disc play. Press the Stop button first,
then follow the instructions below.
Press the C-ADJ/MEMORY button on the main unit or MEMORY button on the
remote control.The following information will be displayed on the Display.
19
Page 20

Press the SKIP/TUNE & SKIP/TUNE buttons to select the track to be
stored in location “ 01 ” (i.e. track 03).
Press the C-ADJ/MEMORY button on the main unit or MEMORY button
on the remote control, the first program selection is now stored in the
program memory.
Select the next track to be programmed using the SKIP/TUNE & SKIP/
TUNE buttons (i.e. track 05).
Press the C-ADJ/MEMORY button on the main unit or MEMORY button on
the remote control to store this track.
Continue entering tracks in this way until all the desired tracks are stored
(up to a limit of 20).When the C-ADJ/MEMORY button on the main unit or
MEMORY button on the remote control is pressed to store the 20th track,
the display will show “ FULL ” .
If you wish to add a track to the program, press the C-ADJ/MEMORY button
on the main unit or MEMORY button on the remote control until the last
programmed track is displayed. Press the C-ADJ/MEMORY button on the
main unit or MEMORY button on the remote control again, Press the SKIP/
TUNE & SKIP/TUNE buttons until the desired track is displayed, then
press the C-ADJ/MEMORY button on the main unit or MEMORY button on
the remote control The added track will be entered as the last track in the
program memory.
20
Page 21

Note:
If the PLAY/PAUSE button is pressed before the C-ADJ/MEMORY
button is pressed to store a track, that track will not be programmed, and
the disc will start playing from the first selected track. Any track can be
programmed to play more than once.
Listening to Programmed Tracks
Press the PLAY/PAUSE button. Disc play will start at the beginning of the
first programmed track.
To Clear the Program Memory
If the disc is playing, press the STOP button to stop the disc. Select IPOD,
AUX or TUNER to clear the Program.
Clock / Timer Function
SETTING THE COLCK AND DATE
This unit has its own digital clock function in the STANDBY mode.
- Press the C-ADJ/MEMORY button to adjust clock.
The unit will then display “ 24 HOUR ” or “ 12 HOUR ” and flash. Adjust
-
the HOUR mode by pressing SKIP/TUNE & SKIP/TUNE button.
Press the C-ADJ/MEMORY button to confirm.
- The unit will then display the time and the hours will start flashing.
Adjust the hours by pressing the SKIP up or DOWN buttons.
- Press the C-ADJ/MEMORY button again, the minutes will start flashing.
- Adjust the minutes by pressing the SKIP/TUNE & SKIP/TUNE
buttons.
- Press the C-ADJ/MEMORY button again, the TIMER ON will display. Press
the C-ADJ/MEMORY button again, the time and the hours will start
flashing.
21
Page 22

- Press the C-ADJ/MEMORY button again, the minutes will start flashing.
- Adjust the minutes by pressing the SKIP/TUNE & SKIP/TUNE
buttons.
- Press the C-ADJ/MEMORY button again, the TIMER OFF will display.
Repeat the TIMER ON process again.
- Press C-ADJ/MEMORY button again, the “ TIMER OFF ” will flashing.
- Select “ TIMER ON ” or “ TIMER OFF ” by pressing SKIP/TUNE & SKIP/
TUNE buttons.
- Press the C-ADJ/MEMORY button to stored the time and all TIMER
ON/OFF time.
Note: Clock setting can be done in STANDBY Mode only.
ATTENTION: If the power supply is disconnected, the clock will have to be
adjusted again.
SWITCHING OFF THE TIMER FUNCTION COMPLETELY
-
Press the C-ADJ/MEMORY button until the display show “ TIMER ON ”
is flashing.
- Select “ TIMER OFF ” by pressing SKIP/TUNE & SKIP/TUNE buttons.
- Press the C-ADJ/MEMORY button to switch off the TIMER completely.
SLEEP TIMER (For Remote Control Only)
The Sleep Timer is a count-down timer for switching the system to a stand
-by mode after a specified time. It enables you to listen to the radio, a CD
or iPod prior to falling asleep. The Sleep Timer can be set from 90 to 10
minutes in every 10 minutes step.
- Switch on the system by pressing the STANDBY button on the main unit
or on the remote control.
- Select the sound source by pressing the FUNCTION button on the unit or
on the remote control.
- Press the SLEEP button on the remote control to set the sleep time.
- The word SLEEP and the number 90 appear on the display.
- The system will now play for 90 minutes.
1800706669
22
Page 23

- To decrease the sleep time in steps of 10 minutes,press SLEEP button
until number 10 appears.
- After a few seconds,the previous display is shown again (e.g. with Tuner
or CD information).
- To switch off the system before the SLEEP time has elapsed, press the
STANDBY button on the main unit or on the remote control.
Special Functions (For Remote Control Only)
MUTE
- Press the Mute button on the remote control to switch off the sound.
The volume indicator will flash.
- Press Mute again to restore the sound at the previous level.
Preset Equalizer (For Remote Control Only)
- The Quality of the sound can be adjusted to suit the type of music
playing (CLASSIC, ROCK,POP, JAZZ, X-BASS or FLAT).
- Simply Press the Preset EQ button on the Remote Control which matches
the type of music playing.
AUXILIARY IN
Connect the Audio Output jacks of your auxiliary sound source (TV, VCR,
DVD Player, Cassette Deck, Mini Disc player, etc.) to the AUX IN jack on the
back panel of the unit.
23
Page 24

The auxiliary function will only activate when the aux in jack is fitted with
connection cable.
Note: The connection cables are not included.
- Press the STANDBY button on the main unit or remote control to power
on the unit.
- Press the FUNCTION button on the main unit or remote control to select
AUX function.
- Turn your auxiliary source ‘ On ’ and operate it as usual. The sound from
the auxiliary source will - be heard through the speakers of this system.
- Adjust the VOLUME level controls of this system as desired.
SUBWOOFER OUT (Sub-woofer not supplied with this product)
Connect the Audio Output jacks of your active subwoofer to the
SUBWOOFER OUT jack on the back panel of the unit. Then the unit will
become a 2.1 system and the bass would be able to sound from the external
active subwoofer.
Note:The connection cables and active subwoofer are not included.
RESETTING
If the system does not have any respond, you may have experienced a severe
electric shock (ESD) or a power surge that triggered the internal computer to
shut down automatically. If this occurs, simply disconnect the main power and
connect the main power again after one minute.
Note:
Although disconnect the power will unlock the internal computer after a
power surge, it will also erase all of the settings. After turning ‘ On ’ the unit,
you will need to reset the settings again.
24
Page 25

Important
Since movement of the CD mechanism and the sensitive circuitry may cause
interference to a radio tuner nearby switch this unit off while operating other
radio devices. This product utilizes a laser.
Danger - Invisible laser radiation when opened and interlock failed or
defeated. Avoid direct exposure to the beam.
Caution - Use of controls, adjustments, or procedures not listed in this
manual may result hazardous radiation exposure.
CARE AND MAINTENANCE
- To prevent any risk of the electric shock, up plug the product the
product form the main socket before cleaning.
- Never allow any water or other liquids to get inside the unit while
cleaning.
- If the cabinet becomes duty, you can wipe it with a soft dry dust cloth,
Do not use any wax, polish sprays, or abrasive cleaners on the cabinet.
Concerning Compact --- Discs Only compact
discs identified with this mark can be used with this player.
25
Page 26

Specification
Power Supply
AC: 240V ~ 50Hz
Radio Frequency Coverage
FM: 87.5 – 108 MHz
AM: 522 – 1620 kHz
Speaker System
Impedance: 4 Ohm
Maximum Input: 8 W
iPod Accessories
Supports: iPod mini,nano,photo and video(Except shuffle)
Design and specifications are subject to change without notice.
26
 Loading...