

Page 1

Page 2

USER MANUAL
32G90G \ 42G90
Page 3

Should you encounter any problems, please contact the help line before
you return this product back to the place of purchase.
Contact our Toll Free Warranty Support Help Line
1300 366 144
Email: warrantyhelp@awa.com.au
Visit our web site for FAQ's or request for service
www.awa.com.au
Page 4
Page 5

TO THE CUSTOMER:
Thank you for purchasing this LED TV. When opening the box for the first time, please
check whether all the accessories are present. Before connecting parts and power, please
carefully read the user manual and always keep these instructions handy and close by your
LED TV.
Contents
Important safety instructions...............................................................................2
Accessories...................................................................................................3
Remote control ..............................................................................................4
Remote control functions................................................................................5
LED TV panel overview...................................................................................7
Connecting to external devices.......................................................................9
The OSD menus.............................................................................................10
Menu Operation (when 'TV' is the selected source).........................................11
Menu Operation (when 'VGA' is the selected source)......................................19
Source Selection.........................................................................................19
TELETEXT function buttons............................................................................6
Trouble shooting.........................................................................................22
Maintenance...............................................................................................23
USB Multimedia operation............................................................................20
Specifications.............................................................................................24
Page 6
2
CAUTION:
TO REDUCE THE RISK OF ELECTRIC SHOCK, DO NOT
REMOVE COVER(OR BACK). REFER SERVICING TO
QUALIFIED SERVICE PERSONNEL
WARNING
RISK OF ELECTRIC SHOCK
DO NOT OPEN
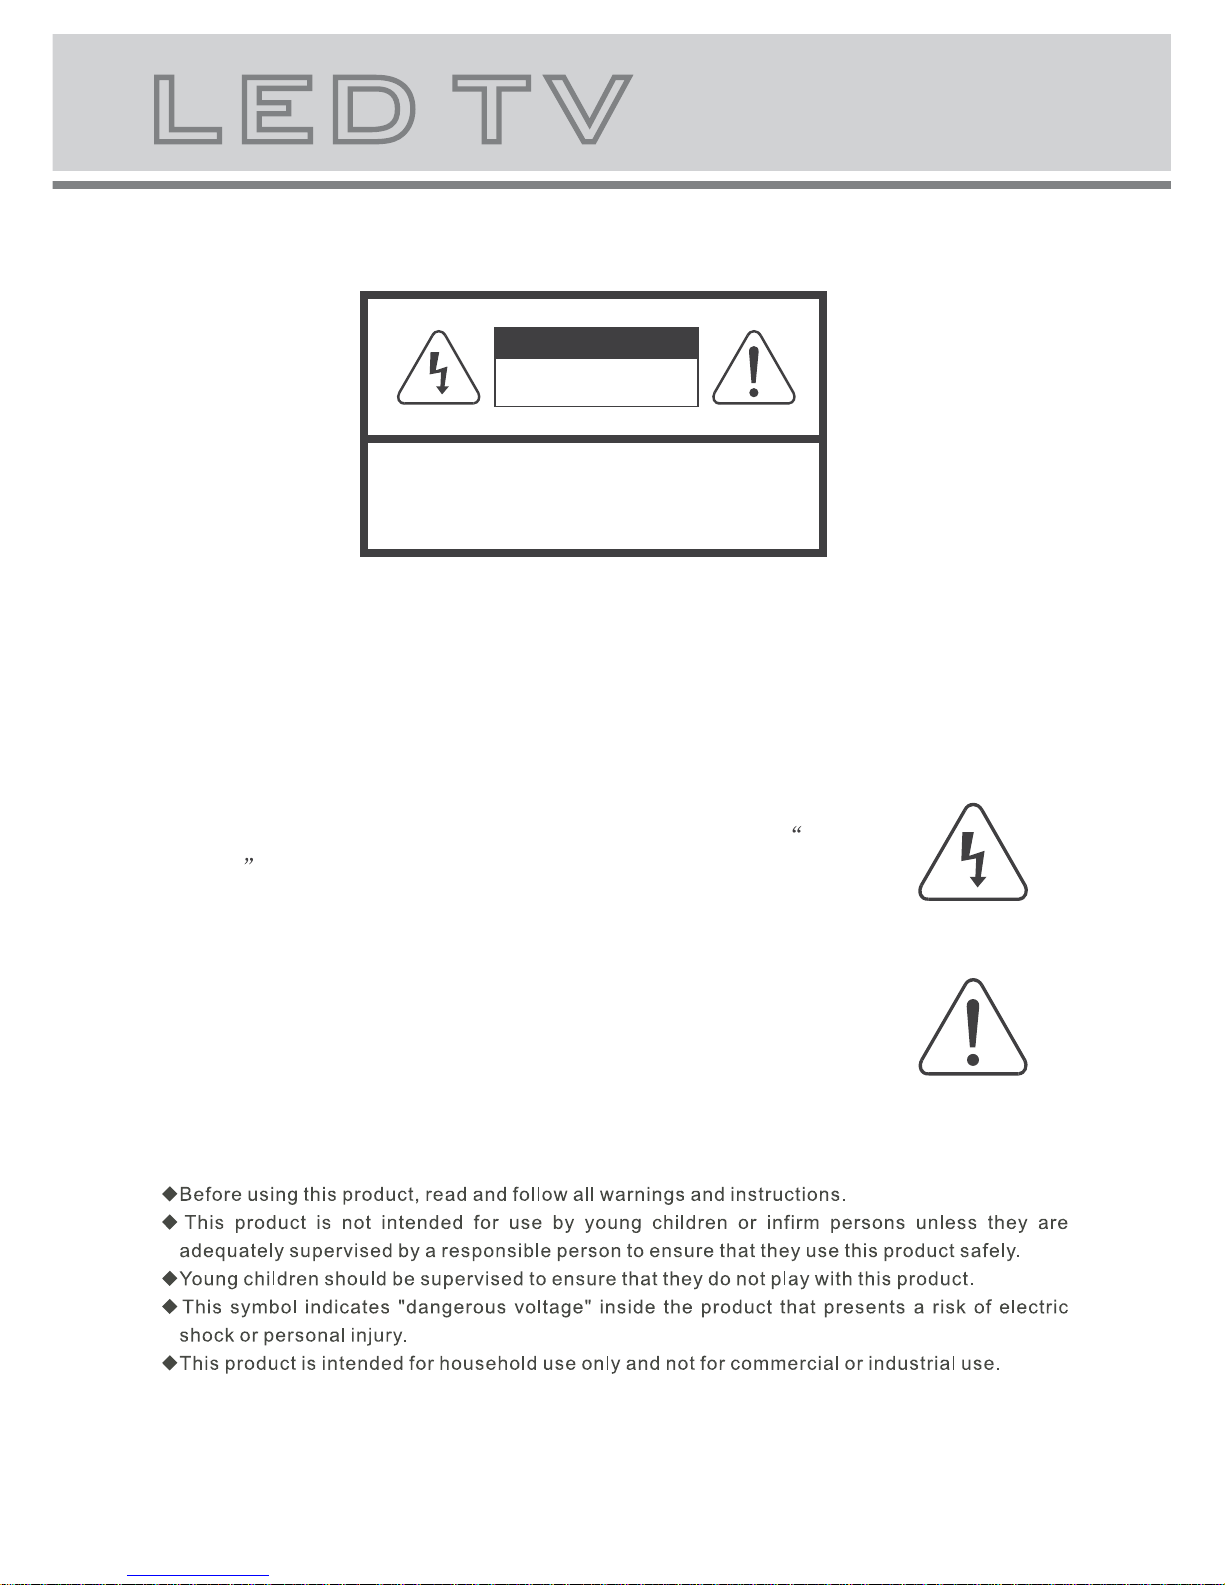
The lightning flash with arrowhead symbol, within an equilateral triangle,
is intended to alert the user to the presence of insinuated dangerous
voltage within the product's enclosure that may be of sufficient
magnitude to constitute a risk of electric shock to persons.
The exclamation point within an equilateral triangles is intended to alert
the user to the presence of important operating and maintenance
(servicing) instructions in the literature accompanying the
appliance.
WARNING:
TO REDUCE THE RISK OF FIRE OR ELECTRIC SHOCK, DO NOT EXPOSE
THIS APPARATUS TO RAIN OR MOISTURE.
Page 7
3
Always power this product from an outlet with the same rating (voltage and frequency) as
Indicated on the rating label in the back of the product.
If this product has been damaged (including cord or plug) take it to an accredited service
technician for inspection, and if necessary, repair.
Turn off and disconnect the power cable before cleaning or storing this product.
Ensure this product does not get wet or splashed.
Only use the A/C power adapter supplied with your product, or a replacement
recommended by a qualified technician.
Do not place naked flames, such as lit candles, on the unit.
Do not place objects filled with liquids, such as vases, on the unit.
Do not install this product on top of other electrical appliances or on uneven surfaces.
Do not use or store this product in a place where it is subject to direct sun, heat,
excessive dust or vibration.
Do not use this product with wet hands.
Do not clean this product with water or other liquids.
Do not block or cover the ventilation slots at the back of the cabinet.
Do not push foreign objects into cabinet slots or holes.
The screen surface is easily scratched. Do not touch the screen with hands or any hard
object.
Do not pull the power cord when disconnecting power. Turn off the switch on the socket
and pull the plug not the cord.
Do not attempt to open this product yourself. There are no user serviceable parts inside.
Note:
This handling description is printed prior to product development.
When a part of the product specification must be changed to improve operability or other functions,
priority is given to the product specification itself. In such instances, the instruction manual may not
entirely match all the functions of the actual product.
Therefore, the actual product and packaging, as well as the name and illustration, may differ from
the manual.
The screen shown as an example in this manual may be different from the actual screen display.
The display panel is a very sensitive and high technology product, giving you finely
detailed pictures. Occasionally, a few non-active pixels may appear on the screen as a fixed point of
black, blue, green or red. Please note that this does not affect the performance of your product.
These pixels shall not be regarded as a failure.
Page 8
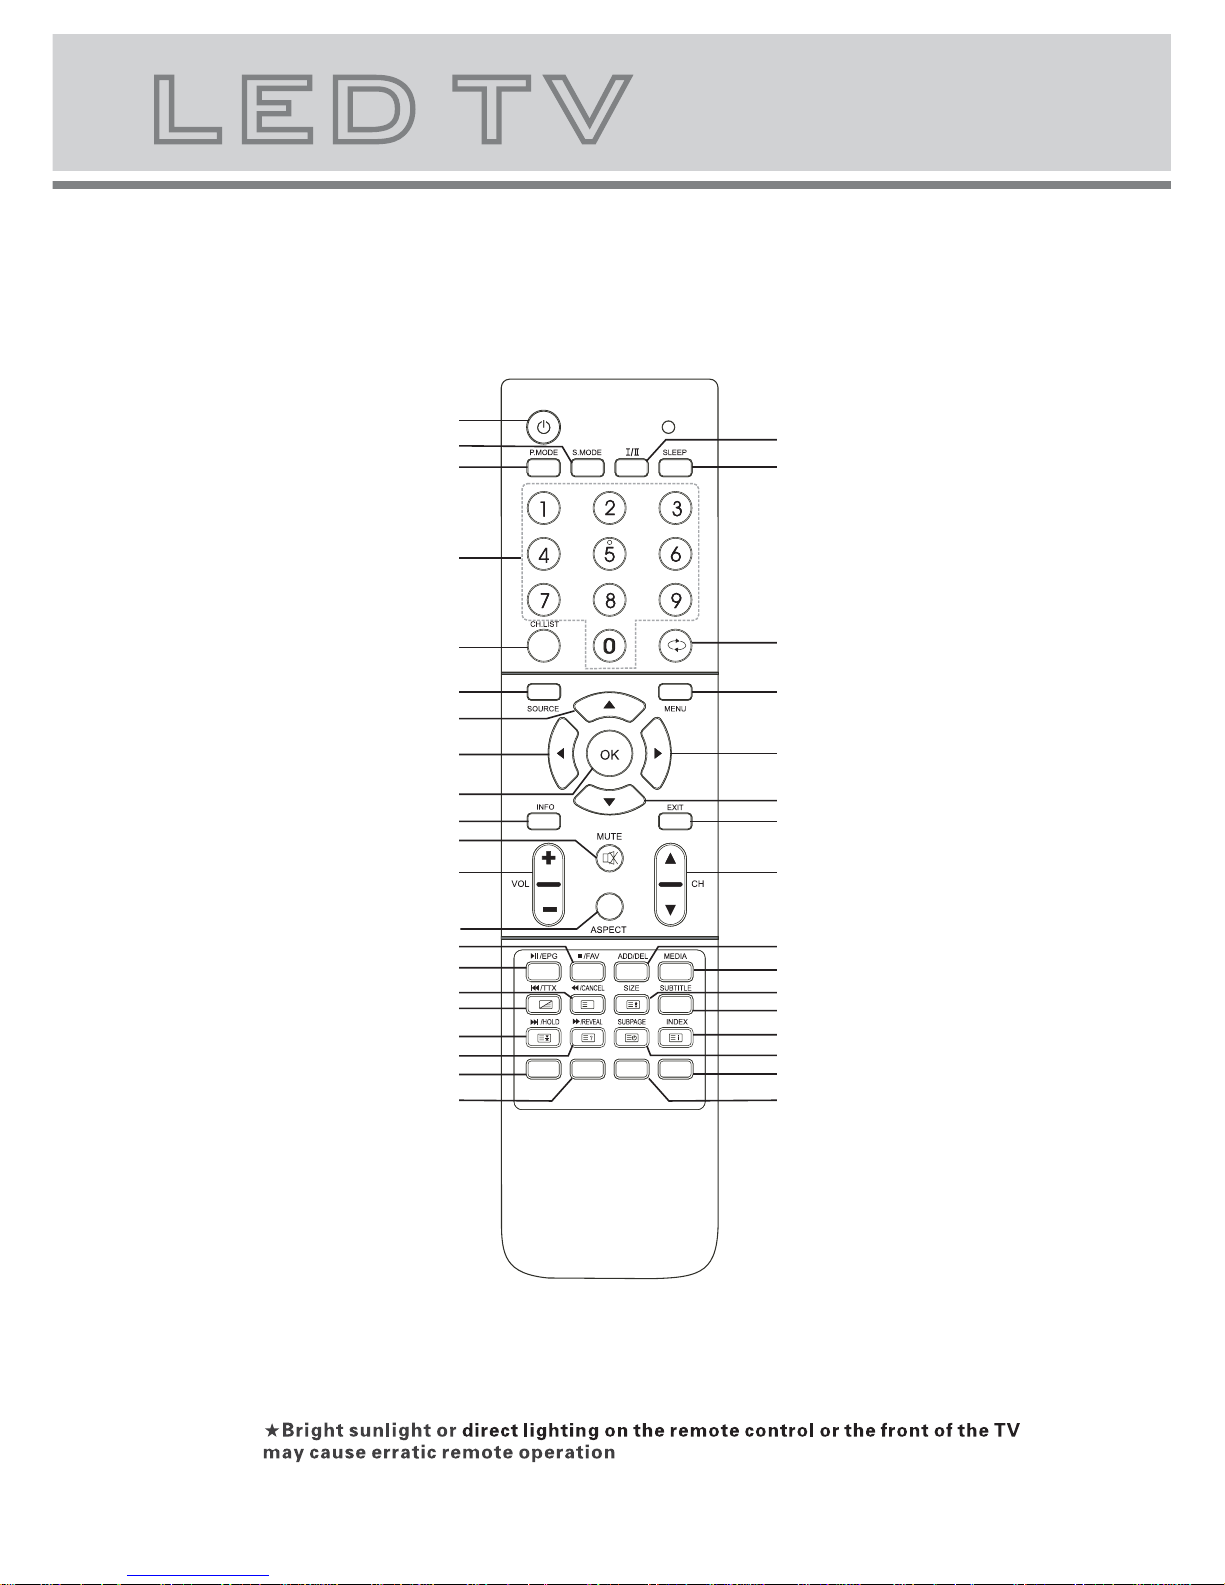
3.Remote Control (see next page for button descriptions)
4
X
Confirm button
Numeric button
Channel list button
Aspect button
Power button
Picture mode button
Sound mode button
NICAM function button
Sleep button
Return channel button
Signal source selection button
Main menu
Up
LEFT
Right
Down
Volume adjusting button
Channel selection button
Mute button
Exit the OSD menu button
RED button
GREEN button
YELLOW button
BLUE button
INDEX button
FORWARD/REVEAL button
HOLD/NEXT button
SUBPAGE button
SUBTITLE button
PREV/TTX/MIX button
Size button
REVERSE/CANCEL button
MEDIA button
STOP/
Favourite button
ADD/DEL button
EPG/Play/Pause button
Information button
Page 9
5
4.Remote control functions
: Power on/standby.
S.MODE: Select a sound mode (Off, Concert, Living Room, Hall, Bathroom, Cave, Arena, Church).
SLEEP: The TV will automatically switch to standby after a preset time
I/II: Select audio language (A2 or NICAM).
P.MODE: Select picture mode (Standard, User, Cinema, Sport, Vivid, Hi-Bright).
ASPECT: Select the picture display ratio: 16:9 / 4:3 / AUTO (Display in 4:3 format is not possible
if the resolution is above 720P.).
INFO: Display information about the current channel.Press again to remove it.
0,1-9: Select TV channel.
CH.LIST: Display the channel list.
: Go back to the last channel.
SOURCE: Select the source: TV, AV1,AV2, S-VIDEO, YPBPR1, YPBPR2, VGA,
HDMI1, HDMI2,HDMI3
MENU: TV system setup menu.
OK: Confirm button for OSD menu / Enter Initial Setup menu.
EXIT: Exit the menu or cancel the current operation.
MUTE: Turn the speaker output on/off.
/ (UP/Down): Move cursor in menu.
/ (Left/Right): Move cursor in menu, adjust .
VOL +/- : Volume up/down.
CH
/: Channel up/down.
EPG: Display the electronic program guide (detailed information about the channel and programs).
FAV: Display your list of favorite channels.
ADD/DEL: Add or delete favorite channel
MEDIA: Enable the media function, enter or exit media function interface.
Play/Pause.
Stop playing.
Skip to previous track.
Skip to next track.
Fast forward
Fast reverse
SUBTITLE: Press to enable/disable display of subtitles from TV broadcasts (broadcast dependent).
Page 10

6
5.TELETEXT function buttons
Press this button once, turn on the teletext function,
Press twice, enter picture and text mix mode.
Press once more, turn off the teletext function.
After searching for some page, press this key once to
go back to the text mode.
While the searching result will be displayed at the top
of the TV picture, press again to go back to the text
mode.
Press this key to change the size of the character of
the current text page as following:
Normal Display the upper half Display the bottom
half Normal Display.
Stop refreshing the current page,
press again to cancel HOLD.
Reveal/Conceal the concealed information of the
current text page.
To enter the subpage.
To show teletext index.
RED GREEN YELLOW BLUE:Fast teletext buttons
[NOTE: At time of printing, teletext services have been cancelled indefinitely by broadcasters in Australia]
Page 11

6.LED TV panel overview
7
TV Control Panel(Touch-Sensitive)
12
3
4
5
1.Volume adjustment and Menu item adjustment.
2.Channel selection and Menu item selection.
3.Main menu display .
4.Signal Source selection button.
5.On/off button.
Operating the TV's Touch-Control Panel
1. First, touch lightly just under any of the labels shown above to activate the
touch panel; the blue indicators will light up.
2. While the blue indicators are still lit, touch the desired indicator; the indicator
will flash in acknowledgement.
NOTE:
- Touch the blue indicators, not the actual label wording.
- You do not need to apply pressure; a light touch is sufficient to activate / use
the controls on the front panel.
Page 12

Connectors (at rear of TV)
8
HDMI3
LRVIDEO2
USB1USB2
1 2 3
4
1. USB Inputs 1 & 2
2. HDMI Input 3
3. AV Input 2
4. Headphone output
5
1
9
2
4
3
6
7
8
1. Antenna input (75 Ohm VHF/UHF).
2. .
3. .
4. S-VIDEO input.
5. .
6. .
7. Coaxial audio .
8. PC audio input.
9. .
Composite Video & Stereo Audio Output
AV Input 1
Component Video & Audio Inputs x 2
VGA (PC) Video Input
output
HDMI Inputs x 2
Page 13

7.Connecting to external devices
9
HDMI
HDMI
ANTENNA
VGA
PC AUDIO
PC
YPBPR
S-VIDEO
L
R
VIDEO
DVD
L
R
HDMI3
LRVIDEO2
USB1USB2
Page 14

10
1. Turn on TV, Please press"OK" to
start the wizard
Menu Setup TV (When using for the first time only)
8.The OSD (on-screen display) Menus
2. Select menu language
3. Select location
4. Connect your antenna to the Antenna Input
(see page 8), then press the OK button to start
channel tuning.
5. Please wait while channel scan detects all
channels available via the connected antenna.
Initial Setup
EXIT
Cancel
Channel Scan
The channel scan may take a while
to complete.
60%
Status:Scanning
Analog Channels:0
Digital Channels:0
Initial Setup
Complete
Congratulations!!
Completed Initial Setup.
Please press [OK] to exit the wizard.
Initial Setup
Please select your language:
Initial Setup
Welcome
Welcome to use the Wizard for
Initial Setup !!
Please press [OK] to start the
wizard.
Language
Back
Back
Select
Next
EXIT
Exit
Initial Setup
Please select your country:
Country
Back
Select
Next
EXIT
Exit
Initial Setup
Back
Select
Next
EXIT
Exit
Channel Scan
First, please connect antenna.
Start channel scan now?
If you skip this step, the channel
scan could be performed in Menu.
Scan
Skip Scan
0%
English
Romania
Russia
Serbia
Slovakia
Slovenia
Tur ke y
Australia
Espanol
Deutch
Deutch
Italiano
Francais
Francais
Page 15

11
1. VIDEO MENU
a. The following
the video menu.
b. The definition of each option:
b-1. Picture Mode:Change the picture mode
in the sequence : Standard User
Cinema Sport Vivid Hi-Bright
b-2. Brightness: Change the value of
brightness with the key / in the range
of 0 to 100.
b-3. Contrast: Change the value of
contrast with the key / in the range of 0
to 100.
b-4. Saturation: Change the value of
saturation with the key / in the range
of 0 to 100.
b-5. Sharpness: Change the value of
sharpness with the key / in the range of
0 to 7.
b-6. DNR: Change the
in the sequence :
Medium Strong Auto
b-7. Color Temperature: Change the
color temperature in the sequence :
User Cool Standard Warm, ,
(G Gain), (B Gain) included in each
is an overview of
Dynamic (picture)
Noise Reduction
Off -->Low (does
not work when using VGA/HDMI/YPbPr sources).
(R Gain)
item.
Menu Operation (when 'TV' is the selected source)
Audio
TV
Setup
Parental
Color Temperature
R Gain
Standard
0
0
0
4
Select
EXIT Exit
G Gain
B Gain
Color Temperature
Video
Video
Video
OK
Enter
Select
EXIT Exit
Audio
TV
Setup
Parental
Picture Mode
Brightness
Contrast
Saturation
Sharpness
DNR
Color Temperature
Video
Standard
Medium
50
50
50
4
[To access, press MENU button on the remote control]
Page 16

12
Audio
TV
Setup
Parental
Video
Video
TV
OK
Enter
Select
EXIT
Exit
Country
Country Region
Audio channel
Channels
Stereo
a. The following
of the TV menu.
b. The definition of each option:
b-1. Country: Change the country in the
sequence : Germany, Denmark, Spain,
Finland, France, United Kingdom, Italy,
Luxembourg, Netherlands, Norway, Sweden,
Australia, Belgium, Switzerland, Russia,etc.
b-2.Country Region:
NSW/ACT,VIC,QLD,SA,WA,TAS,NT.
b-3. Audio channel: Change the audio
channel: Stereo,Dual1,Dual2,Mono
b-4. Channels: Press / key to this
position, Then press key to enter
is an overview
If Country is set to Australia,
choose state:
the 'Channels'
submenu.
3. TV MENU
2. AUDIO MENU
a. The following
of the audio menu.
b. The definition of each option:
b-1. Balance: Change the value of Balance
wit h the key / in the range of -50 to +50.
b-2. Bass: Change the value of Bass with
the key / in th e range of 0 to 100.
b-3. Treble: Change the value of Treble with
the key / in the range o f 0 to 100.
b-4. Sound Surround:.
b-5. Equalizer: Change the Equalizer in the
sequence as: Off Concert Living Room
Hall Bathroom Cave Arena Church.
b-6.Auto volume control: Change the auto
volume control in the sequence as:on off
is an overview
Turn Surround Sound On/Off
TV
Setup
Parental
Balance
Bass
Treble
Sound Surround
Equalizer
Auto Volume Control
Video
50
50
Audio
OK
Enter
Select
EXIT Exit
Video
Video
Audio
0
Off
Off
Australia
NSW/ACT
On
'Channel' submenu (further details below)
Channel-tune (recommended)
Search for new channels
channel-tune.
Skip particular channels
Change channel position
Fine-tuning for
analog channels (not for digital channels)
b-3-1. Channel Scan Auto .
b-3-2. Update Scan .
b-3-3. Manual Scan: manual
b-3-4. Channel Skip .
b-3-5. Channel Sort .
b-3-6. Channel Edit Edit channel information.
b-3-7. Analog Channel Fine Tune
.
Audio
TV
Setup
Parental
Channel Scan
Update Scan
Select
EXIT Exit
G Gain
B Gain
Channels
Video
Video
Channel Skip
Channel Sort
Channel Edit
OK
Scan
Manual Scan
Analog Channel Fine Tune
Page 17

13
b-3-1/2. Channel Scan / Update Scan
These two items are for searching for channels.
Channel Scan searches through all channels.
Update Scan searches for any previously untuned
channels.
26%
Audio
TV
Setup
Parental
Video
Video
Update Scan
Status:Scanning
Analog Channels:0
Digital Channels:0
EXIT Cancel
Status:Scanning
Analog Channels:0
Digital Channels:0
34%
Audio
TV
Setup
Parental
Video
Channel Scan
Audio
TV
Setup
Parental
Analog Manual Scan
Digital Channel Range Scan
Select
EXIT
Exit
Manual scan
Video
Video
OK
Enter
Single RF Scan
b-3-3. Manual Scan
Try this if 'Channel Scan' doesn't pick up all desired
channels. Tune individual channels with
'Single RF Scan', or a range of digital/analog
channels with the other options.
EXIT Cancel
b-3-4. Channel Skip
Channels selected here will not be accessible when
scrolling through channels with the CH /CH buttons
(they will still be accessible directly via the number keys).
Audio
TV
Setup
Parental
Video
Video
Digital
2
Digital
phoenix
3
Digital
Das Erste
4
Digital
WDR Dortmund
5
Digital
WDR Dusseldorf
6
Digital
WDR Essen
900
Analog
901
Analog
902
Analog
BBC1
Analog
1
arte
Select
EXIT Exit
Channel Skip
OK
Set
903
BBC1
Page 18

14
Audio
TV
Setup
Parental
Select
EXIT
Channel Edit
Video
Video
OK
Set
Digital
2
Digital
phoenix
3
Digital
Das Erste
4
Digital
WDR Dortmund
5
Digital
WDR Dusseldorf
6
Digital
WDR Essen
900
Analog
901
Analog
902
Analog
BBC1
903
Analog
BBC1
1
arte
Audio
TV
Setup
Parental
Select
EXIT
Channel Sort
Video
Video
OK
Set
2
Digital
phoenix
3
Digital
Das Erste
4
Digital
WDR Dortmund
5
Digital
WDR Dusseldorf
6
Digital
WDR Essen
900
Analog
901
Analog
902
Analog
BBC1
903
Analog
BBC1
Digital
1
arte
b-3-5. Channel Sort
Change the channel position.
b-3-6. Channel Edit
Edit channel details (see below).
Press numeric button to edit channel
name:
1 : A / B / C / 1
2 : D / E / F / 2 .
3 : G / H / I / 3
4 : J / K / L / 4
5 : M / N / O / 5
6 : P / Q / R / 6
7 : S / T / U / 7
8 : V / W / X / 8
9 : Y / Z / 9
0 : + / - / . / 0
Exit
Exit
Audio
TV
Setup
Parental
Video
Video
Channel Number:
Network Name:
Channel Name:
Frequency
Color system
Sound system
900
48.5
Auto
B/G
Select
EXIT
Channel Edit
OK
Set
Exit
Page 19

15
b-3-7. Analog Channel Fine Tune
Displays the frequency of each program.
Audio
Audio
TV
Setup
Parental
Analog Channel FineTune
Video
Video
901
906
907
908
909
902
903
904
905
62.25MHz
216.2MHz
631.3MHz
636.8MHz
704.3MHz
128.3MHz
136.25MHz
152.25MHz
200.25MHz
BBC1
BBC1
900
48.5MHz
Select
EXIT
OK
Adjust
Audio
Audio
TV
Setup
Parental
Video
Video
EXIT
OK
Set
Channel Number: 900
Channel Name ......
Frequency: 48.5MHz
Exit
Cancel
a. This menu is used to set the function
b. The definition of each option:
b-1. OSD Language: Change the OSD
language in the sequence as: English
French German Italian.
b-2. Screen Mode: Change the screen
mode in the sequence as: Auto 16:9 4:3.
b-3. OSD TIMEOUT: set
of OSD Menu in the sequence : Short
Middle Long.
b-4. OSD Transparency: set the
transparency of the OSD Menu in the
sequence as: Middle Low High.
b-5. Time Setup: .
b-6. Subtitle : .
b-7. Teletext:
b-8. Blue Mute:
b-9 . Reset Default:
Spanish
display duration
set the time (see next page for details)
Set subtitles
Teletext setup (teletext not available
in Australia).
Enable audio mute and blue screen
when an insufficient signal is received.
Restore all factory default settings
(NOTE: your personalised settings will all be lost).
4. Setup MENU
Parental
TV
Video
Video
Audio
Setup
OSD Language
OSD Timeout
Screen Mode
OSD Transparency
Time Setup
Subtitle
Blue Mute
Reset Default
Teletext
Setup
Long
Middle
English
Auto
On
Select
EXIT Exit
OK
Enter
Page 20

16
Parental
Video
Video
Audio
TV
Setup
Digital Teletext Language
Decoding Page Language
TTX Presentation Level
English
WEST EUR
Level 2.5
Teletext
Select
EXIT
Exit
The Submenu of Time Setup
b-5-1. Time Zone: Change the time zone
by user.
b-5-2. Time: set the time and set power
on/off time.
The submenu of Subtitle .
b-6-1. Analog Subtitle:Change the
Mute
b-6-2. Digital Subtitle Language:
Change the subtitle language
Off English Espanol Francais Deutsch
Nederlands,etc .
b-6-3. Digital Subtitle Language 2nd:
Change subtitle language in
the sequence as: Off English
Espanol Francais Deutsch Nederlands,etc .
b-6-4. Subtitle Type:Change the subtitle type :
Normal(NORMAL is for the normal person )
Hearing Impaired(Hearing Impaired is for people who
with hearing problems ).
subtitles for analog channels: On / Off /
for digital channels:
the 2nd
Parental
Video
Video
Audio
TV
Setup
Time Zone
Time
As Broadcaster
Time Setup
Select
EXIT
Parental
Video
Video
Audio
TV
Setup
Analog Subtitle
Digital Subtitle Language
Digital Subtitle Language2nd
Subtitle Type
Off
Off
Off
Normal
Subtitle
Select
EXIT
Exit
Exit
b-7-1. Digital Teletext Language: Change
the digital teletext language in the
sequence as: English Espanol Francais
Deutsch Nederlands,etc.
b-7-2. Decoding Page Language: Change
the decoding page language in the
sequence as: WEST EUR EAST EUR
RUSSIA RUSSIA-2 GREEK Turkey
Arab/Hbrw Farsian Arab,etc.
b-7-3.TTX Presentation Level: Change TTX
Presentation Level as:Level 1.5 Level 2.5
Teletext Submenu:
Page 21

17
Select
EXIT
OK
Enter
Exit
Video
Video
Password
Audio
TV
Setup
Parental
Parental
a. Define Child Lock functionality.
Enter the parental
default
Once the correct password is entered, the submenu
below is displayed.
Password password,
the password is 0000.
b. 'Parental' submenu (further details below)
particular channels
undesired channels
prevent display from selected
input connection types.
default settings.
b-1. Hotel block: Hotel mode set
b-2. Channel block: block
b-3. Program block: block
b-4. Input block:
b-5. Change password: change the
parental password.
b-6. Clean all: restore
5 . Parental menu
Select
EXIT
OK
Enter
Exit
Parental
Parental
Video
Video
Audio
TV
Setup
Channel Block
Program Block
Input Block
Change Password
Clean All
Hotel Block
b-1. The submenu of Hotel Block:
b-1-1: Hotel lock: On/Off
b-1-2:On source: Select input source .
(
)
b-1-3:On channel: Select your TV channel No.
while you open the main unit under TV mode.
b-1-4:Max Volume: Set the maximum volume
level.
startup
TV, AV1,AV2, S-VIDEO,
YPBPR1, YPBPR2, VGA, HDMI1, HDMI2,HDMI3
Select
EXIT Exit
Hotel Block
Parental
Video
Video
Audio
TV
Setup
Max volume
Hotel lock
Off
On source
On channel
TV
100
b-2. The submenu of Channel Block.
If you select any of the channel, the
channel can not receive signal unless
you unblock it.
Video
Video
Audio
TV
Setup
Parental
2
phoenix
3
Das Erste
4
WDR Dortmund
5
WDR Dusseldorf
6
WDR Essen
900
901
902
BBC1
903
Digital
Digital
Digital
Digital
Digital
Digital
Analog
Analog
Analog
Analog
BBC1
1
arte
Channel Block
Select
EXIT
OK
Set
Exit
Page 22

18
b-3 . The submenu of Program Block.
Restriction of Access: The program will be
blocked if the age you set is below that
.transmitted with the program (broadcast dependent)
b-4. The submenu of Input Block.
If you select any of the ,the
source can not be used unless
connection types here,
unselected in this
menu item.
Video
Video
Audio
TV
Setup
Parental
Program Block
Restriction of Access
No Block
Select
EXIT
Exit
Input Block
Parental
Video
Video
Audio
TV
Setup
TV
AV2
S-VIDEO
YPBPR2
2
3
4
1
Select
EXIT
OK
Set
Exit
AV1
5
6
7
VGA
HDMI1
HDMI2
HDMI3
8
9
10
YPBPR1
b-5. The submenu of Change Password.
You need to input the new password
and confirm it.
b-6. Confirmation screen when 'Clean All' is
selected; pressing OK will restore settings to
factory defaults. If you do not want to do this,
select 'Cancel' instead.
TV
Video
Video
Audio
Setup
Parental
Change Password
Confirm Password
New Password
EXIT Exit
Are you sure?
Cancel
OK
Page 23

19
a. When SOURCE is set to 'VGA' (ie. you have
connected your PC to this TV via VGA cable),
the main menu will have a 'VGA' option For
explanation of the other menu items, see page 11.
automatically, depending on the
input resolution
a-1. Auto Adjust: set position and size
of the picture
.
a-2. H.Position: Adjust the H-Position of
the picture. you can set the value range
0-100.
a-3. V.Positon: Adjust the V-Position of the
picture. you can set the value range 0-100.
a-4. Phase: Adjust the phase of the
picture. you can set the value range 0-31.
a-5. Clock: set the clock. you can set the
value range 0-255.
SOURCE SELECTION
1. Press "SOURCE" button to enter the
signal source menu.
2. Press " / " button to select signal source.
3. Press "OK" button to confirm.
4. Press "EXIT" button to exit signal
source menu.
TV
Source
Video
Video
VGA
Video
Video
Audio
Setup
Parental
Auto Adjust
Clock
Phase
V.Position
H.Position
61
52
18
145
VGA
Select
EXIT
OK
Enter
Exit
AV2
S-VIDEO
YPBPR2
AV1
VGA
HDMI1
HDMI2
HDMI3
YPBPR1
Page 24

USB Multimedia operation
Import ant: USB multimedia operations are available only when an USB storage device is
connected. The USB storage is not included in this TV
packing, please purchase it separately.
device (eg. USB stick or USB hard disk)
NOTE:
(a)Switch off the TV before connecting any USB devices
to the USB port
(b)If a hard disk is used ,make sure its AC/DC adapter is
connected to the power supply.
(c)The file system only support FAT32 format
MULTIMEDIA OPERATION
Press MEDIA button on the remote control to show the
MULTIMEDIA menu, press MEDIA button again to exit
this menu
Press buttons to select the sub-menu( Picture /
Music / Video), press OK button to enter
Multimedia Operation: Picture
Press buttons to select Picture, press OK button to enter ,
Press EXIT button to return to the previous menu.
press the buttons to select the photo you want to view,
press the OK button to view the picture, press the EXIT
button to exit.
NOTE: format supported: JPEG
Press the RED button on the remote control to pause, press again to
Press the GREEN button on the remote control to select different duration mode (medium/
Press the YELLOW button on the remote control to select different effect mode (none/
dissolve/wipe right/wipe left/wipe up/wipe down/box in/box out)
Press the BLUE button on the remote control to view the picture
picture file
continue slideshow.
long/short). When paused on a picture, press the GREEN button to rotate the picture.
information (press again to close).
NOTE: You can have background music playing during your picture slideshow; see next page.
20
USB
HDMI3 L RVIDEO2USB1USB2
ZOOM
Page 25

USB Multimedia operation
Multimedia Operation:Music
Press buttons to select EXIT button to return to the
previous menu.press the buttons to select the Music to the OK button to play
the music. Press the EXIT button to exit.
NOTE: supported : MP3
(continued)
'Music', press OK button to enter. Press
view, then press
Music file formats
Press button once to pause,
Press button again to return to normal play
Press button to stop playback.
Press button to play the previous track.
Press button to play the next track
Press button for quick revind search
Press button for quick forward search
Press RED button to select repeat play mode.
Press GREEN button to select shuffle play mode
Press BLUE button to display the currently information
Multimedia Operation: Picture and Music mode
Multimedia Operation: Video
Press buttons to select
press the buttons to select the Video to view, the OK button to play the movie.
Press the EXIT button to exit.
NOTE: SD MPEG1(.dat .mpg) /SD MPEG2(.vob .mpg)/SD MPEG4(.avi),
Press button once to pause,
Press button again to return to normal play
Press button to stop playback.
Press button to play the previous .
Press button to play the next
Press button for quick search
Press button for quick forward search
Press GREEN button to select picture mode(user/cinema/sport/vivid/hi-bright )
Press BLUE button to display the currently information
playing music's
Play music as described above. Now press EXIT button to quit Music mode. Enter Picture mode and
press OK to view pictures; the music will continue to play in the background.
'Video'. (to return to previous menu, press EXIT).
then press
Supported video file formats:
(NOT supported: DivX and other HD video formats)
video
video
reverse
playing video's
21
Picture Mode
Page 26

Trouble shooting
Please refer to the table below as well as the operating instructions in this manual if your TV
behaves unexpectedly. If the problem persists, please contact Customer Support for assistance.
No sound and picture
PROBLEM POSSIBLE SOLUTION
PROBLEM POSSIBLE SOLUTION
- Check that the main plug has been connected to a power outlet.
- Check that you have touched 'POWER' on the front of the TV.
- Check the picture contrast and brightness settings.
- Check your connections (see page 9). Check that the correct source is
selected (SOURCE button)
Normal picture but no
sound
- Check the volume.
- Sound muted? Press the MUTE button.
- Try another problem may be with the broadcast.channel; the
- Are the audio cables installed properly.
The remote control does
not work
- Check to see if there between the and remote control
Causing obstruction.
is any obstruction TV
- Are batteries installed with correct polarity(+ to +,- to -).
- Install new batteries
Power is suddenly turned
off
- Had the Sleep Timer been set?
- Check the power source
Picture appears slowly
after switching on
- This is normal, the image is muted during the product startup process. Please
contact , if the picture has not appeared after five minutes. Customer Support
No or poor color or poor
picture
- Adjust the color in menu option.
- Keep a sufficient distance between the TV and any VCR/speakers.
- Try another channel, the problem may be with the broadcast.
- Are the VIDEO cables installed properly?
Horizontal/vertical bars
or picture shaking
- Check for local interference such as an electrical appliance or power tool.
Poor reception on some
channels
- Station or cable product experiencing problems. Tune to another station.
- Station signal is weak, reorient antenna to receive weaker station.
- Check for sources of possible interference.
Lines or streaks in pictures
- Check the antenna(Change the direction of the antenna).
No output from one of the
speakers
- Adjust balance in menu option.
22
* See next page for VGA troubleshooting.
Page 27

23
PROBLEM POSSIBLE SOLUTION
PROBLEM POSSIBLE SOLUTION
No display
- Adjust resolution, horizontal frequency, or vertical frequency.
- Check it whether the signal cable is connected or loose.
- Check the input source.
Vertical bar or stripe on
back ground&Horizontal
Noise&Incorrect position.
- or adjust clock, phase, or H/V position.Run Auto-adjust
Screen color is unstable
or single color.
- Check the signal cable.
- Plug the VGA cable again securely.
Maintenance
Careful and regular cleaning can extend the amount of time you will have your new TV. Be sure to turn the
power off and unplug the power cord before you begin any cleaning.
Cleaning the screen
Cleaning the screen
1. Here’ s a great way to keep the dust off your screen for a while. Wet a soft cloth in a mixture of lukewarm
water and a little fabric softener or dish washing detergent. Wring the cloth until it’s almost dry, and then
used it to wipe the screen.
2. Make sure the excess water is off the screen, and then let it air-dry you turn on your TV.
fully before
Cleaning the cabinet
Cleaning the cabinet
To remove dirt or dust, wipe the cabinet with a soft, dry, lint-free cloth. Please be sure not to use a wet cloth.
Extended Absence
If you expect to leave your TV for a long time(such as a vacation), it’ s a good idea to
unplug the power cord to protect against possible damage from lightning or power surges.
unused
When a PC is connected to the TV via VGA cable:
Page 28

24
Power
Power
Power Consumption
110 W
AC 100V - 240V ~ 50 / 60Hz
English.French.German.Italian.Spanish.
Panel Features
Screen Size
32 inch
Active Area
698.4mm(H) X 392.85mm(V)
Aspect Ratio
16:9
Panel Resolution
1920 X 1080
Brightness
350 cd/m²
Contrast Ratio
4500:1
Viewing Angle
176º(H) X 176º (V)
Dot Pitch
0.12125mm(H) X 0.36375mm(V)
Maximum Colour
1.073G
Response Time Black-White (R&D) 4.5ms
OSD Languages
TV Function
Broadcast System
Receiving Channel
Video Standards Supported
Composite Video input
NTSC / PAL / SECAM
NTSC / PAL / SECAM
S-Video Input
Antenna (RF)
Audio Output
Maximum Audio Output
Input Connections
TV Input (Analogue TV Antenna)
1(RF-75Ohm)
2
VGA Input
1 (15 pin D-Sub)
L + R Audio Input (For AV S-Video )
PC Audio in
4 (White RCA, Red RCA)
Stereo Mini Phono Jack Input (3.5mm)
VGA Resolutions Supported
640x480 @ 60Hz
800x600 @ 60Hz
1024x768 @ 60Hz
2X6W
1920x1080 @ 60Hz
AV Input (Video) 2 Composite (Yellow RCA)
HDMI
3 (19 pi n )
S-Video Input 1
(4 pin DIN)
PAL/ SECAM
DK / BG / I
PAL/ SECAM
USB 2.0
2 (4 pin )
Specifications for model LEF3290:
Page 29

25
Power
Power
Power Consumption
130W
AC 100V - 240V ~ 50 / 60Hz
English.French.German.Italian.Spanish.
Panel Features
Screen Size
42 inch
Active Area
930.24mm(H) X 530.26mm(V)
Aspect Ratio
16:9
Panel Resolution
1920 X 1080
Brightness
450 cd/m²
Contrast Ratio
4000:1
Viewing Angle
176º(H) X 176º (V)
Dot Pitch
0.1915mm(H) X 0.4845mm(V)
Maximum Colour
1.07G
Response Time Black-White (R&D) 4ms
OSD Languages
TV Function
Broadcast System
Receiving Channel
Video Standards Supported
Composite Video input
NTSC / PAL / SECAM
NTSC / PAL / SECAM
S-Video Input
Antenna (RF)
Audio Output
Maximum Audio Output
Input Connections
TV Input (Analogue TV Antenna)
1(RF-75Ohm)
2
VGA Input
1 (15 pin D-Sub)
L + R Audio Input (For AV S-Video )
PC Audio in
4 (White RCA, Red RCA)
Stereo Mini Phono Jack Input (3.5mm)
VGA Resolutions Supported
640x480 @ 60Hz
800x600 @ 60Hz
1024x768 @ 60Hz
2X6W
1920x1080 @ 60Hz
AV Input (Video) 2 Composite (Yellow RCA)
HDMI
3 (19 pi n )
S-Video Input 1
(4 pin DIN)
PAL/ SECAM
DK / BG / I
PAL/ SECAM
USB 2.0
2 (4 pin )
Specifications for model LEF4290:
 Loading...