

AV TOOL VTB-108, VIVID TV Box Pro VTB-108 Operation Manual
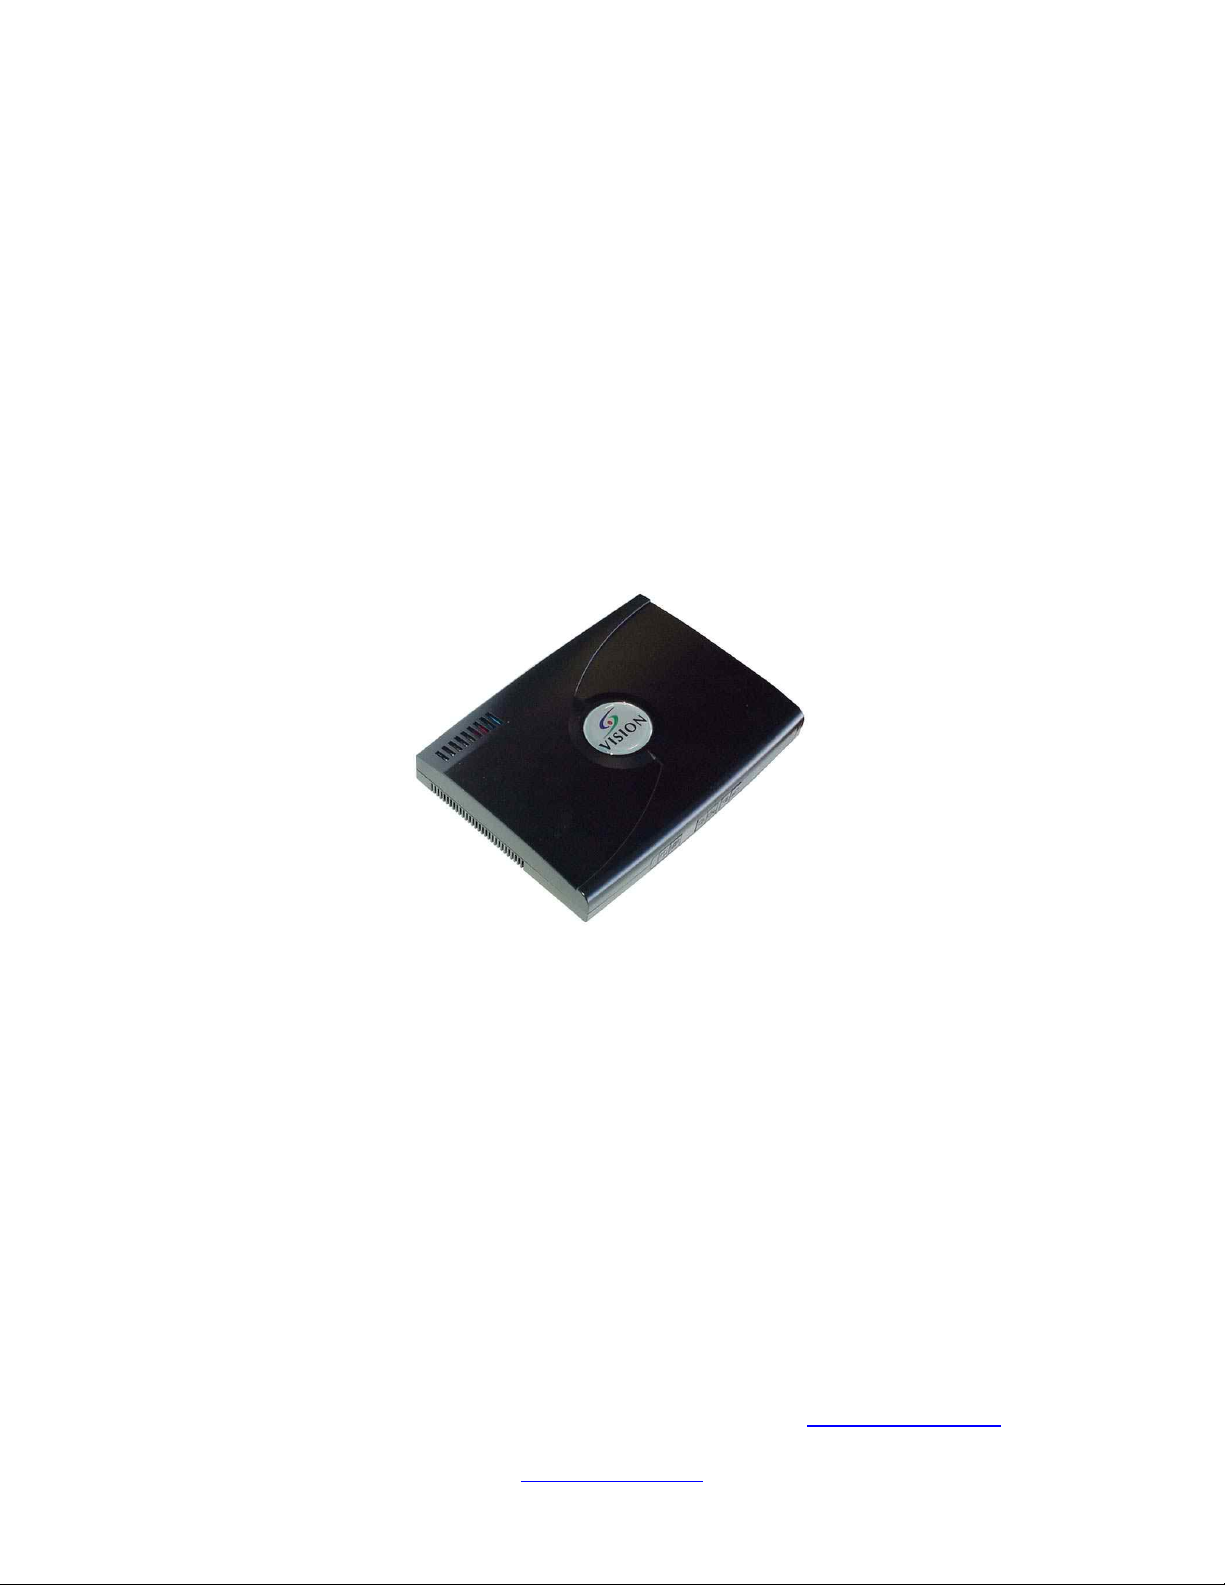
VIVID TV Box Pro
VTB-108
Operation Manual
Please browse our online catalogue to view our full product range.
44-48 Maitland Road, Mayfield East, NSW, 2304 Australia, sales@converters.tv
Phone +61 249689313 Fax +61 249689314
www.converters.tv

Introduction
This unit is a state-of-the-art TV to PC Video converter. The compact unit easily turns
your LCD, CRT monitor, plasma display or projector into a multimedia center. With a
built-in TV tuner and multiple video ports, you can connect DVD players, digital
cameras, VCRs or even game consoles. View corporate presentations or catch the end of
the game all in full-screen, high-resolution images. The unit also has a custom built-in
V-chip, which allows content to be filtered.
With the VTB108 you can enjoy up to 125 channels of high-resolution (1280x1024) TV
at full screen in 24-bit color. Easily create and view digital content on your highresolution display. Enjoy full-screen, high-resolution video entertainment with or without
your PC. The unit provides S-video, composite (RCA), component (YCbCr) video
connectors and audio pass-through support.
The VTB108 with advanced scaling technology provides 3:2 pull down correction that
eliminates jitter from DVD movies that originated from motion picture films. Motion and
adaptive de-interlacing also improves the clarity and sharpness of the overall image.
The PIP (Picture In Picture) function enables users to have a small square on the screen
showing something from TV tuner, S-Video, Composite or Component input. Users can
select PIP input from TV tuner, S-Video, Composite or Component. The size, position,
quality of the PIP is also adjustable.
Closed caption technology displays text overlay of spoken audio over video. A RGB
computer pass-through function also lets you watch TV or enjoy a DVD movie without
turning on your computer. SAP/MTS stereo allows the reception of audio other than main
programming audio. Auto tuning features let you tune the TV broadcast and cable TV
channels automatically.
Precautions
1. Do not expose this product to direct sunlight.
2. Keep the unit away from radiator, heat sources and magnetic field.
3. Do not place it in very dusty or humid locations.
4. Use this unit in a horizontal position only.
5. Do not put heavy objects on top of the converter.
6. Put the unit in an open space that has good ventilation.
7. If the unit is acting abnormally keep the unit away from TV or other electronic
equipment.
8. Unplug the unit from the power supply when it is not to be used for a long period
of time.
Please browse our online catalogue to view our full product range.
44-48 Maitland Road, Mayfield East, NSW, 2304 Australia, sales@converters.tv
Phone +61 249689313 Fax +61 249689314
www.converters.tv

Features
• Plug-N-Play, no software & driver required, applicable to all O/S
• Provide user-friendly OSD(on screen display) to control functions
• Fully functional infra-red remote control
• Support removing & adjustable P.I.P(Picture in Picture) function to enjoy
TV/Video program and work on the PC at the same time
• Enjoy full-screen, high resolution TV/Video program on CRT or LCD or Plasma
Display
• Compatible for multi-signal inputs: TV tuner, Video, S-Video, Component
(YCbCr) & VGA
• Appreciate sharp & clear images with advanced scaling technology
• Adjustable multiple output resolutions up to SXGA(1280 x 1024 @75Hz)
meeting up-to-date 19” LCD Monitor requirement
• Enhanced 3D motion adaptive de-interlacing and adaptive 3D non-linear noise
reduction filter
• All Frequency/All Channel scan with channel memorizing function
• Remapping function for programming your favorite channels
• Support Full channels with fine tuning function
• Support SAP/MTS stereo for NTSC, Nicam/A2 stereo for Pal(Optional)
• Support Teletext for Pal (Optional)
• Support protection of Channel setting: V.Chip/Close-Caption(Optional, for USA
only)
Please browse our online catalogue to view our full product range.
44-48 Maitland Road, Mayfield East, NSW, 2304 Australia, sales@converters.tv
Phone +61 249689313 Fax +61 249689314
www.converters.tv

Operation Controls and Functions
Front Panel
1. POWER
Pressing this button to switch the unit On or Off.
2. VIDEO SOURCE SELECTION
Select the video source between TV/Cable, S-Video, AV or PC
3. POWER LED / INFRARED RECEIVER
Lights when the TV BOX is powered up and ready to operate. Receive the Infrared
signal from the remote control.
4. : Decrease the sound volume
5. : Increase the sound volume
6. : Adjust channel decrease
7. : Adjust channel increase
Please browse our online catalogue to view our full product range.
44-48 Maitland Road, Mayfield East, NSW, 2304 Australia, sales@converters.tv
Phone +61 249689313 Fax +61 249689314
www.converters.tv
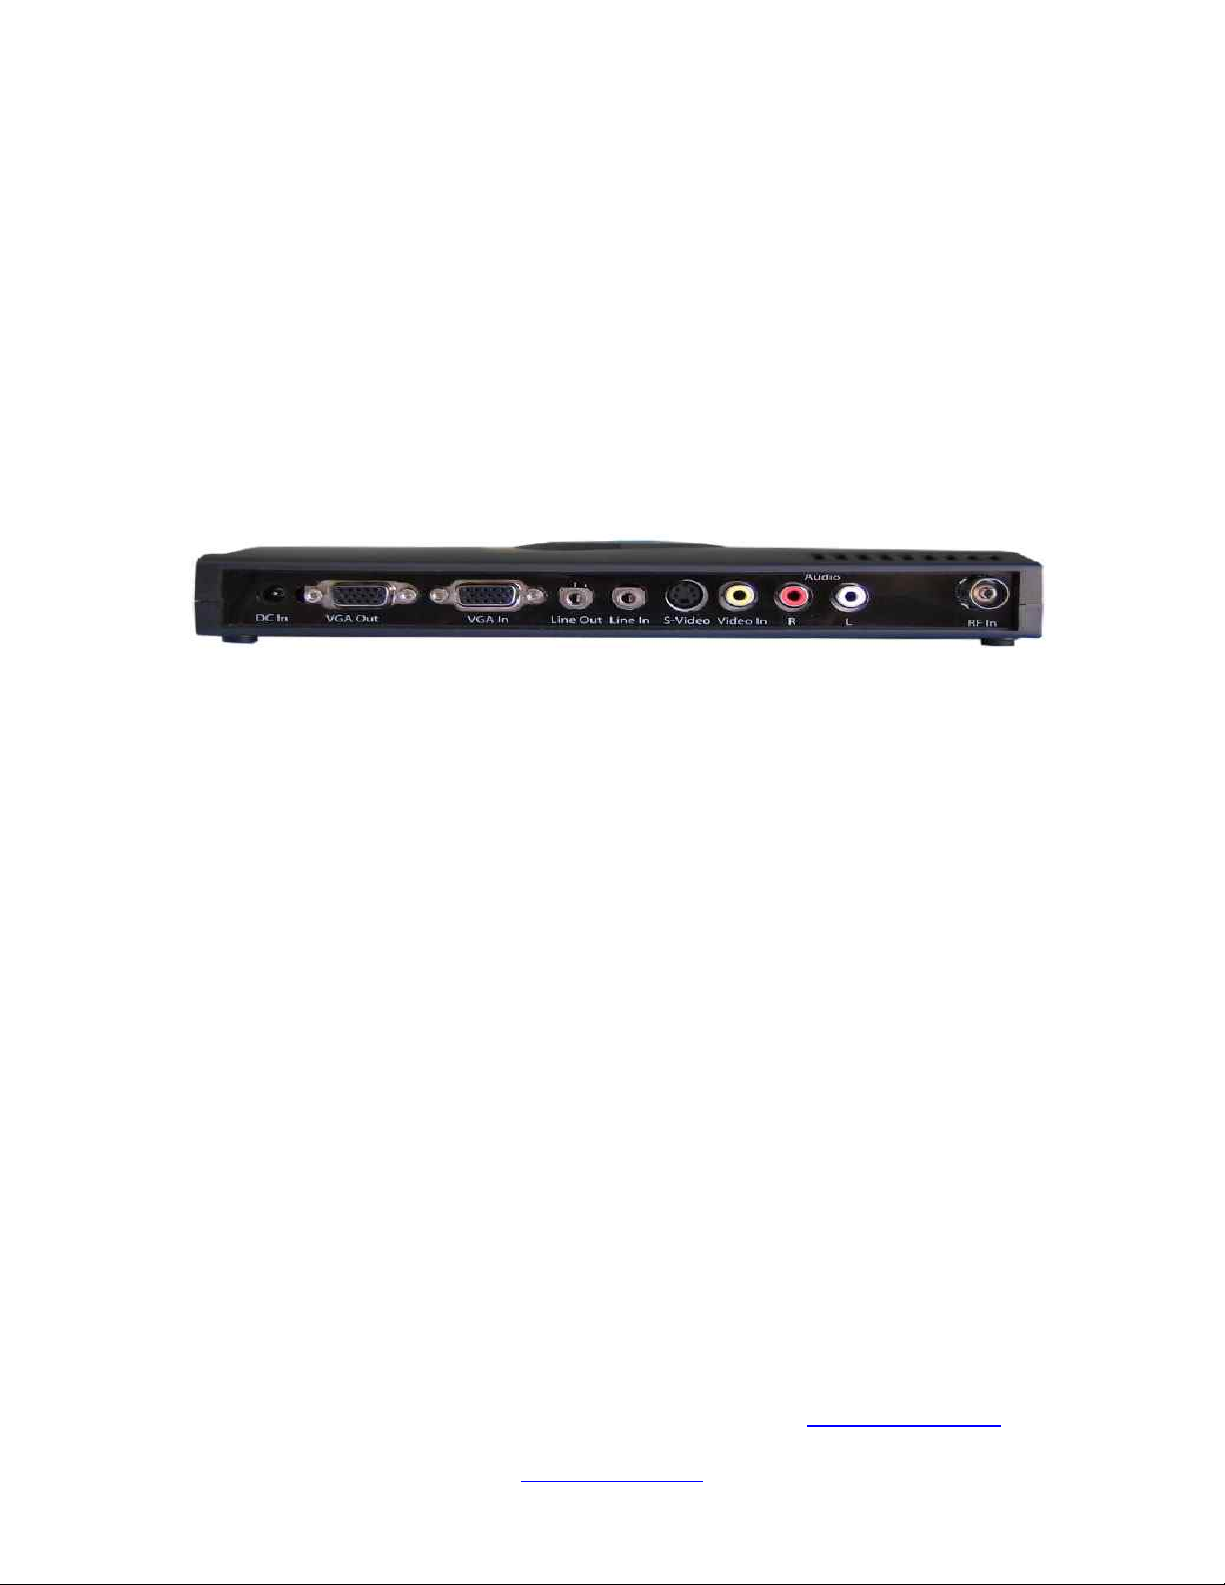
Rear Panel
1. DC In- Connect to a 12V power supply
2. VGA Out- Connect your 15 Pin Monitor to the VGA output.
3. VGA In- Using the 15 pin VGA cable provided, connect one side to the VGA
output on your pc and the other side to the VGA In of your unit.
4. Line Out – Please connect it to your PC/external speakers.
5. Line In- Please connect the audio from the sound card to Line In port. Thus
you should be able to have sound from PC/external speakers even when your
unit is in sound by mode.
6. S-Video- Please connect it to the S-Video In port when the external Video
device is S-Video.
7. Video In- Please connect the external video from VCR, LD/VCD/DVD or
video game console to the Video In port.
8. Audio (R + L)- Please connect the external audio to the Audio In port.
9. RF In (VHF/UHF)- Please connect your RF cable to RF IN port to receive
antenna or cable TV signal.
Please browse our online catalogue to view our full product range.
44-48 Maitland Road, Mayfield East, NSW, 2304 Australia, sales@converters.tv
Phone +61 249689313 Fax +61 249689314
www.converters.tv
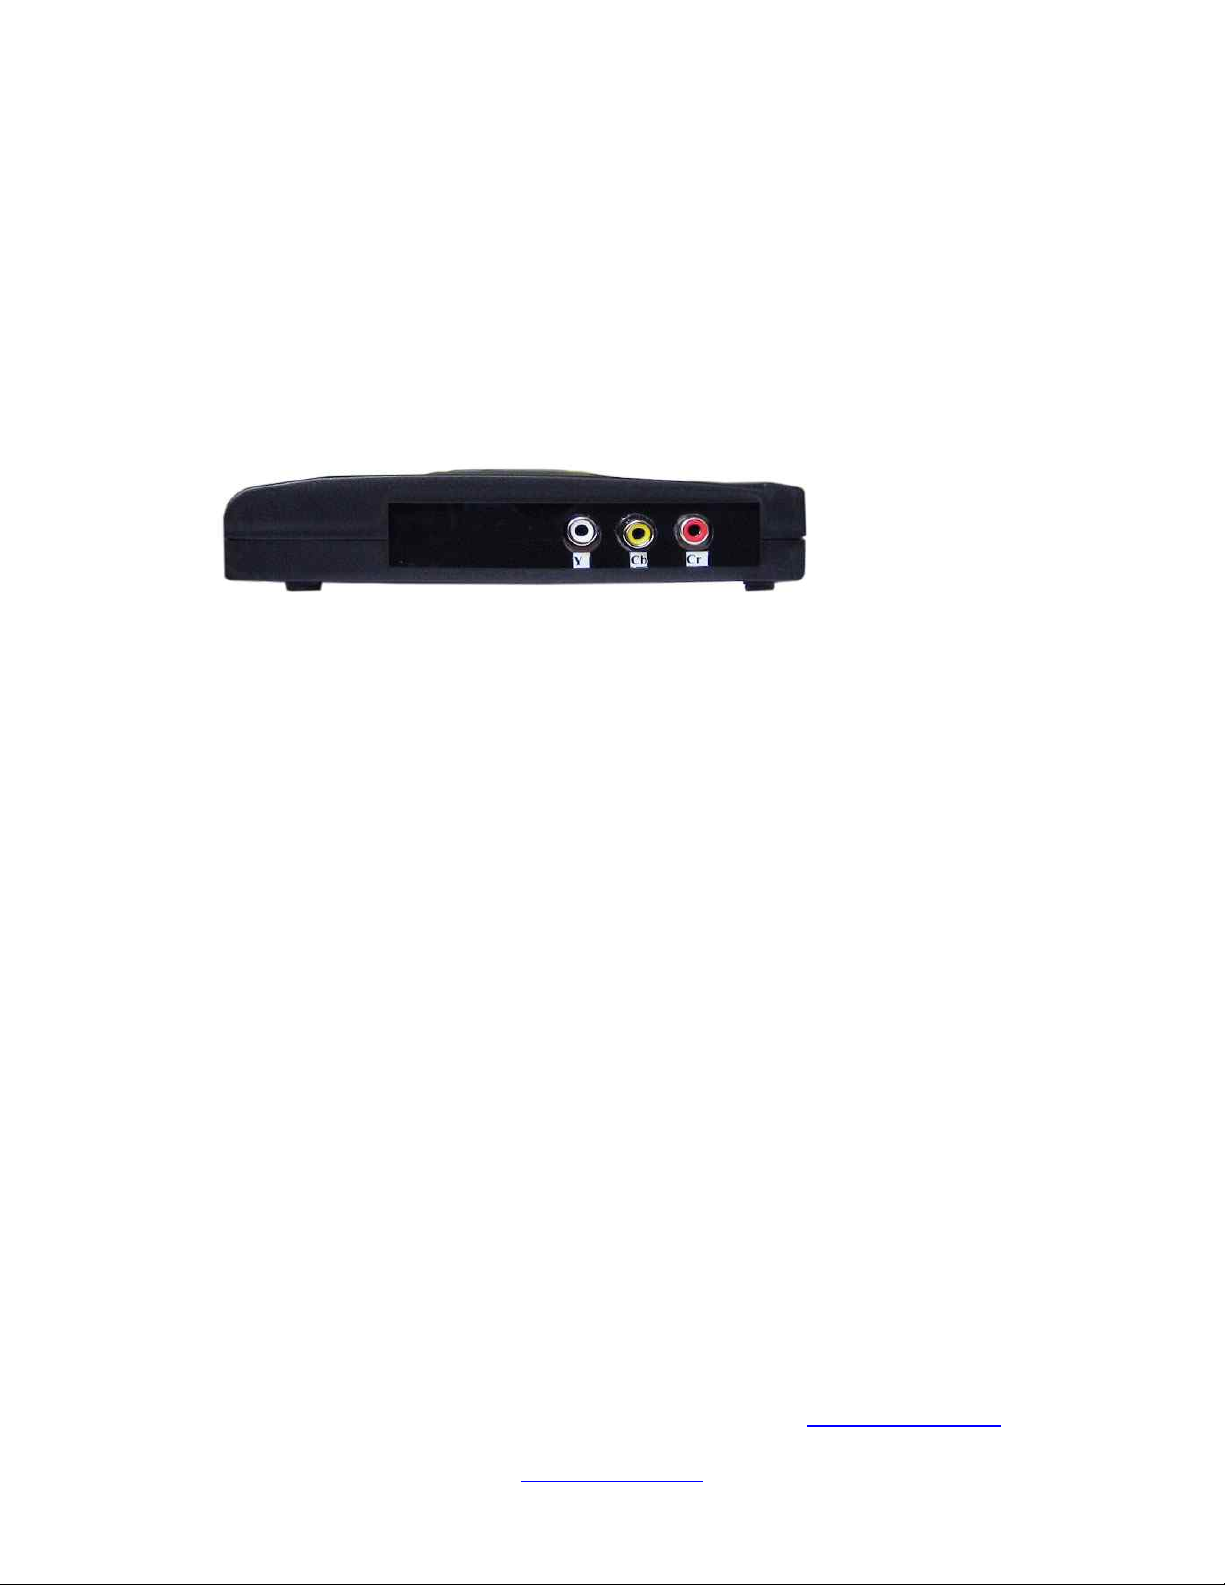
Side Panel
1. Component (Y, Cb, Cr) Input- Please connect them to the Component
(Y,Cb,Cr). In port when the external video device has Y, Cb, Cr Output’s support.
Please browse our online catalogue to view our full product range.
44-48 Maitland Road, Mayfield East, NSW, 2304 Australia, sales@converters.tv
Phone +61 249689313 Fax +61 249689314
www.converters.tv

Connection and Installation
1. To prevent damage to your equipment due to ground potential
influence, make sure that all devices on the installation are properly
grounded. Consult your dealer for technical details if necessary.
2. Please turn off the power of all devices before connection.
To install the unit for the analog TV and A/V device connection, please refer to the
diagram below.
Rear Panel
Side Panel
Notes-
* Audio/Video connection: For audio connection, pleas use RCA audio (LTR) connector.
For video connection, please choose either RCA video connector or S-Video connector.
* Moreover, for connection to a stand alone, please omit those connections associated
with PC.
Please browse our online catalogue to view our full product range.
44-48 Maitland Road, Mayfield East, NSW, 2304 Australia, sales@converters.tv
Phone +61 249689313 Fax +61 249689314
www.converters.tv
 Loading...