

Page 1
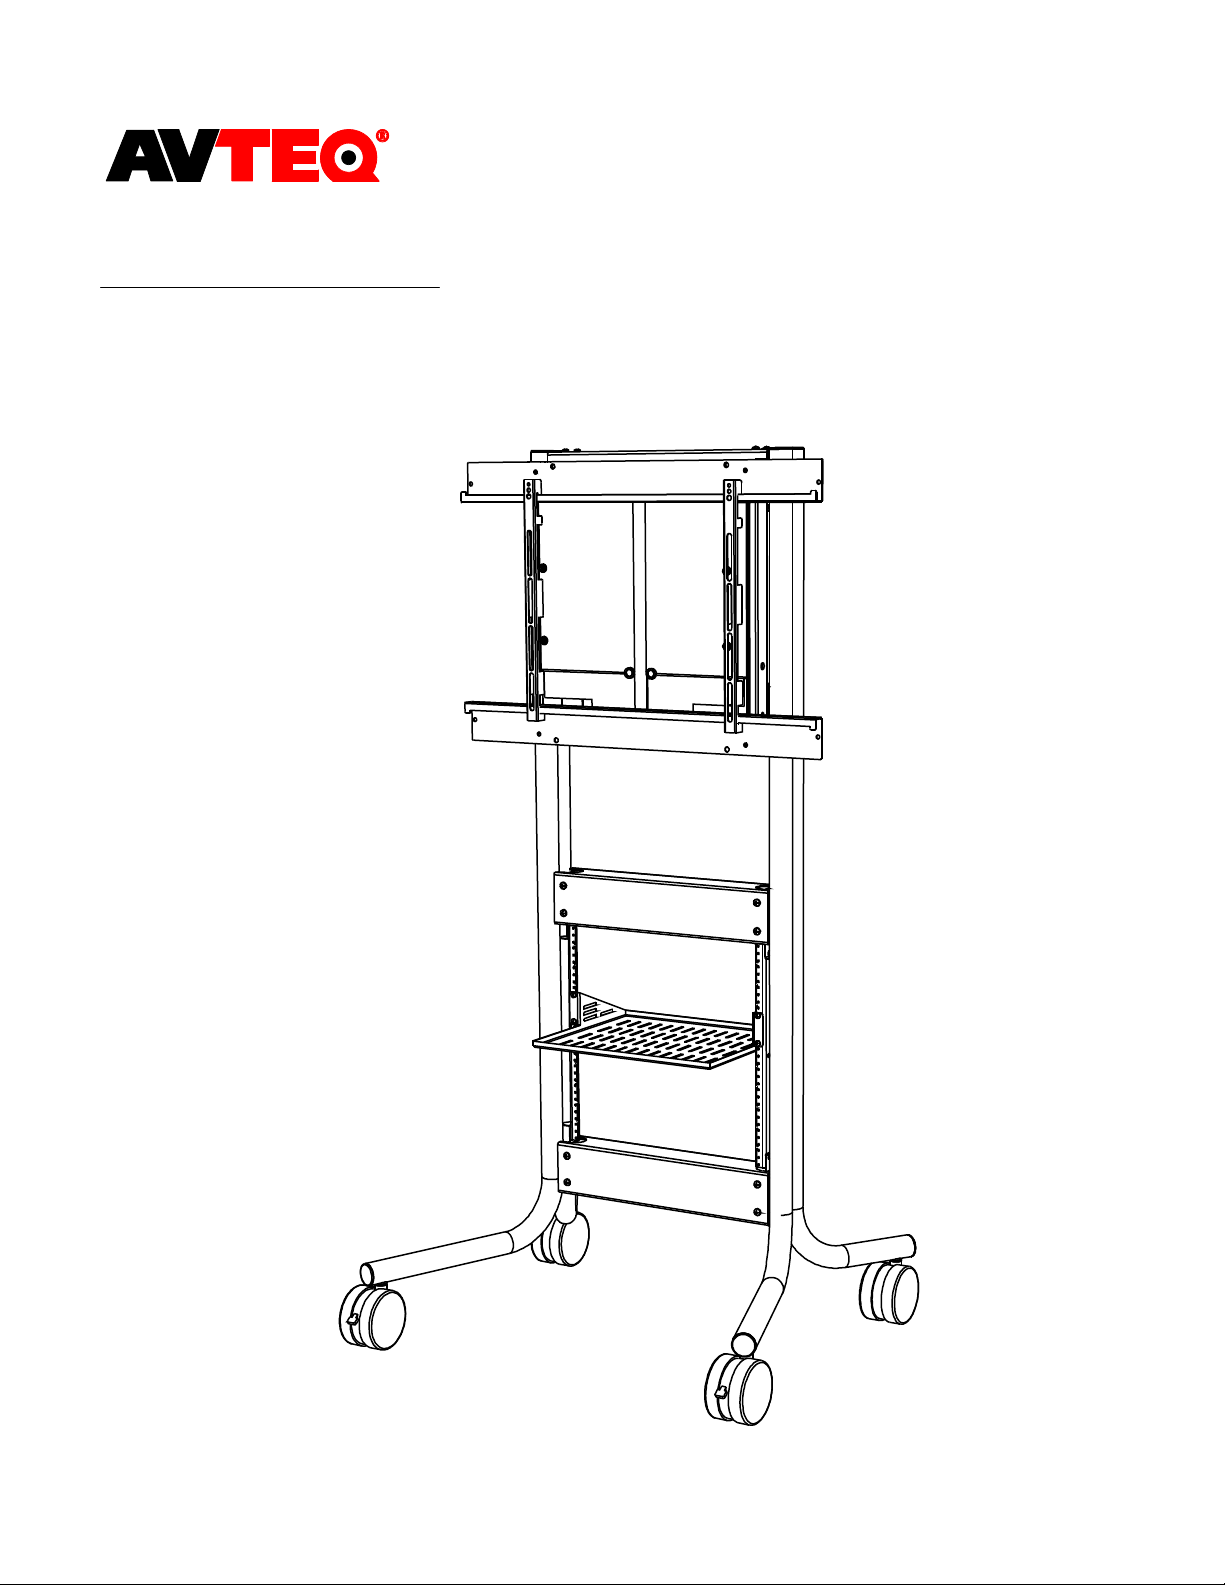
EASY SETUP GUIDE
DynamiQ RPS-500
Page 2
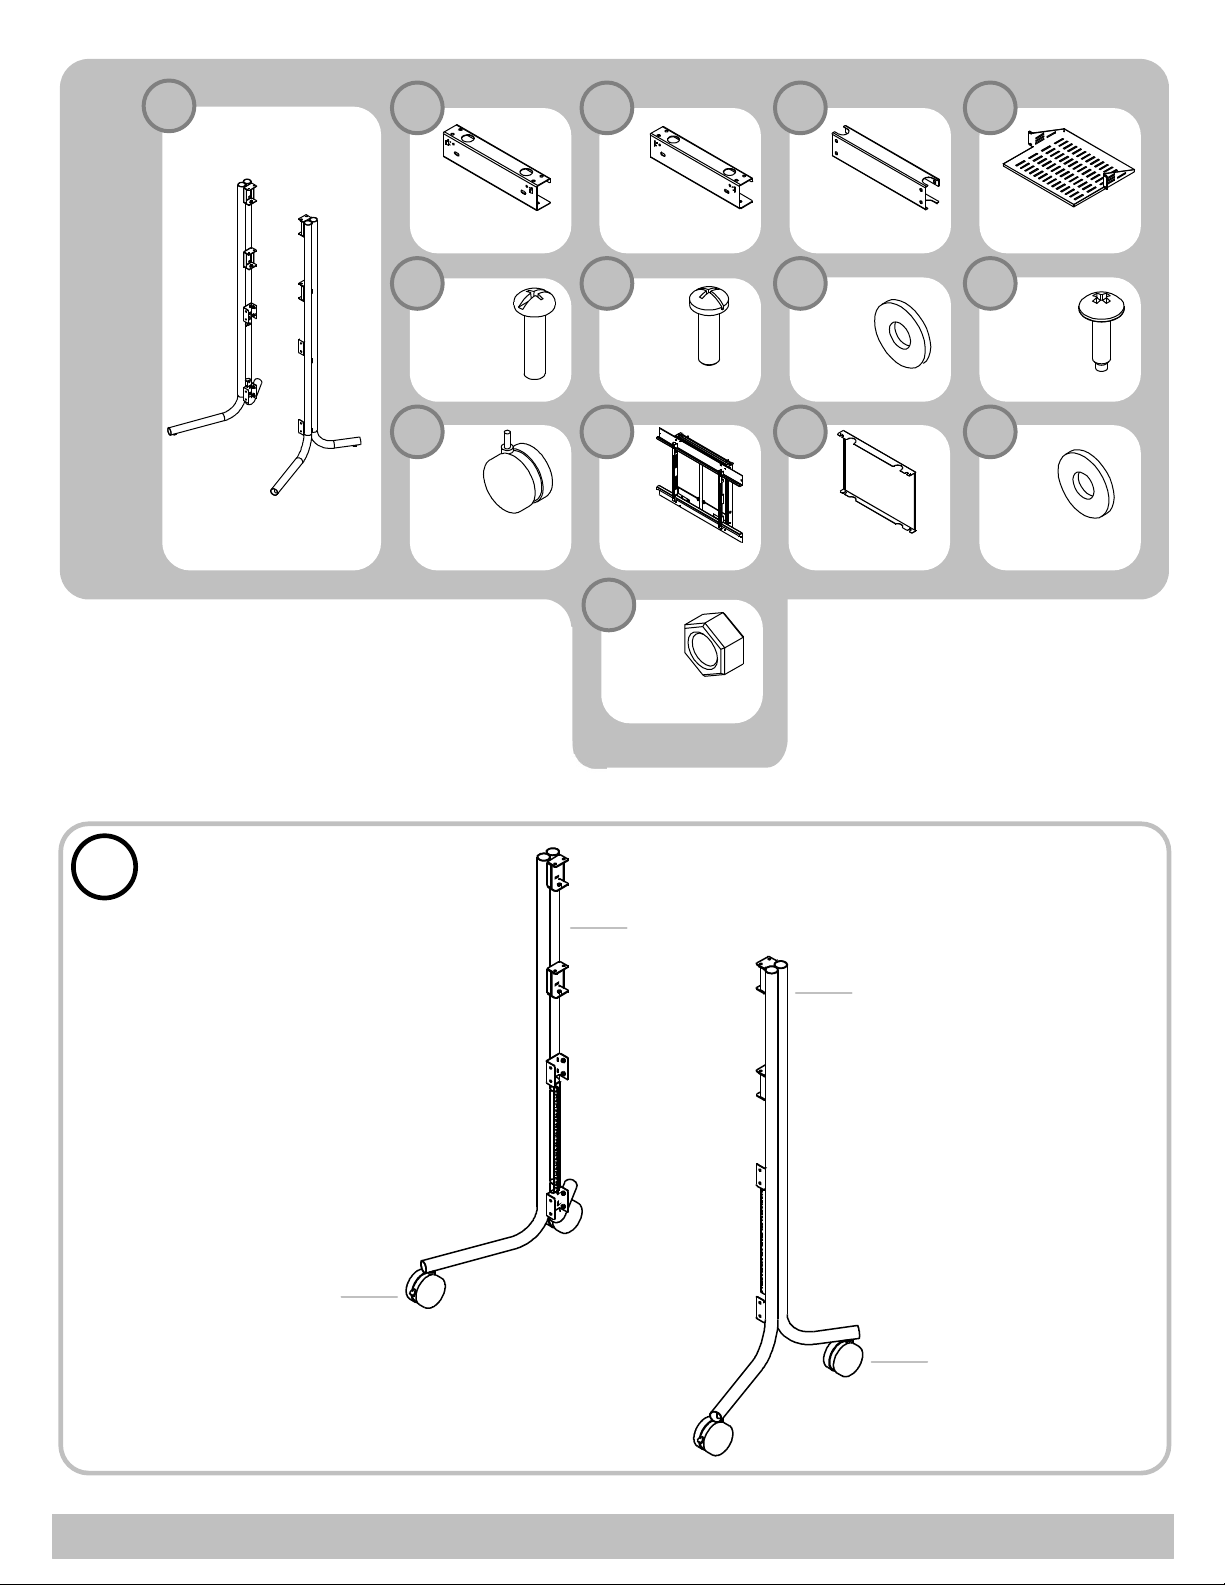
A
B
C
D E
Top Horizontal
Support
F
Philips
Items needed for install
- Phillips screw driver
- Wrench 3/4”
Leg
(x2)
Items
Included
Install Tip: As you are installing the bolts
and nuts, leave them all loose. Install all of
them before tightening.
Head Bolt
1/4”x 1”-1/4”
(x2)
Casters
With Brake (x2)
Without Brake (x2)
Middle Horizontal
Support
G
Phillips
Head Bolt
5/16”x 1 or
5/16”x 3/4” (x28)
(x1)(x1) (x2)
Bottom Horizontal
Support
H I
5/16”
ext 0.75”
(x28) (x4)
KJ L M
DynamiQ 400
Mount (x1)
Mount Cover (x1)
N
Nut 1/4”
(x2)
Shelf (x1)
Rack Screws
10-32
Washer
1/4” (x2)
1
Attach Casters (J) to the end of
each Leg (A). Make sure the
Casters with Brakes are
installed in the front of the cart.
J
A
A
J
800-285-8315
AVTEQ.net
Page 3
2
G
H
3
B
G
H
A
B
G
C
H
D
D
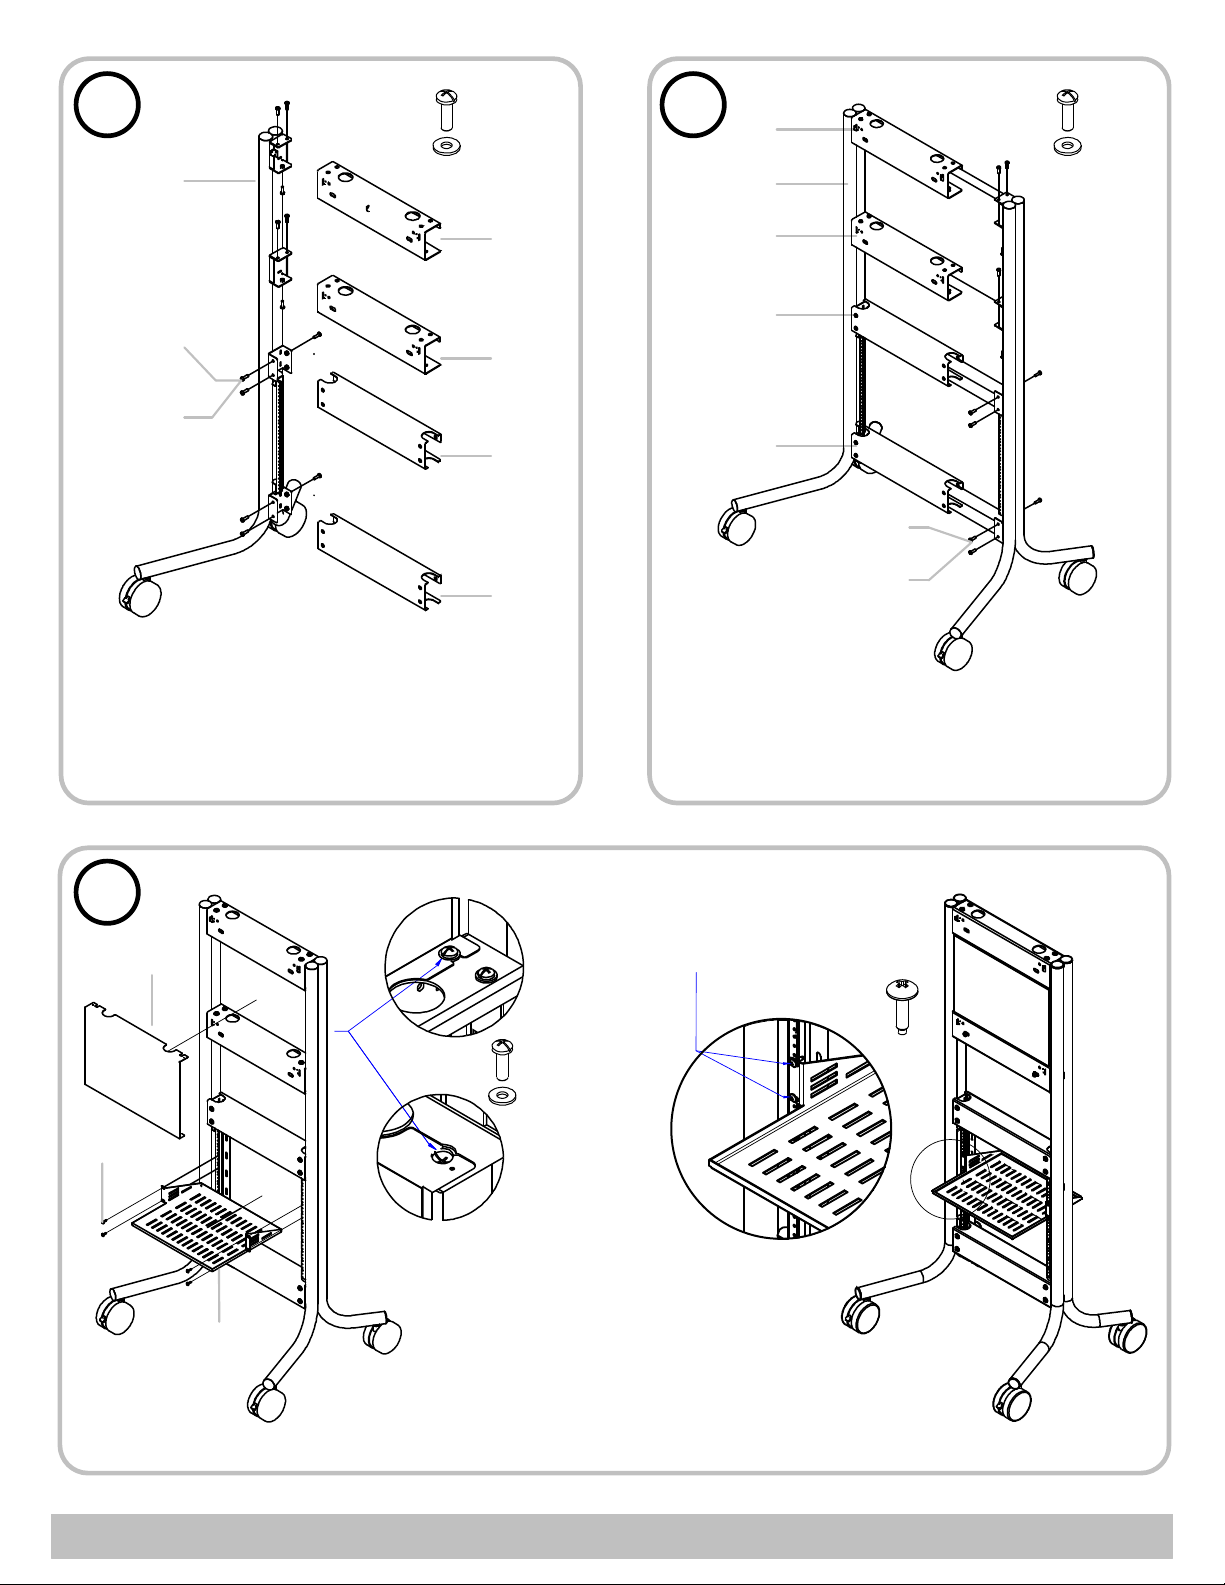
Attach each of the Horizontal Supports
(B) (C) (D) to the first Leg (A) using
the Bolts (G) and Washers (H) as
shown. Make sure the flat side of each
support is facing the front of the cart.
A
C
D
D
G
H
Attach the other Leg (A) to the Horizontal Supports (B) (C) (D) using the
Bolts (G) and Washers (H) as shown.
4
I
L
E
Install the Shelf (E) to
the vertical rack rails
using the Rack Screws (I).
I
G
H
Secure Mount Cover (L)
between the Top and Middle
Horizontal Supports using the
Phillips Head Bolts (G) and
Washers (H) as shown.
800-285-8315
AVTEQ.net
Page 4
5
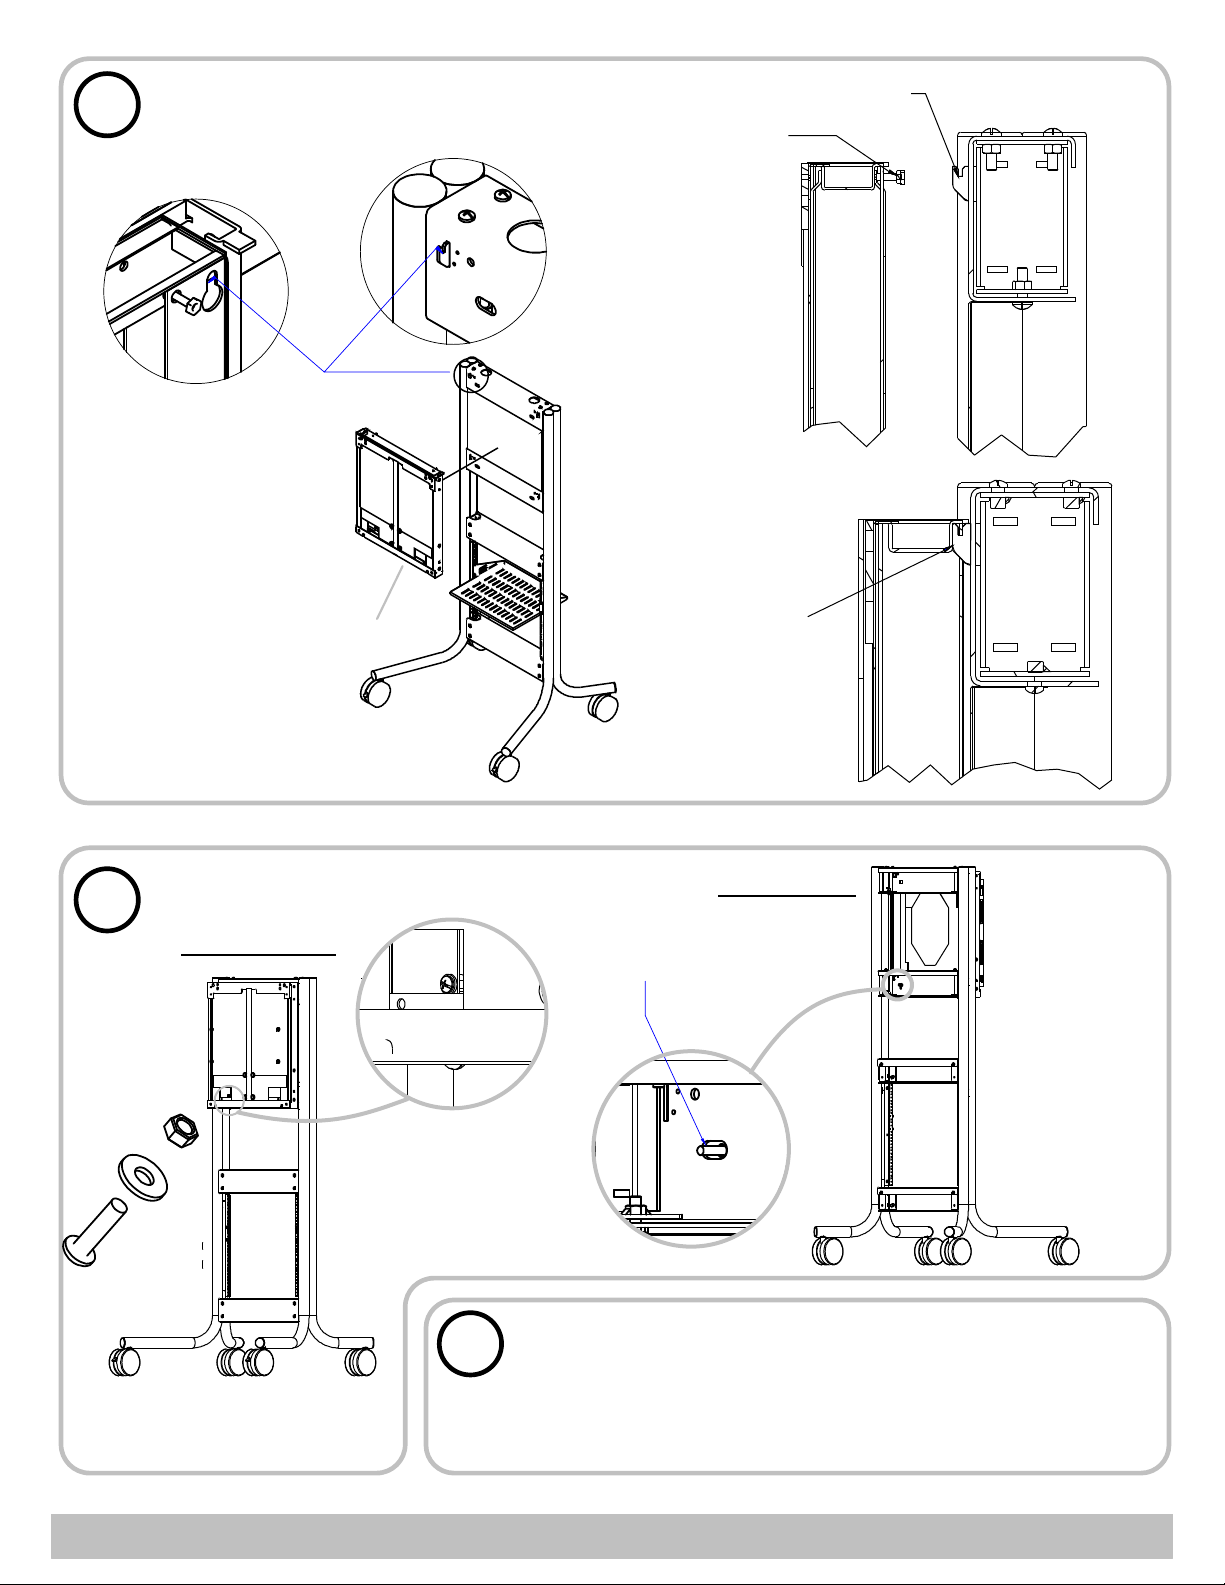
Attach the DynamiQ
400 Mount (K) to the
frame by aligning the
holes on each side of
the mount with the
hooks on the top
Horizontal Support.
K
Hook on Top Horizontal Support
Hole in DynamiQ
400 mount
Hang mount to
frame
F
6
FRONT CART
N
M
7
REAR CART
Secure with Bolt (F),
Washer (M) and Nut (N).
Please refer to the instructions in the BB VESA mount for
VESA mount assemble and please refer to the instructions
in the DynamiQ/BalanceBox 400 series mount for adjusting
the DynamiQ mount. See UM-1 Adaptor and CSB Mount
Instructions if using cart with Cisco boards
800-285-8315
AVTEQ.net
 Loading...