

Page 1
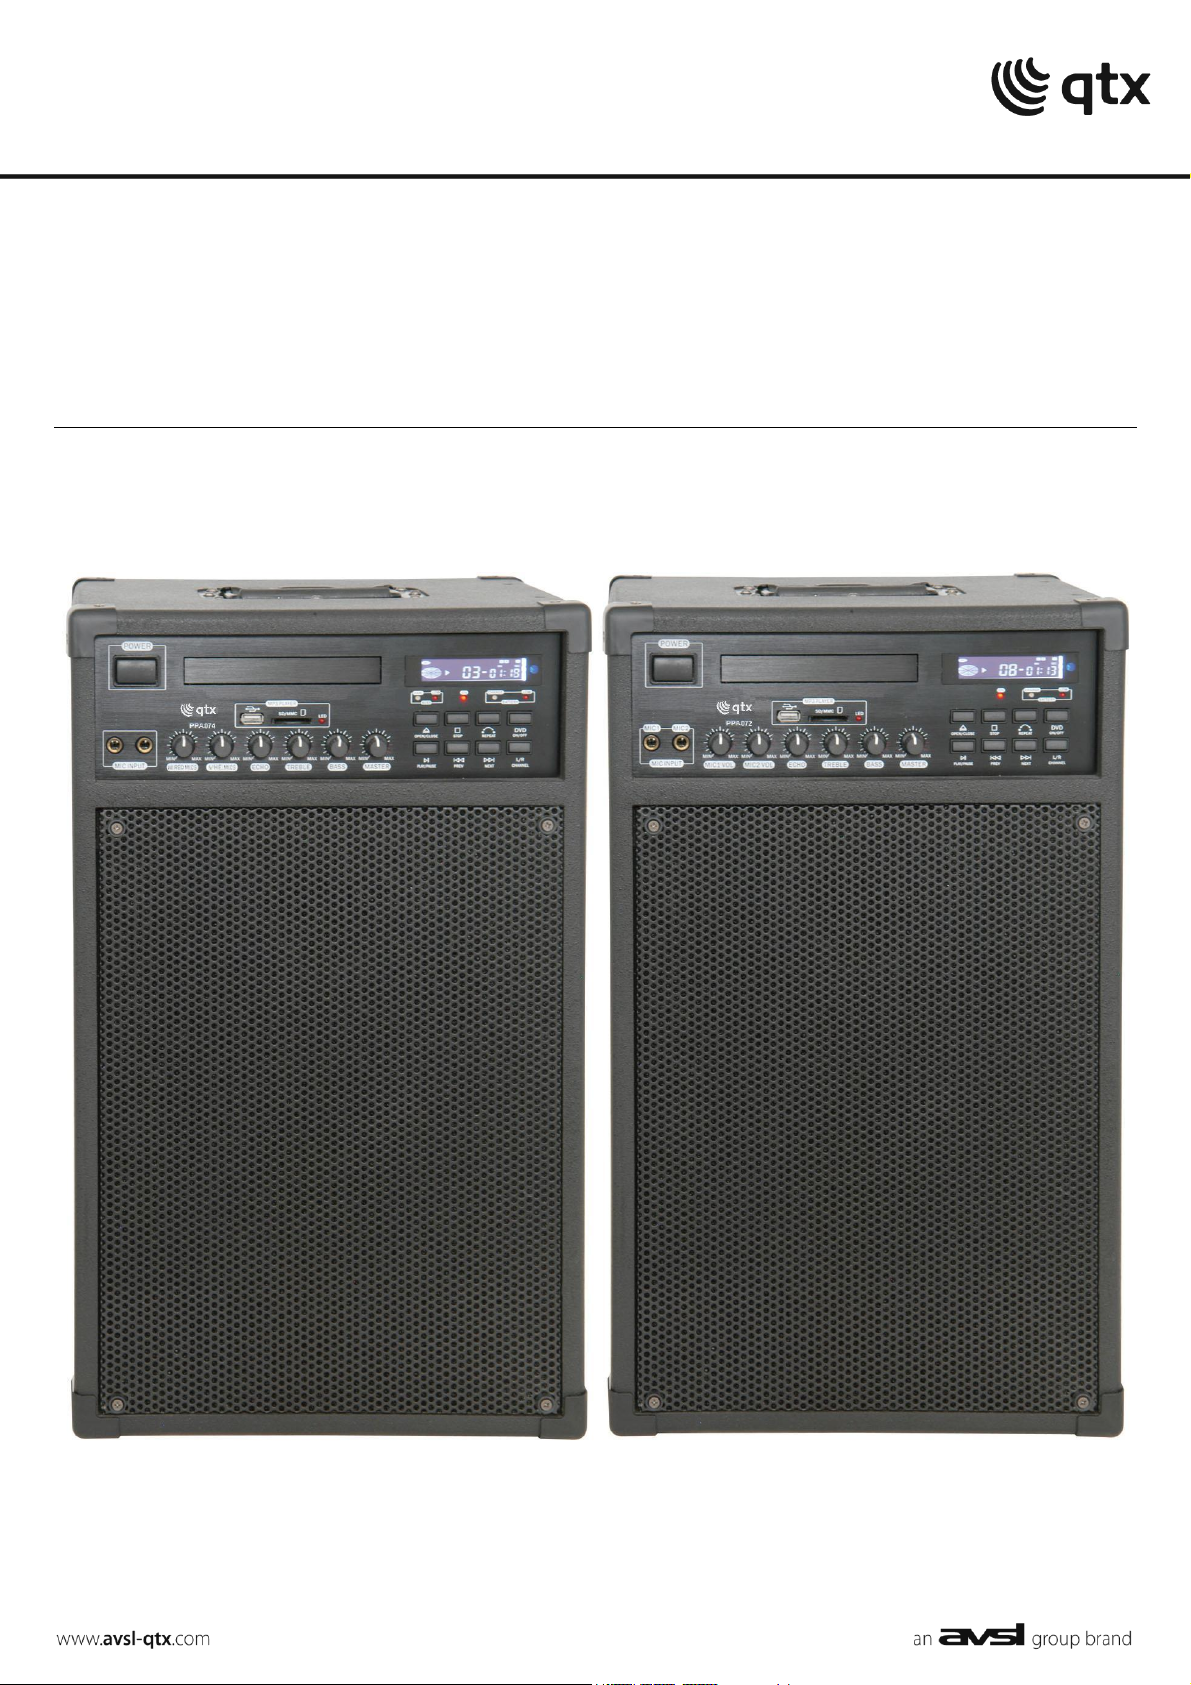
PPA72, PPA74
Portable PA Units
Item ref: 170.125UK, 170.127UK
User Manual
Page 2

Introduction
Thank you for choosing a QTX Sound PPA series portable PA set. This product has been designed to offer reliable,
versatile playback and public address for many varied situations. In order to gain the best results from this equipment
and avoid damage through misuse, please read and follow these instructions and retain for future reference.
Warning
To prevent the risk of fire or electric shock, do not expose any of the components to rain or moisture.
If liquids are spilled on the surface, stop using immediately, allow unit to dry out and have checked by qualified
personnel before further use.
Avoid impact, extreme pressure or heavy vibration to the unit.
There are no user serviceable parts inside the unit – refer all servicing to qualified service personnel.
Safety
For re-charging and mains operation, check the supply voltage and use the correct IEC lead supplied.
Ensure mains leads and signal leads are in good condition
Do not use the USB connector as a general purpose power source or charger.
Do not allow any foreign particles or moisture to enter the unit through vents or connectors
Do not cover cooling vents and keep clear from dust and debris.
Placement
Keep the unit in an upright position on a stable surface or sturdy pole-mount stand
Keep out of direct sunlight and away from heat sources.
Keep away from damp or dusty environments.
Avoid using the trolley mechanism on uneven surfaces as this can cause the unit to fall
Cleaning
Use a soft cloth with a neutral detergent to clean the casing as required
Use a soft brush to clear debris from the cooling vents
Do not use strong solvents for cleaning the unit.
Note: Video Format
Your PPA unit can only output video in one format at a time. The unit may be shipped with video set to a different format
than you wish to use, giving a poor quality output or no output at all. Use the VIDEO MODE key on the handheld remote
control to cycle through the mode options for video until the correct mode is active for a clear signal to your TV or visual
display.
170.125UK, 170.127UK User Manual
Page 3
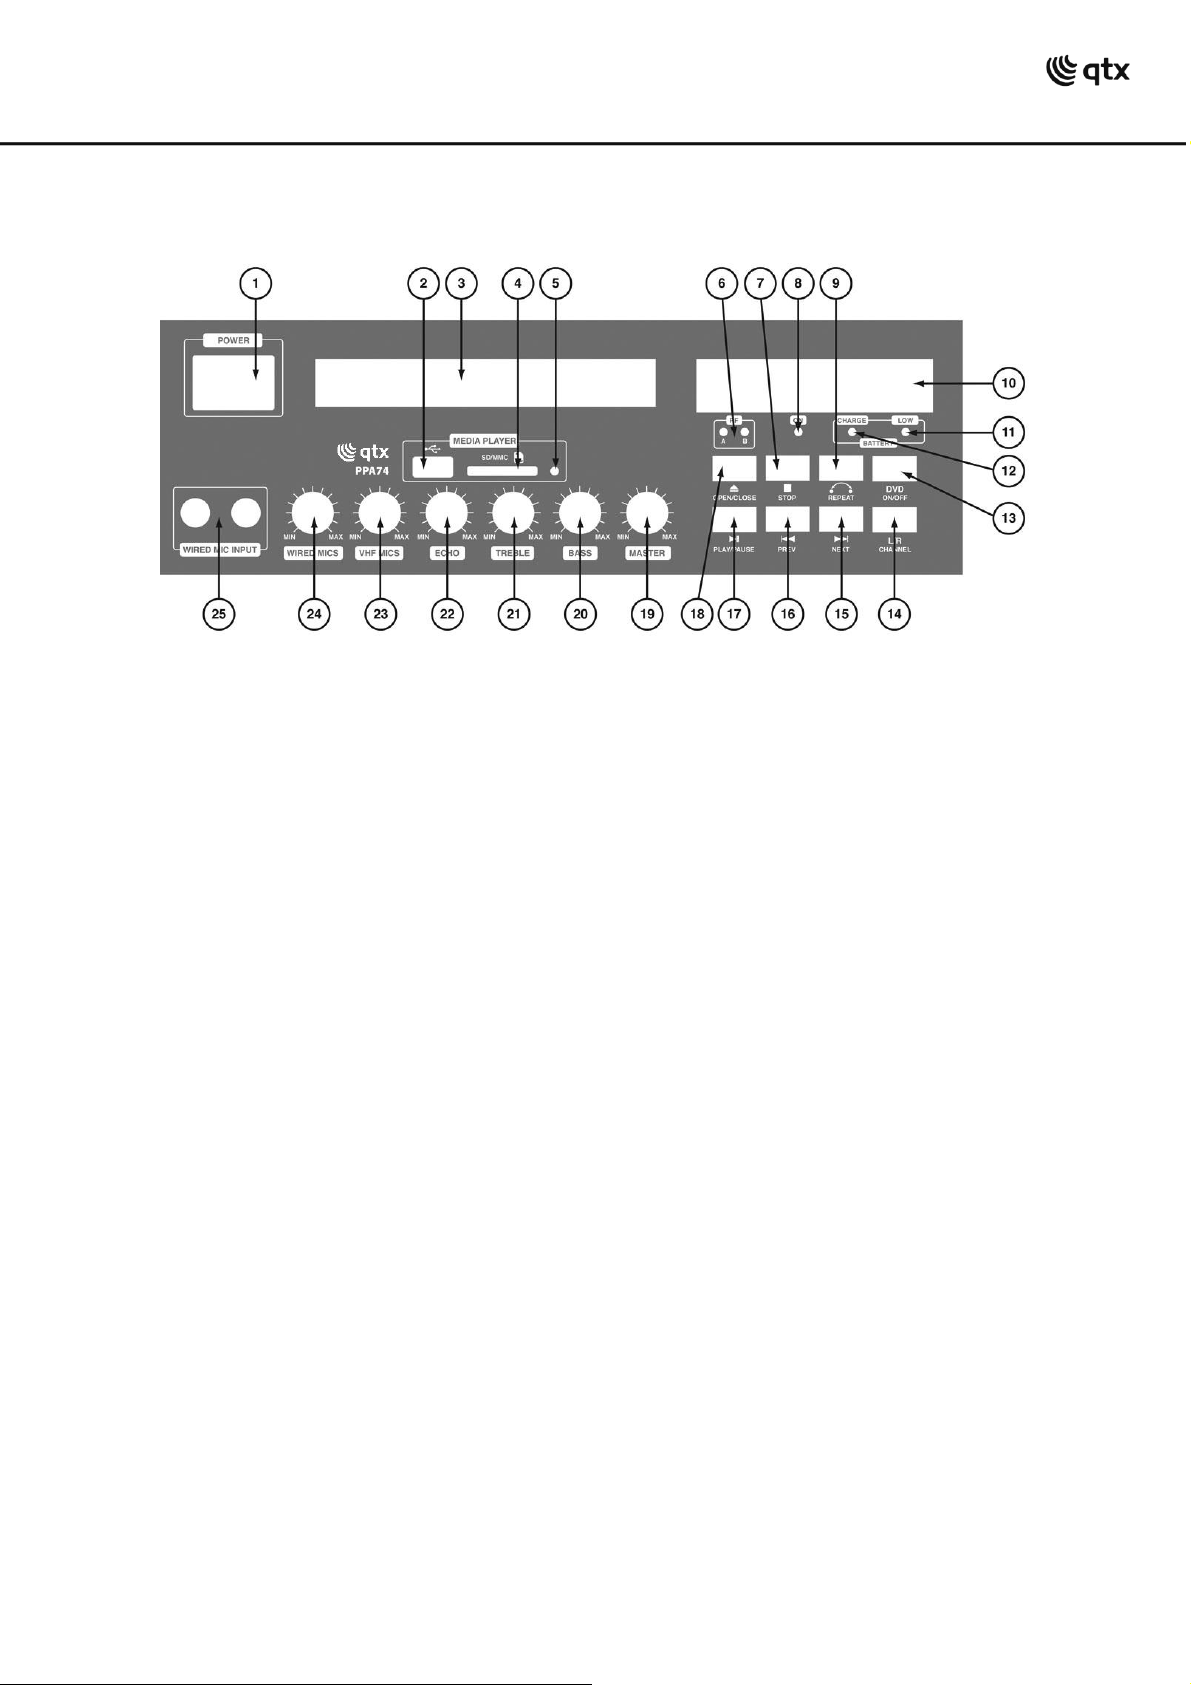
1. Mains POWER switch
2. USB type A memory device input
3. CD/DVD disc drawer
4. SD/MMC card slot
5. USB/SD/MMC media player status indicator
6. VHF wireless microphone indicators (PPA74 only)
7. Transport control: STOP track
8. Power ON indicator
9. Transport control: REPEAT
10. Audio player Mode, Status and Time display
11. BATTERY low indicator
12. BATTERY charging indicator
13. DVD ON/OFF switch
14. L-R karaoke stereo output mode switch
15. Transport control: FORWARD/NEXT track
16. Transport control: REVERSE/PREVIOUS track
17. Transport control: PLAY/PAUSE track
18. OPEN/CLOSE disc eject button
19. MASTER volume control
20. BASS tone control
21. TREBLE tone control
22. ECHO control for microphones
23. VHF MICS level control (PPA74 only)
24. WIRED MICS level control (MICS 1 + 2 on PPA72)
25. WIRED MIC input (MICS 1 + 2 on PPA72)
Control Panel
170.125UK, 170.127UK User Manual
Page 4

Rear Panel
1. Cooling fan – do not cover
2. ACTIVE BUS IN from another PPA unit
3. ACTIVE BUS OUT to another PPA unit
4. LINE IN – L+R auxiliary RCA input
5. LINE OUT – L+R main mix RCA output
6. Audio Front Left RCA output
7. Audio Surround Left RCA output
8. Audio Front Right RCA output
9. Audio Surround Right RCA output
10. Audio Subwoofer RCA output
11. Audio Centre RCA output
12. Audio Front Left RCA output
13. Component video Y (luminance) output
14. Audio Front Right RCA output
15. Component video PB (blue-Y) output
16. S/PDIF audio coaxial output
17. Component video PR (red-Y) output
18. Composite video output
19. VGA video output
20. TOSLINK optical S/PDIF audio output
21. S-Video output
22. Cooling fan – do not cover Power ON indicator
23. MAINS inlet with fuse
170.125UK, 170.127UK User Manual
Page 5

Remote Control
1. DISPLAY mode key
2. PROG – Program track order
3. VIDEO MODE select
4. PSCAN/NORMAL – Progressive scan select
5. Pitch keys – flat/natural/sharp
6. Transport: STOP key
7. ENTER key
8. Previous track key
9. Next track key
10. N/P - NTSC/PAL select
11. Video: SET-UP key
12. L/R stereo mode
13. Video: STEP frame search key
14. Video: ANGLE select
15. TIME key
16. Numerical keypad
17. Standby/On key
18. Disc tray open/close (eject)
19. MUTE key
20. MENU select
21. Video: SLOW key
22. Volume +
23. Video: ZOOM key
24. Volume -
25. Fast Reverse
26. Fast forward
27. Navigation keys
28. Play/Pause key
29. A – B toggle key
30. Video: TITLE screen select
31. REPEAT key
32. Video: SUBTITLE select
33. Video: LANGUAGE select
Connection
Connect the 2 wired microphones to the 6.3mm jack inputs on the front panel
Install 2 x AAA batteries in the remote control handset.
For the PPA74 model, install PP3 batteries into the VHF wireless microphones and connect antennae at the rear.
Connect any required auxiliary line input to the LINE IN RCA connectors on the rear panel.
A left and right output can be connected to further equipment from the LINE OUT connectors on the rear panel.
There are further RCA connectors for 5.1 surround sound connection (AFL, AFR, ASL, ASR, ASW, AC/C) and digital audio
(optical and COAX S/PDIF)
170.125UK, 170.127UK User Manual
Page 6

Connections for video include Component (Y/Y, CP/PB, CR/PR), Composite video, SVHS and VGA connections.
Model
PPA72
PPA74
(Stock Code)
(170.127)
(170.125)
Power Supply
240Vac 50Hz and dual rechargeable 12V/5Ah batteries
Output power
70Wrms @ 4Ω
Microphone inputs
2 x 6.3mm jack
2 x 6.3mm jack + 2 x VHF wireless
VHF microphone power
supply
N/A
9Vdc (PP3 battery) each
VHF microphone
frequencies
N/A
173.8MHz + 174.8MHz
Aux Input
L + R RCA line input
Video outputs
Component, Composite, SVHS and VGA
Audio outputs
L+R line out, 5.1 surround, S/PDIF optical and coax
Multiple unit link
Active bus IN and OUT, 6.3mm jack
Disc Player
CD, CDR, CD+G and DVD playback
Digital Media Player
Compressed digital audio from USB pen drive or SD/MMC card
Charge time
8 hours
THD
<0.1%
Frequency response
50Hz - 20kHz (±3dB)
Dimensions (mm)
540 x 330 x 290mm
Weight
21.4kg
Multiple PPA units can be connected together to create a larger system by connecting a 6.3mm mono jack lead from the
ACTIVE BUS OUT of one PPA unit to the ACTIVE BUS IN of a second PPA unit. This connection can be repeated from the
second PPA unit to a further unit and so on until a chain of PPA units is created.
If the unit is to be run from mains power, connect the supplied IEC lead, checking the supply voltage is correct.
Switch on the POWER switch on the front panel and turn up the MASTER volume gradually.
If a CD, DVD or karaoke disc is to be used for playback, press OPEN/CLOSE button on either front panel or remote
control to open the drawer unit, carefully position the disc in place and press OPEN/CLOSE again.
If a USB pen drive or SD/MMC card with compressed digital audio is to be used for playback, insert this media into the
correct slot on the front panel.
Operation
Playback may start automatically and tracks can be played, paused and navigated using the front panel or remote control
transport controls. For CD/DVD player, it may be necessary to press DVD ON/OFF.
A backlit LCD display shows the status and elapsed time of playback material.
Adjust the MASTER volume control to the required level for the playback and then balance with any auxiliary input.
Switch on wired microphones and gradually increase the WIRED MIC (or MIC1 and MIC2) volume controls whilst testing
the level of speech into the microphone through the speaker. For PPA74, repeat this process for the VHF wireless
microphones.
Adjust BASS and TREBLE controls to achieve the required tone characteristic for microphone and line inputs.
Adjust ECHO control to vary the amount of echo to be applied to microphone inputs for karaoke/vocalists.
Before powering down, it is advisable to turn the MASTER volume down to avoid a loud click when switching off.
Switch off wired and wireless microphones plugged into the unit and remove USB or SD/MMC card media.
Remove any CD or DVD media by pressing OPEN/CLOSE, removing disc and pressing OPEN/CLOSE again.
Press the POWER switch to power down. This will be then be the charging mode for the internal battery.
Specifications
170.125UK, 170.127UK User Manual
Page 7

Troubleshooting
No LEDs lit on front panel
Ensure mains is connected properly or battery is charged
Check mains lead and supply voltage are correct
Battery “CHARGE” LED is lit
Unit is in re-charging mode – switch power on to operate
Battery “LOW” LED is lit
Switch to mains power or switch off until battery is charged
No playback from CD or DVD
Check format is correct (will not play CDROM and some other types)
Press DVD ON/OFF button and use transport controls to check
USB/SD player will not play audio
from media (CM-LIVE models
only)
Press PLAY on transport controls
Check memory device is connected properly (remove and re-insert)
Check file types – standard compressed digital audio files required
Check memory device works on a PC or Mac for standard playback
No output from VHF microphones
(PPA74 only)
Check batteries in handheld transmitters
Check handheld transmitters are switched on
Output is very quiet
Turn up MASTER and/or Microphone level controls
Check volume controls are not turned down on remote control
If Battery LOW LED is lit, switch to mains power or charge battery
Press L/R CHANNEL button to check karaoke output mode
Check for quiet recording of media files on USB/SD or CD
Output is very loud or distorted
Check level of input signal is not too high
Reduce Microphone level controls
Reduce MASTER level control
Ensure Hi-Z line level input(s) not connected via XLR
Check for high gain recording of media files on USB/SD or CD
Feedback (loud squealing or howling
from mics)
Face the microphone away from the speaker
Reduce Microphone LEVEL control and ECHO control
Reduce MASTER volume control
Note: for further troubleshooting, refer equipment to qualified service personnel for testing
DISPOSAL: Please disposal of the unserviceable device according to the current statutory requirements.
Errors and omissions excepted.
Copyright© 2013. AVSL Group Ltd.
170.125UK, 170.127UK User Manual
 Loading...