

AVS AVS-3010i Instruction Manual

Owner’s manual
AVS 3010+
AVS 3010
AVS keyless entry
www.avscarsecurity.com
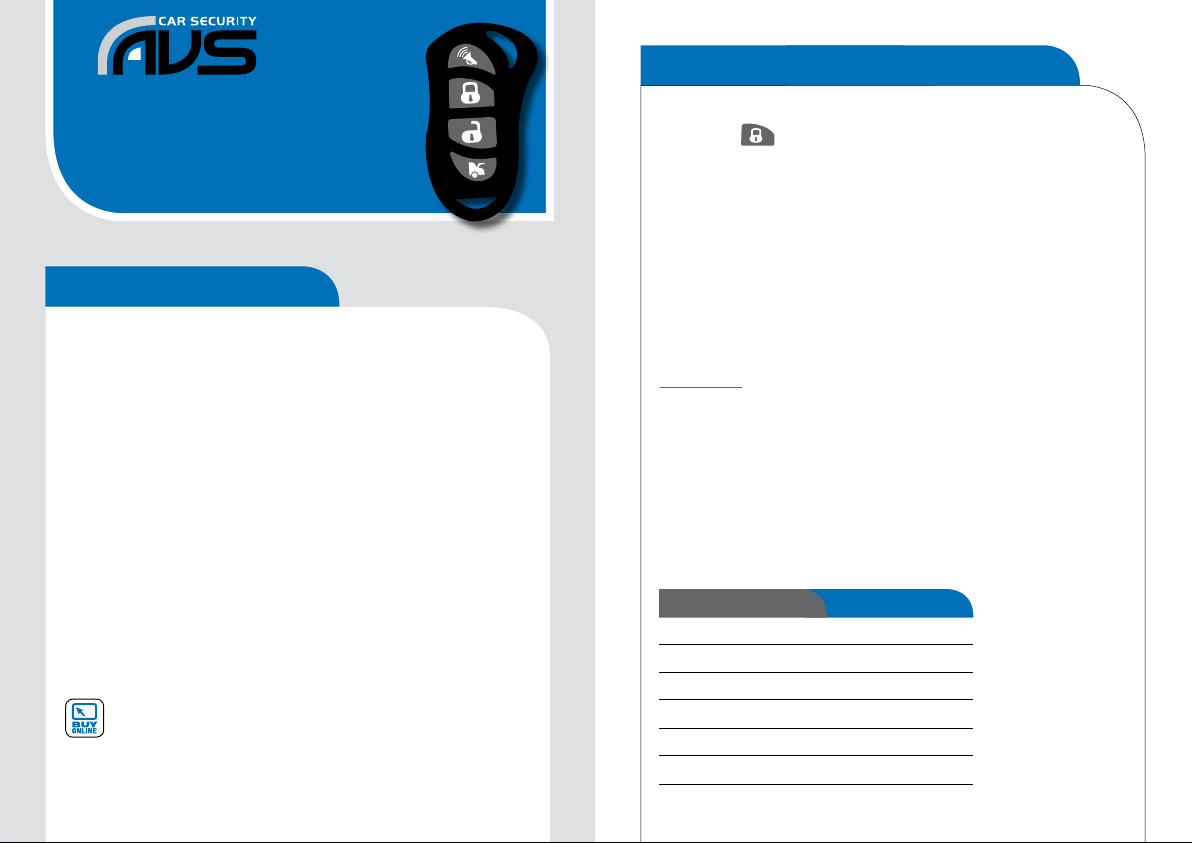
Thank you for choosing a system from the AVS 3010
car alarm range. This range has been designed to
provide reliable security and functionality for you and
your vehicle. Please read this guide carefully and keep
it in a safe place for future reference.
ARMING
1. Press the
button.
2. The indicators will flash once and the siren will chirp once.
3. The doors will lock (if optional central locking installed).
4. The LED light on the dash will light solid for 15 seconds.
5. The LED light will then start flashing. The system is now armed.
ALARM TRIGGER
If a door, bonnet or boot is opened while the system is armed the siren
will sound and the indicators will flash for 30 seconds. The system
will then re-set itself.
Remote controls
Two remotes are supplied and are used to control the system’s
functions. The remotes have rolling codes (4 billion codes) to
prevent scanning and code grabbing devices. The remotes are also
waterproof in normal use conditions.
REMOTE BATTERIES
Each remote is fitted with CR1616 x 2 long life Lithium batteries.
You can purchase new batteries online at avscarsecurity.com, from
your local AVS dealer or good electrical retailers. Replace the remote
batteries if the remote range begins to decrease.
NOTE: Like any electrical device the remotes contain sensitive
components that are easily damaged or broken, especially if dropped.
They are expensive to replace so please take care of them.
Spare remotes and batteries
DOOR AJAR WARNING/ZONE ERROR
If the siren chirps after four seconds on arming a door, bonnet or boot
is opened or there is a problem with one of the zones in the vehicle.
The system will exclude that zone until there is no error. See the
table below for the zone error message:
Number of chirps Error zone
1 Door*
2 Bonnet/boot
3 Voltage drop
4 Optional sensor
5 Shock sensor
6 ACC/ignition
* If your vehicle has a factory interior light delay this feature may not be available.
Normal operation AVS 3010+ and AVS 3010
AVS 3010+
The AVS 3010+ can also be triggered from the shock sensor. See
Shock Sensor later in this manual.
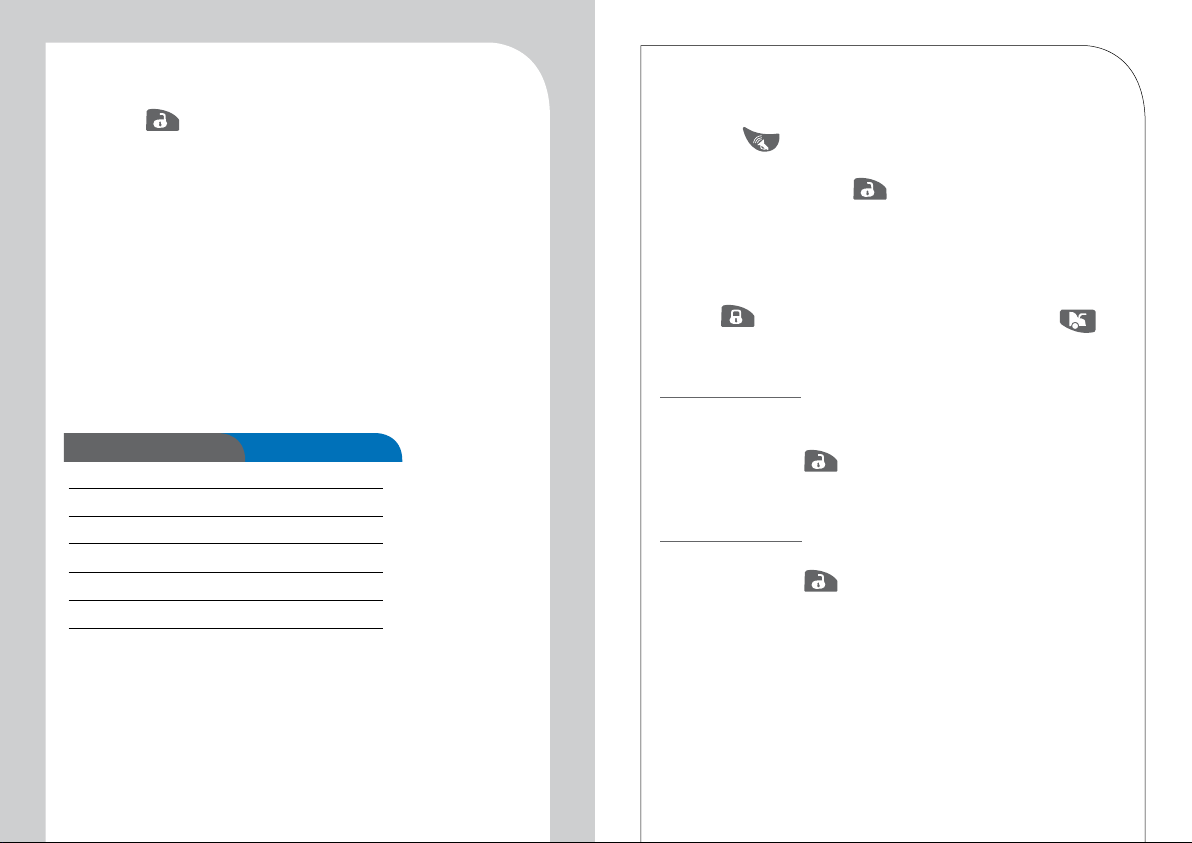
DISARMING
1. Press the
button.
2. The indicators will flash and the siren will chirp three times.
3. The doors will unlock (if optional central locking installed).
4. The LED light on the dash will go out. The system is now disarmed.
ALARM TRIGGER ZONE
1. Disarm the alarm and turn on the ignition.
2. Watch the LED light on the dash and count the number of flashes.
It will only flash the first time you turn on the ignition after a trigger.
3. See the table below for zone codes.
PANIC/CAR FINDER
If the alarm is triggered while you are away from the vehicle the LED
light on the dash will tell you which zone has been triggered.
Number of flashes Triggered zone
1 Door
2 Bonnet/boot
3 Voltage drop
4 Optional sensor
5 Shock sensor
6 ACC/ignition
VALET MODE
1. Make sure the car ignition is turned off.
2. Press the
button on the remote.
3. The indicators will flash and the siren will sound for 30 seconds.
4. To cancel panic, press the
button.
This mode will stop the alarm arming. It is a useful if your vehicle
is being serviced or repaired. In valet mode only central locking
from the
(if connected) and the boot release from the
button (if connected) of the remote will operate.
Turn valet mode on
1. Disarm the alarm.
2. Turn the ignition on.
3. Push and hold the
button on the remote for two seconds.
4. The siren will chirp 10 times to confirm it is in valet mode.
Turn valet mode off
1. Turn the ignition on.
2. Push and hold the
button on the remote for two seconds.
3. The siren will chirp 10 times to confirm valet mode is off.
IMMOBILISATION
The alarm includes two immobiliser cuts via the starter motor and
ignition system or fuel pump. The immobilisers come on automatically when the alarm is armed so the car cannot be started unless the
alarm is disarmed via the remote.
 Loading...