

Page 1

SPC
Installer/User Guide
Page 2
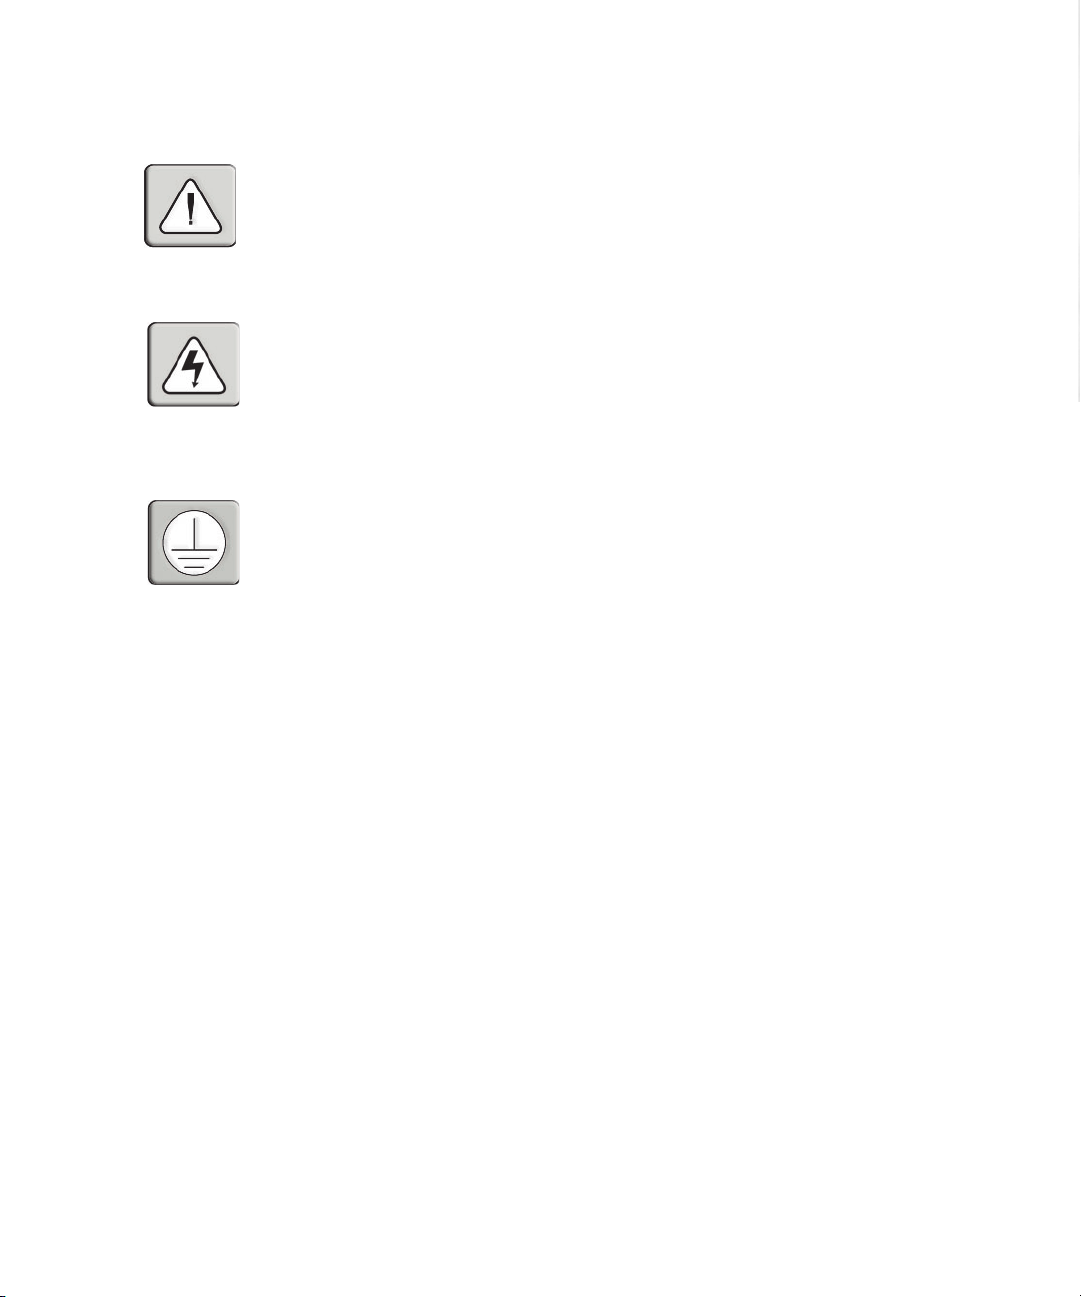
INSTRUCTIONS
This symbol is intended to alert the user to the presence of important operating and
maintenance (servicing) instructions in the literature accompanying the appliance.
DANGEROUS VOLTAGE
This symbol is intended to alert the user to the presence of uninsulated
dangerous voltage within the product’s enclosure that may be of sufficient
magnitude to constitute a risk of electric shock to persons.
PROTECTIVE GROUNDING TERMINAL
This symbol indicates a terminal which must be connected to earth ground
prior to making any other connections to the equipment.
Page 3

SPC
Installer/User Guide
Avocent, the Avocent logo, The Power of Being There and CPS
are trademarks of Avocent Corporation. All other marks are the
property of their respective owners.
© 2003 Avocent Corporation. All rights reserved.
Page 4

USA Notification
Canadian Notification
Compliance
Warning: Changes or modifications to this unit not expressly approved by the party
responsible for compliance could void the user's authority to operate the equipment.
Note: This equipment has been tested and found to comply with the limits for a Class A
digital device, pursuant to Part 15 of the FCC Rules. These limits are designed to provide
reasonable protection against harmful interference when the equipment is operated
in a commercial environment. This equipment generates, uses and can radiate radio
frequency energy and, if not installed and used in accordance with the instruction
manual, may cause harmful interference to radio communications. Operation of this
equipment in a residential area is likely to cause harmful interference in which case the
user will be required to correct the interference at his own expense.
This digital apparatus does not exceed the Class A limits for radio noise emissions
from digital apparatus set out in the Radio Interference Regulations of the Canadian
Department of Communications.
Le présent appareil numérique n’émet pas de bruits radioélectriques dépassant les
limites applicables aux appareils numériques de la classe A prescrites dans le Règlement
sur le brouillage radioélectrique édicté par le Ministère des Communications du Canada.
Units have been safety tested/certified to the following standards: USA and Canada to UL
60950 3rd Ed. and CAN/CSA 22.2 No. 60950-00, European Union to EN60950.
Page 5

Table of Contents
Chapter 1: Product Overview
Features and Benefits . . . . . . . . . . . . . . . . . . . . . . . . . . . . 3
Safety Precautions . . . . . . . . . . . . . . . . . . . . . . . . . . . . . . 4
Chapter 2: Installation
Getting Started . . . . . . . . . . . . . . . . . . . . . . . . . . . . . . . . . 9
Component Overview . . . . . . . . . . . . . . . . . . . . . . . . . . . 9
Rack Mounting . . . . . . . . . . . . . . . . . . . . . . . . . . . . . . . 11
Connecting the SPC to the CPS . . . . . . . . . . . . . . . . . . . 12
Connecting the SPC to the Power Source . . . . . . . . . . . 12
Connecting Devices to the SPC . . . . . . . . . . . . . . . . . . . 13
Chapter 3: Operations
Interfaces . . . . . . . . . . . . . . . . . . . . . . . . . . . . . . . . . . . . 17
Port Naming and Grouping . . . . . . . . . . . . . . . . . . . . . 17
Usernames and Passwords . . . . . . . . . . . . . . . . . . . . . . 17
Logging In . . . . . . . . . . . . . . . . . . . . . . . . . . . . . . . . . . . 18
Using the Command Line . . . . . . . . . . . . . . . . . . . . . . . 19
Operations Commands . . . . . . . . . . . . . . . . . . . . . . . . . 20
Administration Commands . . . . . . . . . . . . . . . . . . . . . 25
Using the Control Screen . . . . . . . . . . . . . . . . . . . . . . . 34
Ending a Session . . . . . . . . . . . . . . . . . . . . . . . . . . . . . . 39
Appendices
Appendix A: Resetting to Factory Defaults . . . . . . . . . 43
Appendix B: Technical Specifications . . . . . . . . . . . . . 44
Appendix C: Technical Support . . . . . . . . . . . . . . . . . . 46
Page 6

Page 7

1
Product Overview
Contents
Features and Benefits . . . . . . . . . . . . . . . . . . . . . . . . . . . . 3
Safety Precautions . . . . . . . . . . . . . . . . . . . . . . . . . . . . . . 4
Page 8

Page 9

Chapter 1: Product Overview 3
Chapter 1: Product Overview
Features and Benefits
The Avocent SPC offers secure AC power management for 8 (SPC800/810) or
16 (SPC1600/1610) attached devices. The SPC can remotely control the power
on/off status for each attached device plus provide measurement and reporting
of the total combined load of all devices for more accurate load management.
Wake-up power sequencing
When the SPC is powered up, each of the power receptacles, or ports, is
powered sequentially with a two-second delay between each port. This power
sequencing staggers the individual loads, eliminating the potential of a blown
fuse or circuit breaker.
Cumulative load measurement
The load measurement feature eliminates guesswork by supplying the
cumulative operating load in amperes. This measurement allows on-site
technicians to install and operate as much equipment as possible on a circuit
without worry. Circuit use is maximized, while effectively leaving a 10% to
20% safety margin. Remote users may also access this information at any time
over an IP connection from the SPC command line or control screen.
Port grouping
For simultaneous operations across multiple attached devices, SPC ports may
be combined in named groups. Operations may then be issued to all ports in
the named group with one easy command sequence.
Easy installation
The SPC ships with mounting brackets for easy rack installation. Vertical units
install on the side of a rack without taking up valuable U-space. Horizontal
units use only 1U (SPC800/810) or 2U (SPC1600/1610) of rack space.
User interfaces and LEDs
The SPC features two types of user interfaces: the command line and the
control screen. For easier port recognition, both individual ports and port
groups may be assigned descriptive names for use in control commands. For
the local technician, LED displays on the SPC indicate individual port power
status and the cumulative power load.
Administrative security and control
The SPC ships with three predefined usernames, including an administrator.
The administrator may create up to 57 additional usernames, each with port and
command access rights. SPC access is further secured through password protection.
Page 10
4 SPC Installer/User Guide
For configurations that require multiple fully-privileged users, administrative
privileges may be granted to other users in the system.
Automatic time-out
When an SPC user ends a session, configuration changes made during the
session are saved. For added system security, a user session will be terminated
automatically after five minutes of inactivity, without saving any configuration
changes made during the session. If a user is called away unexpectedly, an
unprotected channel will not remain open indefinitely.
Configuration reset capability
The SPC may be reset to the factory default configuration through an
administrative level command. If the administrator password is lost or
unavailable, the unit may be reset manually by pressing a reset button on the
SPC unit.
Using the SPC with Avocent Appliances
The SPC user interfaces described in this document are available when a serial
Telnet connection is made to the unit. When an SPC is connected as a device on
an Avocent appliance, these interfaces may be available or other interfaces may
be provided by the Avocent appliance, depending on the configuration. For more
information, see the installer/user guide for the appropriate Avocent appliance.
Safety Precautions
This section contains important safety and regulatory compliance information that
should be reviewed before installing and using the SPC. For input and output
current ratings, see Appendix B.
• This equipment is only for installation by qualifi ed service personnel and
use in a Restricted Access Location with the following installation and
use instructions.
• This equipment is designed to be installed on a dedicated circuit.
• The dedicated circuit must have circuit breaker or fuse protection. SPC
units have been designed without a master circuit breaker or fuse to avoid
becoming a single point of failure. It is the customer’s responsibility to
provide adequate protection for the dedicated power circuit. Protection
should not exceed 120% of the Total Output Rating of the SPC units (see
Appendix B), have a 10,000 A interrupt rating and must meet all applicable
local, state and federal codes and regulations.
• The plug on the power supply cord shall be installed near the equipment
and shall be easily accessible.
Page 11
Chapter 1: Product Overview 5
• Always disconnect the power supply cord before opening to avoid
electrical shock.
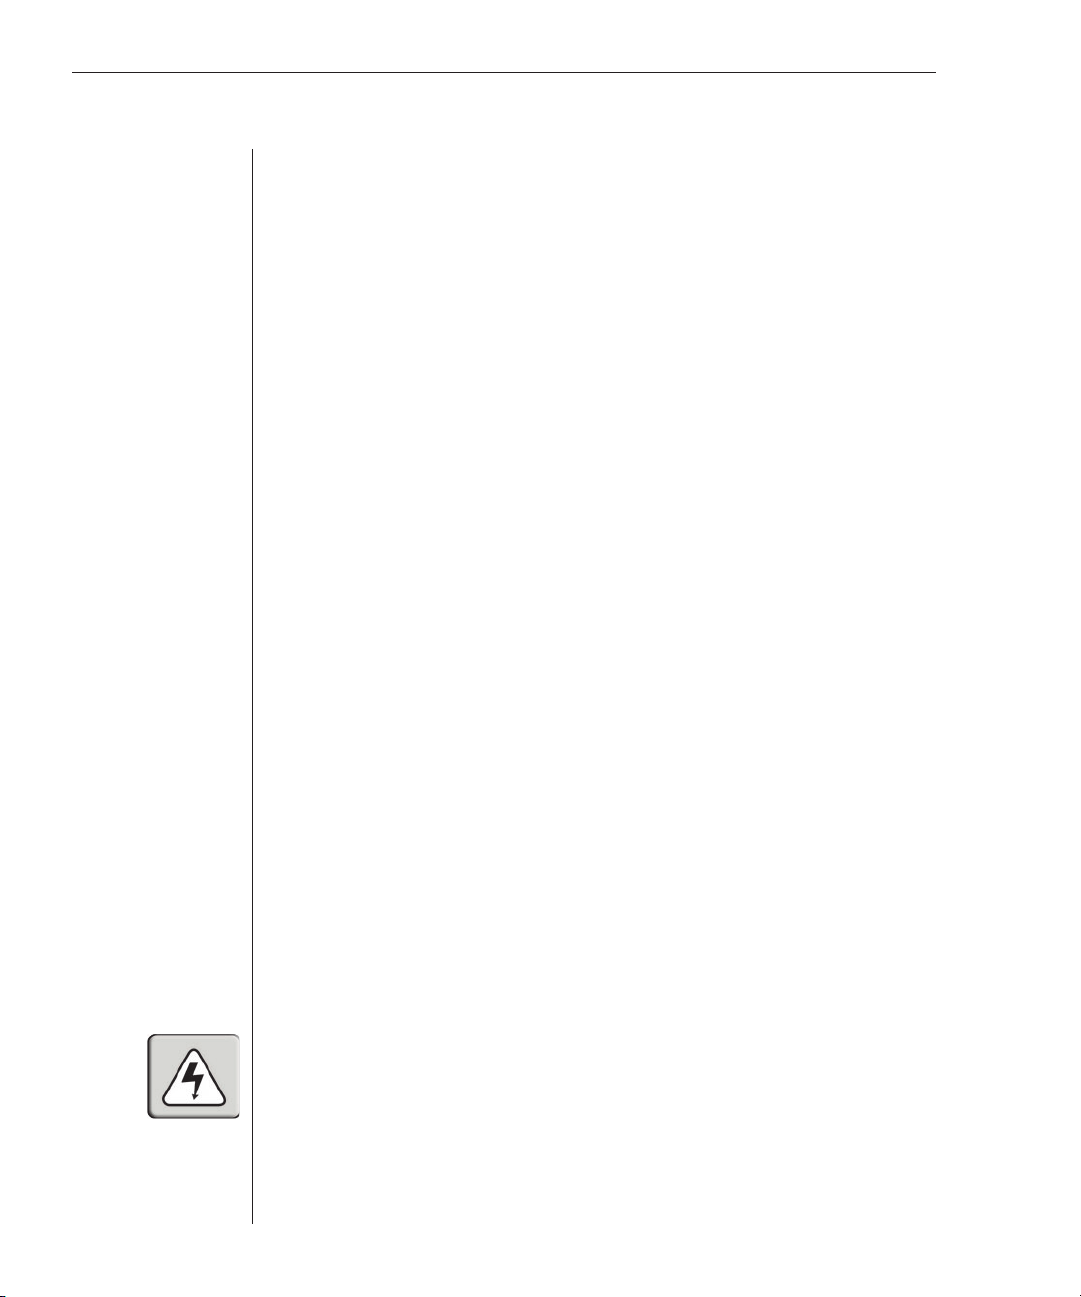
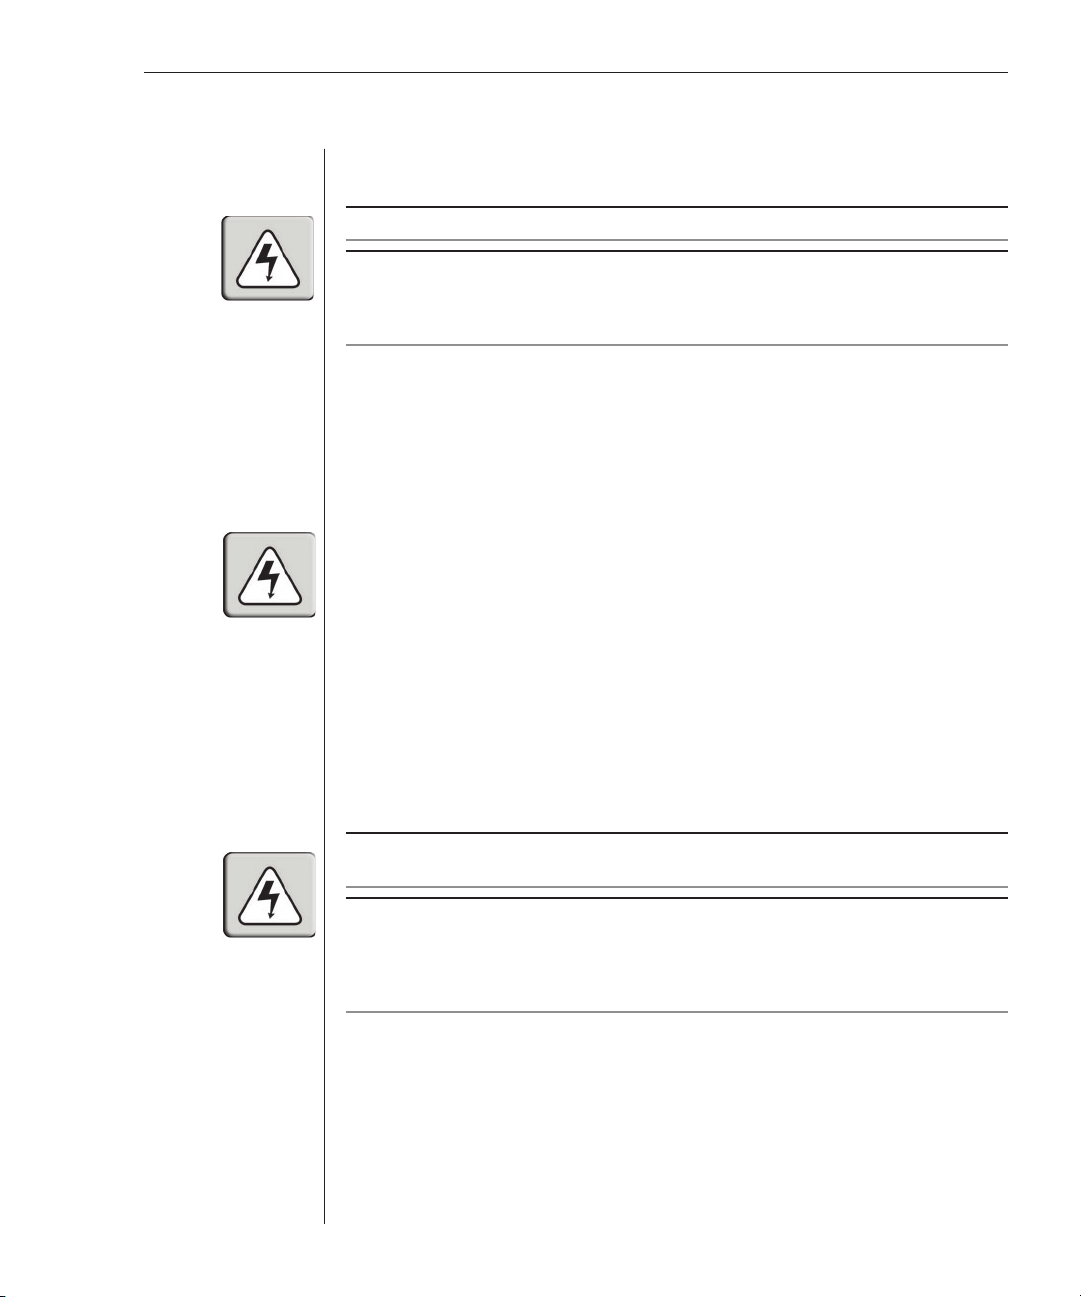
WARNING:
High leakage current! Earth connection is essential before connecting supply!
WARNING: 208-240/230V models only - Outlets are not fused. Outlet circuit protection
is provided by the building installation, which shall not exceed 30A branch circuit protection. The
actual branch circuit protection limit will vary depending on the type of SPC unit and should be
specifi ed by qualifi ed service personnel.
Mesures de sécurité
• Ce matériel doit être installé uniquement par le personnel de maintenance
qualifi é et doit être utilisé dans une zone à accès limité conformément aux
instructions d’installation et d’utilisation suivantes.
• Cet équipement est conçu pour être installé sur un circuit spécialisé.
• Le circuit spécialisé doit être muni d’un disjoncteur ou d’une protection
par fusible. Les unités SPC ont été conçues sans disjoncteur général ni
fusible pour éviter un point de panne unique. Il est de la responsabilité du
client de fournir une protection adéquate pour le circuit d’alimentation
spécialisé. La protection ne doit pas dépasser 120 % de la valeur nominale de sortie totale des unités SPC (voir Annexe B), doit avoir une valeur
nominale d’interruption de 10 000 A et doit être conforme à toutes les
régulations locales, nationales et fédérales applicables.
• La prise du d’alimentation doit être installée a proximité du matériel et
doit être facilement accessible.
• Toujours déconnecter le cordon d’alimentation avant d’ouvrir le matériel
pour éviter un choc électrique.
ATTEN TION:
connecter l’alimentation!
Courant de fuite élevé! Une connexion de masse est essentielle avant de
ATTEN TION: Modèles 208-240/230V uniquement - Les prises n’ont pas de fusible
incorporé. Une protection de la circuit de la prise est fournie par l’installation du bâtiment, qui
ne doit pas dépasser la protection du circuit de dérivation de 30A. La limite de la protection du
circuit de dérivation varie selon le type d’unité SPC et doit être spécifi ée par le personnel de
maintenance qualifi é.
Page 12
6 SPC Installer/User Guide
Sicherheitsvorkehrungen
• Dieses Gerät darf nur unter Beachtung der folgenden Installations- und
Bedienungsanleitung durch qualifi ziertes Wartungspersonal installiert
und in Bereichen mit beschränktem Zugang betrieben werden.
• Dieses Gerät muss an einen zweckbestimmten Stromkreis angeschlossen
werden.
• Der zweckbestimmte Stromkreis muss durch einen Stromkreisunterbrecher oder eine Sicherung gesichert sein. SPC-Einheiten sind weder
mit Hauptsromkreisunterbrecher noch mit einer Sicherung ausgerüstet,
damit sie nicht zu einer Hauptfehlerquelle werden. Der Kunde ist für die
Absicherung des zweckbestimmten Stromkreises verantwortlich. Die
Absicherung sollte nicht 120 % der Gesamtausgangsleistung der SPC-Einheiten übersteigen (siehe Anhang B), muss über eine Abschaltleistung von
10000 A verfügen und muss allen örtlichen, staatlichen und öffentlichen
Bestimmungen entsprechen.
• Der Netzstecker muss in der Nähe de Geräts installiert werden und sollte
leicht zugänglich sein.
• Vor dem Öffnen der Einheit den Netzstecker abziehen, um Elektroschock
zu vermeiden.
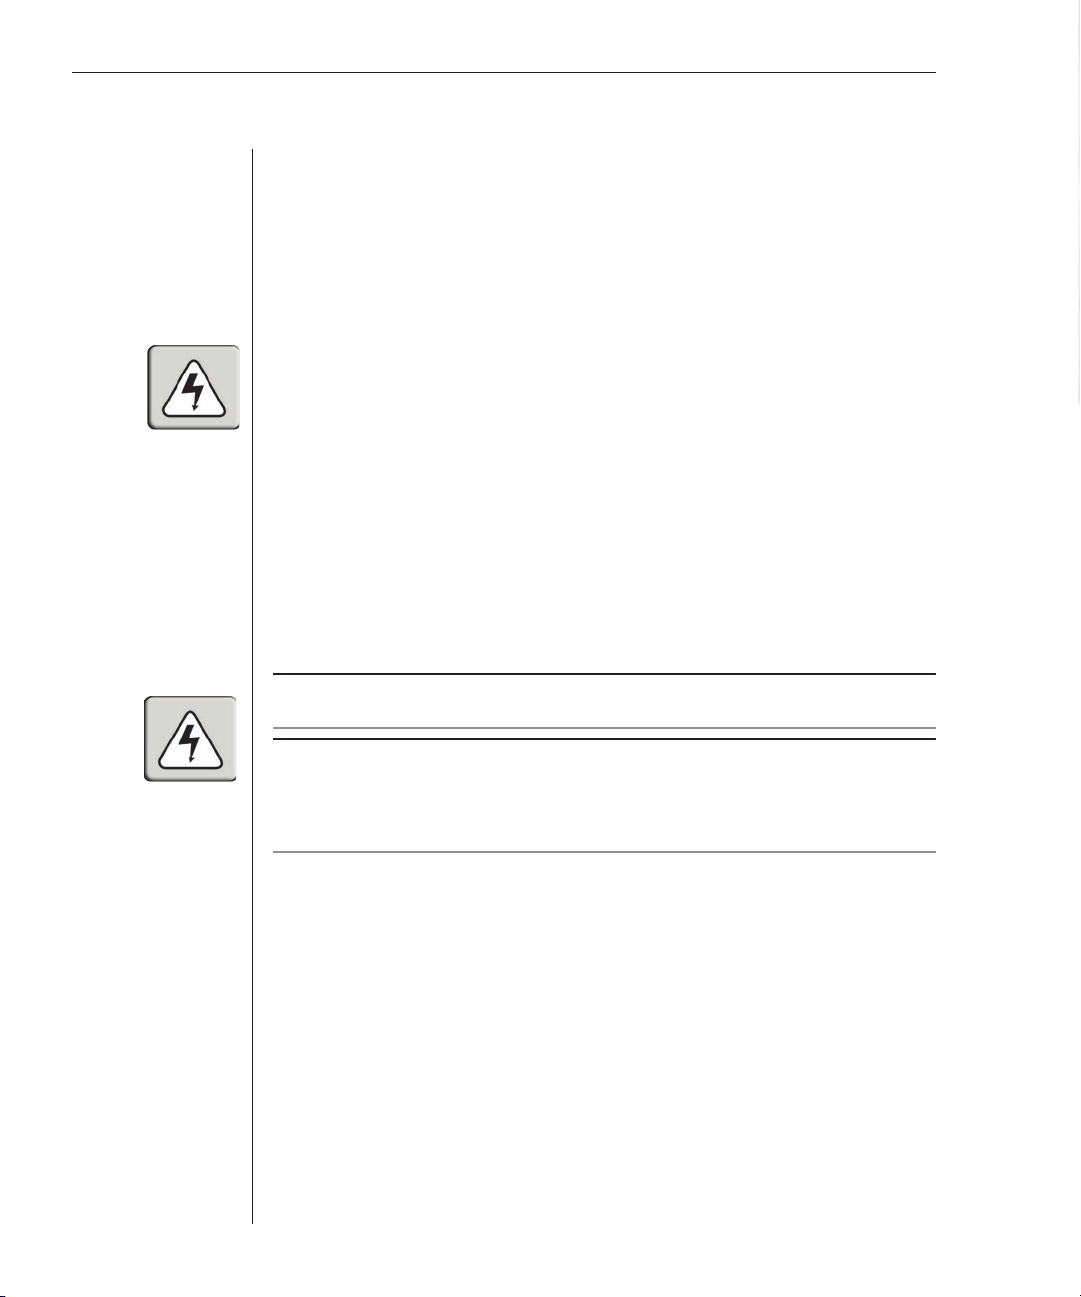
WARNUNG.
geerdet werden!
Hoher Ableitstrom! Gerät muss vor dem Anschluss an eine Stromversorgung
Warnung: nur für 208-240/230V-Modelle - Stromausg änge sind nicht abgesichert.
Die Absicherung des Ausgangskreises erfolgt durch die Gebäudeinstallation, die 30A pro
Abzweigkreis nicht übersteigen sollte. Die eigentliche Absicherungsbegrenzung für einen
Abzweigkreis ist von dem entsprechenden SPC-Gerätetyp abhängig und muss durch
qualifi ziertes Wartungspersonal bestimmt werden.
Page 13

2
Installation
Contents
Getting Started . . . . . . . . . . . . . . . . . . . . . . . . . . . . . . . . . 9
Component Overview . . . . . . . . . . . . . . . . . . . . . . . . . . . 9
Rack Mounting . . . . . . . . . . . . . . . . . . . . . . . . . . . . . . . 11
Connecting the SPC to the CPS . . . . . . . . . . . . . . . . . . . 12
Connecting the SPC to the Power Source . . . . . . . . . . . 12
Connecting Devices to the SPC . . . . . . . . . . . . . . . . . . . 13
Page 14

Page 15

Chapter 2: Installation 9
Chapter 2: Installation
Getting Started
Before installing your SPC, refer to the following lists to ensure that you have
all the items that shipped with the SPC as well as all other items necessary
for proper installation.
Supplied with the SPC
Your SPC package contains the following items:
• SPC unit
• Separate power cord - specifi c 230V units only
• RJ-45 cable
• Mounting bracket hardware
• RJ-45-to-DB9F-DCE serial port adaptor (used by service personnel)
• 8 (SPC800/810) or 16 (SPC1600/1610) port retention clips - units with IEC
outlets only
• SPC Installer/User Guide
Items needed for installation
• Phillips screwdriver
• Screws, washers and nuts to attach the SPC to your rack
Component Overview
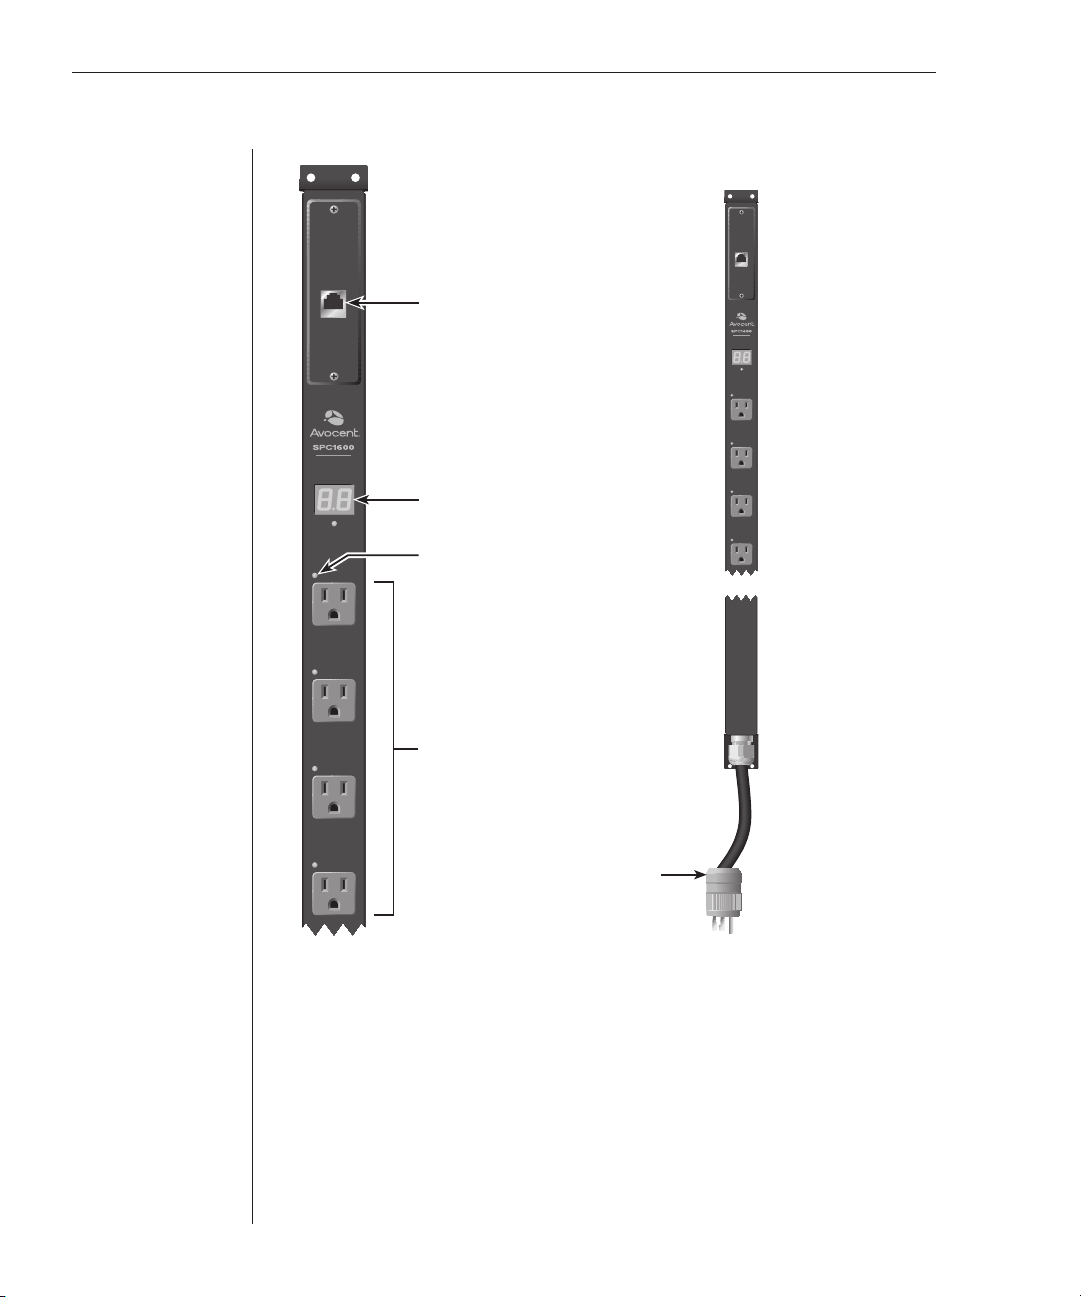
Figure 2.1 shows portions of a 115V vertical SPC. Horizontal units have the
same components described below.
The RJ-45 serial port is used for the cable connection to an appliance.
The Input Current digital LED indicates the total cumulative load in amperes
(A) of all the devices attached to the SPC ports. The LED readout increases in
0.5A increments up to 9.5A. Above 10A, the LED increases in 1.0A increments.
All SPC models indicate an overload by displaying oL at 30.5A, which is the
maximum rating of the SPC unit without considering the capacity of the cord set.
The SPC800/810 has 8 power output connectors, which are called ports. The
SPC1600/1610 has 16 ports. Each port supplies power to an attached device,
and can be individually turned on and off. See the port specifications in
Appendix B for more information.
An LED adjacent to each port will illuminate when that port is powered.
Page 16
10 SPC Installer/User Guide
A1
Input
Current
A2
A3
A4
A1
Input
Current
A2
A3
A4
RJ-45 Serial Port
Input Current LED
Port LED
Ports
AC Power Cord
Figure 2.1: SPC Views
A letter/number combination is printed near each SPC port. The ports are
labeled A1 through A4, B1 through B4, C1 through C4 and D1 through D4.
These names may be used in commands that require a port name. See Port
Naming in Chapter 3 for more information.
The power input cord connects the SPC to the electrical power source. See
power cord and plug specifications in Appendix B for more information.
Page 17
Chapter 2: Installation 11
A1
Input
Current
In horizontal units, the “data side” contains the RJ-45 serial port. The
opposite “power side” contains all the other components. You may rack
mount a horizontal unit with either the data side or power side facing the
front of the rack.
Rack Mounting
To rack mount the SPC, first attach the mounting brackets to the unit, then
attach the SPC to your rack.
To rack mount a vertical SPC:
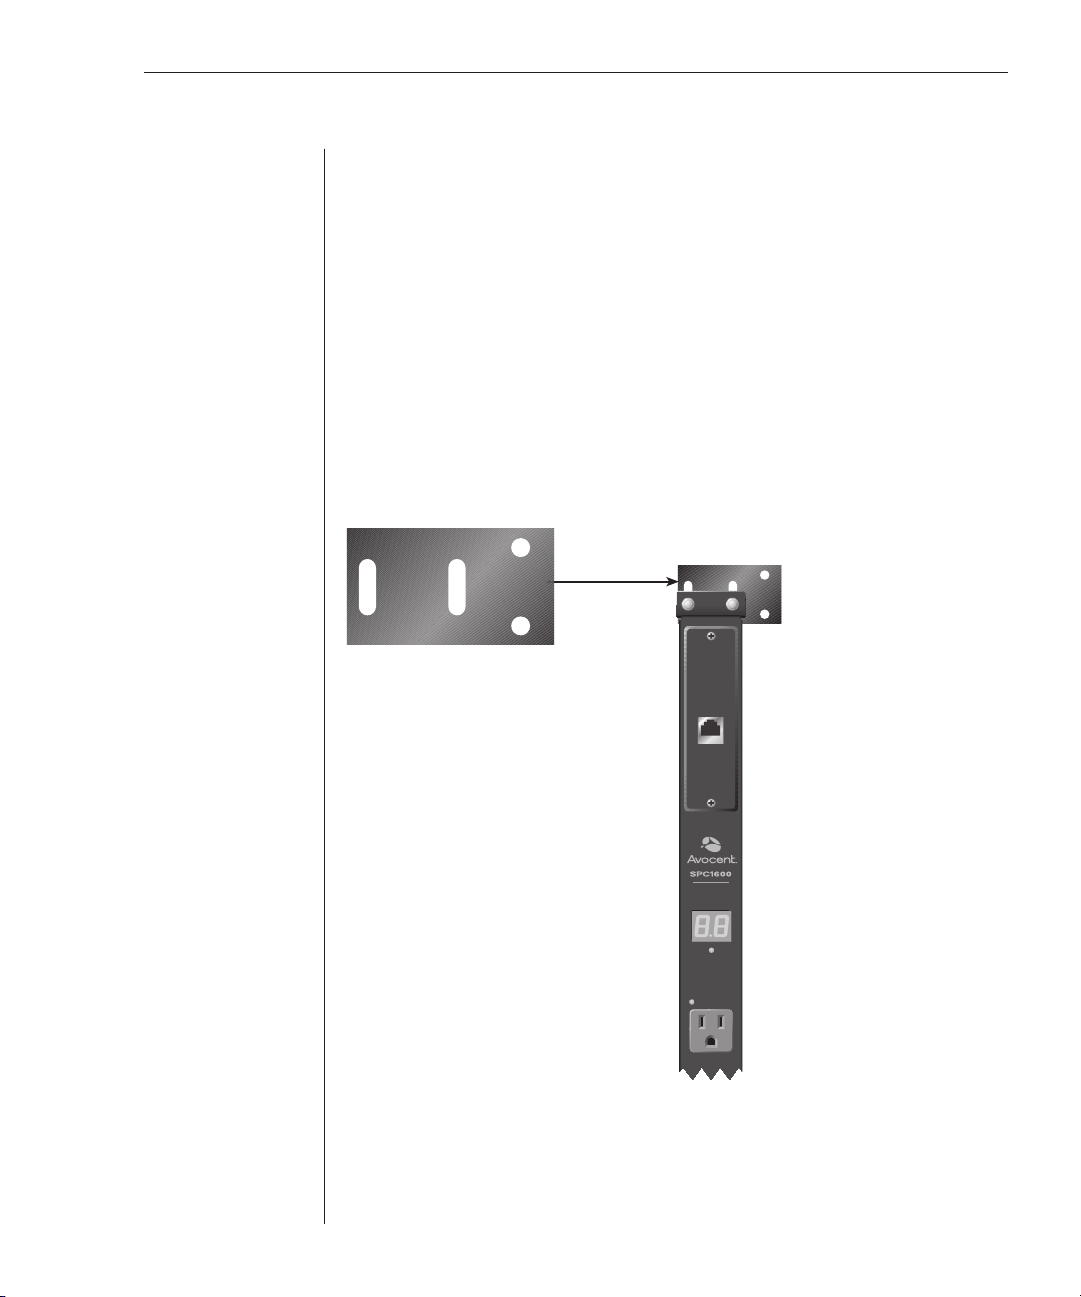
1. Attach one mounting bracket to the top fl ange of the SPC with one set of
screws and washers through each of the slots in the bracket, as shown in
Figure 2.2. Secure each screw with a nut. The slots allow about 1/2 inch of
vertical adaptability.
Figure 2.2: Rack Mounting Bracket for Vertical Units
2. Repeat with the other mounting bracket on the bottom fl ange of the SPC.
Page 18

12 SPC Installer/User Guide
3. Attach the top and bottom brackets to your rack, using the round holes in
each bracket. The round holes may not align with the mounting holes in
your rack. In this case, you may use only one screw and washer set per
bracket to secure the SPC to your rack, as long as both top and bottom
brackets are attached to the rack.
To rack mount a horizontal SPC:
1. Each side of the SPC has multiple bracket mount Pemnuts to
accommodate variable depths. Select the appropriate bracket mounting
point on one side and attach a bracket with two of the screws provided.
2. Repeat with the other mounting bracket on the other side of the unit.
3. Install the unit in your rack, using the slots in each bracket. The slots
allow about 1/4 inch of horizontal adaptability to align with the mounting
holes of your rack.
Connecting the SPC to a CPS
Connect either end of the supplied RJ-45 cable to the connector on the SPC.
Connect the other end to a CPS port.
Connecting the SPC to the Power Source
Depending on the model number, units are shipped with different power cord
configurations and arrangements.
• For a unit with a power cord attached to the SPC and fi tted with a plug,
direct connection to the power source is allowed.
• For a unit supplied with a detachable power cord, the power cord must be
fi rst attached to the SPC and then to the power source.
• A unit with a power cord attached but without a plug (unterminated)
requires qualifi ed service personnel to select and install the appropriate
plug before attaching the SPC to the power source.
Each port powers up sequentially, with a two-second delay between each port,
eliminating a potential blown primary fuse or circuit breaker.
To attach a detachable 230V power cord to the 230V SPC unit:
1. Plug the female end of the power cord fi rmly into its connector on the SPC.
2. Use a screwdriver to tighten the two screws on the retention bracket.
To connect the SPC to the power source:
Plug the male end of the SPC power cord into the AC power source.
Page 19

Chapter 2: Installation 13
Connecting Devices to the SPC
To avoid the possibility of noise due to arcing:
Keep the device’s on/off switch in the off position until after it is plugged into
the SPC port.
- or Log in to the SPC and turn the ports off before connecting the devices to the
SPC. After connecting the devices, turn them on using the SPC.
On 115V units, connect devices to the SPC ports. On 230V units, install a
retention clip on each port. Pull the open prongs out slightly and insert them
into holes on the sides of the SPC adjacent to the port. Then insert the device’s
power cord and gently snap the retention clip over the cord.
It is recommended that the attached devices be evenly distributed across all
available outlets to avoid exceeding outlet ratings limitations.
WARNING:
unit. Always disconnect the power cord from the wall outlet.
The SPC and all attached devices should be powered down before servicing the
Page 20

14 SPC Installer/User Guide
Page 21

3
Operations
Contents
Interfaces . . . . . . . . . . . . . . . . . . . . . . . . . . . . . . . . . . . . 17
Port Naming and Grouping . . . . . . . . . . . . . . . . . . . . . 17
Usernames and Passwords . . . . . . . . . . . . . . . . . . . . . . 17
Logging In . . . . . . . . . . . . . . . . . . . . . . . . . . . . . . . . . . . 18
Using the Command Line . . . . . . . . . . . . . . . . . . . . . . . 19
Operations Commands . . . . . . . . . . . . . . . . . . . . . . . . . 20
Administration Commands . . . . . . . . . . . . . . . . . . . . . 25
Using the Control Screen . . . . . . . . . . . . . . . . . . . . . . . . 34
Ending a Session . . . . . . . . . . . . . . . . . . . . . . . . . . . . . . 39
Page 22

Page 23

Chapter 3: Operations 17
Chapter 3: Operations
Interfaces
The SPC has two interfaces: command line and control screen. When a valid
user logs in, the command line prompt (SPC:) appears. From this prompt,
commands may be issued according to the user’s privileges. The control screen
is accessed from the command line with the Show command. You may return
to the command line from the control screen by typing c.
You may end an SPC session either from the command line or the control screen.
Port Naming and Grouping
When a command calls for an SPC port name, you may specify it in one of two ways:
a predefined absolute name or a descriptive name assigned by the administrator.
An absolute name is specified by a period (.) followed by a group letter and
number. Beginning at the top of the SPC800/810 or 1600/1610, the first four
ports form group A, and the next four ports form group B. On the SPC1600/
1610, the third set of four ports forms group C and the final set of four ports
forms group D. Ports within each group are numbered 1 through 4. The letter/
number value is printed above each port. To specify an absolute port name,
add a period before this value. For example, the eleventh port on an SPC1600/
1610 has an absolute port name of .C3.
Alternatively, descriptive port names may be created on the control screen and
used in commands that require a port name. See Using the Control Screen in
this chapter for more information about descriptive port names.
SPC ports may be assigned group names on the control screen, enabling you
to issue a command that affects all ports in the group. Specify the group name
with the command, such as on, off or reboot. See Using the Control Screen for
more information about group names.
Usernames and Passwords
The SPC has three predefined usernames, shown in the following table.
Predefi ned Usernames
Name Password Privileges
Admn admn Fully-privileged
Gen1 gen1 Semi-privileged
Gen2 gen2 Semi-privileged
Page 24

18 SPC Installer/User Guide
NOTE: For security, you may wish to change the passwords for the predefi ned usernames.
You may add up to 57 additional users.
By default, only the Admn user may perform administrative operations such as
adding/deleting usernames and command privileges, changing passwords and
displaying port and user information. The Admn user may also view the status
of all SPC ports, access the control screen and control power to all ports.
By default, the Gen1 and Gen2 users may view the status of all SPC ports,
access the control screen and control power to all ports. The administrator may
change these privileges.
The administrator creates additional usernames with the Add User command,
then uses the Add Port command to grant these users the right to view the
status of and control power to specific SPC ports. The administrator uses the
Set Show command to grant control screen access to additional users.
The administrator may grant administrative privileges to another user with the
Admnp command. This command may also be used to remove administrative
privileges previously granted to another user. This feature allows the SPC to
have more than one administrator-level user.
Additional usernames must contain from 1-16 characters; spaces are not
allowed. A username is not case sensitive. Passwords may contain up to
16 characters, and are case sensitive. A password is not required for an
additional user. The administrator may change a password with the Set
Password command.
For security, when a password is typed, either blanks or asterisks appear on
the screen instead of the typed password characters.
See Administration Commands in this chapter for more information about
commands that create and manage usernames.
NOTE:
SPC usernames are distinct from CPS usernames.
Logging In
To log in to the SPC:
1. Initiate a Telnet session to the CPS port with the SPC connection. Enter
your CPS username and password, if required.
Page 25

Chapter 3: Operations 19
2. After receiving the Connected to port ... banner, press the Enter key
twice. The following appears, where x.x is the fi rmware version:
Avocent SPC Version x.x
Username:
3. At the Username: prompt, enter a valid username and press Enter. The
Password: prompt appears.
If you do not enter a valid username within 60 seconds, the
session ends with the message:
You r tim e is up. Try again later
Session ended.
4. At the Password: prompt, enter a valid password and press Enter.
If you do not enter a valid password within 60 seconds, the
session ends with the message:
You r tim e is up. Try again later
Session ended .
If you enter an invalid password, the following message appears:
Username/Password entered is NOT valid
Username:
You are given three attempts to enter a valid username and password
combination. If all three fail, the session ends with the message:
Username/Password entered is NOT valid
Check your Username/Password and try again later
Session ended
When you enter a valid username and password, the SPC command prompt
(SPC:) appears. If a location identifier was defined, it will be displayed before the
SPC: prompt. See Creating a location description and login banner in this chapter for
more information.
Using the Command Line
You may enter commands in uppercase, lowercase or using a combination.
You must enter all command characters correctly; there are no command
abbreviations. The Admn user may issue any command. Other usernames may
be granted access to some or all commands.
The administrator may lock one or more ports on the control screen. When a
port is locked, its on/off state cannot be changed from the command line or the
control screen until the administrator unlocks the port. See Using the Control
Screen for more information about locking and unlocking ports.
The command line supports two types of commands: operations and
administration. In most cases, a user must have administrative privileges
Page 26

20 SPC Installer/User Guide
to use the administration commands. The following table lists and briefly
describes each command. The letter (A) indicates an administration command
and (O) indicates an operations command.
Command Summary
Command (Type) Description
Add Port (A) Grants a username access to one or all ports
Add User (A) Adds a username
Admnp (A) Grants or removes administrative privileges for a username
Del Port (A) Removes access to one or all ports for a username
Del User (A) Deletes a username
Iload (O) Displays the total cumulative input load
List Port(s) (A) Displays information about one or all ports
List User(s) (A) Displays information about one or all users
Login (O) Brings up the Username: prompt
Off (O) Turns one or more ports off
On (O) Turns one or more ports on
Quit (O) Ends a session
Reboot (O) Reboots one or more ports
Set Location (A) Specifi es a descriptive fi eld for the control screen and login banner
Set Password (A) Changes the password for a username
Set Screen (A) Enables or disables a confi rmation query for control screen
Set Show (A) Enables or disables Show command access for a username
Show (O) Displays the control screen
Status (O) Displays the on/off status of one or more ports
Version (O) Displays the SPC fi rmware version
operations that change a port’s state
To display the names of commands that you may execute:
At the command prompt, press Enter. A list of valid commands for your
username appears.
Operations Commands
Operations commands manage SPC port states, provide information about the
SPC environment and control session operations.
Page 27

Chapter 3: Operations 21
For most operations commands that affect port states, you may specify
multiple port names on one command line, separated by a space or a comma,
to a maximum of 50 characters.
Turning ports on
The On command turns on one or more ports. When the command completes,
a display indicates the number of ports that were turned on and the number of
ports that are locked in their current state.
To turn ports on:
At the SPC: prompt, type on, followed by one or more port names separated by
spaces or commas, and press Enter.
- or -
Type on, followed by a group name, and press Enter.
- or -
Type on all and press Enter.
Examples
The following command turns the second port on, using the port’s
absolute name:
SPC: on port .a2<Enter>
The following command turns on all the ports in the group named ops_srv:
SPC: on port ops_srv<Enter>
The group name was previously defined on the control screen.
The following command turns on ports A1 and C3, using the ports’
absolute names:
SPC: on ports .a1 .c3<Enter>
Turning ports off
The Off command turns off one or more ports. When the command completes,
a display indicates the number of ports that were turned off and the ports that
are locked in their current state.
To turn ports off:
At the SPC: prompt, type off, followed by one or more port names separated by
spaces or commas, and press Enter.
- or -
Type off, followed by a group name, and press Enter.
Page 28

22 SPC Installer/User Guide
- or Type off all and press Enter.
Examples
The following command turns the sixth and eighth ports off, using the ports’
absolute names:
SPC: off port .b2 .b4<Enter>
The following command turns off the port named ops_2:
SPC: off port ops_2<Enter>
The port name was previously defined on the control screen.
The following command turns off all ports:
SPC: off port all<Enter>
Rebooting ports
The Reboot command reboots one or more ports. This operation turns the
port(s) off, delays for a period of time and then turns the port(s) on. The delay
interval is 15 seconds by default, or the minimum-off time specified on the
control screen, whichever is greater.
When the command completes, a display indicates the number of ports that
were rebooted and the ports that are locked in their current state.
If you plan to reboot a large number of ports simultaneously by specifying all
ports or a group name that is assigned to many ports, it may be beneficial to set
staggered minimum-off time values among the ports. This enables you to avoid
an excessive in-rush of current and possible circuit overload. See Using the
Control Screen for information about the minimum-off time.
To reboot one or more ports:
At the SPC: prompt, type reboot, followed by one or more port
names separated by spaces or commas, and press Enter.
- or Type reboot, followed by a group name, and press Enter.
- or Type reboot all and press Enter.
Examples
The following command reboots the ports named ops_2 and shp_2:
SPC: reboot ops_2 shp_2<Enter>
Page 29

Chapter 3: Operations 23
These port names were previously defined on the control screen.
The following command reboots all the ports in the group named ops_srv:
SPC: reboot ops_serv<Enter>
The group name was previously defined on the control screen.
The following command reboots all ports:
SPC: reboot all<Enter>
Displaying port status
The Status command displays the on/off status of one or more ports. For the
three predefined usernames Admn, Gen1 and Gen2, this command may be
used to display the status of all ports, including ports for which power control
access is not allowed. For additional usernames, the command displays the
status of only those ports for which the username has power control access.
The display indicates the number of ports that are on as well as those that
are off. If you do not specify any parameter with this command, the status of
all ports is displayed.
To display on/off status of one or more ports:
At the SPC: prompt, type status, followed by one or more port
names separated by spaces or commas, and press Enter.
- or -
Type status, followed by a group name, and press Enter.
- or -
Type status all and press Enter.
- or -
Type status and press Enter.
Examples
The following command displays the on/off status of the port named shp_2:
SPC: status shp_2<Enter>
The port name was previously defined on the control screen.
The following command displays the on/off status of all ports:
SPC: status<Enter>
Page 30

24 SPC Installer/User Guide
Accessing the control screen
The Show command displays the control screen, which contains two or four
pages of information, depending on your SPC model. You may specify a page by
its absolute name: .A for page 1, .B for page 2, .C for page 3 and .D for page 4. You
may also use a page name defined on the control screen. If you do not specify a
page name, page 1 is displayed. See Using the Control Screen for more information
about control screen pages.
The Show command is always available to the predefined usernames Admn,
Gen1 and Gen2. By default, added usernames are not allowed to use the Show
command. The administrator may use the Set Show command to enable and
disable Show command access for other usernames.
To access the control screen:
At the SPC: prompt, type show, optionally followed by a page name, and press
Enter. If you omit a page name, the first page is displayed.
To return to the command line from the control screen, press c.
Displaying the cumulative input load
The Iload command displays the current cumulative input load for all SPC
ports, in quarter-ampere granularity. This value is also displayed on the
control screen. Additionally, the digital LED above the ports on the SPC
indicates the total input load in half-ampere granularity.
To display the cumulative input load:
At the SPC: prompt, type iload and press Enter.
Displaying the SPC firmware version
The Vers command displays the SPC firmware version.
To display the fi rmware version:
At the SPC: prompt, type vers and press Enter.
Starting a new session
The Login command activates the Username: prompt. The current session ends,
allowing a user to log in and start a new session under a different username.
To start a new session:
At the SPC: prompt, type login and press Enter. The Username: prompt appears.
Page 31

Chapter 3: Operations 25
Ending a session
The Quit command ends a session. You may also end the current session and
immediately start a new one with the Login command.
Additionally, you may end a session from the control screen by pressing q. A
session ends automatically when no activity is detected for five minutes, or
upon loss of connection to the Avocent CPS.
NOTE: If you have made confi guration changes during a session, you must end the session by
using the Quit command or by pressing q from the control screen to ensure that confi guration
changes are stored in memory.
To end a session:
At the SPC: prompt, type quit and press Enter.
Administration Commands
Administration commands include the Add, Del, List and Set commands, plus
the Admnp command. Some of these commands manage usernames and
their privileges. Other administration commands affect the control screen.
Administration commands may only be issued by a user with administrative
privileges, such as the predefined Admn user or another user who has been
granted administrative privileges with the Admnp command.
To display a list of available Add commands:
At the SPC: prompt, type add and press Enter.
The following display appears:
ADD commands are:
USER PORT
To display a list of available Del commands:
At the SPC: prompt, type del and press Enter.
The following display appears:
DEL commands are:
USER PORT
To display a list of available List commands:
At the SPC: prompt, type list and press Enter.
Page 32

26 SPC Installer/User Guide
The following display appears:
LIST commands are:
USER USERS PORT PORTS
To display a list of available Set commands:
At the SPC: prompt, type set and press Enter. The following display appears:
SET com mands are:
LOCATION PASSWORD SHOW SCREEN
Adding a username
The Add User command adds a username and password. See Usernames and
Passwords in this chapter for more information.
To add a username:
1. At the SPC: prompt, type add user, optionally followed by a 1-16 character
username. Spaces and colon characters are not allowed, and usernames
are not case sensitive. Press Enter.
If you do not specify a username, you are prompted for it (Username:).
2. At the Password: prompt, type a password of up to 16 alphanumeric and
other typeable characters (ASCII 32 to 126 decimal). Passwords are case
sensitive. Press Enter. To specify no password, press Enter at the prompt.
3. At the Verify Password: prompt, retype the password. Press Enter. To verify
no password, press Enter at the prompt.
Examples
The following command adds username JaneDoe:
SPC: add user JaneDoe<Enter>
Password: *****<Enter>
Verify New Password: *****<Enter>
For security, password characters are displayed as asterisks.
The following command adds username JohnDoe:
SPC: add user<Enter>
Username: JohnDoe<Enter>
Password: ******<Enter>
Verify Password: ******<Enter>
The following command adds username Sydney with no password:
SPC: add user Sydney<Enter>
Password:<Enter>
Verify Password:<Enter>
Page 33

Chapter 3: Operations 27
Granting port access to a username
The Add Port command grants a username access to one or all ports. To grant
access for more than one port, but not all ports, you must use multiple Add
Port commands. When the command completes successfully, the following
message appears, where x indicates the number of ports:
x port(s) added Command Completed Successfully
To grant port access to a username:
At the SPC: prompt, type add port, optionally followed by a username
and a port name. Press Enter.
- or Type add port, followed by a username, then all. Press Enter.
If you omit a username, you are prompted for it (Username:). If you omit a port
name, you are prompted for it (Port Name:).
If you enter an invalid username or port name, the command aborts
with the message:
0 port(s) added. Com mand Completed Successfully.
Examples
The following commands use absolute port names to grant the username
JaneDoe access to ports A1, A2 and C2:
SPC: add port janedoe .a1<Enter>
SPC: add port janedoe .a2<Enter>
SPC: add port janedoe .c2<Enter>
The following commands grant access to the same ports, but they use the ports’
descriptive names that were previously defined on the control screen (ops_1,
ops_2 and shp_2):
SPC: add port janedoe ops_1<Enter>
SPC: add port janedoe ops_2<Enter>
SPC: add port janedoe shp_2<Enter>
The following command grants access to all ports for the username JohnDoe:
SPC: add port<Enter>
Username: johndoe<Enter>
Port Name: all<Enter>
Page 34

28 SPC Installer/User Guide
Deleting port access for a username
The Del Port command removes a username’s access to one or all ports. You
cannot remove access to any port for the Admn user. When the command
completes successfully, the following message appears, where x indicates the
number of ports:
x port(s) deleted Command Completed Successfully
To delete port access for a username:
At the SPC: prompt, type del port, optionally followed by a username
and a port name. Press Enter.
- or -
Type del port all. Press Enter.
If you omit a username, you are prompted for it (Username:). If you omit a port
name, you are prompted for it (Port Name:).
If you enter an invalid username or port name, the command aborts
with the message:
0 port(s) deleted. Command Completed Successfully
Deleting a username
The Del User command removes a username. You cannot delete the
predefined usernames Admn, Gen1 or Gen2. When the command completes
successfully, the following message appears:
0 port(s) deleted Command Completed Successfully
To delete a username:
At the SPC: prompt, type del user, optionally followed by a username. Press Enter.
If you omit a username, you are prompted for it (Username:).
If you enter an invalid username, the command aborts with the message:
Name entered is NOT valid.
Displaying port information
The List Port and List Ports commands display information about one or all
ports, respectively. This information includes:
• Descriptive port name, if applicable
• Group name assigned to the port, if any
• Usernames who may access the port
Page 35

Chapter 3: Operations 29
When requesting information about all ports, the display begins with port
A1’s information, followed by a prompt to either continue with the next port’s
information or quit the display. If you choose to continue, port A2’s information
is displayed, followed by a prompt to continue or quit. You may choose to quit
at any time. After the information for all ports has been displayed, or after
quitting, you are returned to the command prompt.
To display information about one port:
At the SPC: prompt, type list port, optionally followed by a port name. Press Enter.
If you omit a port name, you are prompted for it (Port Name:).
To display information about all ports:
At the SPC: prompt, type list ports and press Enter.
Examples
The following command requests information about port B1 by specifying its
absolute port name:
SPC: list port .b1<Enter>
.B1 hr_1 hr_srv
Usernames:
ADMN GEN1 GEN2
JOHNDOE
Username List for .B1 Complete
The display indicates that port B1 has the descriptive name hr_1 and is in the
port group named hr_srv. The usernames who may access this port are Admn,
Gen1, Gen2 and JohnDoe.
The following command requests information about all ports:
SPC: list ports<Enter>
.A1 ops_1 ops_serv
Usernames:
ADMN GEN1 GEN2
JANEDOE
Username List for .A1 Complete
Press: N)ext, Q)uit:
The first screen of the resulting display indicates that port A1 has a descriptive
port name of ops_1 and is in the port group named ops_srv. The usernames
who may access port A1 are Admn, Gen1, Gen2 and JaneDoe. The page ends
with a prompt to continue with the display for the next port, A2, or quit and
return to the SPC: prompt.
Page 36

30 SPC Installer/User Guide
Displaying user information
The List User and List Users commands display information about one or
all users, respectively. When requesting information about one user, the
display includes a list of all ports the user may access, and whether the Show
command is enabled or disabled for the user. When requesting information
about all users, the display indicates whether the Show command is enabled
or disabled for each user and whether each user has been given
administrative privileges.
To request information about one user:
At the SPC: prompt, type list user, optionally followed by a username. Press Enter.
If you omit a username, you are prompted for it (Username:).
To request information about all users:
At the SPC: prompt, type list users and press Enter.
Examples
The following command displays information about the username JaneDoe:
SPC: list user janedoe<Enter>
Active Port List for Username JANEDOE Show command disabled
A1 ops_1 ops_srv
A2 ops_2 ops_srv
C2 shp_2
List Complete
The display indicates that JaneDoe may not use the Show command to access
the control screen. JaneDoe may access the following ports: A1 which has a
descriptive name of ops_1 and is in the port group named ops_srv, A2 which
has a descriptive name of ops_2 and is in the port group named ops_srv and C2
which has a descriptive name of shp_2.
The following command requests information about all users:
SPC: list users<Enter>
ADMN Show command enabled Administrative user
GEN1 Show command enabled
GEN2 Show command enabled
JANEDOE Show command disabled
JOHNDOE Show command enabled
List Complete
Page 37

Chapter 3: Operations 31
Creating a location description and login banner
The Set Location command specifies text that appears in the control screen’s
Location field. The text is also appended to a Welcome to banner that appears
when a user successfully logs in.
If you do not issue this command, or if you issue this command without
specifying any text, the control screen’s Location field will be blank and no
Welcome to banner will be displayed.
When this command completes successfully, the following message appears:
All pages changed locations
To create a location description and login banner:
At the SPC: prompt, type set location, optionally followed by up to 16
characters. Spaces are allowed. Press Enter.
Omitting any characters after typing set location deletes any previouslyspecified text.
Examples
The following command specifies Florida HQ as the descriptive location for
the control screen and the login banner:
SPC: set location Florida HQ<Enter>
The following command deletes any previously-specified location description:
SPC: set location<Enter>
In this case, the control screen’s Location field will be blank, and no welcome
banner will be displayed after a successful login.
Enabling and disabling user access to the control screen
The Set Show command enables or disables a username’s access to the Show
command. This determines whether the username may access the control screen.
When the command completes successfully, one of the following messages is
displayed, where USERNAME is the username specified in the command:
Show command enabled for USERNAME
Show command disabled for USERNAME
To enable or disable control screen access:
At the SPC: prompt, type set show, optionally followed by a username and on
or off. Press Enter.
Page 38

32 SPC Installer/User Guide
If you do not specify a username, you are prompted for it (Username:). If you
do not specify on or off, you are prompted for it (Specify ON or OFF:).
If you specify an invalid username, the command aborts with the message:
Name entered is NOT valid
Examples
The following command enables Show command access for the user JohnDoe:
SPC: set show johndoe on<Enter>
The following command disables Show command access for the user JaneDoe:
SPC: set show<Enter>
Username: janedoe<Enter>
Specify ON or OFF: off<Enter>
Changing a password
The Set Password command changes a username’s password. To change the
password for any user other than Admn, you do not need to know the current
password. To change the password for the Admn user, you must know the
current password.
For security, when you type a password, the characters appear as asterisks
(*) on the screen. When the command completes successfully, a confirmation
message is displayed. See Usernames and Passwords for
more information.
To change a password:
1. At the SPC: prompt, type set password, optionally followed by a username.
Press Enter.
If you do not specify a username, you are prompted for it (Username:).
If you specify an invalid username, the command aborts with the message:
Name entered is NOT valid
2. If you are changing the password for the Admn user, the Enter Current
Password: prompt appears. Type the current password and
press Enter.
3. At the Enter New Password: prompt, type the new password and press
Enter. Passwords may contain up to 16 characters, and spaces are not
allowed. To specify no password, press Enter at the prompt.
4. At the Verify New Password: prompt, retype the new password and press
Enter. To verify no password, press Enter at the prompt.
Page 39

Chapter 3: Operations 33
Examples
The following command changes the password for the user named JohnDoe:
SPC: set password johndoe<Enter>
Enter New Password: ******<Enter>
Verify New Password: ******<Enter>
For security, password characters display as asterisks.
The following command blanks the password for the user named JaneDoe:
SPC: set password<Enter>
Username: janedoe<Enter>
Enter New Password:<Enter>
Verify New Password:<Enter>
Enabling and disabling confirmation for control
screen operations
The Set Screen command enables or disables a confirmation query when
requesting port power changes on the control screen. When the Confirm
option is set, the user is prompted with Are you sure? (Y/N) when an on, off or
reboot operation is initiated on the control screen. When the Noconfirm option
is set, the requested operation is completed immediately. The default value is
Noconfirm. The Set Screen setting applies to all usernames.
To enable or disable confi rmation for control screen operations:
At the command prompt, enter set screen, followed by confirm or noconfirm.
Press Enter.
If you omit the confirm/noconfirm parameter or spell it incorrectly, the
command aborts with the message:
SET SCREEN options are
NOCONFIRM CONFIRM
Example
The following command enables control screen confirmation queries:
SPC: set screen confirm<Enter>
Granting and removing administrative privileges
The Admnp command grants or removes administrative privileges for
usernames other than the predefined Admn user. This command allows an
SPC to have more than one administrative-level user. You cannot remove
administrative privileges from the Admn user.
Page 40

34 SPC Installer/User Guide
To grant or remove administrative privileges for a username:
At the SPC: prompt, type admnp, followed by on or off, optionally followed by
a username. Press Enter.
If you do not specify a username, you are prompted for it (Username:).
Examples
The following command grants administrative privileges to the
username JohnDoe:
SPC: admnp on johndoe<Enter>
The following command removes administrative privileges from the
username JohnDoe:
SPC: admnp off<Enter>
Username: johndoe<Enter>
Using the Control Screen
The control screen contains SPC configuration and status information. Figure
3.1 shows an example of the first page of a control screen for an SPC1600/1610.
Avocent Secure Power Controller 1 of 4
Location: Input Load: 1.00A
Port Name: [ ] [ ] [ ] [ ]
Control Status: (x) On (x) On (x) On (x) On
( ) Off ( ) Off ( ) Off ( ) Off
Module Status: Normal Normal Normal Normal
Minimum-On Time: 00:00:00 00:00:00 00:00:00 00:00:00
Minimum-Off Time: 00:00:00 00:00:00 00:00:00 00:00:00
Wake-Up State: On On On On
Group: [ ] [ ] [ ] [ ]
Access: All All All All
Page: [ ]
Press: C)mnd, E)dit, N)ext, Q)uit, Space-Bar to Select
Figure 3.1: Example Control Screen
Page 41

Chapter 3: Operations 35
The control screen for an SPC800/810 has two pages; the control screen for
an SPC1600/1610 has four. Each page contains information about four ports.
Page 1 contains information about ports A1 through A4 and page 2 contains
information about ports B1 through B4. For an SPC1600/1610, page 3 contains
information about ports C1 through C4 and page 4 contains information about
ports D1 through D4.
The Show command accesses the control screen from the command line. Use
the Arrow keys on your keyboard to move the cursor from field to field. The
help line at the bottom of the screen displays key commands that, when typed
on your keyboard, perform specific operations. The following chart describes
these keys.
Control Screen Help Line
Key Action
C)mnd Pressing C activates the SPC command line.
E)dit Pressing E moves the cursor to the end of the current entry in
an editable fi eld. Each press of the Backspace key erases one
character. When you fi nish editing the fi eld, press Enter or Tab.
N)ext Pressing N displays the next control screen page.
P)revious Pressing P displays the previous control screen page.
Q)uit Pressing Q ends the session. This is equivalent to the Quit command
in the command line.
Space-Bar to Select Pressing the Spacebar toggles among preset values. You may
also use the Spacebar in the Control Status rows to change a
port’s state to the state of the current cursor location: On or Off.
Alternatively, you may use the Plus ( + ) and Minus ( - ) keys on the
numeric keypad to switch among preset values.
Some fields on the control screen are display-only and cannot be changed.
Other fields may be changed by toggling among preset values or by entering
text. The following sections describe each control screen field.
Location field
The display-only Location field may contain text that was specified with the Set
Location command. The text in this field is also appended to a Welcome to
banner that appears when a user successfully logs in.
Input Load field
The display-only Input Load field indicates the current cumulative input load
in amperes of all devices attached to the SPC. You may also obtain this value
Page 42

36 SPC Installer/User Guide
from the command line with the Iload command, or by viewing the Input
Current LED on the SPC.
Port Name field
The editable Port Name field may contain a descriptive name for the device
connected to the port. You may use this name in commands that require a port
name, as an alternative to using the port’s absolute name. See Port Naming
and Grouping for more information about port names.
To specify a port name:
1. Position the cursor in the relevant Port Name fi eld.
2. Type e. If you are changing an existing name, press the Backspace key to
erase characters. Type a 1-8 character name. Press Enter or Tab.
Control Status field
The editable Control Status field indicates the port’s current state with a
character in the On or Off field. An x indicates the port is accessible. An
asterisk (*) indicates that the administrator has locked the port, or that the
current username does not have access rights to the port.
To turn a port on or off:
Position the cursor in the port’s desired state (On or Off) and press the
Spacebar or the Plus ( + ) key. The x will move to the new state.
To reboot a port:
Position the cursor in the port’s On or Off field and press r. If the port is already
off, it will turn on immediately. If the port is on, it will turn off, delay and then
turn back on. The delay interval is either 15 seconds or the minimum-off time,
whichever is greater. During the reboot delay, the Off field contains an r,
indicating that the port is going to reboot.
To lock or unlock a port:
Position the cursor in the port’s On or Off field and press l to lock or u to
unlock. A locked port has an asterisk (*) in the On or Off field and cannot be
controlled by other usernames; only an administrator can unlock it.
Module Status field
The display-only Module Status field indicates the port’s current status.
Page 43

Chapter 3: Operations 37
Module Status Field Values
Display Description
Normal The port is working correctly
No Rspns The interface cannot communicate with the port
OnS Fail The port was instructed to be on, but it is off
Off Fail The port was instructed to be off, but it is on
Minimum-On Time field
The editable Minimum-On Time field indicates the minimum amount of time
that a port will stay on before it can be turned off by a command. The default
value is Ø. Manual commands in the control screen’s On and Off fields are
always immediate and ignore this value.
Minimum-Off Time field
The editable Minimum-Off Time field indicates the minimum amount of
time that a port will stay off before it can be turned on by a command. The
default is Ø. Manual commands in the control screen’s On or Off fields are
always immediate, ignoring this value except during a reboot. During a reboot,
whether initiated from the command line or the control screen, the value in
this field determines the time that a port remains in the off state during the
reboot cycle, if it is longer than 15 seconds.
You may use this value to stagger the startup of ports when a command
is issued to reboot multiple ports at the same time. For example, setting
different minimum-off time values may be useful when you issue a Reboot All
command or a Reboot command for a large group.
NOTE: The wake -up power sequencing feature applies only when the entire SPC unit receives
power, not when the power state is changed from the command line or the control screen.
It may be important in your configuration to set the minimum-off time values
differently to avoid a circuit overload caused by an excessive in-rush of current
that may occur when too many devices power up simultaneously.
The following example shows one way to configure the minimum-off time
values for the four ports on each control screen page:
Minimum-Off Time: 00:00:15 00:00:30 00:00:45 00:01:00
Page 44

38 SPC Installer/User Guide
To change a port’s minimum-off time value:
Position the cursor in the port’s Minimum-Off Time field and press the
Spacebar or the Plus ( + ) or Minus ( - ) key. Each press moves through preset
values to a one hour maximum.
The preset values are: 15 seconds, 30 seconds, 45 seconds, 1 minute, 1 minute
15 seconds, 1 minute 30 seconds, 1 minute 45 seconds, 2 minutes, 3 minutes, 4
minutes, 5 minutes, 10 minutes, 15 minutes, 30 minutes and one hour.
Wake-up State field
The editable Wake-up State field indicates the state that the port will go to,
in sequence, when the SPC is powered up, either during normal operation
or when power is restored after an outage. The options are On and Off. The
default is On. When power is first supplied to the SPC, the ports are off. Shortly
after the SPC wakes up, the ports are sequenced on in two-second increments.
Only ports that are set with a wake-up state of Off will remain off.
To change a port’s wake-up state:
Position the cursor in the field and press the Spacebar, the Plus ( + ) key or the
Minus ( - ) key. Each press toggles between On and Off.
Group field
The editable Group field may contain a descriptive name. All ports with the
same group name may be acted upon simultaneously with the On, Off and
Reboot commands from the command line. Individual on, off and reboot
commands initiated on the control screen do not affect other ports that have
been assigned the same group name. Only command line actions that contain
the group name parameter will cause all ports within the same group to power
up, down or reboot as a group.
If you assign the same group name to a significant number of ports, consider
staggering the minimum-off time values of the affected ports to help prevent
an excessive in-rush load from occurring when a command is issued to reboot
the group.
To specify a group name:
1. Position the cursor in the port’s Group fi eld.
2. Press e. If you are changing an existing name, press the Backspace key to
erase characters. Type a 1-8 character name. Press Enter or Tab.
Page 45

Chapter 3: Operations 39
Access field
The editable Access field allows the administrator to easily change port access
for the usernames Admn, Gen1 and Gen2. Port access for additional usernames
must be enabled with the Add Port command from the command line.
To change port access for the Admn, Gen1 or Gen2 usernames:
1. Position the cursor in the port’s Access fi eld.
2. Use the Spacebar, the Plus ( + ) key or the Minus ( - ) key to switch
among the preset options:
All - grants port access to Admn, Gen1 and Gen2; this is the default
Admn - grants port access to Admn
Gen1 - grants port access to Admn and Gen1
Gen2 - grants port access to Admn and Gen2
Page field
The editable Page field may contain a name for the current control screen
page. When you want to display a specific page of the control screen, you may
use this page name as a parameter in the Show command, or you may specify
a page with its absolute name: .A for page 1, .B for page 2, .C for page 3 and .D
for page 4.
To specify a page name:
1. Position the cursor in the Page fi eld.
2. Press e. If you are changing an existing name, use the Spacebar to erase
characters. Type a 1-8 character string. Press Enter or Tab.
Ending a Session
You may end a session from the command line or the control screen.
If you made configuration changes during the session, they are automatically
stored in non-volatile memory. After you end the session, wait for the
following message before taking any action that will power down the SPC:
Updating configuration memory . . .
Update complete
Session ended
A session ends automatically after five minutes of inactivity, but if you have
made any configuration changes during the session, they will not be saved.
Page 46

40 SPC Installer/User Guide
To end a session:
From the SPC: prompt, type quit and press Enter.
- or From the control screen, press q.
Page 47

Appendices
Contents
Appendix A: Resetting to Factory Defaults . . . . . . . . . 43
Appendix B: Technical Specifications . . . . . . . . . . . . . 44
Appendix C: Technical Support . . . . . . . . . . . . . . . . . . 46
Page 48

Page 49

Appendices 43
Appendices
Appendix A: Resetting to Factory Defaults
You may reset the non-volatile RAM that stores all configurable SPC options.
This clears all administrator-editable fields on the control screen and resets
all command line configurable options to their default values, including
usernames and passwords.
You may reset the SPC to factory defaults by issuing a command or by pressing
the reset button on the SPC. You must have administrator-level privileges to
issue the command. Using the reset button may be necessary when a forgotten
password prevents administrator login. Either method updates the current
working configuration to what was set at the factory.
To reset the SPC to factory defaults from the command line:
1. At the SPC: prompt, type set cnfg all factory and press Enter.
2. When the command completes successfully, the following message
appears, where n =2 for an SPC800/810 and n =4 for an SPC1600/1610:
Config changed on n board(s), 0 ignore(s).
To reset the SPC to factory defaults using the reset button:
1. On the front of the SPC, locate the recessed reset button directly below the
Input Current LED. You will need a non-conductive, non-metallic tool that
fi ts inside the recess.
2. Insert the tool in the recess, then depress and hold the reset button for at
least fi ve seconds. When you fi rst press the reset button, the Input Current
LED changes to two side-by-side horizontal lines in the middle of the
display. Continuing to press the reset button for fi ve seconds begins the
reset, which is indicated by three side-by-side pairs of horizontal lines in
the top, middle and bottom of the display. At this point, you may release
the reset button. When the reset completes, the LED returns to displaying
the cumulative input load.
Page 50

44 SPC Installer/User Guide
Appendix B: Technical Specifications
Load ratings
Load ratings for individual ports, sets of four ports and all ports are affected by
plug type, cordage, operating voltage and domestic versus international use.
The label on the SPC indicates the operating voltage and frequencies supported,
maximum total output rating, limits that apply to each individual port and
limits that apply to the cumulative load of each set of four ports.
Input and Output Current Ratings
Input Current Ratings Output Current Ratings
Single Quad
Model Voltage Amp A B C D A+B C+D Total
SPC800-AM 100-120 20 10 15 15 - - 20 - 20
SPC1600-AM 100-120 20 10 15 15 15 15 20 20 20
SPC1600-AMS 100-120 20 10 15 15 15 15 20 20 20
SPC1600-AM1 100-120 30 10 15 15 15 15 24 24 30
SPC800-AM2 200-250 30 6 15 15 - - 30 - 30
SPC1600-AM2 200-250 30 6 15 15 15 15 24 24 30
SPC800-EU 230 16 6 10 10 - - 16 - 16
SPC1600-EU 230 16 6 10 10 10 10 16 16 16
SPC800-EU1 230 16**** 6 10 10 - - 16**** - 16****
SPC1600-EU1 230 16**** 6 10 10 10 10 16**** 16**** 16****
SPC800-EU2 230 30 6 15 15 - - 30 - 30
SPC1600-EU2 230 30 6 15 15 15 15 24 24 30
SPC810-AM 100-120 20 10 15 15 - - 20 - 20
SPC1610-AM 100-120 30 10 15 15 15 15 20 20 30
SPC810-EU 230 20 6 15 15 - - 20 - 20
SPC1610-EU 230 30 6 15 15 15 15 24 24 30
* All ratings are in amperes. Input current ratings are based on the power input confi guration.
** A=A1+A2+A3+A4, B=B1+B2+B3+B4, C=C1+C2+C3+C4, D=D1+D2+D3+D4
*** A+B=A1+A2+A3+A4+B1+B2+B3+B4, C+D=C1+C2+C3+C4+D1+D2+D3+D4
**** This rating decreases to 13 amps if the unit is used with the 13 amp power cord supplied. If
a power cord that is rated at 16 amps or greater is used, the total rating is 16 amps.
**
Octet
***
Page 51

Appendices 45
Cordsets
Model Connector to SPC Connector to AC Power Source *
SPC800-AM Molded to unit L5-20P, 20A/125V twist-lock
SPC1600-AM Molded to unit L5-20P, 20A/125V twist-lock
SPC1600-AMS Molded to unit 5-20P, 20A/125V straight-blade
SPC1600-AM1 Molded to unit L5-30P, 30A/125V twist-lock
SPC800-AM2 Molded to unit L6-30P, 30A/250V twist-lock
SPC1600-AM2 Molded to unit L6-30P, 30A/250V twist-lock
SPC800-EU IEC-60320/C19 Euro CEEE 7/7, 16A/250V non-locking
SPC1600-EU IEC-60320/C19 Euro CEEE 7/7, 16A/250V non-locking
SPC800-EU1 IEC-60320/C19 BS1363, 13A/250V non-locking
SPC1600-EU1 IEC-60320/C19 BS1363, 13A/250V non-locking
SPC800-EU2 Molded to unit Unterminated, customer-supplied AC plug
SPC1600-EU2 Molded to unit Unterminated, customer-supplied AC plug
SPC810-AM Molded to unit L5-20P, 20A/125V twist-lock
SPC1610-AM Molded to unit L5-30P, 30A/125V twist-lock
SPC810-EU Molded to unit Unterminated, customer-supplied AC plug
SPC1610-EU Molded to unit Unterminated, customer-supplied AC plug
* Units with a power cord attached but without a plug (unterminated) require qualifi ed service
personnel to select and install the appropriate plug before attaching it to the power source.
RJ-45 Serial Port Connector
CPS Direction SPC
RTS 1 --> 8 CTS
DSR 2 <-- 7 DTR
CD 3 <-- 6 GND
RD 4 <-- 5 TD
TD 5 --> 4 RD
GND 6 3 GND
DTR 7 --> 2 DSR
CTS 8 <-- 1 RTS
Ports
The 100-120 volt models ending with an -AM value use a NEMA 5-15R power
outlet. Models ending with an -EU value and 200-250 volt models ending with
-AM2 use an IEC 60320/C13 power outlet.
Page 52

46 SPC Installer/User Guide
Appendix C: Technical Support
Our Technical Support staff is ready to assist you with any installation or
operating issues you encounter with your Avocent product. If an issue should
develop, follow the steps below for the fastest possible service:
1. Check the pertinent section of the manual to see if the issue may be
resolved by following the procedures outlined.
2. Check our web site at www.avocent.com/support to search the knowledge
base or use the on-line service request.
3. Call Avocent Technical Support for assistance at (888) 793-8763. Visit the
Avocent web site at http://www.avocent.com/support and click on Support
Phone Numbers for current phone support hours.
Page 53

Appendices 47
Page 54

48 SPC Installer/User Guide
Page 55

LIMITED WARRANTY
Avocent Corporation warrants to the original retail purchaser that this product is and will be free from defects
in materials and workmanship for a period of 24 months from the date of purchase.
Additionally, all Avocent products carry an unconditional thirty-day satisfaction guarantee. If, for any reason, you
are dissatisfi ed with the performance of this product, you may return it to the point of purchase for a refund of
the purchase price (excluding shipping charges). This guarantee does not apply to special order products, and
may not be available through all resellers. During the warranty period, purchaser must promptly call Avocent
for a RETURN MATERIALS AUTHORIZATION (RMA) number. Make sure that the RMA number appears on the
packing slip, proof of purchase, AND ON THE OUTSIDE OF EACH SHIPPING CARTON. Unauthorized returns
or collect shipments will be refused.
Ship prepaid to: Avocent Corporation
4991 Corporate Drive
Huntsville, AL 35805 U.S.A.
Telephone: (256) 430-4000
The above limited warranty is voided by occurrence of any of the following events, upon which the product is
provided as is, with all faults, and with all disclaimers of warranty identifi ed below:
1. If defect or malfunction was caused by abuse, mishandling, unauthorized repair, or use other than intended.
2. If unauthorized modifi cations were made to product.
3. If unreported damages occurred in any shipment of the product.
4. If damages were due to or caused by equipment or software not provided by Avocent.
5. If the unit is used with non-grounded or incorrectly polarized AC power.
6. If the product is used in contradiction to any instruction provided by any User Guide or Instruction Sheet
provided to you or with the product.
7. If the product is damaged due to power surges, water exposure or act of God including lightning.
EXCEPT AS SPECIFICALLY PROVIDED ABOVE AND TO THE MAXIMUM EXTENT ALLOWED BY LAW,
AVOC E NT CORPORATION DISCLAIMS ALL WARRANTIES AND CONDITIONS WHETHER EXPRESS,
IMPLIED, OR STATUTORY AS TO ANY MATTER WHATSOEVER INCLUDING, WITHOUT LIMITATION,
TITLE, NON-INFRINGEMENT, CONDITION, MERCHANTABILITY OR FITNESS FOR ANY PARTICULAR OR
INTENDED PURPOSE.
EXCEPT AS EXPRESSLY PROVIDED ABOVE AND TO THE MAXIMUM EXTENT ALLOWED BY LAW, AVOCENT
CORPORAT ION SHALL NOT BE LIABLE FOR ANY SPECIAL, INDIRECT OR CONSEQUENTIAL DAMAGES
(INCLUDING WITHOUT LIMITATION, LOSS OF PROFIT, LOSS OF BUSINESS, LOSS OF INFORMATION,
FINANCIAL LOS S, PER SONAL INJU RY, LOSS OF P RIVACY OR NEGLI GENCE) WH ICH MAY BE CAUS ED BY OR
RELATED TO, DIRECTLY OR INDI RECTLY, THE USE OF A PRODUCT OR SERVICE, THE INABILITY TO USE A
PRODUCT OR SERVICE, INADEQUACY OF A PRODUCT OR SERVICE FOR ANY PURPOSE OR USE THEREOF
OR BY ANY DEFECT OR DEFICIENCY THEREIN EVEN IF AVOCENT CORPORATION OR AN AUTHORIZED
AVOCENT DEALER HAS BEEN ADVISED OF THE POSSIBILITY OF SUCH DAMAGES OR LOSSES.
©2003 Avocent Corporation. All rights reserved.
Page 56

For Technical Support:
Email: [email protected]
www.avocent.com
Avocent Corporation
4991 Corporate Drive
Huntsville, Alabama 35805-6201 USA
Tel: +1 256 430 4000
Fax: +1 256 430 4031
Avocent Asia Pacifi c
Singapore Branch Offi ce
100 Tras Street, #15-01
Amara Corporate Tower
Singapore 079027
Tel: +656 227 3773
Fax: +656 223 9155
Avocent Canada
50 Mural Street, Unit 5
Richmond Hill, Ontario
L4B 1E4 Canada
Tel: +1 877 992 9239
Fax: +1 877 524 2985
Avocent International Ltd.
Avocent House, Shannon Free Zone
Shannon, County Clare, Ireland
Tel: +353 61 715 292
Fax: +353 61 471 871
Avocent Germany
Gottlieb-Daimler-Straße 2-4
D-33803 Steinhagen
Germany
Tel: +49 5204 9134 0
Fax: +49 5204 9134 99
590-234-001B
 Loading...