

Page 1

LONGVIEW® 1000
Installer/User Guide
Page 2
USA Notification
Warning: Changes or modifications to this unit not expressly approved by the party responsible for compliance
could void the user’s authority to operate the equipment.
Note: This equipment has been tested and found to comply with the limits for a Class A digital device, pursuant to Part 15 of the FCC Rules. These limits are designed to provide reasonable protection against harmful
interference when the equipment is operated in a commercial environment. This equipment generates, uses and
can radiate radio frequency energy and, if not installed and used in accordance with the instruction manual, may
cause harmful interference to radio communications. Operation of this equipment in a residential area is likely to
cause harmful interference in which case the user will be required to correct the interference at his own expense.
European Notification
Warning: This is a class A product. In a domestic environment this product may cause radio interference in which
case the user may be required to take adequate measures.
Canadian Notification
This class A digital apparatus complies with Canadian ICES-003.
Cet appareil numérique de la classe A est conforme à la norme NMB-003 du Canada.
Japanese Approvals
Safety and EMC Approvals and Markings
USA (UL, FCC), Canada (cUL), European Union (CE) and Japan (VCCI)
Page 3

LongView® 1000 Extender
Installer/User Guide
Avocent, the Avocent logo, The Power of Being There and LongView are
registered trademarks of Avocent Corporation or its affiliates in the U.S.
and other countries. All other marks are the property of their respective
owners.
© 2010 Avocent Corporation. 590-550-501D
Page 4
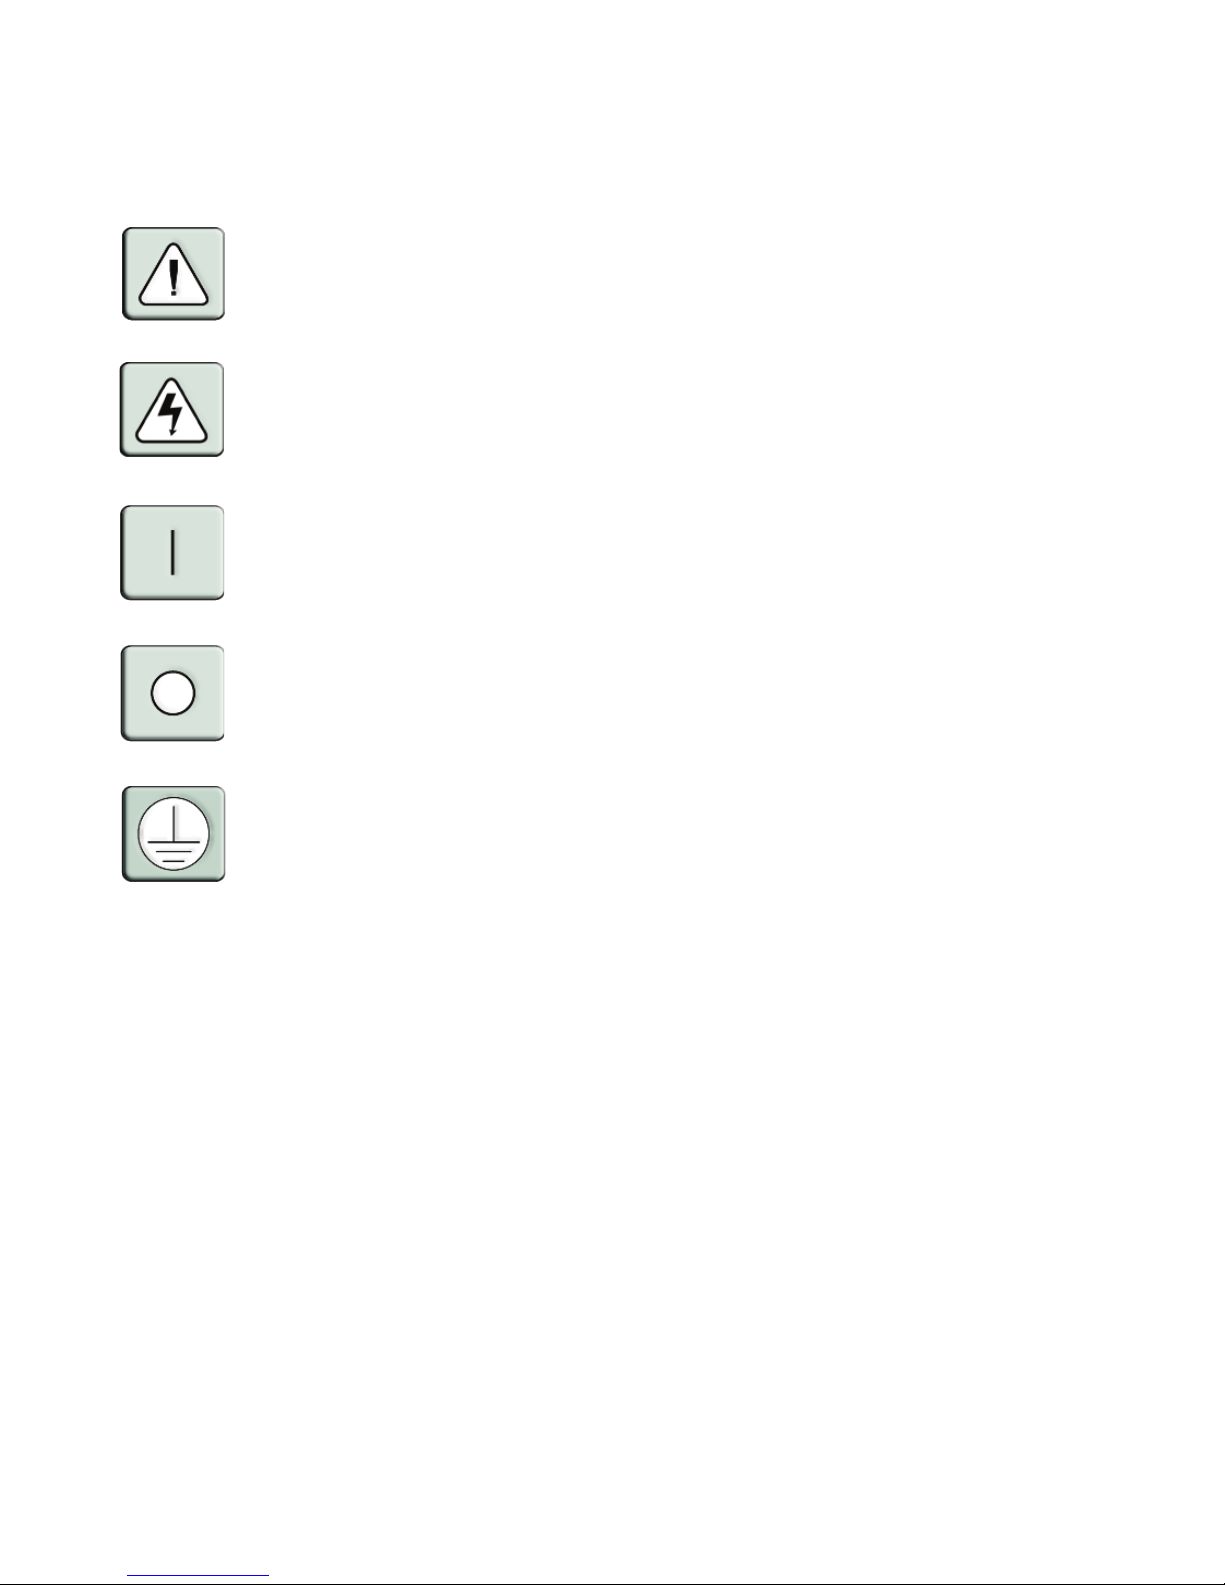
Instructions
This symbol is intended to alert the user to the presence of important operating and maintenance
(servicing) instructions in the literature accompanying the appliance.
Dangerous Voltage
This symbol is intended to alert the user to the presence of uninsulated dangerous voltage within the
product’s enclosure that may be of sufficient magnitude to constitute a risk of electric shock to persons.
Power On
This symbol indicates the principal on/off switch is in the on position.
Power Off
This symbol indicates the principal on/off switch is in the off position.
Protective Grounding Terminal
This symbol indicates a terminal which must be connected to earth ground prior to making any other
connections to the equipment.
Page 5

iii
Chapter 1: Product Overview.......................................................................................... 1
Features and Benefits ........................................................................................................................1
Compatibility with Peripherals..........................................................................................................1
Safety Precautions .............................................................................................................................2
Chapter 2: Installation ..................................................................................................... 3
Getting Started...................................................................................................................................3
Mounting options ........................................................................................................................3
Connecting the local keyboard, monitor and mouse .................................................................. 3
Connecting power.......................................................................................................................6
Chapter 3: Operations ..................................................................................................... 7
About Your LongView 1000 Extender ...............................................................................................7
Configuring keyboard layout and emulation for the receiver via the OSD................................ 8
Configuring keyboard layout and emulation for the transmitter via the OSD ........................... 8
Configuring your OSD hotkey sequence.....................................................................................9
Activating OSD Timeout............................................................................................................. 9
Displaying system information ...................................................................................................9
Accessing the Command Line .......................................................................................................... 11
Equalization tuning...................................................................................................................11
Deskew tuning...........................................................................................................................12
Upgrading Your LongView 1000R Receiver and Transmitter
via Bootloader..................................................................................................................................13
Activating bootloader ............................................................................................................... 14
Bootloader features .................................................................................................................. 15
Appendices..................................................................................................................... 21
Appendix A: Technical Specifications ......................................................................................21
Appendix B: Technical Support................................................................................................ 23
Appendix C: Troubleshooting...................................................................................................24
TABLE OF CONTENTS
Page 6

iv LongView 1000 Installer/User Guide
Page 7

1
Product Overview
Features and Benefits
The Avocent LongView® 1000 extender, which utilizes the LongView 1000R receiver and an
AMIQDM module (transmitter), allows PS/2 and USB keyboard, video and mouse (KVM)
peripherals to work seamlessly from up to 1000 feet away from your server. Standard UTP cabling
makes installation simple and keeps costs low. The LongView 1000R receiver can be rack
mounted, desk mounted or mounted on the back of your monitor.
The industry-standard design of the LongView 1000 extender makes it compatible with virtually
any PC, display technology and operating system. Installation requires no new drivers or software.
Figure 1.1: LongView 1000R Receiver
Compatibility with Peripherals
The LongView 1000 extender is compatible with the following peripherals:
• Keyboard - The LongView transmitter and receiver support standard PS/2 and USB
keyboards.
• Mouse - The LongView transmitter and receiver support 2-button PS/2 and USB mice. Mice
that have more than two buttons work with the reduced functionality of a 2-button mouse.
• Video - The LongView 1000 extender supports VGA, SVGA, XGA and UXGA resolutions up
to 75 Hz refresh rate. Both CRT and LCD monitors with standard 15-pin high density
connectors are
supported.
• Audio - Speakers are supported on the receiver side of your LongView 1000 extender,
provided the transmitter has been connected to the sound card of your PC with the provided
audio cable.
CHAPTER
1
Page 8

2 LongView 1000 Installer/User Guide
Safety Precautions
To avoid potential video and/or keyboard problems when using Avocent products:
• If the building has 3-phase AC power, ensure that the server and monitor are on the same
phase. For best results, they should be on the same circuit.
To avoid potentially fatal shock hazard and possible damage to equipment, please observe the
following precautions:
• Do not use a 2-wire extension cord in any Avocent product configuration.
• Test AC outlets at the server and monitor for proper polarity and grounding.
• Use only with grounded outlets at both the server and monitor. When using a backup
Uniterruptible Power Supply (UPS), power the server and the LongView transmitter off the
same supply.
NOTE: The AC inlet is the main disconnect.
Page 9

3
Installation
Getting Started
Before installing your LongView 1000 extender system, refer to the list below to ensure that you
have all the items necessary for installation.
Needed for the LongView 1000 extender system
• LongView 1000R receiver (supplied)
• System specific AMIQDM module (sales option dependent, contact Avocent)
• External Power Supply (supplied)
• IEC power cord (supplied)
• LongView 1000 Quick Installation Guide (supplied)
Mounting options
The LongView 1000R receiver features the following mounting options, allowing you to easily
adapt to most work environments:
• Under desk mounting via the horizontal mounting bracket
• Monitor mounting via the mounting plate accessory
• Rack mounting via the rack mount kit
NOTE: Mounting accessories are ordered separately. Contact Avocent for more information.
Connecting the local keyboard, monitor and mouse
The following instructions will enable you to connect your LongView 1000 extender system.
WARNING: To reduce the risk of electric shock or damage to your equipment, disconnect the power from the
extender by unplugging the power supply from the electrical outlet.
CHAPTER
2
Page 10
4 LongView 1000 Installer/User Guide
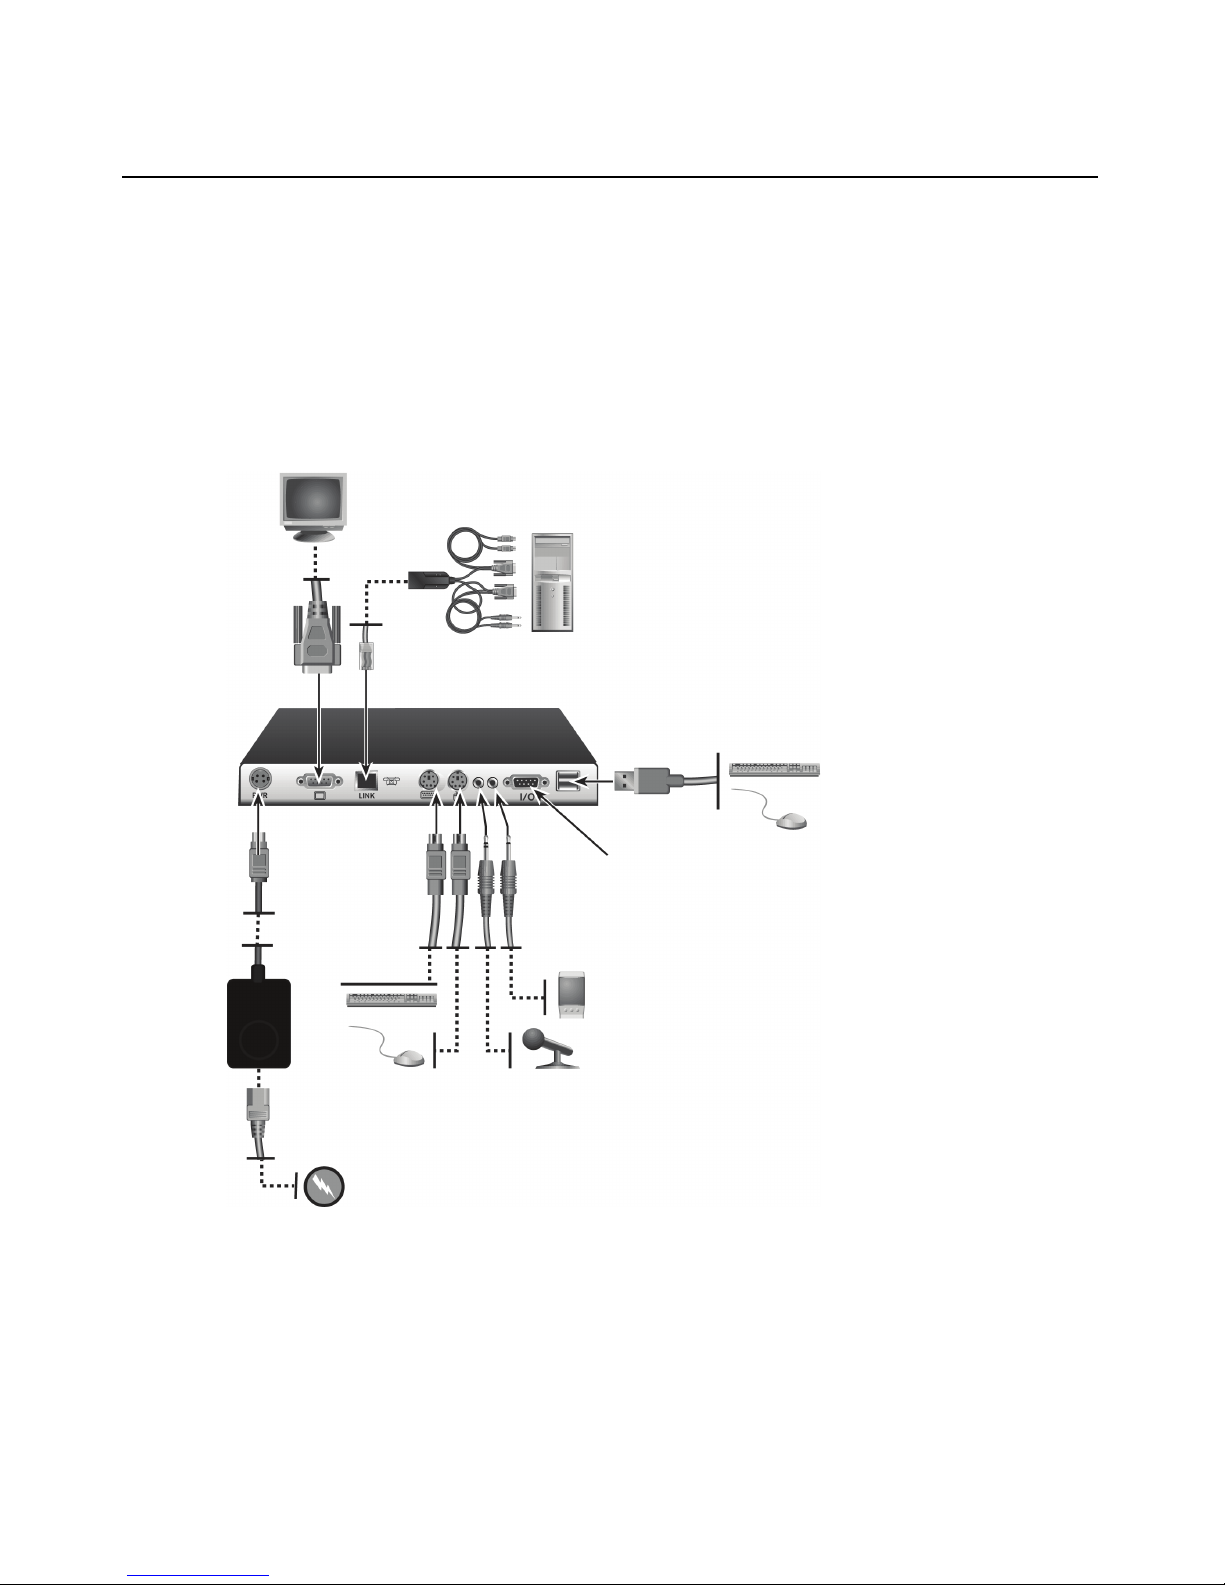
To connect the LongView 1000R receiver:
1. Select a convenient location for your LongView 1000R receiver.
2. Plug your keyboard, monitor and mouse cables into the appropriate ports on the back of
the LongView 1000R receiver.
3. Insert one end of a UTP cable into the LINK port on the rear of the LongView 1000R receiver.
4. Route the UTP cable to the AMIQDM module at the remote server up to 1000 feet (300
meters) away and connect them together.
Figure 2.1: LongView 1000R Receiver and AMIQDM Module Installation
1
4
2
6
3
5
Page 11

Chapter 2: Installation 5
To connect the AMIQDM module:
1. Turn off the remote server.
2. Connect the AMIQDM module keyboard, monitor and mouse connectors to the appropriate
ports on the back of the server.
3. Connect the AMIQDM module serial and audio connectors into the appropriately labeled ports
on the back of the server, if desired.
4. Turn on the server.
Figure 2.2: PS/2 AMIQDM Module
Table 2.1: Description of Figure 2.1
Number Description Number Description
1 AMIQDM module 4 Serial ports
2
LongView 1000
receiver
5 External power supply
3 USB ports 6 Local peripherals
1
3
2
4
5
Page 12

6 LongView 1000 Installer/User Guide
Connecting power
The LongView 1000R receiver features an external power supply with a four-pin miniDIN
connector. A DC port is located on the rear of the LongView 1000R receiver.
NOTE: Use only an Avocent-supplied power supply.
To connect power to the LongView 1000R receiver:
1. Plug the external power supply’s four-pin miniDIN connector into the DC port on the
LongView 1000R receiver.
2. Connect the detachable IEC power cord into the power supply.
3. Plug the IEC power cord into an appropriate wall outlet.
Table 2.2: Description of Figure 2.2
Number Description Number Description
1 Keyboard/Mouse 4 Mic
2 Video 5 Audio
3 Serial
Page 13

7
CHAPTER
3
Operations
About Your LongView 1000 Extender
While the default settings on your LongView 1000 extender will work with most systems, you may
choose to change settings to better fit your extender system. Internal settings such as keyboard
layout, emulation and hotkey sequences can be configured via the On-Screen Display (OSD), while
Flash upgrades are available via the bootloader function. The OSD also displays your system
settings and information about your connected transmitter.
NOTE: Table 3.1 lists available hotkey options to access the OSD.
Figure 3.1: Configuration Screen
Page 14

8 LongView 1000 Installer/User Guide
Configuring keyboard layout and emulation for the receiver via the OSD
To change your keyboard layout and/or emulation:
1. Activate the OSD by pressing the hotkey sequence. If you are activating the OSD for the first
time, any of the sequences in Table 3.1 will activate the display. Ensure the Config tab is
selected.
Table 3.1: OSD Hotkey Sequences
2. Click the Local radio button to change keyboard settings for the LongView 1000R receiver.
3. Use the Layout drop-down menu to scroll to and select your desired country.
4. Select the type of keyboard you are using from the Emulation drop-down menu. The LongView 1000R receiver supports standard, Chyron Duet and Pinnacle FAK keyboard emulation.
5. Click Apply to save settings, or click Close to exit without saving changes.
Configuring keyboard layout and emulation for the transmitter
via the OSD
To change your keyboard layout and/or emulation:
1. Activate the OSD by pressing the hotkey sequence. Ensure the Config tab is selected.
2. Click the Remote radio button to change settings for the remote transmitter.
3. Use the Layout drop-down menu to scroll to and select your desired country.
The PS/2 AMIQDM module supports standard and Pinnacle FAK. The Emulation drop-down
menu is grayed out if a USB or Sun AMIQDM module is attached to the receiver and the
Remote radio button is selected.
To enable or disable audio and serial on the transmitter:
1. Activate the OSD by pressing the hotkey sequence. Ensure the Config tab is selected.
2. Click the Remote radio button to change settings for the remote transmitter.
Hotkey Sequences (all sequences are default until selected)
Print Screen Alt - Alt (L)
Ctrl - Ctrl ( L - R) Alt - Alt (R)
Ctrl - Ctrl ( L) Shift - Shift (L - R)
Ctrl - Ctrl ( R) Shift - Shift (L)
Alt - Alt (L - R) Shift - Shift (R)
Scroll - Scroll
Page 15

Chapter 3: Operations 9
3. Select or de-select the Audio Out, Audio In or Serial radio buttons to enable or disable these
functions and click Apply.
Configuring your OSD hotkey sequence
To change the hotkey sequence that activates your OSD:
1. Activate the OSD by pressing the default or your currently configured hotkey sequence.
Ensure the Config tab is selected.
2. Select your desired hotkey sequence from the OSD Hotkey drop-down menu.
Activating OSD Timeout
The LongView 1000R receiver can be configured to log out users after 15 minutes of inactivity.
To activate OSD Timeout:
1. Activate the OSD by pressing the hotkey sequence. Ensure the Config tab is selected.
2. Click the OSD Timeout checkbox at the bottom-left corner of the screen.
Displaying system information
To display system information:
1. Activate the OSD by pressing the hotkey sequence.
2. Click on the Info tab.
3. Click the Local radio button for information about the LongView 1000R receiver; click the
Remote radio button for information about the transmitter.
NOTE: The distance between the LongView 1000R receiver and remote transmitter is shown at the bottom of
the screen.
Page 16

10 LongView 1000 Installer/User Guide
Figure 3.2: Local System Information
Figure 3.3: Remote System Information
Page 17

Chapter 3: Operations 11
Figure 3.4: No Device Connected
Accessing the Command Line
To access the Command Line on your LongView 1000 extender system, press Ctrl, Alt, Shift and C
together. The Command Line displays.
Equalization tuning
To adjust the video quality of the monitor connected to your extender, you may manually tune the
equalization values that are applied during video compensation.
To edit equalization offset values:
1. Press the default Command Line hotkey sequence to display the Command Line.
2. Type equalization tuning and press Enter. The Equalization Tuning screen will be displayed.
Figure 3.5: Equalization Tuning Screen
3. Select Enable to allow manual adjustment of equalization offset values.
Page 18

12 LongView 1000 Installer/User Guide
4. Select the color(s) you wish to adjust. You may adjust colors individually or as a group.
5. To increase the offset value of the selected color(s) by increments of one, press the Up key or
Plus key.
-or-
To decrease the offset value of the selected color(s) by increments of minus one, press the
Down key or Minus key.
If you are currently connected to a target device, the offset values will be immediately applied
to the video signal.
6. If you wish to save the current equalization tuning settings, click Save. The equalization tuning
settings will be permanently stored on the extender and will be applied to the video signal each
time you connect to a target device.
-or-
If you do not wish to save changes to the extender, click Close. The equalization tuning will
apply to the video signal of the currently connected target device until the connection is closed.
-or-
If you want to reset the equalization tuning values to zero and disable equalization tuning, click
Reset.
NOTE: If equalization tuning is not supported on your extender, you will not be able to access the Equalization
Tuning screen.
Deskew tuning
To adjust the video quality of the monitor connected to your user station, you may manually adjust
the deskew values that are applied during video compensation.
To edit deskew values:
1. Press the default Command Line hotkey sequence to display the Command Line.
2. Type deskew tuning and press Enter. The DeSkew Tuning screen will be displayed.
Figure 3.6: DeSkew Tuning Screen
3. Select Enable to allow manual adjustment of deskew values.
Page 19

Chapter 3: Operations 13
4. Select the color(s) you wish to adjust. You may adjust colors individually or as a group.
5. To increase the deskew value of the selected color(s) by increments of one, press the Up key or
Plus key.
-orTo decrease the deskew value of the selected color(s) by increments of minus one, press the
Down key or Minus key.
If you are currently connected to a target device, the deskew values will be immediately
applied to the video signal.
6. If you wish to save the current deskew settings, click Save. The deskew settings will be
permanently stored on the extender and will be applied to the video signal each time you
connect to a target device.
-orIf you do not wish to save changes to the extender, click Close. The deskew tuning will apply
to the video signal of the currently connected target device until the connection is closed.
-orIf you want to reset the deskew values to zero and disable deskew tuning, click Reset.
NOTE: If deskew tuning is not supported on your extender, you will not be able to access the DeSkew
Tuning screen.
Upgrading Your LongView 1000R Receiver and Transmitter
via Bootloader
The LongView 1000 extender system can be upgraded through the serial port. All terminal
commands are accessed through a terminal or PC running HyperTerminal
®
emulation software
or equivalent.
To access the Terminal Applications menu:
Connect a terminal or PC running terminal emulation software to the serial port on the back panel
of the LongView 1000R receiver using a null modem cable. The terminal should be set to 57600
baud, 8 data bits, no parity, 1 stop bit and no flow control.
Page 20

14 LongView 1000 Installer/User Guide
Figure 3.7: Com1 Properties
Activating bootloader
To activate bootloader:
1. Activate the OSD by pressing the hotkey sequence. Ensure the Config tab is selected.
2. Click the Invoke checkbox in the bottom-right corner of the screen.
3. Click the Call button.
The screen closes and the LongView 1000R receiver bootloader OSD is displayed. The terminal
menu is now available on the serial port.
Figure 3.8: Bootloader Menu: No Connected Device
Page 21

Chapter 3: Operations 15
Figure 3.9: Active Bootloader Menu
Bootloader features
You can select several bootloader options using the terminal menu keyboard.
Resetting the LongView 1000R receiver from the terminal menu
Once bootloader is active, you can exit the menu and reset the device by typing 0.
LongView 1000R receiver upgrade via XMODEM
Option 1 allows you to program the bootloader or the application of the LongView 1000R receiver.
The update file has to be sent via XMODEM from the terminal software after this option is chosen.
The LongView 1000R receiver will verify that the transferred file is valid for the device after it has
received the first six XMODEM blocks. If a wrong file is sent, the update is cancelled. During the
transfer, the terminal will provide a progress display. After the transfer, the flashed data is checked
and the device reboots.
The LongView 1000R receiver may need both application and boot code updated. The update
release notes will specify whether one or both files are needed. Always update the boot code
followed by the application.
Page 22

16 LongView 1000 Installer/User Guide
Figure 3.10: Boot or Application Upgrade of the LongView 1000R Receiver
NOTE: You can also visit www.avocent.com to access upgrade files.
Figure 3.11: OSD During XMODEM Update
NOTE: Figure 3.9 will display during an XMODEM update via the serial console of the LongView 1000R receiver.
The boot and application codes must be updated separately using the XMODEM. The percentage complete
shows the amount for the file being transferred.
Page 23

Chapter 3: Operations 17
Transmitter boot and application upgrade via XMODEM
Option 2 allows you to program the boot and application of the connected transmitter. The update
file has to be sent via XMODEM from the terminal software after this option is chosen.
Figure 3.12: Upgrade Transmitter Boot or Application Code
The OSD screen in Figure 3.11 will appear when a connected transmitter is being updated. Up to
three files (boot, application and/or FPGA) can be sent to the transmitter. The update release notes
will say which files are needed. Always update the boot code before the application. The
percentage bar displays the percentage complete for a particular file.
Figure 3.13: Updating a Local Transmitter
Page 24

18 LongView 1000 Installer/User Guide
Transmitter FPGA upgrade via XMODEM
Option 3 allows you to program the FPGA code of the connected transmitter. The update file has to
be sent via XMODEM from the terminal software after this option is chosen. See Figure 3.12.
Figure 3.14: Upgrade Transmitter FPGA
Displaying information about connected devices
Type ? to display the System Information of the connected transmitter.
Figure 3.15: Transmitter Information Screen
Page 25

Chapter 3: Operations 19
Re-request Pod
The Re-request Pod feature allows an extender to attempt to regain access to a device if the user
station has no keyboard or mouse connected. When access is re-established to the target audio and
serial, access to the device is also re-established.
NOTE: The term “pod” refers to the data channel between a user station and the AMIQDM module.
To enable the Re-request Pod feature:
1. Activate the OSD by pressing the hotkey sequence. Ensure the Config tab is selected.
Figure 3.16: Configuration Menu (Re-request Pod Feature)
2. Click the Re-request Pod checkbox in the lower left-hand portion of the Configuration menu to
enable the Re-request Pod feature (disabled by default).
3. Click Close.
Page 26

20 LongView 1000 Installer/User Guide
Page 27

21
Appendices
Appendix A: Technical Specifications
Table A.1: LongView 1000 Extender Product Specifications
Extension Ports
Number
1
Connectors
RJ-45 switch interconnect
User Ports
Number
PS/2: 1; USB: 1 (with two connectors); Serial: 1; VGA video: 1
Type
PS/2, USB and VGA video
Connectors
6-pin miniDIN, PS/2 keyboard and mouse; USB Type A, USB keyboard and
mouse;15HDD female: VGA; 9-pin D-Shell, Serial; 3.5mm audio jacks, line out and mic
Dimensions
H x W x D 27 x 210 x 188 mm (1.06 x 8.27 x 7.40 in)
Weight
1Kg (2.20 lb) without packaging, cables, power supply and literature
Heat Dissipation
90 K
Power Consumption
25 W
AC-input power
25 W maximum
AC-input current rating
A
AC-frequency
50/60 Hz
Temperature
0° to 40° Celsius (32° to 104° Farenheit) operating
-20° to 50° Celsius (-4° to 122° Farenheit) nonoperating
Humidity
0 to 95% noncondensing operating
Supported Hardware
Peripherals
PS/2 keyboard and mouse, USB keyboard and mouse, speakers, microphone, serial
devices (max baud rate of 38,400 baud)
APPENDICES
Page 28

22 LongView 1000 Installer/User Guide
Video Resolution
Standard:
• 1920 x 1440 @ 60 Hz with 100 feet of UTP from target device to user
• 1600 x 1200 up to 75 HZ with 200 feet of UTP from target device to user
• 1280 x 1024 up to 85 HZ with 1000 feet of UTP from target device to user
Widescreen:
• 1920 x 1200 @ 60 HZ with 100 feet of UTP from target device to user
• 1680 x 1050 up to 60 HZ with 200 feet of UTP from target device to user
• 1440 x 900 up to 75 HZ with 800 feet of UTP from target device to user
• 1360 x 768 up to 60 HZ with 1000 feet of UTP from target device to user
Supported Hardware
Sync Types
Separate horizontal and vertical; sync on green (as used on SGI
and HP9000); composite
Safety and
EMC Standards
EN55022 Class A, EN55024, EN 61000-3-2, EN 61000-3-3, EN60950, FCC 47CFR
Part15 Class A, CSA C22.2 No. 60950, IEC 60950, FCC 15 Class A, UL 60950 third
edition, VCCI Class A
Table A.1: LongView 1000 Extender Product Specifications (Continued)
Page 29

Appendices 23
Appendix B: Technical Support
Our Technical Support staff is ready to assist you with any installation or operating issues you
encounter with your Avocent product. If an issue should develop, follow the steps below for
the fastest possible service.
To resolve an issue:
1. Check the pertinent section of this manual to see if the issue can be resolved by following
the procedures outlined.
2. Visit www.avocent.com/support and use one of the following resources:
Search the knowledge base or use the online service request.
-or-
Select Technical Support Contacts to find the Avocent Technical Support location nearest you.
Page 30

24 LongView 1000 Installer/User Guide
Appendix C: Troubleshooting
Table C.1: Troubleshooting the LongView 1000R Receiver
No power status light on LongView 1000R receiver
Verify that the power supply is plugged in correctly.
Ensure that the power cable from the Avocent-supplied power supply is securely
plugged into the LongView 1000R receiver.
No video on monitor attached to LongView 1000R receiver
Verify that the monitor attached to the LongView 1000R receiver has power.
Ensure that the video cable from the monitor is securely plugged in to the correct
connector on the LongView 1000R receiver.
Ensure that the video cable from the AMIQDM module is securely plugged in to
the correct connector on the server.
Verify that the server is powered.
Cycle power to the LongView 1000R receiver. An informational message should
appear on the monitor for a brief moment. If the message does not appear, check
the monitor by plugging the video cable from the monitor directly into the server to
verify that the monitor is working and that the server is generating active video. If
this is functioning, check that the display settings for your server are set no higher
than a resolution of 1024 x 768 at 60 Hz refresh rate. If the monitor does not
function correctly, replace it.
As a last check, plug the video cable from the monitor directly into the server to
verify that the monitor is working and that the server is generating active video. If
this is functioning, check that the display settings for your server are set no higher
than a resolution of 1024 x 768 at 60 Hz refresh rate. If the monitor does not
function correctly, replace it.
No mouse or keyboard operation from peripherals attached to LongView 1000R receiver
Ensure that the mouse and keyboard operation cables are connected to the
correct PS/2 or USB ports on the LongView 1000R receiver. Match the connector
color codes (green is mouse and purple is keyboard).
Ensure that the mouse and keyboard cables from the AMIQDM module are
connected to the correct PS/2 or USB ports on the server. Match the connector
color codes (green is mouse and purple is keyboard).
Retest the mouse and keyboard by connecting them directly to the server and
rebooting. If one does not function correctly, replace the nonfunctioning peripheral.
Page 31

Appendices 25
No audio from speakers attached to LongView 1000R receiver
Ensure that the audio cable is securely plugged into the line out port of the server
(should be color-coded green).
Ensure that the speaker cable is securely plugged into the line out port of the
LongView 1000R receiver.
Retest the speakers by connecting them directly to the server. If they do not
function correctly, replace them.
Ensure speakers are powered.
Poor video quality on monitor attached to LongView 1000R receiver
Ensure that the video cable from the monitor is securely plugged in to the correct
connector on the LongView 1000R receiver.
Ensure that the video cable from the AMIQDM module is securely plugged in to
the correct connector on the server.
Audio and serial are disabled (AMIQDM module)
Select the Remote radio button in the OSD Configuration screen to configure
Audio In, Audio Out and Serial support via the remote transmitter.
Table C.1: Troubleshooting the LongView 1000R Receiver (Continued)
Page 32

26 LongView 1000 Installer/User Guide
Page 33

Page 34

590-550-501D
For Technical Support:
www.avocent.com/support
 Loading...