

Page 1
Automatic Video Skew
and EQ Adjustment
EXTENDER
VGA-LDXW PRO(Local) VGA-RDXW PRO(Remote)
VGA-EDXW PRO
USER MANUAL V1.0
Package Contents
z VGA-LDXW PRO Local Unit x 1
z VGA-RDXW PRO Remote Unit x 1
z User manual x 1
z Power adapter DC 12V with lock x 2
z VGA Cable 1.2m x 1
If any thing missed, please contact with your vendor.
Features
Through the VGA auto video adjustment extender , you
can use one PC to display identical image and
extension of VGA signal up to 300 meter.
Resolution up to 1600 x 1200.
Equalization & Gain is adjusted automatically.
VGA’s RGB skew is adjusted automatically.
EDID copy(from Remote to Local)
One CAT.5 cable extension.
-1-
Specifications
Function VGA-LDXW PRO VGA-RDXW PRO
PC Connector 1 x HD-15 Female None
Monitor Connector 1 x HD-15 Female 1 x HD-15 Female
RJ-45 Connector 1
Power LED 1
Link LED 1
Video Resolution 1600 x 1200 @ 60Hz
Cable Distance 300 m (Max.)
Power Adapter DC 12V with lock
Housing Metal
Weight 288 g 288 g
Dimensions(LxWxH) 150x80x25 mm
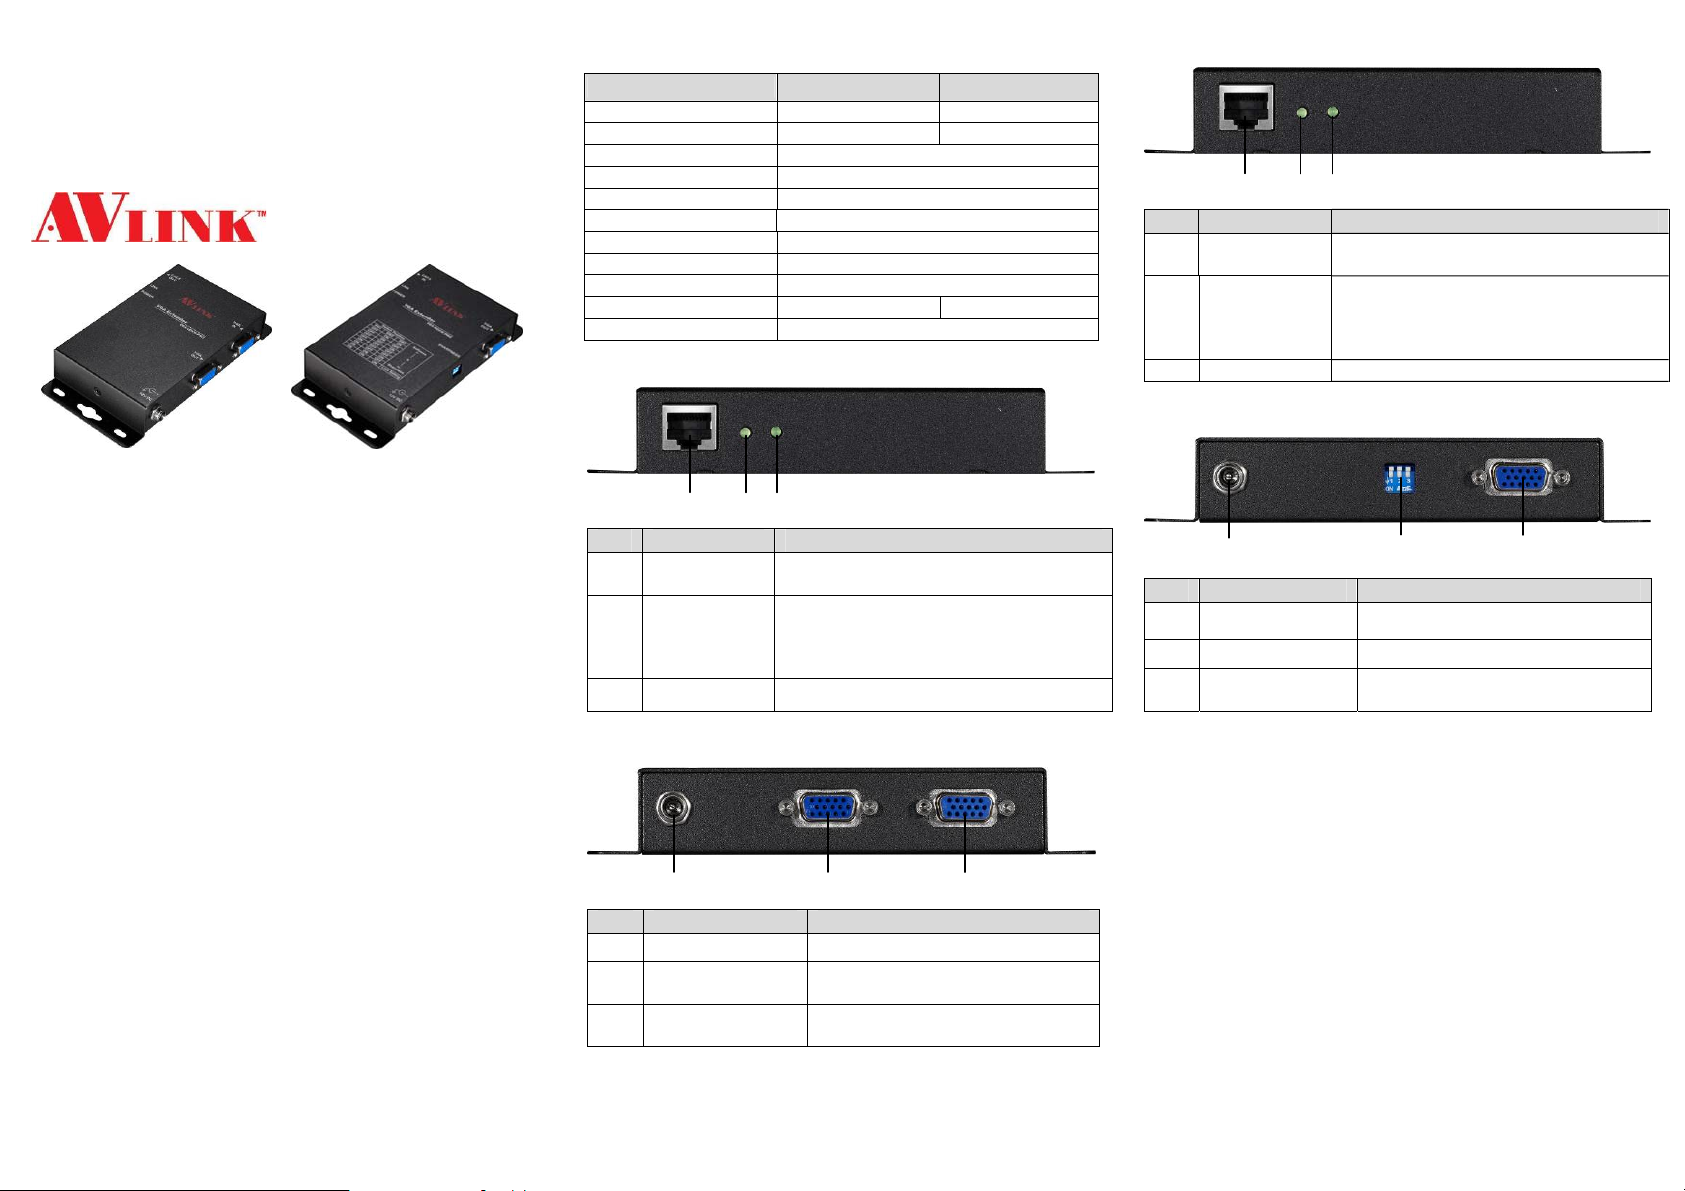
VGA-LDXW PRO FRONT VIEW
No Component Description
1
2 Link LED
3 Power LED On when the unit power on.
c
CAT.5
Connector
e
d
Plugs the CAT5 cable into this
connector.
On when links successfully.
Off when no link to Remote unit.
Flash when update EDID from Remote
to Local.
VGA-LDXW PRO REAR VIEW
No Component Description
c d
1 Po wer Jack The power adaptor plugs here.
2
3
VGA-out
Connector
VGA-In
Connector
The VGA cable connects to the
Local monitor plugs in here.
The VGA cable connects to the
PC plugs in here.
e
-2-
VGA-RDXW PRO FRONT VIEW
No Component Description
1
2 Link LED
3 Power LED On when the unit power on.
c
CAT.5
Connector
e
d
Plugs the CAT5 cable into this
connector.
On when links successfully.
Off when no link to Remote unit.
Flash when update EDID from Remote
to Local.
VGA-RDXW PRO REAR VIEW
No Component Description
c
1 Power Jack The power adaptor plugs here.
2 DIP switch DIP switch for sharpness control
3
VGA-In
Connector
The VGA cable connects to the
PC plugs in here.
d
-3-
e
Page 2
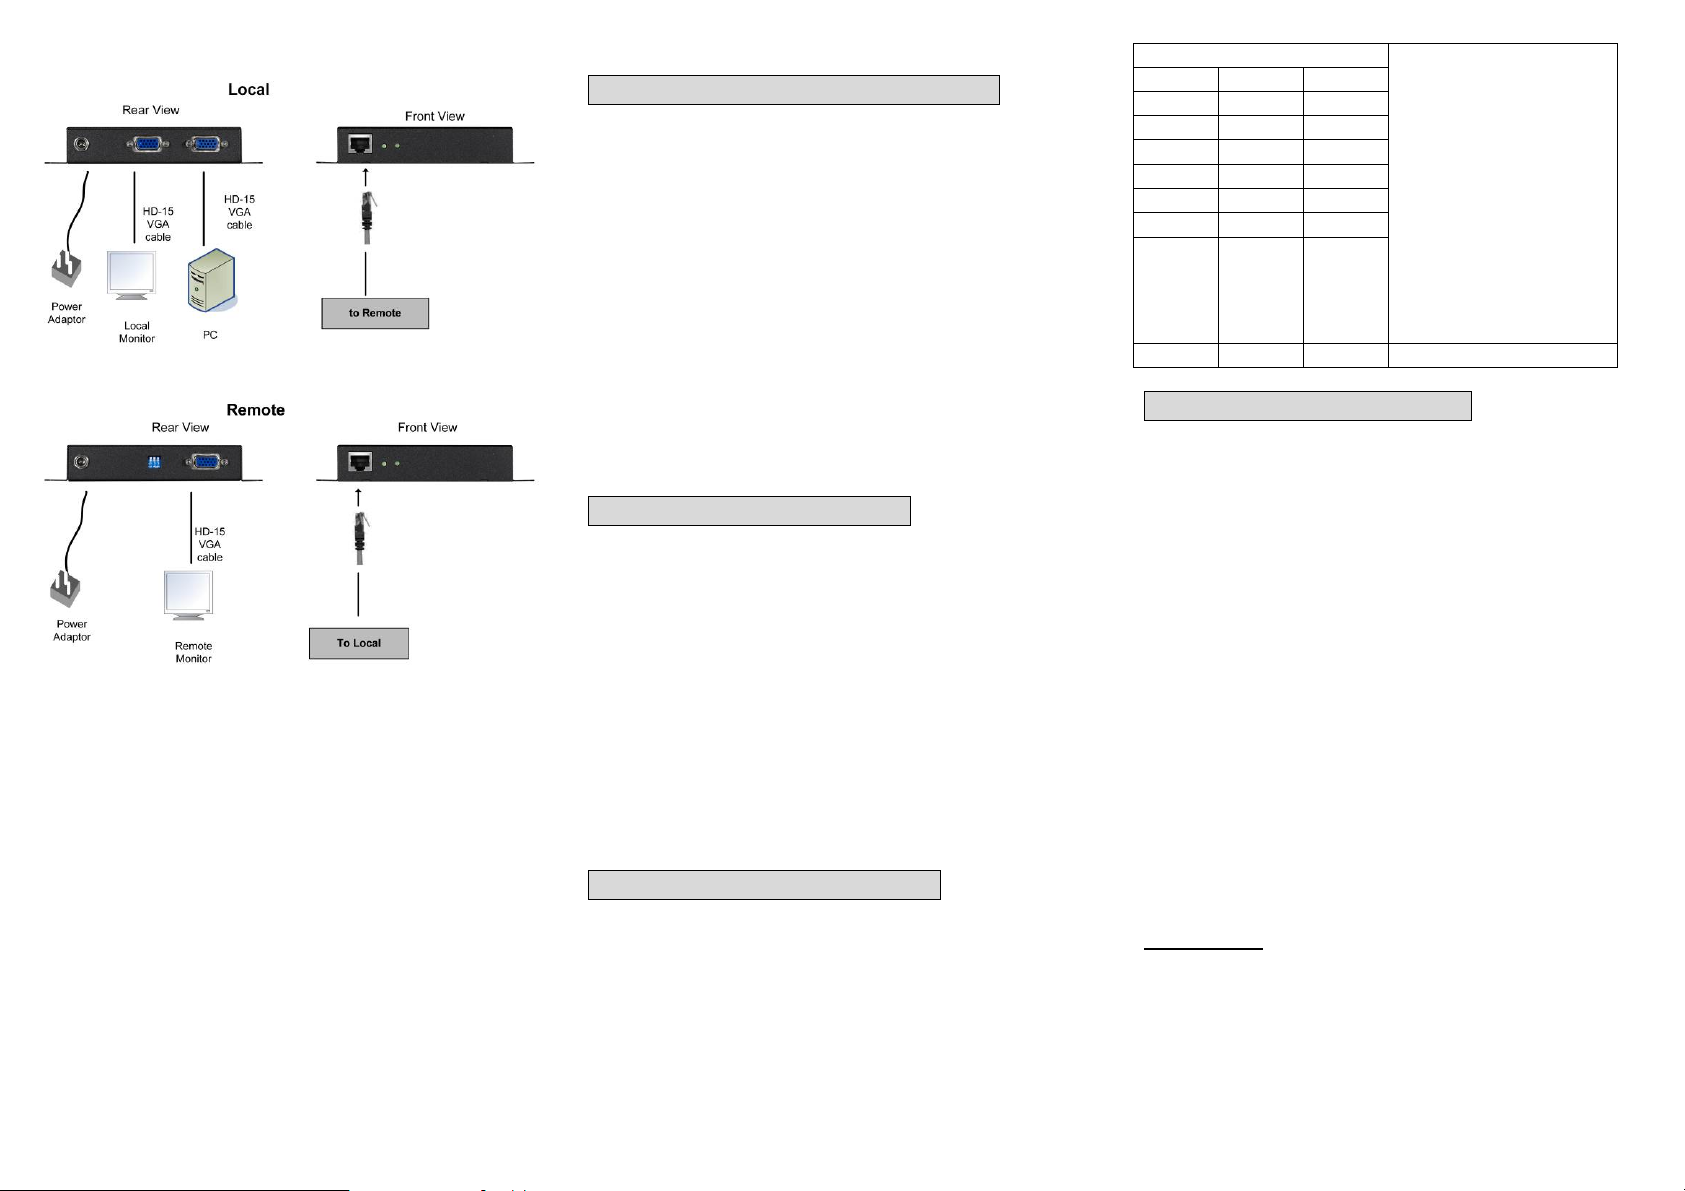
Installation
1. Connect PC VGA port by usin g standard VGA cable to
Local.
2. Connect CAT5 cable to Local.
3. Connect CA T5 cable to Remote.
4. Connect Monitor by using standard VGA cable to
Remote.
5. Power on and VGA-LDXW PRO and VGA-RDXW
PRO.
6. Power on Local PC.
-4-
Operation
“Auto video adjustment” operation
When the user reconnects the CAT5/E cable between the
local and remote unit, the VGA-EDXW PRO will start to
adjust the remote video automatically in seconds.
For better video adjust result, the resolution of video
source (usually: PC) should under or equal the resolution
“1280*1024@60”.
For example, when the user works with the VGA
resolution 1600*1200@60, change the video resolutio n to
be 1280*1024@60 before install the VGA-EDXW PRO;
then install the VGA-EDXW PRO.
And after the VGA-EDXW PRO finished the “auto video
adjustment procedure”, change the video resolution back
to 1600*1200@60 and process “lock video setting”.
“Auto EDID copy” operation
When the user reconnects the CAT5/E cable between the
local and remote unit, the VGA-EDXW PRO will start to
copy EDID from remote Monitor to local unit.
And local unit will save the EDID content from the remote
monitor even when the VGA-EDXW PRO re-power.
The VGA-EDXW PRO will update the EDID content,
when the remote monitor’s EDID is different with the
EDID in the memory of the VGA-EDXW PRO.
*note: When there is no connection between the local and
remote unit, the local unit will use the EDID content of the
local monitor to the PC.
DIP Switch of VGA-RDXW PRO
For advanced usage, the user can follow the below table
to adjust the video after “auto video adjustment
procedure”.
-5-
Switch Position
SW1 SW2 SW3
OFF ON ON
OFF ON OFF
OFF OFF ON
OFF OFF OFF
ON OFF OFF
ON OFF ON
ON ON OFF
ON ON ON Lock Video Setting
Softness
(-)
|
|
|
|
-0|
|
|
|
(+)
Sharpness
Lock Video Setting (Remote)
We suggest the user “Lock Video Setting” by tapping the
SW1, SW2, and SW3 to be “ON”, after the extender finish
the “auto video adjustment procedure”.
So even when the VGA-EDXW PRO re-power or the
CAT5 connection fail temporarily, the video setting
parameter of VGA-EDXW PRO won’t change or restart
the “auto video adjustment procedure”.
Troubleshooting
1. If no video signal is displayed on the monitor.
(1) Please check all of VGA cable and CAT5 cable
is loosened or disconnected.
(2) Power adapter is not connected.
2. If video signal is foggy or un-clear, please check VGA
connector, or low the VGA resolution for long cable. It
is highly recommended to use “optimal CAT5 cable
length” to get the best video quality and not to waste
unnecessary CAT5 cable.
© C&C TECHNIC TAIWAN CO., LTD. All rights reserved.
Trademarks:
All the companies, brand names, and product names
referred to this manual are the trademarks or registered
trademarks belonging to their respective companies.
-6-
 Loading...