


Avira Premium Security Suite
www.avira.com
User Manual

Trademarks and Copyright
Trademarks
AntiVir is a registered trademark of Avira GmbH.
Windows is a registered trademark of the Microsoft Corporation in the United States and other countries.
All other brand and product names are trademarks or registered trademarks of their respective owners.
Protected trademarks are not marked as such in this manual. This does not mean, however that they may be used freely.
Copyright information
The purpose of this information is to acknowledge and recognize the code from third-party suppliers used for Avira
Premium Security Suite. We would like to thank the copyright owners for allowing us to use their code.
MD5-Code
The MD5 code used for security reasons was written by the Information Science Institute of the University of Southern
California and derived from the Message-Digest algorithm from RSA Data Security, Inc.
Copyright (C) 1991-2, RSA Data Security, Inc., Created in 1991.
All rights reserved.
The license to copy and use this software is distributed with the stipulation that it is designated as the "RSA Data Security,
Inc. MD5 Message-Digest Algorithm" in all materials mentioned by this software or which refer to this software or these
functions.
The license is also granted for the creation of works deriving from this, with the stipulation that these works are
designated as "derived from the RSA Data Security, Inc. MD5 Message-Digest Algorithm" in all materials which mention
the derived work or refer to it.
RSA Data Security, Inc. provides no warranty whatsoever regarding the marketability of this software or the suitability of
this software for a particular purpose. It is provided without any guarantee in its present form. This applies to expressed
or implied guarantees.
This information must be contained in every copy of each part of this documentation and/or software.
Expat
Copyright (c) 1998, 1999, 2000 Thai Open Source Software Center Ltd
Permission is hereby granted, free of charge, to any person obtaining a copy of this software and associated
documentation files (the "Software"), to deal in the Software without restriction, including without limitation the rights to
use, copy, modify, merge, publish, distribute, sublicense, and/or sell copies of the Software, and to permit persons to
whom the Software is furnished to do so, subject to the following conditions:
The above copyright notice and this permission notice shall be included in all copies or substantial portions of the
Software.
THE SOFTWARE IS PROVIDED "AS IS", WITHOUT WARRANTY OF ANY KIND, EXPRESS OR IMPLIED, INCLUDING
BUT NOT LIMITED TO THE WARRANTIES OF MERCHANTABILITY, FITNESS FOR A PARTICULAR PURPOSE AND
NONINFRINGEMENT.
IN NO EVENT SHALL THE AUTHORS OR COPYRIGHT HOLDERS BE LIABLE FOR ANY CLAIM, DAMAGES OR OTHER
LIABILITY, WHETHER IN AN ACTION OF CONTRACT, TORT OR OTHERWISE, ARISING FROM, OUT OF OR IN
CONNECTION WITH THE SOFTWARE OR THE USE OR OTHER DEALINGS IN THE SOFTWARE.
ScewXML
Copyright (C) 2002, 2003 Aleix Conchillo Flaque: SCEW is free software; you can redistribute it and/or modify it under the
terms of the GNU Lesser General Public License as published by the Free Software Foundation; either version 2.1 of the
License, or (at your option) any later version: http://www.gnu.org/copyleft/lesser.html
c-ares
Copyright 1998 by the Massachusetts Institute of Technology.
Permission to use, copy, modify, and distribute this software and its documentation for any purpose and without fee is
hereby granted, provided that the above copyright notice appear in all copies and that both that copyright notice and this
permission notice appear in supporting documentation, and that the name of M.I.T. not be used in advertising or
publicity pertaining to distribution of the software without specific, written prior permission. M.I.T. makes no
representations about the suitability of this software for any purpose. It is provided "as is" without express or implied
warranty.

Table of Contents
Table of Contents
1 Introduction .......................................................................................................6
2 Icons and emphases............................................................................................. 7
3 Product information ........................................................................................... 8
3.1 Delivery scope.............................................................................................. 8
3.2 System requirements ...................................................................................9
3.3 Licensing ................................................................................................... 10
3.3.1 License manager........................................................................................................... 11
4 Installation and Deinstallation.......................................................................... 12
4.1 Installation ............................................................................................... 12
4.2 Modification installation ........................................................................... 15
4.3 Installation modules .................................................................................. 15
4.4 Uninstallation ........................................................................................... 16
5 Premium Security Suite overview....................................................................... 18
5.1 User interface and operation...................................................................... 18
5.1.1 Control Center.............................................................................................................. 18
5.1.2 Configuration ...............................................................................................................21
5.1.3 Tray icon .......................................................................................................................24
5.2 How to...? .................................................................................................. 25
5.2.1 Activate license.............................................................................................................25
5.2.2 Avira Premium Security Suite automatic update........................................................26
5.2.3 Start a manual update.................................................................................................. 27
5.2.4 On-demand scan: Using a scan profile to scan for viruses and malware...................28
5.2.5 On-demand scan: Scan for viruses and malware using Dragamp;Drop.....................29
5.2.6 On-demand scan: Scan for viruses and malware via the context menu ....................30
5.2.7 On-demand scan: Automatically scan for viruses and malware ................................ 30
5.2.8 On-demand scan: Targeted scan for active rootkits...................................................31
5.2.9 Reacting to detected viruses and malware..................................................................31
5.2.10 Quarantine: Handling quarantined files (*.qua) ....................................................33
5.2.11 Quarantine: Restore the files in quarantine........................................................... 34
5.2.12 Quarantine: move suspicious files to quarantine................................................... 35
5.2.13 Scan profile: Amend or delete file type in a scan profile........................................ 35
5.2.14 Scan profile: Create desktop shortcut for scan profile........................................... 36
5.2.15 Events: Filter events ................................................................................................ 36
5.2.16 MailGuard: Exclude email addresses from scan..................................................... 37
5.2.17 MailGuard: Train the anti-spam module................................................................ 37
5.2.18 Firewall: Select the security level for Firewall ........................................................38
5.2.19 Backup: Create backups manually........................................................................... 38
5.2.20 Backup: Create automatic data backups ................................................................. 40
6 Scanner............................................................................................................. 42
7 Updates............................................................................................................. 43
Avira GmbH Avira Premium Security Suite 3

Table of Contents
8 Backup.............................................................................................................. 44
9 FAQ, Tips .......................................................................................................... 45
10 Viruses and more........................................................................................... 58
11 Info and Service............................................................................................. 63
9.1 Frequently asked questions (FAQs)............................................................. 45
9.2 Troubleshooting ........................................................................................ 48
9.3 Shortcuts................................................................................................... 52
9.4 Windows Security Centre ........................................................................... 55
10.1 Extended threat categories ........................................................................ 58
10.2 Viruses and other malware......................................................................... 60
11.1 Contact address ......................................................................................... 63
11.2 Technical support ...................................................................................... 64
11.3 Suspicious file............................................................................................ 64
11.4 Report false positive .................................................................................. 65
11.5 Your feedback for more security ................................................................. 65
12 Reference: Configuration............................................................................... 66
12.1 Scanner ..................................................................................................... 66
12.1.1 Scan ..........................................................................................................................66
12.1.1.1. Action for concerning files .............................................................................69
12.1.1.2. Further actions................................................................................................71
12.1.1.3. Archive list.......................................................................................................72
12.1.1.4. Exceptions ....................................................................................................... 72
12.1.1.5. Heuristic.......................................................................................................... 73
12.1.2 Report.......................................................................................................................74
12.2 Guard ........................................................................................................ 75
12.2.1 Scan ..........................................................................................................................75
12.2.1.1. Action for concerning files .............................................................................77
12.2.1.2. Other actions .................................................................................................. 79
12.2.1.3. Exceptions ....................................................................................................... 79
12.2.1.4. Heuristic.......................................................................................................... 81
12.2.2 Report.......................................................................................................................82
12.3 MailGuard ................................................................................................. 84
12.3.1 Scan ..........................................................................................................................84
12.3.1.1. Action for concerning files .............................................................................84
12.3.1.2. Other actions .................................................................................................. 86
12.3.1.3. Heuristic.......................................................................................................... 87
12.3.1.4. AntiBot ............................................................................................................88
12.3.2 General .....................................................................................................................89
12.3.2.1. Exceptions ....................................................................................................... 89
12.3.2.2. Cache ...............................................................................................................91
12.3.2.3. AntiSpam......................................................................................................... 91
12.3.3 Report.......................................................................................................................92
12.4 Firewall ..................................................................................................... 93
4 Avira Premium Security Suite Avira GmbH

Table of Contents
12.4.1 Adapter rules............................................................................................................93
12.4.1.1. Incoming Rules ...............................................................................................97
12.4.1.2. Outgoing Rules..............................................................................................104
12.4.2 Application rules.................................................................................................... 105
12.4.3 Settings...................................................................................................................107
12.4.4 Popup settings .......................................................................................................107
12.5 WebGuard................................................................................................ 109
12.5.1 Scan ........................................................................................................................109
12.5.1.1. Action for concerning files ...........................................................................109
12.5.1.2. Locked requests.............................................................................................110
12.5.1.3. Exceptions ..................................................................................................... 112
12.5.1.4. Heuristic........................................................................................................114
12.5.2 Report.....................................................................................................................115
12.6 Backup..................................................................................................... 116
12.6.1 Settings...................................................................................................................116
12.6.2 Exceptions.............................................................................................................. 116
12.6.3 Report.....................................................................................................................118
12.7 General.................................................................................................... 119
12.7.1 Email.......................................................................................................................119
12.7.2 Extended threat categories....................................................................................120
12.7.3 Password ................................................................................................................120
12.7.4 Security................................................................................................................... 122
12.7.5 Directories..............................................................................................................123
12.7.6 Update ....................................................................................................................123
12.7.6.1. Web server.....................................................................................................124
12.7.7 Events.....................................................................................................................126
12.7.8 Limit reports ..........................................................................................................126
Avira GmbH Avira Premium Security Suite 5

Introduction
1 Introduction
Avira Premium Security Suite from Avira GmbH protects you computer against viruses,
malware, adware and spyware, unwanted programs and other dangers. This manual
deals with viruses and software in brief.
The manual describes the program installation and operation.
Please go to our website http://www.avira.com where you can download the Avira
Premium Security Suite manual in PDF from, update Avira Premium Security Suite or
renew your license.
You can also find information on our website such as telephone numbers for technical
support and information on how to subscribe to our newsletter.
Your Avira GmbH team
6 Avira Premium Security Suite Avira GmbH
Icons and emphases
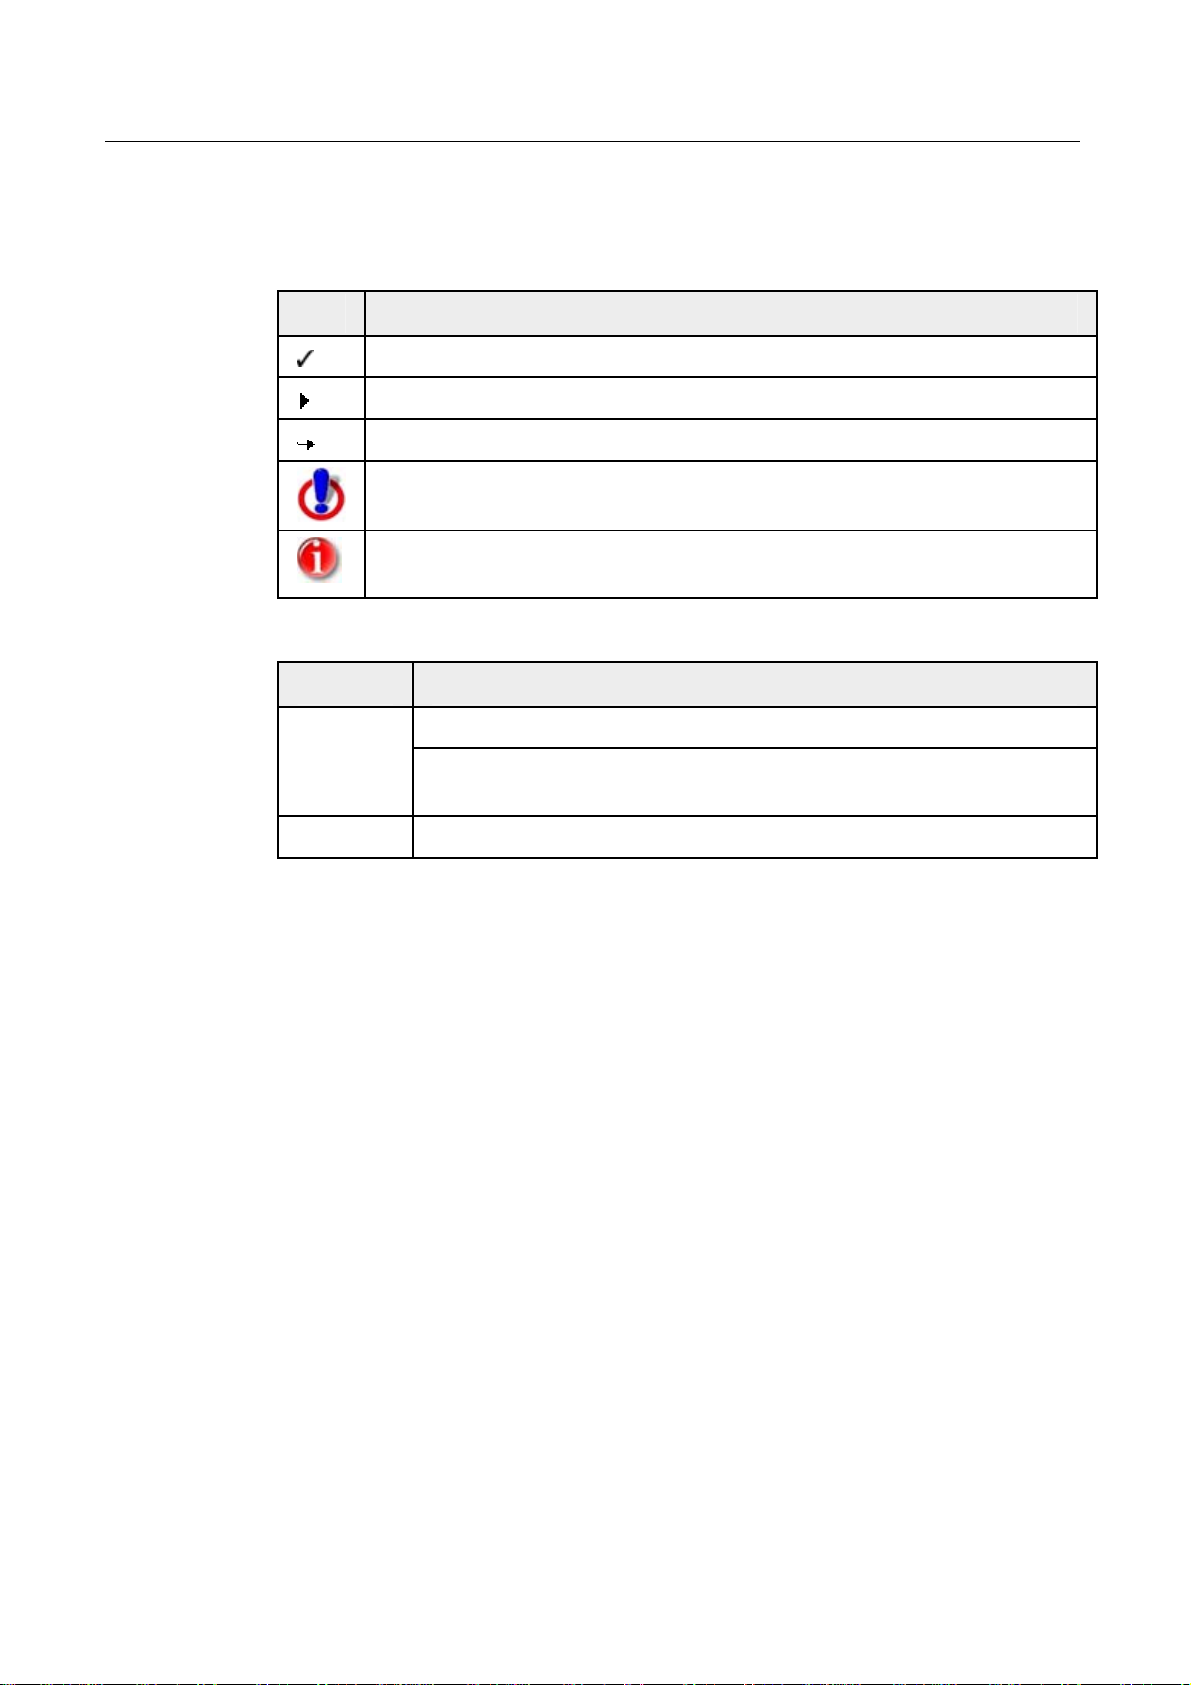
2 Icons and emphases
The following icons are used:
Icon Explanation
Placed before a condition which must be fulfilled prior to implementation.
Placed before an action step that you implement.
Placed before an event that follows the previous action.
Placed before a warning of the danger of critical data loss.
Placed before a link to particularly important information or a tip which
makes Avira Premium Security Suite easier to use.
The following emphases are used:
Emphasis Explanation
Cursive
File name or path data.
Displayed software interface elements (e.g. window heading, window
field or options box).
Bold
Clicked software interface elements (e.g. menu item, section or button)
Avira GmbH Avira Premium Security Suite 7
Product information
3 Product information
This chapter contains all information relevant to the purchase and use ofAvira Premium
Security Suite:
– see chapter: Delivery scope
– see chapter: System requirements
– see chapter: Licensing
– see chapter: License manager
Avira Premium Security Suite is a comprehensive and flexible tool you can rely on to
protect your computer from viruses, malware, unwanted programs, and other dangers
f Please note the following information:
Loss of valuable data usually has dramatic consequences. Even the best virus
protection program cannot provide one hundred percent protection from
data loss. Make regular copies (Backups) of your data for security purposes.
A program can only provide reliable and effective protection from viruses,
malware, unwanted programs and other dangers if it is up-to-date. Make sure
Avira Premium Security Suite is up-to-date with automatic updates.
Configure the program accordingly.
3.1 Delivery scope
Avira Premium Security Suite gives you the following functions:
– Control Center for monitoring, administering and controlling the entire
program
– Central configuration with user-friendly standard and advanced options and
context-sensitive help
– Scanner (On-Demand Scan) with profile-controlled and configurable search for
all known types of virus and malware
– Integration into the Windows Vista User Account Control allows you to carry out
tasks requiring administrator rights
– Guard (On-Access Scan) for continuous monitoring of all file access attempts
– MailGuard (POP3- and SMTP-Scanner) for the permanent checking of emails for
viruses and malware. Checking of email attachments is included
– WebGuard for monitoring data and files transferred from the Internet using the
HTTP protocol (monitoring of ports 80, 8080, 3128)
– Backup-component for creating backups of your data (mirror backups)
– Integrated quarantine management to isolate and process suspicious files
– Rootkit protection for detecting hidden malware installed in your computer
system (rootkits)
(Only for 32-bit systems)
– Direct access to detailed information on the detected viruses and malware via
the Internet
8 Avira Premium Security Suite Avira GmbH

Product information
– Simple and quick updates to the program, virus definitions, and search engine
through Single File Update and incremental VDF updates via a webserver on the
Internet
– User-friendly licensing in License Manager
– Integrated Scheduler to plan one-off or recurring tasks, such as updates or test
runs
– Very high rates of virus and malware detection using innovative search
technologies (search engines) and heuristic search processes
– Detection of all common archive types, including detection of nested archives
and smart extensions
– High-performance multithreading function (simultaneous high-speed scanning
of multiple files)
– Firewall to protect your computer against illegal access from the Internet or
from a network, and against illegal access from the Internet/network by an
unauthorized user.
3.2 System requirements
For Avira Premium Security Suite to work perfectly, the computer system must fulfill the
following requirements:
– Computer, Pentium, minimum 133 MHz
– Operating system
– Microsoft Windows Vista (32 or 64 Bit) or
– Microsoft Windows XP Home or Professional, SP2 recommended, or
– Microsoft Windows 2000, SP 4 recommended
Avira Premium Security Suite also supports Microsoft Windows XP x64
Edition and 64 Bit Microsoft Windows Vista.
– At least 192 MB RAM with Windows 2000/XP
– At least 512 MB RAM with Windows Vista
– 40 MB free memory space on the hard disk (more if using the quarantine
function)
– 100 MB temporary memory space on the hard disk
– For installation of Avira Premium Security Suite: Administrator rights in
Windows NT, 2000 and XP
Information for Windows Vista users
On Windows 2000 and Windows XP, many users work with administrator rights.
However, this is not desirable from the point of view of security, because it is then easy
for viruses and unwanted programs to infiltrate computers.
Avira GmbH Avira Premium Security Suite 9

Product information
For this reason, Microsoft is introducing the "User Account Control" with Windows
Vista. This offers more protection for users who are logged in as administrators: thus in
Windows Vista, one administrator only has the privileges of a normal user at first.
Actions for which administrator rights are required are clearly marked in Windows Vista
with an information icon. In addition, the user must explicitly confirm the required
action. Privileges are only increased and the administrative task carried out by the
operating system after this permission has been obtained.
Avira Premium Security Suite requires administrator rights for some actions in Windows
Vista. These actions are identified with the following symbol:
appears on a button, administrator rights are required to carry out this action. If your
current user account does not have administrator rights, the Windows Vista dialog of
the User Account Control asks you to enter the administrator password. If you do not
have an administrator password, you cannot carry out this action.
3.3 Licensing
In order to be able to use Avira Premium Security Suite, you require a license. You
thereby accept the license conditions of Avira Premium Security Suite.
. If this symbol also
The license is issued via a digital license code in the form of the file hbedv.key. This
digital license code is the Control Center of your personal license. It contains exact
details of which programs are licensed to you and for what period of time. A digital
license code can therefore also contain the license for more than one product.
If you purchased Avira Premium Security Suite on the internet, or via a program
CD/DVD, the digital license code is sent to you by email. You can load the license key
during installation of Premium Security Suite or install it later in License Manager.
10 Avira Premium Security Suite Avira GmbH
Product information
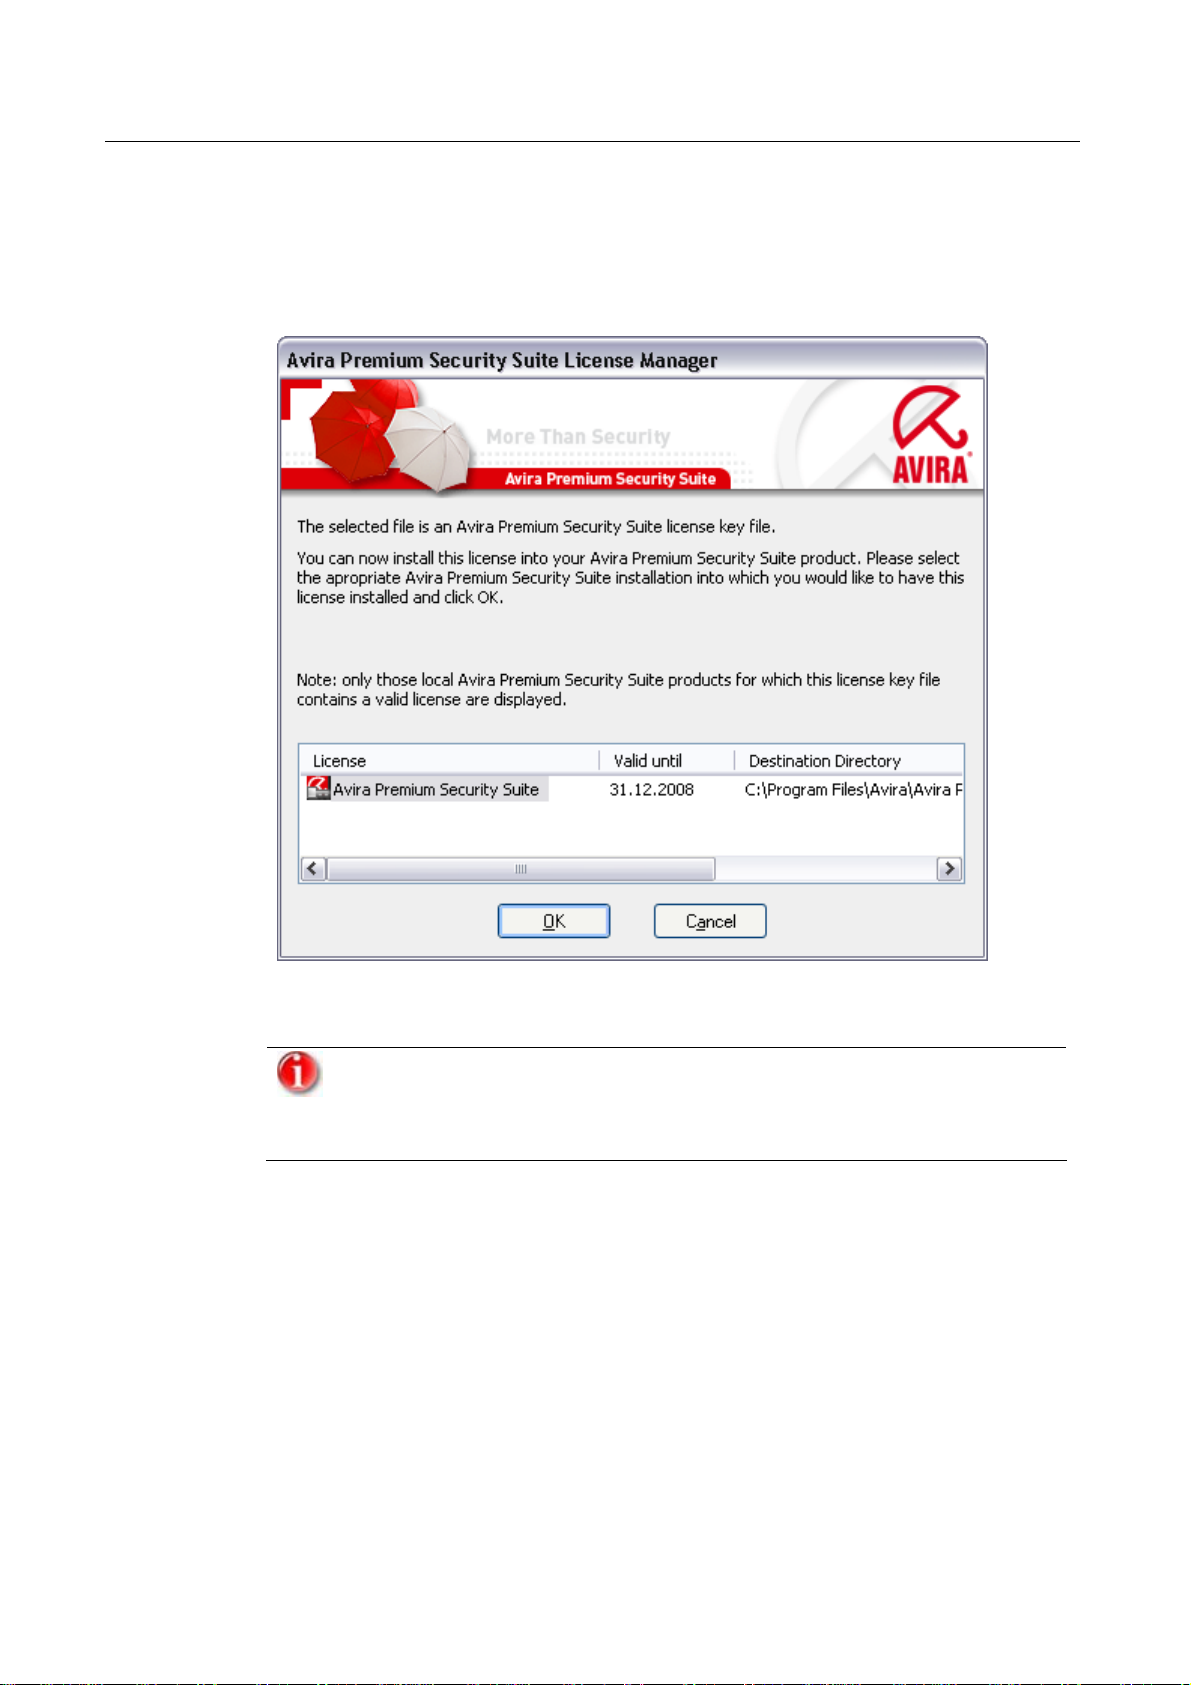
3.3.1 License manager
The Avira Premium Security Suite License Manager enables very simple installation of
the Avira Premium Security Suite license.
Avira Premium Security Suite License Manager
You can install the license by selecting the license file in your file manager or in the
activation email with a double click and following the relevant instructions on the
screen.
The Avira Premium Security Suite License Manager automatically copies the
corresponding license in the relevant product folder. If a license already
exists, a note appears as to whether the existing license file is to be replaced.
The existing file is then renamed hbedv.old.
Avira GmbH Avira Premium Security Suite 11

Installation and Deinstallation
4 Installation and Deinstallation
This chapter contains information relating to the installation and uninstallation of your
Avira Premium Security Suite:
– see Chapter: Installation: Conditions, Installation types, Install
– see Chapter: Installation modules
– see Chapter: Modification installation
– see Chapter: Uninstallation: Uninstall
4.1 Installation
Before installing Avira Premium Security Suite, check whether your computer fulfils all
the minimum system requirements. If so, you can install Avira Premium Security Suite.
From Windows XP, Avira Premium Security Suite generates a restore point of
your computer before installation of Avira Premium Security Suite. This
enables you to safely remove Avira Premium Security Suite if installation
fails. Note that for this the option Turn off System Restore under: "Start |
Settings | Control Panel | System | Tab System Restore" must not be
marked.
If you want to recover your system earlier, you can do so with the function
"Start | Programs | Accessories | System Tools | System Restore". The
restore point generated by Avira Premium Security Suite is indicated by the
entry Premium Security Suite.
Installation types
During installation you can select a setup type in the installation assistant:
Full
Premium Security Suite is fully installed with all program components. Program files are
installed in a predefined default directory in C:\Program files.
User-defined
You can choose to install individual program components (see Chapter Installation and
uninstallation::Installation modules). A destination folder can be selected for the
program files to be installed. You can disable Create a desktop icon and program group in
the Start menu and predefine a setting for the Win32 file heuristic.
Before starting installation
f Close your email program. It is also recommended to end all running applications.
f Make sure that no other virus protection solutions are installed. The automatic
protection functions of various security solutions may interfere with each other.
12 Avira Premium Security Suite Avira GmbH

Installation and Deinstallation
Install
The installation program runs in self-explanatory dialog mode. Every window contains a
certain selection of buttons to control the installation process.
The most important buttons are assigned the following functions:
– OK: Confirm action.
– Abort: Abort action.
– Next: Go to next step.
– Back: Go to previous step.
How to install Premium Security Suite:
The following actions for disabling the Windows Firewall only apply to the
Windows XP operating system.
f Start the installation program by double-clicking on the installation file that you
have downloaded from the internet or insert the program CD.
After a security message is displayed confirming the publisher of the software,
the installation program dialog box appearss.
f Click Accept.
The setup program for Avira Premium Security Suite starts.
f Click Continue.
The dialog box Welcome... appears.
f Click Next.
The dialog box Expanded risk categories appears containing information on basic
and advanced protection.
f Click Next.
The dialog box with the license agreement appears.
f Confirm that you accept the license agreement and click Continue.
The dialog box Select installation type appears.
f Decide whether you want to perform a full or a user-defined installation.
f Enable the option Full orUser-defined and confirm by clicking Continue.
User-defined installation
The dialog box Select destination directory appears.
f Confirm the specified destination directory by clicking Continue.
- OR -
Use the Browse button to select a different destination directory and confirm by
clicking Next.
The dialog box Install components appears:
f Enable or disable the required components and confirm by clicking Continue.
If Windows Firewall is installed, a message appears saying it must be disabled to
avoid conflicts with Avira Firewall
f Click Yes to confirm.
Windows Firewall is disabled.
Avira GmbH Avira Premium Security Suite 13

Installation and Deinstallation
In the following dialog box you can decide whether to enable the Win32 file
heuristic.
f Click Next.
In the following dialog box you can decide whether to create a desktop shortcut
and/or a program group in the Start menu.
f Click Next.
f Skip the following section "Full installation".
Full installation
If Windows Firewall is installed, a message appears saying it must be disabled to
avoid conflicts with Avira Firewall.
f Click Yes to confirm.
Windows Firewall is disabled.
Continue for full and user-defined installation.
The dialog box Install license appears:
f Go to the directory in which you have saved the license file, read the message in the
dialog box and confirm by clicking Next.
The license file is copied and the components are installed and started.
The setup program asks if thereadme.txt file containing up-to-date information
on Avira Premium Security Suite should be displayed.
f Agree where appropriate and click Finish.
f Confirm the information by clicking OK.
Next procedure (varies slightly depending on the operating system)):
The setup program closes the installation and, where appropriate, creates a
desktop shortcut.
The file readme.txt is displayed where appropriate.
You are asked if you want to perform an update.
On the latest version of Avira Premium Security Suite provides reliable
protection from the ever-increasing number of viruses and other malware.
Perform an update immediately after installation. After this first update, the
Windows Security Centre (XP and Vista) announces that Avira Premium
Security Suite is ACTIVATED.
- OR -
You are asked if you want to restart your computer.
In Windows XP, when the Windows Firewall is disabled, a dialog box always
appears (for security purposes), indicating that the computer must be
restarted..
If you want to perform an update:
f Click Yes to confirm.
An update is sought for Avira Premium Security Suite via the existing web server
connection.
14 Avira Premium Security Suite Avira GmbH

Installation and Deinstallation
Avira Premium Security Suite then starts an automatic scan of the Windows
If you want to restart the computer:
f Click Yes to confirm.
system directories.
The first scan is particularly important to ensure that your system is free
from viruses and malware. Do not cancel the first scan.
The computer is restarted.
4.2 Modification installation
You have the option of adding or removing individual program components of the
current Avira Premium Security Suite installation (see ChapterInstallation and
uninstallation::Installation modules)
If you wish to add or remove modules of the actual Avira Premium Security Suite
installation, you can use the option Add or Remove Programs in the Windows
control panel to Change/Remove programs.
Select Avira Premium Security Suite and click Change. In the welcome dialog of Avira
Premium Security Suite select the option Modify. You will be guided through the
installation changes.
4.3 Installation modules
In a user-defined installation or a modification installation, the following installation
modules can be selected, added or removed.
– Premium Security Suite
This module contains all components required for successful installation of Avira
Premium Security Suite.
– AntiVir Guard
The AntiVir Guard runs in the background. It monitors and repairs, where
necessary, files during operations such as open, write and copy in on-access
mode. Whenever a user carries out a file operation (e.g. load document, execute,
copy), Avira Premium Security Suite automatically scans the file. Renaming a file
does not trigger a scan by AntiVir Guard.
– AntiVir MailGuard
AntiVir MailGuard is the interface between your computer and the email server
from which your email program (mail client) downloads the emails. MailGuard is
connected as a so-called proxy between the email program and the email server.
All incoming emails are routed through this proxy, scanned for viruses and
unwanted programs and forwarded to your email program. Depending on the
configuration, the program processes the affected emails automatically or asks
the user for a certain action. In addition, the MailGuard can reliably protect you
against spam emails.
Avira GmbH Avira Premium Security Suite 15

Installation and Deinstallation
– AntiVir WebGuard
When surfing the internet, you are using your web browser to request data from
a web server. The data transferred from the web server (HTML files, script and
image files, Flash files, video and music streams, etc) will normally be moved
directly into the browser cache for display in the web browser, meaning that an
on-access scan as performed by AntiVir Guard is not possible. This could allow
viruses and unwanted programs to access your computer system. WebGuard is
what is known as an HTTP proxy which monitors the ports used for data transfer
(80, 8080, 3128) and checks the transferred data for viruses and unwanted
programs. Depending on the configuration, the program may process the affected
files automatically or prompt the user for a specific action.
– Avira Firewall
Avira Firewall controls communication to and from your computer. It permits or
denies communications based on security policies.
– Rootkit Detection
The Rootkit Detection checks whether software is already installed on your
computer that can no longer be detected with conventional methods of malware
protection after penetrating the computer system.
– Shell Extension
The Avira Premium Security Suite Shell Extension generates an entry Scan
selected files with AntiVir in the context menu of the Windows Explorer (righthand mouse button). With this entry you can directly scan files or directories.
– Backup
The Backup component lets you create mirror backups of your data manually and
automatically.
4.4 Uninstallation
If you wish to remove Avira Premium Security Suite from your computer, you can use
the option Add or Remove Programs to Change/Remove programs in the Windows
Control Panel.
To uninstall Avira Premium Security Suite (e.g. in Windows XP and Windows Vista):
f Open the Control Panel via the Windows Start menu.
f Double click on Software (Windows Vista: Program files).
f Select Avira Premium Security Suite and clickRemove.
You will be asked if you really want to remove the program.
f Click Yes to confirm.
You will be asked if you want to re-enable Windows Firewall (Avira Firewall is
disabled).
f Click Yes to confirm.
All components of the program are removed.
f Click on Finish to complete uninstallation.
Where appropriate, a dialog box appears recommending that your computer be
restarted.
16 Avira Premium Security Suite Avira GmbH

Installation and Deinstallation
f Click Yes to confirm.
Avira Premium Security Suite is uninstalled, and all directories, files and registry
entries for Avira Premium Security Suite are deleted when your computer is
restarted.
Avira GmbH Avira Premium Security Suite 17
Premium Security Suite overview
5 Premium Security Suite overview
This chapter contains an overview of the functionality and operation of Premium
Security Suite.
– see Chapter: Interface and operation
– see Chapter: How to...?
5.1 User interface and operation
Your operate Premium Security Suite via three program interface elements:
– Control Center: Monitoring and control of Premium Security Suite
– Avira Premium Security Suite Configuration: Configuration of Premium Security
Suite
– Tray Icon in the system tray of the taskbar: Open Control Center and other
functions
5.1.1 Control Center
The Control Center is designed to monitor the protection status of your computer
systems and control and operate the protection components and functions of Premium
Security Suite.
The Control Center window is divided into three areas: themenu bar, thenavigation
bar and the detail windowview:
– Menu bar: In the Control Center menu bar, you can access general program
functions and information on Premium Security Suite.
18 Avira Premium Security Suite Avira GmbH

Premium Security Suite overview
– Navigation area: In the navigation area, you can easily swap between the
individual sections ofControl Center. The individual sections contain information
and functions of the program components of Premium Security Suite and are
arranged in the navigation bar according to activity. For example: Activity
Overview - SectionStatus.
– View: This window shoes the section selected in the navigation area. According
to section, in the upper bar of the detail window you will find buttons to execute
functions and actions Data or data objects are displayed in lists in the individual
sections You can sort the lists by clicking in the box defining how you wish to sort
the list.
Starting and ending Control Center
To start the Control Center, the following options are available:
– double click the program icon on your desktop
– via the Premium Security Suite program entry in the start menu | program.
– via the Avira Premium Security Suite tray icon.
Close the Control Center via the menu command Close in the menu File or by clicking
on the close tab in the Control Center.
Control Center operation
To navigate in the Control Center
f Select an activity in the navigation bar.
The activity opens and other sections appear. The first section of the activity is
selected and displayed in the view.
f If necessary, click another section to display this in the detail window.
- OR -
f Select a section via the menu View.
Note
You can activate the keyboard navigation in the menu bar with the help of
the [ALT] key. If navigation is activated, you can move within the menu with
the arrow keys. With the Return key you activate the active menu item.
To process data or objects displayed in the detail window:
f highlight the data or object you wish to edit.
To highlight multiple elements (elements in columns), hold down the control key or
the shift key while selecting the elements.
f Click the appropriate button in the upper bar of the detail window to edit the object
Control Center overview
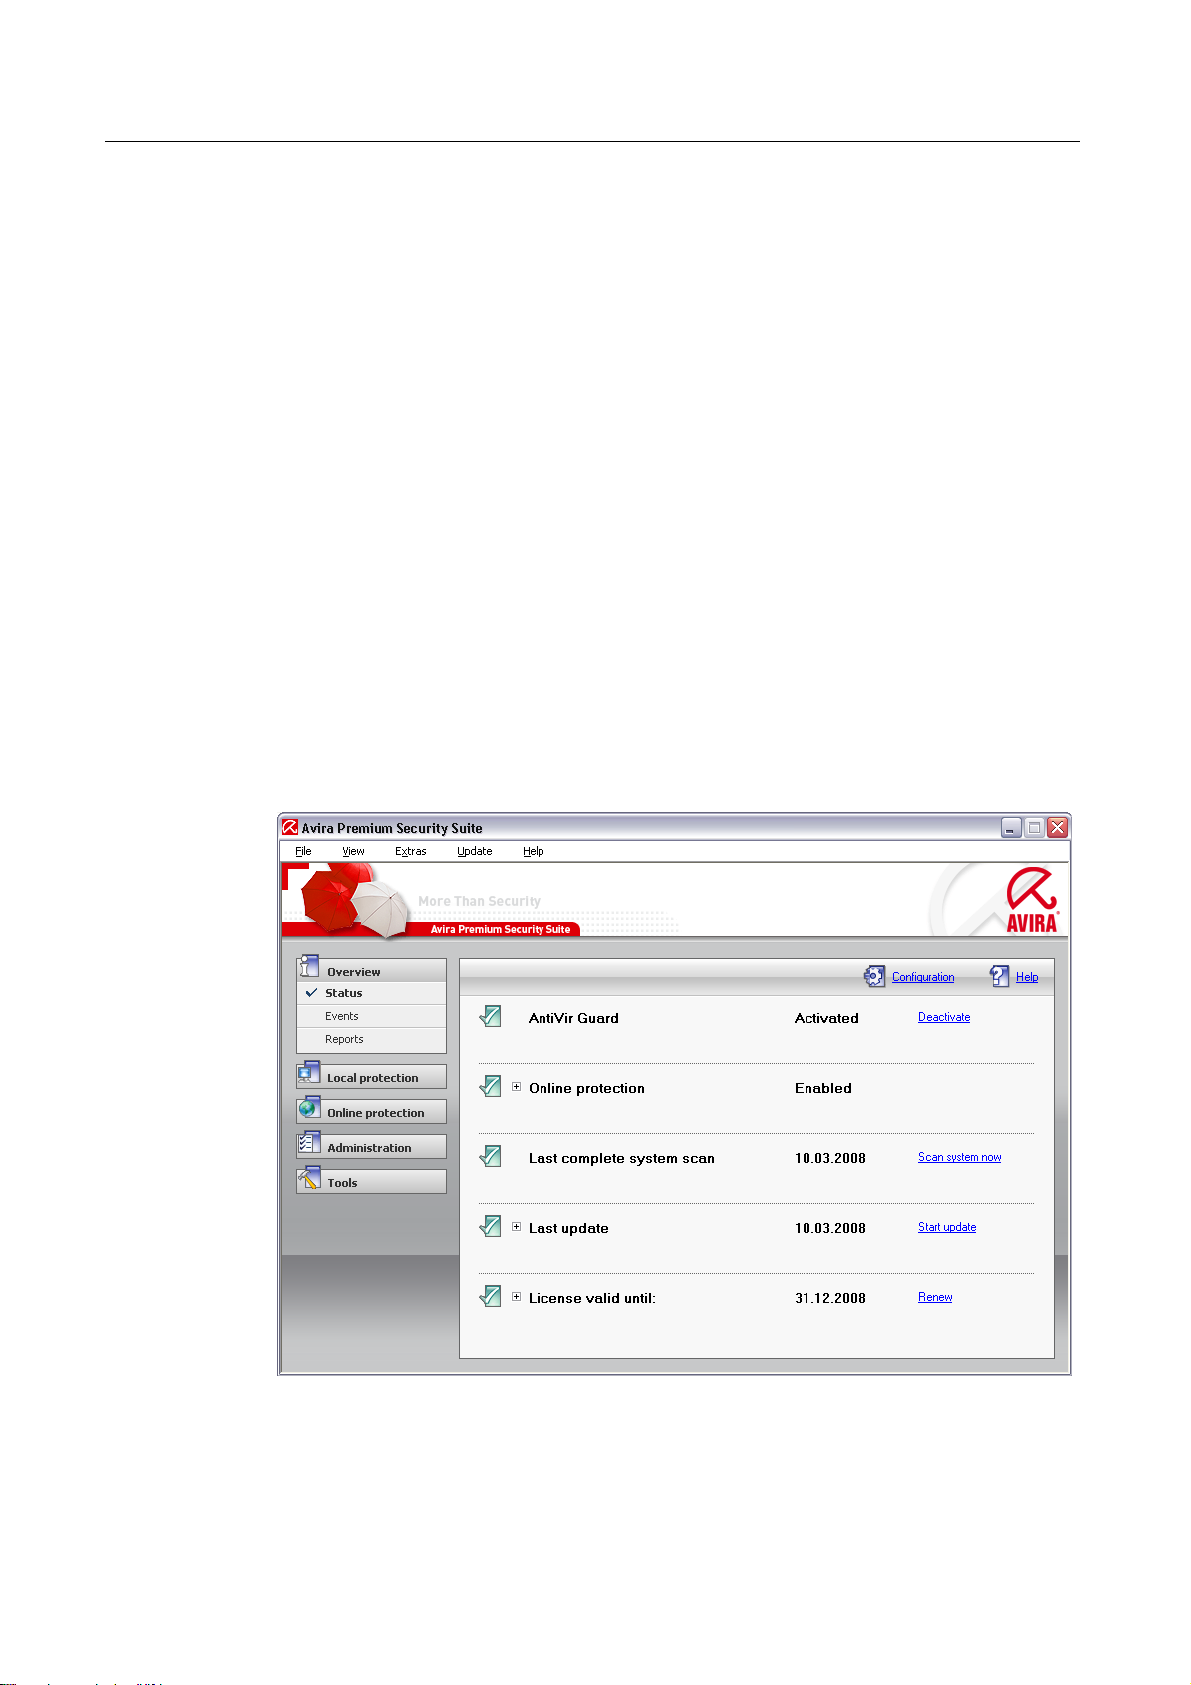
– Overview: In Overview you will find all sections with which you can monitor
the functioning of Avira Premium Security Suite.
– The Status section lets you see at a glance which Avira Premium Security Suite
modules are active and provides information on the last update carried out. You
can also see whether you own a valid license.
– The Events section enables you to view events generated by certain Avira
Premium Security Suite modules.
– Die Reports section enables you to view the results of actions executed by Avira
Premium Security Suite.
Avira GmbH Avira Premium Security Suite 19

Premium Security Suite overview
– Local protection: InLocal protection you will find the components for
checking the files on your computer system for viruses and malware.
– The Scanner section enables you to easily configure and start an on-demand
scan. Predefined profiles enable you to run a scan with preset default options. In
the same way it is possible to adapt the scan for viruses and unwanted programs
to your personal requirements with the help of manual selection (not saved) or by
creating user-defined profiles, .
– The Guard section shows you information on scanned files, as well as other
statistical data, which can be reset at any time, and enables access to the report
file. More detailed information on the last virus or unwanted program found can
be obtained practically "at the push of a button"
– Online protection: In Online protection you will find the components to
protect your computer system against viruses and malware from the internet,
and against unauthorized network access.
– The MailGuard section shows you the emails scanned by MailGuard, their
properties and other statistical data. You can also train the anti-spam filter and
exclude email addresses from future scanning for malware or spam. Emails can
also be deleted from the MailGuard buffer.
– The WebGuard section shows you information on scanned URLs and detected
viruses, as well as otherstatistical data, which can bereset at any time and enables
access to thereport file. More detailed information on the last virus or unwanted
program detected can be obtained practically "at the push of a button".
– The Firewall section enables you to configure the basic settings for the Avira
Firewall. In addition, the current data transfer rate and all active applications
using a network connection are displayed.
– Administration: In Administration you will find tools for isolating and
managing suspicious or infected files, and for planning recurring tasks.
– The Quarantine section contains the so-called Quarantine manager. This is the
central point for files already placed in quarantine or for suspect files which you
would like to place in quarantine. It is also possible to send a selected file to the
Avira Malware Research Center by email.
– The Scheduler section enables you to configure scheduled scanning and update
jobs as well as backup jobs and to adapt or delete existing jobs.
– Tools: In Tools you will find other data security tools.
– In the Backup section, you can create backups of your data easily and quickly and
initiate backup jobs.
20 Avira Premium Security Suite Avira GmbH
Premium Security Suite overview
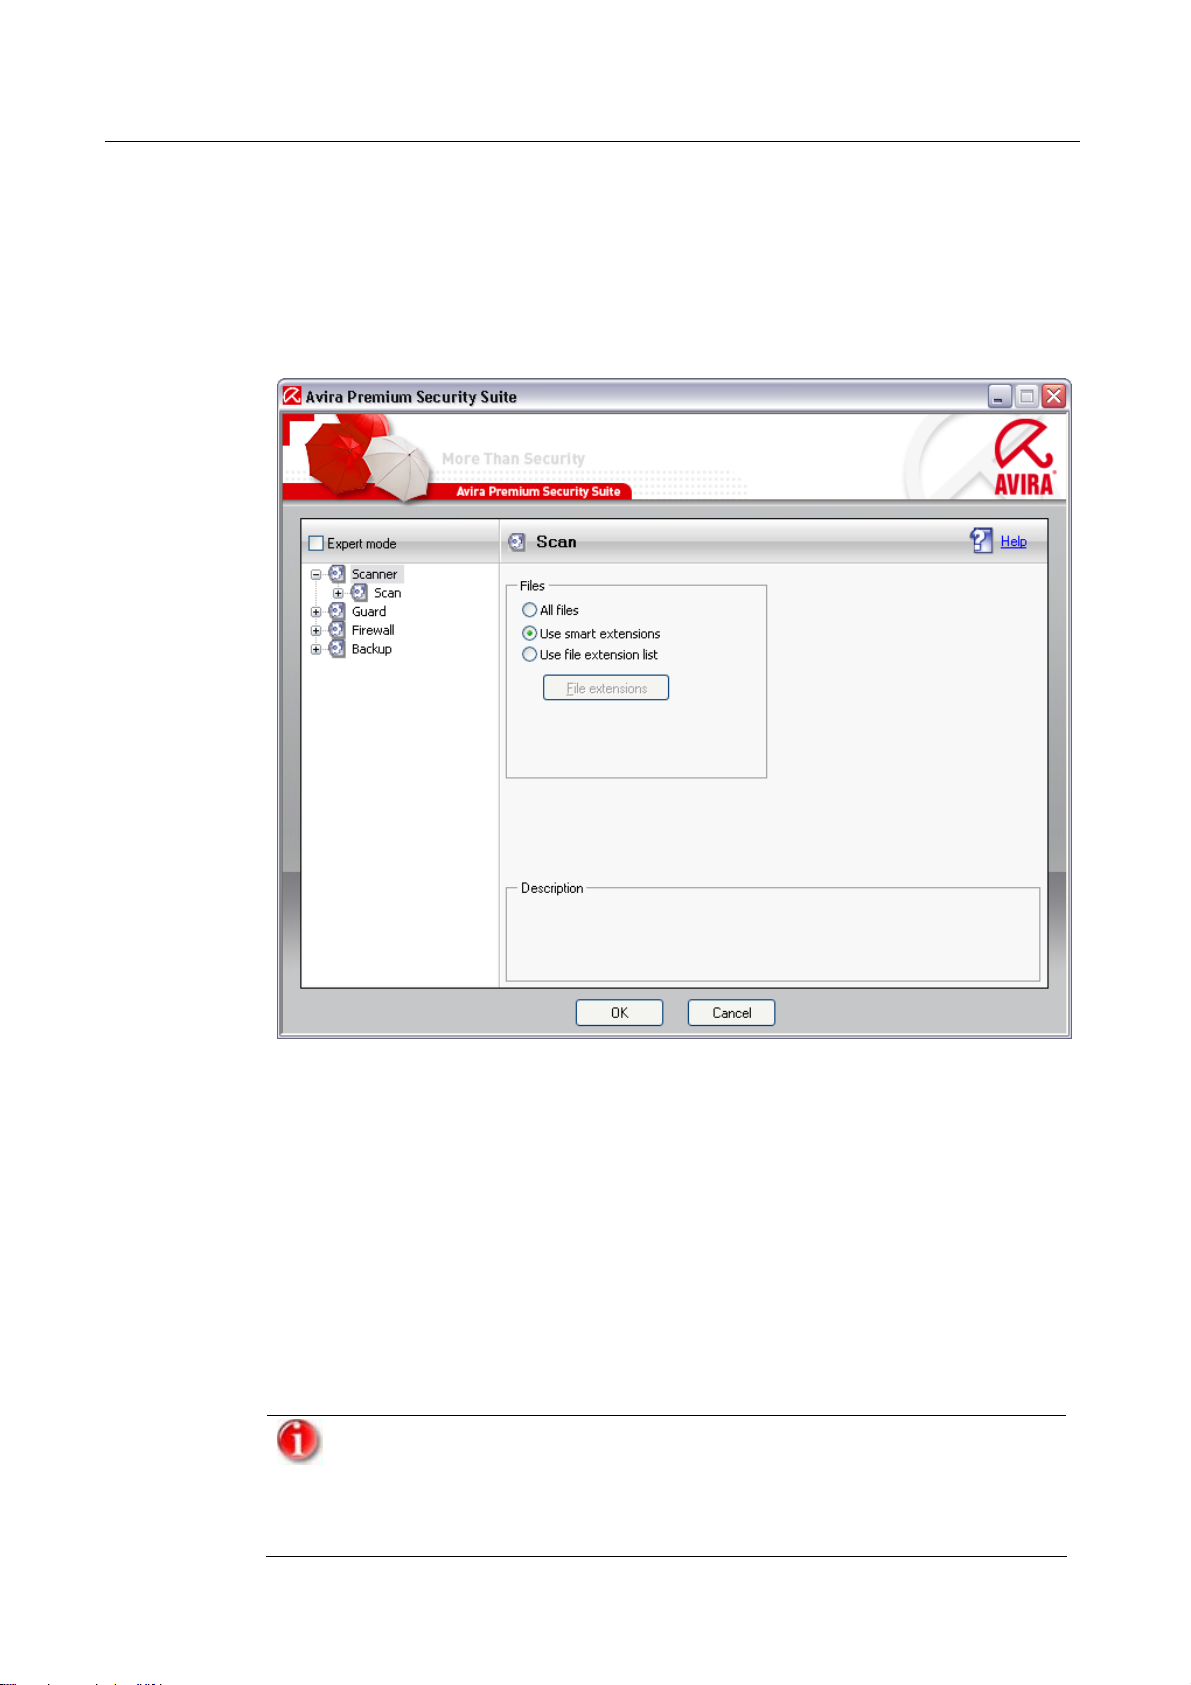
5.1.2 Configuration
In Avira Premium Security Suite Configuration, you can implement settings for Premium
Security Suite. After installation, Premium Security Suite is configured with standard
settings, ensuring optimal protection for your computer system. However, your
computer system or your specific requirements for Premium Security Suite may mean
you need to adapt the protective components of Premium Security Suite.
Avira Premium Security Suite Configuration opens a dialog box: confirm or delete your
configuration settings using the OK or Cancel button. You can select individual
configuration sections in the left-hand navigation bar.
Accessing Avira Premium Security Suite Configuration
You have several options for accessing the configuration:
– via the Windows control panel.
– via the Windows Security Center - from Windows XP Service Pack 2.
– via the Avira Premium Security Suite tray icon.
– in the Avira Premium Security Suite Control Center via the menu item Extras |
Configuration.
– In the Avira Premium Security Suite Control Center via the button
Configuration.
If you are accessing configuration via the Configuration button in Control
Center, go to the configuration register of the section which is active in
Control Center. Expert mode must be activated to select individual
configuration registers In this case, a dialog appears asking you to activate
expert mode
Avira GmbH Avira Premium Security Suite 21

Premium Security Suite overview
Avira Premium Security Suite Configuration operation
Navigate in the configuration window as you would in Windows Explorer:
f Click on an entry in the tree structure to display this configuration section in the
detail window
f Click on the plus symbol in front of an entry to expand the configuration section and
display configuration subsections in the tree structure.
f To hide configuration subsections, click on the minus symbol in front of the
expanded configuration section.
All configuration sections are only displayed in expert mode. Activate expert
mode to see all configuration sections Expert mode can be protected by a
password which must be defined during activation.
If you want to confirm your configuration settings:
f Click OK.
The configuration window is closed and the settings are accepted.
If you want to finish configuration without confirming your settings:
f Click Cancel.
The configuration window is closed and the settings are discarded.
Overview of configuration options
The following configuration options are available:
– Scanner: Configuration of on-demand scan
Scan options
Action for concerning files
File scan options
On-demand scan exceptions
On-demand scan heuristics
Report function setting
– Guard: On-access scan configuration
Scan options
Action for concerning files
On-access scan exceptions
On-access scan heuristics
Report function setting
– MailGuard: Configuration of MailGuard
Scan options
Action on Malware
MailGuard scan heuristics
MailGuard scan exceptions
Configuration of cache, empty cache
Configuration of the anti-spam training database, empty training database
22 Avira Premium Security Suite Avira GmbH

Premium Security Suite overview
– WebGuard: Configuration of WebGuard
Action on detections
Blocked access: unwanted URLs, file types, MIME types
MailGuard scan exceptions
MailGuard heuristics
Report function setting
– Firewall: Configuration of Firewall
Adapter rule setting
User-defined application rule settings
Expanded settings: timeout for rules, lock Windows host file, stop Windows Firewall
– Backup:
Backup component setting (incremental backup, scan for viruses during backup)
Exceptions: Defining files for saving
Report function setting
– General:
Configuration of email using SMTP
Extended risk categories for on-demand and on-access scan
Password protection for access to Control Center and Avira Premium Security Suite
Configuration
Security: Alert for outdated Premium Security Suite, configuration protection,
process protection,
Event log configuration
Configuration of report functions
Setting of directories used
Update: configuration of connection to download server, set-up of product updates
Avira GmbH Avira Premium Security Suite 23

Premium Security Suite overview
5.1.3 Tray icon
After installation, you will see the Premium Security Suite tray icon in the system tray of
the taskbar:
Icon Description
The tray icon displays the status of the AntiVir Guard service.
Central functions of Avira Premium Security Suite can be quickly accessed via the
context menu of the tray icon. To open the context menu, click on the tray icon with the
right-hand mouse button.
Entries in the context menu
– AntiVir Guard enable: activates or deactivates the Avira Premium Security
– Firewall:
– Firewall enable: activates or deactivates the Firewall
– Block All Traffic: When activated, the firewall blocks all data transfer with the
– Game Mode enable: activates or deactivates game mode:
– Start Avira Premium Security Suite: opens the Avira Premium Security Suite
– Avira Premium Security Suite configuration: opens the Avira Premium
– Start update: starts an Update.
AntiVir Guard is activated and the Firewall is activated
AntiVir Guard is deactivated or the Firewall is deactivated
Suite Guard.
exception of transfers to your own computer system (local host / IP 127.0.0.1).
When activated, all defined adapter and application rules apply. Applications for
which no rule is defined are permitted network access and no pop-up window is
opened.
Control Center.
Security Suite Configuration.
– Help: opens this online help.
– Avira on the Internet: opens the web portal of Premium Security Suite on the
Internet. The condition for this is that you have an active connection to the
Internet.
24 Avira Premium Security Suite Avira GmbH

Premium Security Suite overview
5.2 How to...?
5.2.1 Activate license
To activate the Premium Security Suite license:
Activate you license for Avira Premium Security Suite with the license file hbedv.key. You
can get a license file from Avira GmbH by email. The license file contains the license for
all the products you have ordered.
If you have not yet installed Avira Premium Security Suite:
f Save the license file to a local directory on your computer.
f Install Avira Premium Security Suite.
f During installation, enter the save location of the license file.
If you have already installed Avira Premium Security Suite:
f Double click on the license file in File Manager or in the activation email and follow
the on-screen instructions when Avira Premium Security Suite License Manager
opens.
- OR -
f In the Avira Premium Security Suite Control Center access the menu item Help /
License file
Note
In Windows Vista the User Account Control dialog box appears. Log in as
administrator if appropriate. Click Continue.
f Highlight the license file and click Open.
A message appears.
f Click OK to confirm.
The license is activated.
f If necessary, restart your system.
Avira GmbH Avira Premium Security Suite 25
Premium Security Suite overview
5.2.2 Avira Premium Security Suite automatic update
An update job has been pre-installed to update Avira Premium Security Suite
every24 hours if an internet connection is available and additionally when an
internet connection is established.
To create a job in AntiVir Scheduler to update Avira Premium Security Suite
automatically:
f In Control Center, select the Manager:: Scheduler section.
f Click on the
The dialog box Name and description of job appears.
f Give the job a name and, where appropriate, a description.
f Click Next.
The dialog box Type of job is displayed.
f Select Update job from the list.
f Click Next.
The dialog box Time of job appears.
f Select a time for the update:
– Immediately
– Daily
– Weekly
– Interval
– Once
– Login
We recommend that you update Avira Premium Security Suite regularly and
often, e.g. every6 hours.
Create new job with the wizard icon.
f Where appropriate, specify a date according to the selection.
f Where appropriate, select additional options (availability depends on type of job):
– Also start job when internet connection is established
In addition to the defined frequency, the job is carried out when an internet
connection is set up.
In addition to the defined frequency, the job is carried out when an Internet
connection is set up.
– Repeat job if the time has already expired
Past jobs are carried out that could not be carried out at the required time, for
example because the computer was switched off.
f Click Next.
The dialog box Select display mode appears.
f Select the display mode of the job window:
– Minimize: progress bar only
– Maximize: Entire job window
– Hide: No job window
26 Avira Premium Security Suite Avira GmbH
Premium Security Suite overview
f Click Finish.
Your newly created job appears on the start page of the Manager :: Scanner
section with the status activated (check mark).
f Where appropriate, deactivate jobs which are not to be carried out.
Use the following icons to further define your jobs:
View properties of a job
Modify job
Delete job
5.2.3 Start a manual update
You have various options for starting an Avira Premium Security Suite update manually:
When an update is started manually, the virus definition file and search engine are
always updated. A product update can only take place if you have activated the option
Download and automatically install product updates in the configuration under
General :: Update
To start an Avira Premium Security Suite update manually:
f With the right-hand mouse button, click on the Avira Premium Security Suite tray
icon in the taskbar.
A context menu appears.
f Select Start update.
The dialog box Avira Premium Security Suite Updater appears.
- OR -
f In the Control Center, select the Overview :: Status section.
f In the Last update field, click on the link Start update.
The Avira Premium Security Suite Updater dialog box appears.
- OR -
f In the Control Center, in the Update menu, select the menu command Start update.
The Avira Premium Security Suite Updater dialog box appears.
We strongly recommend regular automatic updates for Avira Premium
Security Suite, e.g. every 6 hours.
You can also carry out a manual update directly via the Windows security
centre.
Avira GmbH Avira Premium Security Suite 27

Premium Security Suite overview
5.2.4 On-demand scan: Using a scan profile to scan for viruses and malware
A scan profile is a set of drives and directories to be scanned.
The following options are available for scanning via a scan profile:
– Use predefined scan profile
if the predefined scan profile corresponds to your requirements.
– Customize and apply scan profile (manual selection)
if you want to scan with a customized scan profile.
– Create and apply new scan profile
if you want to create your own scan profile.
Depending on the operating system, various icons are available for starting a scan
profile:
– In Windows XP and 2000:
This icon starts the scan via a scan profile.
– In Windows Vista:
In Microsoft Windows Vista, the control center at the moment only has limited
rights, e.g. for access to directories and files. Certain actions and file accesses can
only be carried out in the control centre with extended administrator rights. These
extended administrator rights must be granted at the start of each scan via a scan
profile.
This icon starts a limited scan via a scan profile. Only directories and files that
Windows Vista has granted access rights to are scanned.
This icon starts the scan with extended administrator rights. After
confirmation, all directories and files in the selected scan profile are scanned.
To scan for viruses and malware with a scan profile:
f In the Control Center select the Local protection :: Scanner section.
Predefined scan profiles appear.
f Select one of the predefined scan profiles.
-OR-
f Adapt the scan profile Manual selection.
-OR-
f Create a new scan profile
f Click on the (Windows XP:
f The Luke Filewalker window appears and an on-demand scan is started.
When the scan is completed, the results are displayed.
If you want to adapt a scan profile:
28 Avira Premium Security Suite Avira GmbH
or Windows Vista: ) icon.

Premium Security Suite overview
f In the scan profile, expand Manual Selection the file tree so that all the drives and
directories you want to scan are open.
– Click on the + symbol: The next directory level is displayed.
– Click on the - symbol: The next directory level is hidden.
f Highlight the nodes and directories you want to scan by clicking on the relevantbox
of the appropriate directory level.
The following options are available, Select directories:
– Directory, including sub-directories (black check mark)
– Directory excluding sub-directories (green check mark)
– Sub-directories of one directory only (grey check mark, sub-directories have
black check marks)
– No directory (no check mark)
If you want to create a new scan profile:
f Click on the
The profile New profile appears below the profiles previously created.
f Where appropriate, rename the scan profile by clicking on the icon
f Highlight the nodes and directories to be saved by clicking on the check box of the
respective directory level.
The following options are available, Select directories:
– Directory, including sub-directories (black check mark)
– Directory excluding sub-directories (green check mark)
– Sub-directories of one directory only (grey check mark, sub-directories have
black check marks)
– No directory (no check mark)
Create new profile icon.
5.2.5 On-demand scan: Scan for viruses and malware using Dragamp;Drop
To scan for viruses and malware systematically using Drag&Drop:
3 Open the Control Center of Avira Premium Security Suite.
f Highlight the file or directoryyou want to scan.
.
f Use the left-hand mouse button to drag the highlighted file or directory into the
Control Center.
The Luke Filewalker window appears and an on-demand scan is started.
When the scan is completed, the results are displayed.
Avira GmbH Avira Premium Security Suite 29

Premium Security Suite overview
5.2.6 On-demand scan: Scan for viruses and malware via the context menu
To scan for viruses and malware systematically via the context menu:
f Click with the right-hand mouse button (e.g. in Windows Explorer, on the desktop or
in an open Windows directory) on the file or directoryyou want to scan.
The Windows Explorer context menu appears.
f Select Scan selected files with AntiVir in the context menu.
The Luke Filewalker window appears and the on-demand scan starts.
When the scan is completed, the results are displayed.
5.2.7 On-demand scan: Automatically scan for viruses and malware
To create a job to automatically scan for viruses and malware:
f In the Control Center select the Manager:: section Scheduler.
f Click on the icon
The dialog box Name and description of job appears.
f Give the job a name and, where appropriate, a description.
f Click Next.
The dialog box Type of job appears.
f Select Scan job.
f Click Next.
The dialog box Select profile appears.
f Select the profile to be scanned.
f Click Next.
The dialog box Time of job appears.
f Select a time for the scan:
– Immediately
– Daily
– Weekly
– Interval
– Once
– Login
f Where appropriate, specify a date according to the selection.
f Where appropriate, select the following additional options (availability depends on
job type):
– Repeat job if the time has already expired
Past jobs are carried out that could not be carried out at the required time, for
example because the computer was switched off.
f Click Next.
The dialog box Select display mode appears.
30 Avira Premium Security Suite Avira GmbH
 Loading...