

Page 1

User Manual
Avira Internet Update Manager
www.avira.com
Page 2

Page 3

Table of Contents
Table of Contents
1
Avira Internet Update Manager.................................................................................................4
1.1 Introduction..........................................................................................................................4
1.2 About this help.....................................................................................................................4
1.2.1 Symbols, emphases and terms................................................................................4
1.3 Product information.............................................................................................................5
1.3.1 Functionality...........................................................................................................5
1.3.2 System requirements..............................................................................................5
1.4 Installation and deinstallation..............................................................................................6
1.4.1 Installation and Deinstallation................................................................................6
1.4.2 Installation using Windows....................................................................................6
1.4.3 Installation with Linux...........................................................................................9
1.4.4 Deinstallation........................................................................................................11
1.5 User interface.....................................................................................................................12
1.5.1 Frontend structure.................................................................................................12
1.5.2 Detail window......................................................................................................15
1.6 Configuration using Windows (graphical user interface)..................................................16
1.6.1 Configuration with graphical user interface.........................................................16
1.6.2 Start Internet Update Manager Frontend for first time.........................................16
1.6.3 Select a server.......................................................................................................17
1.6.4 Configure basic settings for a server....................................................................17
1.6.5 Configure advanced settings for a server.............................................................20
1.6.6 Save settings for a server......................................................................................22
1.7 Configuration using Linux.................................................................................................23
1.7.1 Configuration without graphical user interface....................................................23
1.7.2 Configuration with graphical user interface on Windows....................................24
1.8 Operation using Windows (with graphical user interface) ................................................26
1.8.1 Operation with graphical user interface ...............................................................26
1.8.2 Copy updated files................................................................................................27
1.8.3 Edit server list.......................................................................................................27
1.8.4 Edit product list....................................................................................................27
1.8.5 Start and stop product update manually...............................................................28
1.8.6 Display and delete report......................................................................................29
1.8.7 Display version information on product updates..................................................29
1.9 Operation using Linux without a graphical user interface.................................................29
1.10 Service...............................................................................................................................30
1.10.1 Service..................................................................................................................30
1.10.2 Frequently Asked Questions (FAQ).....................................................................30
1.10.3 Service hotline......................................................................................................31
1.10.4 Online shop ..........................................................................................................31
Avira GmbH Avira Internet Update Manager 3
Page 4
Avira Internet Update Manager
1 Avira Internet Update Manager
1.1 Introduction
In this manual we have included all the information you require on Avira Internet Update
Manager and guide you step by step through installation, configuration and operation of
the software.
On our website http://www.avira.com you can download the manual for Avira Internet
Update Manager as a PDF, update Avira Internet Update Manager or obtain information
on other security solutions from Avira GmbH.
In addition, our website contains information, for example on how to obtain fast,
professional support from our support team and on our newsletter, which you can
subscribe to there.
Your team from Avira GmbH
1.2 About this help
The manual of the Avira Internet Update Manager is divided into the following chapters:
• Chapter 1: Introduction
• Chapter 2: About this help
• Chapter 3: Product information
• Chapter 4: Installation and deinstallation
• Chapter 5: User interface
• Chapter 6: Configuration
• Chapter 7: Operation
• Chapter 8: Service
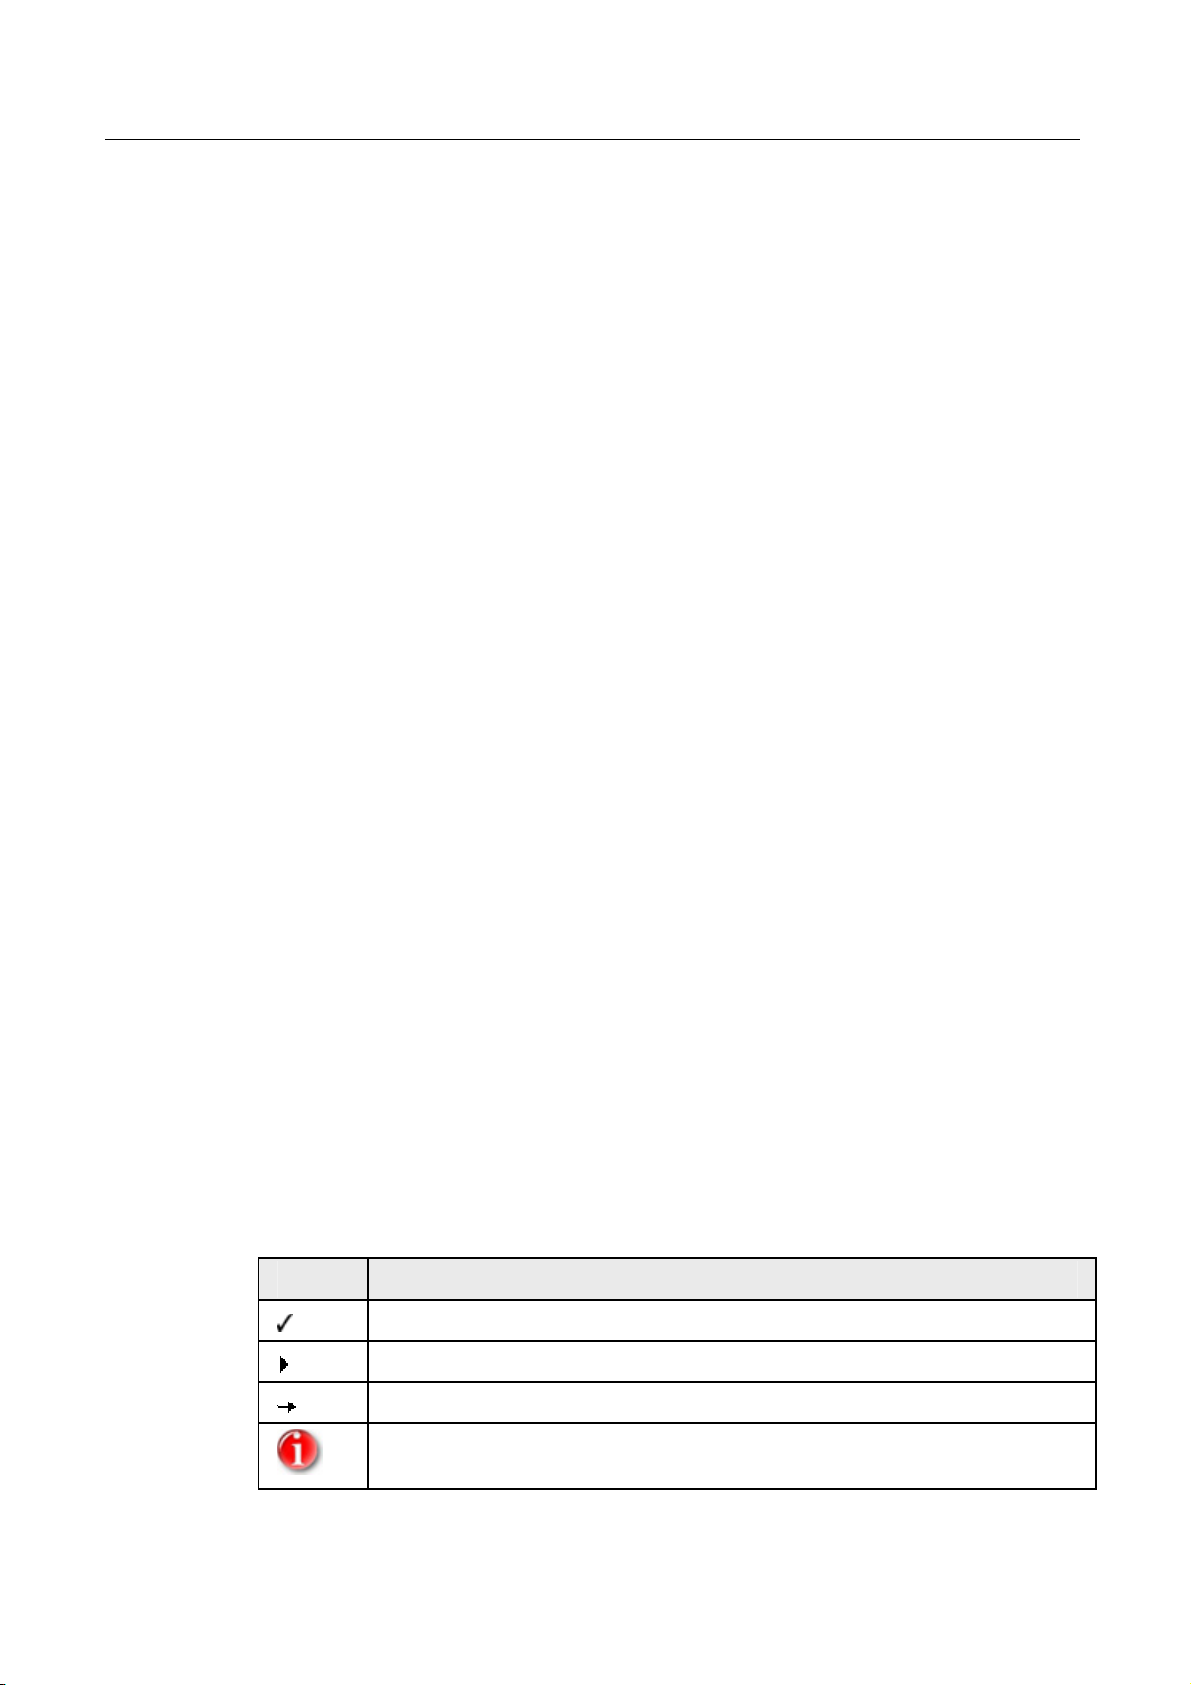
1.2.1 Symbols, emphases and terms
The following symbols are used:
Symbol Explanation
Appears before a condition that must be met before an action is carried out.
The following emphases are used:
4 Avira Internet Update Manager Avira GmbH
Appears before an action that you carry out.
Appears before a result that follows the preceding action.
Appears before a note with especially important information or a tip that
makes it easier to understand and use Avira Internet Update Manager.
Page 5

Avira Internet Update Manager
Emphasis Explanation
Italics
Bold
File name or path.
Elements of the software interface that are displayed (e.g. window
title, window area or option box).
Elements of the software interface that are clicked (e.g. menu item,
tab or button).
1.3 Product information
1.3.1 Functionality
With the Avira Internet Update Manager you can conveniently and automatically
download the updates of a large number of your Avira products from the Internet.
The individual client computers in your network do not then have to download the updates
from the Internet themselves, but instead can update the products via your Intranet.
The Avira Internet Update Manager consists of the following two components:
• Internet Update Manager Service (Service/Daemon)
• Internet Update Manager Frontend (only for Microsoft Windows)
The Internet Update Manager Service runs on one or more servers in your Intranet and
controls the download of the product updates on these servers. With the Internet Update
Manager Frontend you can configure and operate the Internet Update Manager Service
from a central server or another computer (remote control).
1.3.2 System requirements
For the Avira Internet Update Manager to work correctly, the computer system must meet
the following requirements:
• Computer from Pentium, at least 1 GHz
• Operating system
– Microsoft 2000 Server, SP4
– Microsoft 2003 Server x86 or x64
– Microsoft 2008 Server x86 or x64
– Microsoft Windows 2000 SP 4 recommended, XP SP1, Vista x86 or x64
Linux:
(Minor Versions / Service Packs included)
– Novell SUSE Linux Enterprise Server 9, 10
– Novell SUSE Open Enterprise Server 2
– Red Hat Enterprise Linux 4, 5
– Debian GNU/Linux 3, 4, woody, sarge, etch
– Ubuntu Server Edition 8.04
Avira GmbH Avira Internet Update Manager 5
Page 6

Avira Internet Update Manager
Important information:
The frontend (MMC-SnapIn) can only be installed on Microsoft Windows systems.
Dependencies
The following library has to be available on the systems
– libstdc++.so.5
Usually this library has to be installed via the package management of the distribution.
64-bit versions
If you use a 64bit version (amd64/x86_64) of the above mentioned linux distributions you
have to install 32bit compatible libraries before installing the Internet Update Manager.
For that purpose you can use the software management of the distribution
Main memory:
• RAM at least 512 MB for all systems
• 500 MB temporary hard drive memory (depending on the scope of the product update)
• Internet connection (modem or LAN)
• For the installation of Avira Internet Update Manager: administrator rights
If you operation system is not a server operating system only 10
connections to the integrated http-server are possible at the same time.
1.4 Installation and deinstallation
1.4.1 Installation and Deinstallation
In this chapter the following subjects are described:
• Installation
• Deinstallation
1.4.2 Installation using Windows
Useful information about installation
Before installation
Normally you install both components of the Avira Internet Update Manager (Service and
Frontend) on a central server in your Intranet.
Then, if you require, you install the Internet Update Manager Service on all other servers
in the Intranet that you intend to supply the clients with (see Chapter: Install Internet
Update Manager Service on another server).
In addition you can install Internet Update Manager Frontend on other
computers in order to conveniently control the servers with the installed
Internet Update Manager Service from there (see Chapter: Install Internet
Update Manager Frontend on another computer).
6 Avira Internet Update Manager Avira GmbH
Page 7

Avira Internet Update Manager
An Internet Update Manager Service can only be controlled by one
Frontend at a time. Before you access the Internet Update Manager Service
remotely, every open Frontend connection to this Internet Update Manager
must be closed.
Installation steps
Carry out installation in the following steps:
• Install AntiVir Internet Update Manager
• Install Internet Update Manager Service on another server
• Install Internet Update Manager Frontend on another computer
Perform installation with Windows
Prerequisites for installation
Ensure that the following prerequisites are met so that the Avira Internet Update Manager
works correctly on your server:
System requirements met
Administrator rights available
All programs running on the server ended
Ports required by Avira Internet Update Manager opened in the firewall where
applicable
Install Avira Internet Update Manager
Go to the website http://www.avira.com.
Provided for download in the download section of the Avira AntiVir Workstation, in
the Tools section of the Avira Internet Update Manager.
Save the file on your computer.
Double-click on the saved file.
The dialog window of the setup program appears.
Click on Accept.
The set-up program for Avira Internet Update Manager starts. The dialog window
Welcome... appears.
Click on Next.
The dialog window with the license agreement appears.
Confirm that you accept the license agreement and click on Next.
The dialog window Choose destination location appears.
Confirm the target directory entered with Next.
- OR -
Select a different target directory with Change... and confirm with Next.
The dialog window Select components appears.
Mark both components and click on Next.
The dialog window User account appears.
Enter a user account with administrator rights and the associated password.
- OR -
Activate the option Log in as local system account and click on Next.
Avira GmbH Avira Internet Update Manager 7
Page 8

Avira Internet Update Manager
It is useful to enter a user account with administrator rights if the Internet
Update Manager Service is to be "given" certain access rights on
installation. This is necessary, for example, if the Avira Internet Update
Manager is to store the updates on another server.
In the following dialog window, click on Install.
The Avira Internet Update Manager is installed. The message Installation complete
appears.
Click on Finish.
The set-up program creates a new entry in the Windows Start menu Avira - Avira
Internet Update Manager Frontend.
Installation was successful.
After installation, the Internet Update Manager Service starts immediately and must be
configured later with the Internet Update Manager Frontend for the product update (see
Chapter: Configuration).
Install Internet Update Manager Service on another server
Installation of the Internet Update Manager Service on more than one server
is normally only necessary with large networks (>2000 computers).
Proceed as for initial installation of Service and Frontend (see Chapter Install Avira
Internet Update Manager) until the dialog window Select components appears.
Mark the component Internet Update Manager - Service and click on Next.
The dialog window User account appears.
Enter a user account with administrator rights and the associated password.
- OR -
Activate the option Log in as local system account and click on Next.
In the following dialog window, click on Install.
The Avira Internet Update Manager Service is installed. The message Installation
complete appears.
Click on Finish.
The installation of the Internet Update Manager Service on the server is successfully
completed.
Repeat this installation until the service is running on all servers that you require.
After installation, the Internet Update Manager Service starts immediately and has to be
configured later with the Internet Update Manager Frontend for the product update (see
Chapter Configuration).
Install Internet Update Manager Frontend on another computer
Proceed as for the initial installation of Internet Update Manager Service and Internet
Update Manager Frontend (see Chapter Install Avira Internet Update Manager) until the
dialog window Select components appears.
Mark the component Internet Update Manager - Frontend and click on Next.
In the following dialog window, click on Install.
The Internet Update Manager Frontend is installed. The message Installation complete
appears.
8 Avira Internet Update Manager Avira GmbH
Page 9

Avira Internet Update Manager
Click on Finish.
The set-up program creates a new entry in the Windows Start menu Avira Internet
Update Manager.
Installation of the Internet Update Manager Frontend was successful.
1.4.3 Installation with Linux
The installation of the Internet Update Manager is proceeded automatically by an
interactive installation script (bash command line).
The script executes the following steps:
> License query (EULA)
> Control of the integrity of the installation files
> Control of the authorizations which are necessary for the installation (root)
> Control of the AntiVir product versions which are already installed on the computer
> The program files will be copied and the existing files which are no longer necessary
will be overwritten
> The configuration files will be copied
Prerequisites for the installation
Please, make sure that the following prerequisites are given in order to enable the Avira
Internet Update Manager to work properly on your server.
> the systems are conform to the system requirements
> administrator authorization for the installation
> No other programs are using the IUM network port
> the IUM network ports are open in the firewall
Preparing the installation
Please, logon as root. If you are not logged on as root your are not authorized to install the
program and the script will exit with an error message.
Please, unpack the installation package,
f. ex. to /tmp:
gzip -d avira_update_manager_unix-<version>.tar.gz
tar xvf avira_update_manager_unix-<version>.tar
Installing the Avira Internet Update Manager:
Change into the directory where you have unpacked the Avira Internet Update Manager:
cd /tmp/avira_update_manager_unix-<version>
Please, enter the following:
./install
Avira GmbH Avira Internet Update Manager 9
Page 10

Avira Internet Update Manager
Please, read the license agreement and accept them. Press the keys “Q” and “Y” and
confirm with “Enter”.
The installation script will be started. The target directory will be checked and if necessary
it will be created. All required files will be copied into the target directory.
---
2) installing AntiVir IUM Updater
creating /usr/lib/AntiVir/ium ... done
creating /usr/lib/AntiVir/ium/ssl ... done
creating /etc/avira ... done
copying bin/ium to /usr/lib/AntiVir/ium/ ... done
copying bin/ium_msg.avr to /usr/lib/AntiVir/ium/ ... done
copying bin/common_msg.avr to /usr/lib/AntiVir/ium/ ... done
copying bin/libcommon.so to /usr/lib/AntiVir/ium/ ... done
copying bin/libapr-1.so.0.2.8 to /usr/lib/AntiVir/ ... done
copying bin/libaprutil-1.so.0.2.8 to /usr/lib/AntiVir/ ... done
copying bin/libavpal.so.0.0.2 to /usr/lib/AntiVir/ ... done
copying bin/libcurl.so.4.0.0 to /usr/lib/AntiVir/ ... done
copying bin/libexpat.so.0.1.0 to /usr/lib/AntiVir/ ... done
copying bin/libscewxmlw.so.0.1.0.0 to /usr/lib/AntiVir/ ... done
copying bin/libupdate.so.0.1.0.10 to /usr/lib/AntiVir/ ... done
copying bin/libupdcom.so.0.1.0.3 to /usr/lib/AntiVir/ ... done
copying bin/libzdelta.so.0.0.2.1 to /usr/lib/AntiVir/ ... done
copying bin/libz.so.1.2.2.0 to /usr/lib/AntiVir/ ... done
copying bin/avupdate to /usr/lib/AntiVir/ ... done
copying bin/avupdate_msg.avr to /usr/lib/AntiVir/ ... done
copying script/avium to /usr/lib/AntiVir/ium/ ... done
copying cert/cacert.pem to /usr/lib/AntiVir/ium/ssl/ ... done
copying cert/server.pem to /usr/lib/AntiVir/ium/ssl/ ... done
copying etc/IumProducts.xml to /usr/lib/AntiVir/ium/ ... done
copying etc/MirrorConfig.xml to /etc/avira/ ... done
copying etc/avupdate.conf to /etc/avira/ ... done
copying etc/ium.conf to /etc/avira/ ... done
copying templates/ium_index.htm to /usr/lib/AntiVir/ium/ ... done
copying templates/ium_error501.htm to /usr/lib/AntiVir/ium/ ... done
copying templates/ium_error404.htm to /usr/lib/AntiVir/ium/ ... done
copying doc/mail_template_iumstatus.txt to /usr/lib/AntiVir/ium/ ... done
---
10 Avira Internet Update Manager Avira GmbH
Page 11

Avira Internet Update Manager
Afterwards you will be asked if a symbolic link to the IUM start script should be created
in your system directory. This is not essential but it will simplify the start of the IUM later
on. Recommended: Y(es)
--Would you like to create a link in /usr/sbin for avium ? [y]
--Do you want the Avira Internet Update Manager to be started automatically every time the
system is started? Recommended: Y(es)
-Please specify if boot scripts should be set up.
Set up boot scripts [y]:
--The automatic system start is configured:
--setting up boot script ... done
installation of IUM Updater complete
--If you would like to start the Internet Update Manager Daemon manually after a system
start, proceed as follows: Enter “N” and press “Enter”.
In the end a report is shown which confirms the successful completion of the installation.
--Installation of the following features complete:
AntiVir IUM Updater
--Reinstallation of the Avira Internet Update Manager
-------------------------------------------------You can execute the installation script at any time. The following possibilities are offered:
> Installation of a new version (upgrade): The installation script checks the previous
version and installs the necessary new components.
> Activation or Deactivation of the automatic start of the Avira Internet Update Manager
every time the system is started.
Possible applications
--------------------You have the following possibilities to use the Internet Update Manager:
> working as a daemon in the background
Advantages: - remote administration is possible via the IUM Frontend (Windows)
- The updates can be started via cronjob
Disadvantages: - separate process
- Firewall: additional ports have to be enabled
> as updater "on-demand"
Advantages: - The updates can be started via cronjob
- no separate process is necessary
- Firewall: no changes are necessary
Disadvantage: - remote administration is not possible
1.4.4 Deinstallation
How to deinstall Avira Internet Update Manager (for example on Windows XP):
Open the Control Panel via the Windows Start-menu.
Avira GmbH Avira Internet Update Manager 11
Page 12

Avira Internet Update Manager
Double-click on Software.
Select Avira Internet Update Manager and click on Add or Remove Programs.
You are asked whether you really want to remove the program.
Confirm with Yes.
All components of the program are removed.
Click on Finish to complete deinstallation.
Avira Internet Update Manager is deinstalled.
1.5 User interface
Control the Service of the Avira Internet Update Manager with the graphical user interface
- of the Internet Update Manager Frontend -, which is created as a snap-in of the
Microsoft Management Frontend (MMC).
The appearance, structure and menu structure of the MMC may vary
depending on the operating system.
This chapter only describes the proprietary elements of the Avira Internet
Update Manager Frontend.
For further information on the MMC and for manual integration of a
snap-in, please refer to the user manual or the online help of your
operating system.
The Internet Update Manager Frontend consists of a window divided into two areas. The
left-hand window area - the navigation area - displays the Frontend structure. The
Frontend structure contains the elements that are available in a Frontend. The right-hand
window area contains the detail window. The detail window contains information and
functions of these elements. If you click on various elements in the Frontend structure, the
information in the detail window changes. In the detail window, various types of
information can be displayed, including tables and columns.
The entries in the fold-down navigation structure are referred to as nodes, for example
there is the node Settings. Entries that cannot be folded down further are referred to as a
page, for example the page General.
1.5.1 Frontend structure
The Frontend root with the Avira Internet Update Manager contains the following nodes
in the navigation area.
You can activate the context menu by right-clicking on the relevant node.
Server name:Port
Display of the server name and of the selected port.
The context menu of the node Server name provides the following possibilities:
Entry in the
context menu
Meaning
12 Avira Internet Update Manager Avira GmbH
Page 13

Avira Internet Update Manager
Start mirror
Update
Product update is starting
Cancel update Cancels the product update.
Start IUM service
self update
Installs the updated files and product packages stored in the
destination directory.
Remove server Deletes the selected server.
New Window
from Here
Shows the display of the node server name in a new window
Refresh Updates the display of the current view.
Help Displays the online help.
Status of a server
Server connected
Server not connected
Avira Internet Update Manager is attempting to connect to the server
An error has occurred.
The following entries appear below the node Servers:
Released products
The context menu of the page Released products provides the following possibilities:
Entry in the context
menu
Meaning
New Opens a sub-menu.
Add product
New Window from
Here
Opens the dialog window Product selection. Products
for the product update can be added.
Opens a sub-menu with possibilities for the view in the
event area:
Refresh Updates the display of the current view.
Help Displays the online help.
Scheduler
Opens the configuration for scheduling of product updates.
The context menu of the page Scheduler offers the following possibilities:
Entry in the
context menu
Meaning
Avira GmbH Avira Internet Update Manager 13
Page 14

Avira Internet Update Manager
Save schedule Saves the settings of the scheduler
View
New Window
from Here
Opens a sub-menu with possibilities for the view in the MMC
or the snap-in.
Shows the display of the node scheduler in a new window.
Help Displays the online help.
Settings
The context menu of the node Settings offers the following possibilities:
Entry in the
context menu
Meaning
Save config Saves the configurations
New Window from
Here
Displays the node Settings in a new window
Refresh Updates the display of the current window
Help Displays the online help.
The following nodes appear below the node Settings:
General
Opens the configuration that refer to the general settings of the Avira Internet Update
Manager.
The context menu of the page General offers the following possibilities:
Entry in the
context menu
View
New Window
from Here
Meaning
Opens a sub-menu with possibilities for the view in the
MMC and snap-in
Shows the display of the node General in a new window
Help Displays the online help.
Internet
Opens the configuration for setting the report file.
The context menu of the page Internet offers the following possibilities:
Entry in the
context menu
Meaning
New Window
from Here
Shows the display of the node Internet in a new window
Help Displays the online help.
14 Avira Internet Update Manager Avira GmbH
Page 15

Avira Internet Update Manager
Email
Opens the configuration for sending emails.
The context menu of the page Email offers the following possibilities:
Entry in the
context menu
Meaning
New Window
from Here
Help Displays the online help.
1.5.2 Detail window
The detail window displays further information or configuration possibilities for the
individual node or sheet selected..
Server name:Port
Version information of the currently installed Internet Update Manager Service version of
the Avira Internet Update Manager and version information of the downloaded product
updates.
Released Products
Information on the product name of the relevant language, the operating system and the
processor used.
The context menu of the node Products offers the following possibilities:
Entry in the
context menu
New Opens a sub-menu
Shows the display of the node Email in a new window
Meaning
Add Product
New Window
from Here
Opens the window Add Product. Products which shall be
updated can be added
Shows the display of the node Released Products
Refresh Updates the display of the current window
Help Displays the online help.
Scheduler
Configuration for scheduling of the product update.
Settings
Displays the configuration areas of the Avira Internet Update Manager.
General
Configuration that refers to general settings of the Avira Internet Update Manager.
Internet
Configuration for using the Internet. See Chapter: Configure Internet
Email
Configuration for sending emails. See Chapter: Configure sending emails
Avira GmbH Avira Internet Update Manager 15
Page 16

Avira Internet Update Manager
1.6 Configuration using Windows (graphical user
interface)
1.6.1 Configuration with graphical user interface
With the Internet Update Manager Frontend you can configure and operate all servers in
the Intranet on which the Internet Update Manager Service is active.
After installation you must first configure the Internet Update Manager Services installed
on the servers for access to the Intranet and Internet and the required product updates.
This involves the following steps:
• see Chapter: Start Internet Update Manager Frontend for the first time
• see Chapter: Select server
• see Chapter: Configure basic settings for the server
• see Chapter: Configure advanced settings for the server
• see Chapter: Save settings for a server
Please note that after a changed configuration, it has to be saved manually
(see Chapter: Save configuration)
1.6.2 Start Internet Update Manager Frontend for first time
The Internet Update Manager Service must be started on the relevant servers.
If you have installed the Internet Update Manager Frontend on more than
one computer:
Ensure that an Internet Update Manager Service can only be started by one
Internet Update Manager Frontend at a time.
How to start the Internet Update Manager Frontend:
Double-click on the program icon on the Windows Start menu under Start /
Programs / Avira / Avira Internet Update Manager Frontend /
Avira Internet Update Manger Frontend.
The MMC with the snap-in Avira Internet Update Manager appears. In the navigation
area you can see the network node Frontend root and the integrated Avira Internet Update
Manager.
16 Avira Internet Update Manager Avira GmbH
Page 17

Avira Internet Update Manager
1.6.3 Select a server
How to login on the server:
Right-click on the entry Avira Internet Update Manager.
A context menu appears.
Select the entry New and click on Add server.
The dialog window Add computer opens.
Enter the name of the server or its IP address in the area Name.
- OR -
Click on to select the required server.
Enter the port via which the communication with the service program is to take place
in the area Port. Port 7050 and port async 7051 is entered as the default setting.
Click on OK.
The server appears in the navigation area of the user interface.
1.6.4 Configure basic settings for a server
This chapter deals with the following topics:
• see Chapter: Select a product
• see Chapter: Configure Internet
Avira GmbH Avira Internet Update Manager 17
Page 18

Avira Internet Update Manager
• see Chapter: Configure sending emails
• see Chapter: Configure schedule
• see Chapter: Configure report
Select a product
How to select a product to be updated with the aid of the Avira Internet Update Manager:
Click on the node of the server to be configured in the navigation area.
Right-click on Released Products.
A context menu opens.
Select the menu item New / Add product.
The dialog window Product selection opens.
In the area Product, select the product to be updated via the drop-down button.
Select the required language in the area Language via the drop-down button. The
entry All indicates that the product is available either only in English or all available
languages in the program package.
In the area Operating system, select the required operating system via the drop-down
button and the required processor type in the area Processor.
Configure Internet settings
How to configure the Avira Internet Update Manager for updating via the Internet or the
Intranet:
Double-click on the node of the server to be configured in the navigation area.
Double-click on the node Settings.
Click on Internet.
In the area Connection to the Internet, select the option that you use to connect to the
Internet:
– Use default connection (network)
If you want to use a network connection.
– Use the following connection
If you want to use the connection to the Internet via one of the connection options
given. The Avira Internet Update Manager automatically detects which connection
options are available.
An RDT connection can be made manually, for example, via a phone book entry in
Windows.
If you do not connect to the Internet via a network connection:
Activate the option Use the following connection.
Select a connection in the list box.
Enter User and Password for the connection to the Internet.
The password is saved in encrypted form. Only * appear in the box.
If access to the Internet exists via a proxy server:
18 Avira Internet Update Manager Avira GmbH
Page 19

Avira Internet Update Manager
In the area Proxy server, activate the option Use proxy server.
Enter the data for the proxy server (optional if required by the proxy server):
– Address
URL or IP address of the proxy server.
Example: proxy.domain.com or 192.168.1.100
– Port
Port number of the proxy server.
Example: 8080 or 3128
– Login name
Name for login to the proxy server.
– Login password
Password for login to the proxy server. The password is saved in encrypted form.
Only * appear in the box.
Configure sending emails
How to set how the Avira Internet Update Manager sends messages by email:
Double-click on the node of the server to be configured in the navigation area.
Double-click on the node Settings.
Click on Email.
In the area Email messages , activate the option Activate email notification.
– SMTP server: Name of the mail server. The host name must not be more than 127
characters long.
Example: 192.168.1.100 or mail.testcompany.com
– Return address: Email address of the sender (optional).
Example: sendername@testcompany.de
– Recipient(s): Email-address of the recipient.
Separate the individual addresses with a comma. The maximum length of all
addresses is 259 characters.
Example: recipientname@testcompany.de
If an authentication on the mail server is necessary:
In the area Authentication, activate the option Use authentication.
Enter the data for login to the mail server.
– User name
Name for login to the mail server
– Password
The password is saved in encrypted form. Only * appear in the box.
How to set for what events the Avira Internet Update Manager sends emails:
In the area Notification by email for the following events, select when the Avira
Internet Update Manager should send emails:
Avira GmbH Avira Internet Update Manager 19
Page 20

Avira Internet Update Manager
– Error
– Warning
– Information
Also observe the information in the report file.
The Simple Message Transfer Protocol (SMTP) is used for sending emails.
An ESMTP (Extended SMTP) is not currently supported. Encrypted
transmission of TLS (Transport Layer Security) or SSL (Secure Socket
Layer) is not currently possible.
Configure schedule
How to configure at what interval Avira Internet Update Manager searches for available
product updates and downloads them to the server:
Click on the node of the server to be configured in the navigation area.
Click on Scheduler.
Activate the function Enable Scheduling and choose an option (once, hourly, daily,
weekly, daily, monthly or every x days, hours, minutes).
If you have activated every x days, hours, minutes, enter the update interval. The
minimum interval is 15 minutes.
Please, choose the time and date when the task should start
The scheduler is configured. The service calls the product updates on the defined date and
at the relevant intervals.
1.6.5 Configure advanced settings for a server
This chapter deals with the following topics:
• see Chapter: Select storage place for update
• see Chapter: Select storage place for temporary download
• see Chapter: Copy new download directly to the target directory
• see Chapter: Configure Avira Internet Update Manager update
• see Chapter: Start the integrated HTTP server
• see Chapter: Change the default download server
Select storage place for update
How to set the target directory in which updated files and program packages are to be
provided in future.
Double-click on the node of the server to be configured in the navigation area.
Double-click on the node Settings.
Click on General.
20 Avira Internet Update Manager Avira GmbH
Page 21

Avira Internet Update Manager
Enter the target directory on the server in the area Target directory. The target
directory may also be in the network. Shares are not possible.
- OR Click on
to select a local directory.
If the target directory is on a computer in the Intranet, you must enter the
path manually in the form of a UNC path. Ensure that you have sufficient
rights on the target computer. The Avira Internet Update Manager Service
must not be logged in as a local system account, as otherwise a login on the
target computer is not possible.
Example:
\\Target computer\Activation\Updates\AntiVir\
Activate the option Use authentication for root directory if authentication is
necessary on the selceted server
The dialog windows User and Pass are activated.
Enter the login name in the area User and the password for the server in the area
Pass. The password is saved in encrypted form. Only * appear in the box.
Check of the updates by means of the test mode
In order to run the Internet Update Manager in a test mode the following steps have to be
proceeded:
Double-click on the node of the server to be configured in the navigation area.
Double-click on the node Settings.
Click on General.
Activate the test mode beneath the point Updates
Now the Internet Update Manager provides the updates via the port 7100.
After several clients have updated via this port and work properly the test update can be
activated. This works as follows:
Click on the node General and activate the test mode
Click on the node Products
Right-Click on Test Products
A context menu opens.
Choose Commit products
The test update files will now be activated for the general update via the port 7080.
So the update is available to all clients.
Configure Avira Internet Update Manager update
How to configure the automatic update of the Avira Internet Update Manager:
Double-click on the node of the server to be configured in the navigation area.
Double-click on the node Settings.
Avira GmbH Avira Internet Update Manager 21
Page 22

Avira Internet Update Manager
Click on General.
In the area Configure Avira Internet Update Manager updates, activate the option
Search in the Internet for Avira Internet Update Manager updates.
Receive notification by email when an Avira Internet Update Manager
update is available for download. See Chapter Configure email settings.
Activate the option Install updates automatically if you want the update of the Avira
Internet Update Manager to be installed immediately after a successful download.
Start the integrated HTTP server
How to configure the integrated HTTP server:
Double-click on the node of the server to be configured in the navigation area.
Double-click on the node Settings.
Click on Internet.
Change the default port of the HTTP server 7080, or as the case may be the port of
the test http server 7100 if it should already be used by another application on this
computer.
If your operating system is not a server operating system, a maximum of 10
simultaneous connections to the HTTP server is possible.
Change the default download server
How to change the default download server:
Activate the option Change download server.
Enter the address (IP address or computer name) of the required download server in
the input box.
1.6.6 Save settings for a server
How to save the settings for a configured server:
Click on a different navigation area after having proceeded a change or finish the
Internet Update Manager Frontend
A window opens commit settings
Confirm the new configurations with Yes.
22 Avira Internet Update Manager Avira GmbH
Page 23

Avira Internet Update Manager
1.7 Configuration using Linux
1.7.1 Configuration without graphical user interface
You will find the most important settings of your Internet Update Manager in the
configuration file /etc/avira/ium.conf.
vi /etc/avira/ium.conf
---BILD-ium.conf
---BILD-ium.conf
Here you have the following possibilities:
> List IP of Internet Update Manager Daemon
This value is important for all products which are updated via the Internet Update
Manager.
The default value 0.0.0.0 defines that the Internet Update Manager Daemon shall accept
connections on all existing network addresses.
--<ip value="0.0.0.0"/>
--> Proxy sever fort he update server
The Internet Update Manager can use a proxy server in order to proceed the updates.
--<proxy_host value="<ihr_proxy"/>
<proxy_port value="8080"/>
<proxy_use_auth value="false"/>
<proxy_username value=""/>
<proxy_password value=""/>
--> Email notification
After a successful update of the Internet Update Manager repository you can configure an
e-mail notification that will inform you which files have been updated.
--<smtp_server value="smtp.ihr_smtp_server.tld"/>
<smtp_from value="AVIUM@ihre_domain.tld"/>
<smtp_login_required value="false"/>
<smtp_login value=""/>
<smtp_password value=""/
--> Activate test mode
This function provides you with a separate update structure that allows you to test new
versions and updates before you proceed them on your productive system.
For this purpose a new http server is started which is provided by default on the http port
7022.
Avira GmbH Avira Internet Update Manager 23
Page 24

Avira Internet Update Manager
You can check these test updates in a small test environment before you update your
productive system.
--<testmode value="true"/>
--> Change ports of the Internet Update Manager
--<port value="7050"/>
<port_async value="7051"/>
<http_server_ip value="0.0.0.0"/>
<http_server_port value="7080"/>
<http_server_port_test value="7100"/>
<http_server_port_old value="7021"/>
<http_server_port value="7080"/>
--> Change target directory for the Internet Update Manager
<http_server_root value="/var/avira/ium/HttpRoot"/>
> own update server
<http_server_list_user value="0.0.0.0"/>
Advice: If you use the Internet Update Manager in the daemon mode:
After changing the configuration the Internet Update Manager has to be restarted in order
to enable the new settings.
avium restart
or:
/usr/lib/AntiVir/ium/avium restart
--Stopping AntiVir: Avira-IUM.
Starting AntiVir: Avira-IUM.
---
1.7.2 Configuration with graphical user interface on Windows
After activating the Internet Update Manager as daemon you can administer it also with a
graphical user interface (gui).
Therefore you need a windows client (f.ex. Windows XP) in your network on which the
IUM Frontend can be installed.
After the installation of the Avira Internet Update Manager on your linux system you have
to make sure that this client is started and reachable. For this purpose you can use the
included default configuration.
All settings for the Internet Update Manager can be done comfortably with the IUM
Frontend.
24 Avira Internet Update Manager Avira GmbH
Page 25

Avira Internet Update Manager
Prerequisites for the remote administration of the Internet Update Manager on your Linux
system:
The internet update manager has been installed and started properly
Relevant ports are opened in the firewall
A windows client is available and it can reach the Internet Update Manager
The IUM Frontend is installed on a Windows Client
Preparation for the administration by means of the IUM Frontend:
-------------------------------------------------------The following ports have to be enabled (incoming and outgoing) on you server:
7000, 7021, 7022, 7030, 7050, 7051, 7080
How to start the Internet Update Manager on your Linux system:
----------------------------------------------------------------Please, open a shell and enter the following confirmed with “enter“:
(you need root authorization)
avium start
or:
/usr/lib/AntiVir/ium/avium start
By means of the following the Internet Update Manager is started and works as a daemon
in the background:
--avium start
Starting AntiVir: Avira-IUM.
--If you want to verify if the Internet Update Manager Daemon listens at his network port
you can proceed as follows:
netstat -an | grep LISTEN
--tcp 0 0 0.0.0.0:7080 0.0.0.0:* LISTEN
tcp 0 0 0.0.0.0:7050 0.0.0.0:* LISTEN
tcp 0 0 0.0.0.0:7051 0.0.0.0:* LISTEN
tcp 0 0 0.0.0.0:7021 0.0.0.0:* LISTEN
tcp 0 0 0.0.0.0:7030 0.0.0.0:* LISTEN
--The IUM Frontend
---------------Afterwards you can install the IUM Frontend on the Windows client. The Frontend is a
part of the Internet Update Manager for windows.
Avira GmbH Avira Internet Update Manager 25
Page 26

Avira Internet Update Manager
You can download the Internet Update Manager for Windows (including the Frontend)
from the following link:
http://www.avira.de/en/downloads/avira_security_management_center.html
Start the installation of the Avira Internet Update Manager.
During the installation you can choose which components shall be installed.
---BILD-SETUP-WIZARD
[x] Avira Internet Update Manager Frontend
[ ] Avira Internet Update Manager Server
---BILD-SETUP-WIZARD
Please, choose the first option “Avira Internet Update Manager Frontend“ and continue.
After the installation you can start the frontend as follows:
START -> Programme -> Avira -> Avira Internet Update Manager Frontend -> Avira
Internet Update Manager Frontend
Configuration by means of the IUM Frontend
You find detailed information in chapter 1.6.2 – Start the Internet Update Manager
Frontend fort he first time.
How to add products
You find detailed information in chapter 1.8 – Operation
1.8 Operation using Windows (with graphical user
interface)
1.8.1 Operation with graphical user interface
The following conditions must be met:
The Internet Update Manager Service on the server(s) is running
The Internet Update Manager Frontend is started
This chapter deals with the following topics:
• see Chapter: Copy updated files
• see Chapter: Edit server list
• see Chapter: Edit product list
• see Chapter: Start and stop product update manually
• see Chapter: Display and delete report file
• see Chapter: Display version information for product updates
26 Avira Internet Update Manager Avira GmbH
Page 27

Avira Internet Update Manager
1.8.2 Copy updated files
After a successful download you can automatically copy files to the target directory (see
Chapter: Copy download directly to the target directory). Alternatively you can carry out
this action manually.
How to copy the downloaded files manually to the target directory:
Right-click in the navigation area on the node of the server to be configured.
The context menu opens.
Click on the entry Copy downloaded files.
The menu entry is only available if the option for automatic copying of the
files is not activated (see Chapter: Copy new download directly to target
directory).
1.8.3 Edit server list
How to add a new server:
Right-click on the entry Avira Internet Update Manager.
A context menu appears.
Select the entry New and click on Add server.
The dialog window Add computer opens.
Enter the name of the server or its IP address in the area Name.
- OR -
Click on to select the required server.
Enter the port via which the communication with the service program should take
place in the area Port. Port 7050 and the port async 7051 are entered as the default
setting.
Click on OK.
The server appears in the navigation area of the user interface.
How to delete a server:
Right-click in the navigation area on the node of the Server to be deleted.
A context menu appears.
Select the entry Delete server.
1.8.4 Edit product list
How to add a new product to the list of products to be updated:
Click in the navigation area on the node of the server node to be configured.
Avira GmbH Avira Internet Update Manager 27
Page 28

Avira Internet Update Manager
Right-click on Released Products.
A context menu opens.
Select the menu item New / Add product.
The dialog window Product selection opens.
Choose in the navigation area Product the product that shall be updated via the drop-
down menu
Choose your language in the navigation area Language via the drop-down menu. The
entry All indicates that the product is available either only in English or all available
languages in the program package.
Choose in the navigation area Operating System the required operating system via the
drop-down menu and the required processor in the navigation area Processor.
After the right product has been chosen, it will be added to the list of Released
Products via Add Product.
How to delete a product:
Click in the navigation area on the node of the server node to be configured.
Click on Released Products.
Right-click on the product to be deleted in the list of products to be updated.
A context menu opens.
Select the entry Delete product.
1.8.5 Start and stop product update manually
You can manually start the download of product updates separately for each server at any
time or stop a running download at any time. The Scheduler is another way of controlling
the downloads (see Chapter: Configure schedule).
How to start a product update manually:
Right-click in the navigation area on the node of the required server.
The context menu opens.
Click on the entry Start update now.
In the case of a faulty or incomplete download, the update is stopped. All temporary files
are deleted and the target directory is not changed.
The following icon appears next to the selected server:
After a successful download of the product updates, the icon: reappears in front of
the server(s).
How to restart the update after a faulty download:
Check your Internet connection and the connection to the servers in the Intranet
Restart the update.
28 Avira Internet Update Manager Avira GmbH
Page 29

Avira Internet Update Manager
How to stop the running download of the product manually:
Right-click in the navigation area on the node of the required server.
The context menu opens.
Click on the entry Stop update.
You can restart the stopped download by clicking again on Start update now.
1.8.6 Display and delete report
The report file records the activities of the Internet Update Manager Service separately for
each server. You can therefore conveniently view and check error messages and status
reports.
How to display the report of a servers:
Right-click in the navigation area on the node of the required server.
The context menu opens.
Click on the entry Display report file.
The report file is displayed on the screen.
How to delete the report of a server:
Right-click in the navigation area on the node of the required server.
The context menu opens.
Click on the entry Delete report file.
A dialog window opens.
Click on Yes.
1.8.7 Display version information on product updates
The files for each update product on a server contain version information that can be
displayed. In this way you can check which versions are on your server.
Click in the navigation area on the node of the required server.
Information on the product, virus definition files and additional necessary update files
appears in the detail window. In addition, you receive the version information of the
Internet Update Manager Service.
1.9 Operation using Linux without a graphical user
interface
Add products
-------------------You can add products in a very simple way:
/usr/lib/AntiVir/ium/ium --add_products
By means of interactive queries you will get a corresponding configuration automatically.
.---
Avira GmbH Avira Internet Update Manager 29
Page 30

Avira Internet Update Manager
The following products are hosted by the Internet Update Manager at this moment:
Avira Internet Update Manager Server
Avira Internet Update Manager Frontend
Please, choose which products you want the Internet Update Manager to host.
Please enter 'y' when you want to mirror the product, 'n' otherwise.
--Add products to the Internet Update Manager
-----------------------------------------------/usr/lib/AntiVir/ium/ium --add_products
Update products
---------------------/usr/lib/AntiVir/ium/ium --get_updates
Start/stop Daemon: Internet Update Manager
----------------------------------------------/usr/lib/AntiVir/ium/ium start
/usr/lib/AntiVir/ium/ium stop
/usr/lib/AntiVir/ium/ium restart
Evaluate log file
----------------You will find the log files for the Internet Update Manager in the directory : /var/log/ium
1.10 Service
1.10.1 Service
Help and further information is available here:
• see Chapter: Frequently Asked Questions (FAQ)
• see Chapter: Service hotline
• see Chapter: Online Shop
1.10.2 Frequently Asked Questions (FAQ)
What do I have to observe for configuration of the Avira AntiVir Windows
Workstation 7?
The Avira Internet Update Manager generates the necessary update structure
automatically! It is important that when updating via File server/Share, the target directory
on the server receives authorization so that the update can be carried out by the Avira
AntiVir Windows Workstation 7.
Procedure for updating via Fileserver/Share:
Under Configuration :: General :: Update, activate the option via File server / Share.
Go to the tab Configuration :: General :: Update :: File server
Enter the path to the folder target directory upd defined in the Avira Internet Update
Manager in the area Download.
Example:
30 Avira Internet Update Manager Avira GmbH
Page 31

Avira Internet Update Manager
file://x:/SHARED FOLDER/UPD/ or
file://192.168.1.1/SHARED Folder/UPD/
Where appropriate, enter the login data on the server in the area Server Login.
Procedure for updating via web server (http):
Activate the option Via web server under Configuration :: General :: Update
Go to the tab Configuration :: General :: Update :: Web server
Enter the address of the web server from which the updates are to be downloaded in
the area Download.
Example:
http://192.168.1.1:7080/upd or http://server:7080/upd
Where appropriate, adapt the settings for the proxy server in the area Configuration ::
General :: Update :: Web server :: Proxy.
1.10.3 Service hotline
All necessary information on our comprehensive Support Service is available on our
website http://www.avira.com. Our experts will be pleased to answer your questions and
help you with technical problems.
1.10.4 Online shop
Would you like to purchase our products conveniently with a click of the mouse?
In the Online Shop of Avira GmbH you can quickly and safely purchase, extend or
upgrade licenses at http://www.avira.com/en/onlineshop. The Online Shop guides you step
by step through the order menu. A multi-lingual Customer Care Center provides
information on order processes, payment and delivery. Resellers can order on account.
Trademarks
AntiVir is a registered trademark of Avira GmbH.
Windows is a trademark of the Microsoft Corporation in the United States and other countries.
All other brand and product names are trademarks or registered trademarks of their respective owners.
Protected trademarks are not marked as such in this manual . However, this does not mean that they can be used freely.
Publisher
Avira GmbH
D-88069 Tettnang, Lindauer Str. 21
Telephone: +49 (0) 7542 - 500 0
Fax: +49 (0) 7542 - 52510
Email: info@avira.com
Internet: http://www.avira.com
Production
Avira GmbH
D-88069 Tettnang, Lindauer Str. 21
Copyright © Avira GmbH
This manual was created with great care. However, errors in design and content cannot be excluded.
All rights reserved. It is not permitted to reproduce this publication or parts of this publication in any form
without the prior written consent of Avira GmbH.
Errors and technical modifications reserved.
Edition March 2008
Avira GmbH Avira Internet Update Manager 31
Page 32

Avira Internet Update Manager
32 Avira Internet Update Manager Avira GmbH
Page 33

Avira GmbH
Lindauer Str. 21
88069 Tettnang
Germany
Telephone: +49 (0) 7542-500 0
Fax: +49 (0) 7542-525 10
Internet: http://www.avira.com
© Avira GmbH. All rights reserved.
This manual was created with great care. However, errors in design and contents cannot be excluded. The reproduction of this publication or parts thereof in any form is prohibited without previous
written consent from Avira GmbH.
Errors and technical subject to change.
Issued Q2/2008
AntiVir® is a registered trademark of the Avira GmbH. All other brand and product names are
trademarks or registered trademarks of their respective owners. Protected trademarks are not
marked as such in this manual. However, this does not mean that they may be used freely.
 Loading...