

Page 1
9310 1028 0001F rev 2.00
© 2013 Aviom, Inc.
A360 Channel Manager
User Guide
Page 2

Notice of Rights
All rights reserved. No part of this document may be reproduced or transmitted in any form or by any
means—electronic, mechanical, photocopy, recording, or otherwise—without written permission of
Aviom, Inc.
Trademarks
Aviom, A-Net, the A-Net icon, Pro16, Pro16e, Pro64, Virtual Data Cables, m-control, One-Touch Ambience,
Dual Profile Channel, Network MixBack, and AllFrame are trademarks of Aviom, Inc. All other trademarks
are the property of their respective owners.
Aviom products are protected by one or more of the following patents: 7,043,671; 7,301,966; 7,403,828;
7,523,362; 7,526,526; 7,787,580.
© 2013 Aviom, Inc. All rights reserved.
Information subject to change without notice.
Version 2.00
Page 3

Table of Contents
A360 Channel Manager . . . . . . . . . . . . . . . . . . . . . . . . . 1
Feature Overview . . . . . . . . . . . . . . . . . . . . . . . . . . . . 2
Installing A360 Channel Manager . . . . . . . . . . . . . . . . . . . . 3
Computer Requirements . . . . . . . . . . . . . . . . . . . . . . . . . 3
A360 Requirements . . . . . . . . . . . . . . . . . . . . . . . . . . . 3
Start the Installation Process . . . . . . . . . . . . . . . . . . . . . . . 4
Welcome Screens . . . . . . . . . . . . . . . . . . . . . . . . . . . . 4
Software License Agreement . . . . . . . . . . . . . . . . . . . . . . . 5
Install . . . . . . . . . . . . . . . . . . . . . . . . . . . . . . . . . . 6
Software Security . . . . . . . . . . . . . . . . . . . . . . . . . . . . 7
Finish . . . . . . . . . . . . . . . . . . . . . . . . . . . . . . . . . . 7
Updating or Removing the Application . . . . . . . . . . . . . . . . . 8
What Gets Installed . . . . . . . . . . . . . . . . . . . . . . . . . . . 9
Using A360 Channel Manager . . . . . . . . . . . . . . . . . . . . . . 10
Window Components . . . . . . . . . . . . . . . . . . . . . . . . . . 10
Mixer Conguration Editing Tools . . . . . . . . . . . . . . . . . . . . 11
A360 Channel Button . . . . . . . . . . . . . . . . . . . . . . . . . . 12
Mono/Stereo Radio Buttons . . . . . . . . . . . . . . . . . . . . . . . 12
Network Slot Assignment . . . . . . . . . . . . . . . . . . . . . . . . 14
Mono Channels . . . . . . . . . . . . . . . . . . . . . . . . 14
Stereo Channels . . . . . . . . . . . . . . . . . . . . . . . . 15
Ambience . . . . . . . . . . . . . . . . . . . . . . . . . . 15
Channel Status . . . . . . . . . . . . . . . . . . . . . . . . . . . . . 16
Disk-Based Functions . . . . . . . . . . . . . . . . . . . . . . . . . . 17
Load From Drive Drop-Down Menu . . . . . . . . . . . . . . . . . . . 18
A360 Mixer Conguration Number to Load . . . . . . . . . . . . . . . 18
Load Button . . . . . . . . . . . . . . . . . . . . . . . . . . . . . . . 19
Save To Drive Drop-Down Menu . . . . . . . . . . . . . . . . . . . . . 20
Storage Devices . . . . . . . . . . . . . . . . . . . . . . . . 20
A360 Mixer Conguration Number to Save . . . . . . . . . . . . . . . 21
Save Button . . . . . . . . . . . . . . . . . . . . . . . . . . . . . . . 22
What Gets Saved . . . . . . . . . . . . . . . . . . . . . . . . . . . . . 23
Copying Mixer Congurations . . . . . . . . . . . . . . . . . . . . . . 25
Recalling a Mixer Conguration on the A360 . . . . . . . . . . . . . . . 25
Sample Input List . . . . . . . . . . . . . . . . . . . . . . . . . . . . 26
Index . . . . . . . . . . . . . . . . . . . . . . . . . . . . . . . . . . . 27
Software License Agreement . . . . . . . . . . . . . . . . . . . . . . . 29
ii iA360 Ch A n n e l MA n A g e r Us e r gU i d e
Page 4
A360 Channel Manager
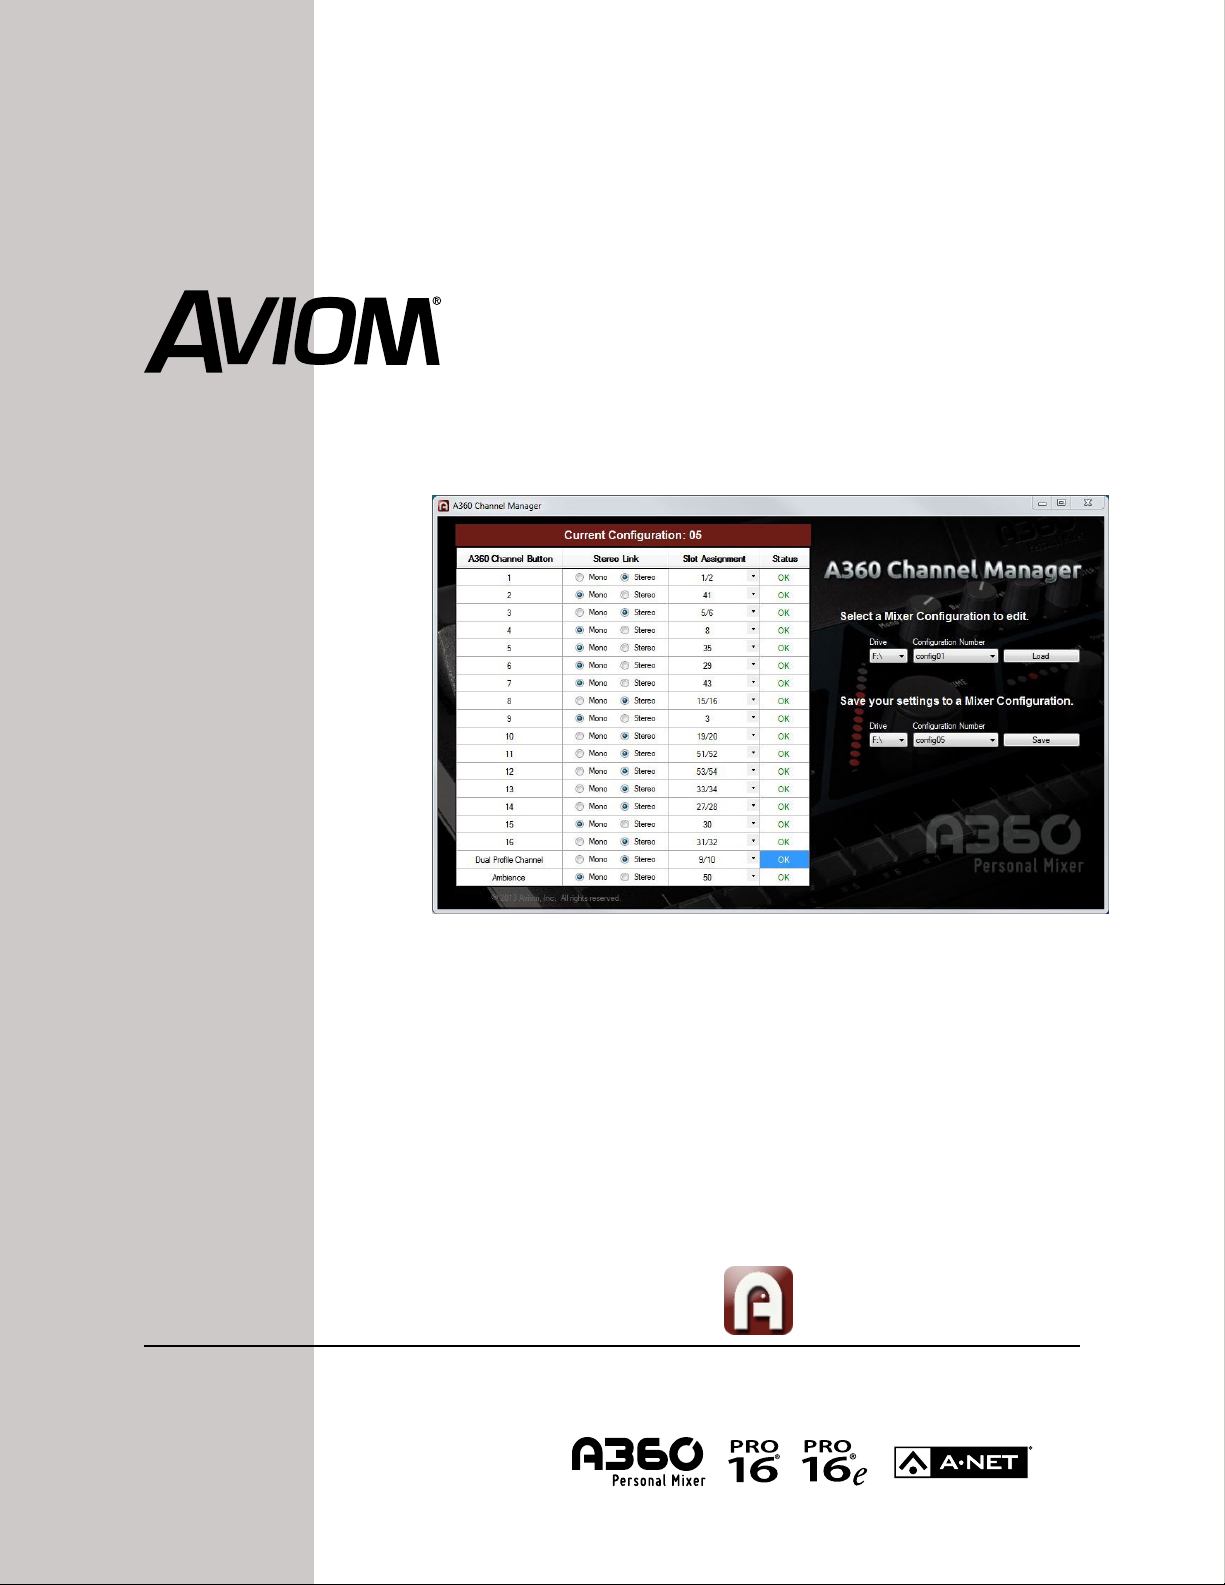
Aviom’s A360 Channel Manager™ is a PC software application designed to simplify the
configuration of A360 Personal Mixers that will be used in Custom mode. A360 Channel
Manager allows Pro16e™ network slots to be assigned to the mix channel buttons of the A360
as well as its Dual Profile Channel™ and One-Touch Ambience™ buttons. The resulting Mixer
Configuration file can be saved to a USB memory stick for loading into the A360
Personal Mixer.
Version 2 of the A360 Channel Manager application also supports user-created mix presets
saved to a USB memory device from the A360 Personal Mixer. This provides an easy way to
back up mix files to a computer and transfer mix presets from one A360 to another. Twenty
mix presets are saved with each mixer configuration.
1A360 Ch A n n e l MA n A g e r Us e r gU i d e
Page 5

Feature Overview
The A360 Channel Manager software features include:
Simple, one-page interface •
Mono and stereo mix channel support •
Support for up to 64 input sources in the Pro16e network •
Assignable Dual Profile Channel •
Assignable One-Touch Ambience button •
16 Mixer Configurations can be stored per USB device •
Stores 20 user-created mix presets in each configuration •
Allows easy backup of user mix presets created on the A360 Personal Mixer •
Provides an easy way to transfer mix presets from one A360 to another •
2A360 Ch A n n e l MA n A g e r Us e r gU i d e
Page 6

Installing A360 Channel Manager
It is recommended that you quit all running Windows applications before starting the Aviom A360 Channel
Manager installation process.
Check the Aviom website (www.aviom.com) for the latest information about software and firmware
updates and the complete line of Aviom Pro16® and Pro64® Series products.
Computer Requirements
The minimum computer system requirements for running the Aviom A360 Channel Manager application
are listed below.
Windows
Intel® or AMD® processor — 1 gigahertz (GHz) or faster •
Intel, AMD, or 100% compatible motherboard & chipset•
Microsoft® • Windows® 7 or 8
2 gigabyte (GB) RAM (32-bit systems) or 4 GB RAM (64-bit systems) •
15 MB of free hard disk space for full installation •
VGA Video (1024 x 768) - 256 colors •
DirectX 9 graphics device with WDDM 1.0 or higher driver•
One available USB port for storing and loading configuration files •
Microsoft .Net Framework 4.0•
If your PC does not have the .NET Framework components installed, an Internet connection may be
required to download and install these Microsoft components.
The free Adobe® Reader (or equivalent) is required to open the included User Guide.
Mac OS
There is no official support for A360 Channel Manager running on Apple® Mac computers.
A360 Requirements
Firmware version 2.x or higher is required when using this version of A360 Channel Manager. Get firmware
updates from the Aviom website; see the A360 Personal Mixer User Guide for information about updating
the firmware in a Personal Mixer.
3A360 Ch A n n e l MA n A g e r Us e r gU i d e
Page 7
Start the Installation Process
Before installing the software, quit any running Windows applications. Locate the installer file, named
“A360_Channel_Manager_Installer.exe,” and double-click it to begin the installation process. If an older
version of A360 Channel Manager is already installed on the computer, it will be uninstalled during the
new installation process. (Any user-created files are preserved.) You can uninstall a previous version of
A360 Channel Manager manually by using the tools built into the Windows OS Control Panel.
During the install, most screens give the option of navigating back to the previous step to review settings
or make changes before continuing. To do this, click the B
to finishing, click the ca n c e l button; no software components will be installed.)
a c k button. (To exit the installer at any time prior
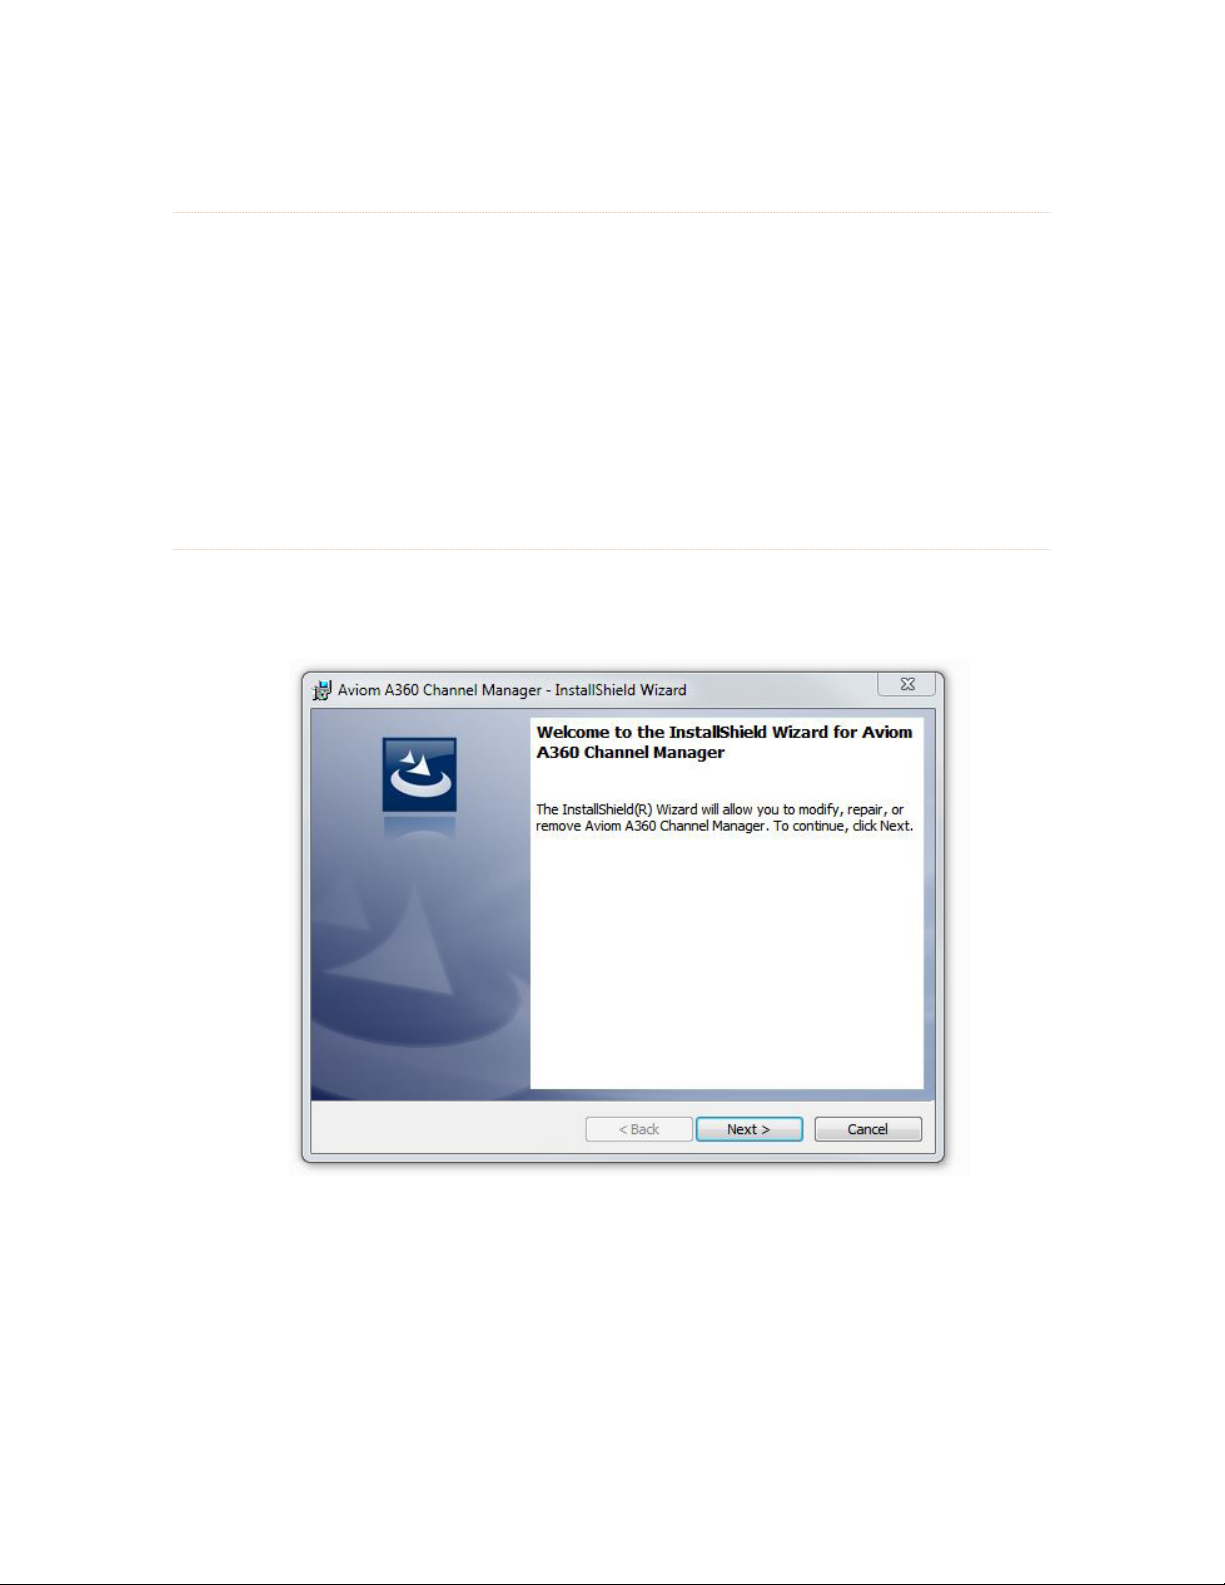
Welcome Screens
When the Welcome screens appear, click ne x t to continue and install A360 Channel Manager or click
ca n c e l to exit without running the installer.
Click the Next but ton to continue the installation process.
4A360 Ch A n n e l MA n A g e r Us e r gU i d e
Page 8
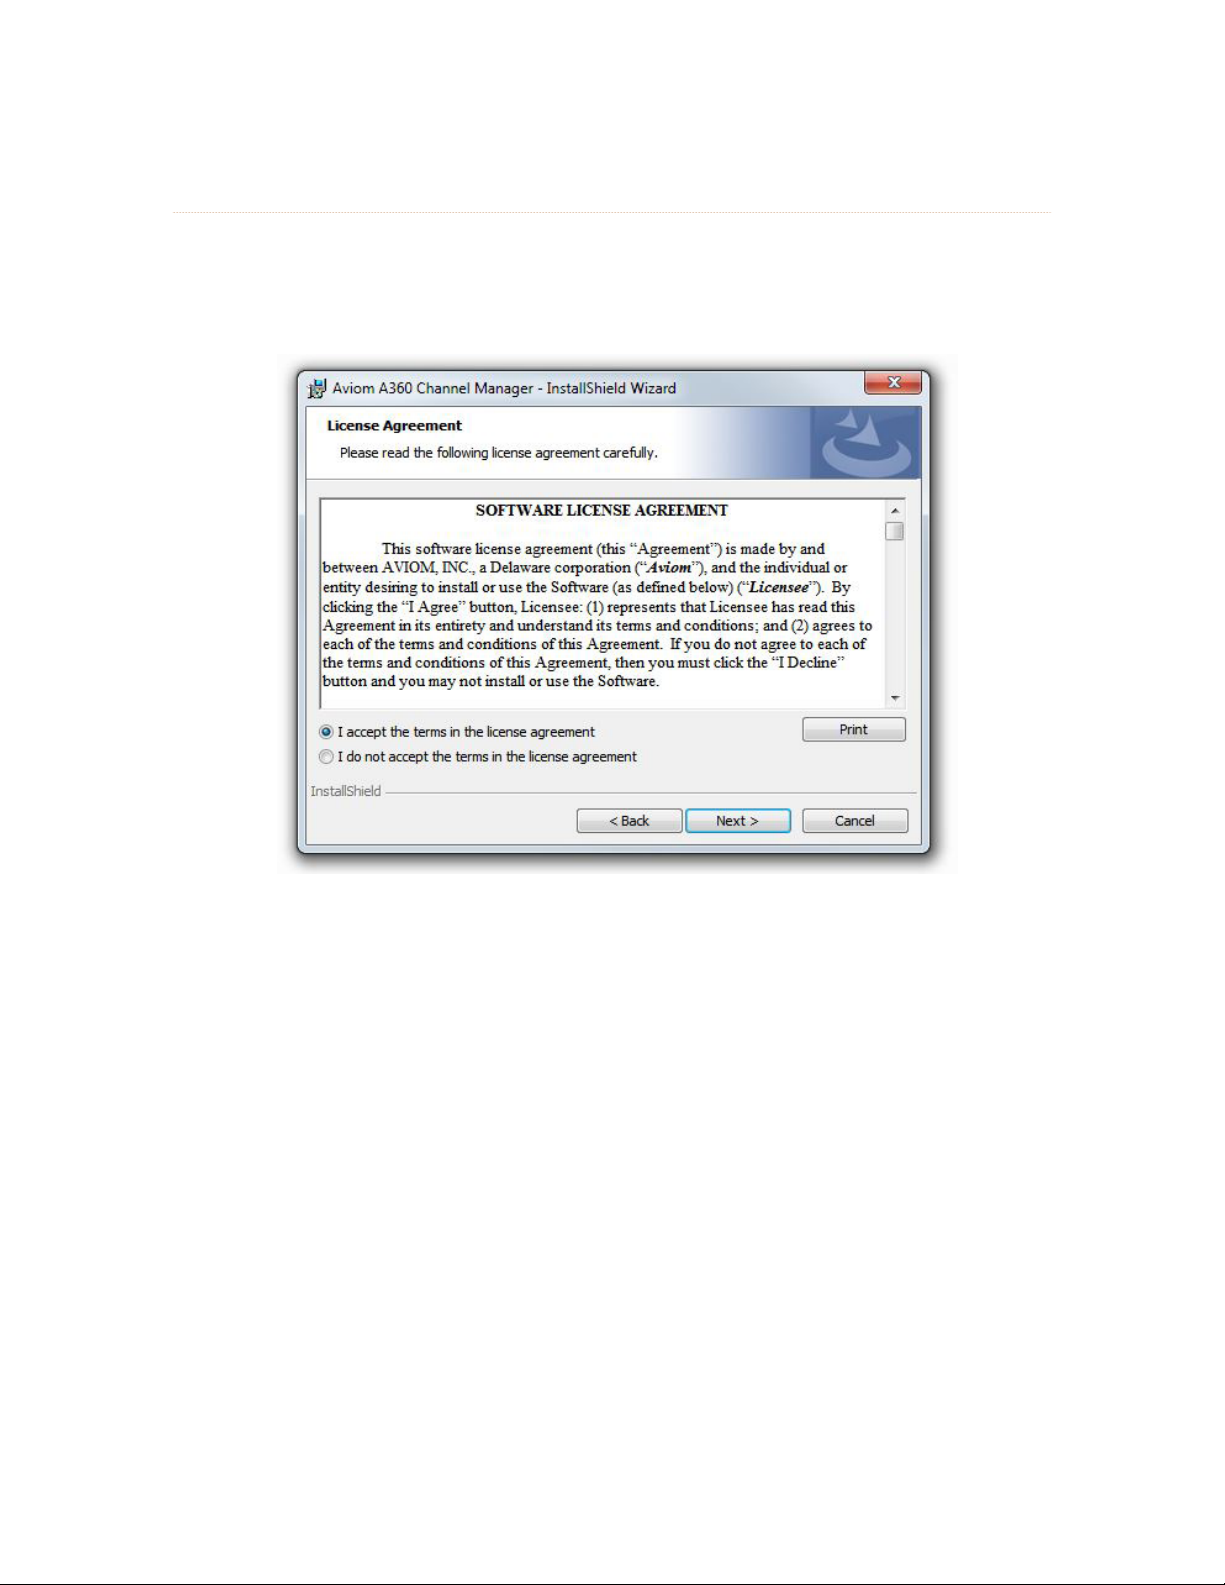
Software License Agreement
When the Software License Agreement page appears, read the agreement completely, click the
I a c c e p t t h e t e r m s I n t h e l I c e n s e a g r e e m e n t radio button, and then click the ne x t button to continue the
installation.
Accept the Software License Agreement to continue.
If you do not accept the software license agreement, the installer will exit without installing Aviom A360
Channel Manager.
Following the license agreement, the current ReadMe document will be displayed. Click ne x t to continue
the installation, click Ba c k to return to the previous page of the installer, or click ca n c e l to exit without
installing the software.
5A360 Ch A n n e l MA n A g e r Us e r gU i d e
Page 9
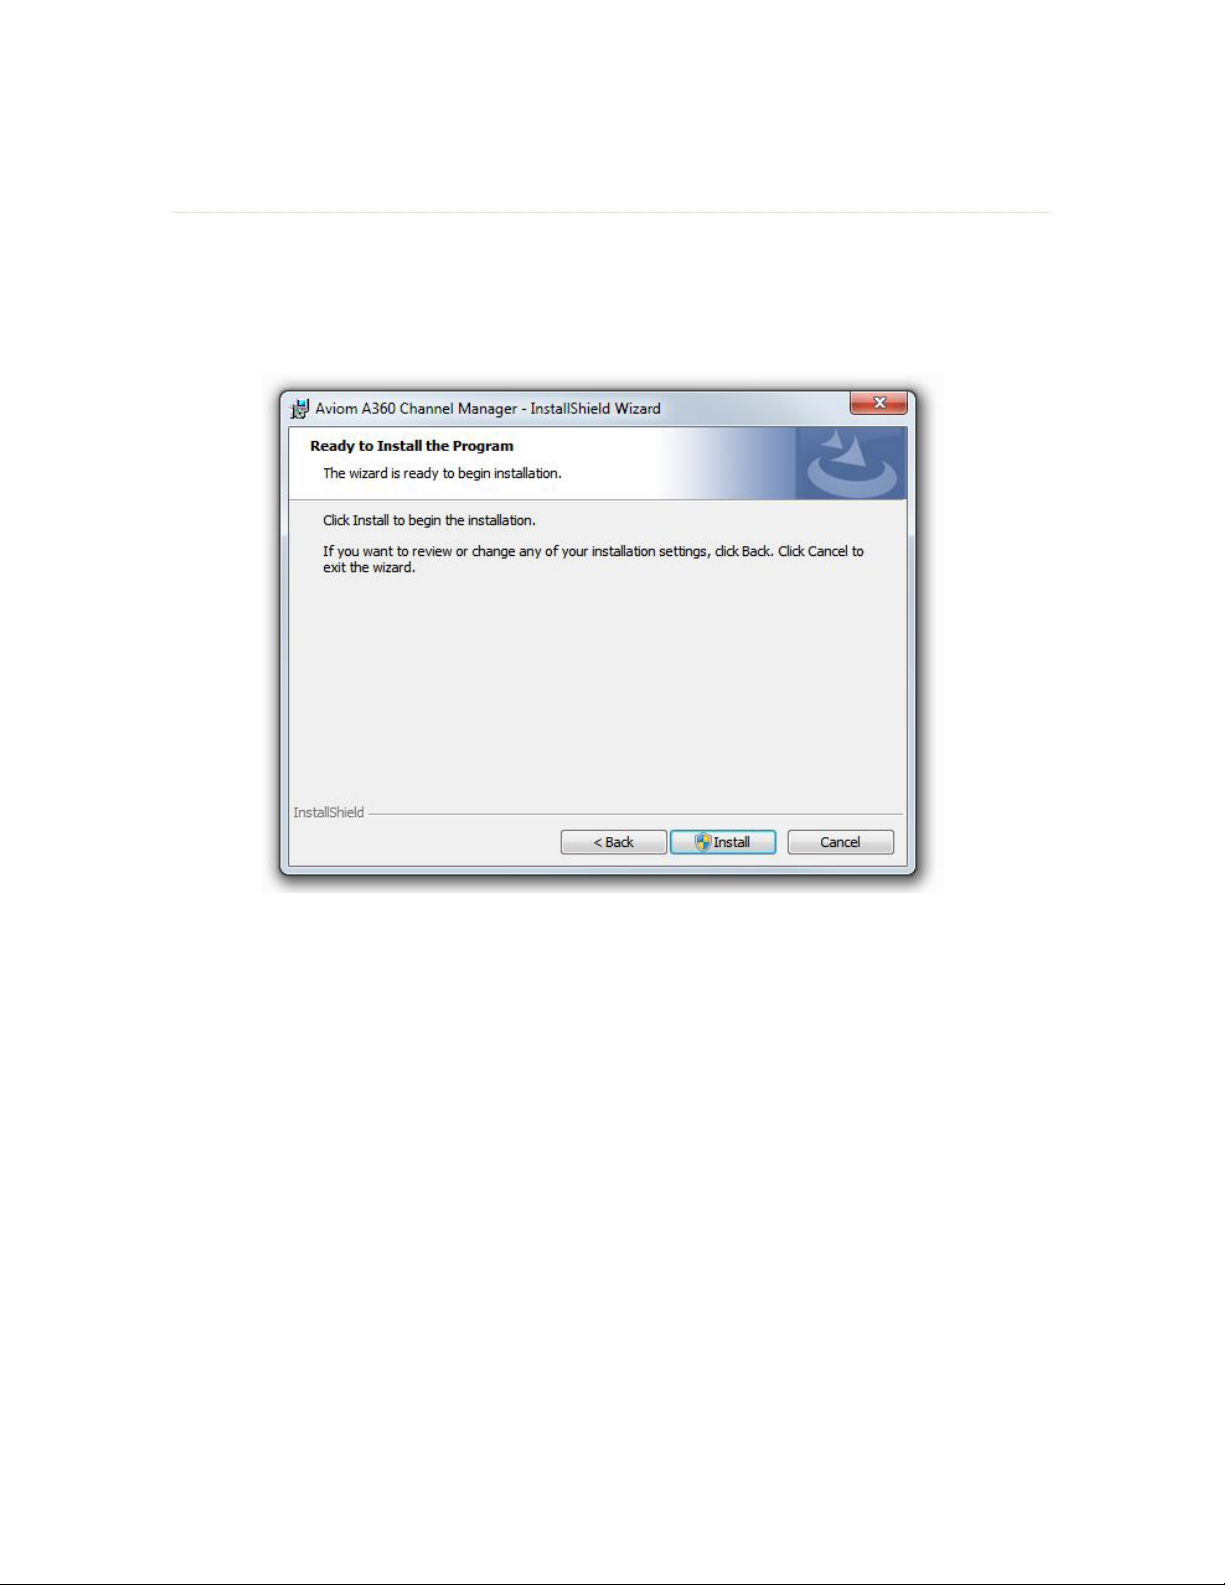
Install
At this point, the installer has enough information to install the A360 Channel Manager application and
its supporting files. On the screen that follows the ReadMe document, click the In s t a l l button to begin
the installation. Click Ba c k to return to the previous screen to review settings, or click ca n c e l to exit the
installer.
Click the Install button to start the software installation process.
6A360 Ch A n n e l MA n A g e r Us e r gU i d e
Page 10
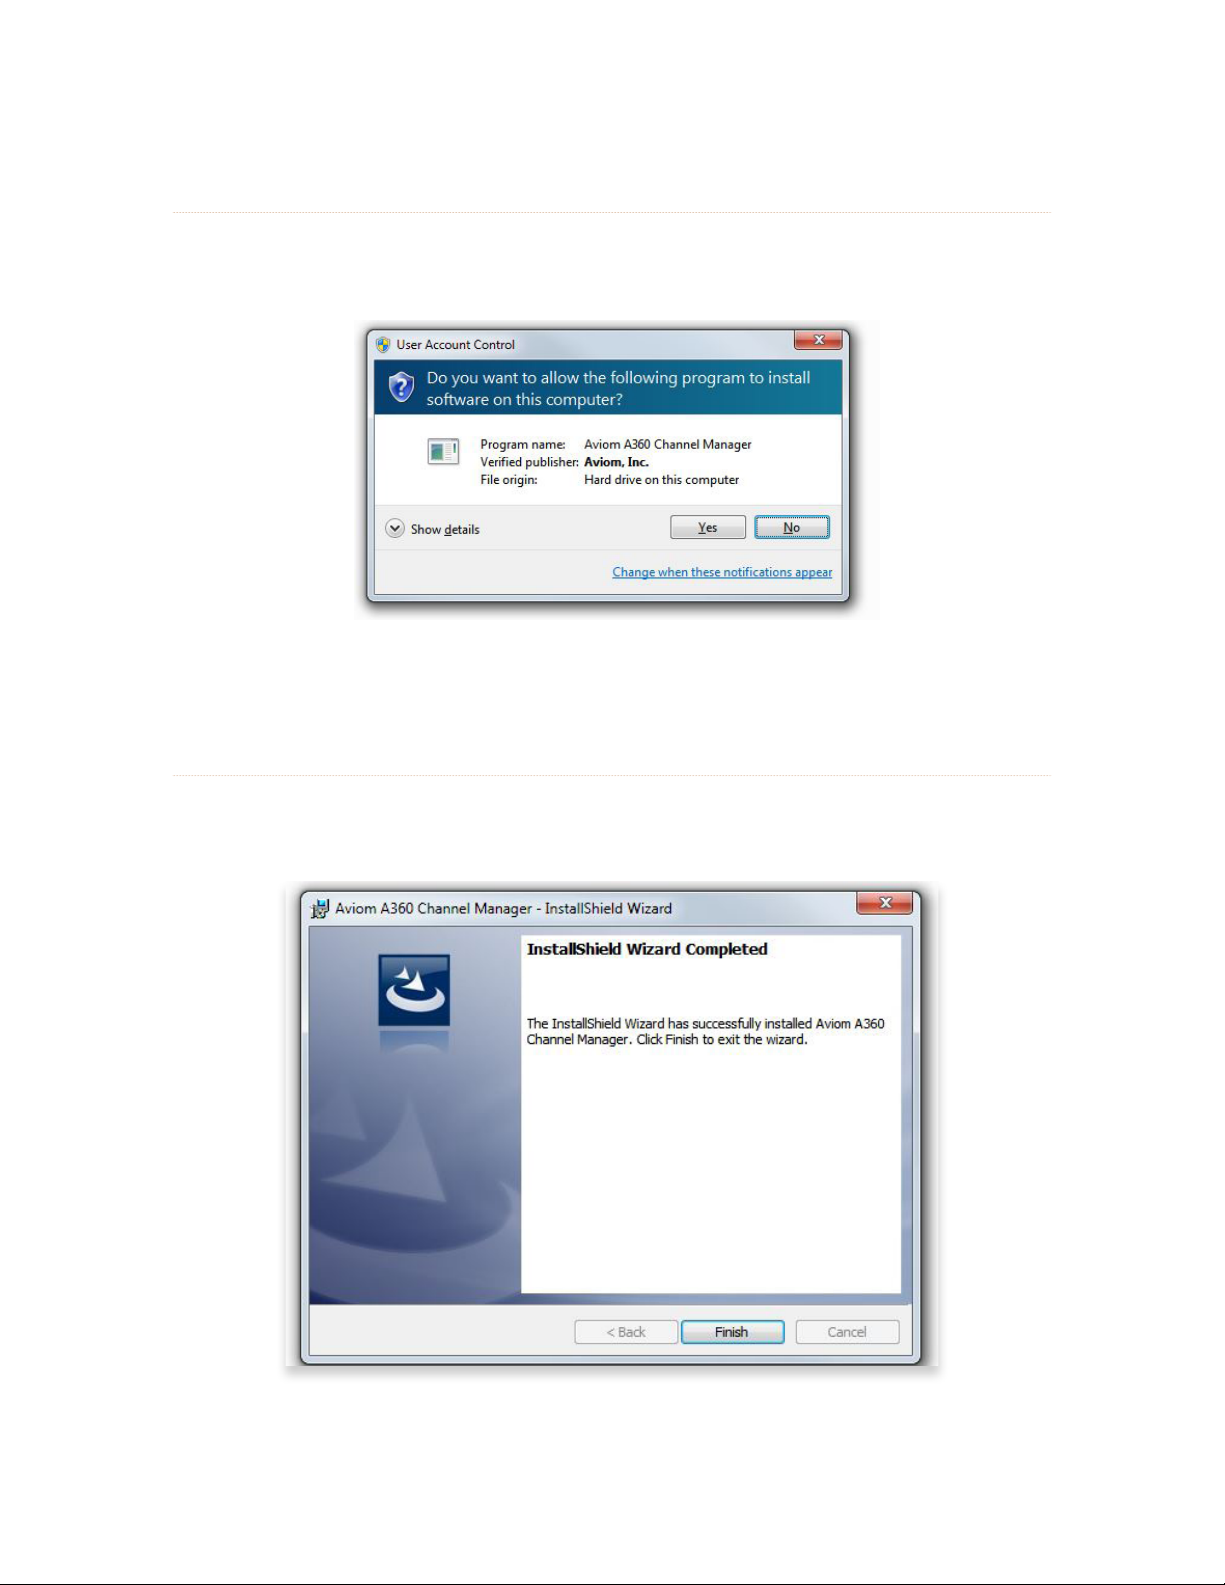
Software Security
If the PC prompts that verification is required to continue the software installation process, click Ye s to
proceed or click no to exit without installing A360 Channel Manager.
Click Yes to continue the installation.
Finish
When the install has finished, the following screen will be displayed. Click the FI n I s h button to complete
the installation process.
Click the Finish button to exit the installer.
7A360 Ch A n n e l MA n A g e r Us e r gU i d e
Page 11
After the installer closes, A360 Channel Manager is ready to use (assuming that all required Microsoft
updates and .NET Framework components are correctly installed).
Launch A360 Channel Manager by double-clicking its icon either from the desktop or in the A360 Channel
Manager application folder (C:\Program Files (x86)\Aviom\A360 Channel Manager), or by selecting a360
ch a n n e l ma n a g e r from within the Aviom folder in the All Programs section of the PC Start menu.
No t e : The default location for the installation is
P
C:\Program Files (x86)\Aviom\A360 Channel Manager\A360 Channel Manager.exe
A desktop icon is installed automatically.
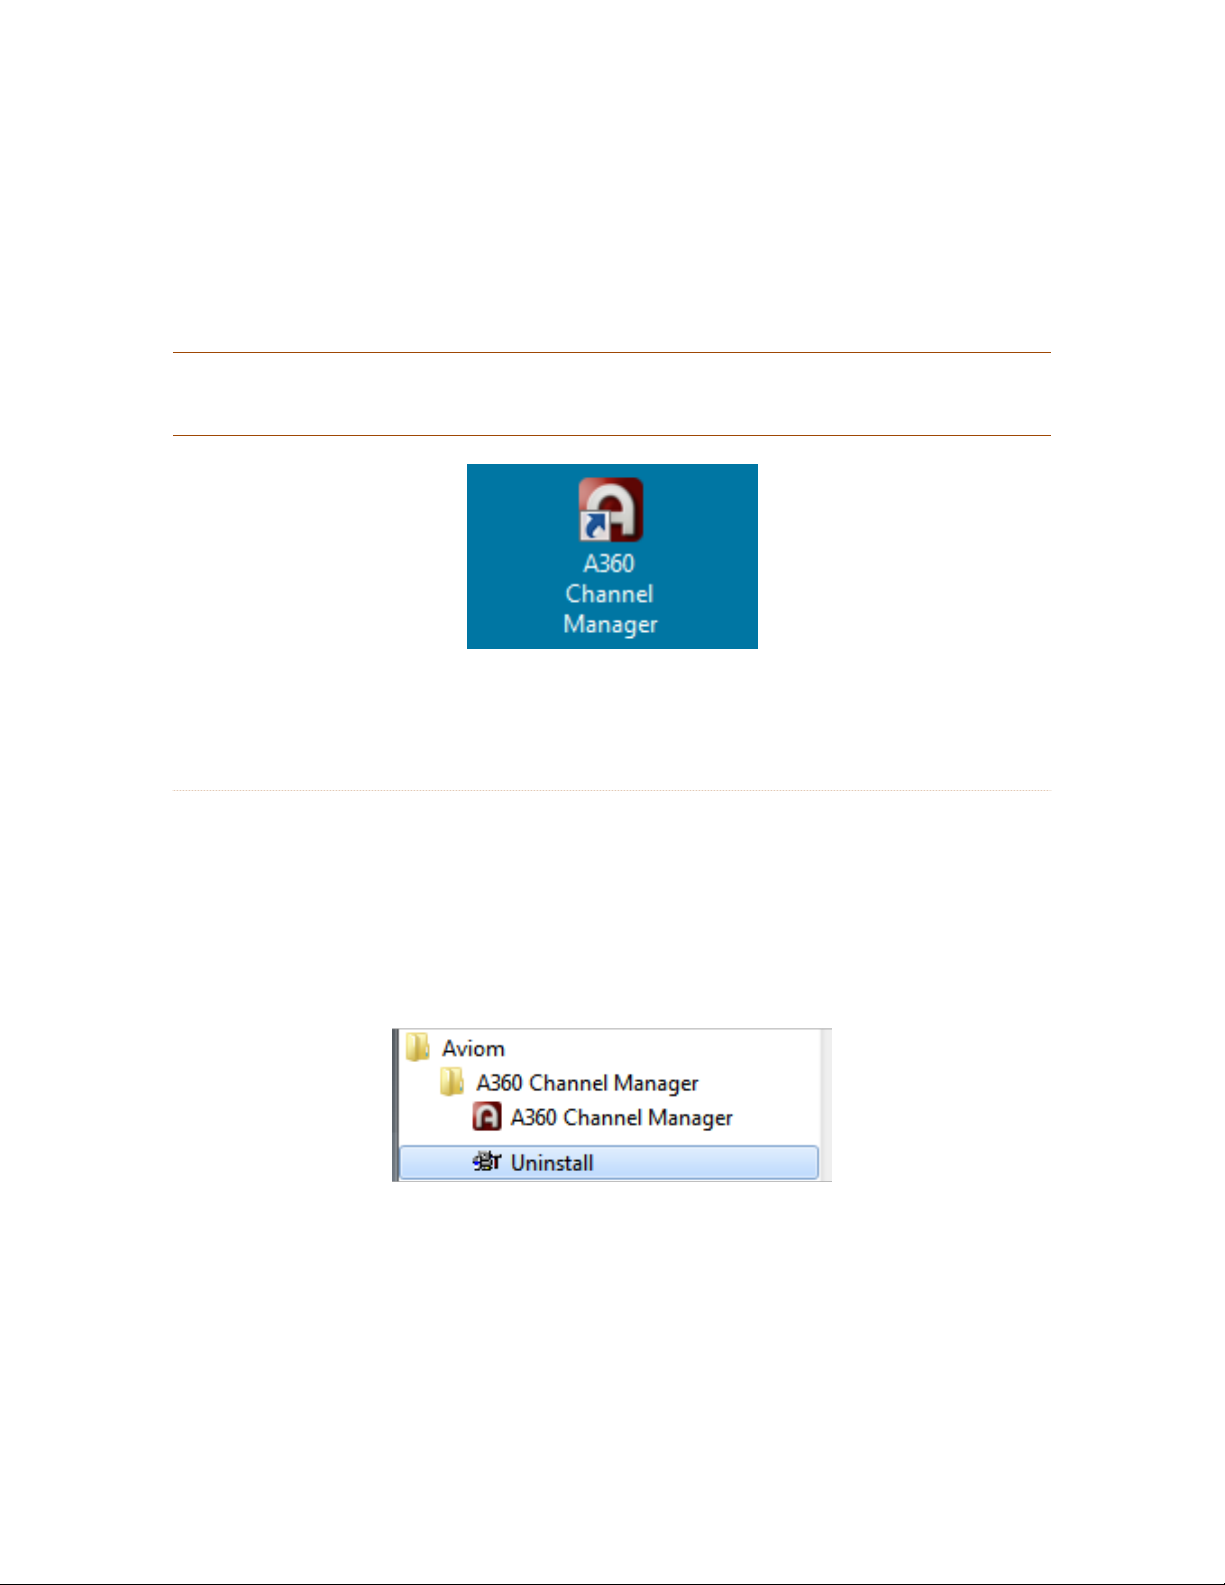
Updating or Removing the Application
When a new version of A360 Channel Manager is available, the old version of the application will be
removed automatically in the process of installing a new version.
If you want to manually remove A360 Channel Manager, an uninstall shortcut is placed in the A360 Channel
Manager folder automatically during the initial installation. The utility can be accessed directly from the
Aviom\A360 Channel Manager folder created in the All Programs menu. Optionally, the application can be
removed by using the standard Windows OS utilities found in the Windows OS Control Panel.
An uninstall shortcut is placed in the All Programs menu.
As a precaution, back up any files in the A360 Channel Manager folder that you wish to save before
proceeding with the uninstall and update procedure. The uninstall utility removes all program files,
product-specific update files, application icons, log files, registry entries, and text files associated with
A360 Channel Manager. It does not delete any user-created files.
8A360 Ch A n n e l MA n A g e r Us e r gU i d e
Page 12

What Gets Installed
A360 Channel Manager is installed by default into the following folder:
C:\Program Files (x86)\Aviom\A360 Channel Manager
Within the A360 Channel Manager folder, which contains the application’s resources, the Do c u m e n t s folder
containing user documentation, the software license, and ReadMe files will also be created. (The free
Adobe Reader, or equivalent, is required to open the included User Guide.)
No t e : Do not rearrange or move any of the files or folders created during the installation.
P
9A360 Ch A n n e l MA n A g e r Us e r gU i d e
Page 13

Using A360 Channel Manager
A360 Channel Manager makes it easy to create, save, and edit custom channel configurations
for the A360 Personal Mixer. Each performer’s Personal Mixer can load a unique channel map
that assigns network slots to the mixer’s channel buttons. The software can edit and save up
to sixteen unique Mixer Configuration files to a disk.
In addition, A360 Channel Manager offers an easy way to back up user-created Mix Preset files
that have been saved to a USB memory device from an A360 Personal Mixer as part of a
configuration file.
Window Components
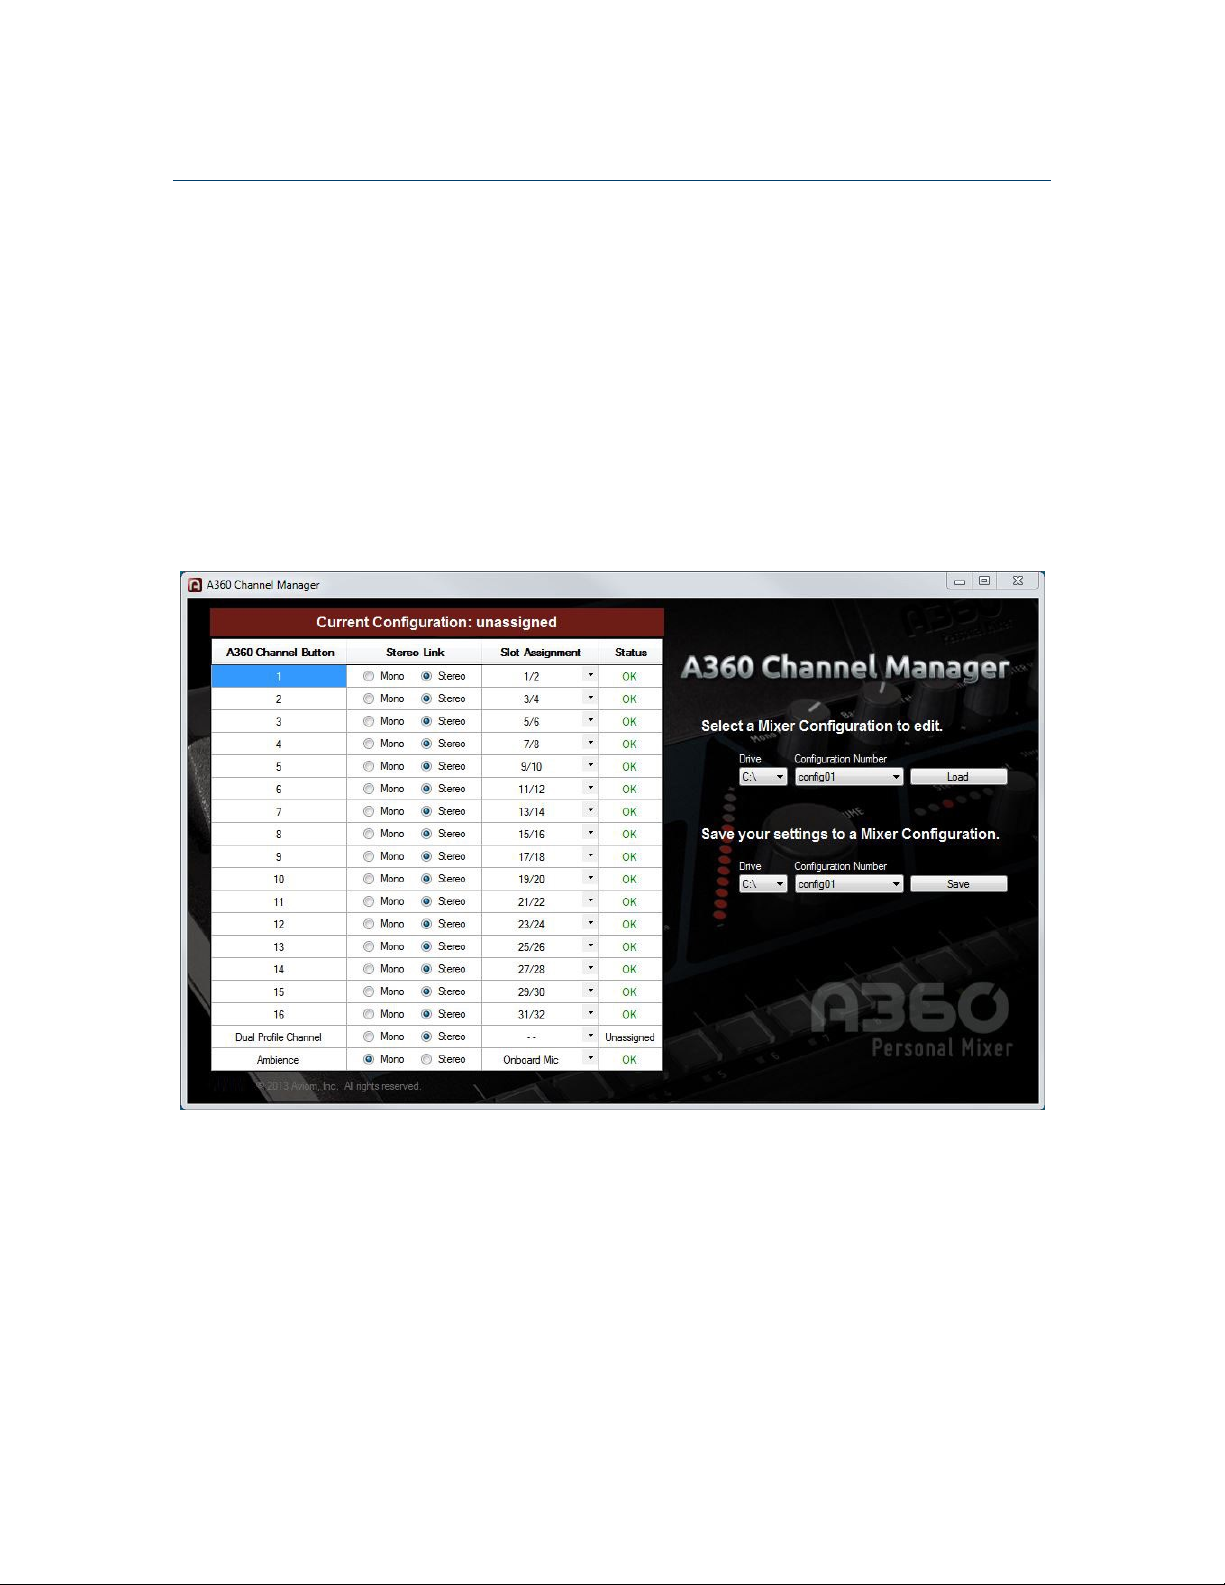
The A360 Channel Manager interface consists of a single window with two main sections that include the
Mixer Configuration editing tools and the disk-based save and load functions.
Channel-based controls are on the left; disk-based controls are on the right.
10A360 Ch A n n e l MA n A g e r Us e r gU i d e
Page 14

Mixer Configuration Editing Tools
Information about the current Mixer Configuration being edited is shown in four columns.
Function
1 A360 Channel Button
2 Stereo Link Mono/Stereo setting
3 Network Slot Assignment
4 Channel Status
11A360 Ch A n n e l M A n A g e r Us e r g U i d e
Page 15

A360 Channel Button
Mono Stereo
Mono Stereo
Mono Stereo
Mono Stereo
Mono Stereo
Mono Stereo
Mono Stereo
Mono Stereo
The A360 Channel Button column has read-only entries that correspond to the A360 Personal Mixer’s
sixteen mix channels, plus the Dual Profile Channel and Ambience buttons.
Each row shows a complete record for one button.
Mono/Stereo Radio Buttons
Each mix channel button on an A360 Personal Mixer (as well as the Dual Profile Channel and Ambience
buttons) can be assigned either a mono or stereo source from the Pro16e network. The Stereo Link status
for each mix channel button on the A360 can be independently set to either mo n o or st e r e o using the
radio buttons.
No t e : The Stereo Link switches on network’s analog or digital input devices must be set correctly to
P
make configurations created with A360 Channel Manager work predictably. Make sure that
the settings coincide between the input device(s) and the configurations made for all A360
Personal Mixers in the system to avoid unpredictable results.
Channels 1-2 and 3-4 are set as stereo pairs.
12A36 0 Ch A n n e l MA n A g e r Us e r g U i d e
Page 16

When editing a configuration, changing a stereo channel to mono (or vice-versa) will automatically clear
the Slot Assignment for the channel button being edited. Its Status column will be set to un a s s i g n e D . See
page 16.
The Slot Assignment is automatically cleared when a channel’s Stereo/Mono setting button is changed.
13A36 0 Ch A n n e l MA n A g e r Us e r gU i d e
Page 17

Network Slot Assignment
The Slot Assignment column consists of two drop-down menus: one is displayed when channel buttons
are set to Mono and the other when they are set to Stereo. The drop-down menu will automatically update
to display a mono or stereo Slot Assignment list as the Mono and Stereo radio buttons are changed for
each channel.
Only network slot numbers are displayed; the use of a text-based input list is suggested to keep track of
the audio sources connected each device’s inputs. A sample input list appears as a reference at the end of
this document.
Mono Channels
The mono drop-down contains 65 entries—network slots 1 through 64, plus the double dash ‘‘- -‘‘ character
used to indicate that no network slot is currently assigned to the channel button.
Selecting a mono network slot
To change a mono mix channel button’s assignment, click to open the drop-down menu associated
with the channel and then choose the desired network slot from the list. (Choose “- -” to have no slot
assignment for the channel.) If any conflicts occur, indicated by an Error in the Status column, they will
need to be resolved prior to saving the Mixer Configuration to disk. The most common error is caused
when two channels are assigned to use the same network slot.
Remember that the stereo/mono settings between the mixer configurations and the hardware input
modules must match. See page 12.
14A360 Ch A n n e l MA n A g e r Us e r gU i d e
Page 18

Stereo Channels
The drop-down menu for stereo channels contains 33 entries shown as pairs of odd-even network slots 1/2
through 63/64, plus the double dash ‘‘- -‘‘ character used to indicate that a channel button is unassigned.
To change an assignment for a stereo mix channel button, click to open the drop-down menu associated
with the channel and then choose the desired pair of network slots from the list. (Choose “- -” to have no
slot assignment for the channel.)
Selecting a stereo network slot from the drop-down menu
If any conflicts occur, indicated by an Error in the Status column, they will need to be resolved prior to
saving the Mixer Configuration to disk.
Ambience
The Ambience button’s drop-down menus for mono or stereo slot selection are unique—each includes an
entry for on b o a r D mi c instead of the double-dash (unassigned) character. The Onboard Mic is always mono.
The Ambience button includes a selection for the Onboard Mic.
15A36 0 Ch A n n e l M A n A g e r Us e r g U i d e
Page 19

Channel Status
The Channel Status column has three states: OK, Unassigned, and Error. The Status will update as changes
are made to the Stereo Link and Slot Assignment columns for each channel, and as Mixer Configurations
are loaded from disk for editing.
A conguration being edited with the three channel Status states is shown.
The OK Status indicates that a mix channel’s network slot assignment has no conflicts with the other mix
channel button assignments in the current Mixer Configuration.
When the channel’s Status reads Unassigned, this indicates that no network slot is currently assigned
to the channel button. Mixer Configurations may be saved with some channels set to Unassigned, but
note that at least one of the mix channel buttons (or the Dual Profile Channel) must be assigned to use
a network slot before a Mixer Configuration can be saved. The Save button will be grayed out until all
channel conflicts are resolved and at least one mix channel button is assigned to a network slot.
No t e : Any Channel Buttons that are Unassigned will not be able to be selected when the A360
P
Personal Mixer is in Custom mode.
The red Error status indicates that a channel has a conflict—this is usually caused during editing by
assigning the same network slot (or pair, if stereo) to more than one channel button. A Mixer Configuration
cannot be saved until all conflicts are resolved.
16A360 Ch A n n e l MA n A g e r Us e r gU i d e
Page 20

Disk-Based Functions
A360 Channel Manager can save up to sixteen Mixer Configurations to a disk. Drop-down menus are used
for Drive and Mixer Configuration selection.
Function
1 Load From Drive Drop-Down Menu
2 A360 Mixer Configuration Number to Load Drop-Down Menu
3 Load Button
4 Save To Drive Drop-Down Menu
5 A360 Mixer Configuration Number to Save Drop-Down Menu
6 Save Button
17A360 Ch A n n e l MA n A g e r Us e r g U i d e
Page 21

Load From Drive Drop-Down Menu
The drop-down Dr i v e menu under the heading Select a Mixer Configuration to edit is used to choose a
storage device connected to the PC from which Mixer Configurations and their associated Mix Presets will
be loaded for editing in A360 Channel Manager. If no external device is connected, the default boot drive
is automatically selected (typically this is C:\).
Mixer Configurations and Mix Presets are saved to a specific file and folder structure at the root of the
storage device.
No t e : Do not move or rename the Mixer Configuration or Mix Preset files.
P
A360 Mixer Configuration Number to Load
The co n f i g u r a t i o n nu m b e r drop-down menu in the Select a Mixer Configuration to edit section of the
window is used to select one of the 16 Mixer Configurations to be loaded. The Mixer Configurations are
named as “config01” through “config16.”
Choose a Mixer Configuration to be loaded.
No t e : Loading a Mixer Configuration also loads any Mix Presets associated with the configuration.
P
Although the Mix Presets cannot be edited, they will be saved when the Mixer Configuration
is saved to disk and will be loaded into the A360 when the Mixer Configuration is recalled
from a USB memory device.
18A360 Ch A n n e l MA n A g e r Us e r gU i d e
Page 22

Load Button
Click the Lo a D button after choosing a Mixer Configuration from the Configuration Number drop-down
menu. Its settings will be loaded into the application for editing, after which it can be saved to any one of
the 16 Mixer Configuration locations on a connected storage device. Twenty Mix Presets are also associated
with each configuration; these are loaded along with the configuration, but cannot be edited.
If you have unsaved changes in the editor and attempt to load a new Mixer Configuration from disk, a
warning message will be displayed.
Attempting to load a Mixer Conguration from disk with unsaved edits will cause a warning message to be displayed.
Click Ye s to load the Mixer Configuration from disk; unsaved changes in the current Mixer Configuration
will be lost. Or click no to cancel; the Mixer Configuration is not loaded. Save the edits and try again.
If you select a Mixer Configuration to load that does not exist on the current storage device, a warning
dialog will appear. Click the oK button to close the dialog box; choose a different Mixer Configuration or
storage device and try again.
The selected Mixer Conguration was not found.
19A360 Ch A n n e l M A n A g e r Us e r g U i d e
Page 23

Save To Drive Drop-Down Menu
The drop-down Dr i v e menu under the heading Save your settings to a Mixer Configuration selects
the PC-formatted storage device connected to the PC where Mixer Configurations will be saved after they
have been edited with A360 Channel Manager.
If no external device is connected, the default boot drive is automatically selected (typically this is C:\).
Mixer Configurations and their associated 20 Mix Presets are saved to the root of the storage device within
the Aviom folder. (The Aviom folder and its underlying folder structure will be automatically created the
first time a Mixer Configuration is saved if they do not already exist.)
Choose a location where the les will be saved.
Storage Devices
The Mixer Configuration and Mix Preset files created with A360 Channel Manager are saved to the root
directory of the selected storage device. The folder path used for file storage is C:\Aviom\mixer_config_
files\banka. Do not change the folder locations or file names. Storage devices must be PC formatted.
Devices may be partitioned, but non-PC partitions will be ignored.
No t e : A PC-formatted USB memory stick is required to load Mixer Configurations and Mix Presets
P
into an A360 Personal Mixer. Recalling a configuration from a USB device will replace any
previously loaded configuration plus all Mix Presets in the A360.
20A360 Ch A n n e l MA n A g e r Us e r gU i d e
Page 24

A360 Mixer Configuration Number to Save
The co n f i g u r a t i o n nu m b e r drop-down menu is used to select one of the sixteen Mixer Configuration
locations on the disk; the current settings for the Mixer Configuration being edited as well as its associated
20 Mix Presets will be stored here.
Select a location where a Mixer Conguration will be saved.
21A360 Ch A n n e l MA n A g e r Us e r gU i d e
Page 25

Save Button
After choosing a Mixer Configuration location with the co n f i g u r a t i o n nu m b e r drop-down menu, click sa v e
to store the Mixer Configuration to disk. If the Mixer Configuration already exists on disk, a warning dialog
will appear. Click Ye s to overwrite the file or click no to cancel. To save to an alternate location, choose a
different Mixer Configuration from the drop-down menu and try again.
Click Yes to replace the current le; click No to cancel.
No t e : Mixer Configurations are saved to a specific file and folder structure at the root of the storage
P
device. Do not move or rename the Mixer Configuration or Mix Preset files or they will not be
recognized. See page 20.
When saving a Mixer Configuration created on the PC to disk for the first time, a warning dialog box will
appear if no Mix Preset files are associated with the newly created Mixer Configuration. Click Ye s to create a
default set of Mix Presets; the Mixer Configuration is saved to disk and a folder of 20 Mix Presets associated
with that Mixer Configuration is also created.
Click Yes to save the conguration and create a set of default Mix Presets.
Click no in the dialog box to proceed without creating any Mix Presets. You may want to do this, for
example, if a configuration was loaded into an A360 and the user has started creating and saving Mix
Presets in the A360, and you now want to change the assignment of the Ambience button to network
audio instead of the built-in mic.
22A360 Ch A n n e l MA n A g e r Us e r gU i d e
Page 26

What Gets Saved
When a Mixer Configuration is saved to disk with Mix Presets, the files written to disk look like the example
seen below. Each saved Mixer Configuration is saved with a number and the “.acg” extension; the Mix
Presets associated with that Mixer Configuration are in a folder named “Preset_Group_nn” where “nn” is the
same number as the Mixer Configuration.
This graphic shows the disk-based le structure for eight Mixer Congurations and their Mix Presets.
23A360 Ch A n n e l MA n A g e r Us e r gU i d e
Page 27

Within a Preset_Group_nn folder are the 16 Mix Presets that are associated with the 16 mix channel buttons
on the A360 along with the four Mix Presets that are associated with the four Instant Mix Recall buttons.
The 16 mixes associated with the mix channels on the A360 are saved with the name “Preset_nn (1-16)”
and the “.amp” extension; the four mixes associated with the Instant Mix Recall buttons are saved with the
name “Preset_IMR_nn (A-D)” and the “.amp” extension.
Each Preset_Group folder contains 20 Mix Preset les.
No t e : Do not move or rename the Mixer Configuration or Mix Preset files; they will not be
P
recognized by the A360 if changes are made to the file structure. See page 20.
24A360 Ch A n n e l MA n A g e r Us e r gU i d e
Page 28

Copying Mixer Configurations
If Mixer Configurations (and their associated Mix Presets) are created on an internal storage device on a PC,
they can easily be copied to a removable USB storage device for loading into an A360 Personal Mixer.
To copy all 16 Mixer Configurations and their Mix Presets to a removable device:
Connect a PC-formatted memory stick or other removable USB storage device to the 1.
computer.
Locate the 2. a
Configuration storage.
Click to highlight and select the Aviom folder. 3.
Right-click and choose 4. co p Y from the contextual menu (or use the shortcut Control-C).
Navigate to the root of the external storage device. 5.
Right-click and choose 6. pa s t e from the contextual menu (or use the shortcut Control-V).
The Aviom folder and its folder structure along with the sixteen Mixer Configurations and 7.
their Mix Presets are written to the external device.
Eject the external storage device.8.
Connect the external device to the A360 Personal Mixer and load a Mixer Configuration 9.
according to the instructions provided below.
v i o m folder at the root of the current disk that was used for Mixer
Recalling a Mixer Configuration on the A360
Once a Mixer Configuration and its associated Mix Presets have been saved onto a USB memory device,
the configuration can be loaded into the A360. Loading a configuration replaces the Mix Presets and any
previously loaded configuration in the A360; there is no undo.
To recall a configuration:
Connect the USB memory device to the USB port on the rear of the 1. A360 Personal Mixer.
Move the rear-panel switch on the A360 to the 2. pr o g r a m position; The sa v e and re c a L L LEDs
flash and the A360 mixing interface is temporarily disabled.
Press the 3. re c a L L button.
The 4. sa v e LED goes out and all 16 mix channel buttons begin to flash.
Press the numbered mix channel button that corresponds to the configuration you wish 5.
to load.
The yellow Mute LEDs beneath the mix channel buttons light in sequence as a 6.
confirmation that the configuration has been loaded successfully.
Move the rear-panel switch on the A360 to the 7. cu s t o m position to use the new channel
layout and Mix Presets.
The USB memory device can be safely removed. 8.
No t e : When a Mixer Configuration file is loaded from a USB device it replaces any previously loaded
P
channel configuration; all Mix Presets in the A360 are replaced with those stored in the Mixer
Configuration.
25A360 Ch A n n e l MA n A g e r Us e r gU i d e
Page 29

Sample Input List
Print this input list to simplify network slot management.
Device Input Source Stereo
1
2
3
4
5
6
7
8
9
10
11
12
13
14
15
16
1
2
3
4
5
6
7
8
9
10
11
12
13
14
15
16
L
R
L
R
L
R
L
R
L
R
L
R
L
R
L
R
L
R
L
R
L
R
L
R
L
R
L
R
L
R
L
R
26A360 Ch A n n e l MA n A g e r Us e r gU i d e
Page 30

Index
A
A360
Program switch 25
A360 Personal Mixer 20, 25
Custom mode 16
Adobe Reader 9
All Programs menu 8
Ambience 12, 15
application folders 9
Aviom folder 9, 20, 25
B
boot drive 18
C
Channel Button 11, 12, 16
channel map 10
Channel Status 11, 16
Computer Requirements 3
Conguration Number 17, 18, 19, 21, 22
Control Panel
Windows OS 8
Copying Mixer Congurations 25
Custom mode 1
A360 16
extension 23
external device 20
F
folder
Preset Group 23
folder path 20
folders 9
format 20
I
Input List 26
Installing 3
Instant Mix Recall 24
L
License 5
Load 17, 18
Load Button 17, 19
load Mixer Conguration 19, 20
M
D
default 18, 20
default install location 8, 9
Documents folder 9
double dash 14
Drive 18
Drive menu 20
drop-down menu 14, 15
Dual Prole Channel 12, 16
E
Error 14, 15, 16
Stereo Link 12
Mac OS 3
mix channel button 12, 16, 24
Mixer Conguration 1, 10, 16, 17, 18, 21, 25
Mix Preset 18, 19, 20, 21, 23, 24, 25
Mono 12, 14
N
Network Slot Assignment 11, 14
no slot assignment 15
27A360 Ch A n n e l MA n A g e r Us e r gU i d e
Page 31

O
OK 16
Onboard Mic 15
overwrite a le 22
P
Preset Group 23, 24
Pro16 3
Pro16e network 12
Pro64 3
Program switch
A360 25
R
radio button 11, 12
ReadMe 5
Recall button 25
Removing the Application 8
rename 18
Requirements 3
root directory 20
Windows 8 3
Windows Control Panel 4
Windows OS 8
S
Save 16, 20, 21
Save Button 17, 22
Save LED 25
Select a Mixer Conguration 18
Slot Assignment 11, 14, 15, 16
Software License 5
Status 14, 15
Stereo 12, 14
Stereo Link 11, 12, 16
Stereo Link switch 12
Storage Device 20
U
Unassigned 13, 15, 16
uninstall 4
USB memory stick 20, 25
user-created les 8
W
warning message 19, 22
What Gets Installed 9
What Gets Saved 23
Windows 7 8
28A360 Ch A n n e l MA n A g e r Us e r gU i d e
Page 32

SOFTWARE LICENSE AGREEMENT
This software license agreement (this “Agreement”) is made by and between AVIOM, INC., a
Delaware corporation (“Aviom”), and the individual or entity desiring to install or use the Software (as
dened below) (“Licensee”). By clicking the “I Agree” button, Licensee: (1) represents that Licensee has
read this Agreement in its entirety and understand its terms and conditions; and (2) agrees to each of the
terms and conditions of this Agreement. If you do not agree to each of the terms and conditions of this
Agreement, then you must click the “I Decline” button and you may not install or use the Software.
De f i n i t i o n s .
“A
v i o m Pr o d u c t ” s h a L L m e a n t h e p r o D u c t o f av i o m i n t o w h i c h t h e fi r m w a r e i s i n t e n D e D
t o b e i n s t a L L e D .
“(a) Firmware” shall mean the rmware provided by Aviom that is intended to be installed
into a specic product of Aviom.
(b) Installation Software” shall mean the software provided by Aviom to enable Licensee to
“
install the Firmware into the Aviom Product.
“(c) Software” shall mean both the Installation Software and the Firmware, collectively.
Grant of License1. . Subject to the terms and conditions of this Agreement, Aviom grants Licensee
a limited, non-exclusive license to the object code version of the Software (the “License”). The License
permits Licensee to install and use the Installation Software on a single workstation and use the Installation
Software to ash the Firmware into the Aviom Product(s). The License also grants Licensee the right to use
the Firmware on all Aviom Products owned by Licensee. Licensee may also use the documentation included
with the Software, if any, (e.g. help les, release notes, and readme.txt les) (collectively, “Documentation”)
as is reasonable and necessary for Licensee to use the Software.
Compensation2. . There is no charge for use of the Software by Licensee under the terms and
conditions of this Agreement.
Ownership3. . Licensee acknowledges that: (a) the Software is and shall remain the exclusive
property of Aviom and Aviom’s successors and assigns; (b) Licensee has no right or interest in the Software
or the Documentation other than as expressly granted in this Agreement; (c) nothing in this Agreement shall
be construed as a sale of the Software or the Documentation to Licensee; and (d) all intellectual property
rights shall remain with Aviom and the Agreement shall not transfer any intellectual property rights in, or
associated with, Software or the Documentation to Licensee.
Transfer of License; Copy Protection4. . Licensee may not rent, loan, transfer, sublicense, lease or
otherwise distribute or operate all or any part of the Software to or for the benet of any third party. Licensee
may not assign all or any part of its rights or obligations under this Agreement without Aviom’s prior written
consent and any attempt to the contrary will be void and a material breach of this Agreement. Aviom may
withhold such consent in its sole discretion.
Other Restrictions. Licensee may not reverse engineer, decompile, disassemble, modify or create derivative
works of all or any part of the Software or otherwise derive the source code to all or any part of the Software.
Without limiting the generality of the foregoing, Licensee shall not use a debugging tool to examine, operate
or alter all or any part of the Software or run all or any part of the Software through a disassembly or source
extraction system of any kind or create any derivative work of all or any part of the Software. Licensee
agrees that any information obtained in violation of the restrictions as set forth in this Section 6 will be
29A360 Ch A n n e l MA n A g e r Us e r g U i d e
Page 33

Condential Information automatically and irrevocably deemed assigned to and owned exclusively by
Aviom. Licensee will ensure that all marks, notices or legends pertaining to the origin, identity or ownership
of the Software or the Documentation remain intact and clearly legible. Notwithstanding anything contained
in this Agreement to the contrary, if Licensee is located in the European Union and Licensee determines that
access to the source code to the Software is necessary to achieve interoperability of the Software with other
programs, then Licensee may reverse engineer the Software provided that: (a) Aviom has not already made
available to Licensee the information necessary to achieve interoperability; and (b) Licensee limits its reverse
engineering activities to those parts of the Software which are necessary to achieve interoperability with such
programs.
Copyright.
The Software and the Documentation contain proprietary material of Aviom and/or material (a)
that other software and/or information suppliers have licensed to Aviom for use in the Software. This
material is protected by copyright and other laws respecting proprietary rights. Aviom and/or its licensors
retain all rights in the Software and the Documentation, including (without limitation) all copyright and
other proprietary rights worldwide in all media. Licensee may not use all or any part of the Software or the
Documentation except as expressly permitted under this Agreement and under U.S. and/or other applicable
copyright laws.
While Licensee may make a reasonable number of copies of the Software and the (b)
Documentation solely for archival/back-up purposes, no part of the Software or the Documentation may
be used, reproduced or duplicated in any medium or format beyond the express terms of this Agreement
without prior written authorization from Aviom. Any use or reproduction not authorized by this Agreement is
prohibited and shall immediately terminate this Agreement.
Licensee acknowledges that the Software and the licensed materials therein are highly (c)
proprietary in nature and that unauthorized copying, transfer or use may cause Aviom irreparable injury that
cannot be adequately compensated for by means of monetary damages. Licensee agrees that any breach
of this Agreement by Licensee may be enforced by Aviom by means of equitable relief (including, but not
limited to, injunctive relief) without the necessity of posting any bonds in addition to any other available
rights and remedies.
Termination5. .
Termination(a) . If Licensee: (i) makes or distributes, or fails to prevent others in its control
from making or distributing, copies of the Software or the Documentation (except as expressly permitted by
this Agreement) or modications or derivations thereof; or (ii) breaches any provision of this Agreement,
then this Agreement shall terminate automatically.
Effect of Termination. Upon any termination of this Agreement, Licensee shall: (i) immediately discontinue
use of the Software and the Documentation; (ii) remove the Installation Software and the Documentation
from all of Licensee’s workstations; and (iii) delete and destroy all copies of the Software and the
Documentation in its possession or control. Sections 4, 5, 6, 7, 8(b) and 9 through 12 shall survive the
termination or expiration of this Agreement for any reason in accordance with their respective terms.
Disclaimer of Warranties6. . AVIOM LICENSES AND PROVIDES THE SOFTWARE AND
THE DOCUMENTATION TO LICENSEE ON AN “AS-IS” BASIS. AVIOM HEREBY DISCLAIMS
ANY AND ALL WARRANTIES AND CONDITIONS WITH REGARD TO THE SOFTWARE AND THE
DOCUMENTATION, INCLUDING, BUT NOT LIMITED TO, ALL IMPLIED WARRANTIES AND
CONDITIONS OF MERCHANTABILITY, FITNESS FOR A PARTICULAR PURPOSE, ACCURACY,
TITLE AND NON-INFRINGEMENT.
30A360 Ch A n n e l MA n A g e r Us e r g U i d e
Page 34

Limitations of Liability7. .
General(a) . IN NO EVENT WILL AVIOM BE LIABLE FOR DAMAGES ARISING OUT
OF THE USE OR LICENSING OF THE SOFTWARE OR THE DOCUMENTATION OR ARISING
UNDER THIS AGREEMENT, WHETHER IN TORT, CONTRACT OR OTHERWISE, TO LICENSEE OR
ANY OTHER PERSON OR ENTITY INCLUDING ANY DAMAGES CAUSED TO AVIOM PRODUCTS
FROM USE OF ALL OR ANY PART OF TH E SOFTWARE.
Consequential Damages, Etc.(b) AVIOM SHALL IN NO EVENT BE LIABLE
TO LICENSEE OR ANY OTHER PERSON OR ENTITY FOR ANY LOST PROFITS, OR
CONSEQUENTIAL, INCIDENTAL, INDIRECT, PUNITIVE, SPECIAL, OR SIMILAR DAMAGES,
INCLUDING, WITHOUT LIMITATION, DAMAGES FOR LOSS OF DATA, DAMAGES TO
HARDWARE INCLUDING BUT NOT LIMITED TO AVIOM PRODUCTS, IMPAIRMENT OR
LOSS OF GOODWILL, WORK STOPPAGE, COMPUTER FAILURE OR MALFUNCTION, AVIOM
PRODUCT FAILURE OR MALFUNCTION, LOSS OF WORK PRODUCT, OR ANY AND ALL OTHER
COMMERCIAL DAMAGES OR LOSSES, DIRECT OR INDIRECT, WHETHER IN TORT, CONTRACT,
OR OTHERWISE, EVEN IF ADVISED OF THE POSSIBILITY OF SUCH DAMAGES.
THE LIMITATIONS OF LIABILITY SET FORTH IN THIS SECTION (I) REFLECT (c)
AN ALLOCATION OF RISK GIVEN THE AMOUNTS PAYABLE UNDER THIS AGREEMENT
AND (II) SHALL REMAIN FULLY OPERATIVE EVEN IF THE LIMITED REMEDY SET FORTH
IN THE AGREEMENT FAILS OF ITS ESSENTIAL PURPOSE OR IS OTHERWISE HELD TO BE
UNENFORCEABLE.
Export Regulations8. . The transfer of technology across national boundaries is regulated by the U.S.
Government. Licensee agrees that Licensee shall not: (a) acquire, ship, transport, export or re-export the
Software, directly or indirectly, into any country in violation of any applicable law (including, but not limited
to, the United States Export Administration Act and the regulations promulgated thereunder); or (b) use the
Software for any purpose prohibited by such laws.
Miscellaneous9. .
Governing law; Jurisdiction(a) . The validity, interpretation, rights and obligations of the
parties and any dispute arising under this Agreement shall be governed by the laws of the Commonwealth
of Pennsylvania applicable to contracts between residents of Pennsylvania and wholly performed in
Pennsylvania. Neither the United Nations Convention on the International Sale of Goods, the 1974
Convention on the Limitation Period in the International Sale of Goods, nor any amendment or protocol to
either of the foregoing shall apply to this Agreement or the activities undertaken under or in respect of this
Agreement. The state and federal courts with jurisdiction over Chester County, Pennsylvania shall have
exclusive jurisdiction over any case, controversy or dispute concerning this Agreement or its performance or
the Software; provided that Aviom may seek injunctive relief in any court of competent jurisdiction.
Severability(b) . If any provision of this Agreement shall be determined to be void, invalid,
unenforceable or illegal for any reason, then the validity and enforceability of all the remaining provisions
hereof shall not be affected thereby.
Failure to Exercise Rights(c) . The failure of either party to exercise any of its rights under
this Agreement for a breach thereof shall not be deemed to be a waiver of those rights or a waiver of any
subsequent breach of the same or any other provision.
Titles(d) . The titles of the Sections of this Agreement are for convenience only and do not in
any way limit or amplify the terms and conditions of this Agreement.
31A360 Ch A n n e l MA n A g e r Us e r gU i d e
Page 35

Entire Agreement(e) . This Agreement constitutes the entire understanding between the parties
with respect to the subject matter of this Agreement and supersedes any and all prior and contemporaneous
understandings, statements, warranties, representations and agreements, both oral and written, relating
thereto. This Agreement cannot be modied except in a writing signed by the party against whom
enforcement is sought.
32A360 Ch A n n e l MA n A g e r Us e r gU i d e
Page 36

1157 Phoenixville Pike, Suit e 201 • West Cheste r, PA 19380 USA
Voice: +1 610.738.9005 • Fax: +1 610.738.9950 • www.Aviom.com
 Loading...