

Page 1
FI
Assembly Instructions
SYZ84-K Stand
Thank you for purchasing AVFI’s SYZ84 Stand
This product is design for free standing mounting of SMART kapp 84®
VESA pattern 600mm x 600mm, 600mm X 400mm ONLY
Confirm all hardware is included before you begin assembly.
Read these instructions start to finish before beginning installation.
Have at least 3 people mount the display.
Note: If you cannot understand these instructions or are concerned about safety of the installation contact a qualified
contractor or contact AVFI at 1-877-834-3876
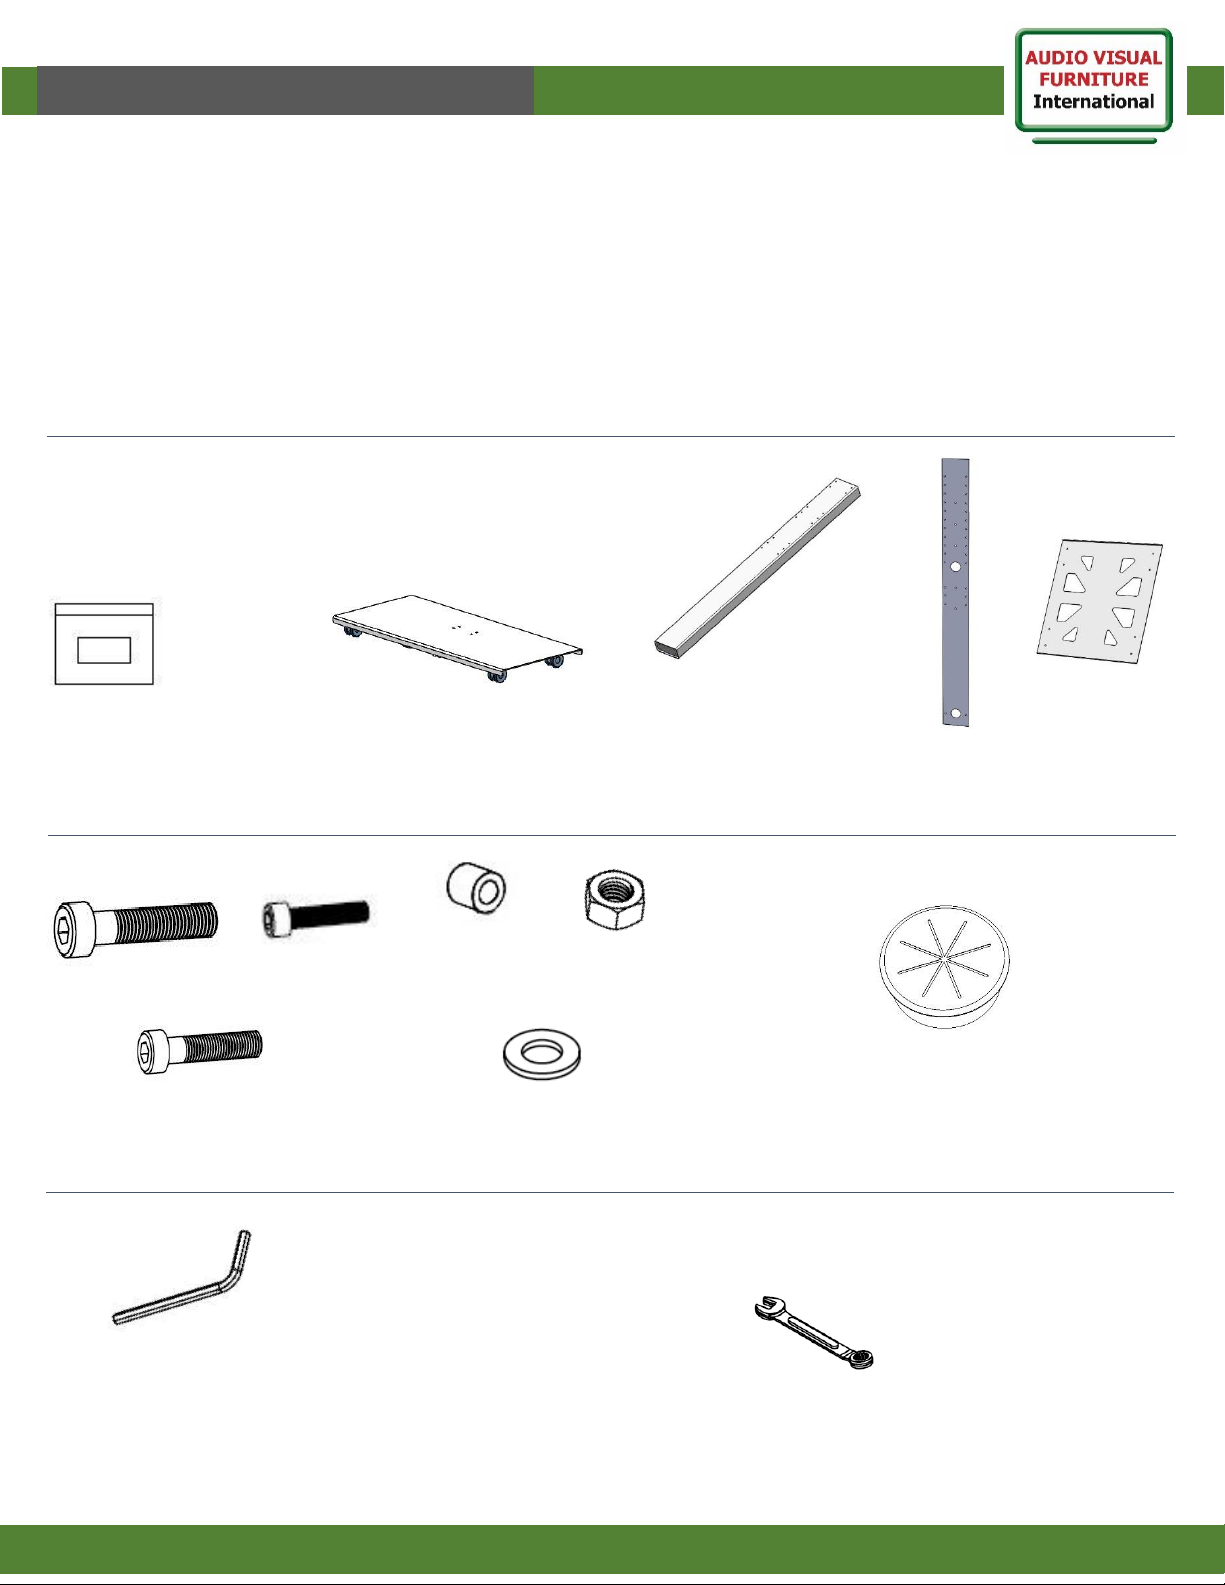
Supplied Parts
Structural Tube
(1)
Supplied Hardware Kit S84-K
Black Spacer
(4)
M10 X 35
(4)
1
www.video-furn.com
288 Don Hillock Drive |Aurora |Ontario|L4G 0G9 | 1.877.834.3876
M6 X 25
(10)
Base with wheels
(1)
Do not use different lengths fasteners
Extra hardware is included, not all hardware supplied will be used.
Hardware Bag
(2)
• Kit S84-K
• Kit Grommet
Tools supplied
Plate
(1)
Hex Key 5mm for M6 bolts
Hex Key 6mm for M8 bolts
Hex Key 8mm for M10 bolts
Back Plate
(1)
M6 Nut
(6)
M6 Washer
(6)
Grommet
(2)
Supplied Kit Grommet
M8 X 30
(6)
10mm wrench
Tools required
Page 2
4
VF
I
Assembly Instructions
SYZ84-K Stand
www.video-furn.com
288 Don Hillock Drive |Aurora |Ontario|L4G 0G9 | 1.877.834.3876
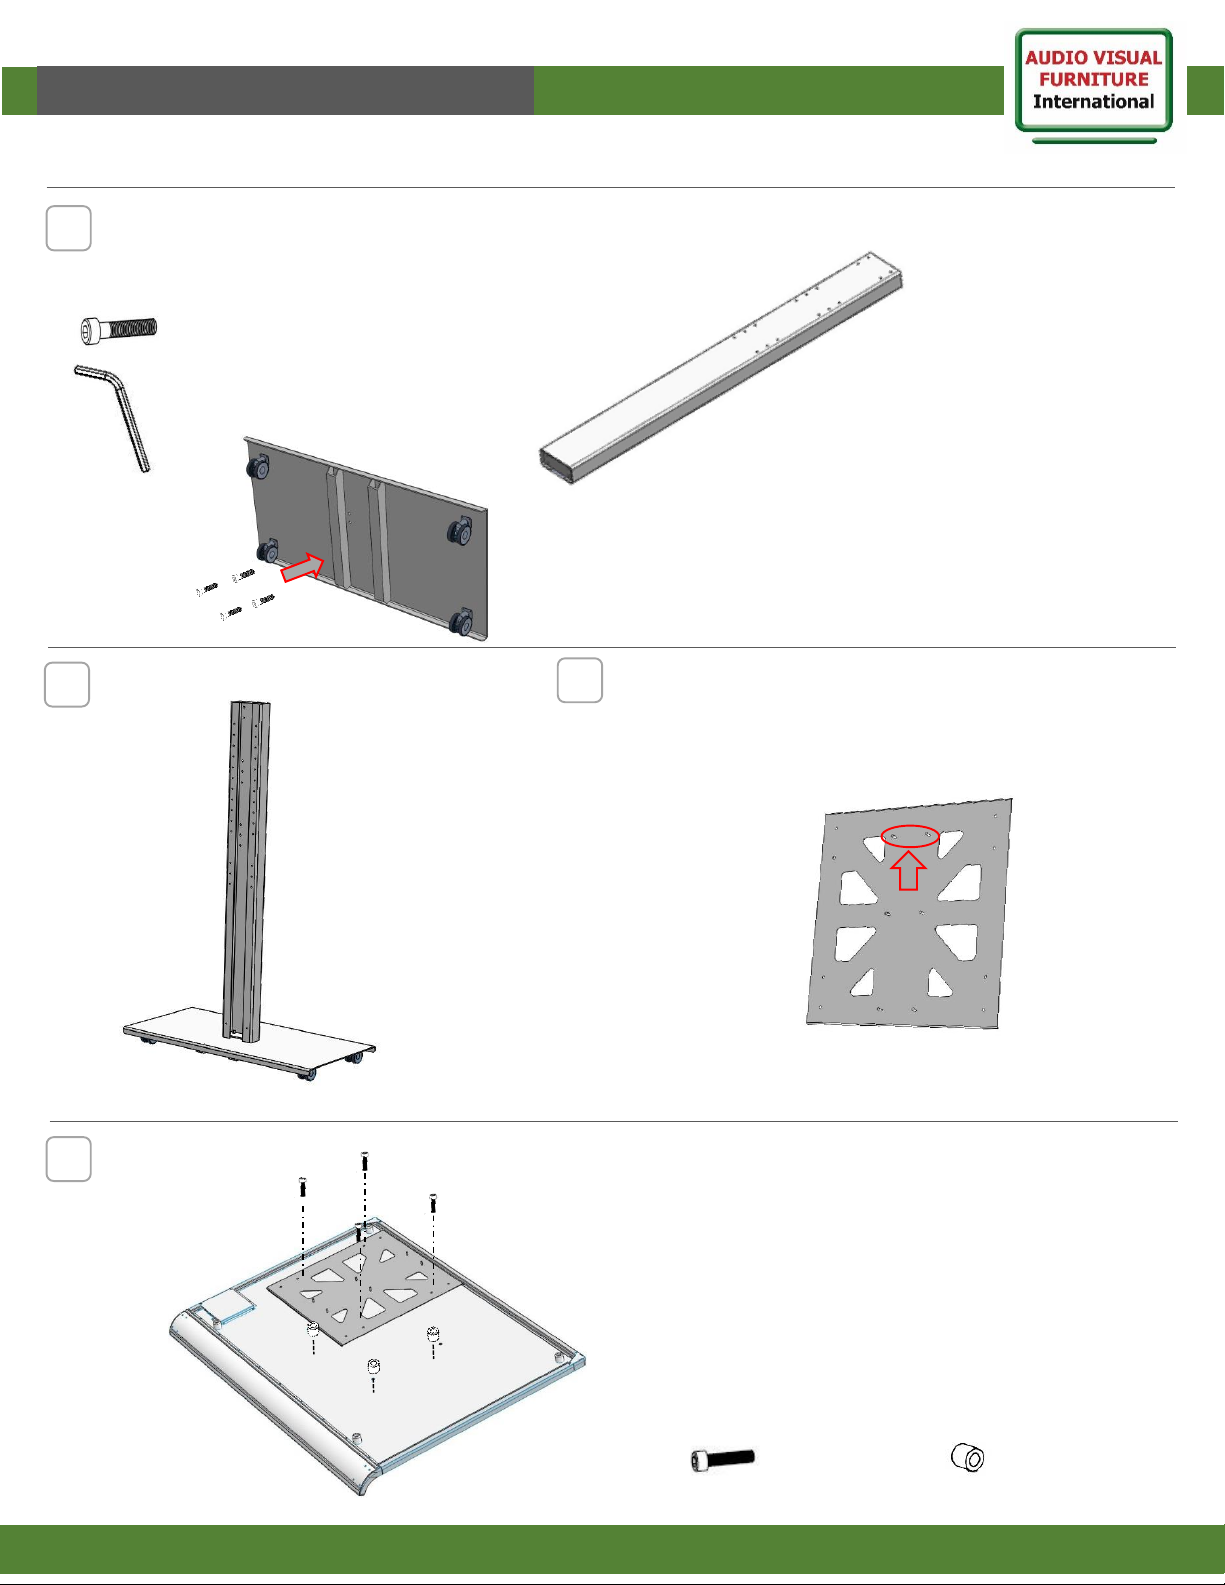
Place parts on non abrasive surface; install base to structure tube
From under the base hand tighten all 4 X M10
bolts onto the holes attaching the structural
base to it. Tighten securely with Hex Key
1
2
Lift the stand
M10 X 35
(4)
M8 X 30 mm (4)
Black Spacer (4)
3
For a SMART kapp 84® insert ( 4) M8 X 30 mm
into hole of monitor having the spacers in
between the monitor and the bracket. Extra
hardware is provided.
Use the Hex key to tighten. DO NOT
substituted or OVERTHIGHTEN AS THIS CAN
DAMAGE OR PUNCTURE THE MONITOR.
2
For suggested SMART kapp 84® height, the
edge pem studs that are closer to the triangle
cutouts should go on the top.
Hex Key 8mm for M10 bolts
Page 3
7
VF
I
Assembly Instructions
SYZ84-K Stand
3
www.video-furn.com
288 Don Hillock Drive |Aurora |Ontario|L4G 0G9 | 1.877.834.3876
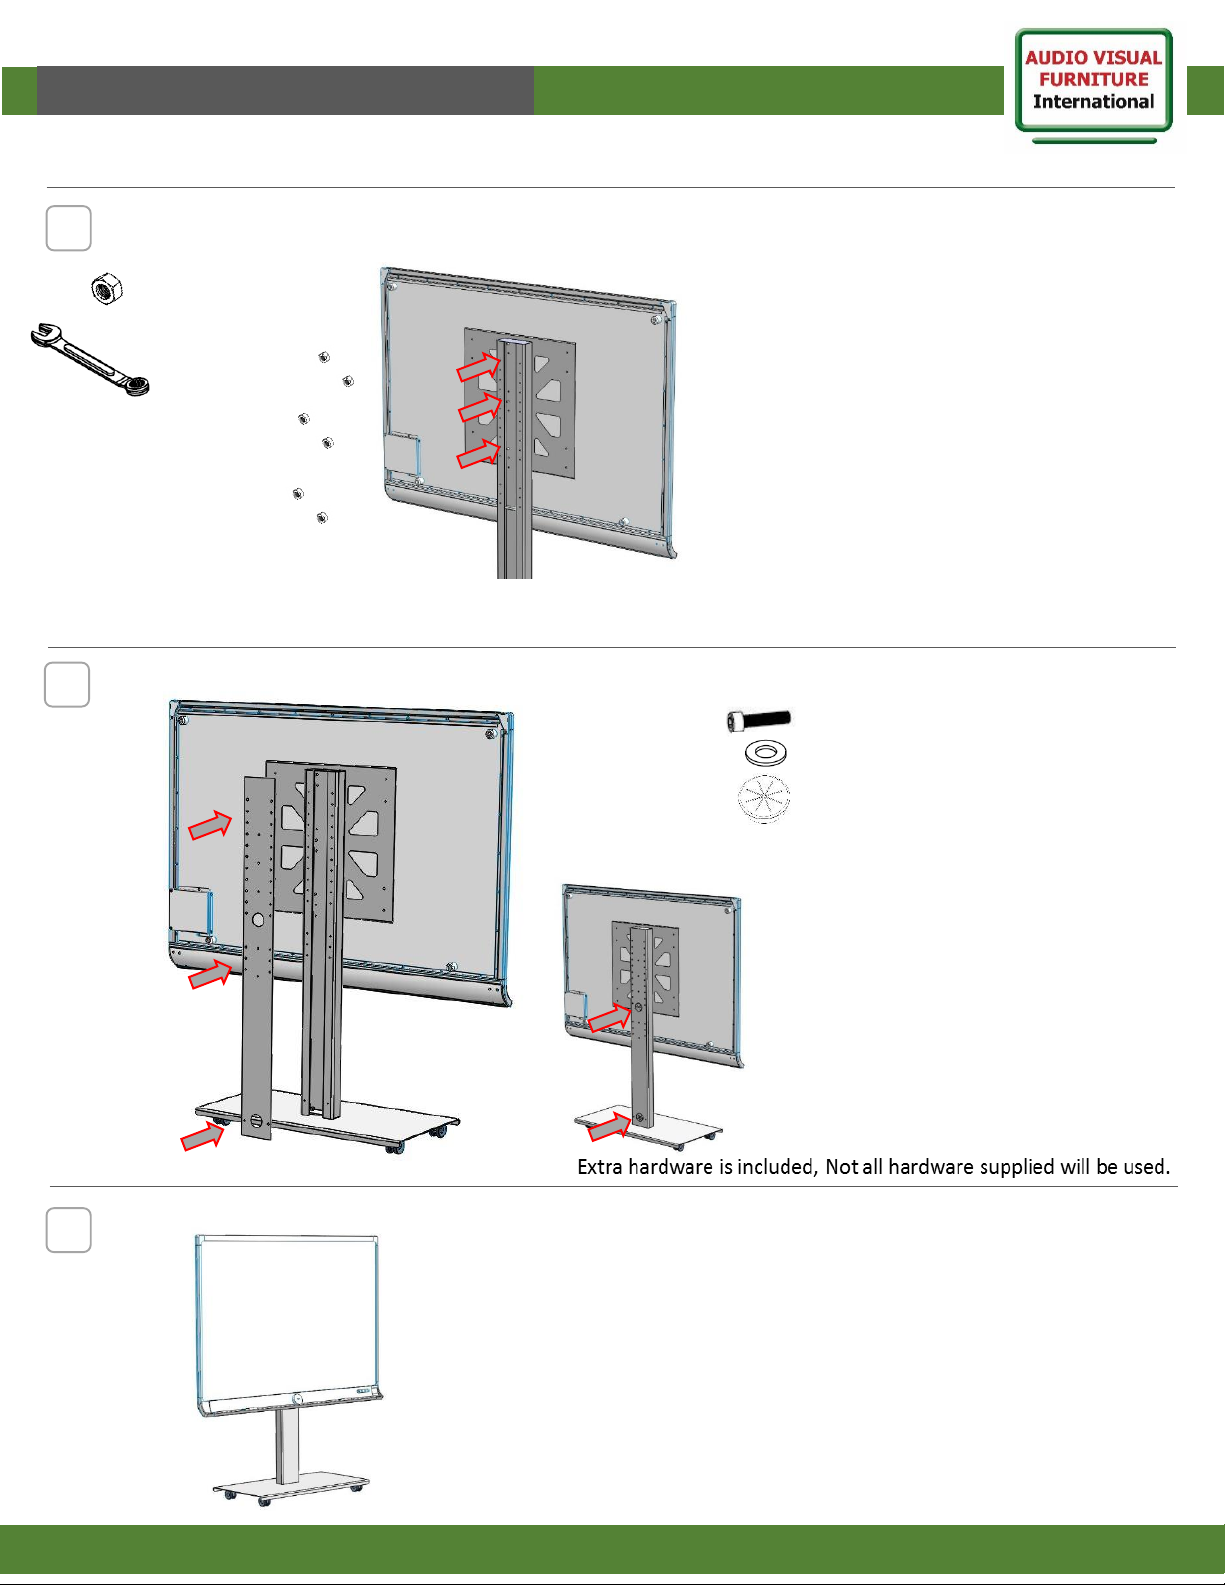
Assembly is complete, enjoy your stand
5
6
Place back plate onto structural tube and
insert M6 Washer (6) with M6 X 25 (6) onto
top, middle and bottom to secure the back
plate. Use the Hex key to tighten
Insert 2 round grommets onto the plate
M6 X 25 (6)
Insert the pem stud of the bracket attached to
the SMART kapp84® to the structural tube and
place the nut onto each pem stud. Tighten
securely with a wrench.
M6 Nut (6)
M6 Washer (6)
Grommet (2)
10mm wrench
 Loading...