

Page 1
VF
I
Assembly Instructions
TP200-WM stand
Thank you for purchasing AVFI’s TP200-WM Stand.
This product is designed for stud or masonry mounting to a wall.
Confirm all hardware is included before you begin assembly.
Read these instructions start to finish before beginning installation.
Note: If you cannot understand these instructions or are concerned about safety
of the installation contact a qualified contractor or contact AVFI at 1-877-834-3876.
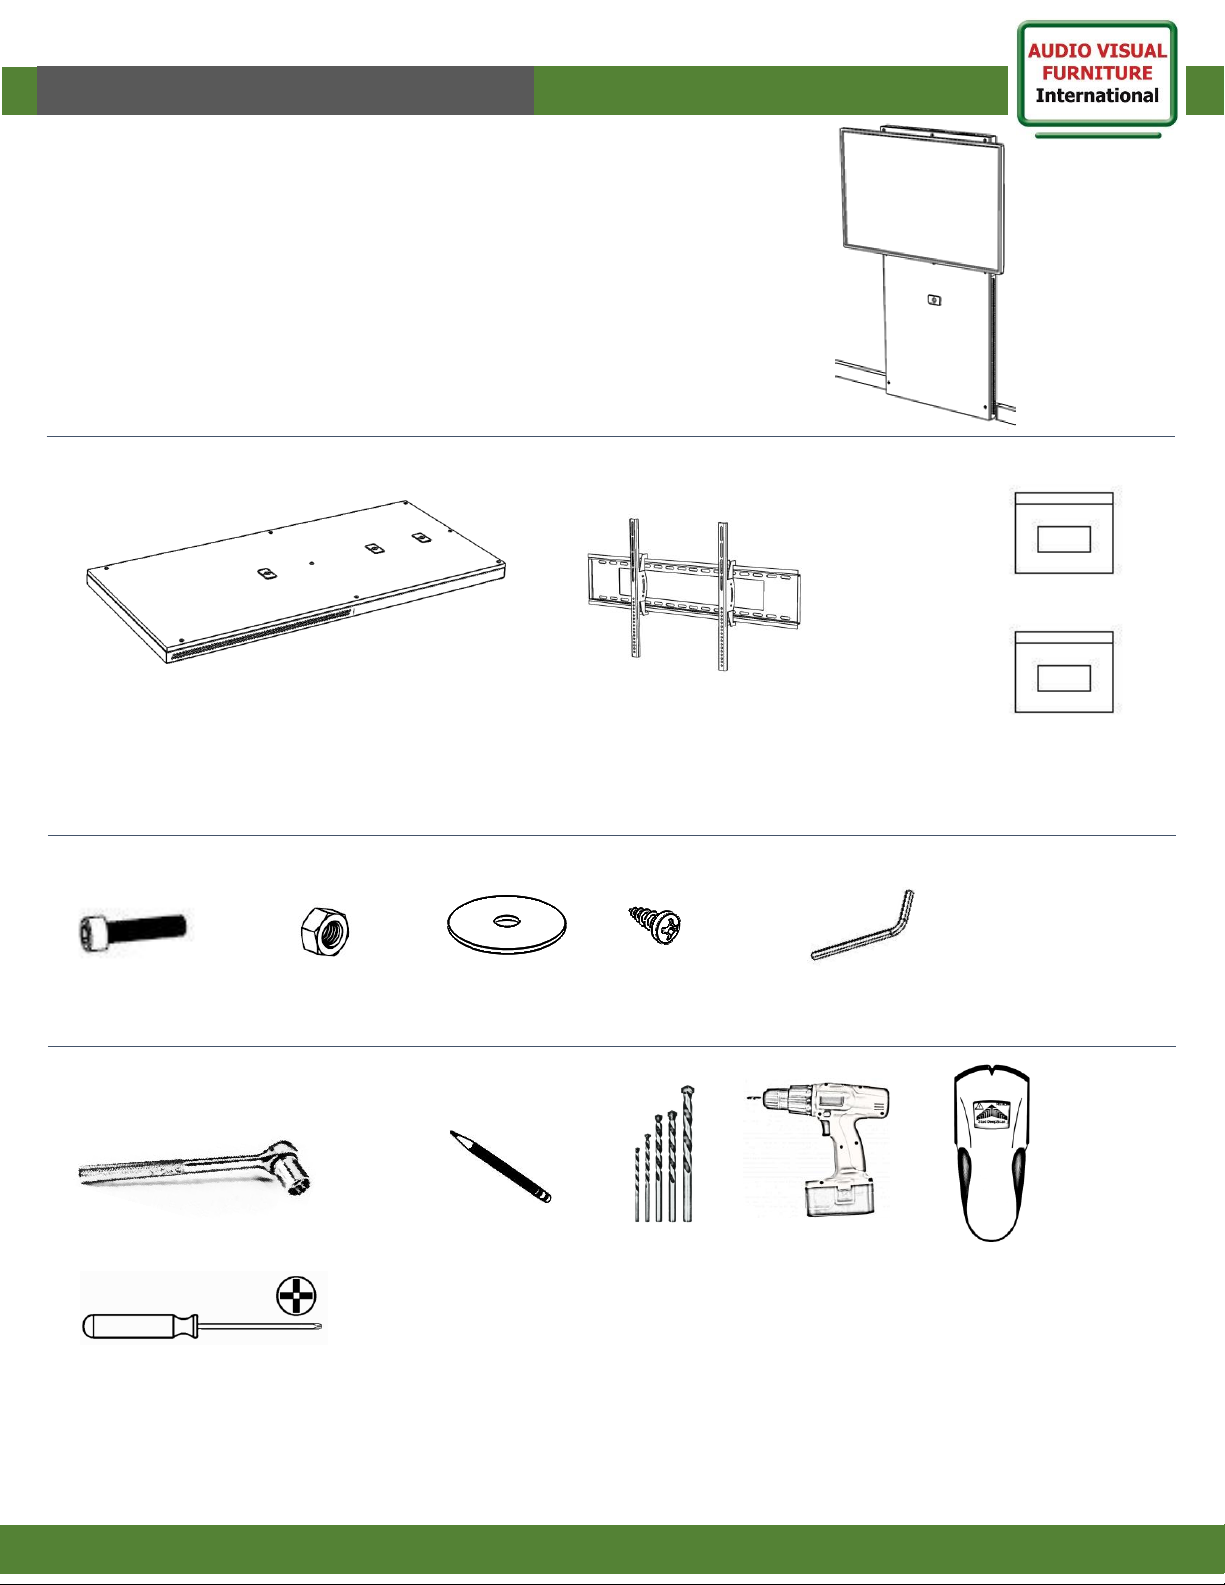
Supplied Parts
Supplied Hardware (additional to hardware bags)
1
www.video-furn.com
288 Don Hillock Drive |Aurora |Ontario|L4G 0G9 | 1.877.834.3876
M8 X 40
(4)
Tower
Not all hardware supplied will be used.
TV Bracket bag
Tools required
TV Bracket
(inside tower unit)
M8 Nut
(4)
Fender Washer
(4)
LFT-WM hardware bag
Stud Finder
Pencil
Socket set
Philips Screwdriver +
Drill bit set
Drill
Allen Key for Panel bolts
(1)
5/8” Screw
(3)
Page 2
VF
I
Assembly Instructions
TP200-WM Stand
www.video-furn.com
288 Don Hillock Drive |Aurora |Ontario|L4G 0G9 | 1.877.834.3876
1
2
3
2
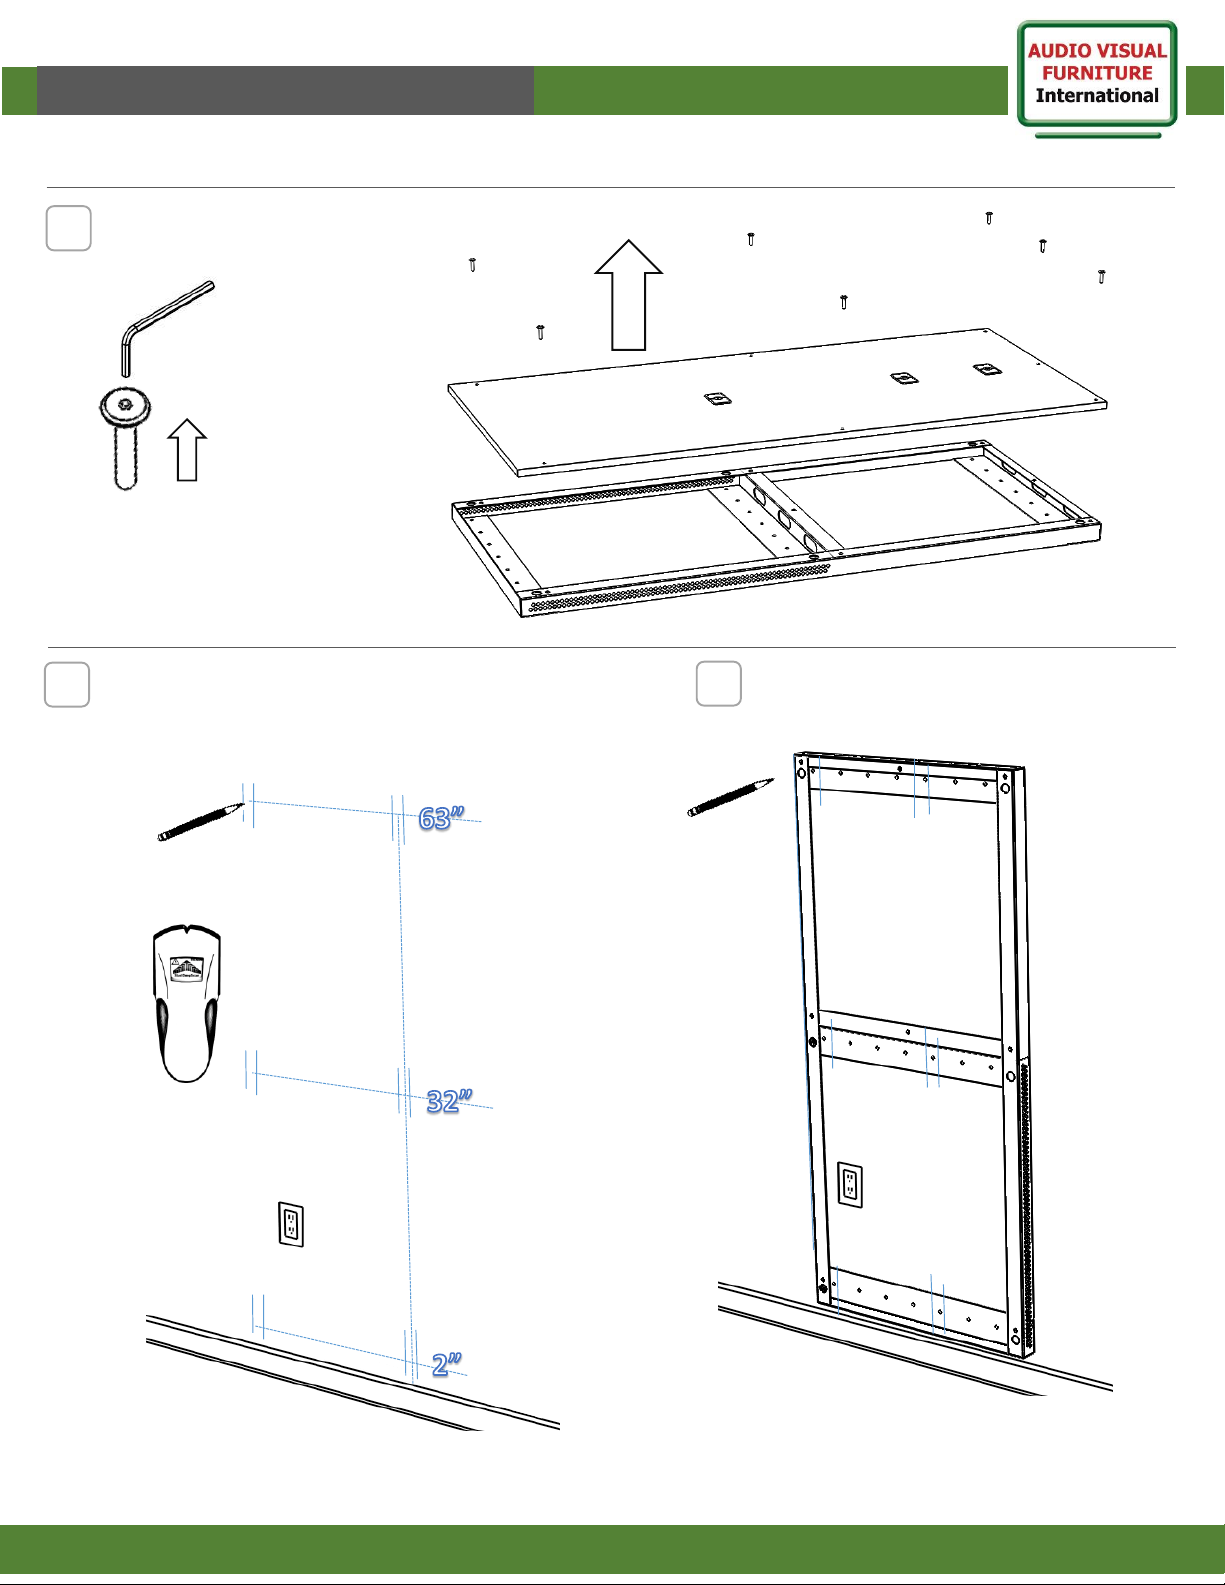
Remove panel bolts and lift off front panel.
Remove TV mount found inside.
Locate/mark studs using stud finder
If masonry, skip to next step.
Locate unit over marks and mark
Hole drilling locations
Unit can be on floor or above baseboard (shown)
Baseboard may require cut to accommodate.
Page 3
5
VF
I
Assembly Instructions
3
www.video-furn.com
288 Don Hillock Drive |Aurora |Ontario|L4G 0G9 | 1.877.834.3876
4
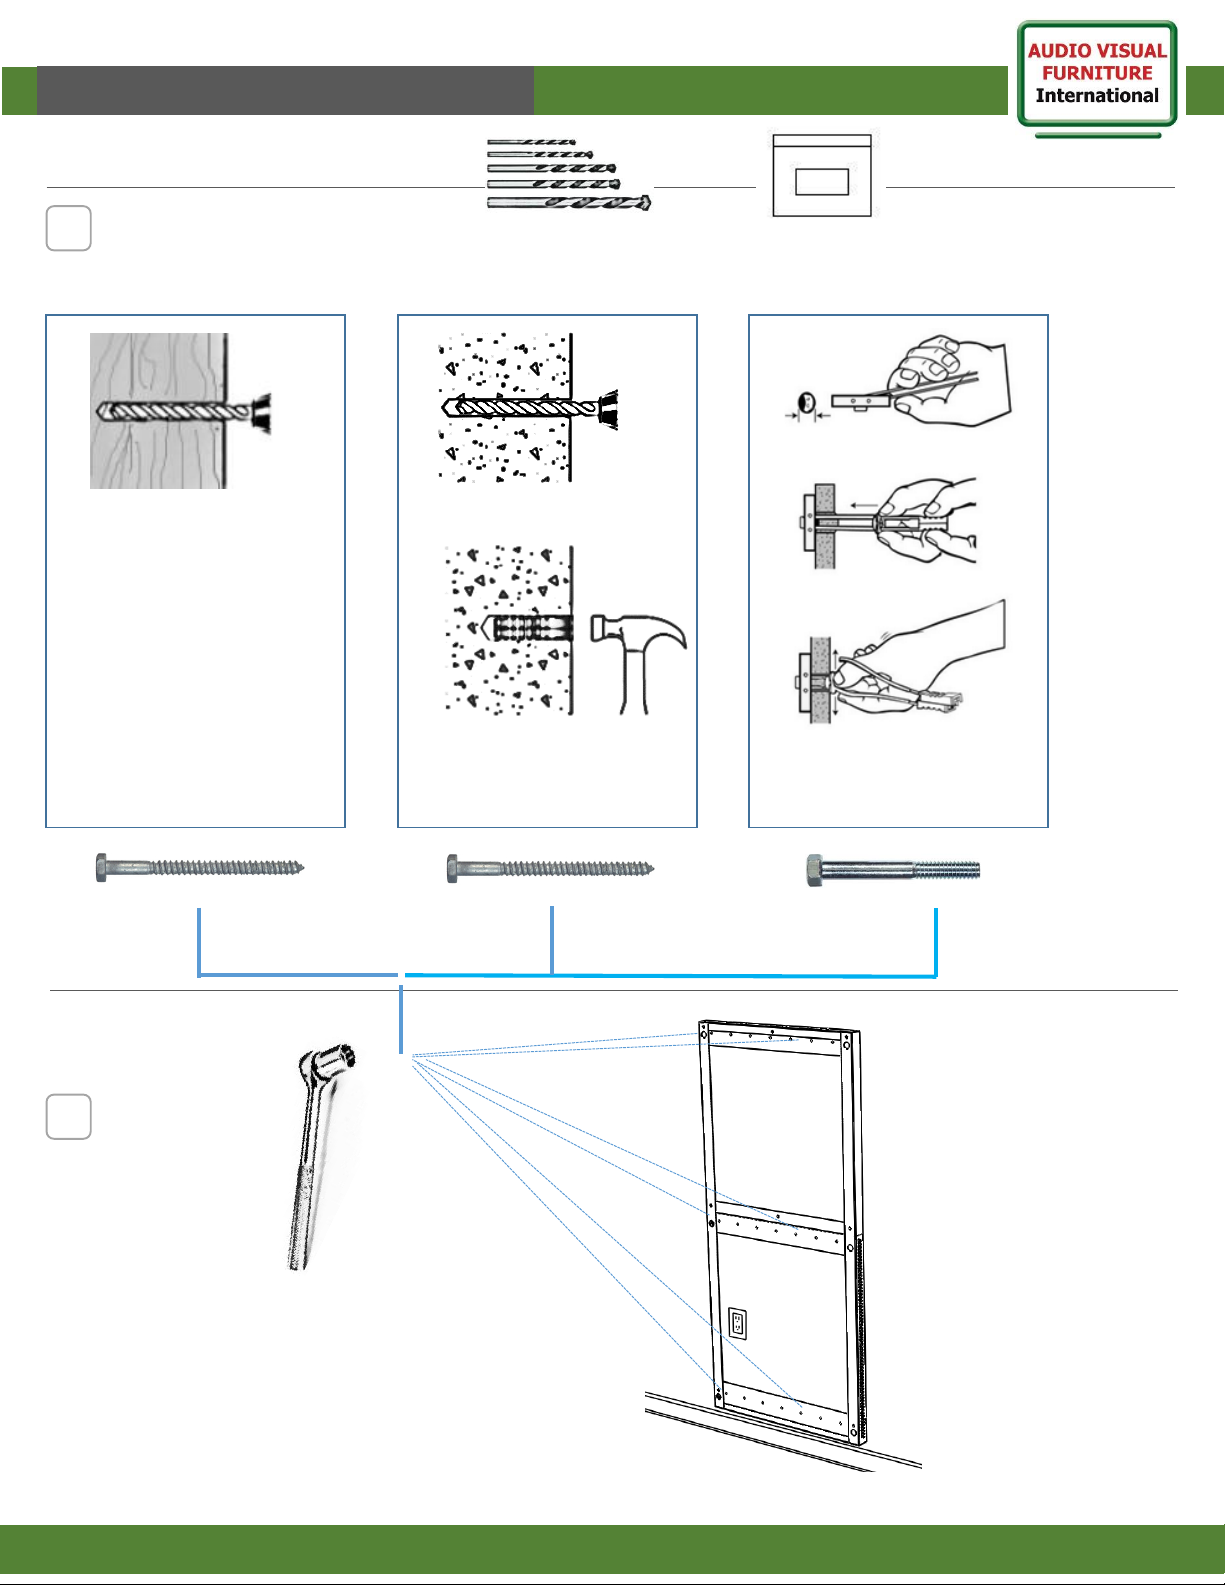
1 / 2“ Drill
Lag Shield
1 / 4“ Drill
1 / 2“ Drill
Wood
Masonry
Drywall
Toggle bolts
TP200-WM Stand
LFT-WM hardware bag
Drill bit set
Bolts
(6)
Drill wall and prepare for Bolts.
Install bolts
using socket
set.
Page 4
VF
I
Assembly Instructions
TP200-WM Stand
www.video-furn.com
288 Don Hillock Drive |Aurora |Ontario|L4G 0G9 | 1.877.834.3876
6
9
4
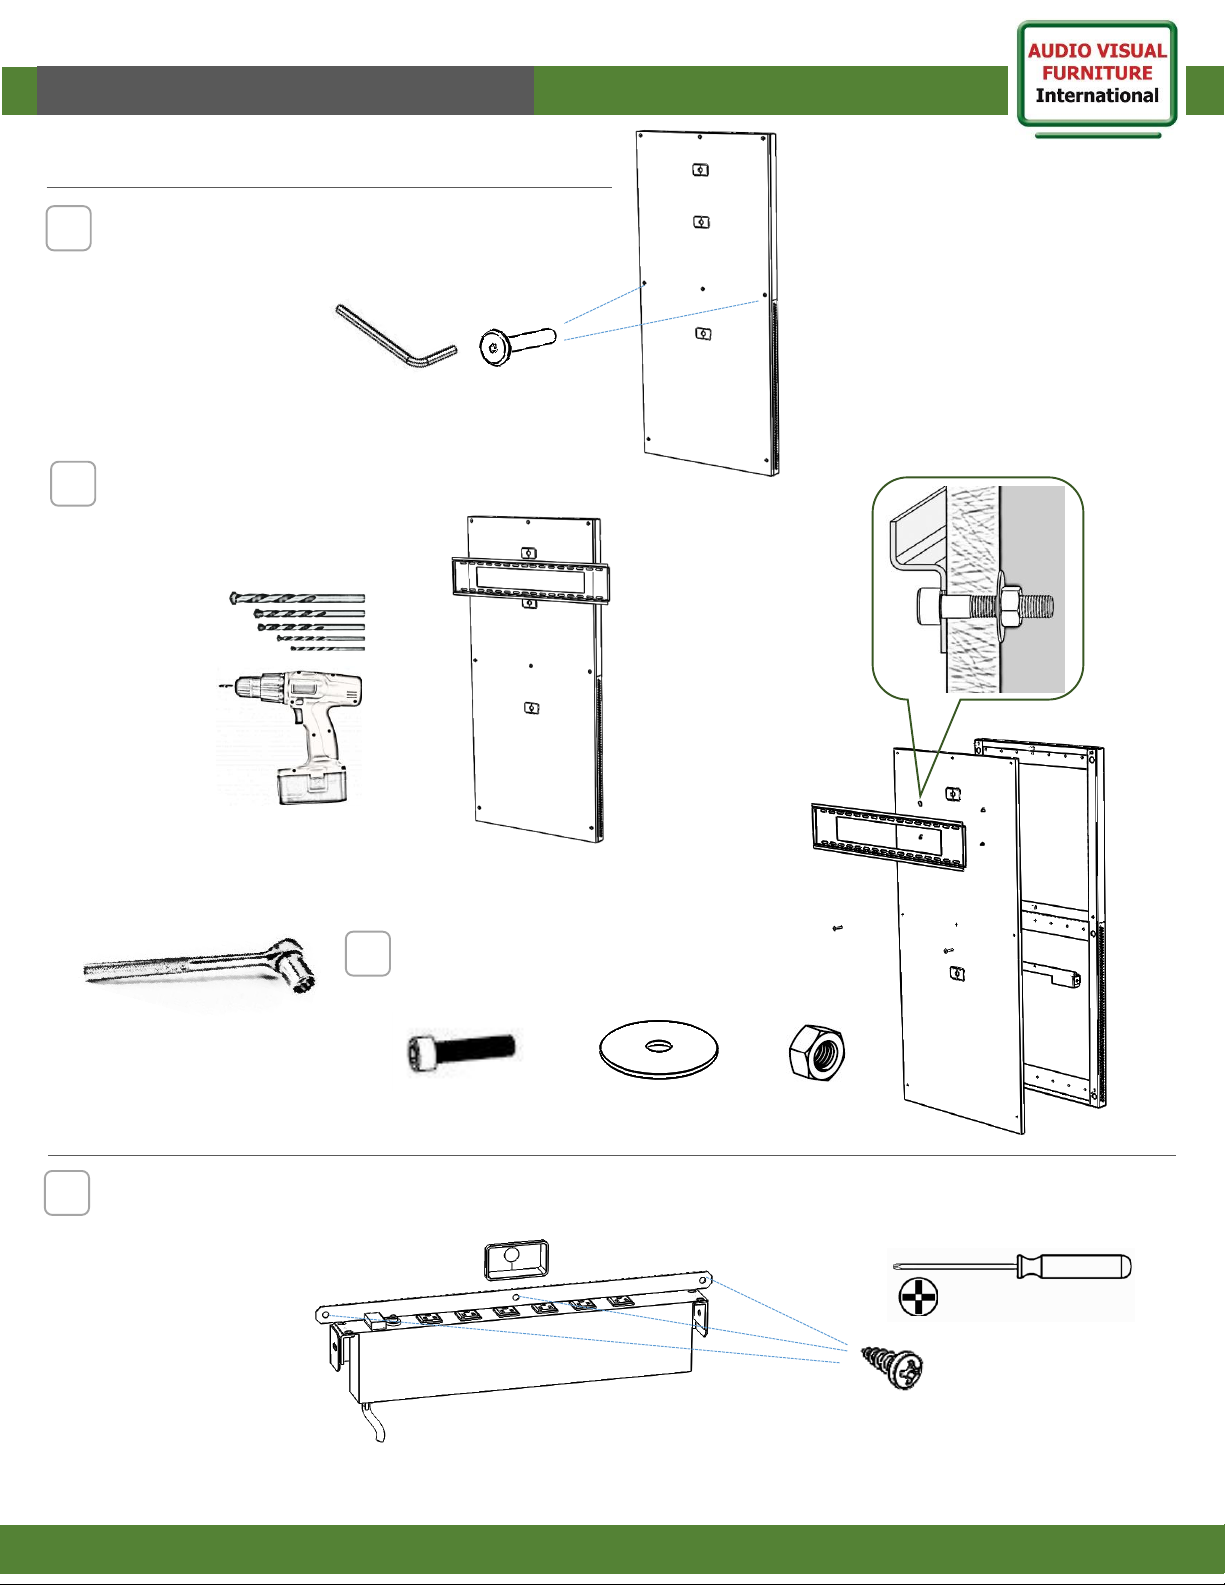
Temporarily Install front panel with 2 bolts.
Panel bolt
(2)
7
Position and level TV Wall bracket
At desired height.(remove grommets if required)
Drill through front panel
with 11/32” bit.
8
Unbolt Panel from wall.
Attach TV Wall bracket Using M8x40 through TV
bracket and Panel, fender washer then nut.
M8 X 40
(4)
M8 Nut
(4)
Fender Washer
(4)
Install 1U Rack equipment (optional)
Then attach vertical rack to back of panel
using 5/8” wood screws.
Page 5
VF
I
Assembly Instructions
TP200-WM Stand
www.video-furn.com
288 Don Hillock Drive |Aurora |Ontario|L4G 0G9 | 1.877.834.3876
11
5
Panel bolt
(8)
10
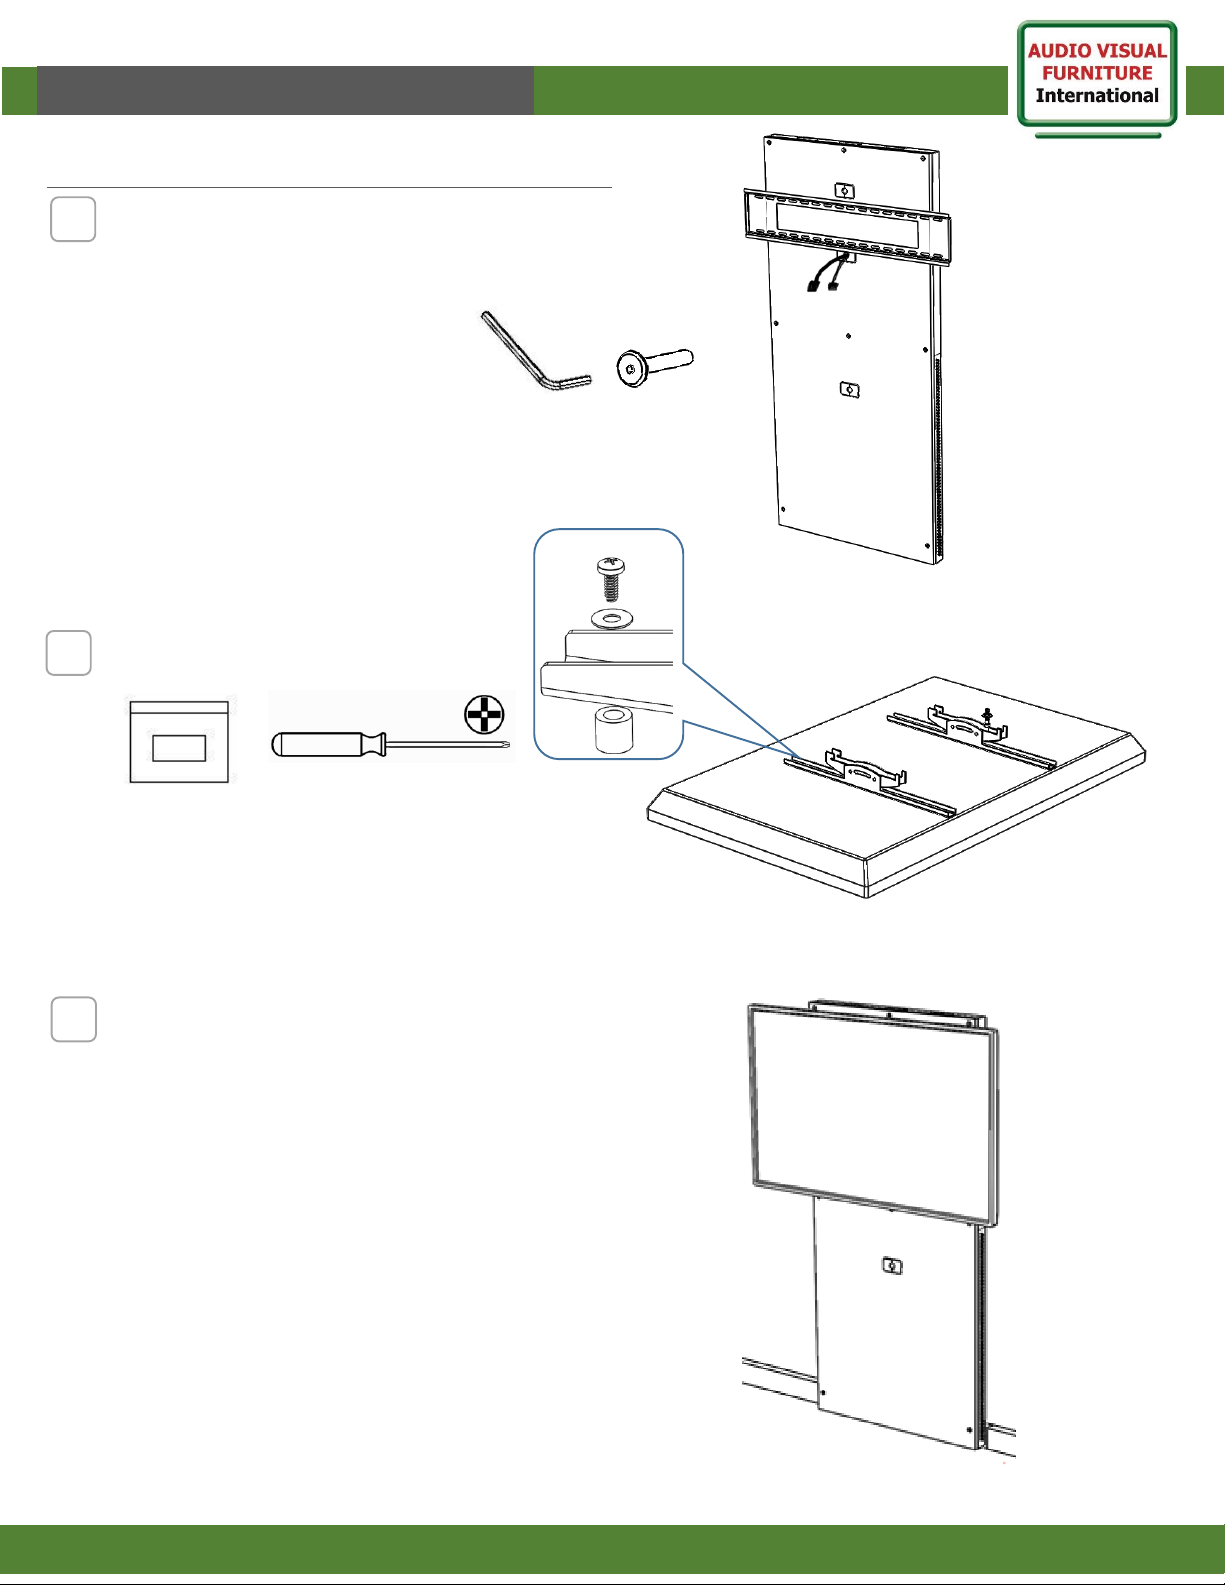
Run all cables/wiring to wall and
through panel to TV.
Reinstall panel using panel bolts.
Mount Brackets to TV using Bracket bag kit.
Use spacers only if required. (TV rear not flat)
TV Bracket bag
12
Hang TV (2 People recommended)
Connect Cables and test.
Available Options:
TVCB- Camera Shelf for Above TV.
TVCB-XL- Large Camera Shelf for Above TV 70”+
PB- 6 outlet power bar.
Finished.
 Loading...