

Page 1
VF
I
Assembly Instructions
Stand60 Eye-level stand for Speakertrack60
Thank you for purchasing AVFI’s Stand60.
This product is designed for mounting a Cisco Speakertrack60 Camera on a Credenza or
tabletop at eye-level.
Confirm all hardware is included before you begin assembly.
Read these instructions start to finish before beginning installation.
Note: If you cannot understand these instructions or are concerned about safety
of the installation contact a qualified contractor or contact AVFI at 1-877-834-3876.
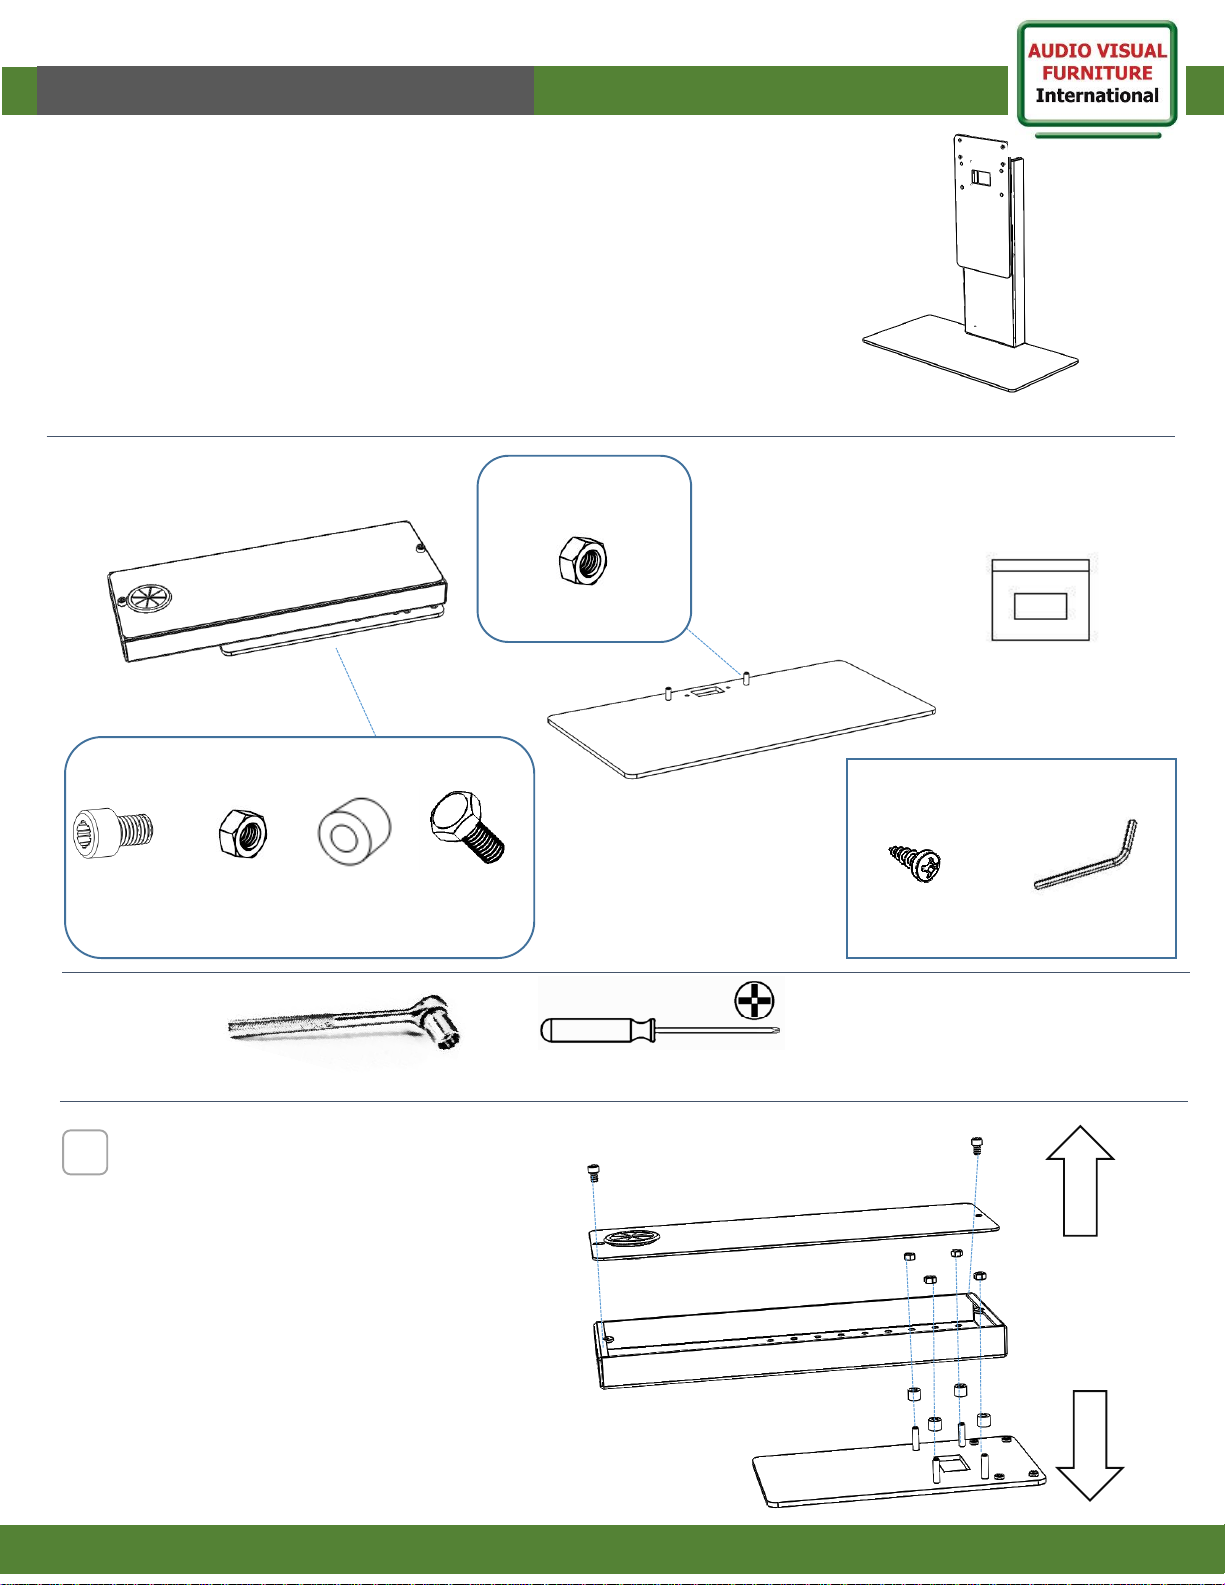
Supplied Parts
www.video-furn.com
288 Don Hillock Drive |Aurora |Ontario|L4G 0G9 | 1.877.834.3876
M8 X 12
(2)
Hardware bag
Tools required
5/16 Nut
(4)
Socket set Philips Screwdriver +
Allen Key for M8
(1)
3/4” Screw
(2)
Base
Supplied Hardware
(inside hardware bag)
5/16 Nut
(2)
Tower
1/2 Spacers
(4)
¼-20 x 3/4
Hex bolts
(4)
Supplied Hardware (installed on parts)
Supplied Hardware
(installed on parts)
1
Remove rear panel bolts and lift off panel.
Remove 4 nuts inside and remove camera
mounting plate. (disassemble unit)
Page 2
VF
I
Stand60 Assembly Instructions
www.video-furn.com
288 Don Hillock Drive |Aurora |Ontario|L4G 0G9 | 1.877.834.3876
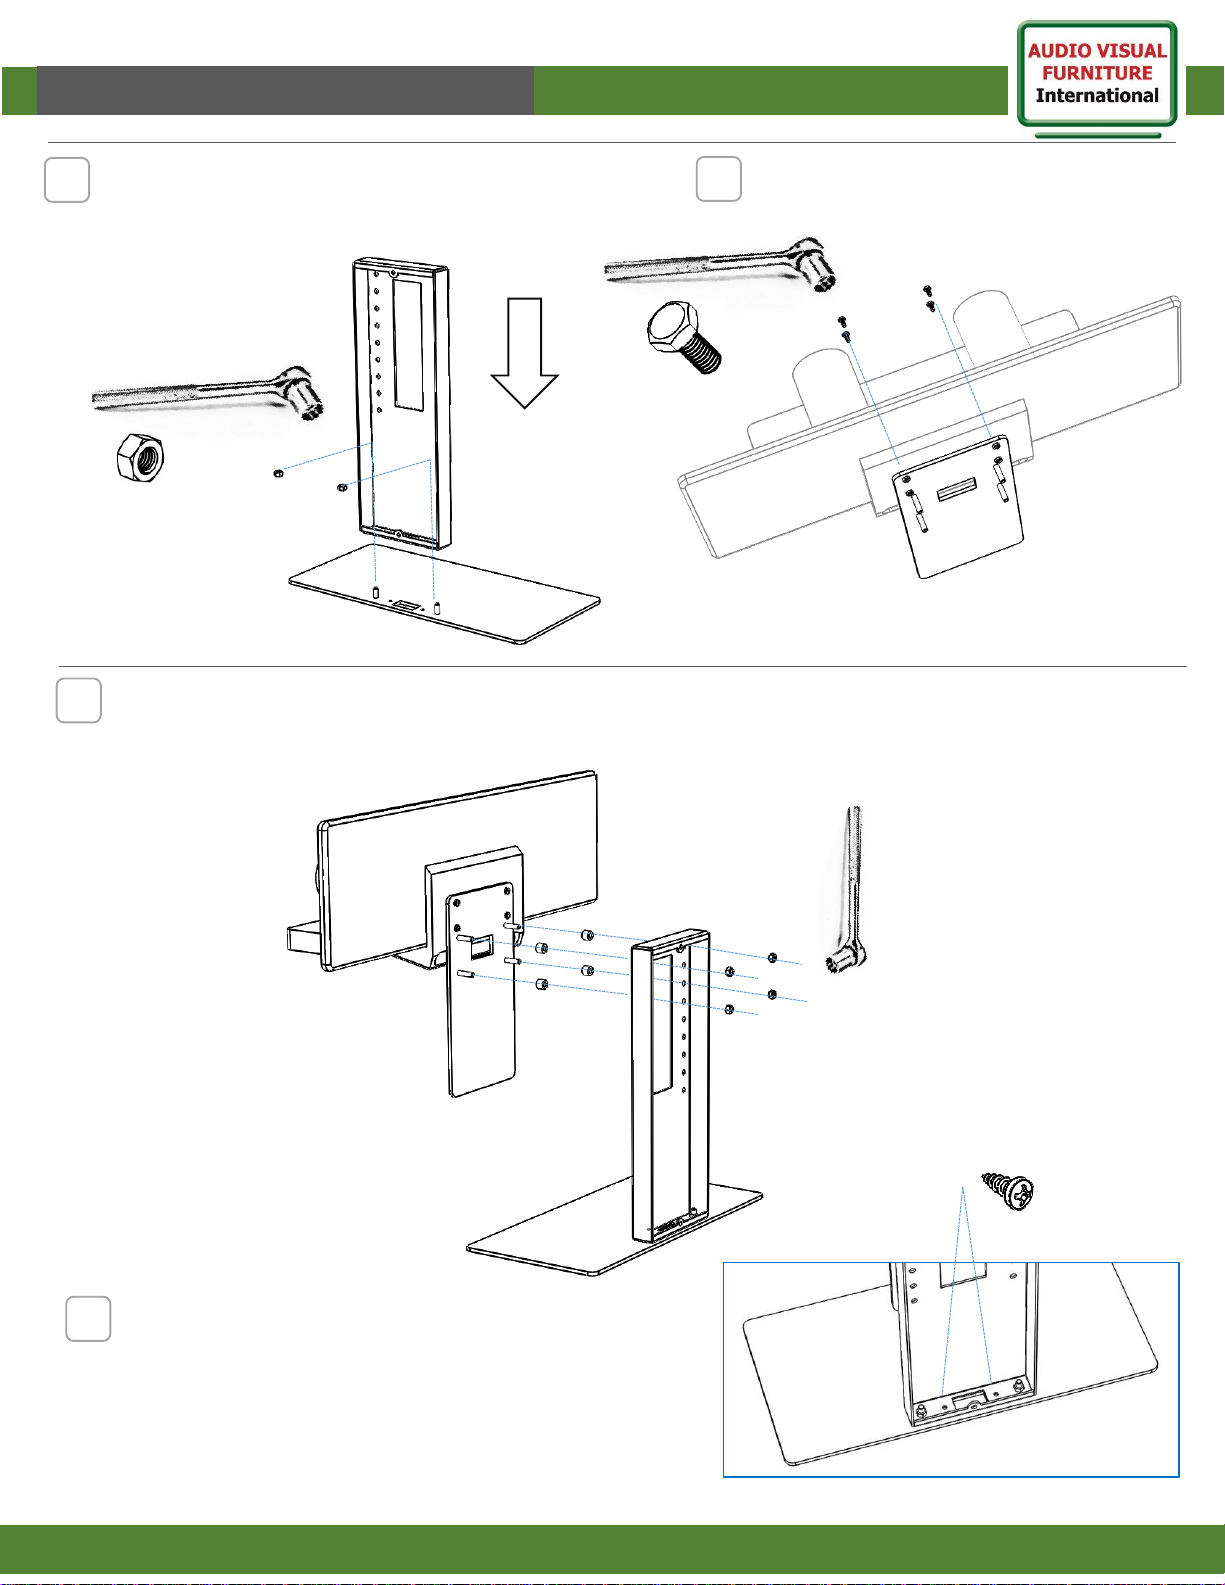
2
3
2
Attach Tower to Base using supplied nuts.
Attach Speaktrack60 to mounting plate
Using Speakertrack60 wall mounting procedure
and ¼-20 Hex bolts provided.
4
Adjust to Eye level (Commonly 45” from floor to camera lens center)
Attach plate using spacers and supplied nuts (x4)
5
Run cables/wiring through inside of unit.
Base can be screwed to tabletop surface if desired (optional)
Test unit and install back cover.
(optional)
Finished.
 Loading...