

Page 1
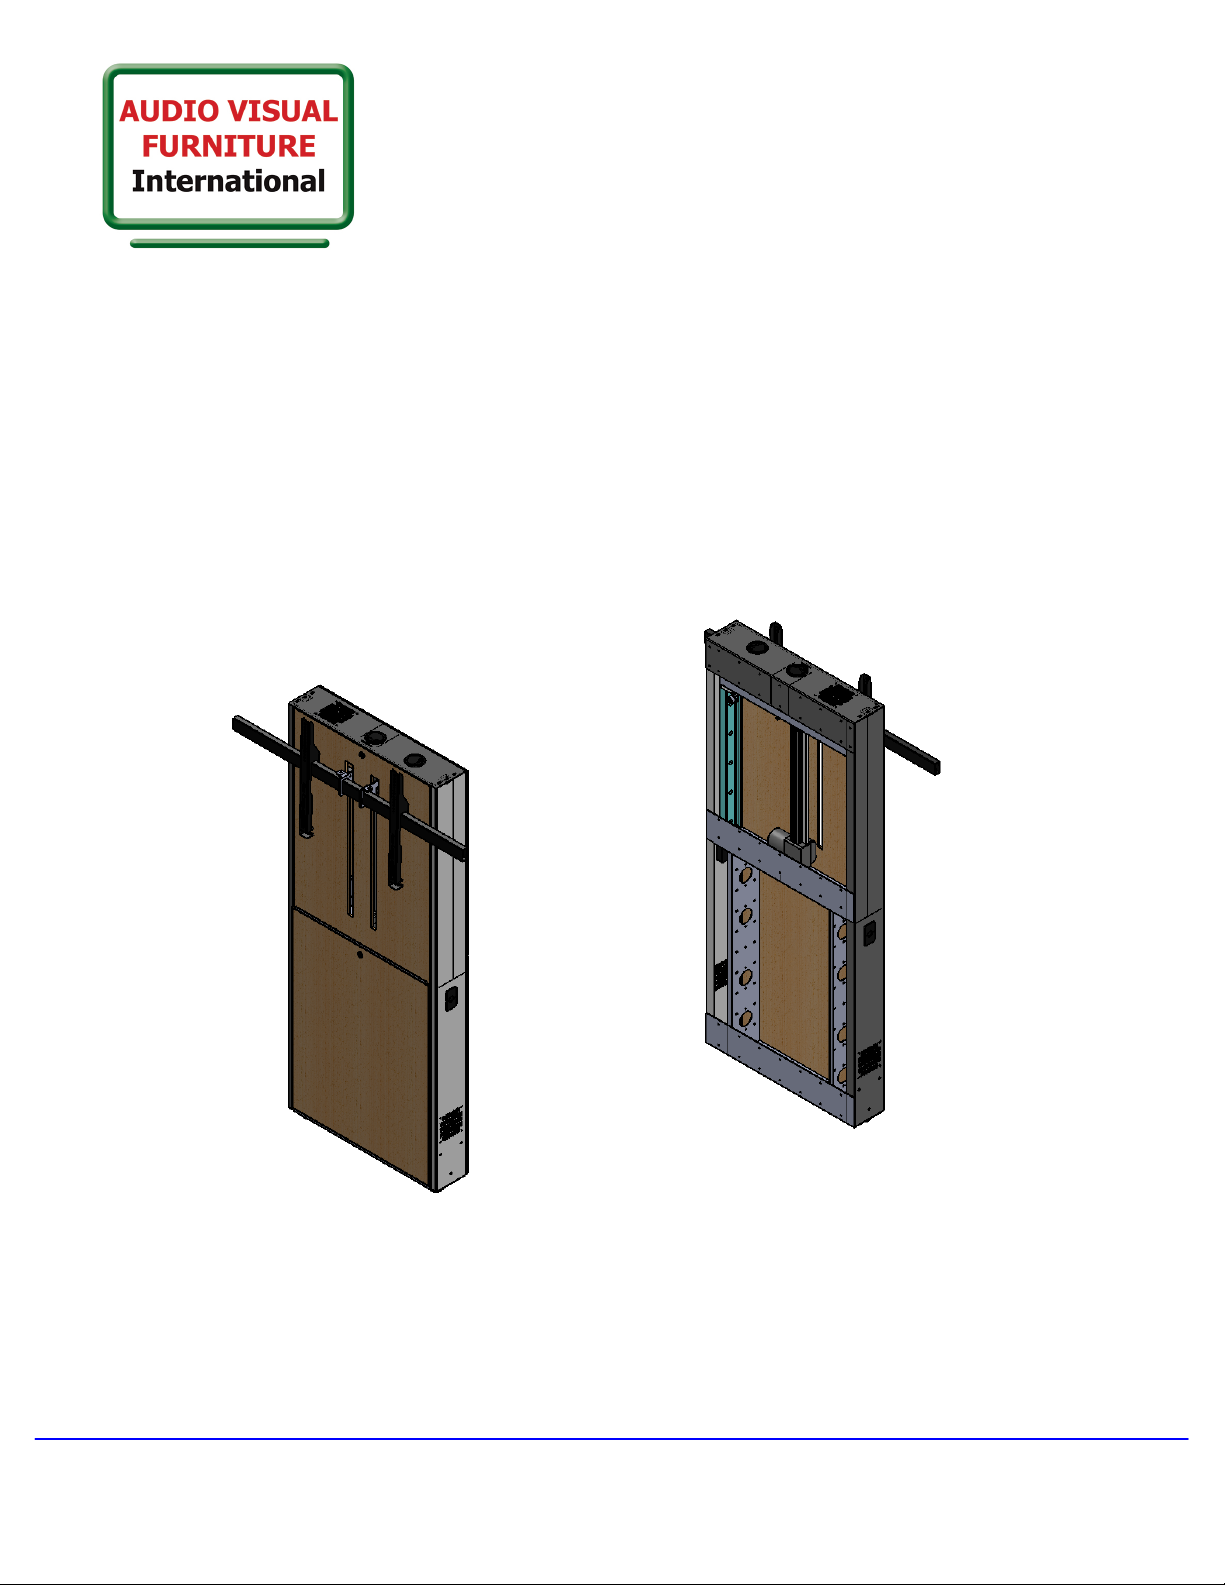
LFT-7000WM
Assembly and Setup Instructions
Note:
If you cannot understand these instructions or are concerned about safety of the installation
Contact a qualified contractor or contact AVFI at 1-877-834-3876.
Confirm all hardware is included before you begin assembly.
Not all hardware supplied will be used depending on the manufacturer of your display/s.
Page 1
of 8
AUDIO VIDEO FURNITURE INTERNATIONAL
288 Don Hillock Drive Aurora , Ontario L4G 0G9 www.video-furn.com
Toll Free: 1-877-834-3876 Fax: 1-905-751-1488 Local:905-751-1459
Page 2
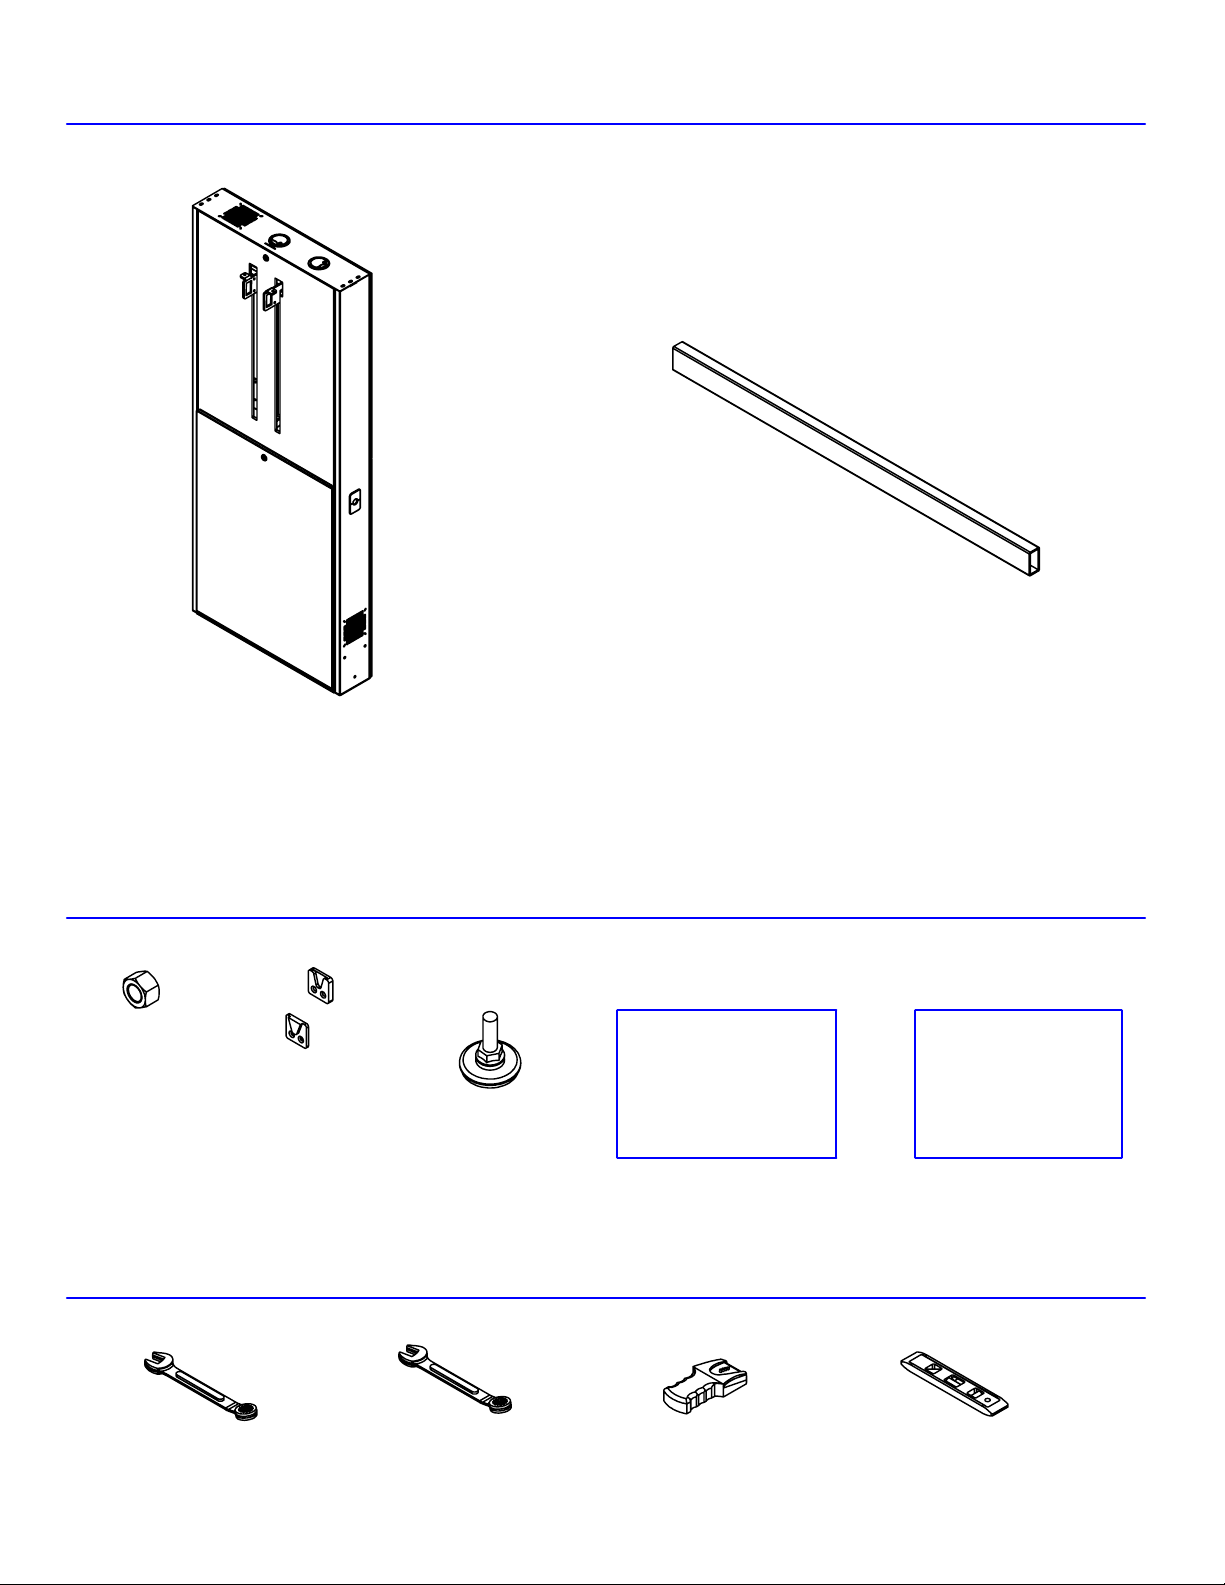
SUPPLIED PARTS
PM-Tube-XL
(1)
Page 2
of 8
LFT-7000
Assembled Unit
SUPPLIED HARDWARE
M8 HEX NUT
(6)
TOOLS REQUIRED: (not included)
Self Adhesive
clips on
remote
(1 pair)
2" Leveling
Foot
(2)
TV
Hardware Bag
(1)
Wall Mount
Hardware
bag
(1)
1/2" WRENCH
3/4" WRENCH
STUD FINDER
LEVEL
Page 3
Page 3
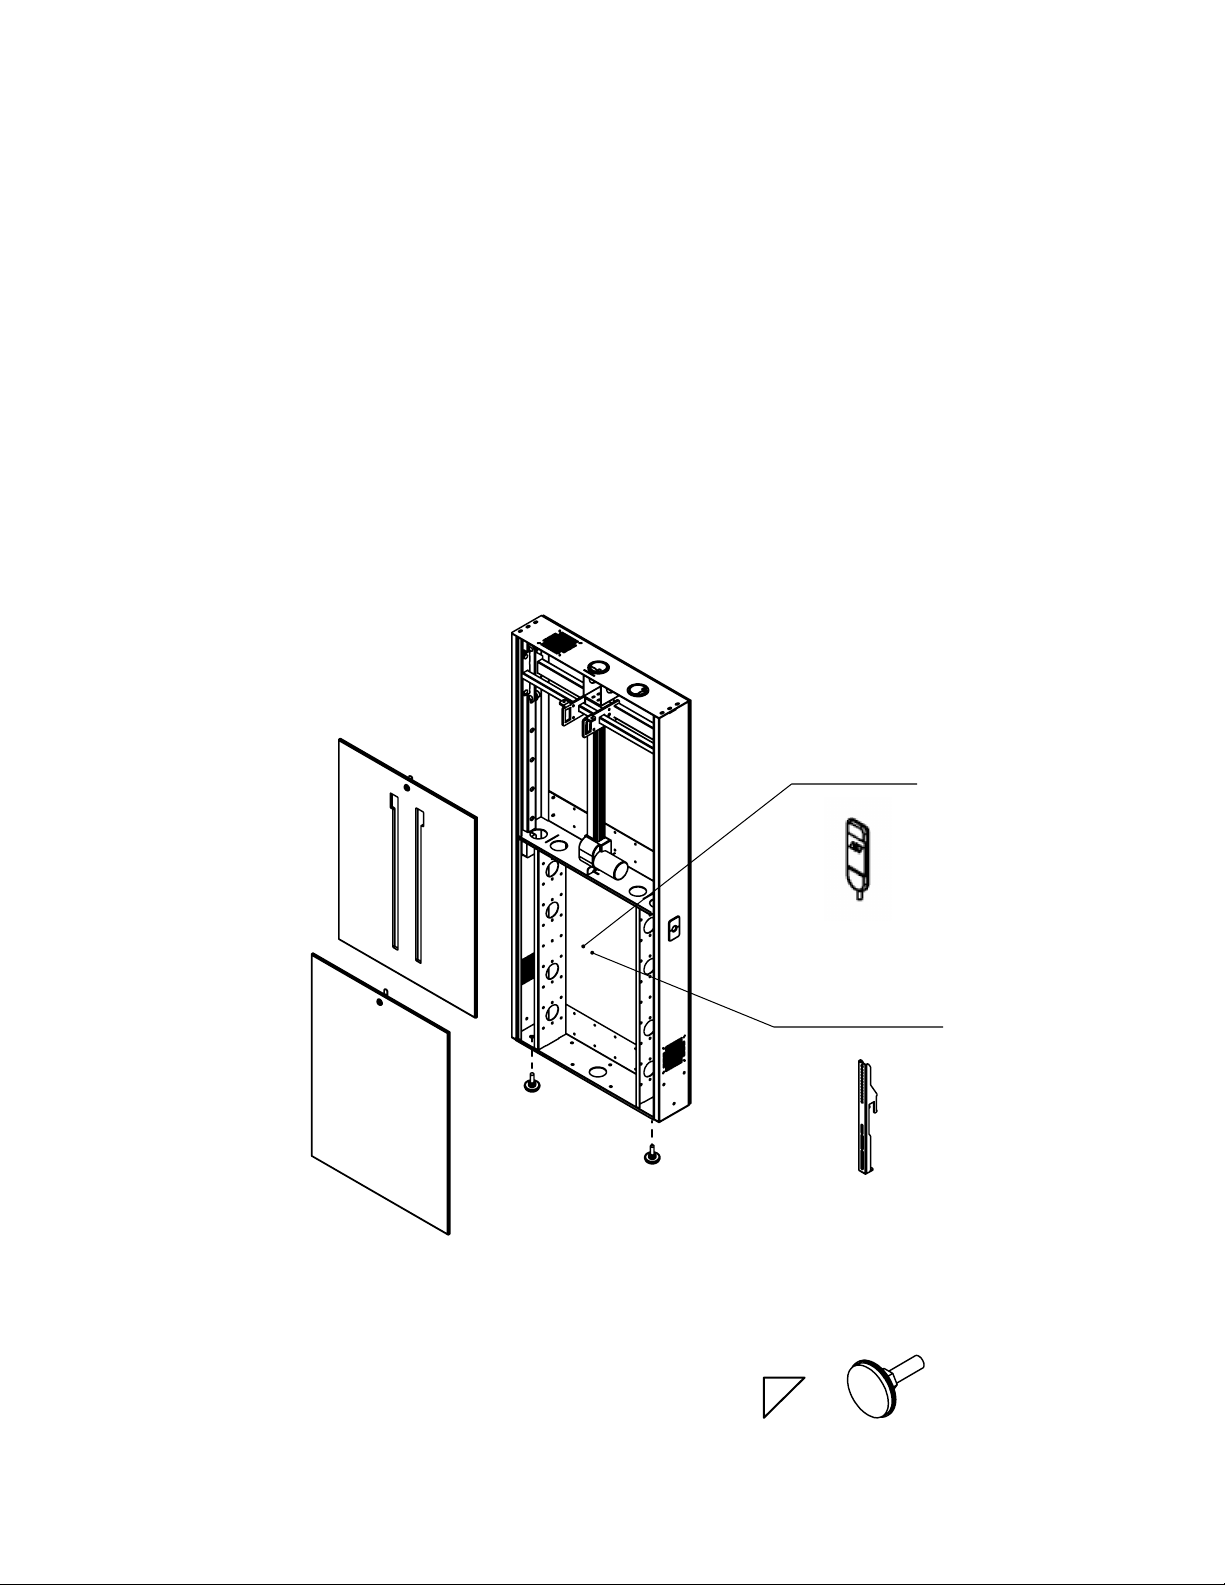
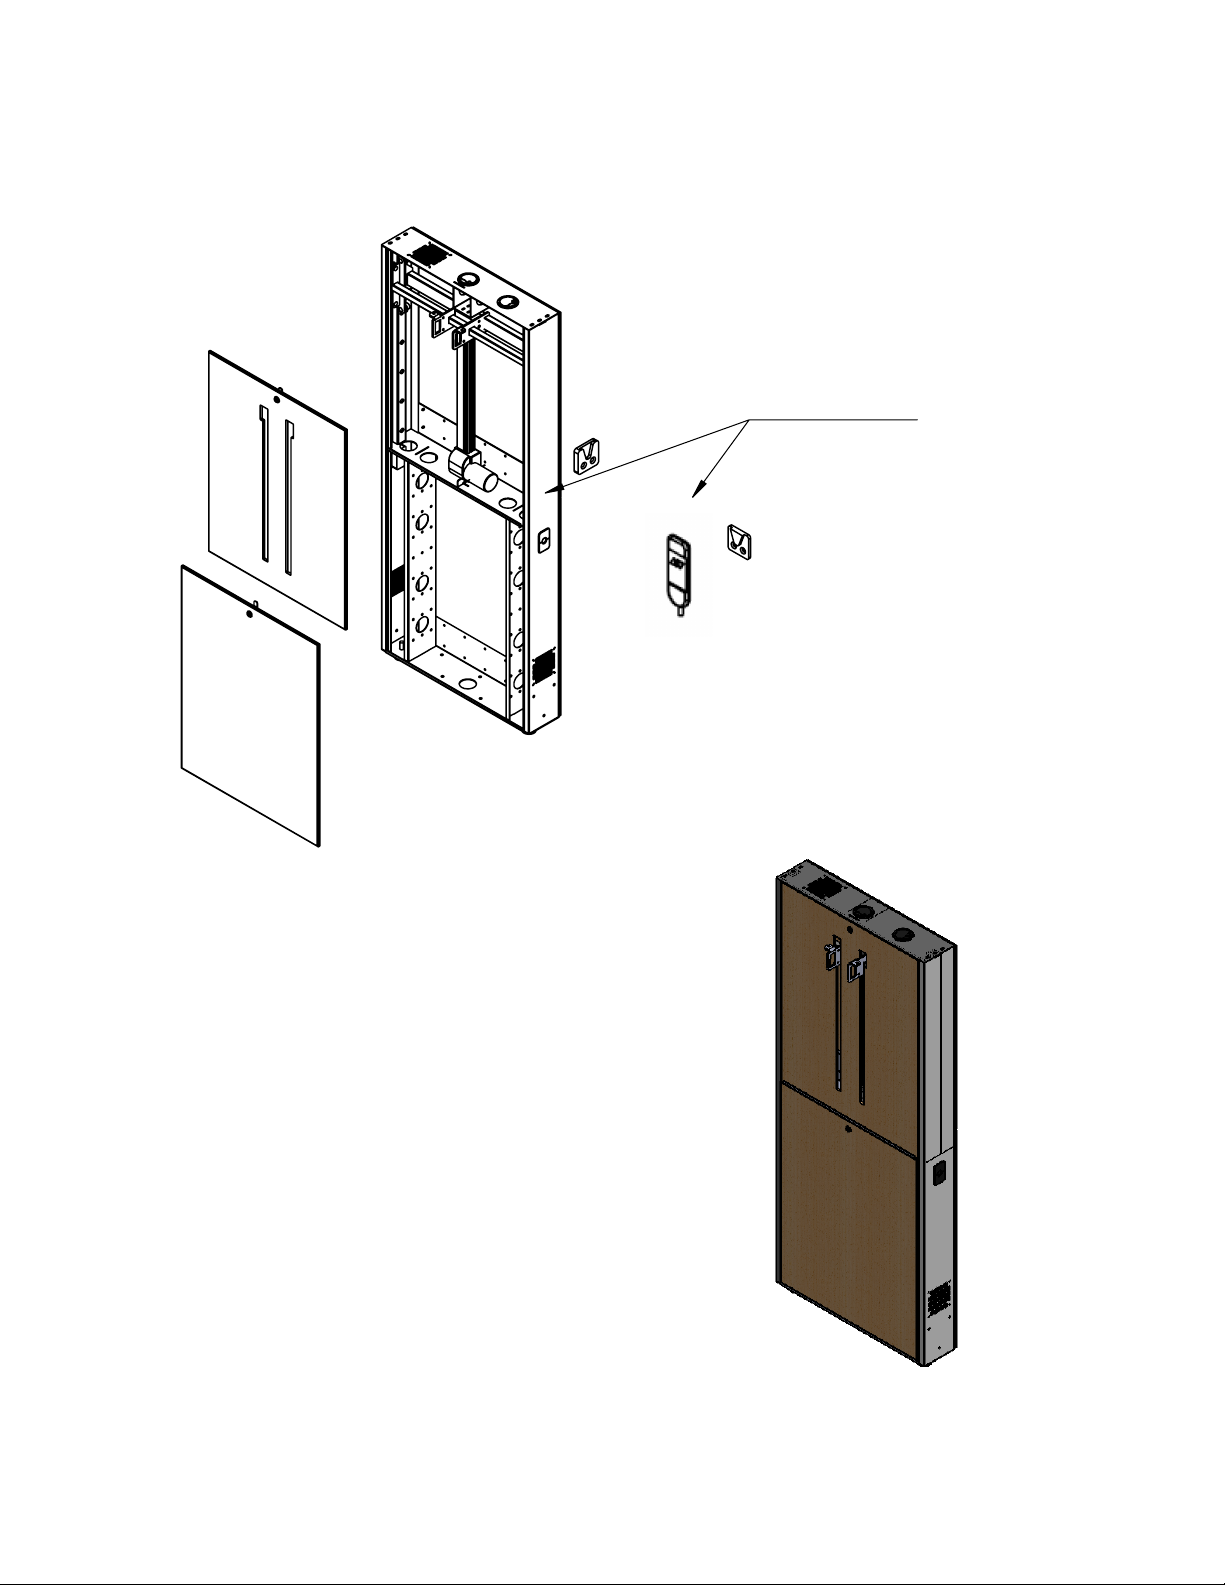
STEP 1:
(1) Stand the unit upright, lean the unit against the wall or have someone
hold the unit securely
(2) Use the keys provided to unlock top and bottom panels
(3) Carefully remove each panel and place in safe location so they do
not get damaged
(4) Remove the remote and mounting hardware from inside the unit and
place it with the panels
(5) Adjust the levelling legs to desired height verify using a level
of 8
Controller
TV Mounting
Hardware (2)
Adjust levelling legs by turning
Clockwise or Couter Clockwise
to raise or lower the unit
Page 4
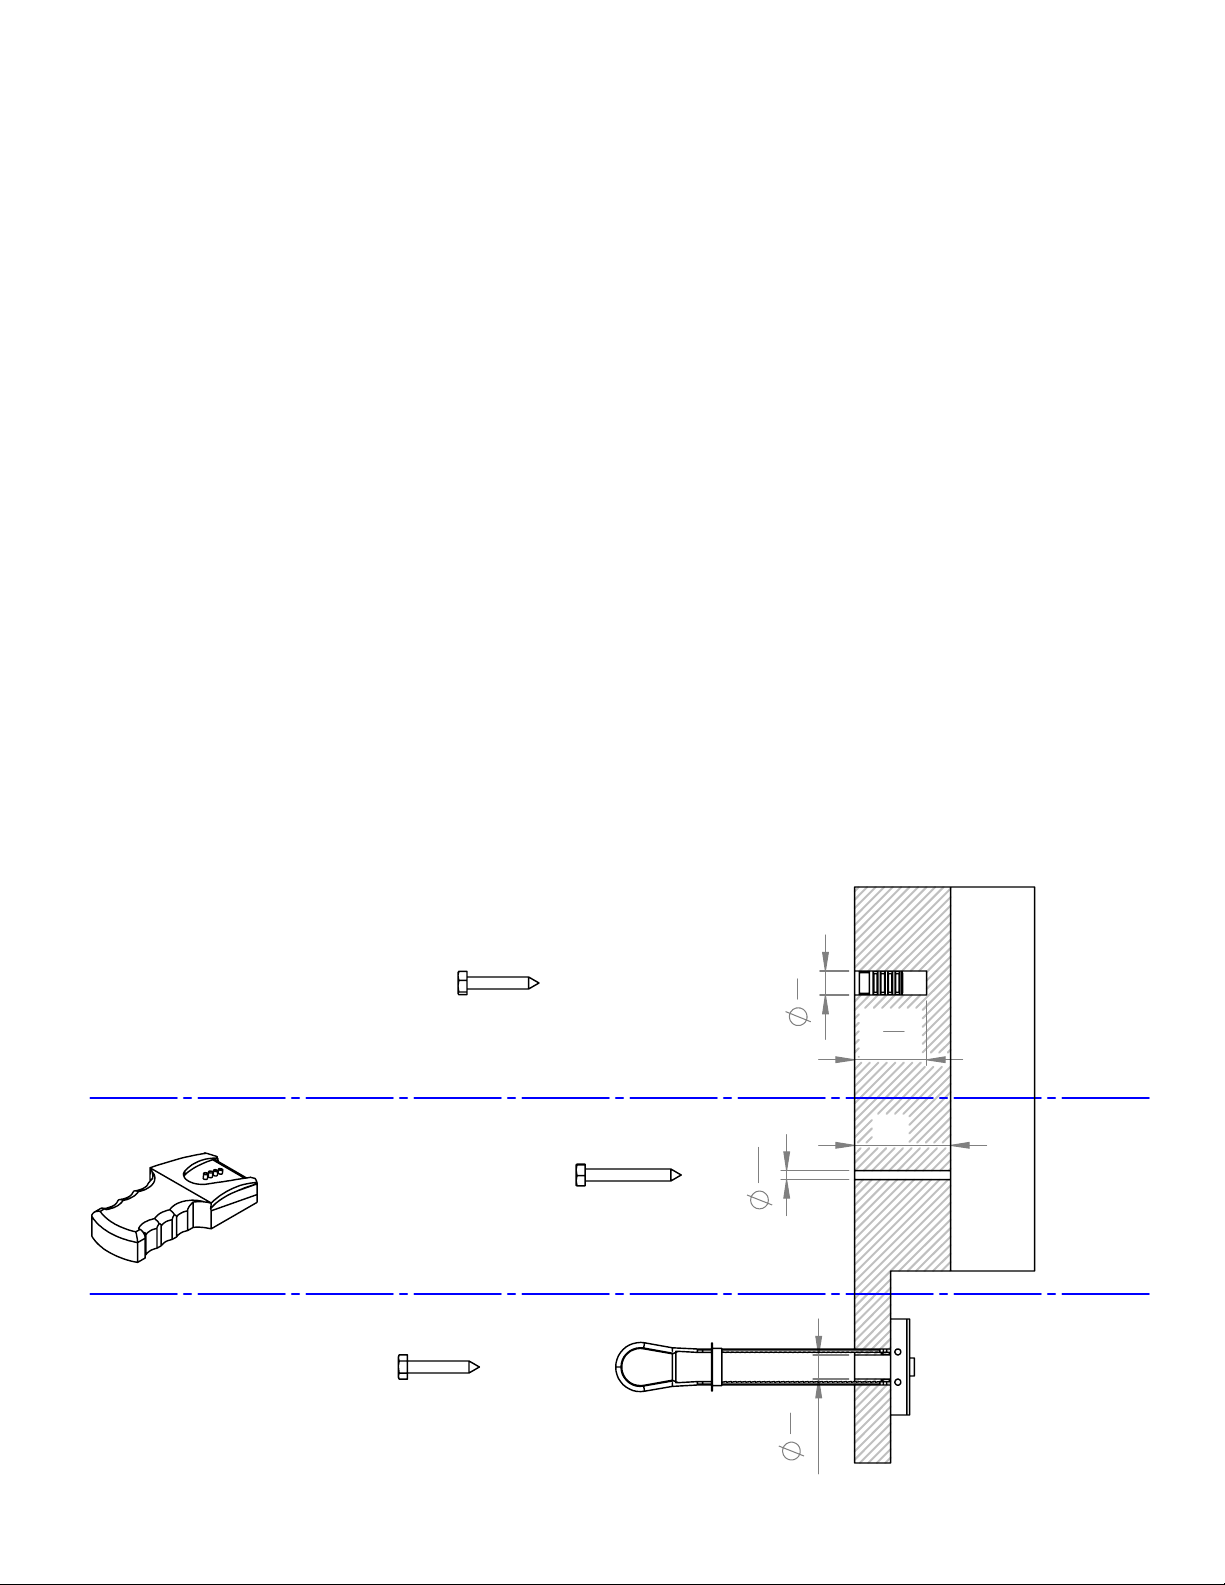
STEP 2: CONCRETE
(1) Positon the LFT-7000WM in its desire location
(2) Using a marker or pen transfer hole locations from top and middle plates to
the wall (NO LESS THEN 2 per plate)
(3) Move the unit and drill holes using a 1/2" masonary bit to a depth of 1.5 inches
(4) Insert Lag shield and tap flush to wall face
(5) Re-align the unit with the drilled holes and fasten using 1/4 lag bolts until tight
STEP 2: DRYWALL WOOD STUD
(1) Using a stud finder locate and indicate wall studs that are 16" apart
(2) positon the unti against the wall so that the hole pattern matches the stud locations
(3) using a pen or marker transfer hole location onto the wall
(4) Move the unit and drill holes using a 3/16 drill bit to a depth of 1.5 inches
(5) Re-align the unit to the drilled holes and fasten using 1/4 lag bolts unitl tight
STEP 2: DRYWALL METAL STUD
(1) Using a stud finder locate and indicate wall studs that are 16" apart
(2) positon the unti against the wall so that the hole patterm matches the stud locations
(3) using a pen or marker transfer hole location onto the wall
(4) Move the unit and drill holes using a 1/2 drill bit through material
(5) Insert the toggle fastener into the hole and push retaining clip flush to wall face
(6) Esure a tight fit before removing excess plastic
(7) Realign the unit to the drilled holes and fasten using 1/4 lag bolts unitl tight
CONCRETE / BRICK
DRYWALL METAL STUD
DRYWALL WOOD STUD
"
1
2
1
1
2
2"
"
"
3
16
"
1
2
Page 5
Page 5
STEP 3:
(1) Route the controller cable through the
grommet and secure using the self adhesive
clips provided
(2) Secure and lock the top and bottom panels
Self adhesive
clip
of 8
This configuration on the LFT-7000
is complete and ready to recieve
the hardware.
Page 6
Page 6
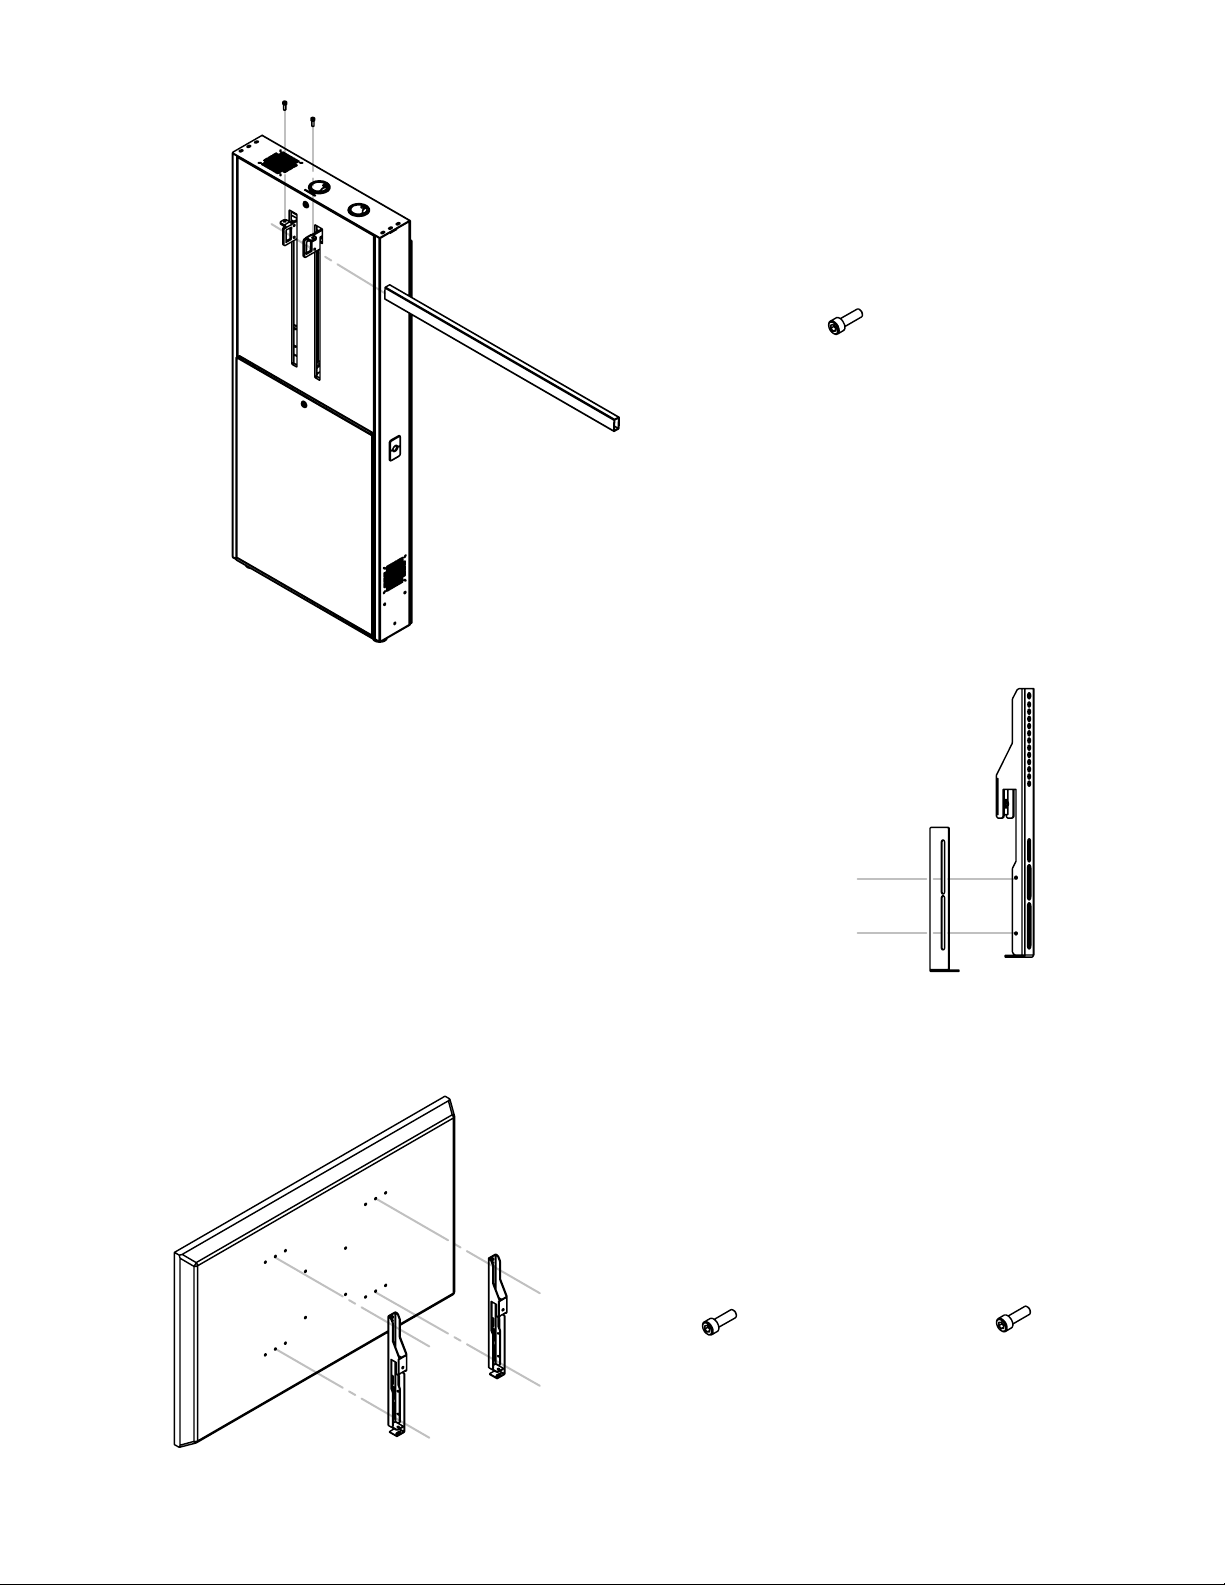
STEP 4:
(1) Insert mounting bar through the lift bracket
(2) centre the bar and secure with bolts
M8 Socket head
cap screw
(2)
of 8
STEP 5:
(1) before installing mounting brackets to your
TV remove the slide lock by undoing the 3
bolts
STEP 6:
(1) Attatch Brackets to TV and secure tightly
before mounting
M8 Socket head
cap screw
(4)
M6 Socket head
OR
cap screw
(4)
Page 7
Page 7
of 8
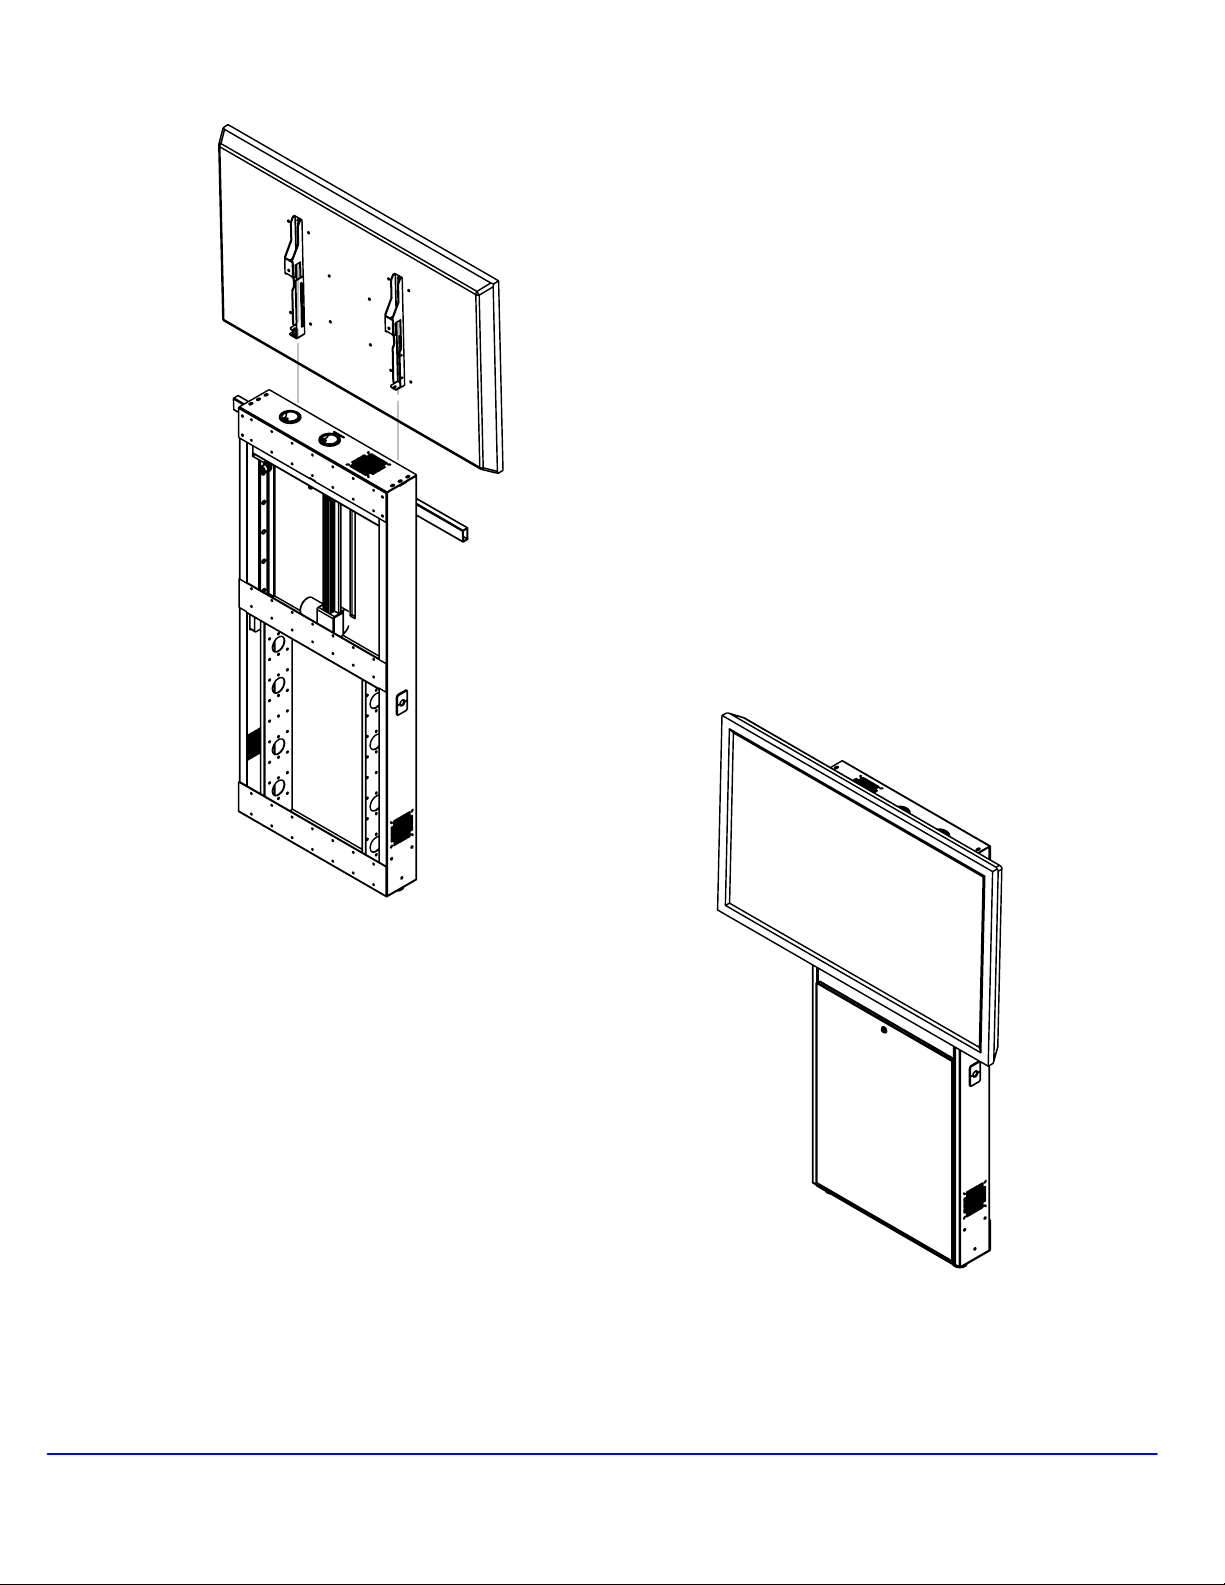
STEP 7:
(1) With assistance lift the TV into position on the
mounting bar
(2) Centre and secure to the bar
AUDIO VIDEO FURNITURE INTERNATIONAL
288 Don Hillock Drive Aurora , Ontario L4G 0G9 www.video-furn.com
Toll Free: 1-877-834-3876 Fax: 1-905-751-1488 Local:905-751-1459
Page 8
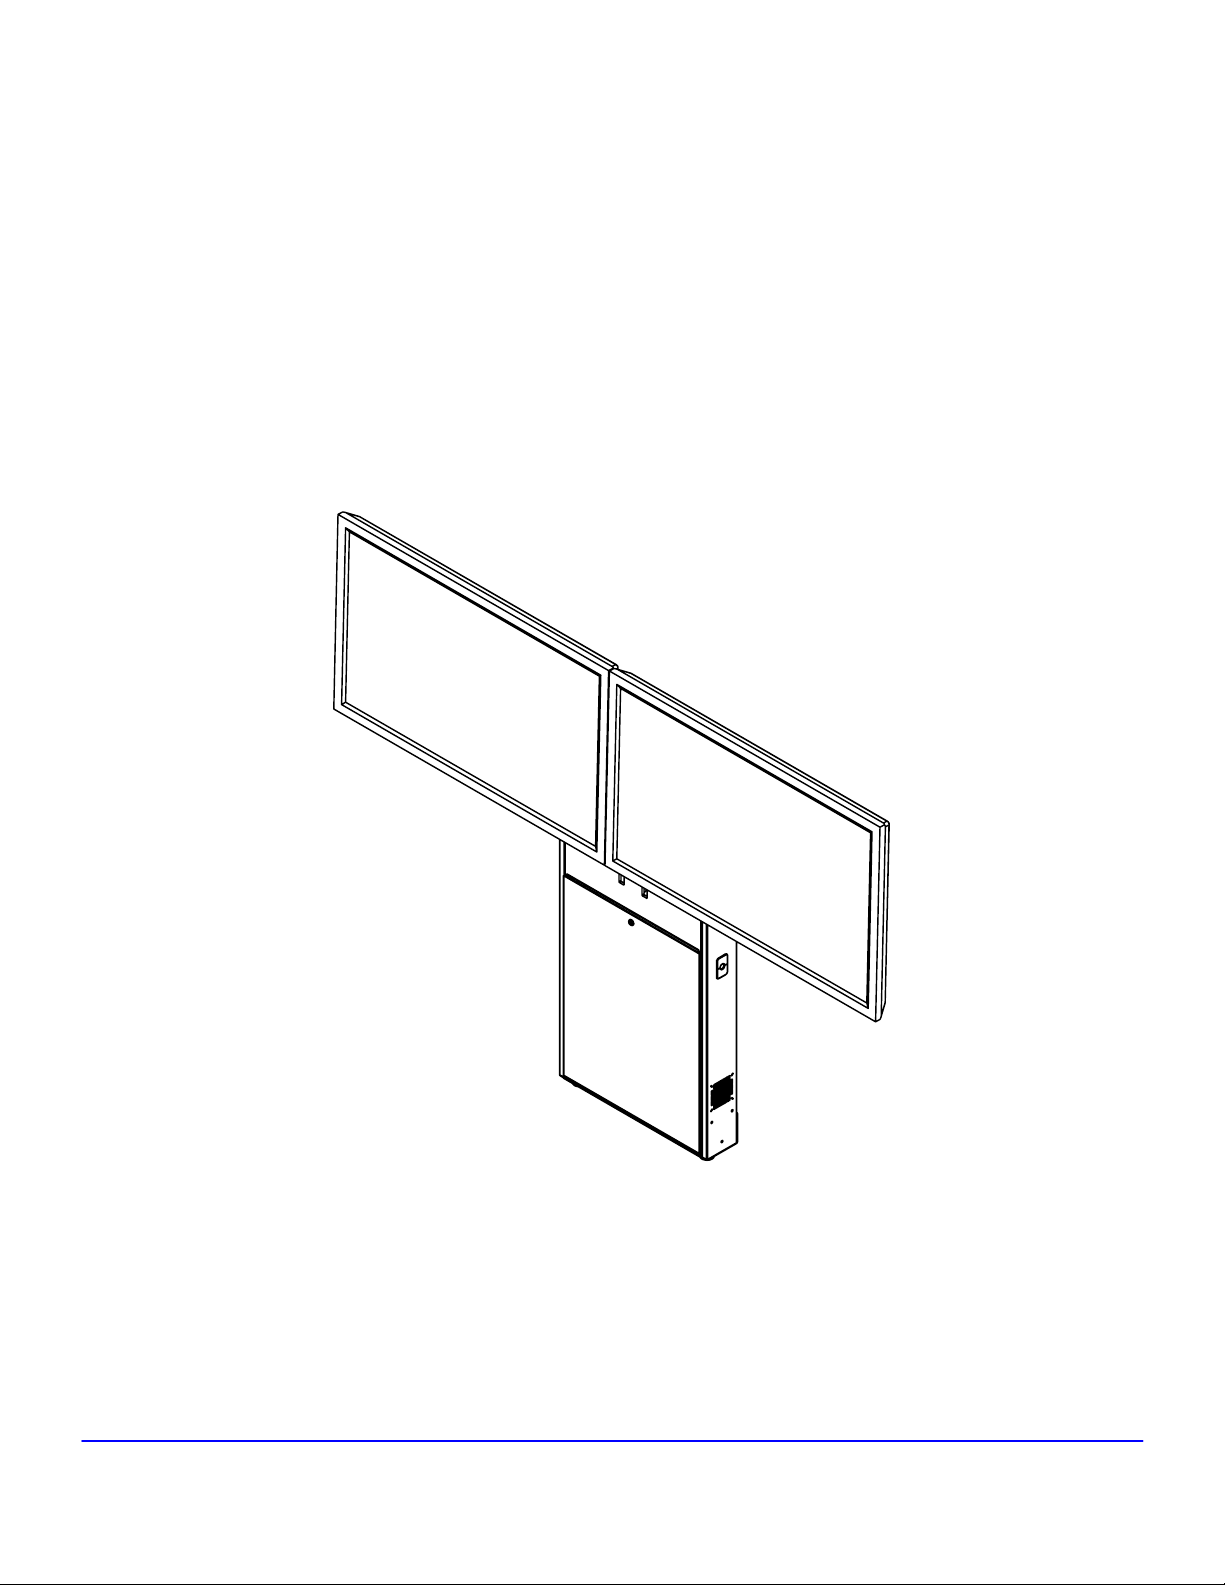
OPTIONAL
This unit can be configured for use with dual monitors, additional hardware
required.
Hardware for this configuration can be purchased seperately.
Page 8
of 8
AUDIO VIDEO FURNITURE INTERNATIONAL
288 Don Hillock Drive Aurora , Ontario L4G 0G9 www.video-furn.com
Toll Free: 1-877-834-3876 Fax: 1-905-751-1488 Local:905-751-1459
 Loading...