

Page 1
Avery Dennison® an d Monarc h® are registered trademarks of
Avery Dennison Corporation.
TC9417PQR Rev. AA 6/16 ©2016 Avery Dennison Corp. All Rights Reserved.
AVERY DENNISON® MONARCH® 9417+
QUICK REFERENCE GUIDE
See ou r W ebsite, www.rbis.averydennison.com, for m ore
information. Review the Safety Sheet provided with your printer.
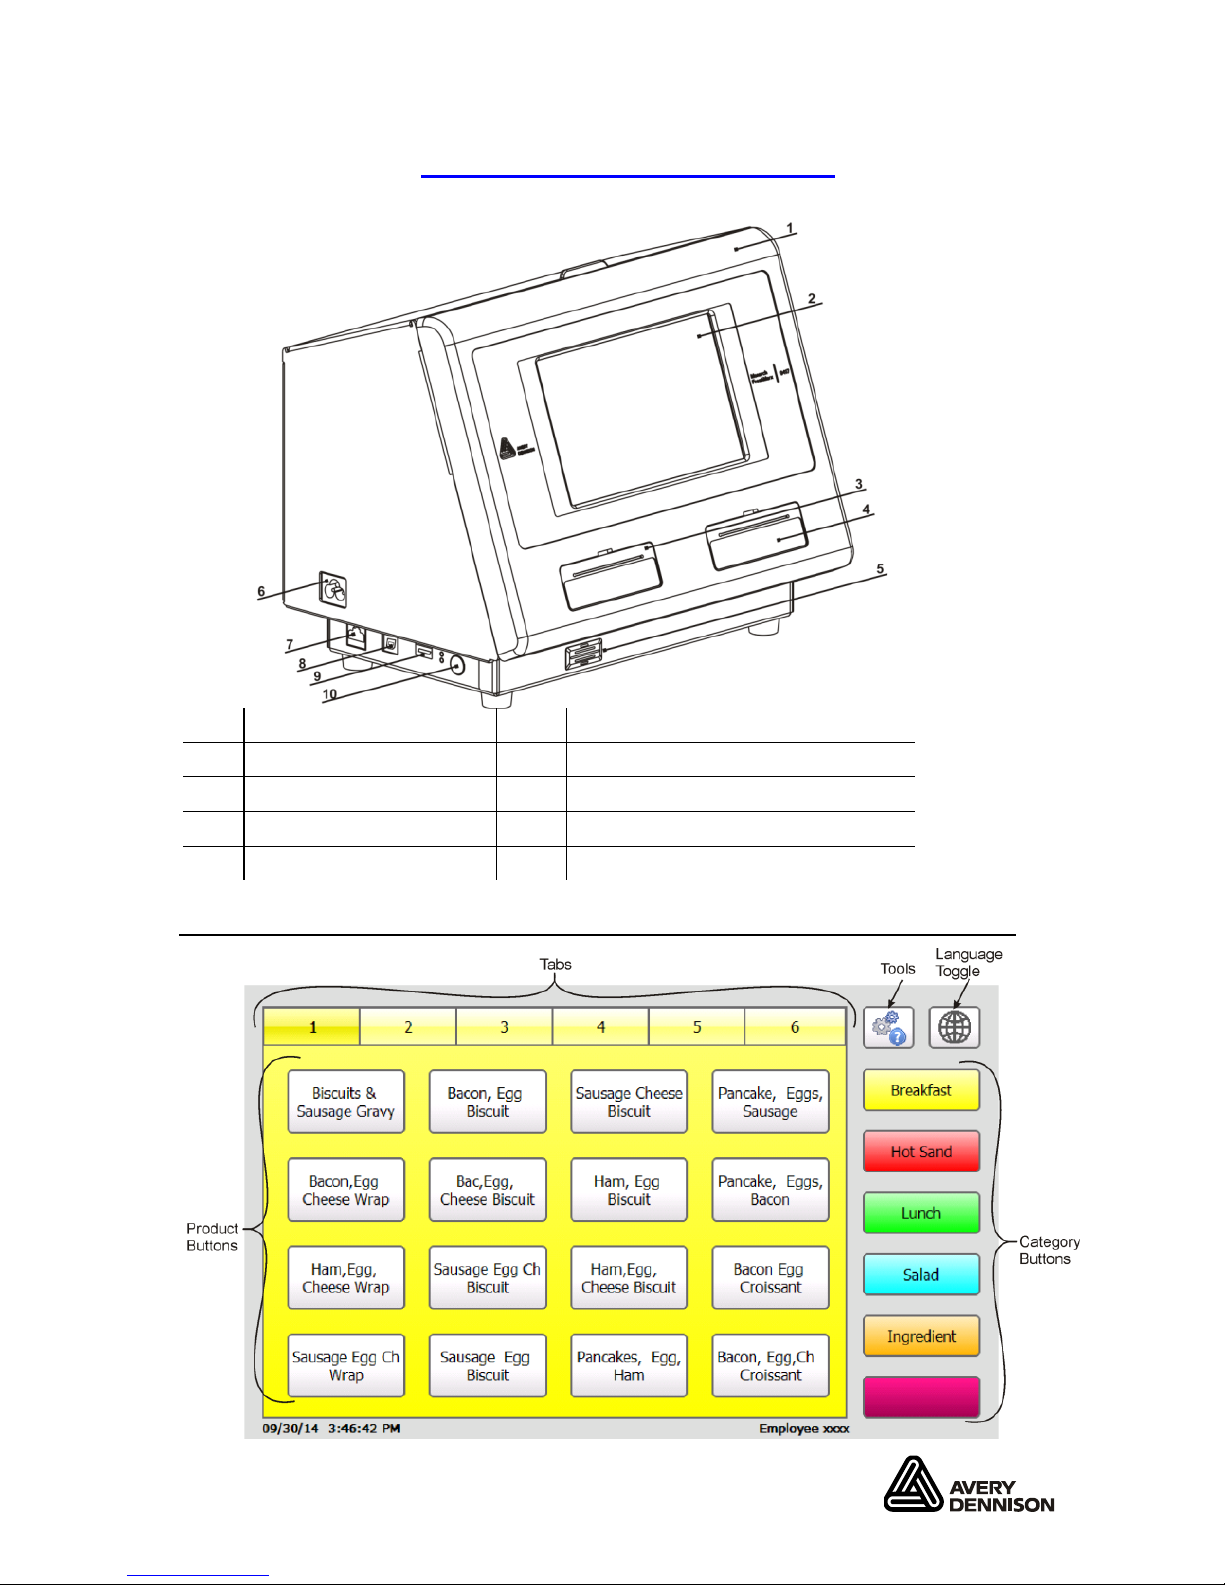
1. Cover 6. Power Cord Connect ion
2. Display 7. Ethernet Port
3. Left Printer 8. USB (Type B) Port
4. Right Printer 9. USB (Type A) Port
5. Speaker 10. Power Button
Using the Printer
Page 2
2-EN
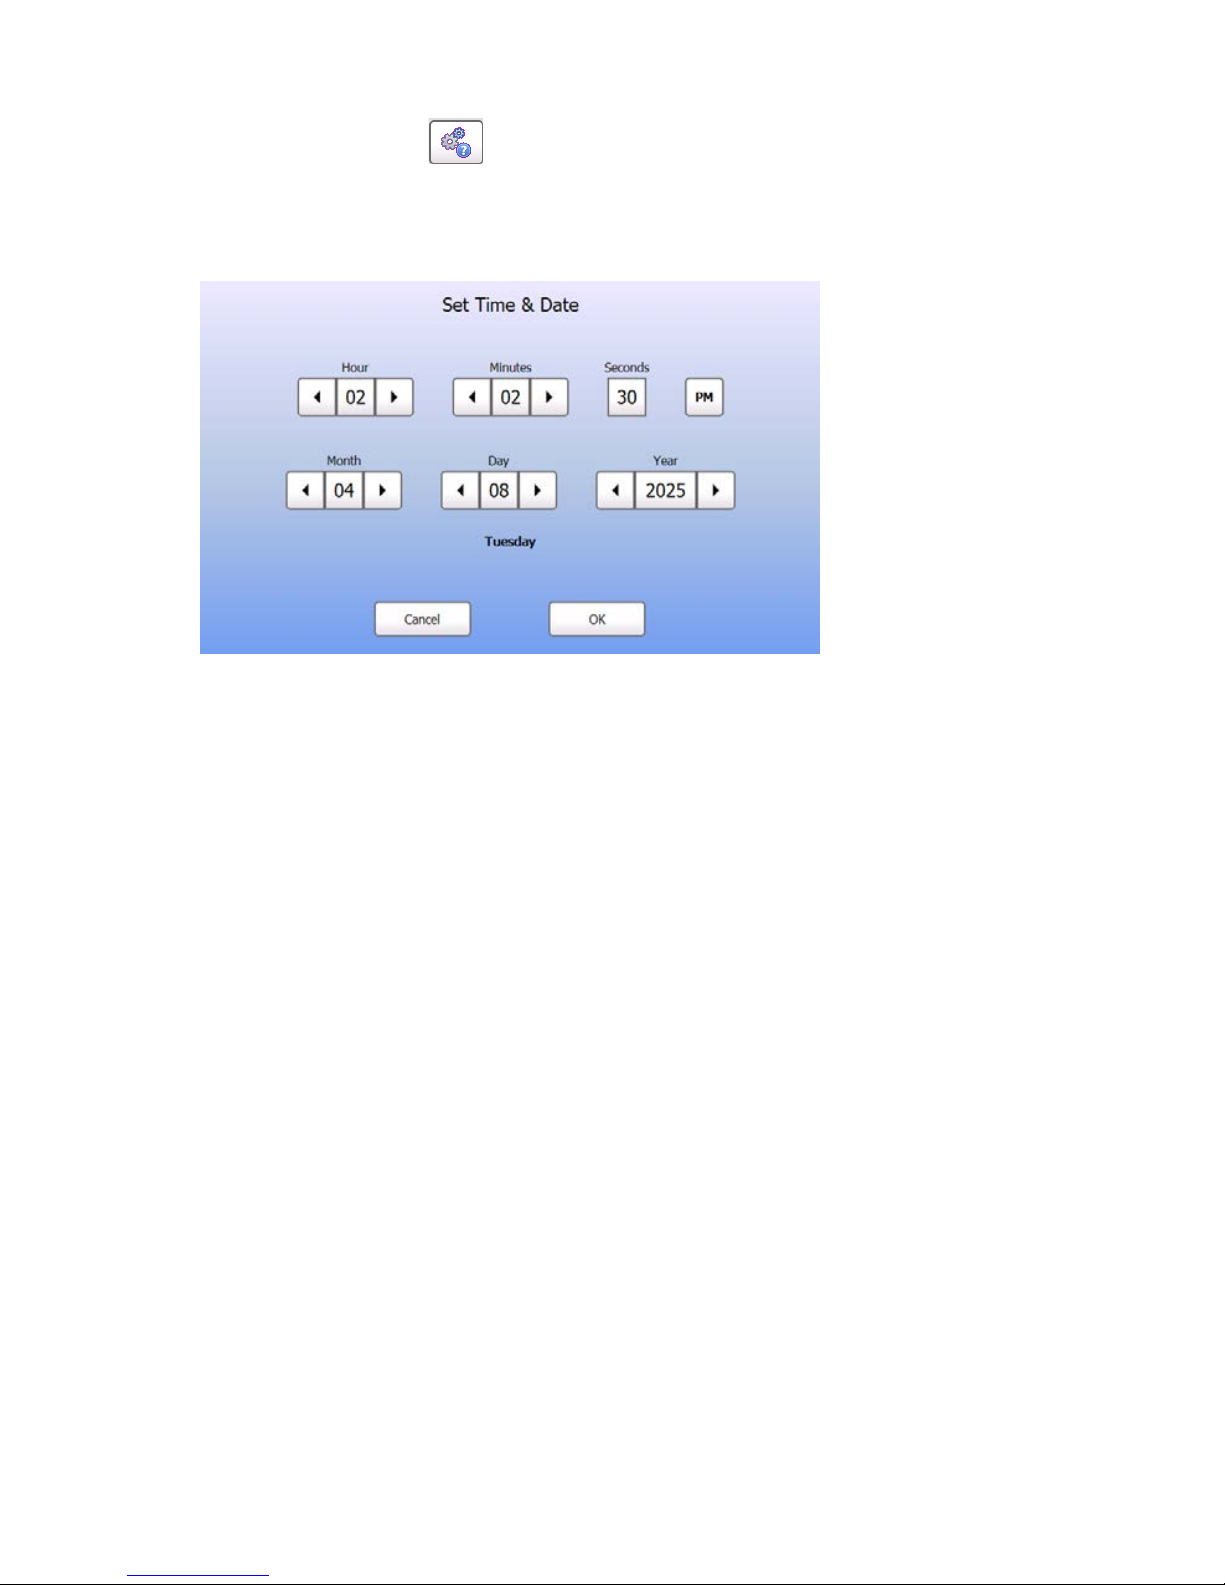
Setting the Time an d Date
1. Press the Tools button then sel ect Admin.
2. Enter the Adm in password and press Enter.
The defaul t password is 1234.
3. Press Set Time/Date.
4. Change the tim e and dat e as neede d then press OK.
Printing Labels
1. Turn on the printer .
2. Press the pro duct button of the label to print.
3. Select the num ber of la bels and press Enter. To print one
label, press Enter.
4. Labels print f or the sel ected produc t.
Note: To print a Use First label, press the T ools button , Use
First, then select the n umber of l abels to pr int.
Page 3
EN-3
Loading Labels – Left Printer
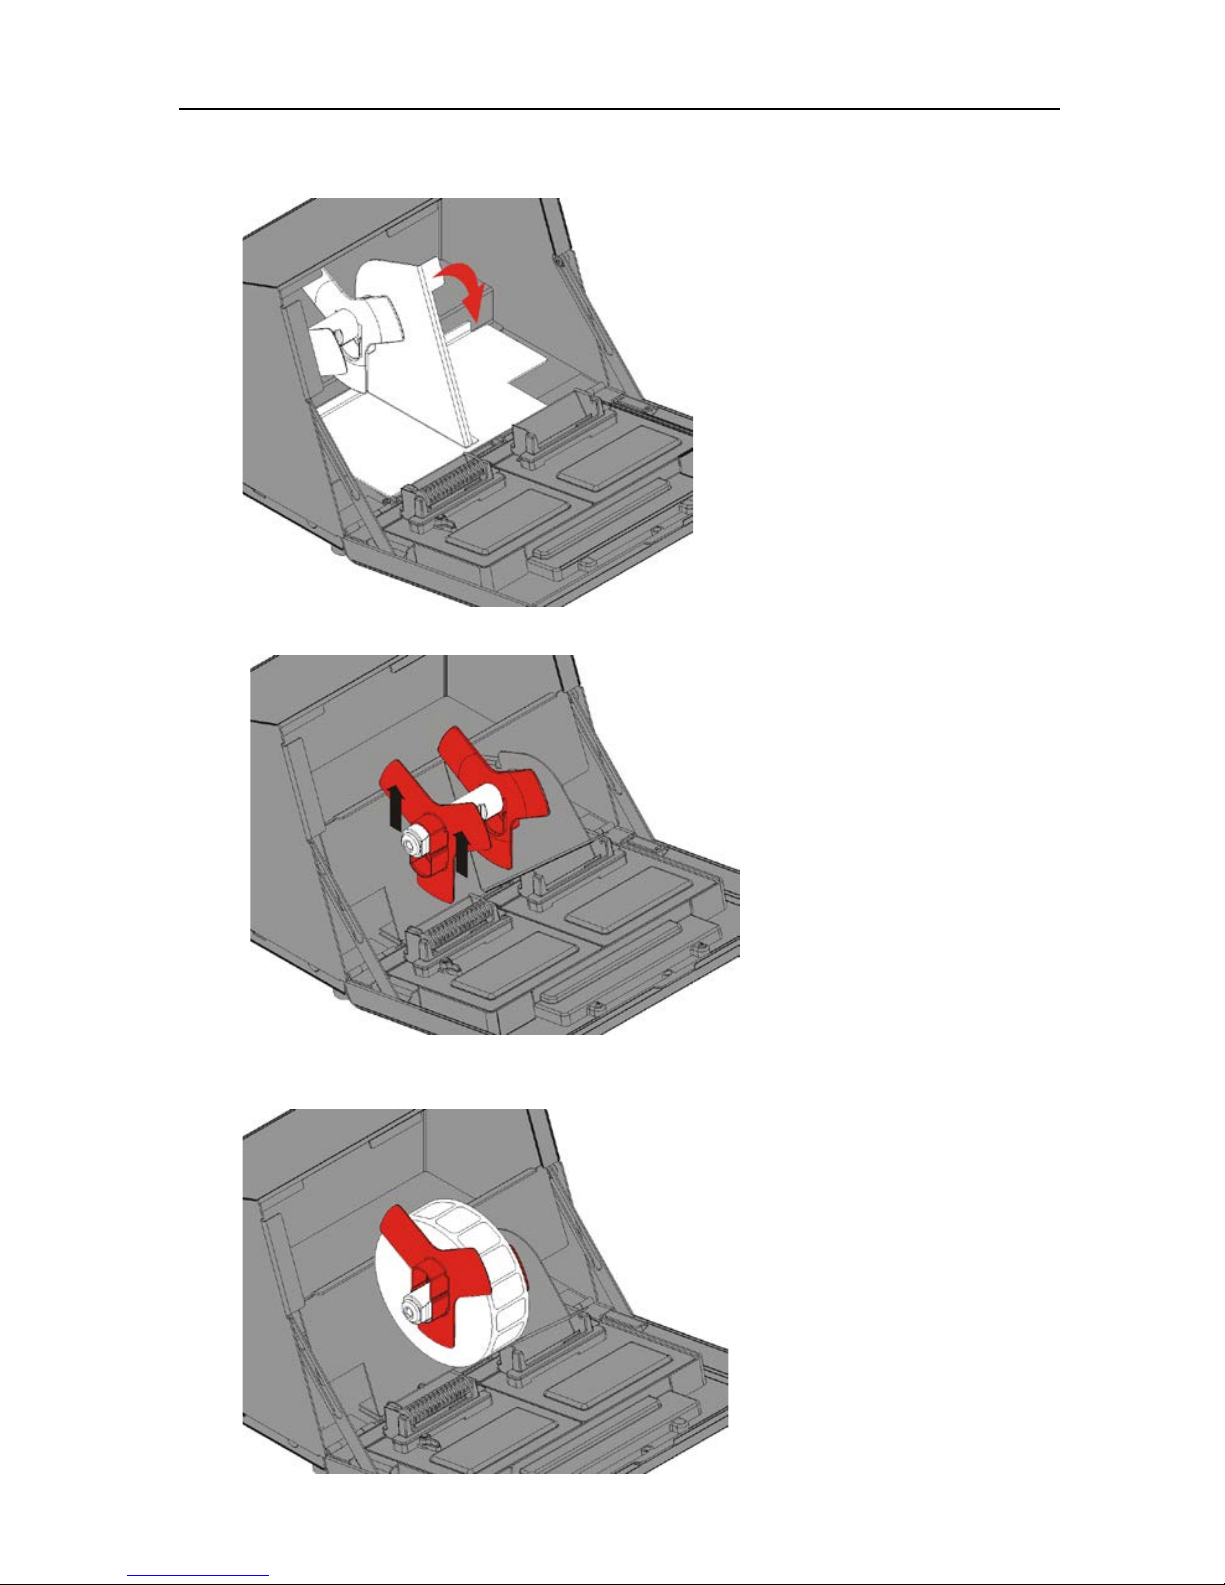
1. Turn on the printer then open the cover.
2. Pull on the s upply tab.
3. Unlock the supply guide and r emove it.
4. Place a r oll of labels (label s ide up) on the supply holder.
Place the sup ply guide on the su pply holder.
Page 4
4-EN
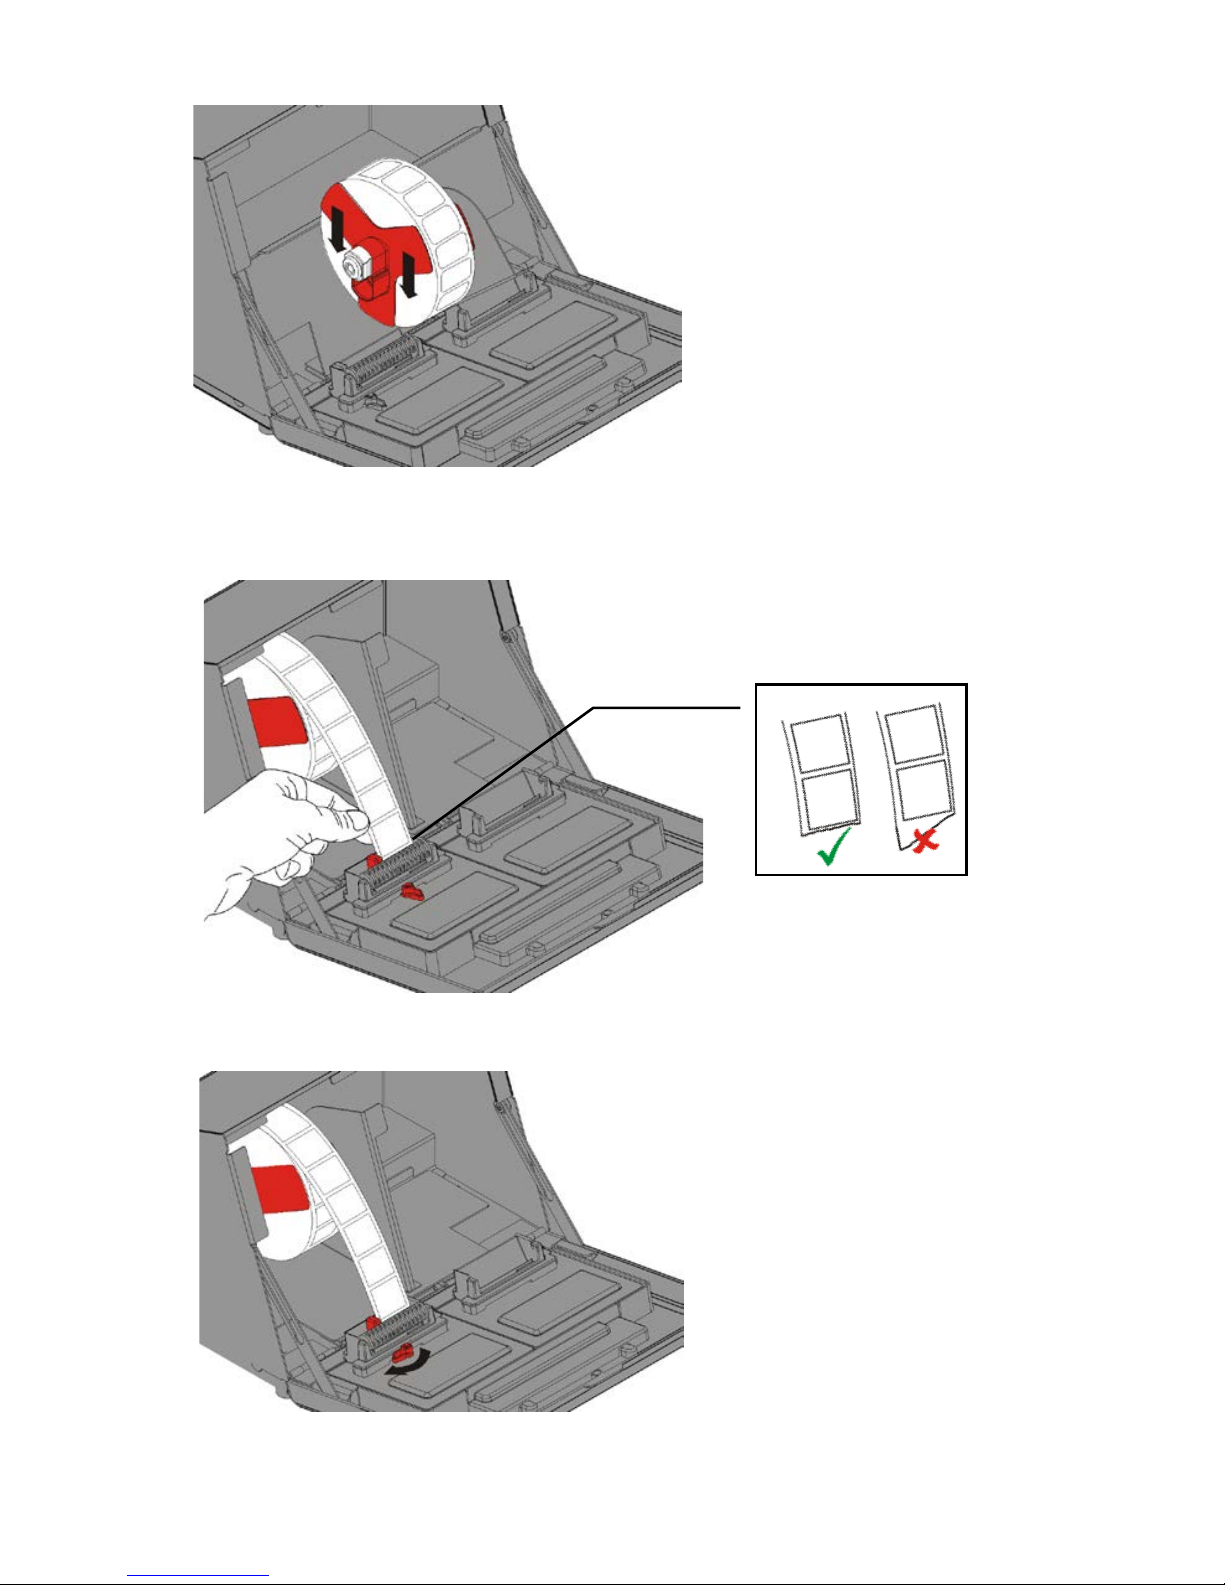
5. Lock the supply guide.
6. Put the supp ly tab back.
7. Guide the lab els along th e inside e dge and into t he slot.
The print er feeds the supply.
8. Slide the sup ply lever n ext to the s upply. Clos e the sup ply
lever.
9. Close the cover.
Page 5
EN-5
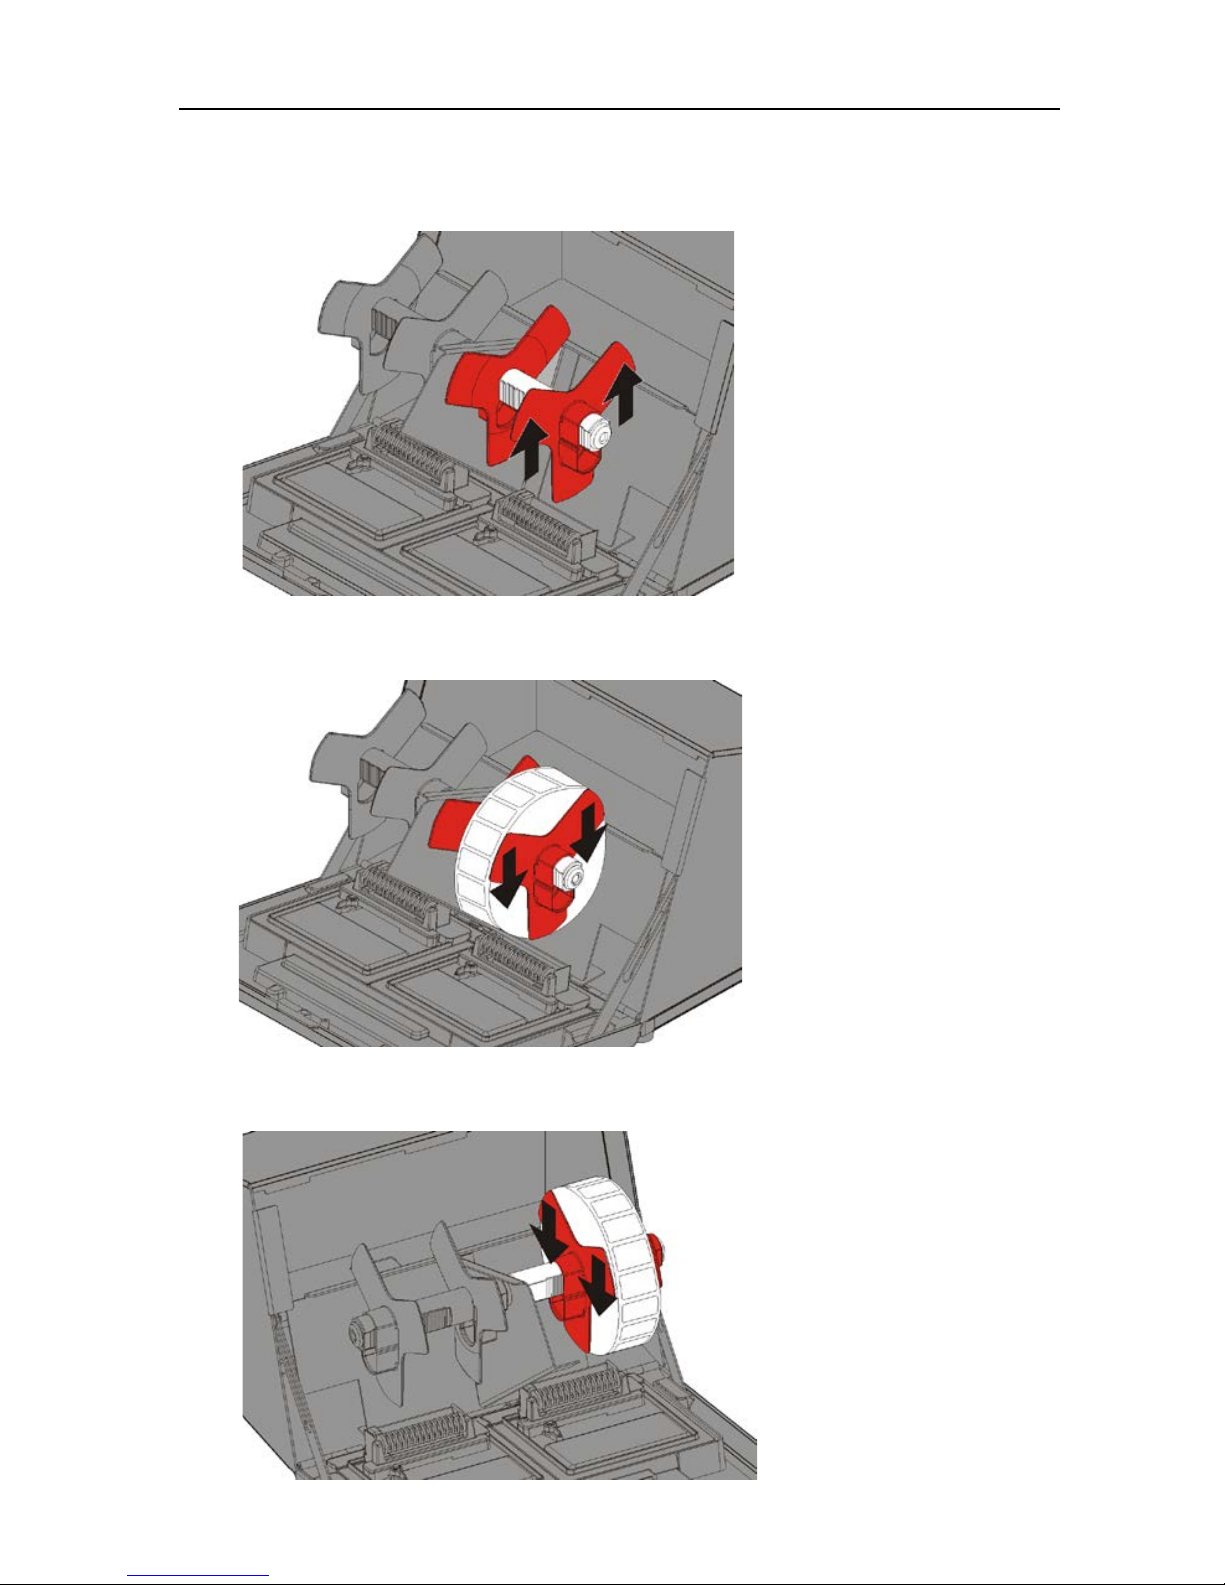
Loading Labels – Right Printer
1. Turn on the printer then open the co ver.
2. Pull on the s upply tab.
3. Unlock the outer supply guide and remove it.
4. Place a r oll of labels (label s ide up) on the supply holder.
5. Replace the ou ter suppl y guide and lock it in plac e.
6. Unlock the in ner suppl y guide, m ove it un til it touc hes the
supply, lock it int o place.
Page 6
6-EN
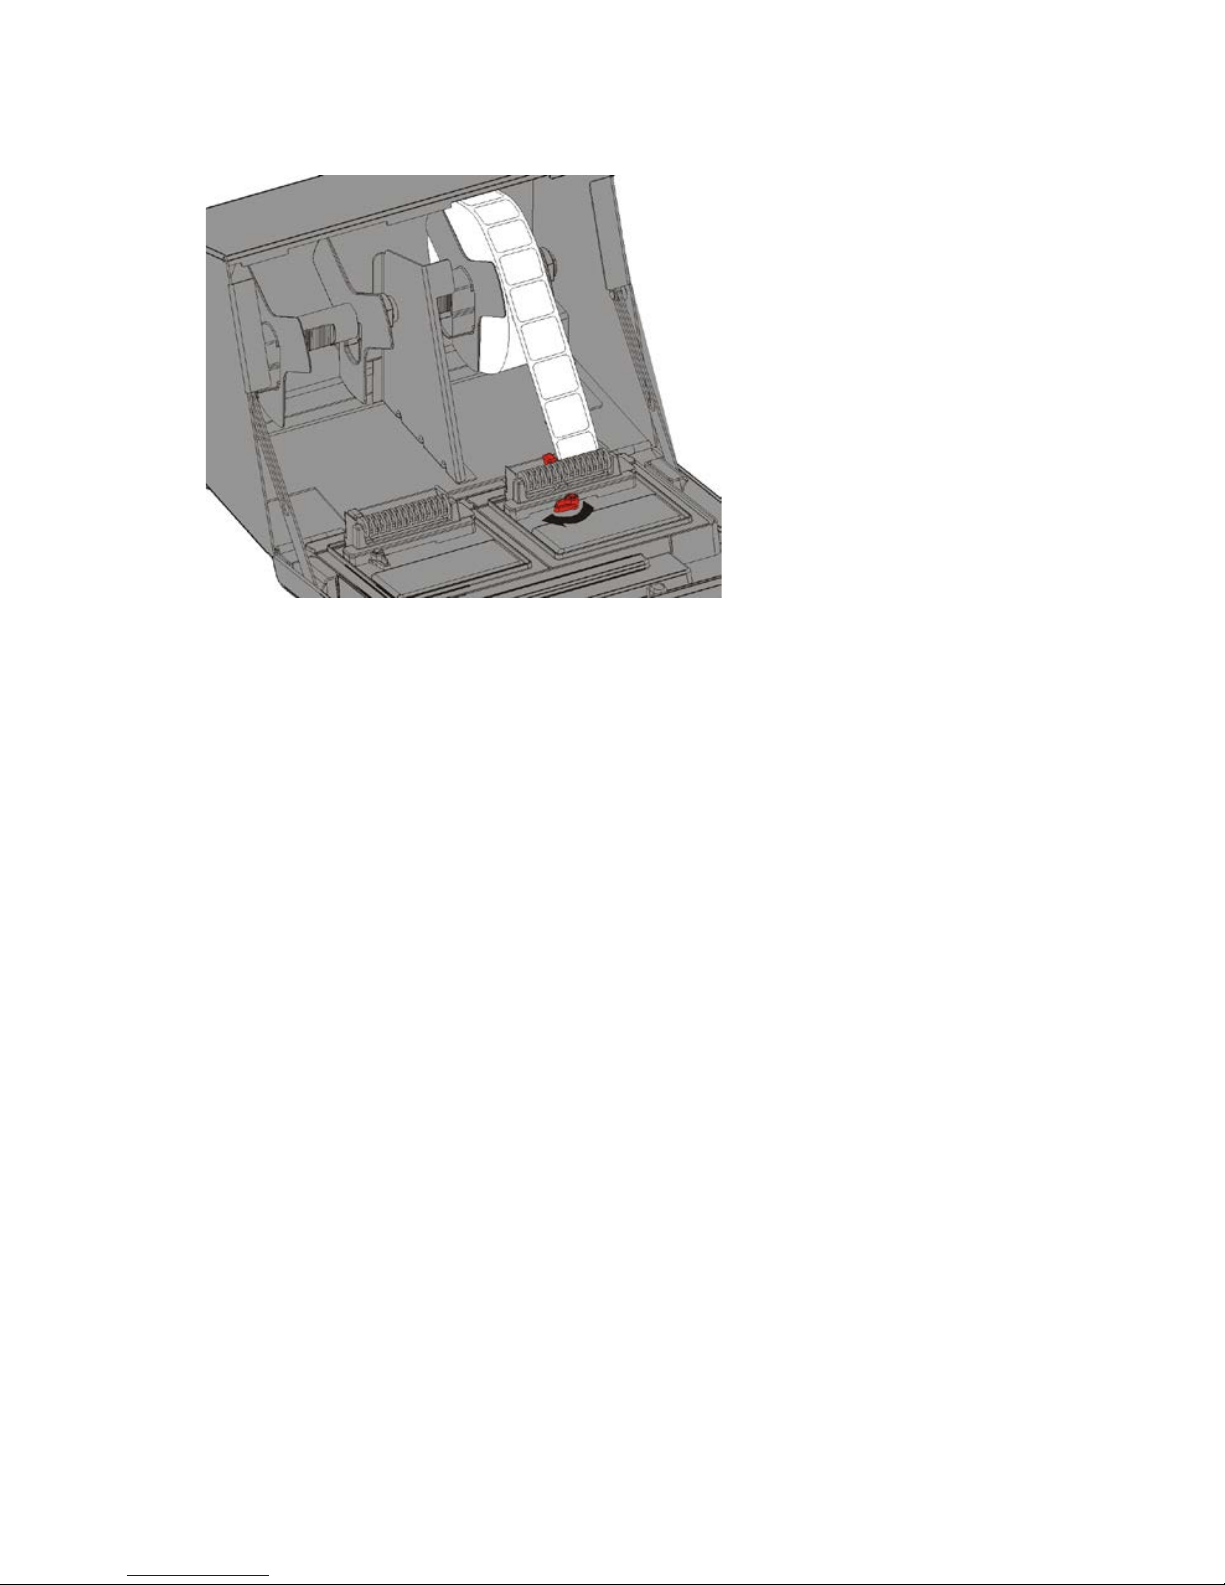
7. Put the supp ly tab back.
8. Guide the labels along the outside ed ge and into the slot .
The print er feeds the supply.
9. Slide the supply lever next to the supply and close it.
10. Close t he cover.
 Loading...