

Page 1
HD810 IP DOME CAMERA
QUICK START GUIDE
About this Guide
This guide is a quick reference that offers users basic information regarding
installation and operation of the HD810 Night Vision Indoor / Outdoor High Definition
IP Cameras. For further details on installation and operation, please refer to the User
Manual at avertx.com.
CONTENTS
Before proceeding, please confirm that the box contains the items listed here. If any
item is missing or has defects, DO NOT install or operate the product and contact
AvertX for assistance.
HD810
Dome Camera
Paintable
Dome Cover
Screws
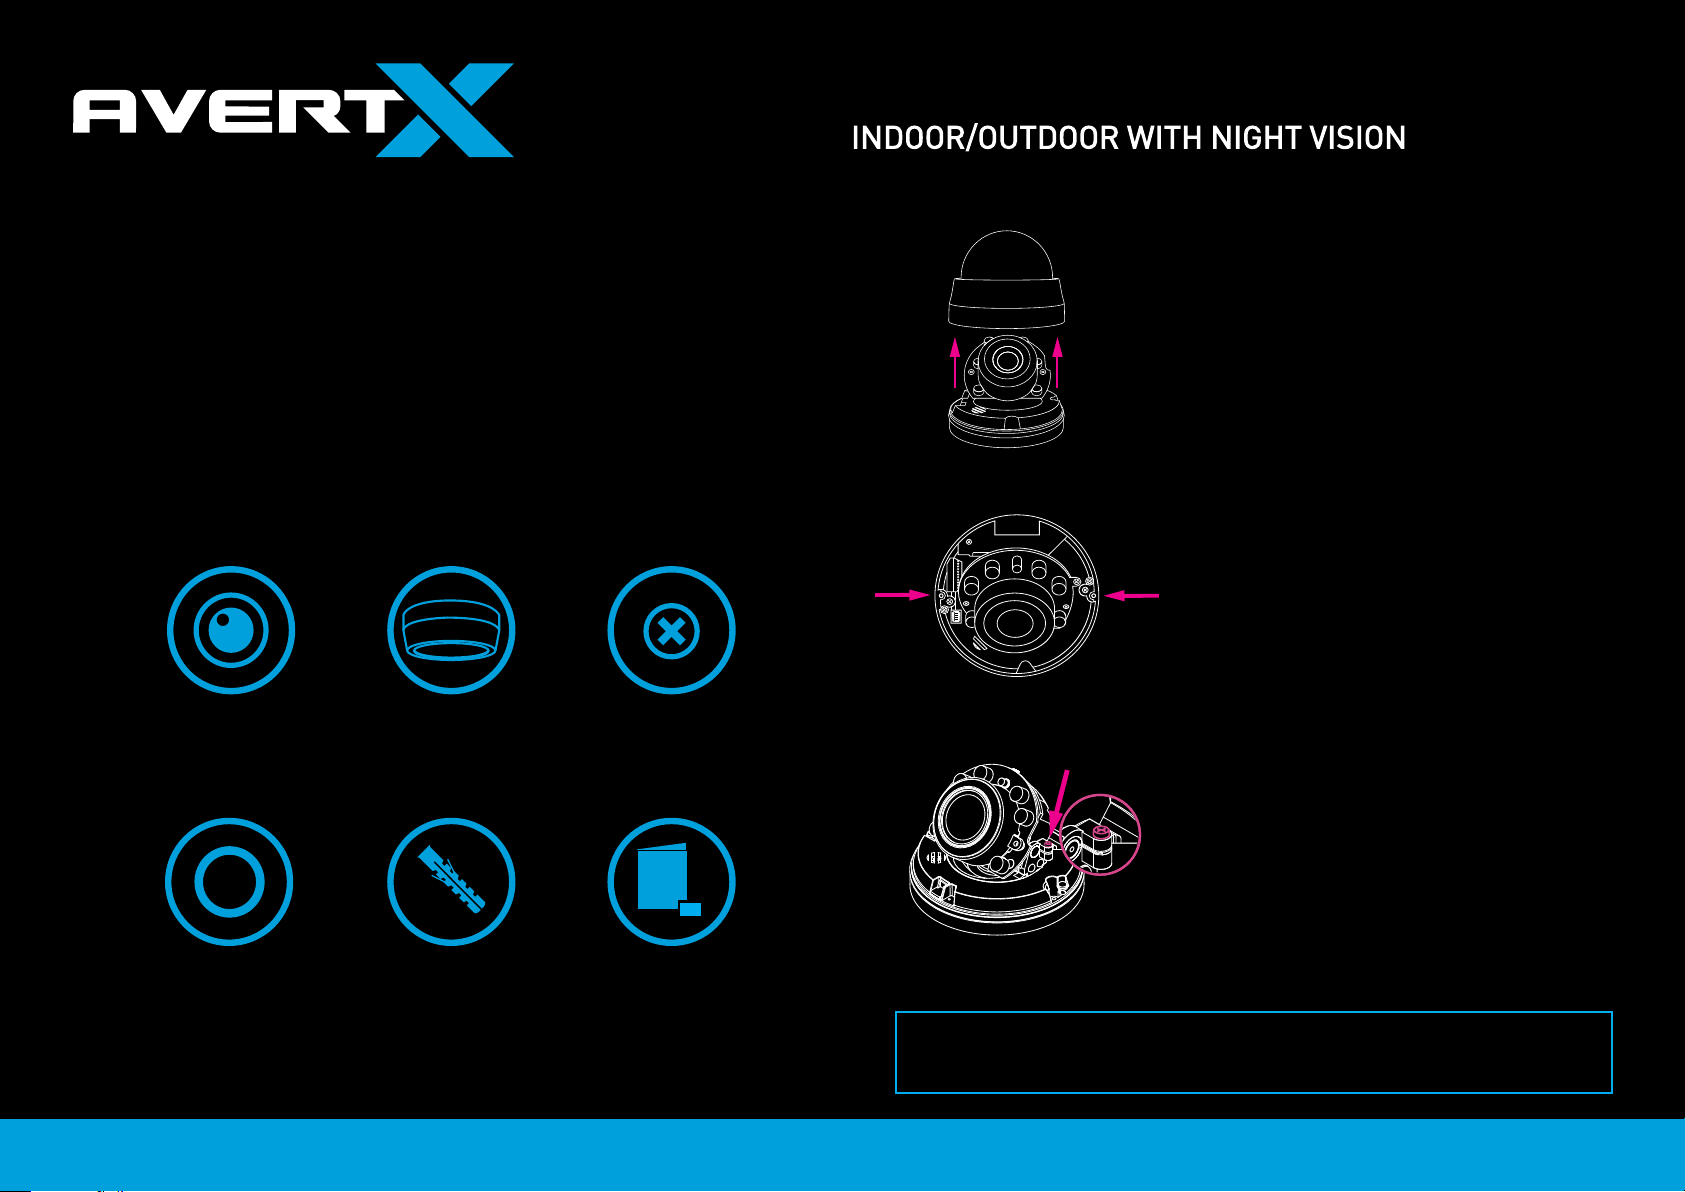
INSTALLATION
Remove Cover
Align Holes on Wall
The HD810 camera can be installed directly onto
a wall or the ceiling. Be sure that the structure is
strong enough to support the camera.
1. Remove the camera dome cover (refer to
base of camera).
2. Use the included mounting template to
pre-drill holes for the mounting screws
and, if passing the cable through the
ceiling or wall, drill a 3/4” hole.
3. Connect the Ethernet cable to the dongle
on the camera. Further information about
cable installation on reverse side.
4. Affix the base of the camera to the wall
with the included self-tapping screws
and wall anchors. Do not over tighten the
mounting screws. Over tightening the
screw could compromise the seal.
5. Adjust the camera to the desired angle.
Loosen adjustment screw before
adjusting angle.
Spare Rubber
Washers
Anchors
Documents &
Desiccant
6. If surface mounting the cable, remove
the cable knockout on the side of the
dome cover.
7. Replace the dome cover. To install, align
knockout tab in housing to cable.
Adjustment Screw
Please note: Using the included mounting screws is required to maintain IP66
outdoor rating. Using other screws or modifying the camera may allow water
intrusion and void the warranty.
32346AD
Page 2

NETWORK CABLE INSTALLATION
WEATHER RESISTANT CABLE
When installing your AvertX Night Vision HD Indoor/Outdoor Dome Camera, it is
important to consider how the network cable attached to the camera is arranged.
• Protect the network cable connection from damage by running the cord inside
a wall or ceiling, or through conduit.
• If passing the camera dongle through a wall or ceiling, drill a 3/4” hole.
• For outdoor installations, seal any holes in the wall or ceiling with silicone
caulk to protect against water intrusion.
MICRO SD CARD
AND RESET BUTTON
Your HD810 camera is equipped with a slot for a Micro SD card and a Reset button.
To access these, you must remove the cover of the HD810 camera.
If you have purchased a microSD card to be used for emergency video backup,
insert the card into the slot. Push the reset button to return the camera to factory
default settings, if necessary. Refer to manual or spec sheet for compatible cards.
Micro SD card slot
CONNECTOR
This camera features an IP66-rated weather resistant connector. For unprotected
outdoor connections, screw the connector on the included ethernet camera cable
onto the camera dongle. Refer to instruction card for more information.
BLACK PAINTABLE DOME COVER
The dome cover for the HD810 is paintable, allowing for a customizable look. Use a
paint designed for plastic and paint away from the camera dome to avoid overspray.
To install, firmly press the cover onto the camera.
Reset button
AUTOFOCUS ZOOM LENS
The HD810 Dome Camera is equipped with an Auto Focus Zoom lens. You do not
need to manually focus this camera. Access focus and zoom functions through the
PTZ menu on your recorder.
Copyright © 2015 AvertX. All rights reserved. Information contained in this document is subject to change without prior notice. AvertX does its best to provide accurate information, but cannot be held responsible for typos or mistakes.
Wall mount bracket and electrical box mounting plate
accessories are available at avertx.com.
For Further Instruction
For more information on installing your AvertX camera, see the user manual or view
instructional videos at avertx.com/videos.
1-855-2AVERTX (1-855-228-3789)
www.avertx.com
32346AD
 Loading...