

Page 1

HD30 QUICK START GUIDE
About this Guide
This guide is a quick reference for users to install and operate HDIP video
surveillance systems. It provides only basic information regarding the network
recorders and cameras. For further details on installation and operation, please refer
to the Hardware and Software User Manuals.
CONTENTS
Before proceeding, please check to conrm that the box contains the items listed
here. If any item is missing or has defects, DO NOT install or operate the product and
contact AvertX for assistance.
HD30 Dome Camera Torx Security Tool
Screws
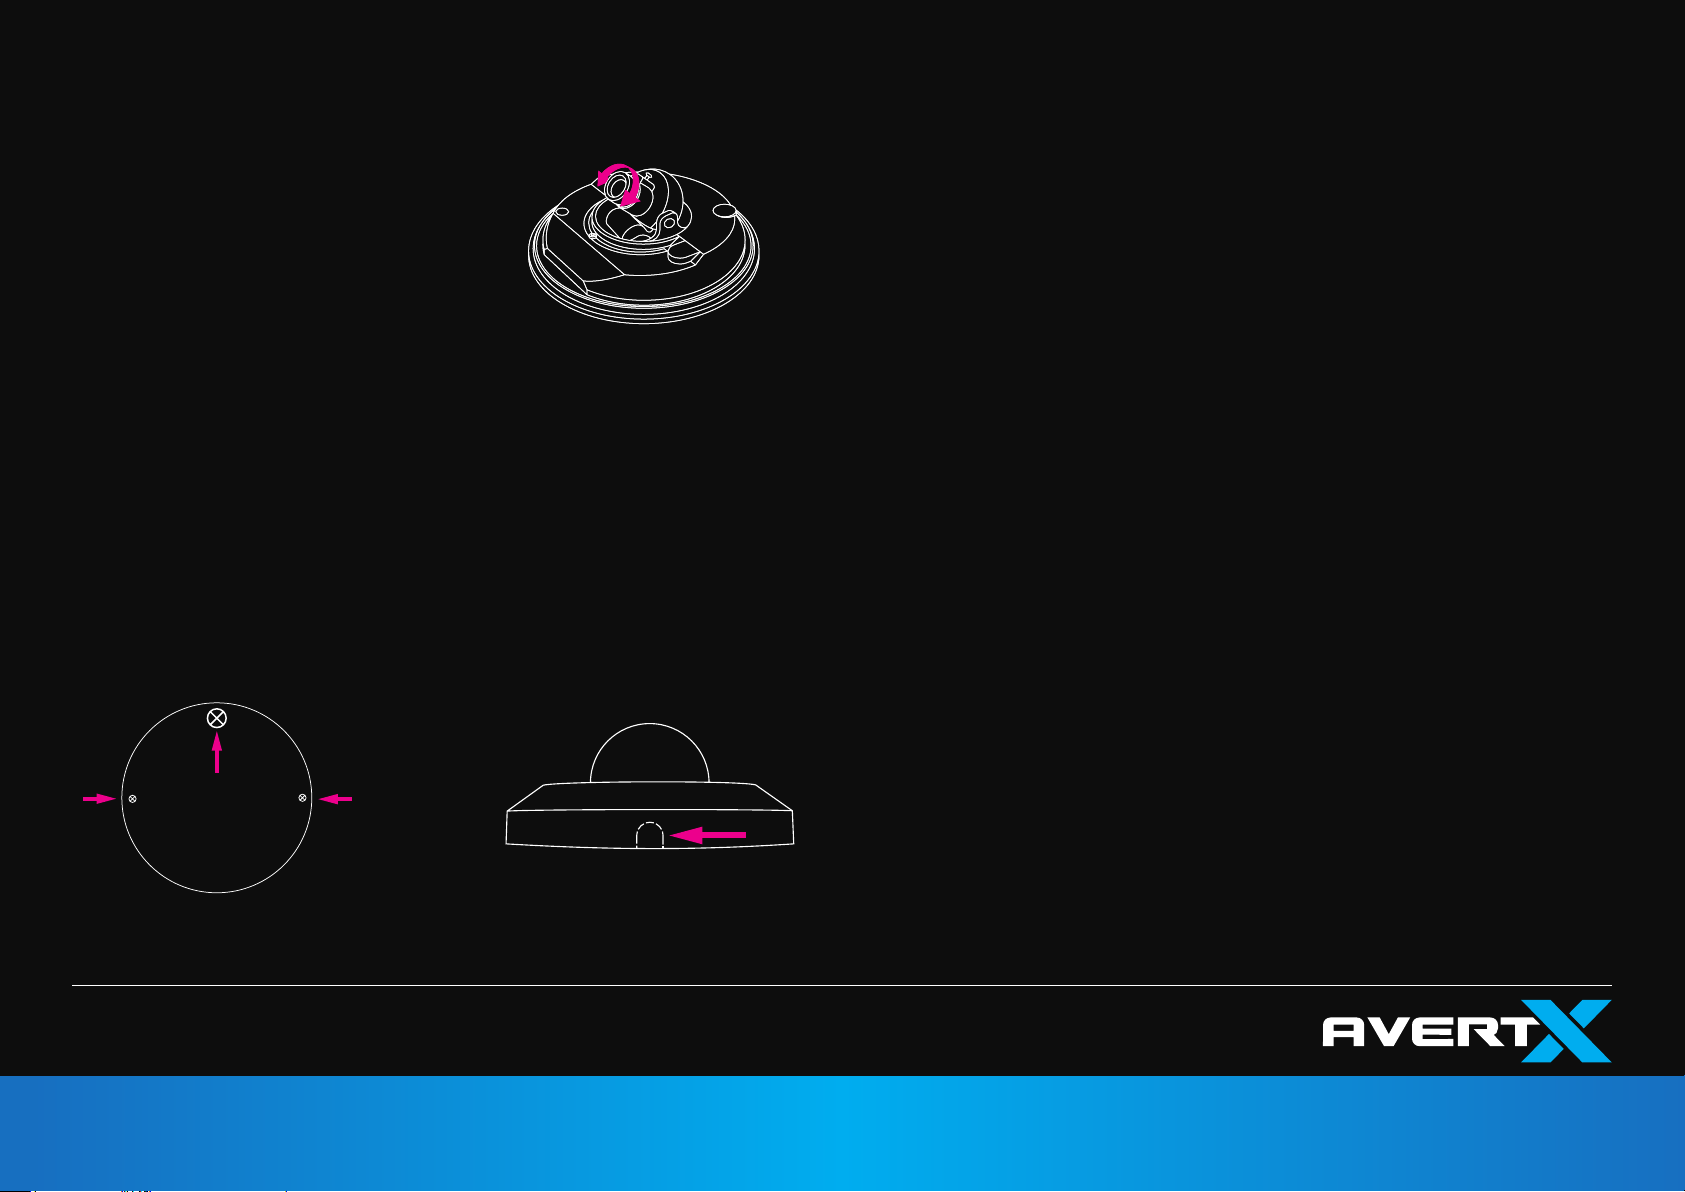
INSTALLATION
Remove Cover
Align Holes on Wall
1. Remove the dome cover using the
supplied Torx tool.
2. Mark the positions of the 2 screw holes
on the base of the camera at your
chosen location.
3. Use a 3/16” drill bit to drill the holes for
the anchors.
4. If necessary, drill a 1 1/16” hole for your
IP Connection Dongle.
5. Insert the anchors into the drilled holes.
6. Fasten the camera to the wall or ceiling
with the supplied screws.
7. Connect the Ethernet cable to the
camera.
8. Adjust the camera to the desired angle.
9. If necessary, cut the hole in the
designated spot on the housing to allow
the dongle to connect without binding.
Anchors
Quick Start Guide & Installation CD
Adjust Aim
10. Replace the dome cover. Screw the two
Torx screws on the side of the dome
cover to tightly fasten the cover in place.
31506AA
Page 2
FOCUSING THE CAMERA
CONNECTING TO THE CAMERA
Follow these steps to focus your AvertX dome camera.
1. Use the included Torx Tool to remove
the camera dome cover.
2. Loosen the lens set screw.
3. Twist the lens to focus the camera
4. Tighten the set screw.
5. Replace the dome cover.
Twist Lens to Focus
NETWORK CABLE INSTALLATION
When installing your AvertX dome camera, it is important to consider how the network
cable attached to the camera is arranged.
• If passing the cord through a wall or ceiling, drill a 1 1/16”” hole.
• If running the cord along a wall or ceiling, cut the notch in the dome housing to
allow the cord to pass through the housing.
• For outdoor installations, seal any holes in the wall or ceiling to protect against
leaks.
If you are using this camera with an AvertX recorder, follow the instructions in the
user manual to connect to your camera. You can also set up your camera over the
web. The viewer software will automatically be installed on your PC the rst time you
connect to the camera. If your internet browser doesn’t install the viewer software,
check the security settings or ActiveX controls and plug-in settings. If your internet
browser asks for permission to install the ActiveX control, you must allow the ActiveX
control to continue the installation.
To enable installation of ActiveX controls on Internet Explorer:
1. From the Tools menu, click Internet Options.
2. Click Security,and then click Internet.
3. Click Custom Level and ensure that all ActiveX controls and plug-ins are set
to Enable or Prompt.
To add the camera to your trusted sites:
1. From the Tools menu, click Internet Options.
2. Click Security, and then click Trusted Sites.
3. Click Sites.
4. Type the IP Address of the camera. Ensure that the Require server verication
check box is cleared.
USERNAME AND PASSWORD
ORDrill Hole in Wall Cut Hole in Housing
Copyright © 2012 AvertX. All rights reserved. Information contained in this document
is subject to change wtihout prior notice. AvertX does its best to provide accurate
information, but cannot be held responsible for typos or mistakes.
The username and password are case sensitive. AvertX strongly recommendeds
changing the password after the initial setup to prevent unauthorized access to the
camera.
Username – Admin
Password – 1234
For Further Instruction
For more information on installing your AvertX camera, see the user manual or view
instructional videos at avertx.com/videos.
1-855-2avertX (1-855-228-3789)
www.avertx.com
31506AA
 Loading...