

Page 1
Quick Guide
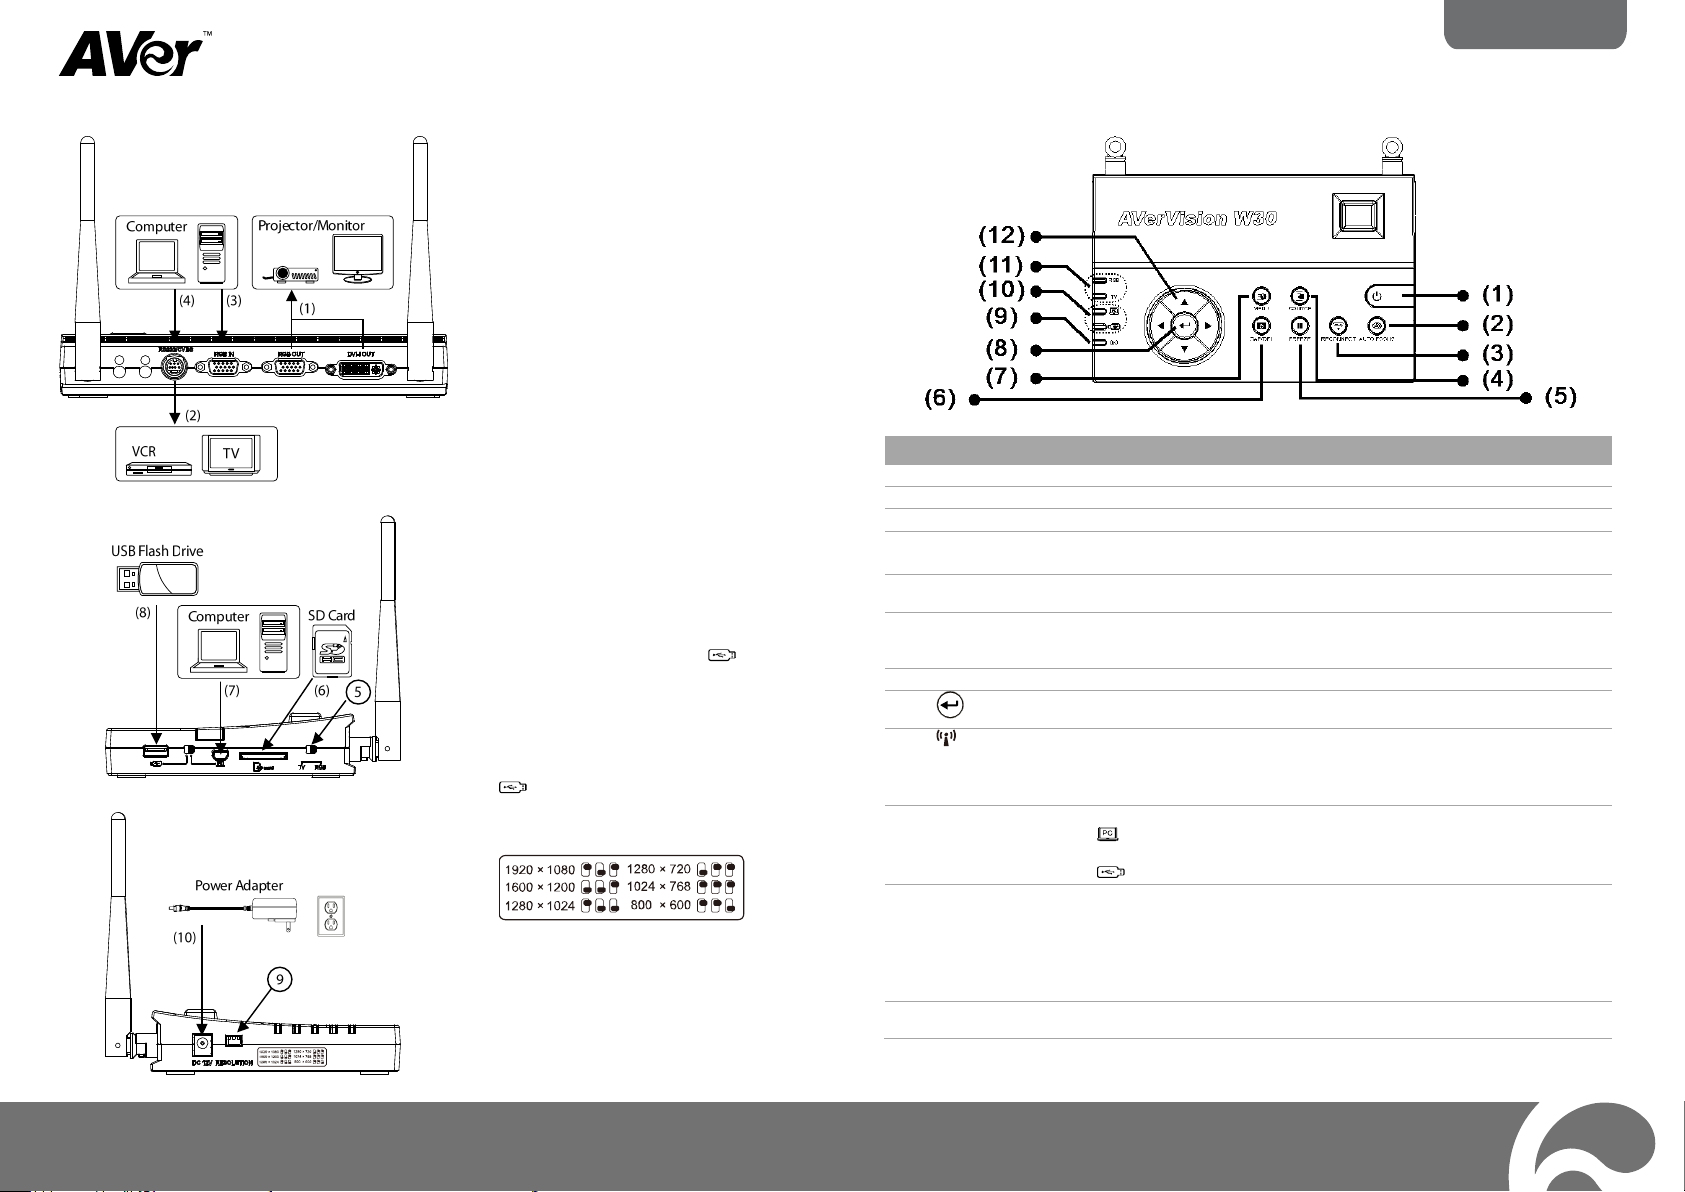
(1) Connect to output video display on a
projector or monitor.
(2) Connect to output video display on a
TV or VCR.
(3) Connect to display video signal from a
computer.
(4) Connect to a computer serial port or to
any control panel or for centralized
control system thru RS-232/CBVS
cable.
(5) TV :
select to output video signal to
RS-232/CVBS port.
RGB:
select to output video signal to
RGB OUT and DVI-I OUT port
(6) Insert an SD card. The captured image
can be saved directly to this card.
(7) Connect to computer via USB cable.
The switch must be set to . This
allows you to use W30 as webcam or
transfer file.
(8) Insert a USB flash drive. The captured
image can be saved directly to this
flash drive. The switch must be set to
.
(9) Set the display output resolution. You may
refer to the table printed on the side.
(10) Connect the power adapter into this port.
Name
Function
(1) POWER
Turn the unit on/standby mode.
(2) AUTO FOCUS
Adjust the focus automatically.
(3) RECONNECT
Reconnect the W30 camera and base.
(4) SOURCE
Select to display CAM, RGB IN, PLAYBACK, CAM/RGB IN, SPLIT
SCREEN or PIP mode.
(5) FREEZE
- Freeze live images in camera mode.
- Pause slide show in playback mode.
(6) CAP/DEL
- Capture still image in Camera mode. In continuous capture mode,
press this button again to stop.
- Delete the selected picture in Playback mode.
(7) MENU
Open and exit the OSD menu.
(8)
- Make a selection in Playback mode and OSD menu.
- Play/Pause picture slide show.
(9)
Show the wireless signal condition.
data to W30 base.
(10) USB Switch LED
Indicate the USB switch selection to show which USB port is activated.
- allowing you to use the W30 as USB camera or transfer the
captured images from the memory to computer.
- allowing you to save still image in the USB flash drive.
(11) OUTPUT LED
Indicate TV-RGB switch selection to show which port the video signal is
sent out.
- RGB indicates the video signal is sent out thru RGB OUT and DVI-I
OUT ports.
- TV indicates that the video signal is sent out thru RS232/CVBS port via
RCA connection.
(12) ▲,▼,◄, & ►
- Pan the image when image is magnified in playback and camera mode.
- Move the selection in Playback mode and in OSD menu.
P/ N 3 03 AP 0AW-AE3
M a d e i n T a i w a n
W30 Base Connection Ports and Switches
W30 Base Control Panel
Page 2
Quick Guide
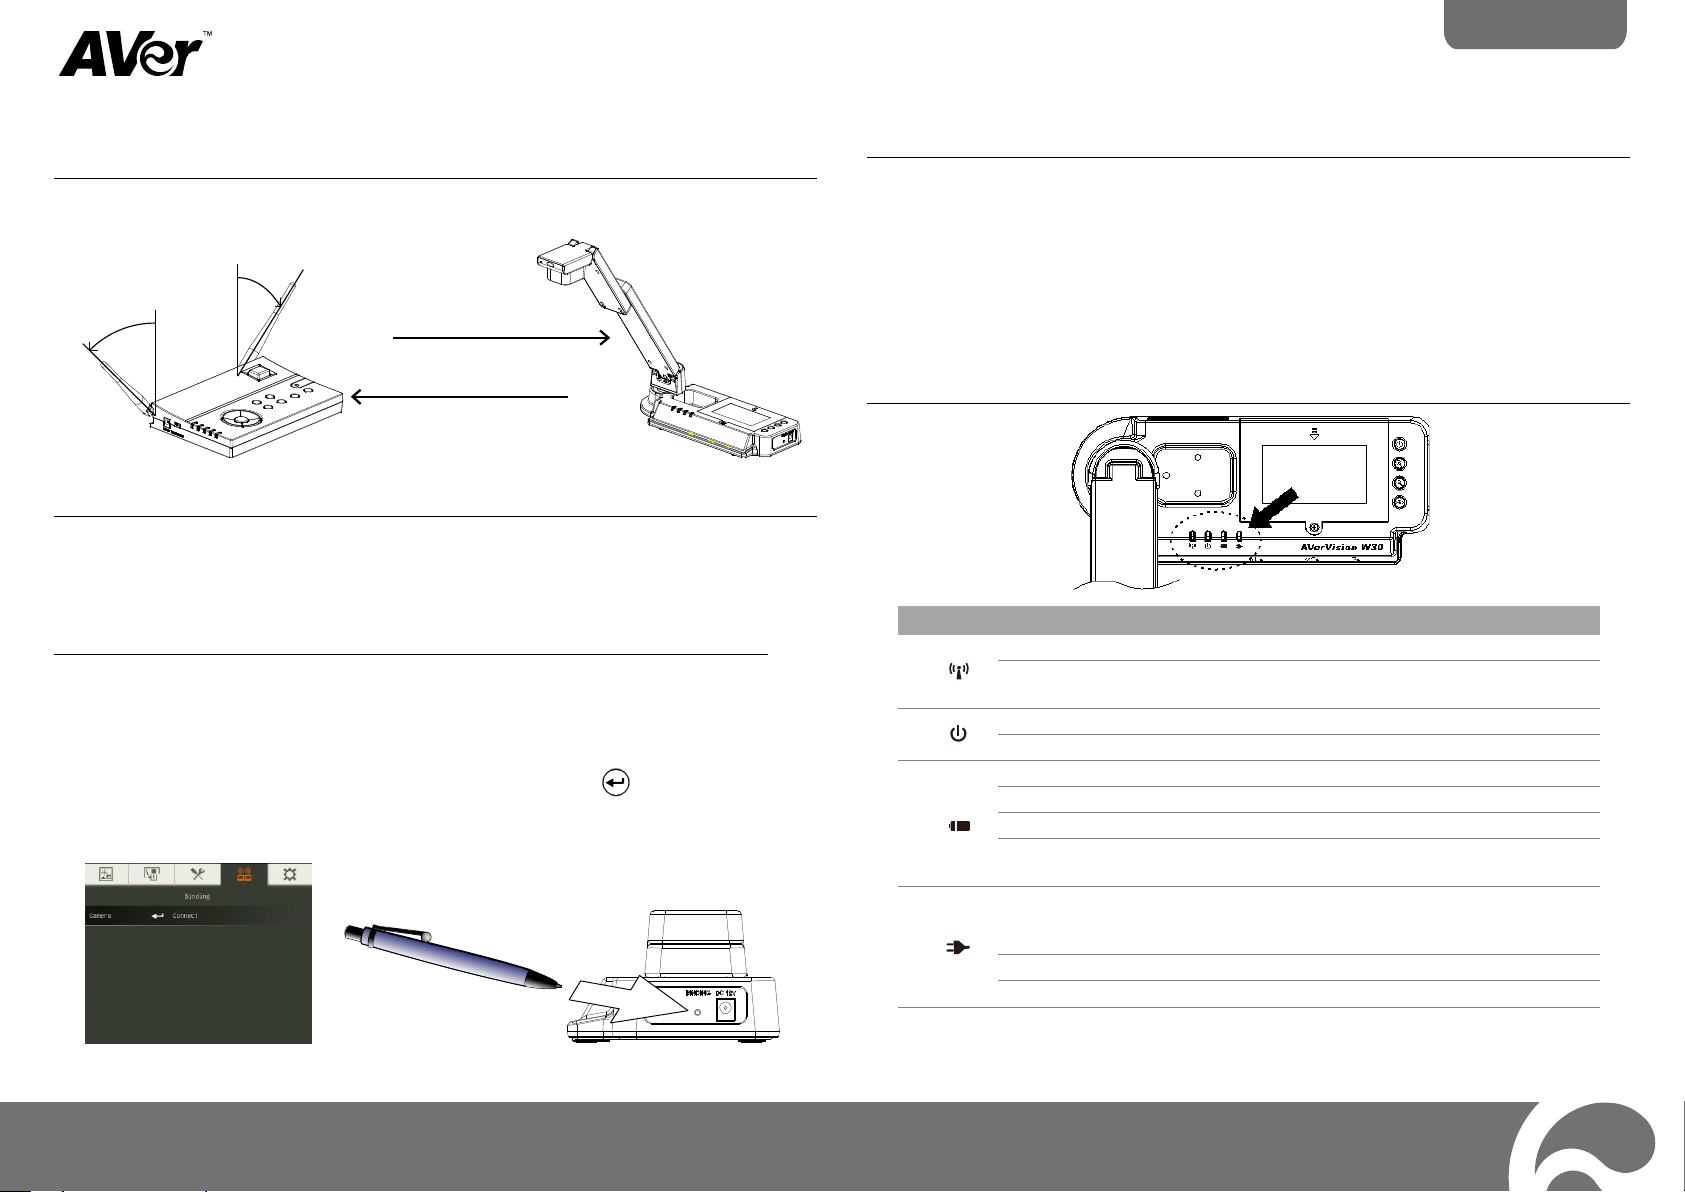
Symbol
LED Pattern
State
(1)
Steady Green
Binding the W30 camera with the W30 base.
Continuous Green
Flashing
Data transition. It sends the W30 camera data to W30
base.
(2)
Steady Blue
W30 camera is power on.
No Light
W30 camera is power off.
(3)
Green
Good charge.
Orange
Medium charge.
Red
Low charge. The camera battery has to be charged soon.
Blinking Red
Very low charge. The camera battery has to be charged
immediately.
(4)
Green
Battery is fully charged. You may unplug the power adapter
or continue to use the power source from the power
adapter.
Red
Charging the battery.
No Light
The power adapter is not connected.
15 m (45 ft)
45°
45°
Getting Started
11..
MMaakkee tthhee ccoonnnneeccttiioonn
- Connect the W30 base to a projector, monitor or TV and power.
- For optimal signal reception, orient both W30 base antennas to 45° angle.
44..
OOppttiimmiizzee tthhee wwiirreelleessss ccoonnnneeccttiioonn bbeettwweeeenn tthhee WW3300
bbaassee aanndd ccaammeerraa
Try to position the W30 base away from any interference listed below and also away
the floor and any metal devices. As we know wireless devices are susceptible to
interference from other consumer electronic devices in the 2.4GHz band, in particular:
- Microwave ovens often radiate at 2.4 GHz, especially if they are in bad repair;
- Bluetooth devices use the 2.4 GHz spectrum, shared with Wi-Fi;
- Fusion lighting, sometimes used in high-ceilinged areas, can affect Wi-Fi; and
- Some cordless phones using DECT technology operate at 2.4 GHz.
22..
CChheecckk tthhee WW3300 ccaammeerraa bbaatttteerryy lliiffee
When using the W30 camera for the first time, charge the W30 camera for at least 3
hrs. Green light means the battery is fully charged and Red light means the unit
requires charging. Upon full charge, the W30 camera can stay on for 8 hrs. Whenever
the W30 camera is not being used, please charge the W30 camera.
33..
TTuurrnn oonn tthhee ppoowweerr
Press the power button on the W30 camera first and then base. Upon turning the
power, the unit will start up for about 15-20 sec. You will be able to see the image
from the W30 camera. If you see “No Signal” on the screen, press RECONNECT
button or bind the unit.
To bind, press MENU > select Binding tab > Connect, and press to start binding.
Then use a pin or tip of the ball point pen and poke the bind button on the right panel
of W30 camera.
55..
WW3300 LLEEDD LLiigghhtt
© 2013 AVer Information Inc. All rights reserved. For more information, please refer to the user
manual in the software CD.
 Loading...