

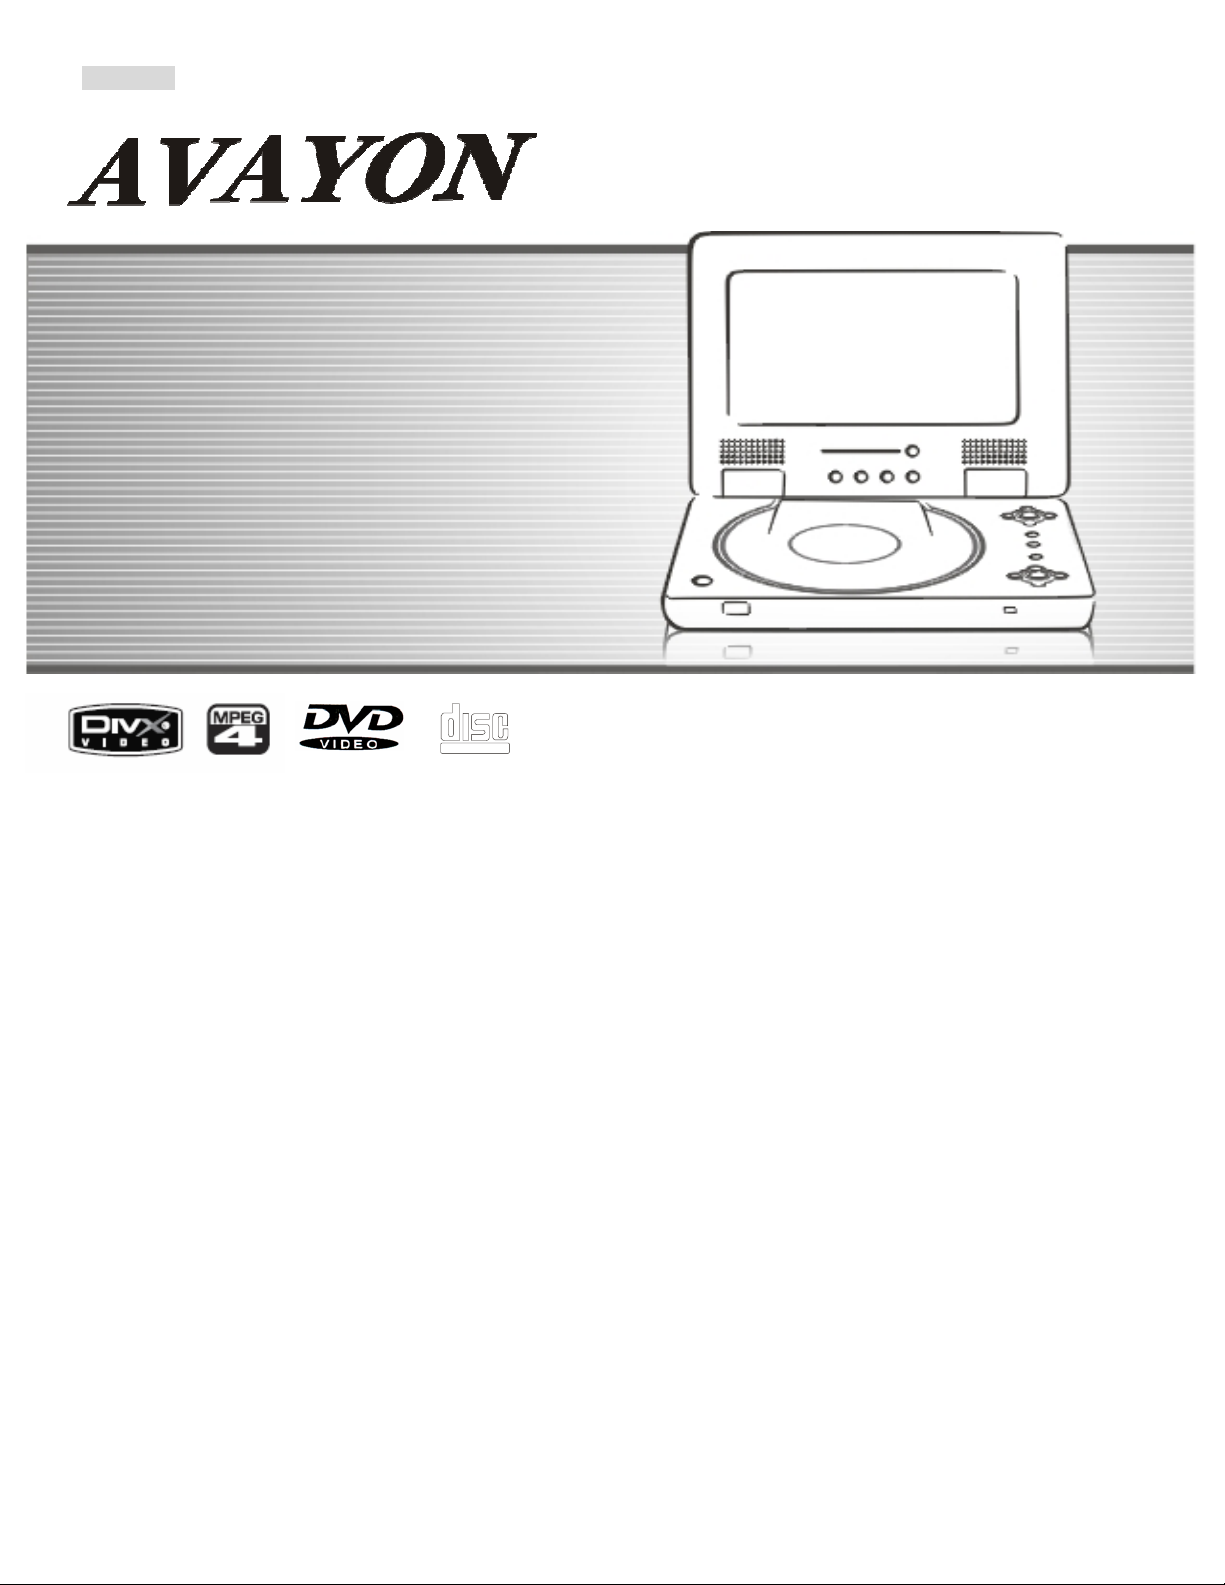
Avayon DXP-7P User Manual
ENGLISH
PORTABLE DivX MPEG-4 DVD PLAYER
Model DXP-7P
OWNER`S MANUAL
Please read this manual before operating.
COMPACT
DIGITAL AUDIO

Table of Contents
Table of Contents.........................................................................................................................................................................……………………..2
Safety Information......................................................................................................................................................................……………………....3
DivX Certification…………………………………………………………………………………………………………………………………………………..4
Remote Control …...................................................................................................................................………………………………….……............5
Description...............................................................................................................................................................................……………………......6
Using the Remote Control....................................................................................................................................................………………….............7
Connecting Earphones to the DVD Player..............................................................................................................................…………………..........8
Connecting to an External Component .................................................................................................................................…………………...........9
Connecting to a TV..................................................................................................................................................................……………………......0
Connecting to a Stereo Component......................................................................................................................................…………………...........11
Using the AC Adaptor..........................................................................................................................................................…………………….........12
Using the Battery Pack.....................................................................................................................................................……………………............13
Cautions in Using Battery Pack.......................................................................................................................................…………………................14
Installing Carrying Bag/Car Harness Kit (Optional Accessory)………………………………………………………………………………………………15
Playing a Disc................................................................................................................................................................……………………........ 16-21
Playing an Mp3 or Regular Audio CD..........................................................................................................................………………........................22
Playing Picture CD......................................................................................................................................................…….…………….............…...23
Setting Screen and Audio………………………………………………………………………………………………………………………………………..24
Setting Parental Control, Password, Camera Angle………………………………………………………………………………………………………….25
Setting System for TV system, Screen saver, TV type(4:3/16:9), Password, Rating, Default , DivX(R) VOD)…………………………………….26-27
Setting Language for OSD, Voice, Subtitle, Menu……....................………..............................................................................................................28
Setting Audio Output............................................................................................................................………..........................................................29
Setting Video for Brightness, Contrast, Hue, Saturation….................………….......................................................................................................30
Adjusting the LCD Screen.....................................................................................................................................................………………… .........31
Troubleshooting..........................................................................................................................................................……………………............32-33
Specifications......................................................................................................................................................…………………….........................34

Safety Information
Please read all of the safety and operating instructions before operating this Player, follow all warnings placed on the Player
and in the user's manual. These safety and operating instructions should be retained for future reference.
Safety Information
Do not expose the system to excessive moisture, rain, sand, or heat sources.
Place the DVD Player on a firm, flat surface.
Keep the DVD Player away from domestic heating equipment and direct sunlight.
When placing the DVD Player in a cabinet, allow about one inch of space all around the DVD Player for ventilation.
SAFETY WARNING
CLASS 1 LASER PRODUCT / KLASSE 1 LASER PRODUKT / LUOKAN 1 LASER LAITE / KLASS 1 LASER APPARAT / PRODUCTO
LASER CLASE.
INVISIBLE LASER RADIATION WHEN OPEN AND INTERLOCKS DEFEATED. AVOID EXPOSURE TO BEAM.
WARNING
To prevent fire or electrical shock, do not expose this Player to rain or moisture.
To avoid electrical shock, do not open the cabinet. No user-serviceable parts inside. Refer servicing to qualified personnel only.
Certain countries may regulate the disposal of the battery used to power this product. Please consult with your local authority.
Listening with earphones for many hours at maximum volume may damage your hearing.
The Player should be connected to a power supply only of the type described in the operating instructions or as marked
on the Player.
REFER ALL SERVICING TO A QUALIFIED SERVICE TECHNICIAN ONLY!

DivX Certification
By displaying the DivX® logo, we are demonstrating that AVAYON products have been tested and certified by DivXNetworks, the creators of DivX® video
technology, and are capable of playing all versions of DivX® video content. DivX Certified ensures that the DivX® content you attain and create can be played on
your AVAYON DivX® Certified product.
Supports DivX V3.11, V4.x, V5.x and later files (without QPEL and GMC).
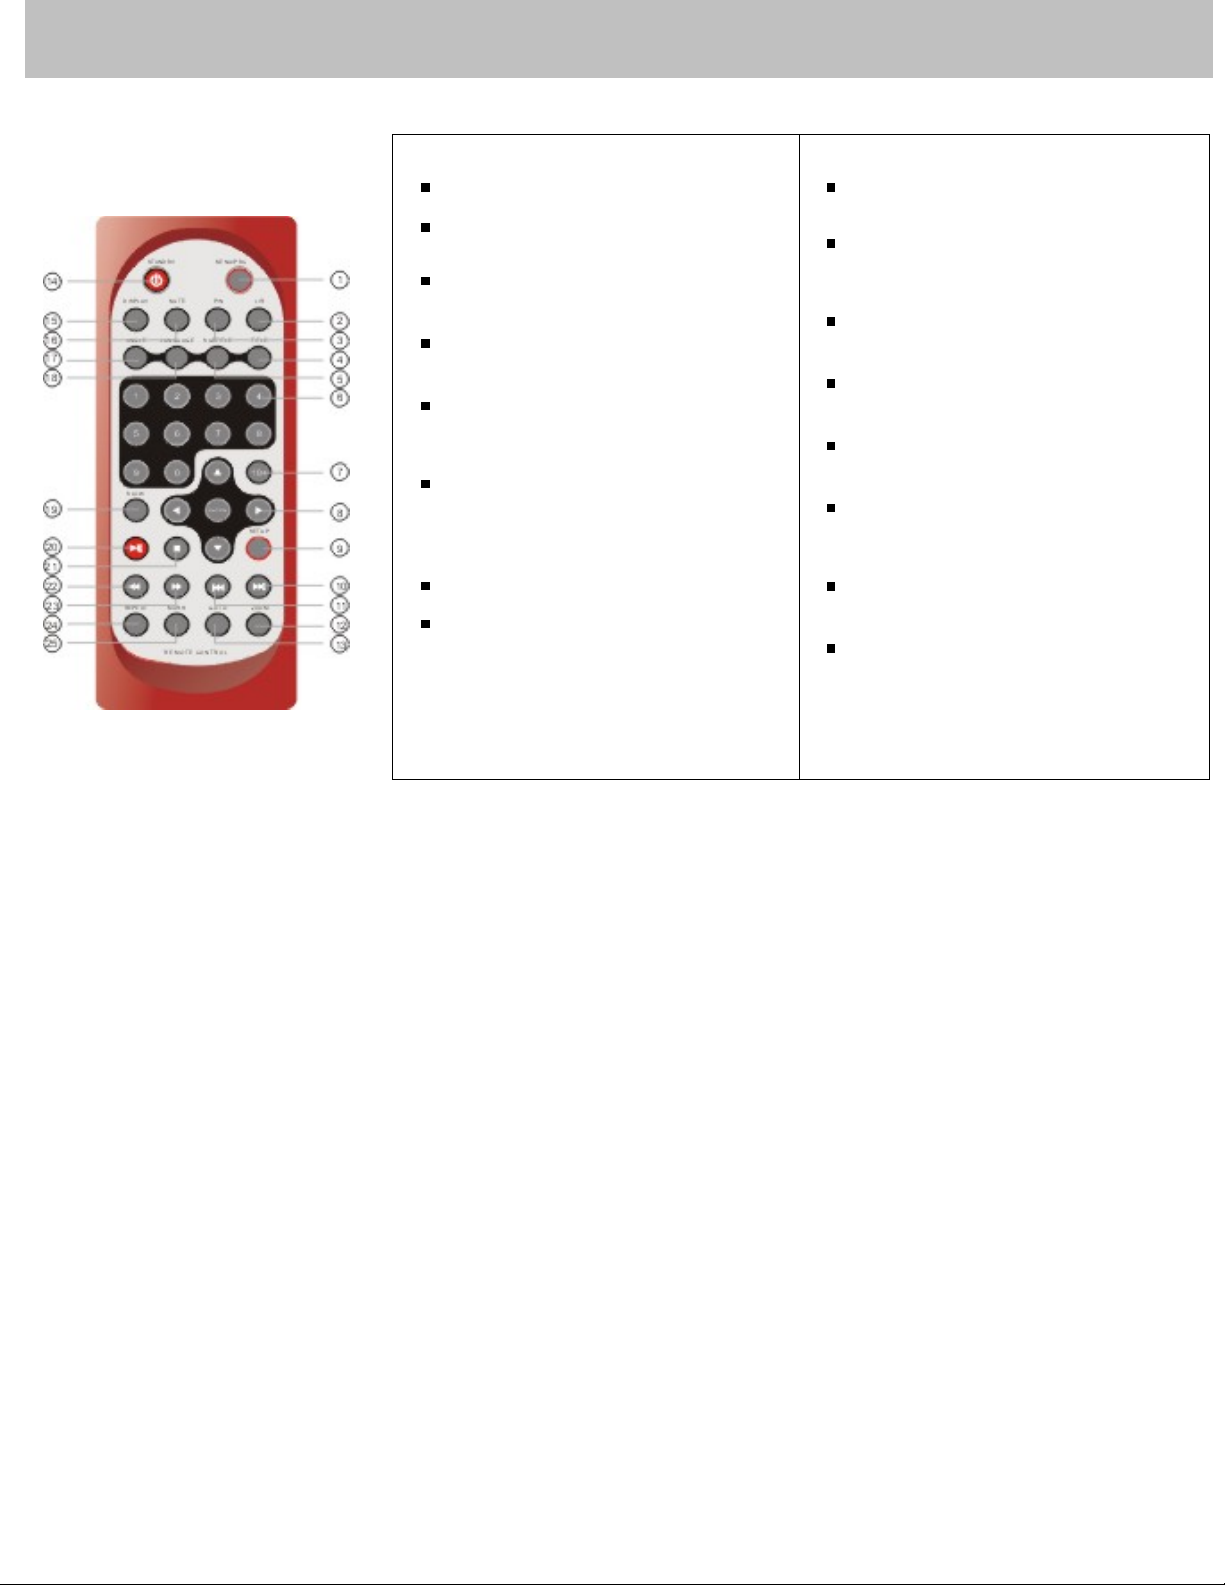
Remote Control
Remote Control
1. MENU/PBC Button
Brings up the disc menu.
2. L/R Button
Selects left, right and stereo
sound tracks.
3. P/N Button
Selects PAL/NTSC/AUTO TV systems.
4. TITLE Button
5. SUBTITLE Button
Selects the subtitle's language.
6. Number Buttons (0,1,...,9)
7. 10+ Button
Uses to input 10 to 999 (combining this
button and other digit number buttons).
8. ENTER/DIRECTION Buttons
9. SETUP Button
Brings up the setup MENU
to set up the system's
language, audio, display,
password etc.
10. SKIP FORWARD (►►▌ )Button
Use to skip to next title, chapter or track.
11. SKIP BACKWARD ( ▐◄◄ ) Button
Use to skip to previous title,
chapter or track.
12. ZOOM Button
13. GOTO Button
Use to enter the specific chapter, track
or time to playback.
14. STANDBY Button
Toggles between putting the Player on
standby and power on.
15. DISPLAY Button
Displays the current disc playback
information.
16. MUTE Button
17. ANGLE Button
Use to access various
camera angles on a DVD.
18. LANGUAGE Button
Selects the voice language in a DVD.
19. SLOW Button
20. PLAY/PAUSE ( ►║ )Button
Press once to start play,
press again to pause.
21. STOP Button
Stops disc play.
22. FAST REVERSE ( ◄◄ ) Button
23. FAST FORWARD ( ►► ) Button
24. REPEAT Button
Allows you to repeat play
a title, chapter, track, or disc.
25. MARK Button
Use to mark a point where the playback
starts each time when the MARK button
is pressed later on.
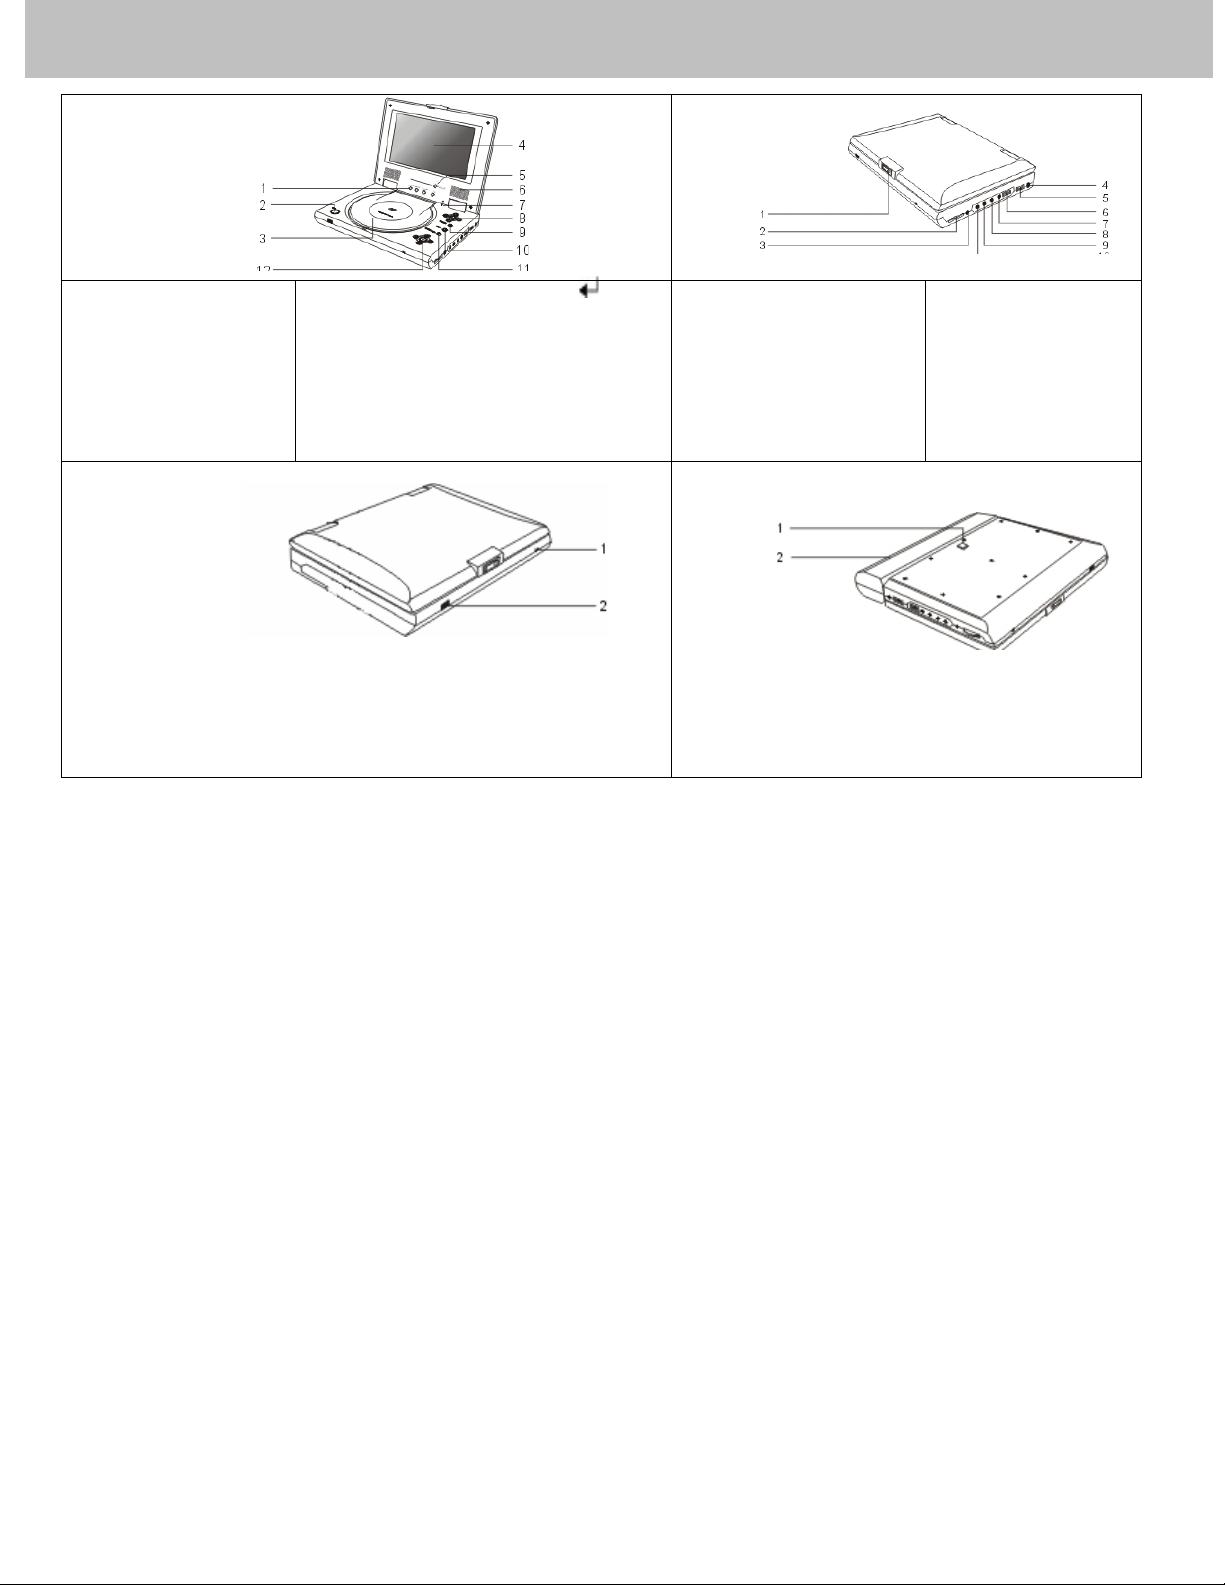
Description
Front View Right View
1. (16:9/4:3)/MODE/DOWN/UP
2. OPEN
3. DISC COVER
4. LCD
5. REVERSE DISPLAY
6. SPEAKER ►
7. LCD on/off switch
Left View
1. LED LIGHT
2. REMOTE CONTROL SENSOR
8. CURSOR(UP/DOWN/LEFT/ RIGHT), ( )
9. MENU/PBC
10. STOP
11. PAUSE/STEP ▐▐ ►
12. PLAYBACK BUTTONS PLAY
■
FAST REVERSE
FAST FORWARD
SKIP-FORWARD
SKIP-PREVIOUS
1. OPEN
2. EARPHONE/SPEAKER
VOLUME
3. EARPHONE JACK
4. DC IN 12V
5. POWER ON/OFF
6. INPUT / OUTPUT
7. VIDEO
8. AUDIO OUT
9. AUDIO IN
10. SPDIF: Digital audio
signal output jack
Bottom View
1. RELEASE LATCH (Battery pack separation switch)
2. BATTERY PACK
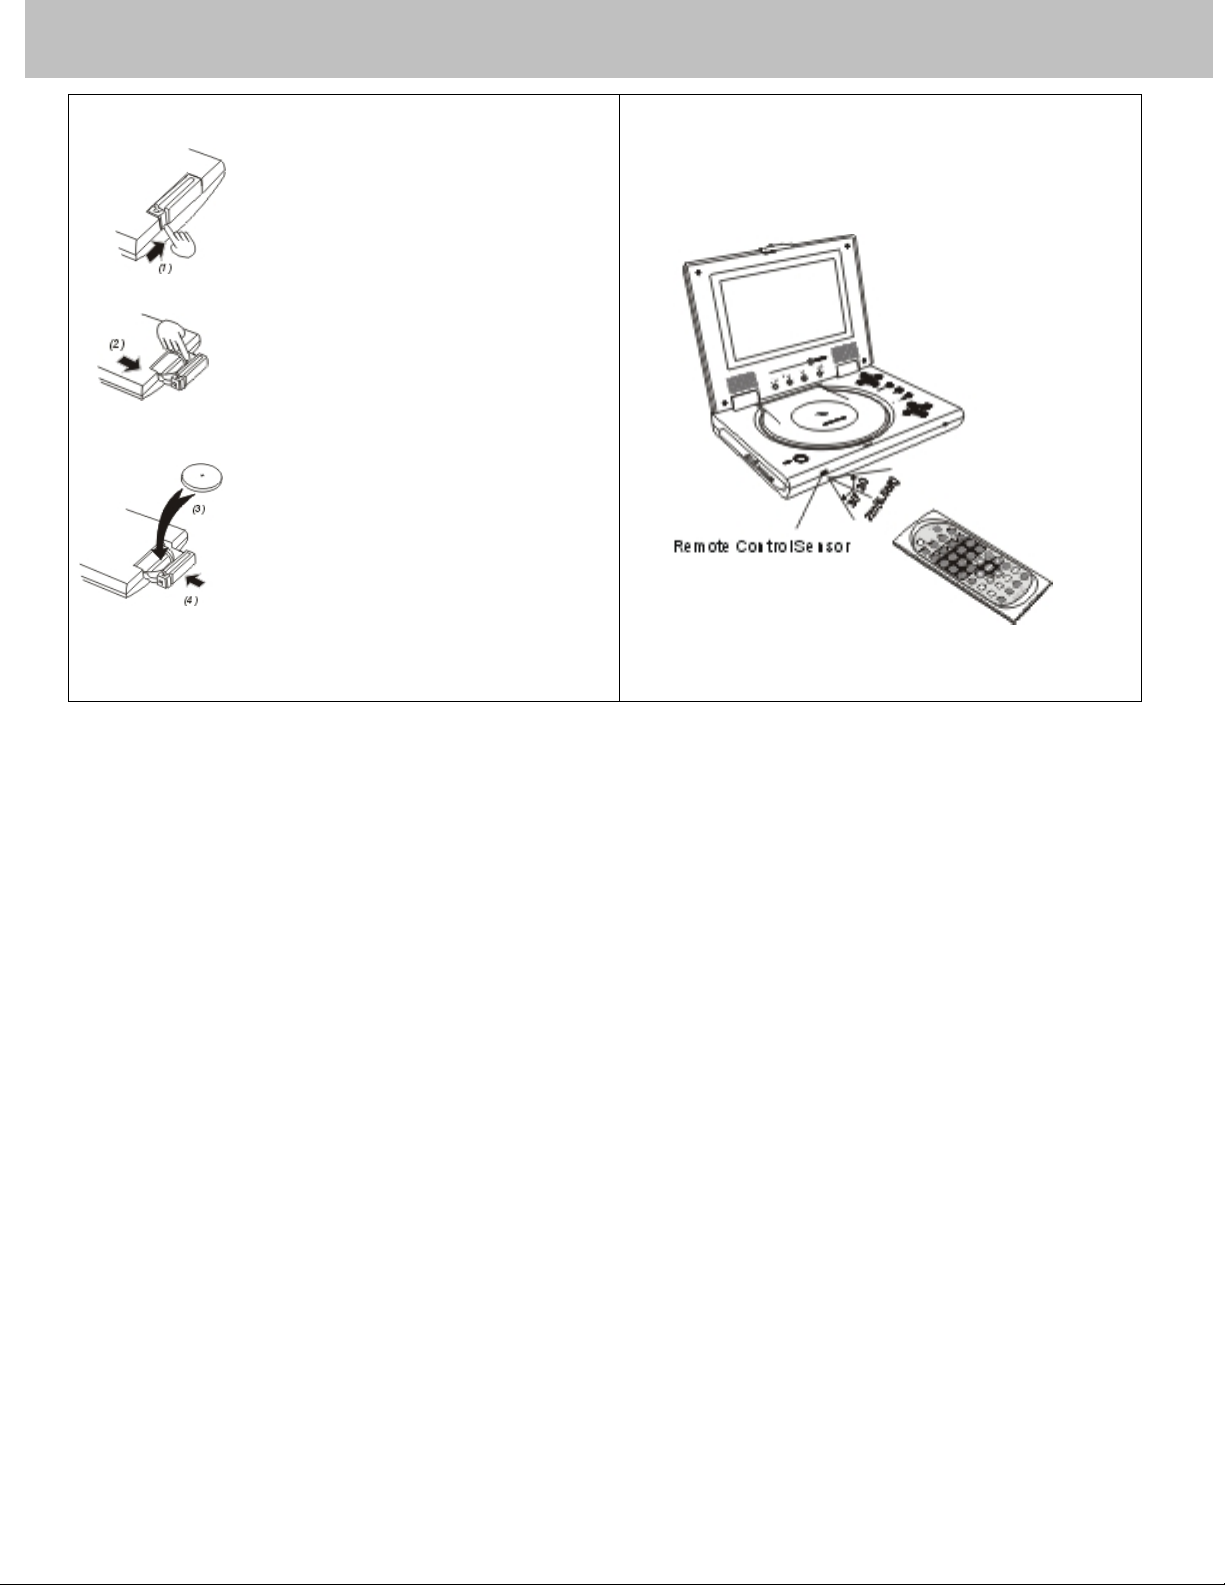
Using the Remote Control
Installing the battery
1.Press the locking tab in the arrow direction.
2. Pull out the battery tray.
3. Insert a 3V lithium battery into the
tray with the polarity ( + ) facing up
as marked.
4. Replace the battery tray by pushing it
until it clicks into place.
Using the remote control
Point the remote control directly at the remote sensor
on the front of the DVD Player.
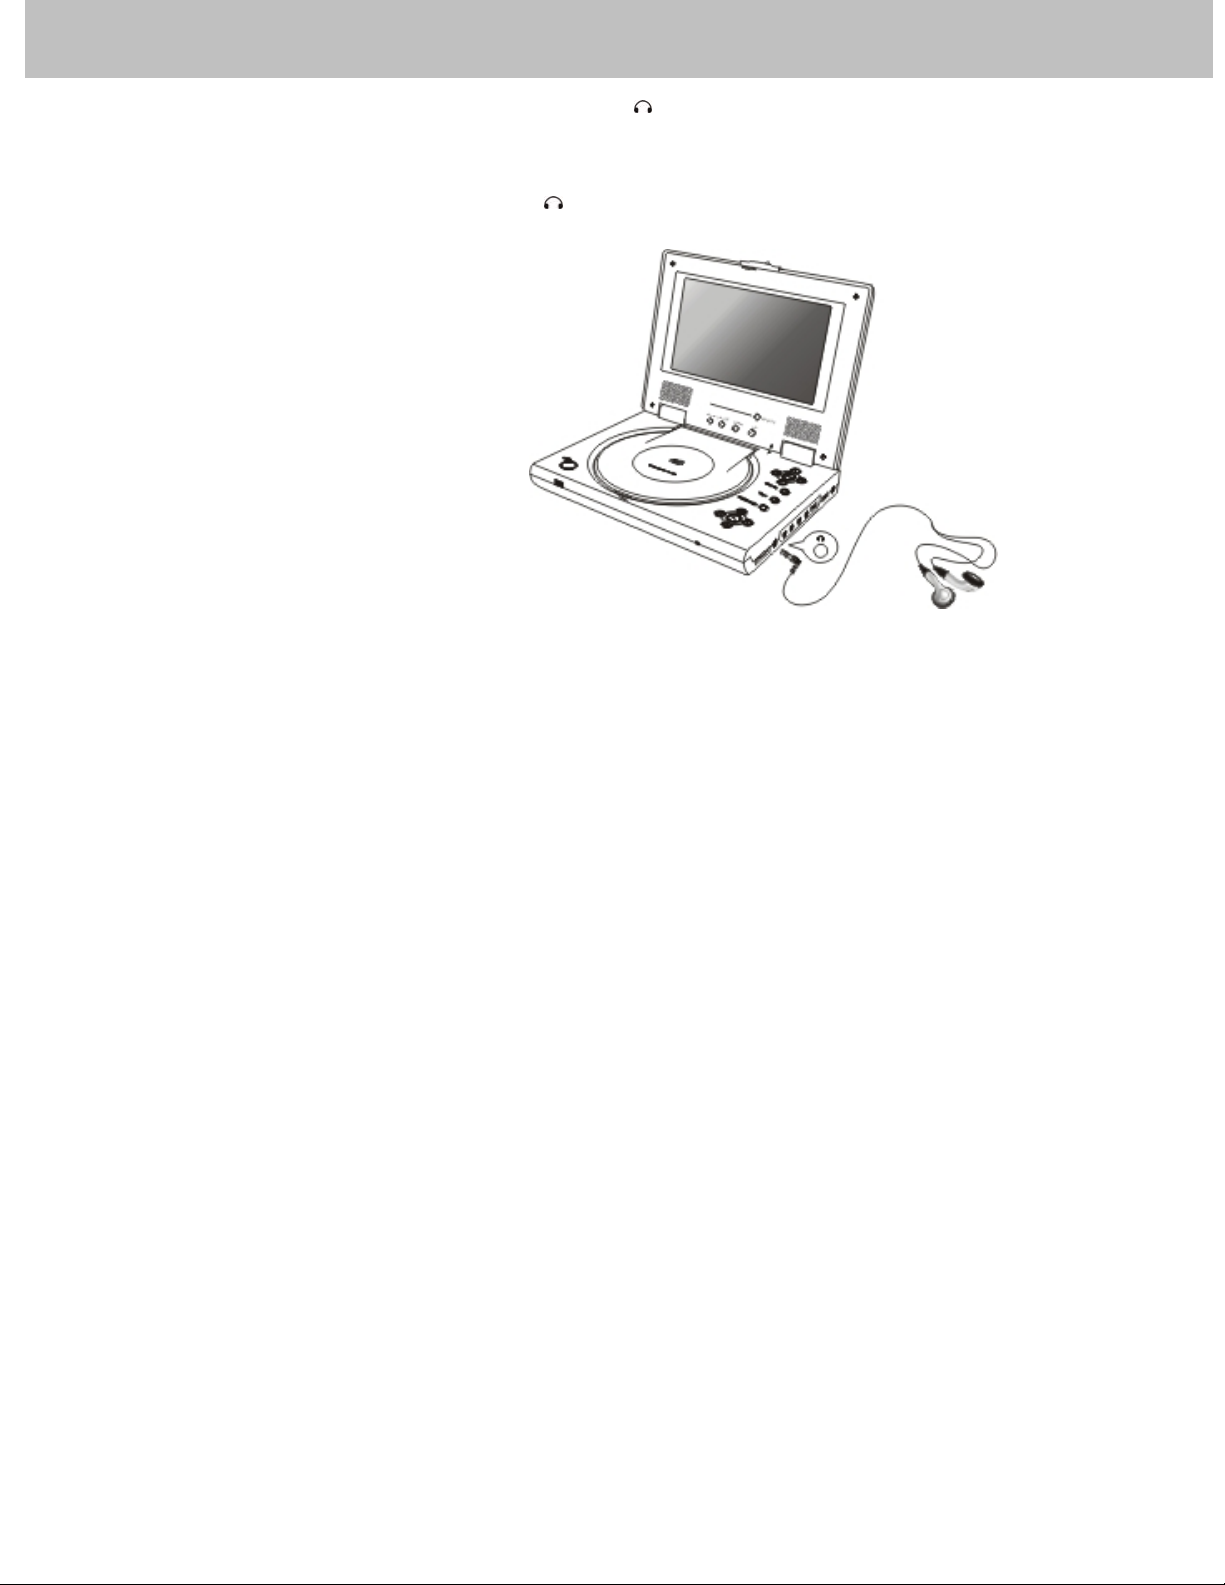
Connecting Earphones to the DVD Player
You can attach an earphone with a stereo mini-jack plug to the phone jack ( ) for private listening. Its volume is adjustable
using the VOLUME control dial. You can also connect a second earphone to the AUDIO OUT jack, but its volume cannot be
adjusted.
Note: When the earphone is connected to the Phone Jack (
Notes on DSP
The DSP decodes the digital audio signal into stereo dts or Dolby digital audio signal for speaker and earphone playback after
converting the signal to analog and amplifying it.
The 5.1 digital signal passes through without decoding and can be accessed by the SPDIF jack on the Player.
), the speaker will be disconnected.
Connecting to an External Component
You can enjoy video from VCR or camcorder on your DVD player.
1. Turn off DVD player, VCR and other components.
2. Connect the audio and video cables as illustrated below.
3. Slide INPUT/OUTPUT to INPUT.
4. Turn on power.
AV daptor cable (provided) Mini-jack to RCA)
Video(yellow)
Video in: Yellow
Video out: Green
Audio(left):White Audio (black)
Audio(right):Red
VCR or other component equipped with external output connectors
Video out: Yellow
Audio(left):White
Audio(right):Red
AV CABLE (Not provided)
Audio (black)
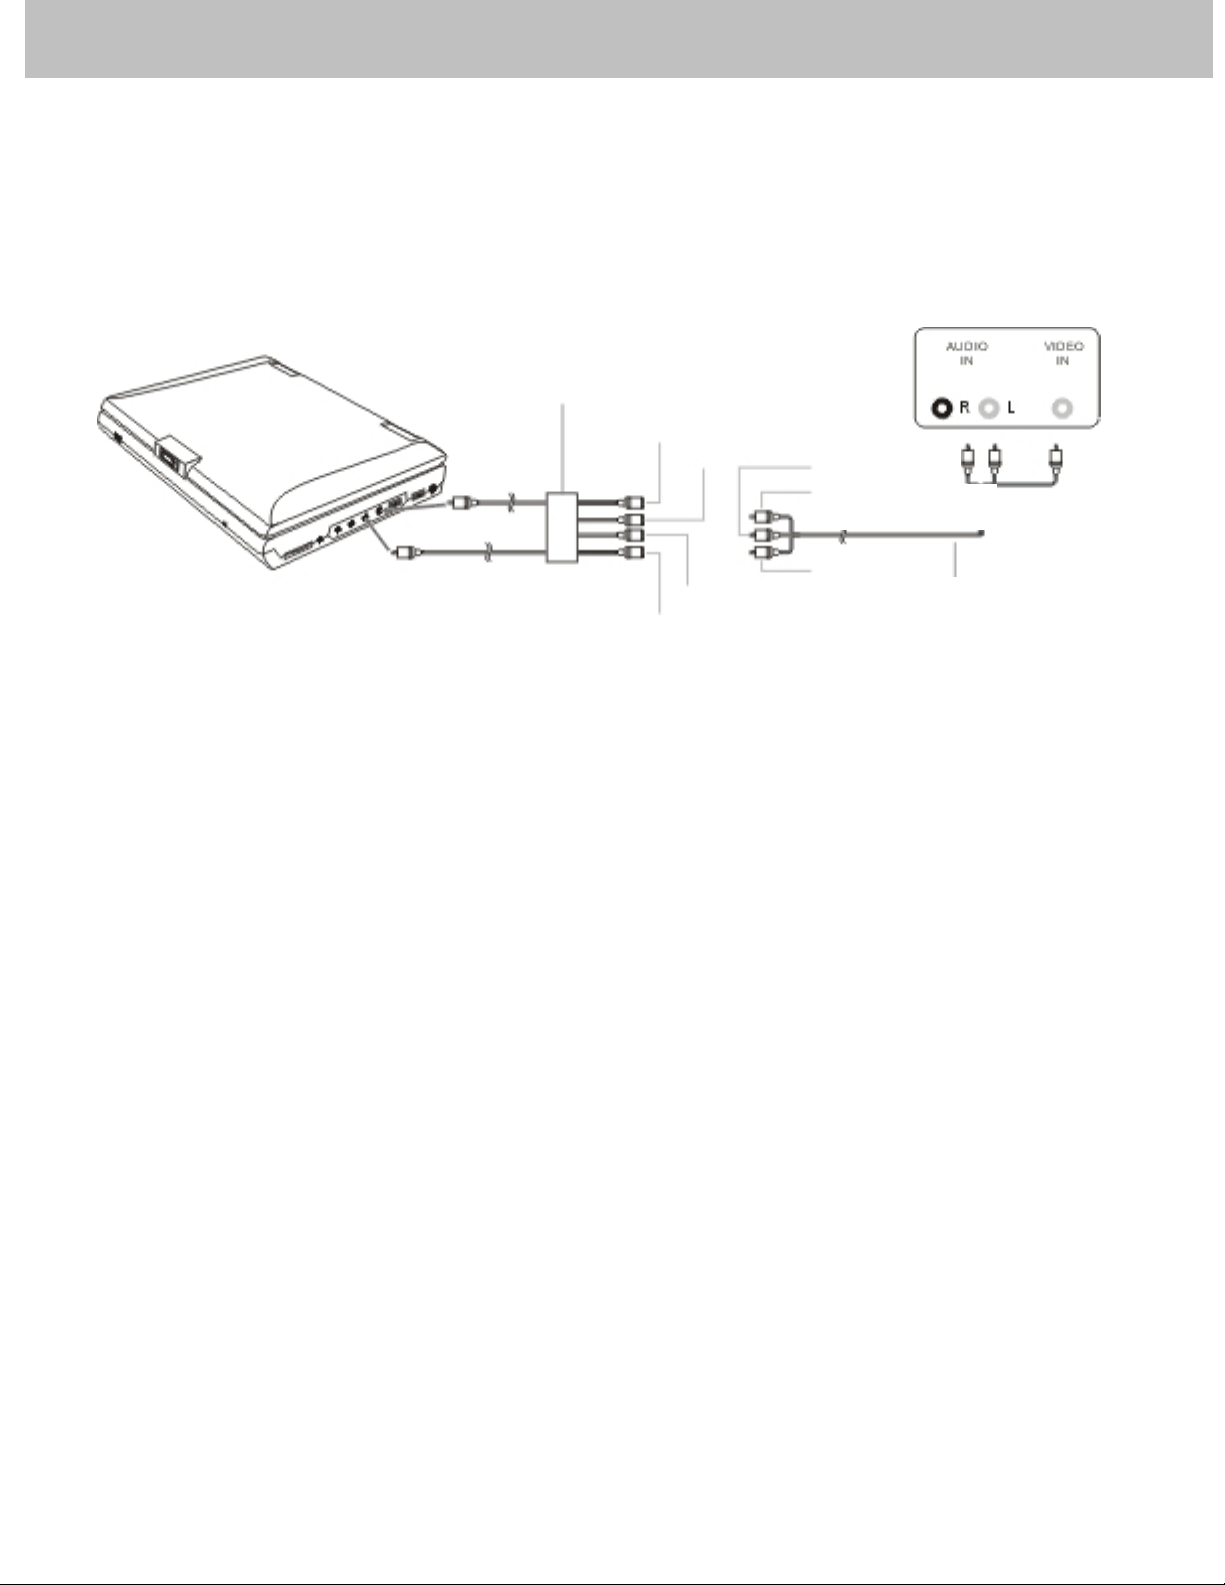
Connecting to a TV
You can enjoy DVD quality video on a TV screen.
1. Turn off DVD player and TV.
2. Connect the audio and video cables as illustrated.
3. Slide INPUT/OUTPUT to OUTPUT.
4. Turn on DVD player and TV.
5. Select corresponding Video input which is connected to DVD player.
6. Press PLAY on DVD player.
Audio (black)
AV adaptor cable (provided)
(Mini-jack to RCA)
Video(yellow)
TIPS
If you wish to view video on your TV only, close the display panel of your Player.
With the display panel shut, use the remote to control the Player.
Video(yellow)
Video out: Green Video(yellow)
Audio(left):White
Audio(right):Red
Video in: Yellow
Audio(right):Red
AV CABLE (Not provided)

Connecting to a Stereo Component
By connecting the digital output (SPDIF) on the DVD player through a coaxial cable (optional accessory)
to a Dolby Digital/DTS amplifier or processor, you can enjoy full 5.1 channel surround sound. Follow
these steps for making the connection.
1. Turn off both DVD player and your stereo system.
2. Connect the SPDIF to your stereo system as illustrated below.
3. Slide INPUT/OUTPUT to OUTPUT.
4. Turn on power of DVD player.
Depending on your amplifier system, you need to make the following selection from MENU:
1. Refer to Changing Audio Output on page 26.
2. Select SPDIF/RAW if your amplifier has 5.1-channel decoder.
3. Select SPDIF/PCM if your amplifier has 2 channels.
4. Select OFF, if there is no digital signal output from the DVD player.
SPDIF(black)
Coaxial cable
Coaxial terminal connecting stereo system
COAXIAL
Coaxial cable
COAXIAL(black)
 Loading...