

Page 1

Avaya Speech Applications Builder
Configurator User Guide
May 15, 2004
Page 2

Speech Applications Builder Configurator User Guide • May 15, 2004 • page 2 of 116
© 2004 Avaya Inc.
All Rights Reserved.
Notice
While reasonable efforts were made to ensure that the
information in this document was complete and accurate at the
time of printing, Avaya Inc. can assume no liability for any errors.
Changes and corrections to the information in this document
may be incorporated in future releases.
Preventing toll fraud
"Toll fraud" is the unauthorized use of your telecommunications
system by an unauthorized party (for example, anyone who is
not a corporate employee, agent, subcontractor, or person
working on your company's behalf). Be aware that there may be
a risk of toll fraud associated with your system and that, if toll
fraud occurs, it can result in substantial additional charges for
your telecommunications services.
Avaya fraud intervention
If you suspect that you are being victimized by toll fraud and you
need technical assistance or support, call Technical Service
Center Toll Fraud Intervention Hotline at +1-800-643-2353 for
the United States and Canada. For additional support telephone
numbers, see the Avaya Web site:
http://www.avaya.com
Select Support, then select Escalation Lists. This Web site
includes telephone numbers for escalation within the United
States. For escalation telephone numbers outside the United
States, select Global Escalation List.
Providing telecommunications security
Telecommunications security (of voice, data, and video
communications) is the prevention of any type of intrusion to
(that is, either unauthorized or malicious access to or use of)
your company's telecommunications equipment by some party.
Your company's "telecommunications equipment" includes both
this Avaya product and any other voice/data/video equipment
that could be accessed via this Avaya product (that is,
"networked equipment").
An "outside party" is anyone who is not a corporate employee,
agent, subcontractor, or person working on your company's
behalf. Whereas, a "malicious party" is anyone (including
someone who may be otherwise authorized) who accesses your
telecommunications equipment with either malicious or
mischievous intent.
Such intrusions may be either to/through synchronous (timemultiplexed and/or circuit-based) or asynchronous (character-,
message-, or packet-based) equipment or interfaces for reasons
of:
• Use (of capabilities special to the accessed
equipment)
• Theft (such as, of intellectual property, financial
assets, or toll-facility access)
• Eavesdropping (privacy invasions to humans)
• Mischief (troubling, but apparently innocuous,
tampering)
• Harm (such as harmful tampering, data loss or
alteration, regardless of motive or intent)
Be aware that there may be a risk of unauthorized intrusions
associated with your system and/or its networked equipment.
Also realize that, if such an intrusion should occur, it could result
in a variety of losses to your company (including, but not limited
to, human and data privacy, intellectual property, material
assets, financial resources, labor costs, and legal costs).
Your responsibility for your company's telecommunications
security
The final responsibility for securing both this system and its
networked equipment rests with you, an Avaya customer's
system administrator, your telecommunications peers, and your
managers. Base the fulfillment of your responsibility on acquired
knowledge and resources from a variety of sources, including,
but not limited to:
• Installation documents
• System administration documents
• Security documents
• Hardware-/software-based security tools
• Shared information between you and your peers
• Telecommunications security experts
To prevent intrusions to your telecommunications equipment,
you and your peers should carefully program and configure:
• Your Avaya-provided telecommunications systems
and their interfaces
• Your Avaya-provided software applications, as well as
their underlying hardware/software platforms and
interfaces
• Any other equipment networked to your Avaya
products.
Part 15: Class A Statement
For the MCC1, SCC1, G600, and CMC1 Media Gateways:
Note: This equipment has been tested and found to comply with
the limits for a Class A digital device, pursuant to Part 15 of the
FCC Rules. These limits are designed to provide reasonable
protection against harmful interference when the equipment is
operated in a commercial environment. This equipment
generates, uses, and can radiate radio frequency energy and, if
not installed and used in accordance with the instruction manual,
may cause harmful interference to radio communications.
Operation of this equipment in a residential area is likely to
cause harmful interference, in which case the user will be
required to correct the interference at his own expense.
Part 15: Class B Statement
For the G700 Media Gateway:
Note: This equipment has been tested and found to comply with
the limits for a Class B digital device, pursuant to Part 15 of the
FCC Rules. These limits are designed to provide reasonable
protection against harmful interference in a residential
installation. This equipment generates, uses, and can radiate
radio-frequency energy and, if not installed and used in
accordance with the instructions, may cause harmful interference
to radio communications. However, there is no guarantee that
interference will not occur in a particular installation. If this
equipment does cause harmful interference to radio or television
reception, which can be determined by turning the equipment off
and on, the user is encouraged to try to correct the interference
by one or more of the following measures:
• Reorient the receiving television or radio antenna
where this may be done safely.
• To the extent possible, relocate the receiver with
respect to the telephone equipment.
• Where the telephone equipment requires AC power,
plug the telephone into a different AC outlet so that the
telephone equipment and receiver are on different
branch circuits.
• Consult the Dealer or an experienced radio/TV
technician for help.
Page 3

Speech Applications Builder Configurator User Guide • May 15, 2004 • page 3 of 116
Canadian Department of Communications (DOC)
Interference Information
For MCC1, SCC1, G600, and CMC1 Media Gateways:
This Class A digital apparatus complies with Canadian ICES-
003.
Cet appareil numérique de la classe A est conforme à la norme
NMB-003 du Canada.
For the G700 Media Gateway:
This Class B digital apparatus complies with Canadian ICES-
003.
Cet appareil numérique de la classe B est conforme à la norme
NMB-003 du Canada.
This equipment meets the applicable Industry Canada Terminal
Equipment Technical Specifications. This is confirmed by the
registration number. The abbreviation, IC, before the registration
number signifies that registration was performed based on a
Declaration of Conformity indicating that Industry Canada
technical specifications were met. It does not imply that Industry
Canada approved the equipment.
Japan
For the MCC1, SCC1, G600, and CMC1 Media Gateways:
This is a Class A product based on the standard of the Voluntary
Control Council for Interference by Information Technology
Equipment (VCCI). If this equipment is used in a domestic
environment, radio disturbance may occur, in which case, the
user may be required to take corrective actions.
For the G700 Media Gateway:
This is a Class B product based on the standard of the Voluntary
Control Council for Interference by Information Technology
Equipment (VCCI). If this equipment is used in a domestic
environment, radio disturbance may occur, in which case, the
user may be required to take corrective actions.
Part 15: Personal Computer Statement
This equipment has been certified to comply with the limits for a
Class B computing device, pursuant to Subpart J of Part 15 of
FCC Rules. Only peripherals (computing input/output devices,
terminals, printers, etc.) certified to comply with the Class B limits
may be attached to this computer. Operation with noncertified
peripherals is likely to result in interference to radio and
television reception.
Part 68: Answer-Supervision Signaling
Allowing this equipment to be operated in a manner that does
not provide proper answer-supervision signaling is in violation of
Part 68 rules. This equipment returns answer-supervision signals
to the public switched network when:
• answered by the called station,
• answered by the attendant, or
• routed to a recorded announcement that can be
administered by the CPE user.
This equipment returns answer-supervision signals on all direct
inward dialed (DID) calls forwarded back to the public switched
telephone network. Permissible exceptions are:
• A call is unanswered.
• A busy tone is received.
• A reorder tone is received.
DECLARATIONS OF CONFORMITY
US FCC Part 68 Supplier’s Declaration of Conformity (SDoC)
Avaya Inc. in the United States of America hereby certifies that
the Avaya switch equipment described in this document and
bearing a TIA TSB-168 label identification number complies with
the Federal Communications Commission’s (FCC) Rules and
Regulations 47 CFR Part 68, and the Administrative Council on
Terminal Attachments (ACTA) adopted technical criteria.
Avaya further asserts that Avaya handset equipped terminal
equipment described in this document complies with Paragraph
68.316 of the FCC Rules and Regulations defining Hearing Aid
Compatibility and is deemed compatible with hearing aids.
Copies of SDoCs signed by the Responsible Party in the US can
be obtained by contacting your local sales representative and
are available on the following Web site:
http://www.avaya.com/support
All Avaya switch products are compliant with Part 68 of the FCC
rules, but many have been registered with the FCC before the
SDoC process was available. A list of all Avaya registered
products may be found at:
http://www.part68.org/
by conducting a search using "Avaya" as manufacturer.
European Union Declarations of Conformity
Avaya Inc. declares that the equipment specified in this
document bearing the "CE" (Conformité Europeénne) mark
conforms to the European Union Radio and Telecommunications
Terminal Equipment Directive (1999/5/EC), including the
Electromagnetic Compatibility Directive (89/336/EEC) and Low
Voltage Directive (73/23/EEC). This equipment has been
certified to meet CTR3 Basic Rate Interface (BRI) and CTR4
Primary Rate Interface (PRI) and subsets thereof in CTR12 and
CTR13, as applicable. Copies of these Declarations of
Conformity (DoCs) signed by the Vice President of R&D, Avaya
Inc., can be obtained by contacting your local sales
representative and are available on the following Web site:
http://www.avaya.com/support
TCP/IP facilities
Customers may experience differences in product performance,
reliability, and security, depending upon network
configurations/design and topologies, even when the product
performs as warranted.
Warranty
Avaya Inc. provides a limited warranty on this product. Refer to
your sales agreement to establish the terms of the limited
warranty. In addition, Avaya’s standard warranty language, as
well as information regarding support for this product, while
under warranty, is available through the following Web site:
http://www.avaya.com/support
Link disclaimer
Avaya Inc. is not responsible for the contents or reliability of any
linked Web sites and does not necessarily endorse the products,
services, or information described or offered within them. We
cannot guarantee that these links will work all of the time and we
have no control over the availability of the linked pages.
Page 4

Speech Applications Builder Configurator User Guide • May 15, 2004 • page 4 of 116
Trademarks
Avaya is a trademark of Avaya Inc.
Insert all other Avaya Trademarks here, then delete this
paragraph. DO NOT include other company’s trademarks.
All trademarks identified by the ® or ™ are registered
trademarks or trademarks, respectively, of Avaya Inc. All other
trademarks are the property of their respective owners.
Ordering information: Avaya Publications Center
Voice: +1-207-866-6701
1-800-457-1764 (Toll-free, U.S. and Canada only)
Fax: +1-207-626-7269
1-800-457-1764 (Toll-free, U.S. and Canada only)
Write: Globalware Solutions
200 Ward Hill Avenue
Haverhill, MA 01835 USA
Attention: Avaya Account Manager
Web: http://www.avayadocs.com
E-mail: [email protected]
Order:
Avaya support
Avaya provides a telephone number for you to use to report
problems or to ask questions about your contact center. The
support telephone number is1-800-242-2121 in the United
States. For additional support telephone numbers, see the Avaya
Web site:
http://www.avaya.com
Select Support, then select Escalation Lists. This Web site
includes telephone numbers for escalation within the United
States. For escalation telephone numbers outside the United
States, select Global Escalation List.
Comments
To comment on this document, send e-mail to
Acknowledgment
This document was written by the CRM Information
Development group.
Page 5

Speech Applications Builder Configurator User Guide • May 15, 2004 • page 5 of 116
Contents
Contents ............................................................................................................................................. 5
About this document ......................................................................................................................... 7
Audience 7
Other documentation 7
System requirements......................................................................................................................... 8
Hardware requirements 8
Software requirements 8
Operating System 8
Introduction to Speech Applications Builder.................................................................................... 9
Some terminology 9
The SAB GUI 9
The structure of a dialog flow 10
Prompts 13
The SAB database 14
Debugging facilities 14
Version control 14
Starting SAB..................................................................................................................................... 16
Logging in 16
Entering the License Key 17
Changing your password 17
Exiting SAB 18
The SAB GUI..................................................................................................................................... 19
The Menu bar 20
The Tool bar 21
Context menus 23
The Browser 24
The Dialog Modeler window 29
The Dialogs tree ............................................................................................................................... 33
Classification 34
Adding a new dialog flow 34
Checking in and out 37
Building a dialog flow 38
Sub-dialogs 68
Deleting a dialog flow 72
Deleting components and connections 72
Page 6

Speech Applications Builder Configurator User Guide • May 15, 2004 • page 6 of 116
Finding a stored dialog 73
Copying a dialog flow 74
Renaming a dialog flow 75
Migrating a dialog flow 76
Saving a dialog flow 77
Importing a dialog flow from file 79
The Prompts tree.............................................................................................................................. 82
Adding a new recorded prompt 82
Searching for a prompt 87
Viewing a recorded prompt 87
Editing a prompt 88
Exporting and importing prompt files 89
Persona 90
The Component Workbench............................................................................................................ 92
Importing components 92
The Administration resource ........................................................................................................... 93
Dialog Configuration 93
Debugging a dialog ........................................................................................................................ 100
Dialog Analysis 100
Run/Debug 102
System Preferences ....................................................................................................................... 105
Dialog Modeler 105
General Preferences 107
Appendix A: Component List ...................................................................................................... 108
Appendix B: Data types ............................................................................................................... 113
Glossary ......................................................................................................................................... 114
Page 7

Speech Applications Builder Configurator User Guide • May 15, 2004 • page 7 of 116
About this document
This manual describes the Avaya Speech Applications Builder (SAB) Configurator and provides
detailed, step-by-step instructions for using its various features to design voice applications.
It is divided into the following sections:
• Introduction to Speech Applications Builder, see page 9, provides a brief overview of SAB
concepts and terminology
• Starting SAB, see page 16, describes how to start up the SAB Configurator.
• The SAB GUI, see page 19, provides a description of the SAB GUI, its workspaces, menus
and buttons
• The Dialogs tree, see page 33, provides a description of the Dialogs resource, including how
to create and manage an SAB dialog flow
• The Prompts tree, see page 82, provides a description of the Prompts resource, including
how to create and manage SAB prompts
• The Component Workbench, see page 92, describes how to import and manage additional
SAB components
• The Administration resource, see page 93, describes how to configure aspects of the SAB
Configurator
• Debugging a dialog, see page 100, describes debugging facilities
• System Preferences, see page 105, describes the various system configuration options
• Appendix A, see page 108, provides a list of components
• Appendix B, see page 113, provides a list of data types handled
• Glossary, see page 114, provides definitions of technical terms.
Audience
The manual is aimed at application developers and other users of the Speech Applications Builder
Configurator.
Other documentation
Related documents include:
• Speech Applications Builder Release Notes
• Speech Applications Builder Installation Guide
• Configuring Speech Applications Builder for Deployment
• JBOSS Configuration and Deployment Guide
• Speech Applications Builder Component List
• Speech Applications Builder Component Developer’s Guide
Page 8

Speech Applications Builder Configurator User Guide • May 15, 2004 • page 8 of 116
System requirements
The minimum system requirements for running Speech Applications Builder are as follows:
Hardware requirements
Minimum speed required for platform 500MHz
Minimum memory required for platform 512MB RAM
Software requirements
Speech Applications Builder Voice Applications Configurator Tool
Operating System
Speech Applications Builder has been verified to run under Windows 2000.
However, it should also be capable of running under any operating system that supports Java™ 1.4.1.
Page 9

Speech Applications Builder Configurator User Guide • May 15, 2004 • page 9 of 116
Introduction to Speech Applications Builder
Some terminology
The Speech Applications Builder (SAB) Configurator is a tool for building, testing, deploying and
updating voice-driven automated telephone services, such as Telephone Banking or Catalogue
Ordering.
An automated telephone service consists of one or more applications.
An application includes one or more interactions with the caller. These interactions are called dialogs.
The software that performs a dialog is called a dialog flow (or a dialog model).
The main dialog flow may contain one or more sub-dialog flows (and a sub-dialog flow may have
sub flows of its own).
SAB dialog flows are built using pre-defined SAB components, and are created as a type of flow
diagram, drawn using the SAB GUI. For a description of the SAB GUI, see page 19.
There are several types of SAB component:
• dialogs - which handle interactions with the caller and may include speech recognition
• processes - which retrieve data and perform data manipulation
• rules - which allow branching or decision making
• interrupt - which is used to provide an alternative dialog flow in response to a particular
recognition result, such as the caller saying “Help” or “Main Menu”
For an overview of how the components are used, see page 10.
For a List of Components, see page 108.
The SAB GUI
SAB dialogs are developed using the SAB GUI. This provides:
• Development facilities - which allow you to create a dialog by selecting and configuring
components and connecting them together in a call flow. The GUI also provides debugging
tools.
• Search facilities - which allow you to search for components and prompt files, by name or
partial name.
• A file directory - which provides easy access to dialog flows and prompt files.
• A version control mechanism - which allows you to label and store earlier versions of a
dialog flow. Speech Applications Builder also provides a formal mechanism for migrating a
dialog from the development phase (the tool environment) to the deployment phase (the
production environment) and then to the decommissioned phase (the decommission
environment).
• Administrative functions.
For a description of the SAB GUI, see page 19.
Page 10
Speech Applications Builder Configurator User Guide • May 15, 2004 • page 10 of 116
The structure of a dialog flow
A dialog flow is built by selecting and configuring pre-defined components and connecting them
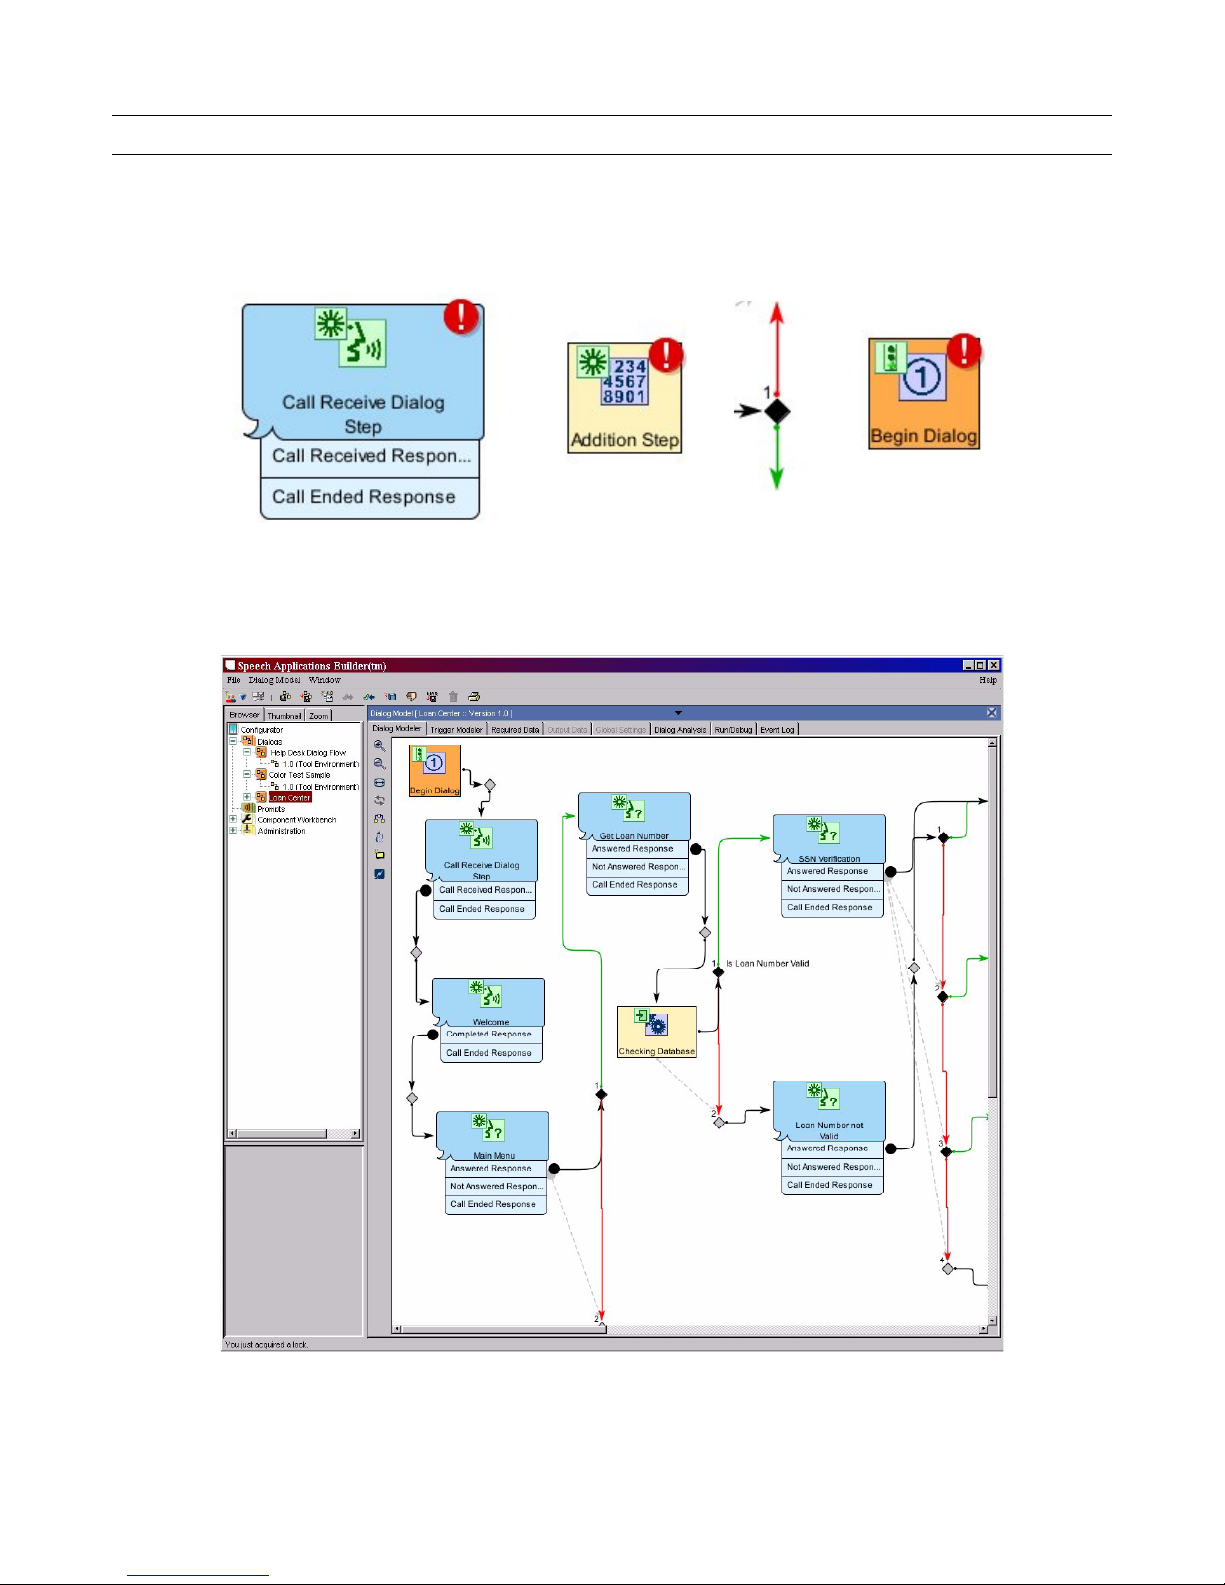
together in a call flow. There are three main types of component: dialogs, processes and rules. An
instance of a component is called a step.
Figure 1. The different step icons (left to right): dialog, process, rule and Begin Dialog step
When you create a new dialog flow (see page 34), SAB automatically creates a Begin Dialog step
and an End Dialog step.
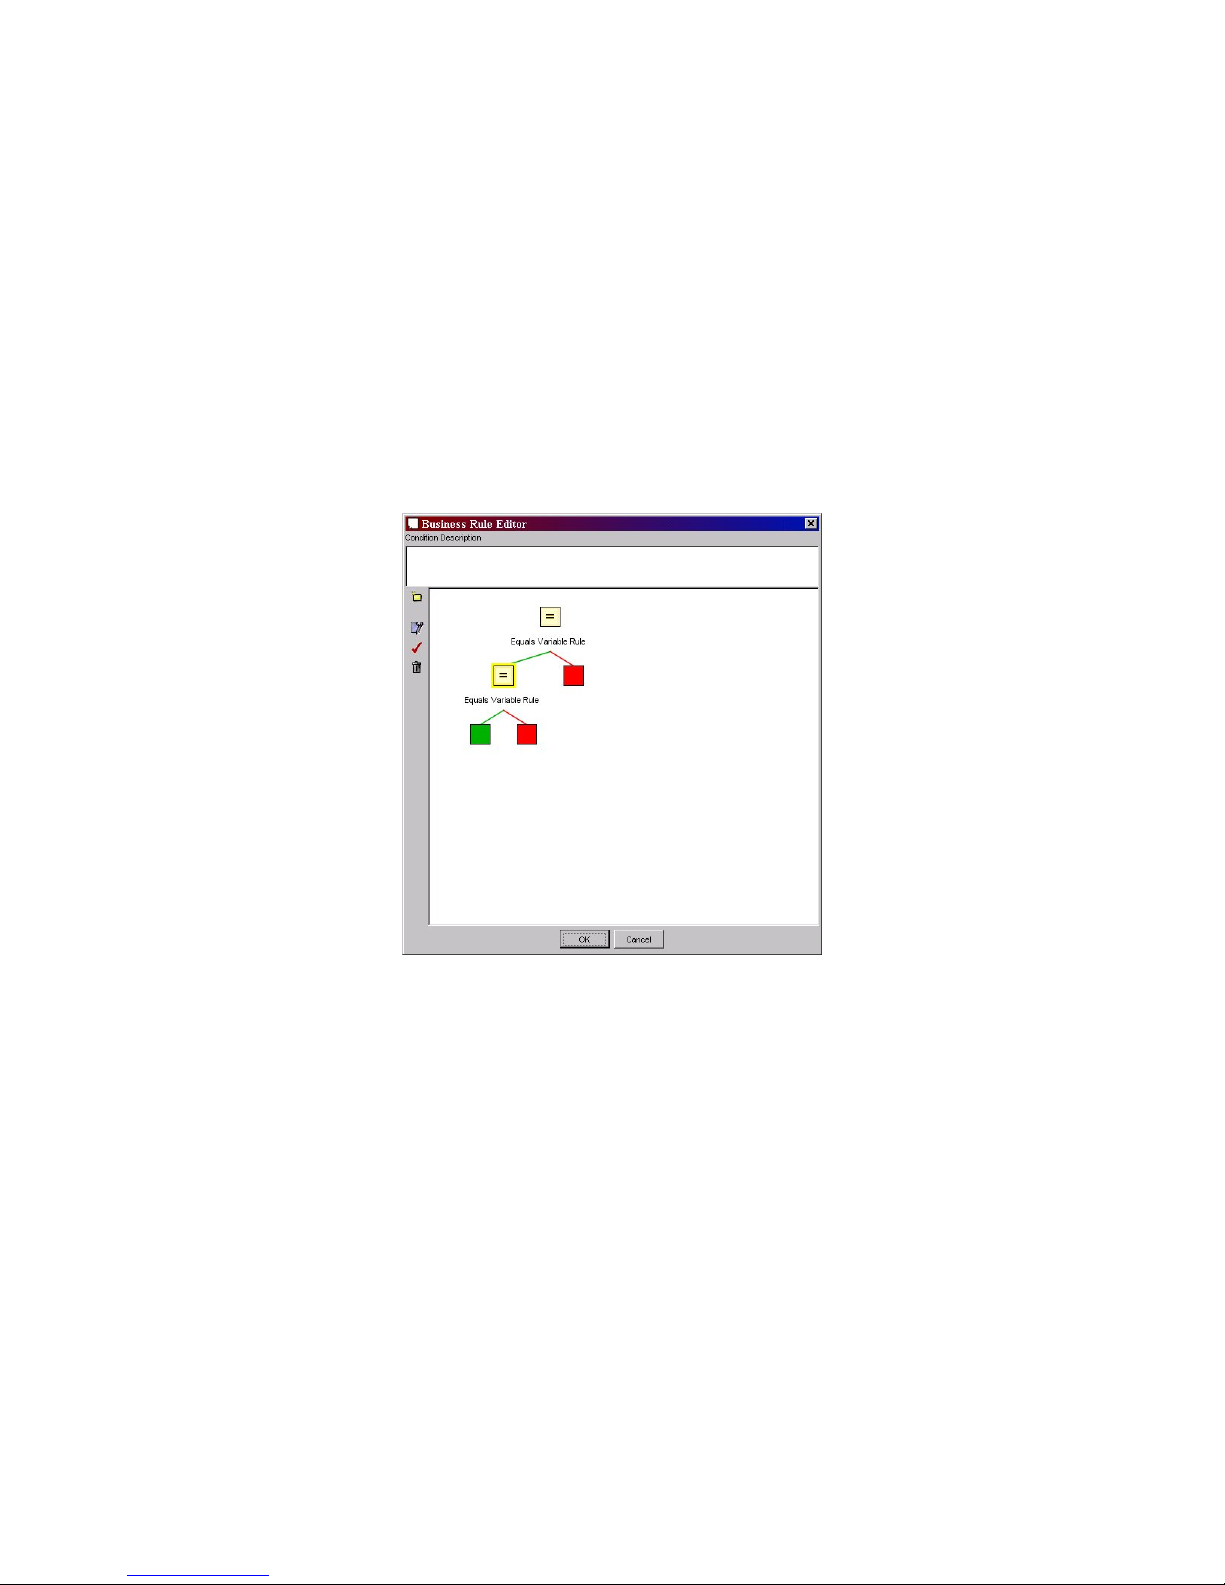
Figure 2. The Dialog Modeler window showing the Begin Dialog step (orange) and the three
types of component: dialogs (blue), processes (yellow), and rules (black diamonds)
Page 11

Speech Applications Builder Configurator User Guide • May 15, 2004 • page 11 of 116
Dialog steps
Generally speaking, dialog steps handle interactions with the caller. Figure 2 shows a series of dialog
steps that
• receive the call, setting up variables to store the CLI, DDI, Port, call time and other information
• play a welcome message (such as Welcome to Acme loan center customer service)
• offer the caller a menu (To inquire about the status of your loan, please say “Status”. For all
other enquiries please say “Operator”’) and recognize his or her response
• ask the caller to say his or her loan number (What is your loan number?) and recognize the
response
• ask for a “password” (For verification purposes, what are the last four digits of your Social
Security Number?) and recognize the response
• deal with an invalid loan number (I’m sorry the loan number you provided is not a valid
number. Please say your loan number now.)
... and so on.
All dialog components that perform speech recognition also handle
• confirmation (Was that 1234?), if required
• no input or silence (I’m sorry I did not hear anything. Please say it again)
• no match (I’m sorry I did not understand that. Please say it again)
• misrecognition
Process steps
Process steps handle data. Figure 2 shows a process step that accesses a database to retrieve the
customer record associated with a particular loan number. Other SAB processes include:
• addition, subtraction, multiplication, division, total, exponentiation
• check lookup table
• capitalize, change case
• set variable, copy variable, insert new variable
• report call end, report call information
• send event code
and so on. The data being manipulated may be static, or derived from a recognition result, or retrieved
from a database.
Connections and Rules
The flow of the dialog is created by drawing connections between the steps.
By default, each connection includes a decision point (these are the grey diamonds on some of the
connections in Figure 2). If the dialog needs to branch, a rule can be defined on the decision point
(these are the black diamonds in the Figure) and a second connection added.
Page 12
Speech Applications Builder Configurator User Guide • May 15, 2004 • page 12 of 116
SAB rules are boolean. They include
• less than, more than, equal to
• text handling rules
• list handling rules
• looping
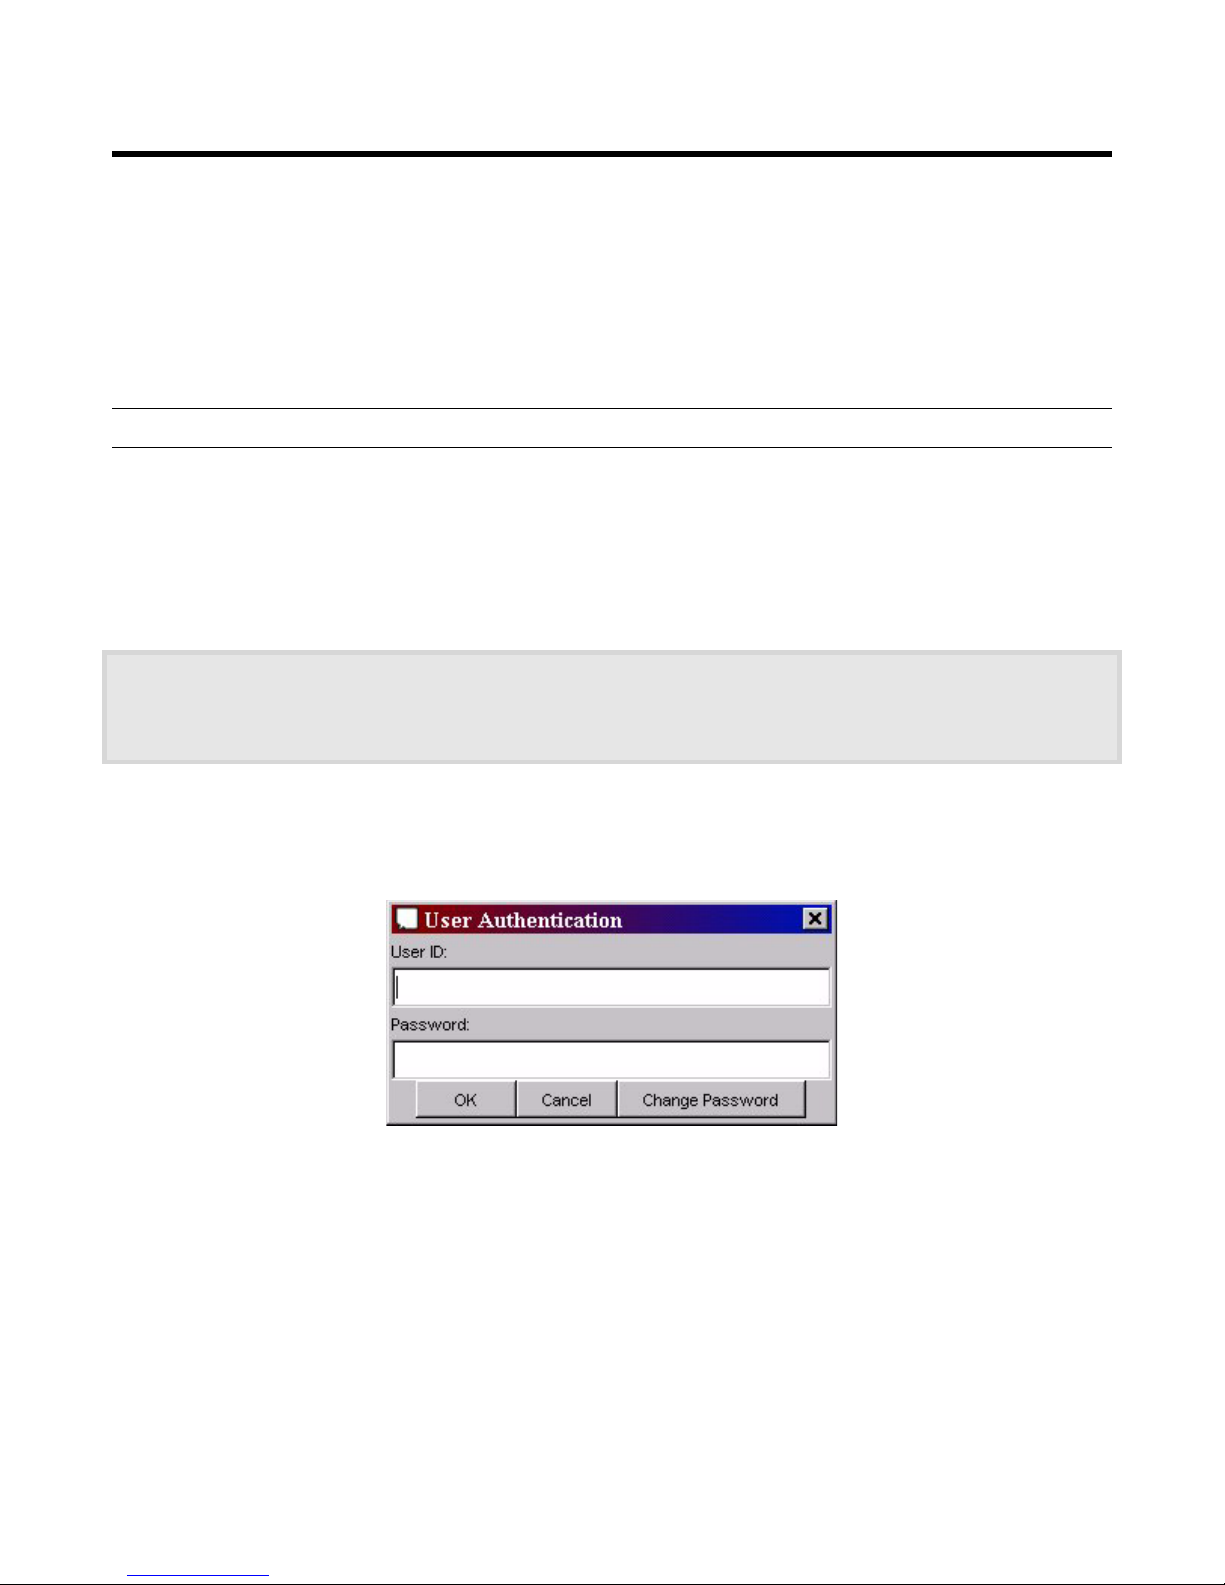
More complex boolean rules can be built using multiple rule components.
For example
If id = 10 AND name = "Jones”
can be built as shown in the Figure below, where the first operator is defined as id = 10 and the
second as name = “Jones”.
Figure 3. A complex rule
For more information about defining rules, see page 64.
Triggers
Certain types of event - including loggable events and Java exceptions - can be handled using
triggers. These are (typically short) alternative dialog flows that are run when the triggering event
occurs.
There are five types of trigger:
• Exception - evaluated only when an exception occurs in the underlying code
• Before step validated - legacy feature. DO NOT USE
• Before step runs - evaluated before the step
• After step runs - evaluated after the step
• Unhandled control - evaluated if the path required is not defined in the dialog flow
Page 13

Speech Applications Builder Configurator User Guide • May 15, 2004 • page 13 of 116
Triggers may be configured
• as part of a flow, in the Trigger Modeler window (see page 62). These triggers are used by
default when any triggering event occurs in that flow, if the step in which the event occurs does
not specifically handle triggers.
• as part of a step, in the Edit Step dialog box (see page 63). Step-based triggers are specific to
the particular instance of the component and take priority over any global triggers.
Prompts
The recorded or synthesized words played out to the caller are called prompts. Prompts are the
automated system’s contribution to the “conversation”.
Some prompts ask the caller for information and require a reply before the dialog can continue. Some
prompts give the caller information and do not require a reply. A prompt that does not require a reply
is often called a message.
Part of the process of configuring a dialog component is defining the prompts it will use. These are
typed into the dialog boxes provided by the component, which also provides a simple method for
including variable data and for turning on Barge-in. (Barge-in allows the caller to interrupt the prompt
before it has finished playing. The speech recognizer listens for speech during the prompt, stops the
prompt playout when it detects a response, and performs the recognition.)
For example,
Typed
Variable dragged and dropped from
a list of previously defined variables
Typed
Command dragged
and dropped
Typed
Did you
say
<caller_data>
?
<BARGE-IN_ON>
Please say
yes or no.
Figure 4. The construction of a typical confirmation prompt
When the dialog flow is run, SAB sends the text of the prompt to the Text-To-Speech (TTS)
synthesizer, which synthesizes a speech equivalent of the text and returns it to SAB to be played out
to the caller.
Synthesized speech is particularly useful during the development of an application, but for a deployed
system many service providers prefer to use a recorded voice.
Recorded prompts are managed in the Prompts resource (see below and page 82), which allows you
to them either by recording and editing them yourself or by specifying .wav files (which may be
professionally recorded).
SAB also provides support for handling
• multiple languages
The list of languages handled is specified by the user in the Administration resource (see
below, and page 93). This, in effect, sets up a separate directory structure for each language.
When you define a prompt, you specify its language by selecting from a drop-down list, and
SAB labels the file accordingly. This mechanism allows you to define multiple sets of prompts
(each set in a different language) that use the same prompt names but are automatically
stored in different directories. This, in turn, allows you to create a single application that uses
multiple languages.
Page 14

Speech Applications Builder Configurator User Guide • May 15, 2004 • page 14 of 116
Note that some languages have multiple variants or 'locales' (for example, US English, UK
English) which are pronounced differently. When you specify a language with multiple locales,
ensure that you use the complete language ID, including the correct locale, for example, “enUS” (for US English), or “en-GB” (for GB English).
• multiple personae
The list of personae handled is specified by the user in the Administration resource (see
below, and page 93). This, in effect, sets up a separate directory structure for each persona.
When you define a prompt, you specify its persona by selecting from a drop-down list, and
SAB labels the file accordingly. This mechanism allows you to define multiple sets of prompts
(each set using a different persona) that use the same prompt names but are automatically
stored in different directories. This, in turn, allows you to create a single application that uses
multiple personae. Persona is discussed on page 90.
The SAB database
SAB stores all components, all dialog flows, and all prompts in a database called the SAB database.
A default database is created when the SAB Configurator is installed. New or updated components
can be imported into the SAB Configurator via the Component Workbench, at any time, and SAB
provides mechanisms for updating existing dialog flows in the Tools environment.
For more information about the Component Workbench, see page 92.
When the SAB Configurator is updated, both the Configurator and the SAB database are uninstalled. It is
therefore essential to export all dialog flows to file (see page 77) before uninstalling SAB. The dialog flows can
be re-imported after the Configurator has been upgraded.
Debugging facilities
The Speech Applications Builder provides facilities for analyzing and debugging a dialog flow. Dialog
Analysis lists and describes every path through the selected dialog flow. The data it provides can be
used to build test cases.
Run/Debug allows you to “run” a dialog, telephone it, and watch the call flow as it happens. You can
open an individual dialog step and check its configuration as you hear it being executed.
Version control
The SAB Configurator provides the following version control mechanisms:
• SAB automatically adds a version number (1.0) to a new dialog flow and provides both a copy
with same version number facility (see page 74) and a copy with an incremented version
number facility (see page 74). All versions of a dialog flow are stored in the SAB database,
and are displayed in the Dialogs tree, in the Dialog version index and following a search.
• SAB is a multi-user development environment. To prevent more than one developer
simultaneously editing a dialog flow, SAB automatically opens it in a read-only version. The
developer cannot edit the dialog flow until he or she checks it out (see page 37). Whilst a
dialog flow is checked out, no other developer can edit it (though he or she may open another
read only version). The dialog flow should be checked in when the developer has finished
editing.
Page 15

Speech Applications Builder Configurator User Guide • May 15, 2004 • page 15 of 116
• SAB is both a development environment and a runtime environment, and provides a formal
mechanism for migrating a dialog from the development phase (the tool environment) to the
deployment phase (the production environment) and then to the decommissioned phase
(the decommission environment).
o When a dialog flow is in the tool environment, it can be edited.
o When the dialog flow has been migrated to the production environment it can be
viewed and executed but cannot be edited.
o When a dialog flow has been migrated to the decommission environment it cannot
executed. However, the decommissioned version can be copied (with an incremented
version number), back into the tool environment and edited, and then re-deployed.
Page 16
Speech Applications Builder Configurator User Guide • May 15, 2004 • page 16 of 116
Starting SAB
The Installation procedure is described in the Speech Applications Builder Installation Guide.
To launch SAB:
1. Either double-click on the SAB icon, or select
Start > Programs > Avaya Speech Applications Builder
Logging in
If this is the first time you have opened the Configurator, SAB will ask you to enter a License Key (see
page 17).
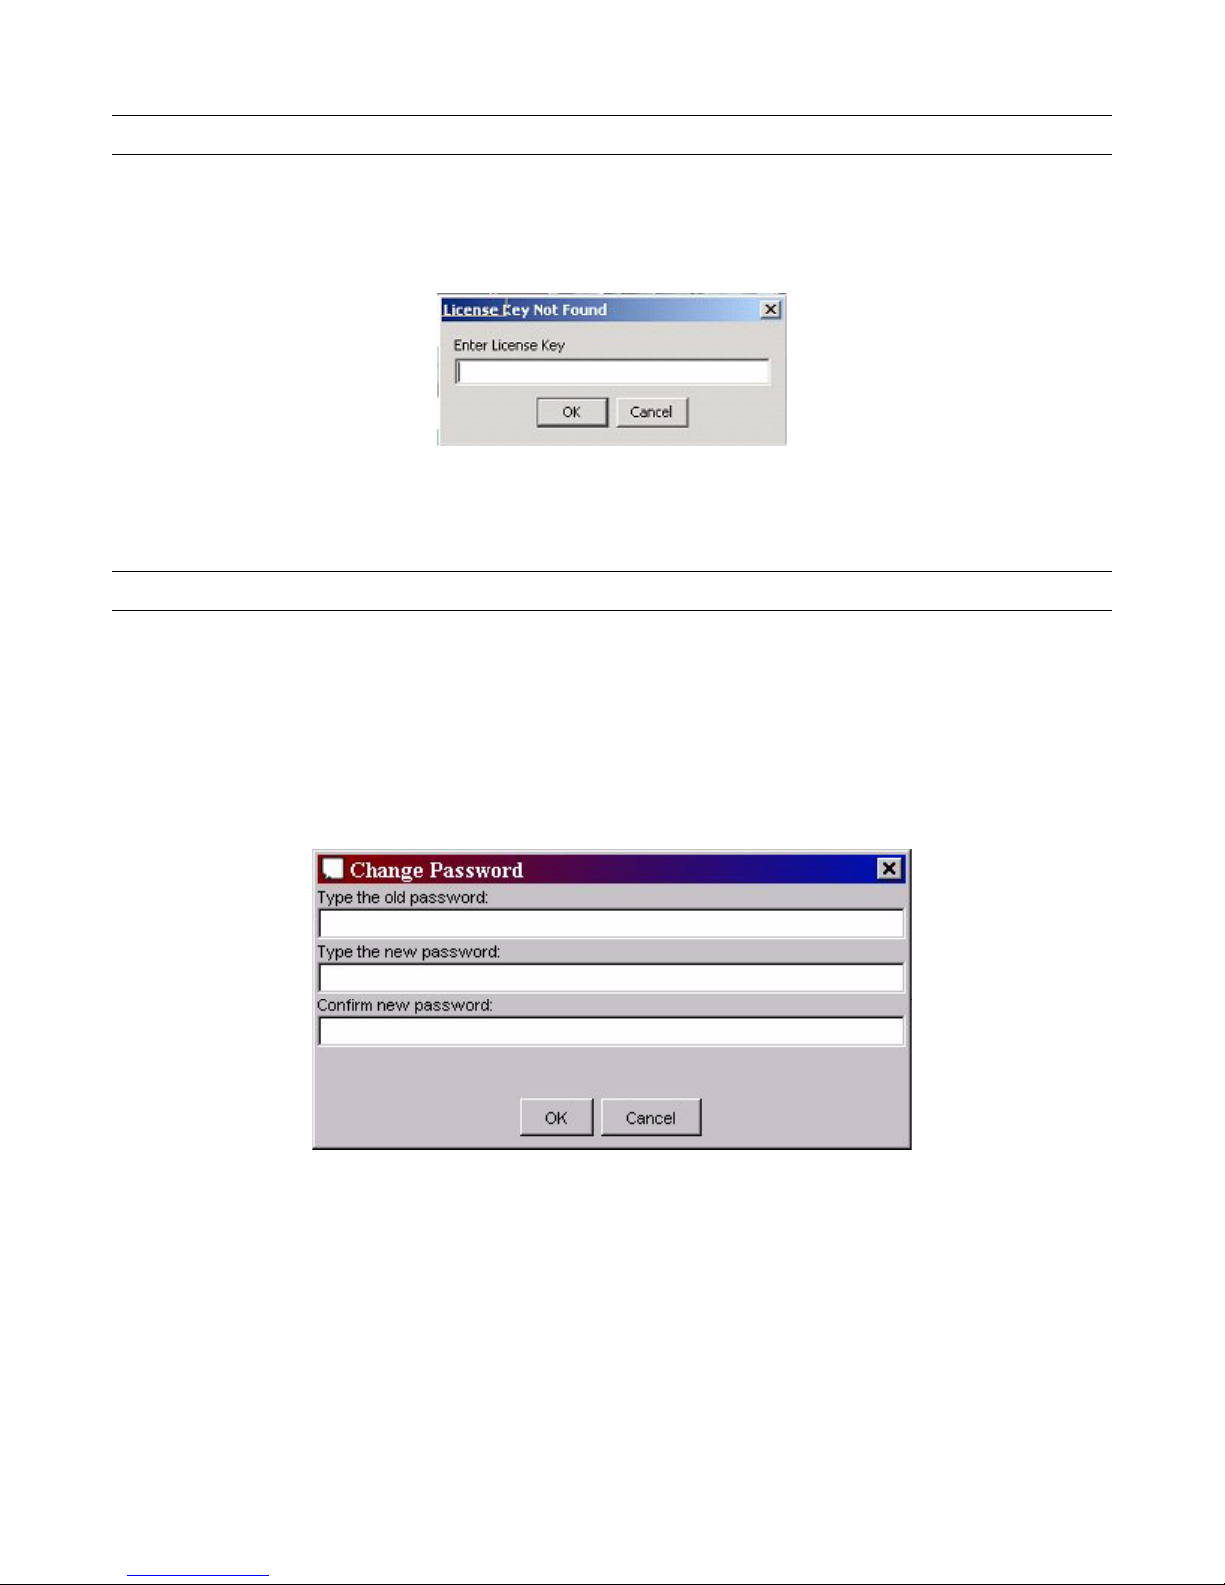
Otherwise, SAB displays the User Authentication dialog box, which asks you to enter a UserID and
Password.
For details of how to change your Password, see page 17.
The SAB Configurator is installed with the following defaults:
UserID: administrator
Password: password
To log in:
1. Enter your User ID and Password.
2. Click OK.
Figure 5. User Authentication dialog box
Page 17
Speech Applications Builder Configurator User Guide • May 15, 2004 • page 17 of 116
Entering the License Key
If this is the first time you have opened the Configurator, SAB asks you to enter a License Key.
To enter the License Key:
1 Enter or copy it into the dialog box.
Figure 6. License Key dialog box
2 Click OK.
Changing your password
To change your password:
1 Open the SAB Configurator.
2 Either click Change Password on the User Authentication dialog box (see page 16) or, from the
Configurator Menu bar, select File > Edit System Preferences.
3 Select User Preferences.
4 Click on Change Password. SAB displays the following dialog box.
Figure 7. Change Password
5 Enter your old password.
6 Enter your new password twice.
7 Click OK.
Page 18
Speech Applications Builder Configurator User Guide • May 15, 2004 • page 18 of 116
Exiting SAB
To exit SAB, select File > Exit.
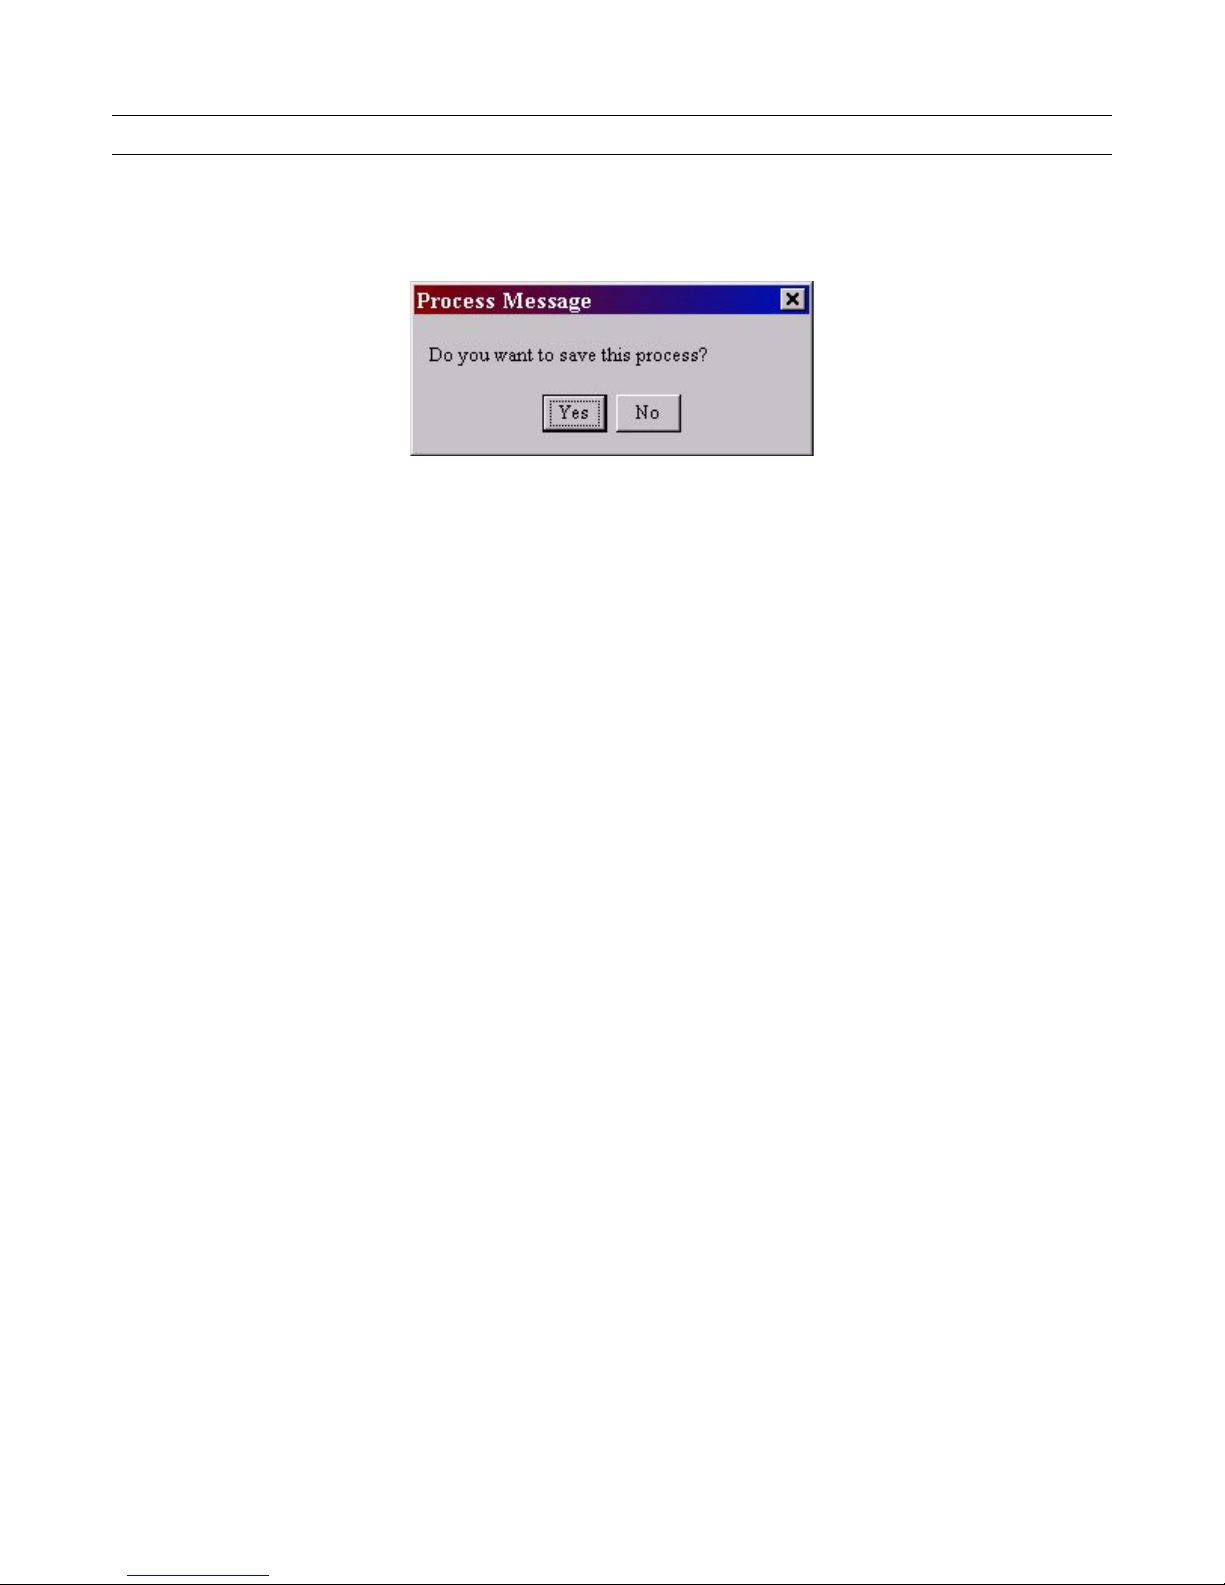
If you have made unsaved changes to a dialog flow, SAB will ask you if you want to save the dialog
flow.
Figure 8. Save warning message
Page 19
Speech Applications Builder Configurator User Guide • May 15, 2004 • page 19 of 116
The SAB GUI
This chapter provides a brief description of the SAB Graphical User Interface (GUI). The features
discussed here are described in more detail at the appropriate places in the remainder of the manual.
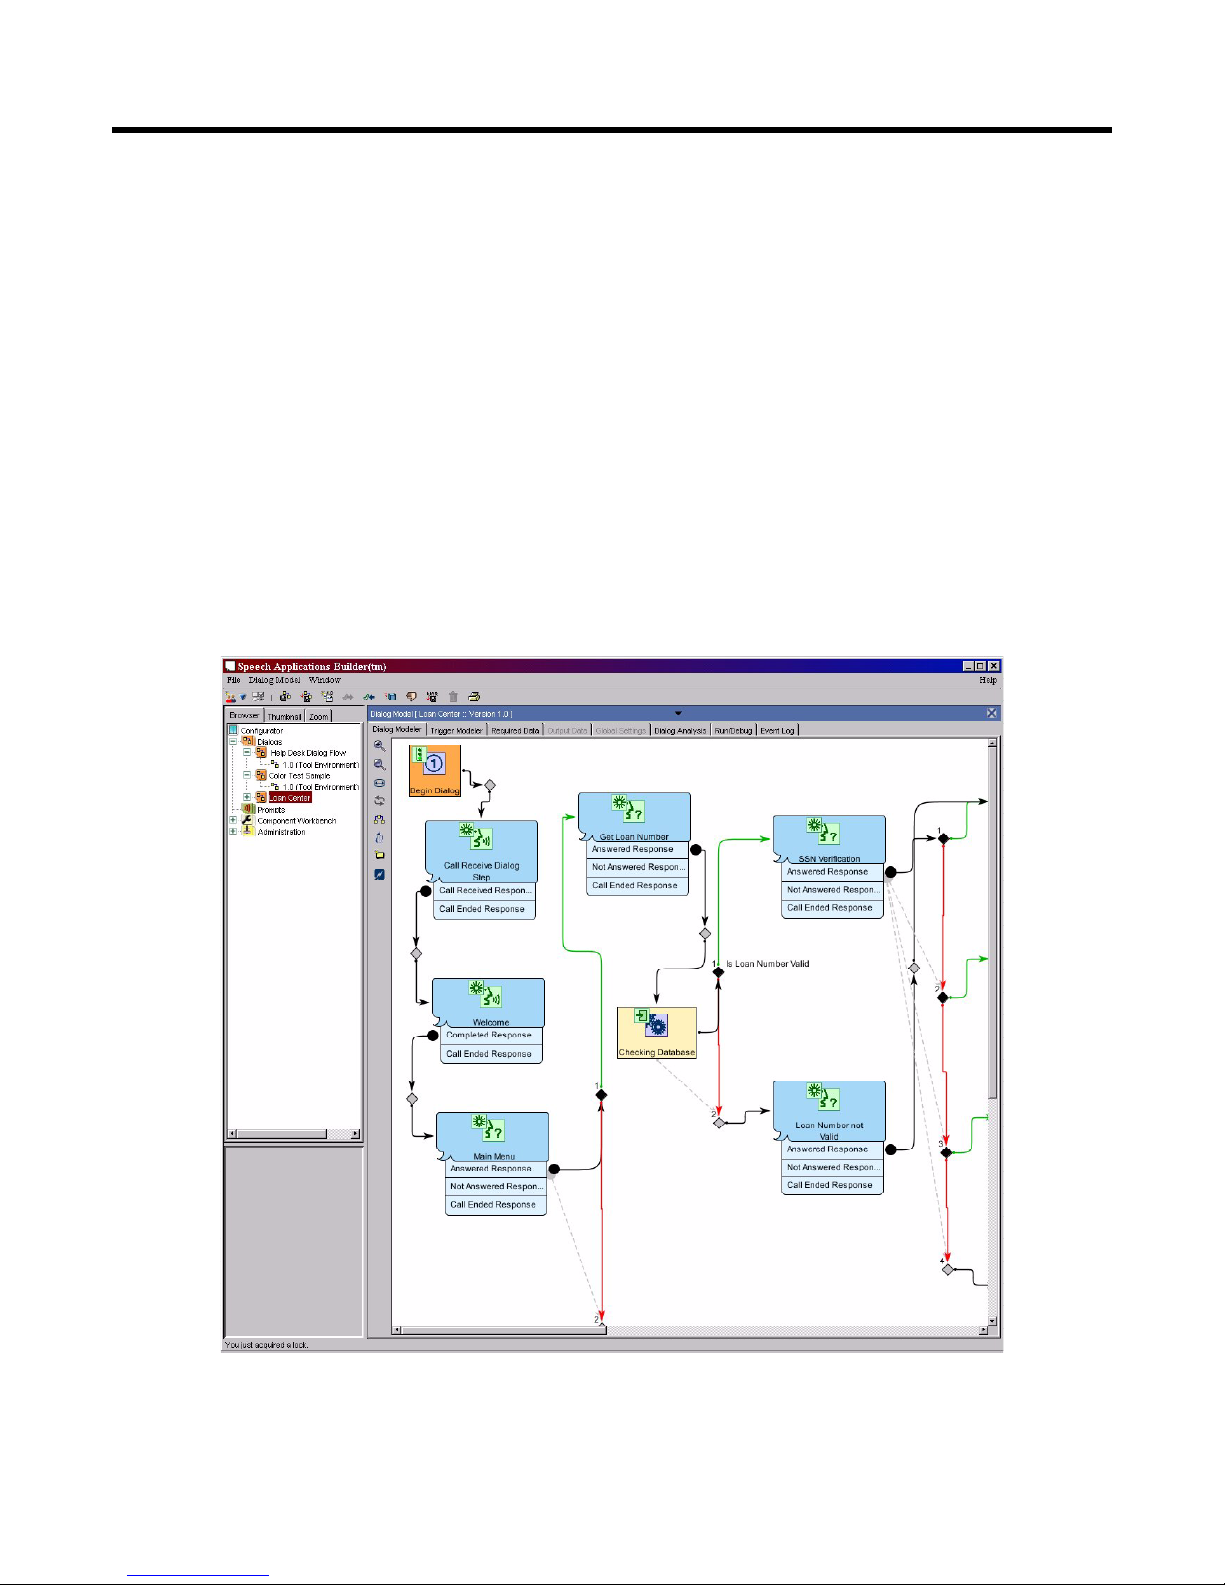
The SAB GUI consists of
• a Menu bar and Tool bar, running along the top, which display both generic and context-
sensitive options
• a Browser, on the left, which is a tool used to display, search for and manage dialogs and
their related resources, and to perform system administration
• an area, on the right, that is primarily used to display the Dialog Modeler, which is used to
create and manage dialog flows. This area is also used to:
o create and edit recorded prompts
o import and manage components
o perform system administration.
Figure 9. The SAB GUI
Page 20
Speech Applications Builder Configurator User Guide • May 15, 2004 • page 20 of 116
The Menu bar
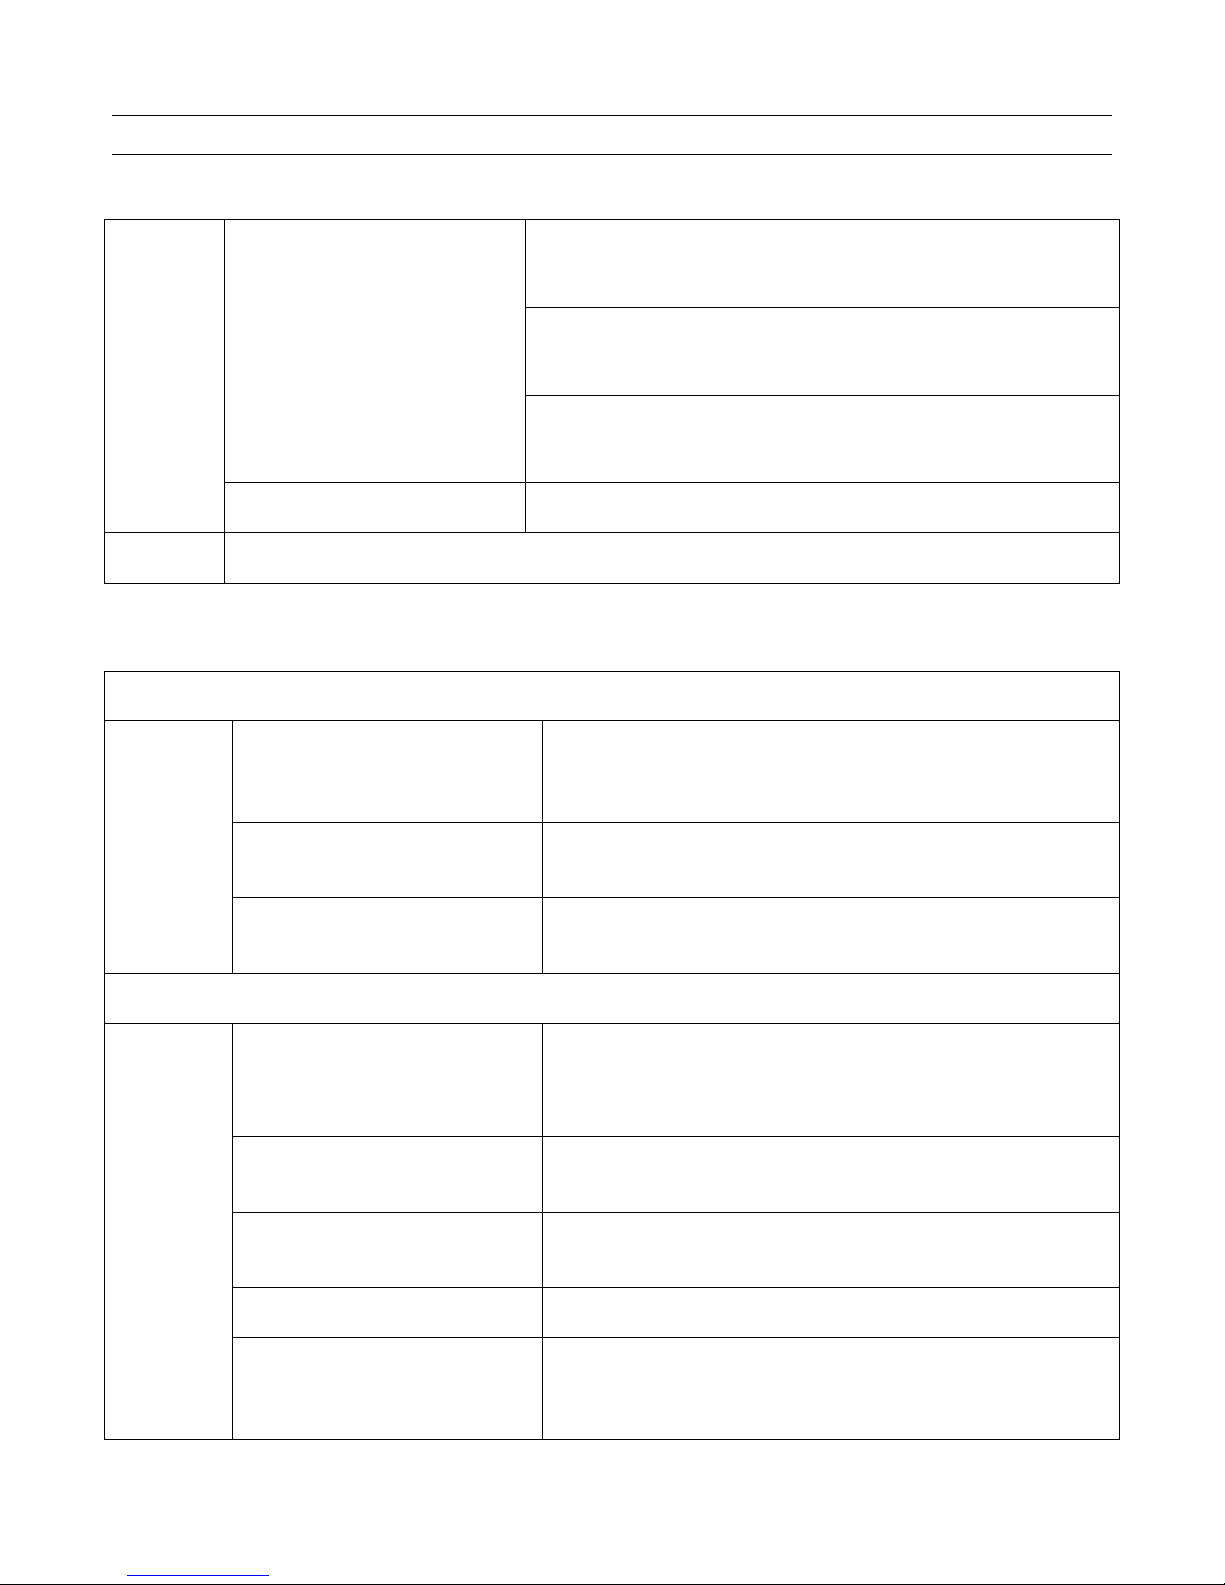
The Menu bar provides the following generic functions:
Dialog modeler
Used to configure the Dialog Modeler display.
User preferences
Used to change password..
Edit System Preferences
See page 105.
General preferences
Used to configure general features of the Configurator.
File >
Exit
Closes SAB.
Window
Used to toggle between instances of the Dialog modeler.
The Menu bar also provides a Dialog Model menu and a Prompt menu, when appropriate:
When the Dialogs tree is selected in the Browser
Add Dialog Model
Opens a new dialog flow window (or dialog model) that
can then be checked out and used to develop a new
dialog flow. See page 34.
Imports a Dialog Model
from a File
Used to import an SAB file stored outside the SAB
database. See page 79.
Dialog
Model >
Exports the Dialog Model
to a File
Used to save an SAB dialog flow file to a location outside
the SAB database. See page 77.
When a dialog flow is selected in the Browser
Save
Saves the currently selected dialog flow in the SAB
database. See page 77.
Note that dialog flows can also be exported to file.
Copy Dialog Model and a
selected version
Creates a copy of the selected dialog flow file, labeled
“Copy of”. See page 74.
Deletes the Selected Dialog
Model Version
Deletes the selected dialog flow. See page 72.
Rename
Renames the selected dialog flow. See page 75.
Dialog
Model >
Increments the Version of
the Selected Dialog
Version
Creates a copy of the selected dialog flow file with a new
version number. See page 74.
Page 21
Speech Applications Builder Configurator User Guide • May 15, 2004 • page 21 of 116
Add Prompt
Used to create a new recorded prompt. See page 82.
Import Wave Zip
Used to import a zip archive containing recorded
prompts. See page 89.
Prompt >
Create Wave Extract
Used to create a zip file that contains prompts. See page
89.
The Tool bar
The Toolbar, which runs along the top of the SAB Configurator, provides short cuts to some of the
options available from the Menu bar.
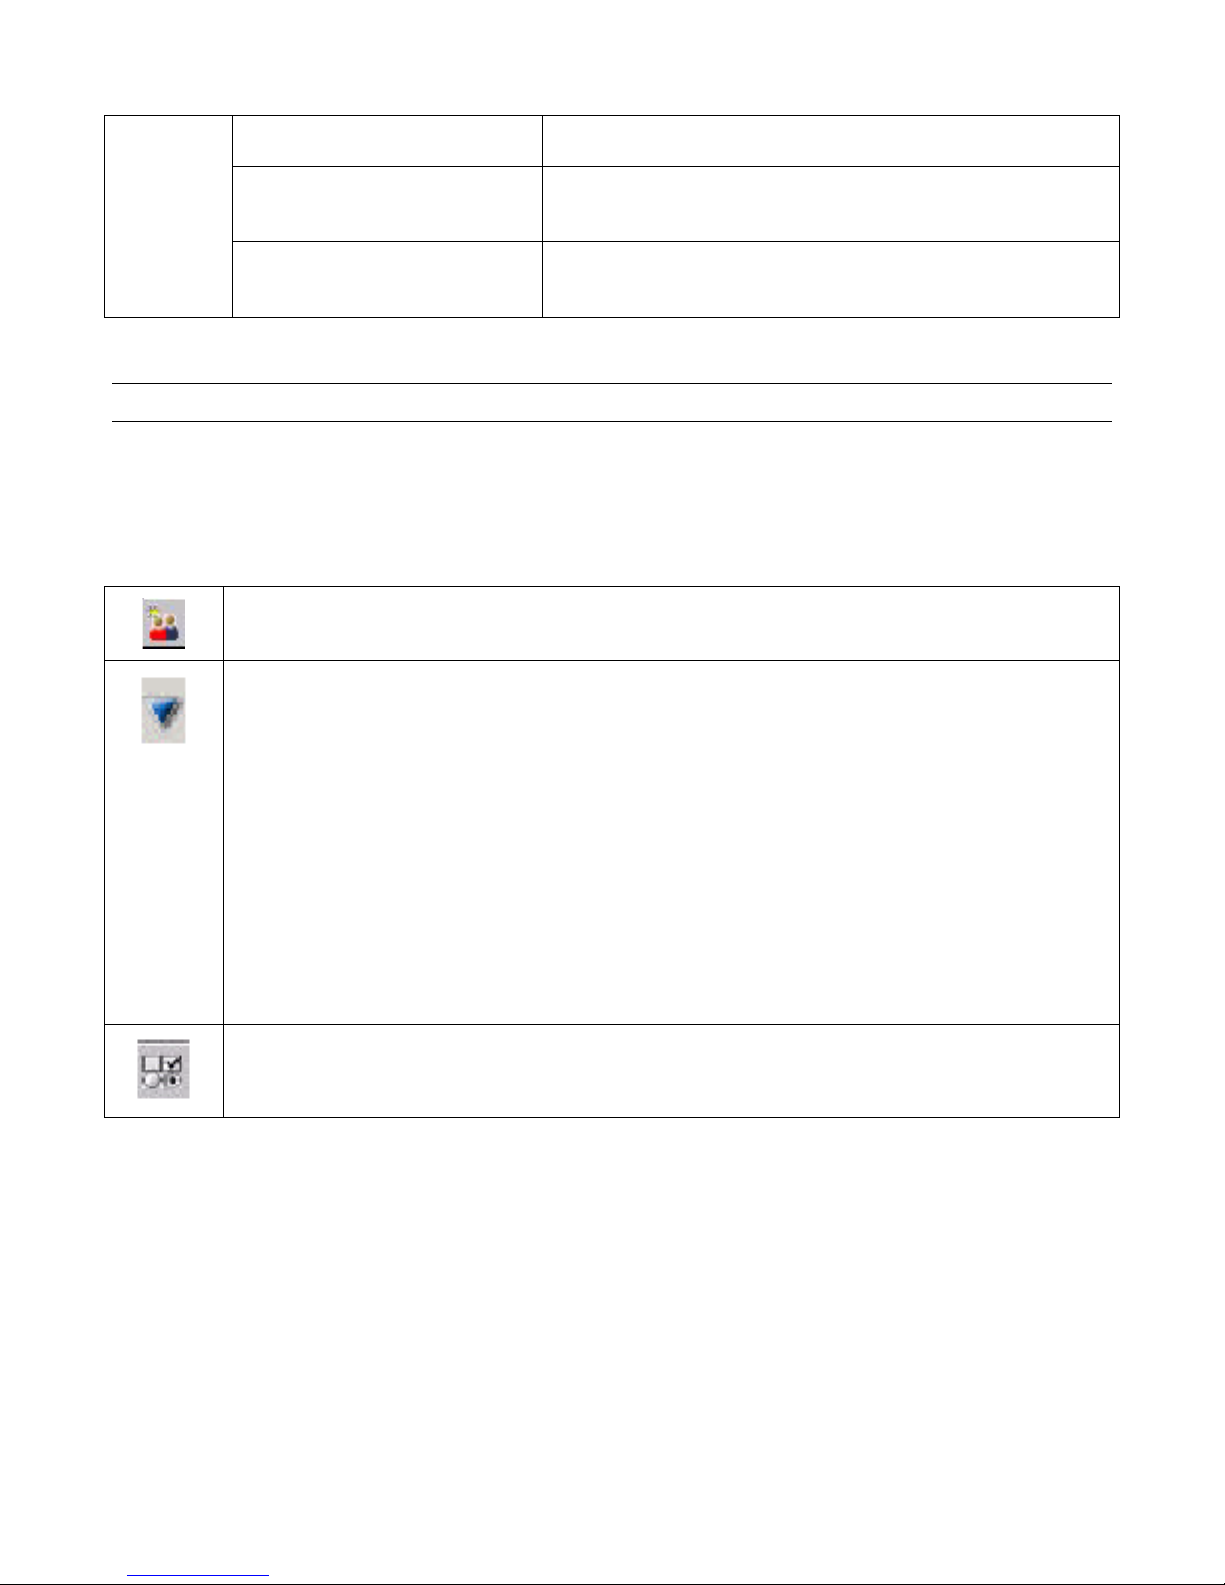
Generic buttons
Add Organization
Add ...
Opens a drop down menu of “create new item” options:
Organization Node
Environment
For example, a QA environment. This would be similar the Production environment, in
that dialog flows could not be edited.
Permission Type
Add Dialog
Opens an Add New Dialog dialog box. See page 34.
Add Prompt
Opens an Add New Prompt dialog box. See page 82.
Edit System Preferences
Used to configure certain features of the SAB GUI. See page 105.
Page 22
Speech Applications Builder Configurator User Guide • May 15, 2004 • page 22 of 116
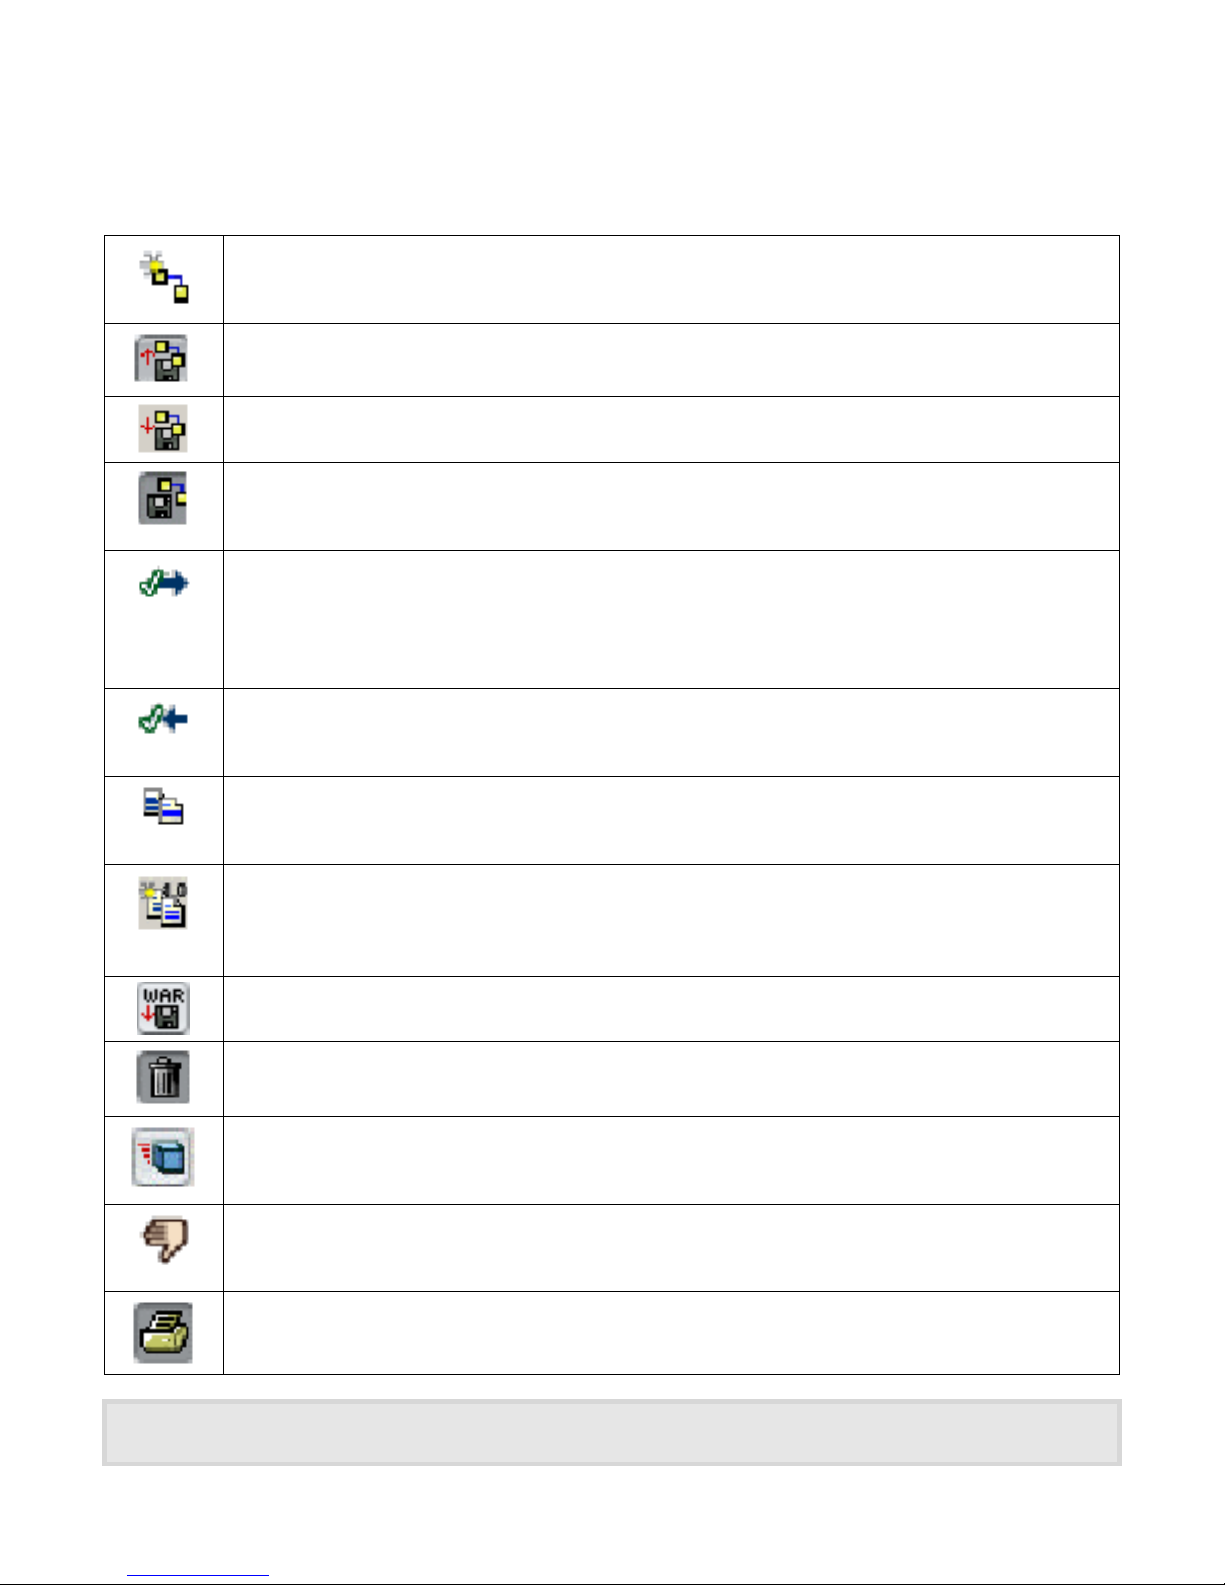
Dialogs buttons
The following buttons are provided when the Dialogs tree is in use. The selection of buttons displayed
is relevant to the task being performed.
Add a Dialog Model
Opens a new dialog flow window complete with Begin Dialog and End Dialog steps.
Imports a Dialog Model from a File
Exports a Dialog Model to a File
Saves the current Dialog Model (all versions)
The Dialog flow is saved to the SAB database.
Check out a Dialog Model
Opens an editable version of the dialog flow and locks out other users. Since SAB is a
multi-user environment, checking in and checking out ensures that only one user can
work on a dialog at any time.
Check in a Dialog Model
Closes the editable version of the dialog flow and makes it accessible to other users
Copy Dialog Model and selected version
Copies the selected version of a dialog flow, creating an exact copy labeled “copy”.
Increments the Version of the Selected Dialog Version
Copies the dialog and places copy in the Tool environment, incrementing the version
number (for example 1.0 becomes 2.0)
Generate War File for Deployment
Deletes the Selected Dialog Model
Migrate Package
Migrates a dialog from one environment to another.
Decommission
Takes a dialog out of Production
Print
Some of these options are also available from the pop-up Context menu displayed by right clicking on the dialog
flow name in the Dialogs tree.
Page 23
Speech Applications Builder Configurator User Guide • May 15, 2004 • page 23 of 116
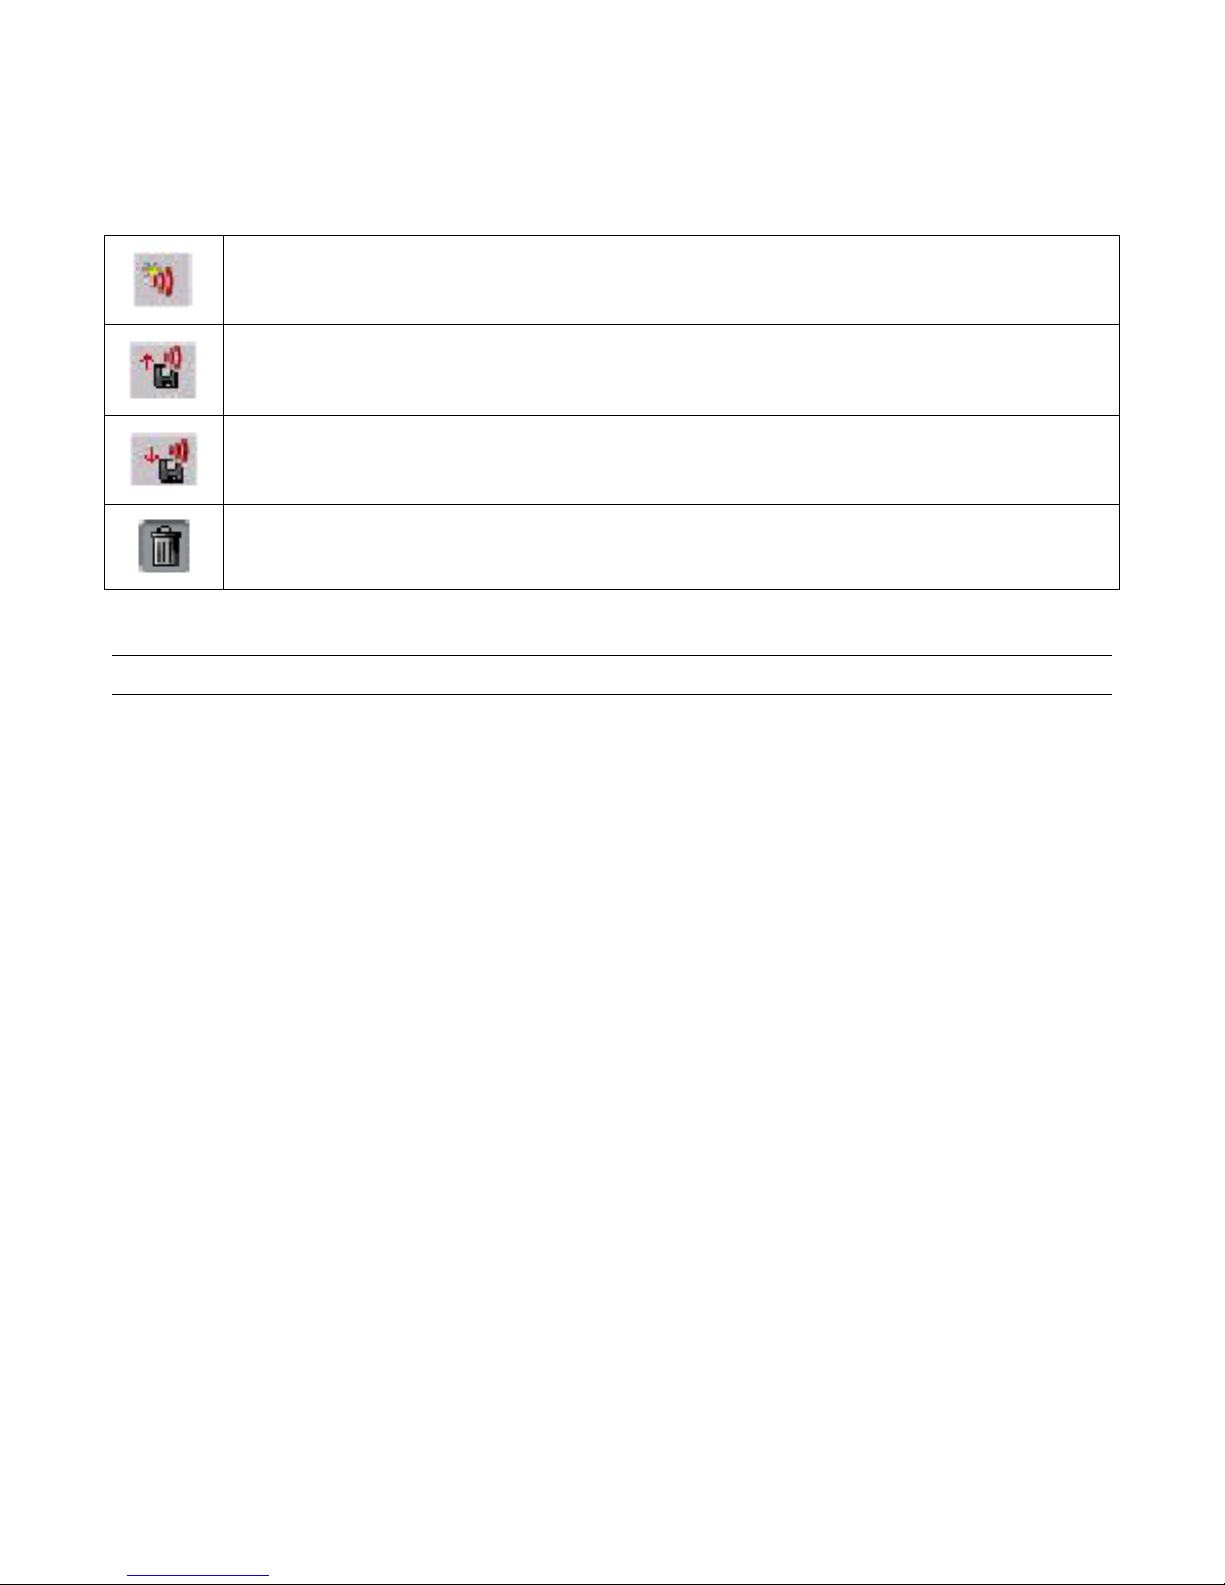
Prompt buttons
The following buttons are provided when the Prompts resource is in use. The selection of buttons
displayed is relevant to the task being performed.
Add (create) a prompt
Import a zipped prompt directory. See page 89.
Export a zipped prompt directory. See page 89.
Delete
Context menus
Many of the options provided on the Menu bar and Tool bar are also presented on pop-up Context
menus, which can be displayed by
• right-clicking on an icon in the Browser
• right-clicking in the Dialog Modeler window.
The options presented in a pop-up menu are relevant to the task being performed.
Refresh Tree From Here
Refresh Tree From Here is available from the Browser pop-up menus at strategic points in the
Dialogs and Prompt trees. Selecting the option refreshes all the child nodes of the selected node,
performing any updates that have not occurred automatically.
Page 24
Speech Applications Builder Configurator User Guide • May 15, 2004 • page 24 of 116
The Browser
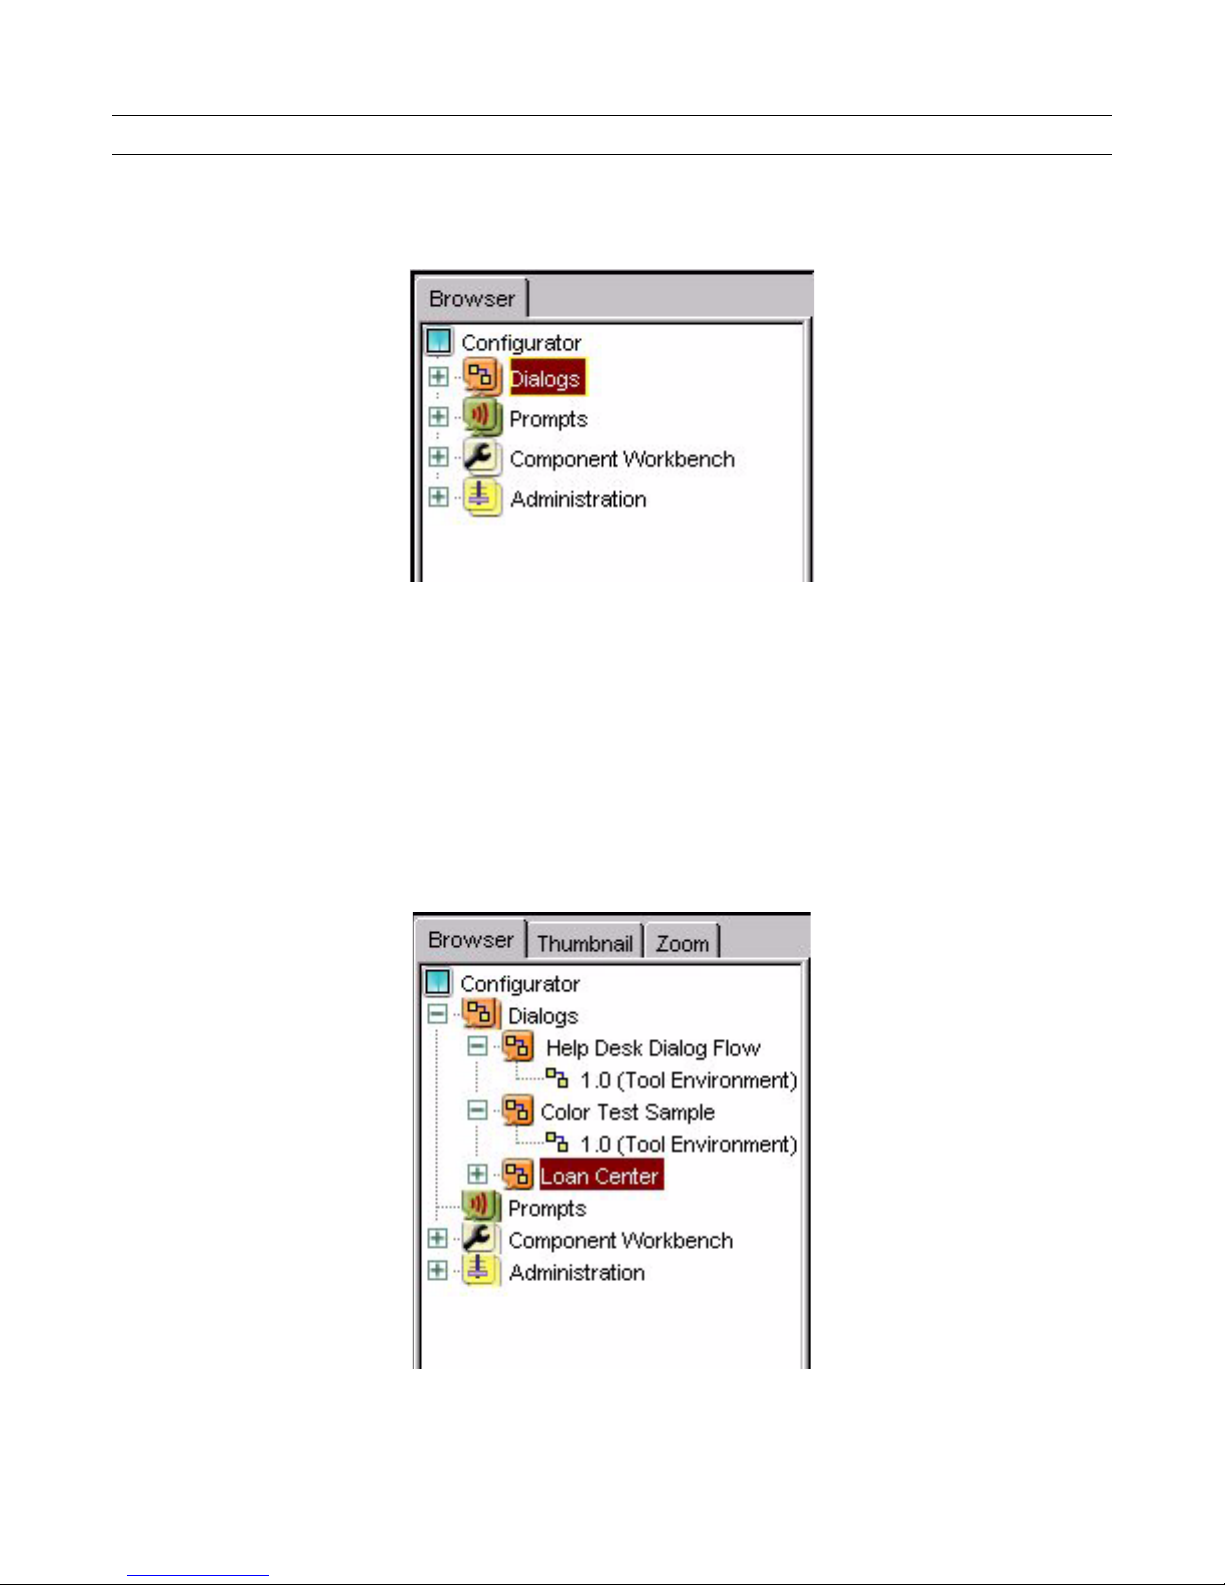
The Browser is a tool used to display, search for and manage dialog flows and prompts, import
components, and perform system administration. The Browser provides access to four sets of
resources, called Dialogs, Prompts, Component Workbench and Administration.
Figure 10. The Browser, showing the Dialogs, Prompts, Component Workbench and
Administration resources
• Dialogs is used to manage dialog flows. See page 33.
• Prompts is used to manage prompts. See page 82.
• The Components Workbench is used to import new components and manage existing
components. See page 92.
• Administration is used to manage SAB. See page 93.
In some respects, the tree displayed in the Browser acts like a typical directory structure. For
example, all Dialog flow files are displayed beneath the Dialogs node.
Figure 11. The Dialogs directory structure, expanded to show the stored dialog flows
Page 25
Speech Applications Builder Configurator User Guide • May 15, 2004 • page 25 of 116
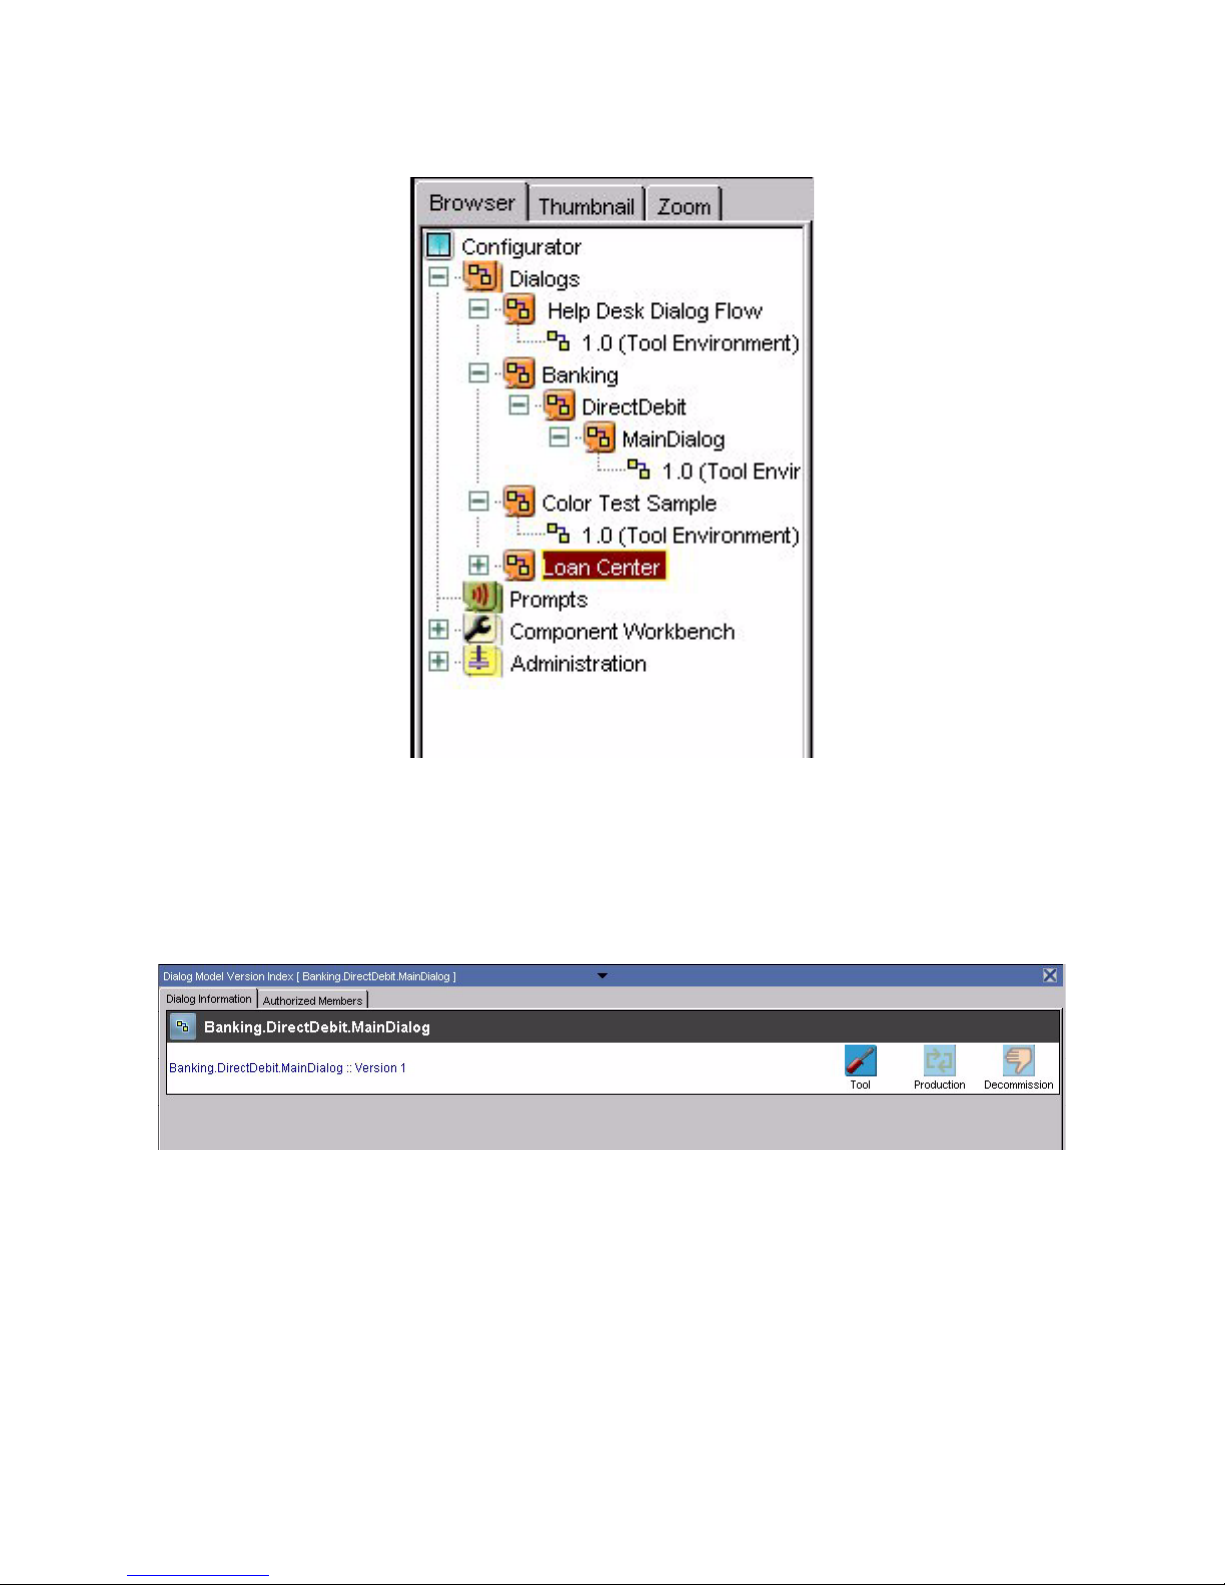
By default, the dialog flows are displayed in alphabetical order, but you can group and nest them as
required by specifying a Classification (see page 34) when you create the dialog flow file.
Figure 12. The Dialogs directory structure, showing a dialog flow “Main Dialog” classified under
“Direct Debit”, which is itself classified under “Banking”.
If you click on a dialog flow icon, (for example, Main Dialog in the Figure above, which is, in effect, a
leaf node), SAB displays the Dialog Model Version Index, shown in the Figure below, which lists all
the versions of the dialog flow available, and you can open the version you require by clicking on the
entry.
Figure 13. Part of the Dialog Model Index
Alternatively, you can expand the dialog flow in the tree, and open a particular version of the dialog
flow by clicking on the version number.
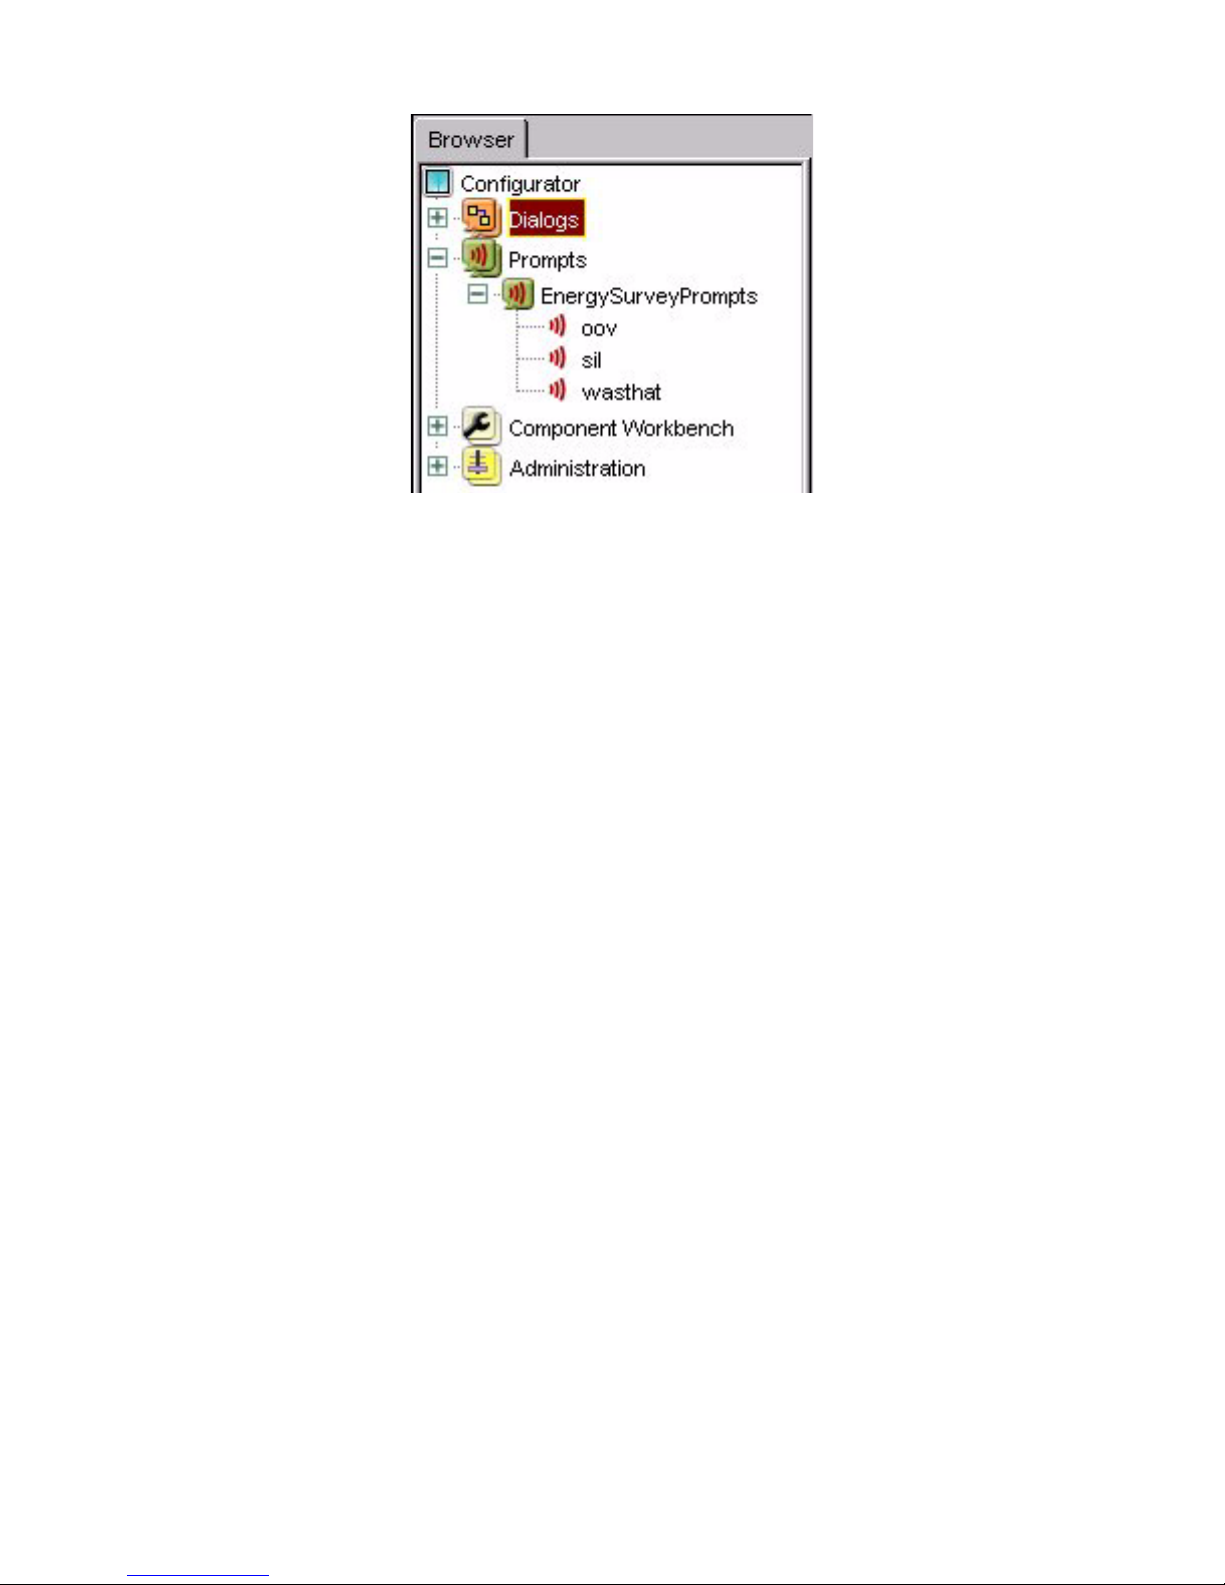
All the trees work in a similar way. The Prompts tree displays a list of prompt folders, which can be
expanded to display individual prompt files. These can be opened for editing by clicking in the file icon
to display the prompt version index and then clicking on the version number required.
Page 26
Speech Applications Builder Configurator User Guide • May 15, 2004 • page 26 of 116
Figure 14. The Prompts directory structure, expanded
Expanding the Component Workbench opens the Repository Maintenance window, which can be
used to import new components. Expanding Administration displays the Configuration, Organization
and Permissions options.
Search engine
In addition to its file directory and feature directory function, the tree also provides a Search engine
that can be used to search for
• a dialog flow (see page 73)
• a prompt (see page 87)
To search for any entity:
1 Click on the appropriate node; for example, to search for a dialog flow, click on one of the Dialogs
nodes. (Note, however, that the Search engine is not available from a leaf node). Voice Runner
displays its Search engine in the Dialog Modeler window.
2 Type the name, or partial name, of the entity you want to find into the Name field. If you have used
a partial name, ensure that the Partial Match box is also checked.
3 In the case of a dialog flow or a prompt, you can select the environment you want to search:
• Any environment - searches all environments; this is the default
• Tool - searches the Tool environment. This contains dialog flows that are under construction
(and related prompts)
• Production - searches the Production environment. This contains dialog flows that are
deployed (and related prompts)
• Decommission - searches the Decommission environment. This consists of dialog flows that
have been taken out of deployment (and related prompts).
4 Click Search. SAB displays a list of all matching entities in the Dialog Modeler window.
5 Click Show Details to display further details.
6 Click on the entity name to open it in the Dialog Modeler window.
Page 27
Speech Applications Builder Configurator User Guide • May 15, 2004 • page 27 of 116
Thumbnail and zoom facilities
When a dialog flow is open in the Dialog Modeler window, the Browser also provides
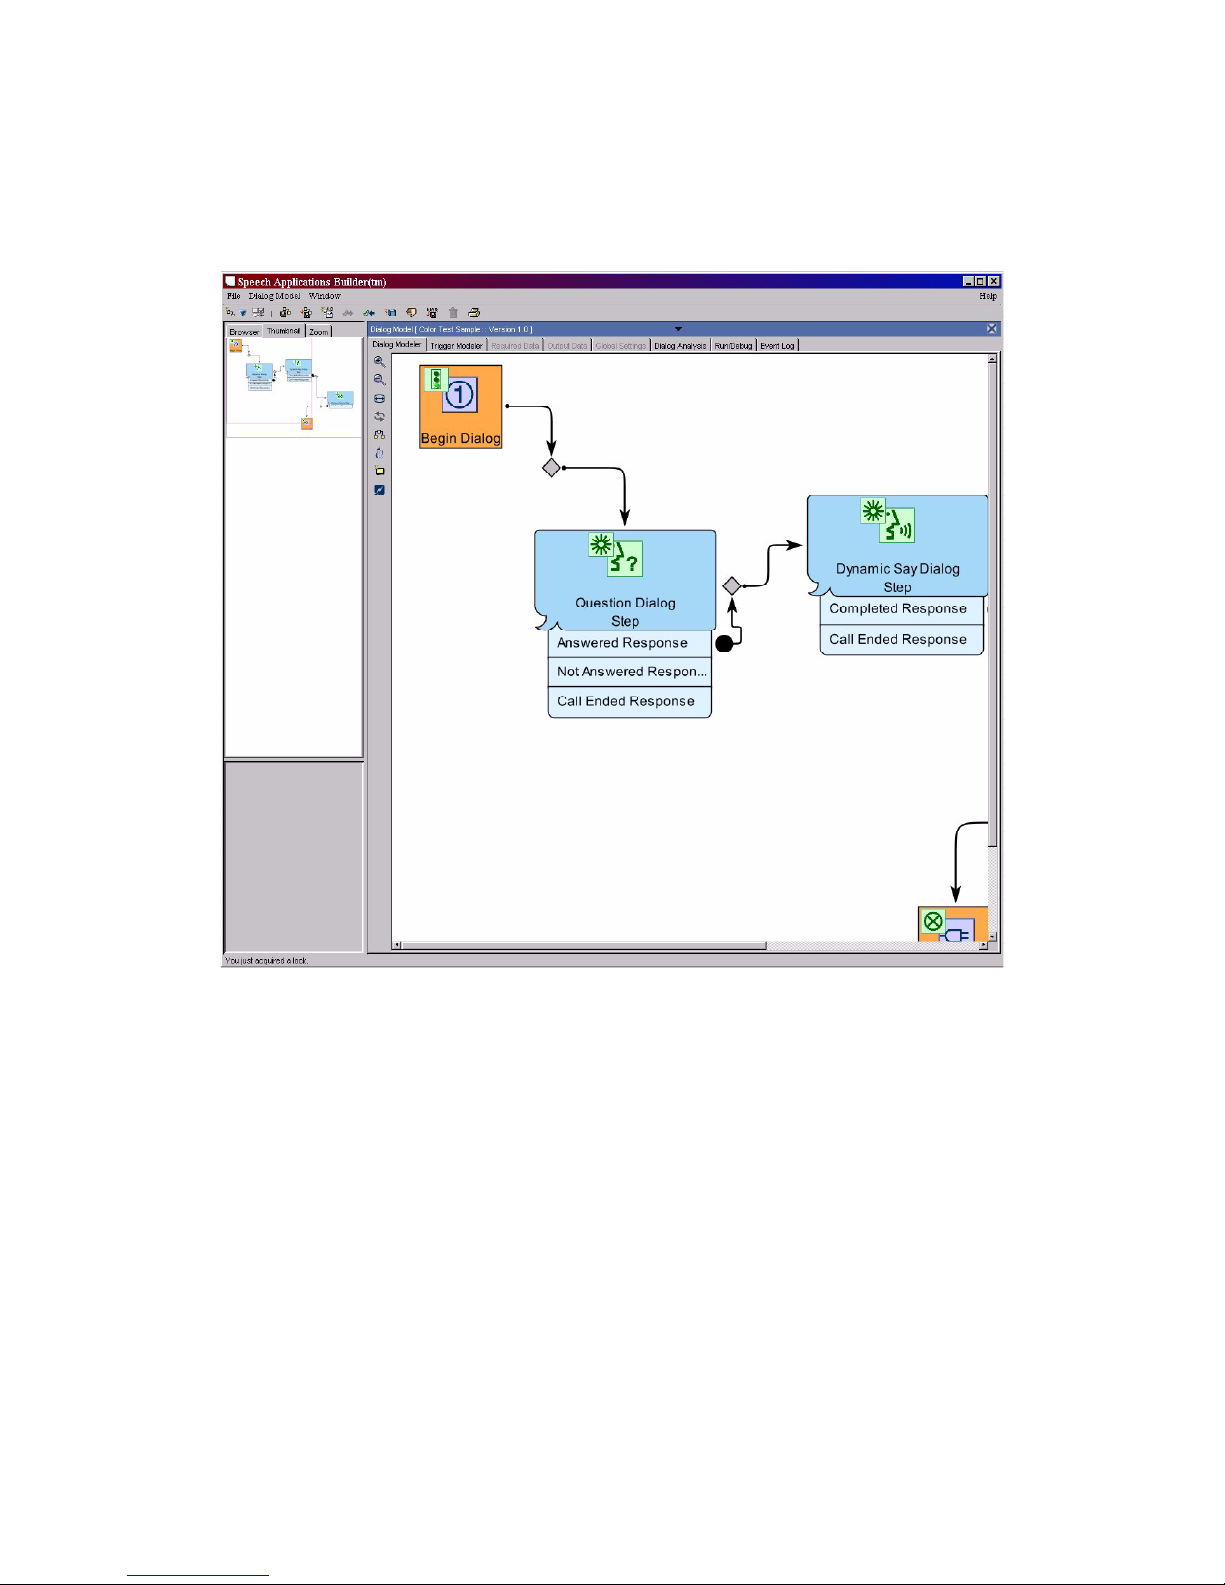
• a thumbnail view of the entire dialog flow, outlining the area that is also displayed in the Dialog
Modeler window with a red border
Figure 15. The Browser thumbnail view
Page 28
Speech Applications Builder Configurator User Guide • May 15, 2004 • page 28 of 116
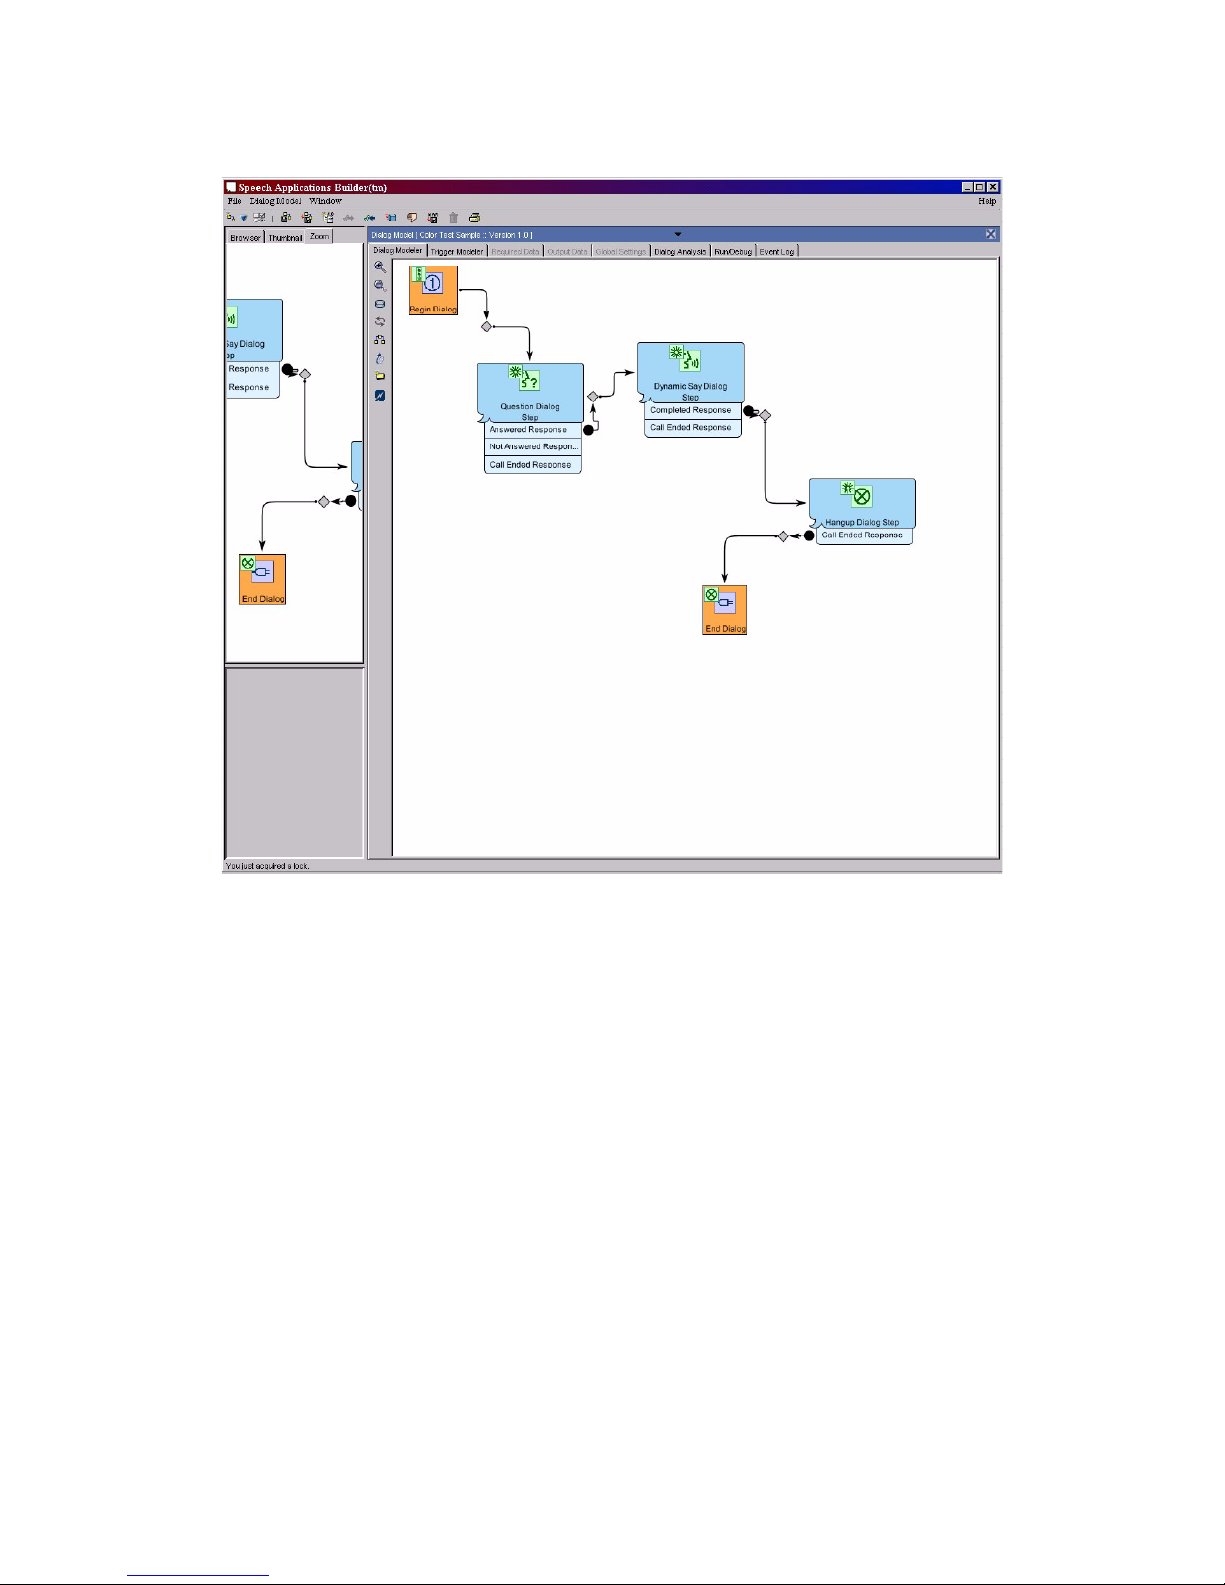
• a “zoomed” view of the dialog flow, which can be scrolled by moving the cursor around the
Dialog Modeler window.
Figure 16. The Browser “zoomed” view
Page 29

Speech Applications Builder Configurator User Guide • May 15, 2004 • page 29 of 116
The Dialog Modeler window
The Dialog Modeler window (on the right of the Configurator) is a workspace where you can build new
dialogs and view or amend existing dialogs. It allows you to build, test, analyze and deploy dialog
flows.
Figure 17. The Dialog Modeler window (at right hand side)
The Dialog Modeler window contains the following tabbed worksheets:
Worksheet
Function
Dialog
Modeler
The default worksheet, which is used to create and edit dialog flows by “drawing”.
Trigger
Modeler
Used to create alternative dialog flows to handle specified events occurring in this dialog
flow.
Note that triggers can also be set up within the individual component steps and, if these
exist, take precedence over the dialog-wide triggers.
See page 62.
Required
Data
Used to set up the variables and arrays that are required by this sub-dialog flow.
See page 68.
Page 30
Speech Applications Builder Configurator User Guide • May 15, 2004 • page 30 of 116
Worksheet
Function
Output
Data
Used to set up the variables and arrays used to pass data out of this sub-dialog flow.
See page 68.
Global
Settings
Used to configure certain global recognition parameters, including
• barge-in (see Glossary, page 114)
• default minimum confidence (see Glossary, page 114)
• no input timeout - defines the length of silence that must elapse before SAB
classifies the response as no input
• maximum errors allowed - defines the maximum number of times SAB attempts
to obtain a valid response.
Dialog
Analysis
Used to analyze paths through the dialog and check for unreachable Steps (steps that
cannot be executed). See page 100.
Run/Debug
Used to test the dialog in the debugger test environment. See page 102.
Event Log
Logs “development events”, such as Save and Export.
Drawing facilities
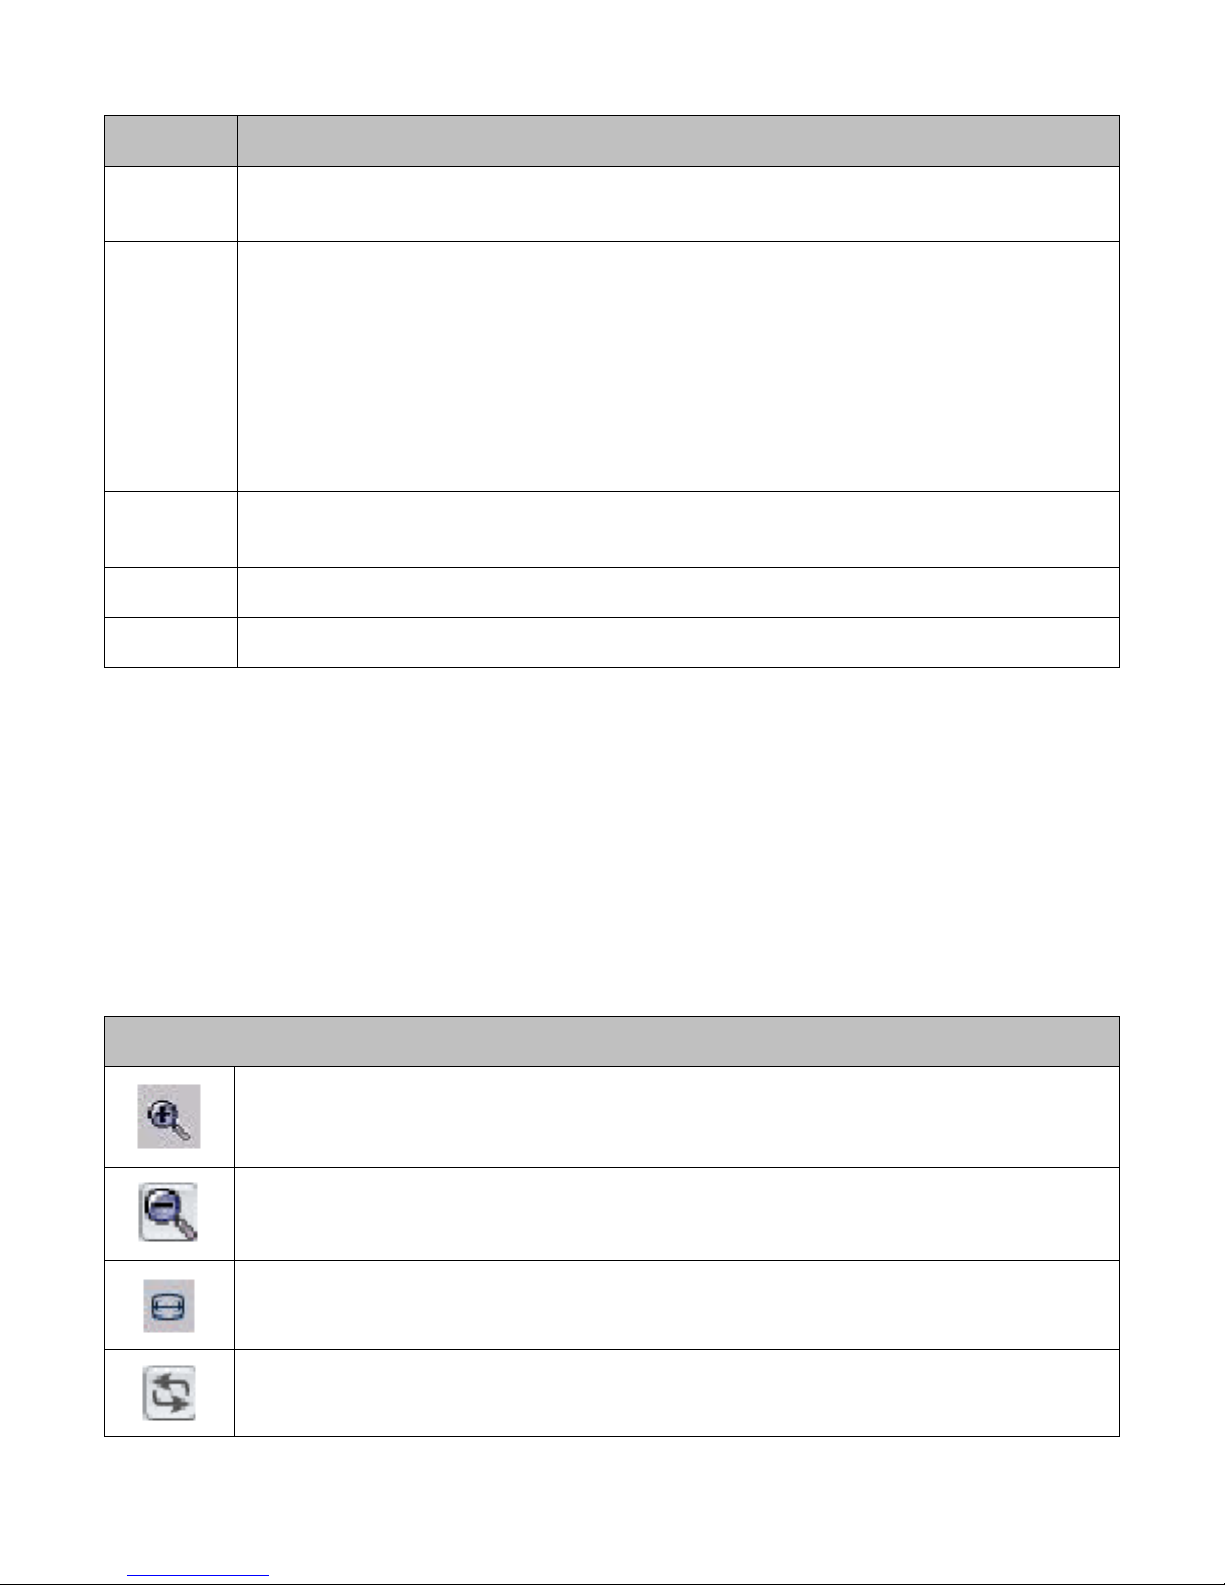
The Dialog Modeler window provides a “canvas”, on which the dialog flow is drawn, and a set of
drawing tools, accessed in either of the following ways:
• by clicking on the buttons in the Dialog Modeler toolbar, running down the left hand margin of
the Dialog Modeler window
• from the pop-up context menu, which is displayed by right clicking anywhere in the Dialog
Modeler window.
The drawing tools include
Before the dialog is checked out
Zoom in
By a pre-defined factor.
Zoom out
By a pre-defined factor.
Fit to screen
Refresh dialog flow
Page 31
Speech Applications Builder Configurator User Guide • May 15, 2004 • page 31 of 116
When the dialog has been checked out
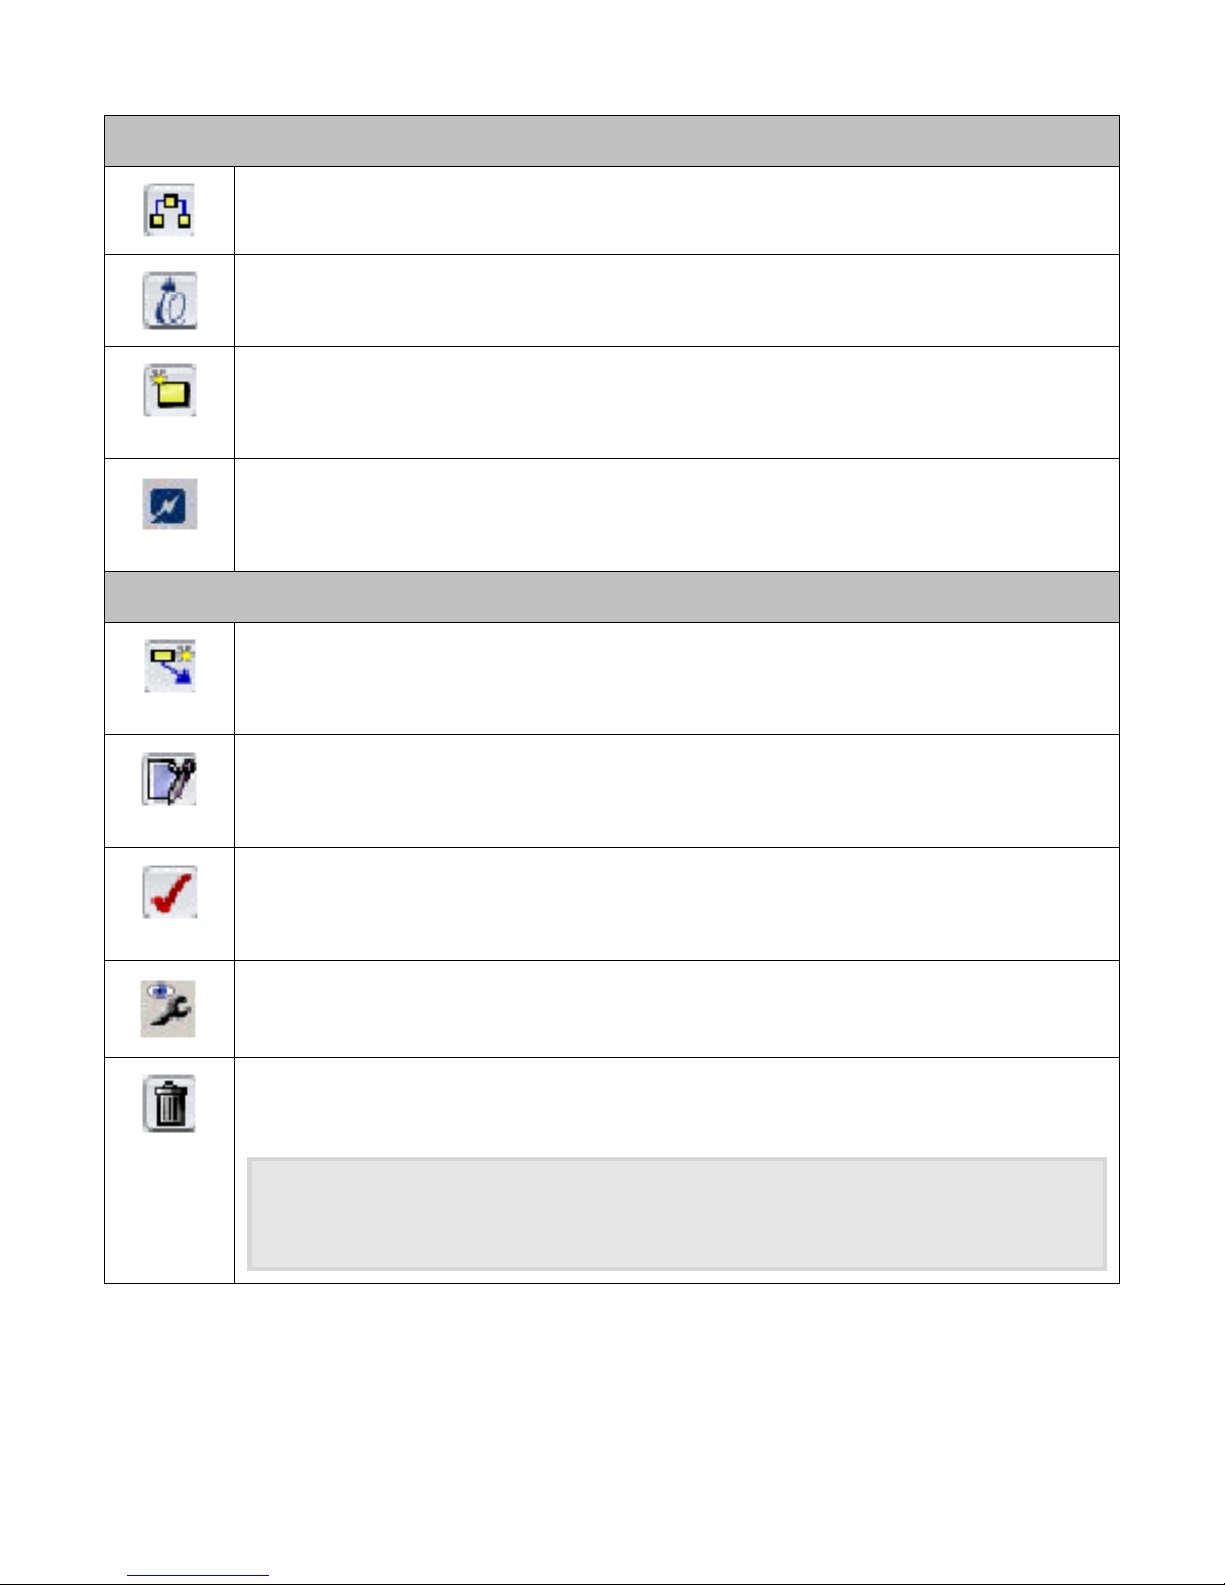
Arrange steps and connections
Check repository for updated components
If any newer versions are available, SAB gives you the opportunity to update the dialog.
Add component
Opens the Select Component dialog box, which allows you to select a component and
then “paste” it in the Dialog Modeler window. See page 39.
Adds a new interrupt component
Allows you to “paste” an Interrupt component in the Dialog Modeler window.
See page 66
When a component is selected
Add connection
Note that if the selected component is a dialog step, you must select one of the result
bars or this button remains grayed out. See page 41.
Edit selected step
Opens the Edit Step dialog box, which allows you to configure the dialog step.
See page 42.
Check if selected step is valid
Checks that the step is connected to the rest of the dialog flow and that all the variables
required have been defined. See page 67.
View or edit the master component
Allows you to view detailed general information about the selected component.
Delete selected step.
See page 72.
If you delete a decision point or a rule the associated connections are also deleted.
When you delete a connection, the variables and arrays defined in the earlier in the flow are
no longer available to components later in the flow and may need to be re-defined.
Page 32
Speech Applications Builder Configurator User Guide • May 15, 2004 • page 32 of 116
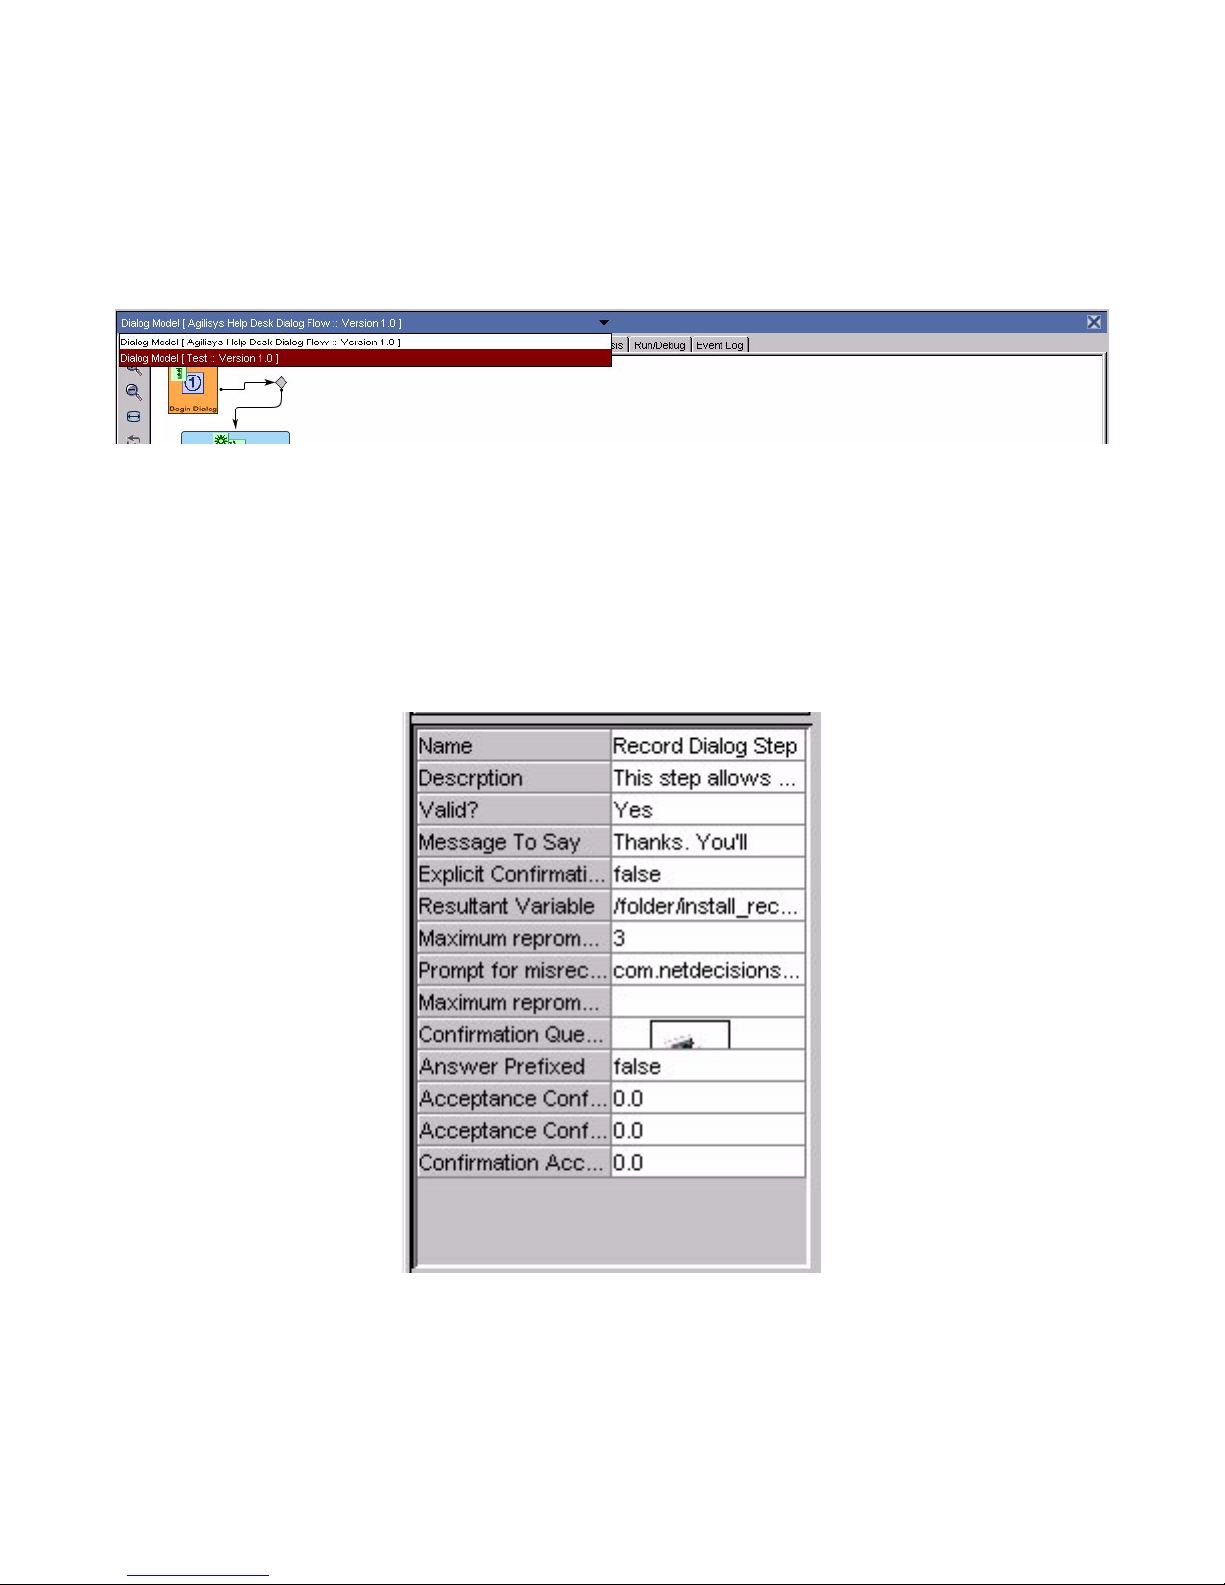
Multiple dialog flow windows
Multiple dialog flow windows may be opened in the Dialog Modeler and can be selected
• from the list displayed under the Windows option in the Menu bar
• from the drop-down list accessed from the blue title bar at the top of the Dialog Modeler
window.
Figure 18. The Dialog Modeler window title bar, showing drop-down list
The dialog flow currently displayed in the Dialog Modeler window can be closed by clicking on the
Close button, at the right of the title bar.
Component configuration details
When a component is selected, its configuration details are displayed in the window directly beneath
the Browser.
Figure 19. Component configuration details
Page 33
Speech Applications Builder Configurator User Guide • May 15, 2004 • page 33 of 116
The Dialogs tree
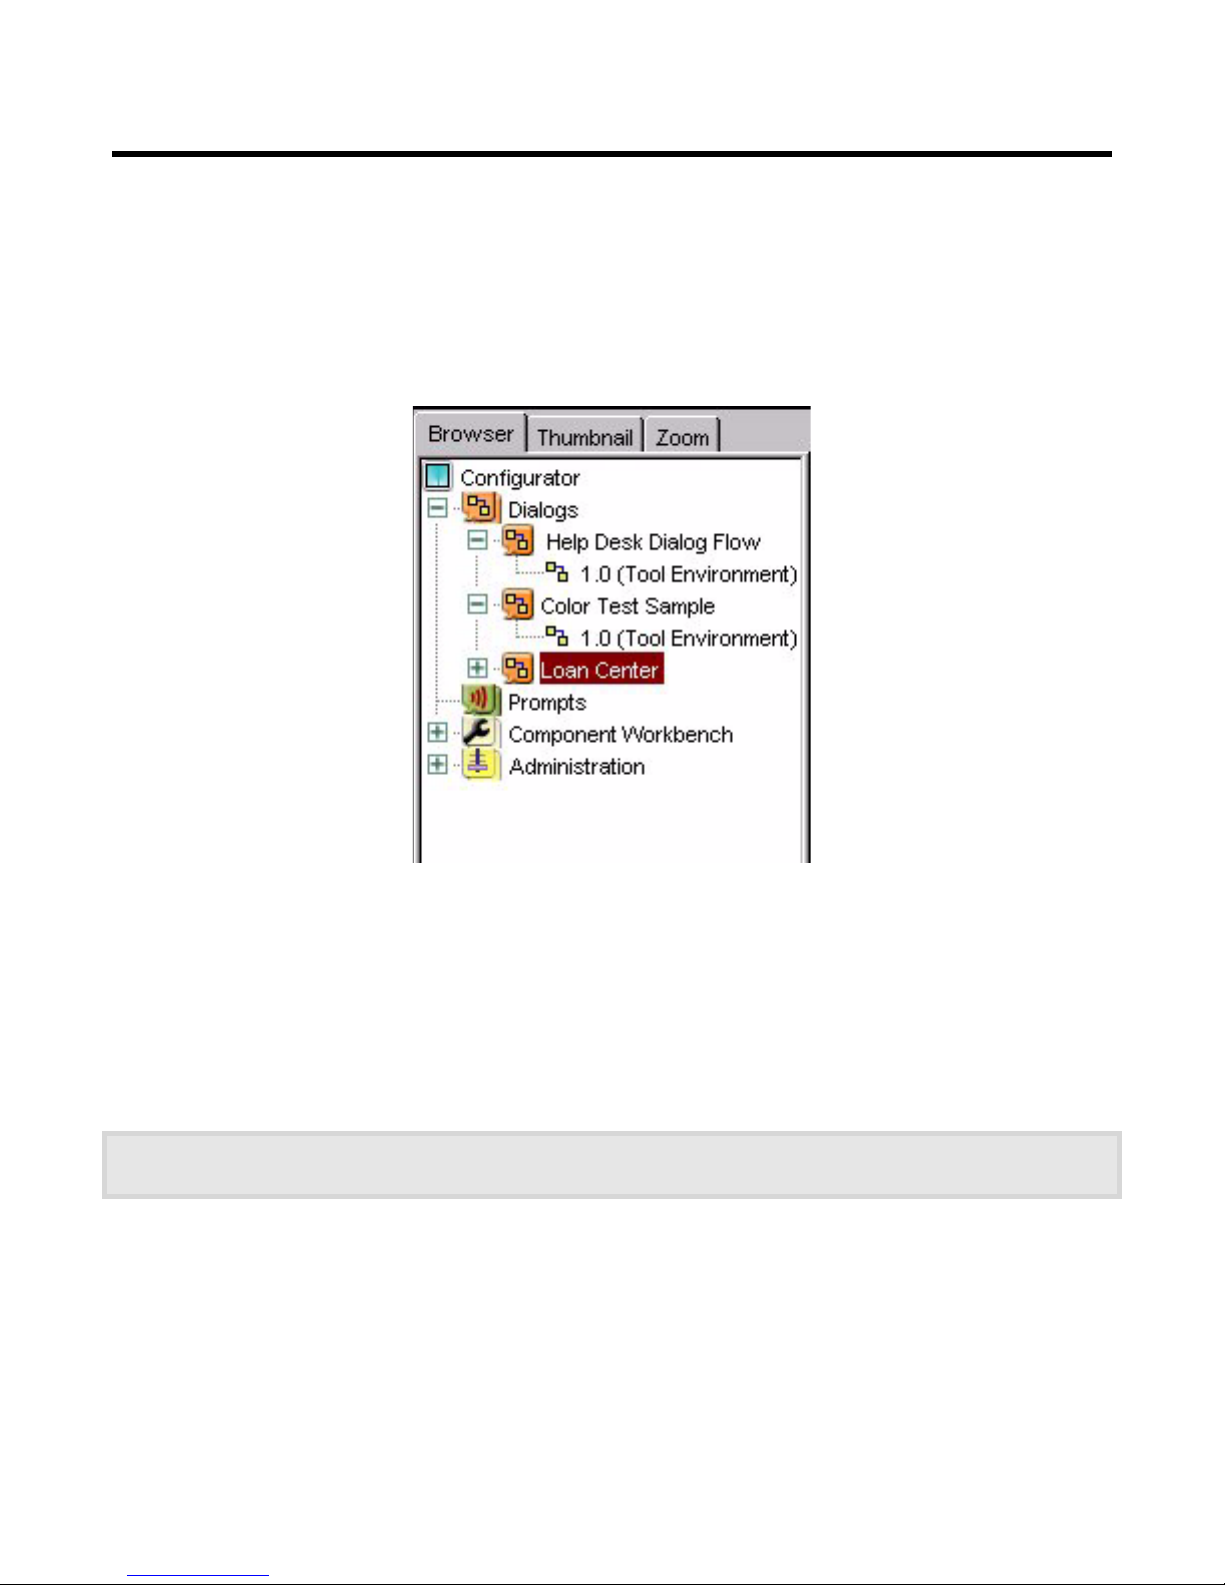
Interactions between an automated system and a caller are called dialogs.
The software that performs a dialog is called a dialog flow (or a dialog model or, sometimes, a
process). A dialog flow may contain one or more sub-dialog flows (and a sub-dialog flow may have
sub flows of its own).
Dialog flows are managed in the Dialogs tree.
Figure 20. The Browser, showing the Dialogs tree
The Dialogs tree provides
• a list or tree of dialog flow folders, in the Browser window
• a Dialog Search engine (see page 73)
• a version control mechanism (see page 37)
• a dialog flow design facility, in the Dialog modeler window (see page 38)
The options presented in the Menu bar and as buttons in the Tool bar are configured dynamically according to
the feature you are using.
Page 34
Speech Applications Builder Configurator User Guide • May 15, 2004 • page 34 of 116
Classification
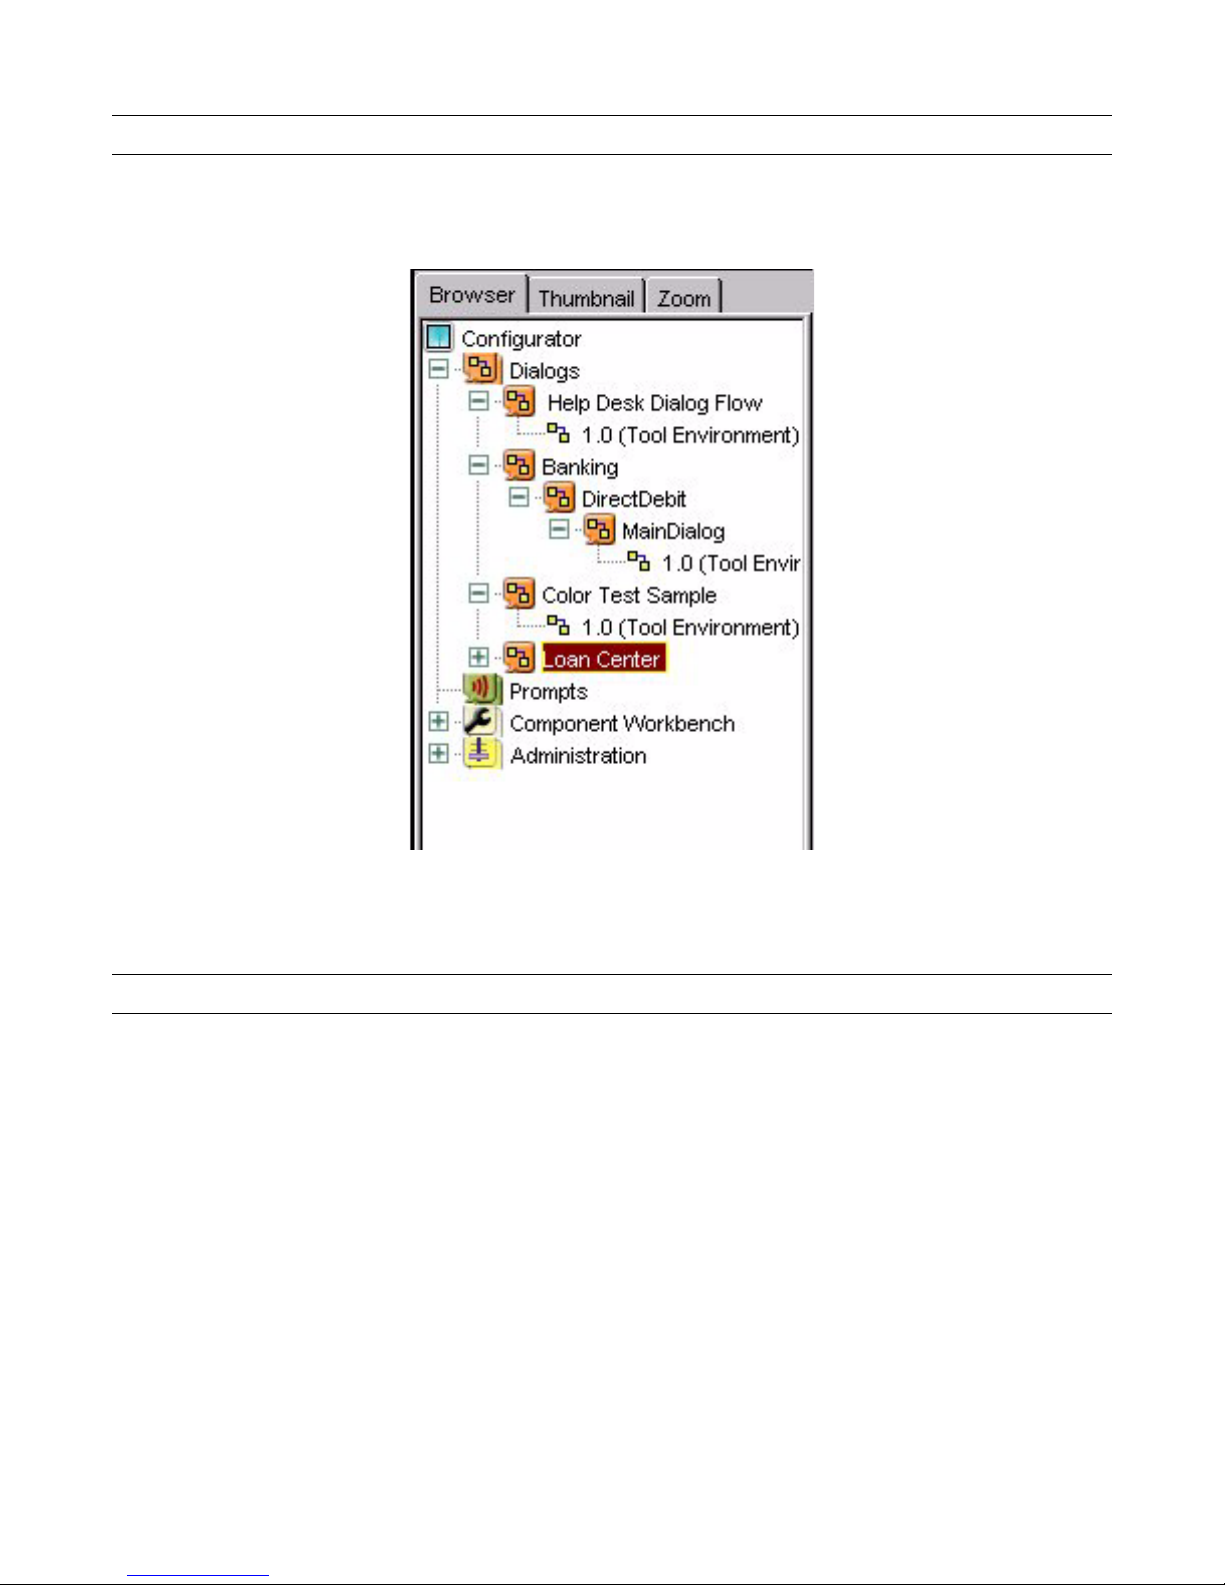
The Classification feature is used to build the file directory structure by grouping and nesting dialog
flows; for example, the Figure below shows a dialog flow “Main Dialog” that has been classified under
“Direct Debit”, which has itself been classified under “Banking”.
Figure 21. The Dialogs directory structure, showing Classification.
The Classification path is specified when the dialog flow is created or renamed (see page 75).
Adding a new dialog flow
To add a new dialog flow:
1. Click anywhere on the Dialogs tree in the Browser window. Do one of the following:
• Select Dialog Model > Add Dialog Model from the Menu bar
• Click on the Add button and select Add Dialog
• Click on the Add Dialog Model button
• Right click on the Dialogs tree to display the pop-up Dialogs context menu and select Add
Dialog Model.
Page 35
Speech Applications Builder Configurator User Guide • May 15, 2004 • page 35 of 116
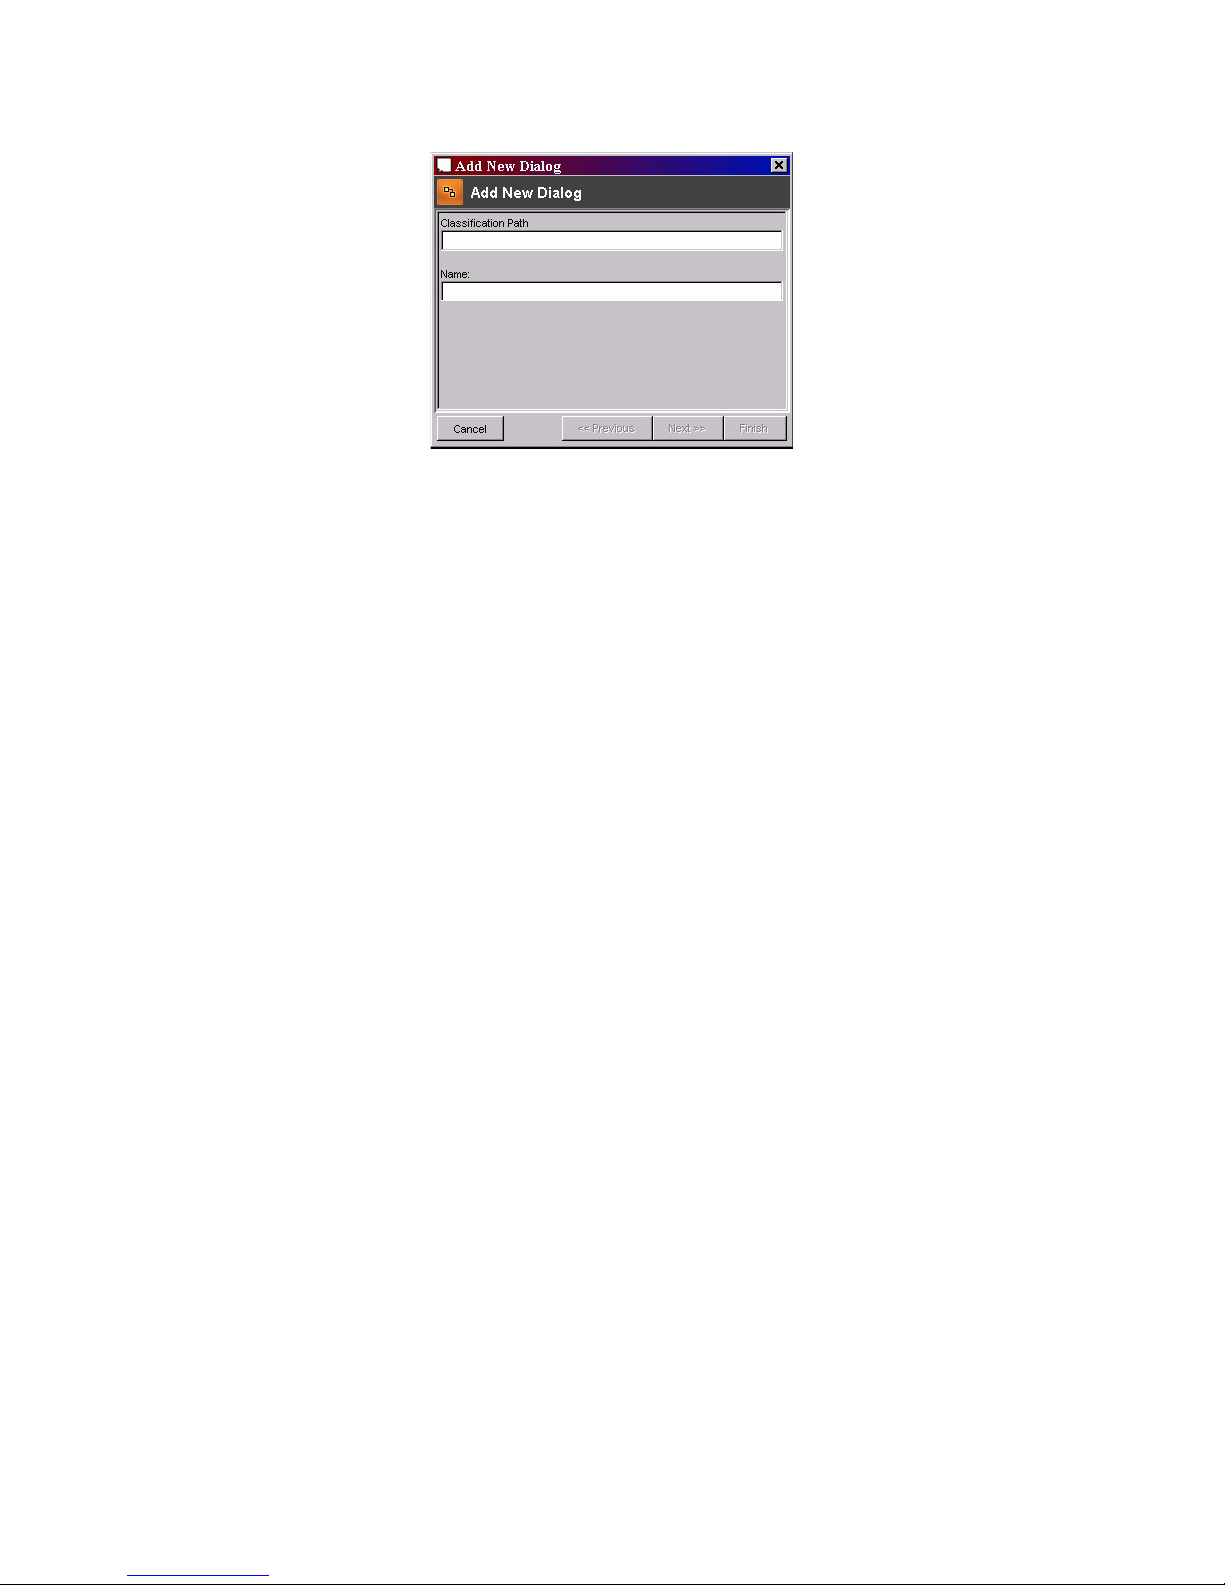
SAB displays the first Add New Dialog dialog box.
Figure 22. Add New Dialog 1
2. (Optionally) enter a Classification Path name (see page 34 for an explanation of Classification).
You can enter this using one of the following methods:
• one level at a time; for example, enter Banking in the first Classification Path field, Voice
Runner automatically displays another Classification Path field, enter DirectDebit in the second
• in a single string; for example, enter Banking.DirectDebit (separated by a period), in the first
field.
3. Enter a dialog flow Name.
4. Click Finish.
SAB allocates a default version number of 1.0 to a new dialog and automatically adds it to the
Tool Environment, where it can be edited.
Page 36
Speech Applications Builder Configurator User Guide • May 15, 2004 • page 36 of 116
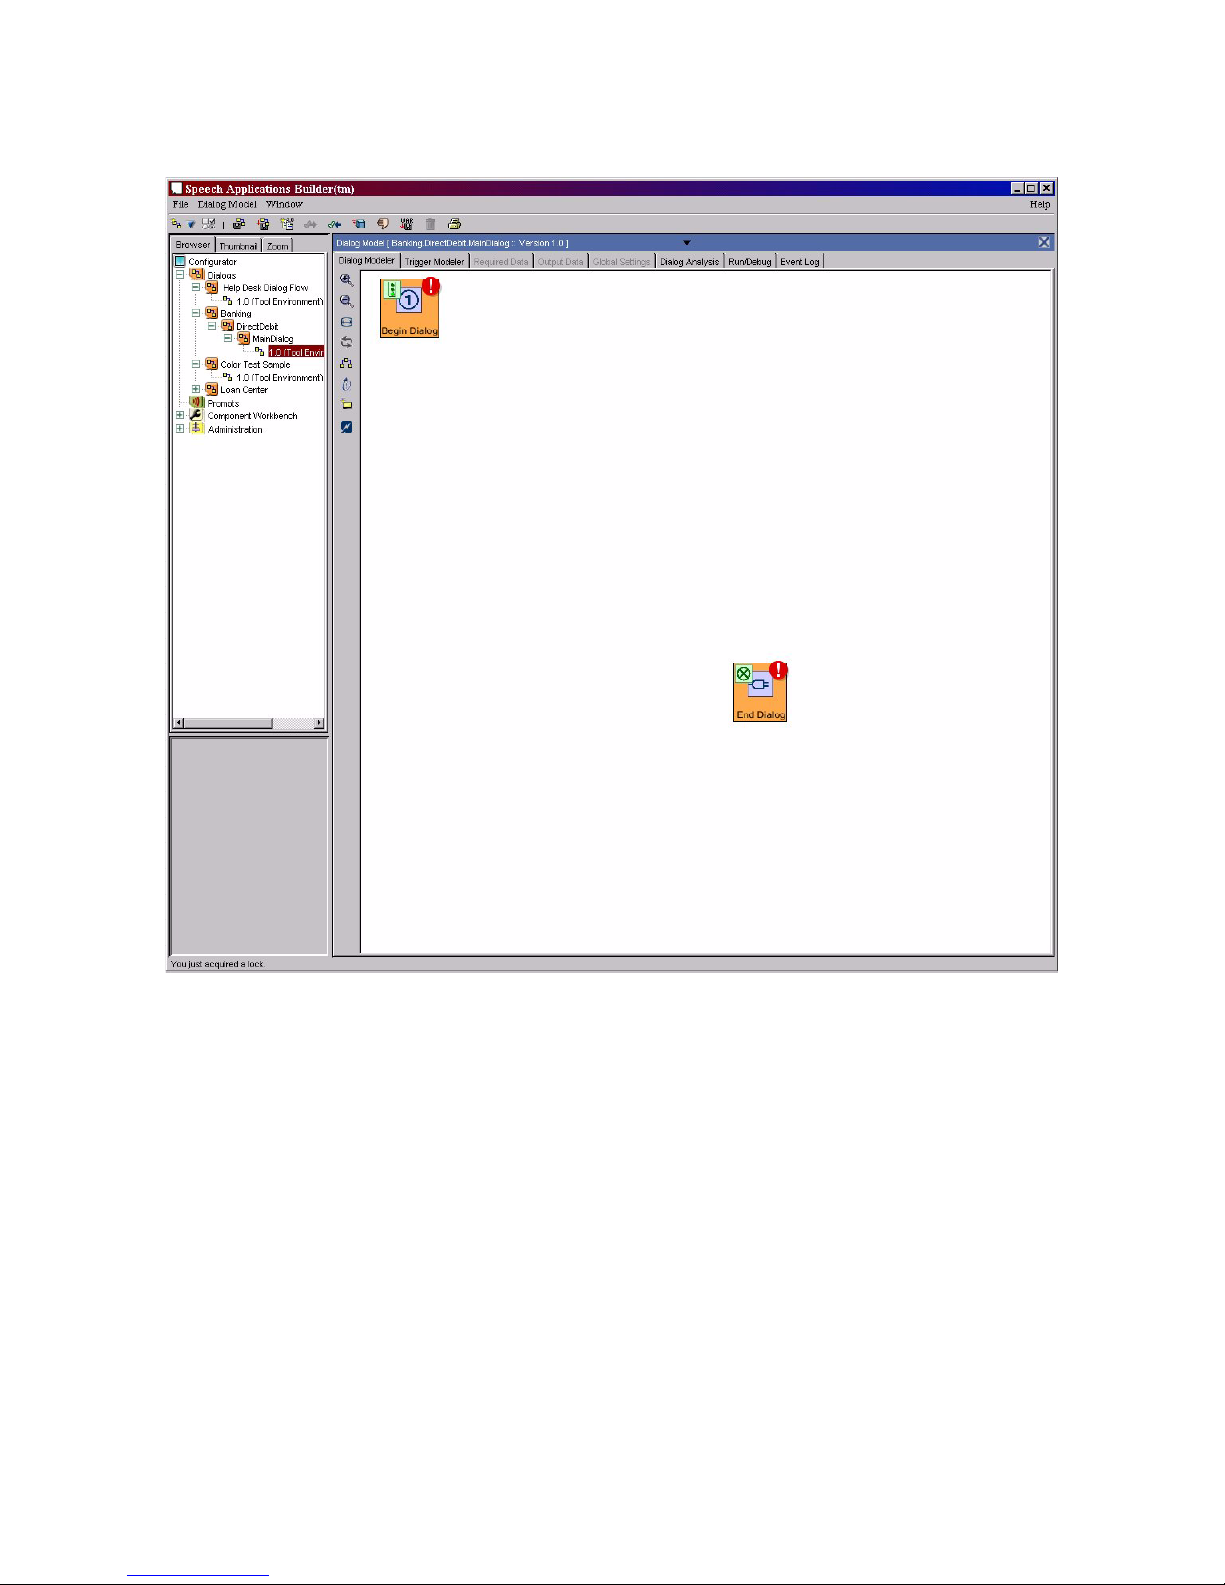
It lists the Dialog Model name in the Dialogs tree, and opens a read only version of the new dialog
flow, complete with Begin Dialog and End Dialog steps, in the Dialog Modeler window.
Figure 23. The Dialog Modeler window (at right hand side)
Page 37
Speech Applications Builder Configurator User Guide • May 15, 2004 • page 37 of 116
Checking in and out
SAB is a multi-user development environment. To prevent more than one developer simultaneously
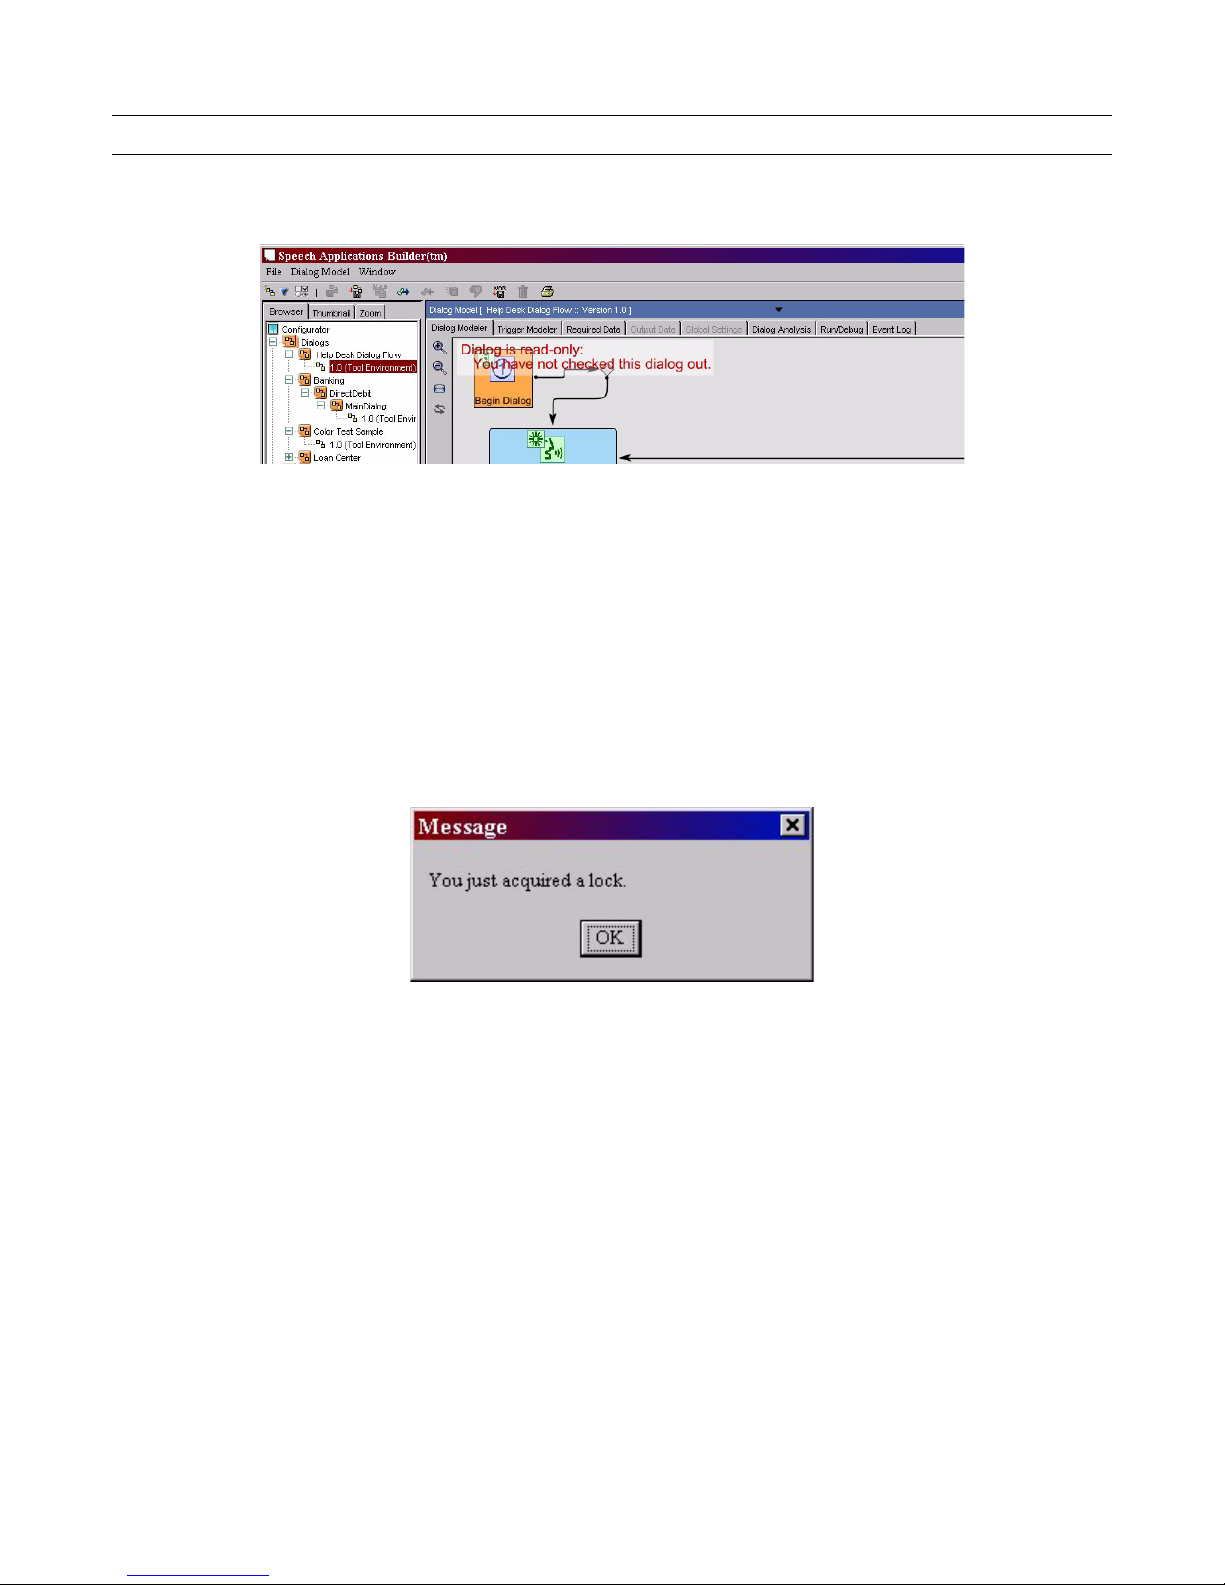
editing a dialog flow, SAB does not allow you to edit a dialog flow until you have checked it out.
Figure 24. The read-only warning message
While a dialog flow is checked out, no other developer can edit it (though he or she may open another
read only version).
The dialog flow should be checked in when you have finished editing.
Checking out
To check out a dialog flow:
1. Click the Check out button in the Tool bar. SAB confirms that the dialog flow has been checked
out.
Figure 25. Check out confirmation message
2. Click OK. The background of the Dialog Modeler window turns white and the dialog flow can now
be edited.
Page 38
Speech Applications Builder Configurator User Guide • May 15, 2004 • page 38 of 116
Checking in
To check in a dialog flow:
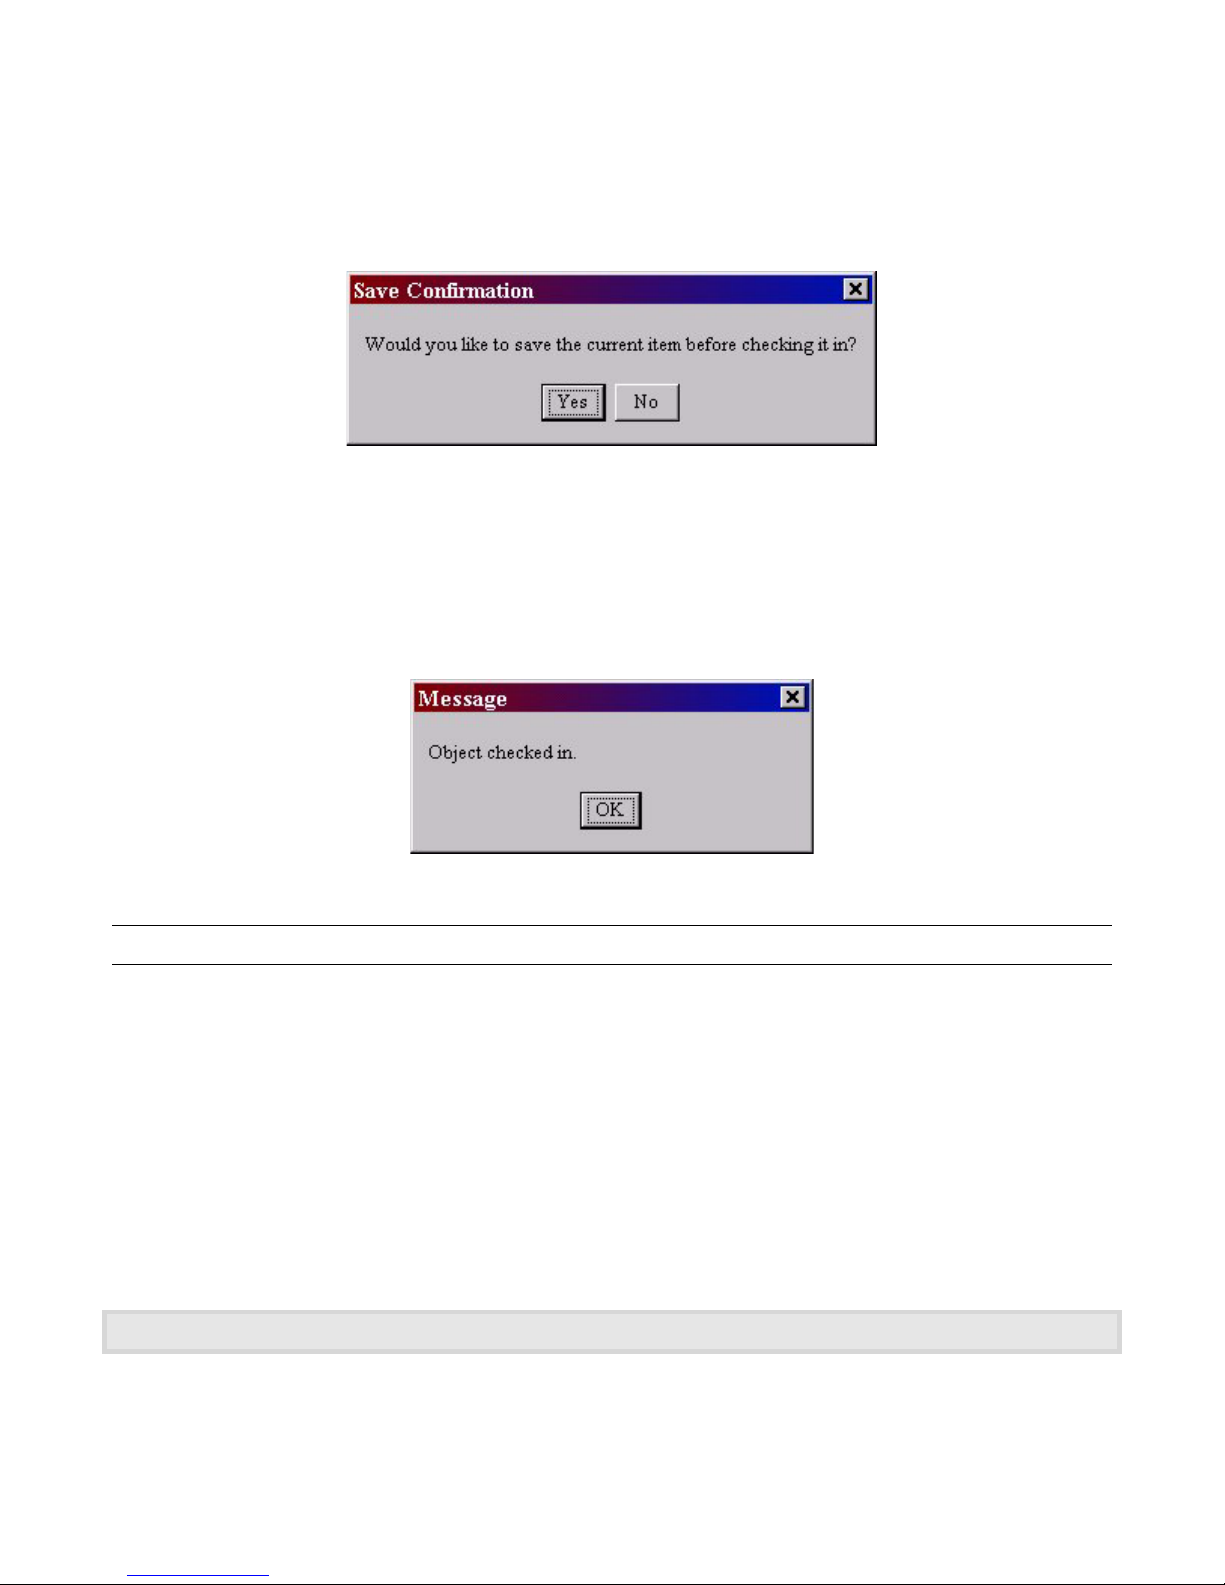
1. Click on the Check in button on the Tool bar. SAB asks if you want to save the dialog flow
before you check it in.
Figure 26. Save confirmation message
2. Click Yes to save or No to check in without saving.
Note that you cannot cancel the checking in at this stage. If you want to continue editing, click Yes
to save, click OK on the confirmation message (shown in the figure below) then check the dialog
flow out again.
3. SAB displays the check in confirmation message.
Figure 27. Check in confirmation message
Building a dialog flow
Dialog flows and sub-flows
Interactions between the caller and the automated system are handled by dialog flows. Depending on
the nature of the interaction, a dialog flow may consist of one single-level flow or of a main, top-level,
flow with one or more sub-flows. A sub-flow may have sub flows of its own.
Mandatory components
When you open a new Dialog Model, SAB automatically places a Begin Dialog step and an End
Dialog step in the Dialog Modeler window. The remainder of the dialog flow is drawn between these
two steps.
A top level dialog flow must end with a Hangup step connected to the End Dialog step.
Page 39
Speech Applications Builder Configurator User Guide • May 15, 2004 • page 39 of 116
Visibility of variables
As you build a dialog flow, SAB automatically makes available to the current component all the
variables defined in all the previous components in the path. For this reason, the most efficient way to
draw a dialog is to add a component, connect it to the previous component, then edit its details.
Adding a dialog or process component
To add a dialog component to a dialog flow:
1. Click on the Add Component button.
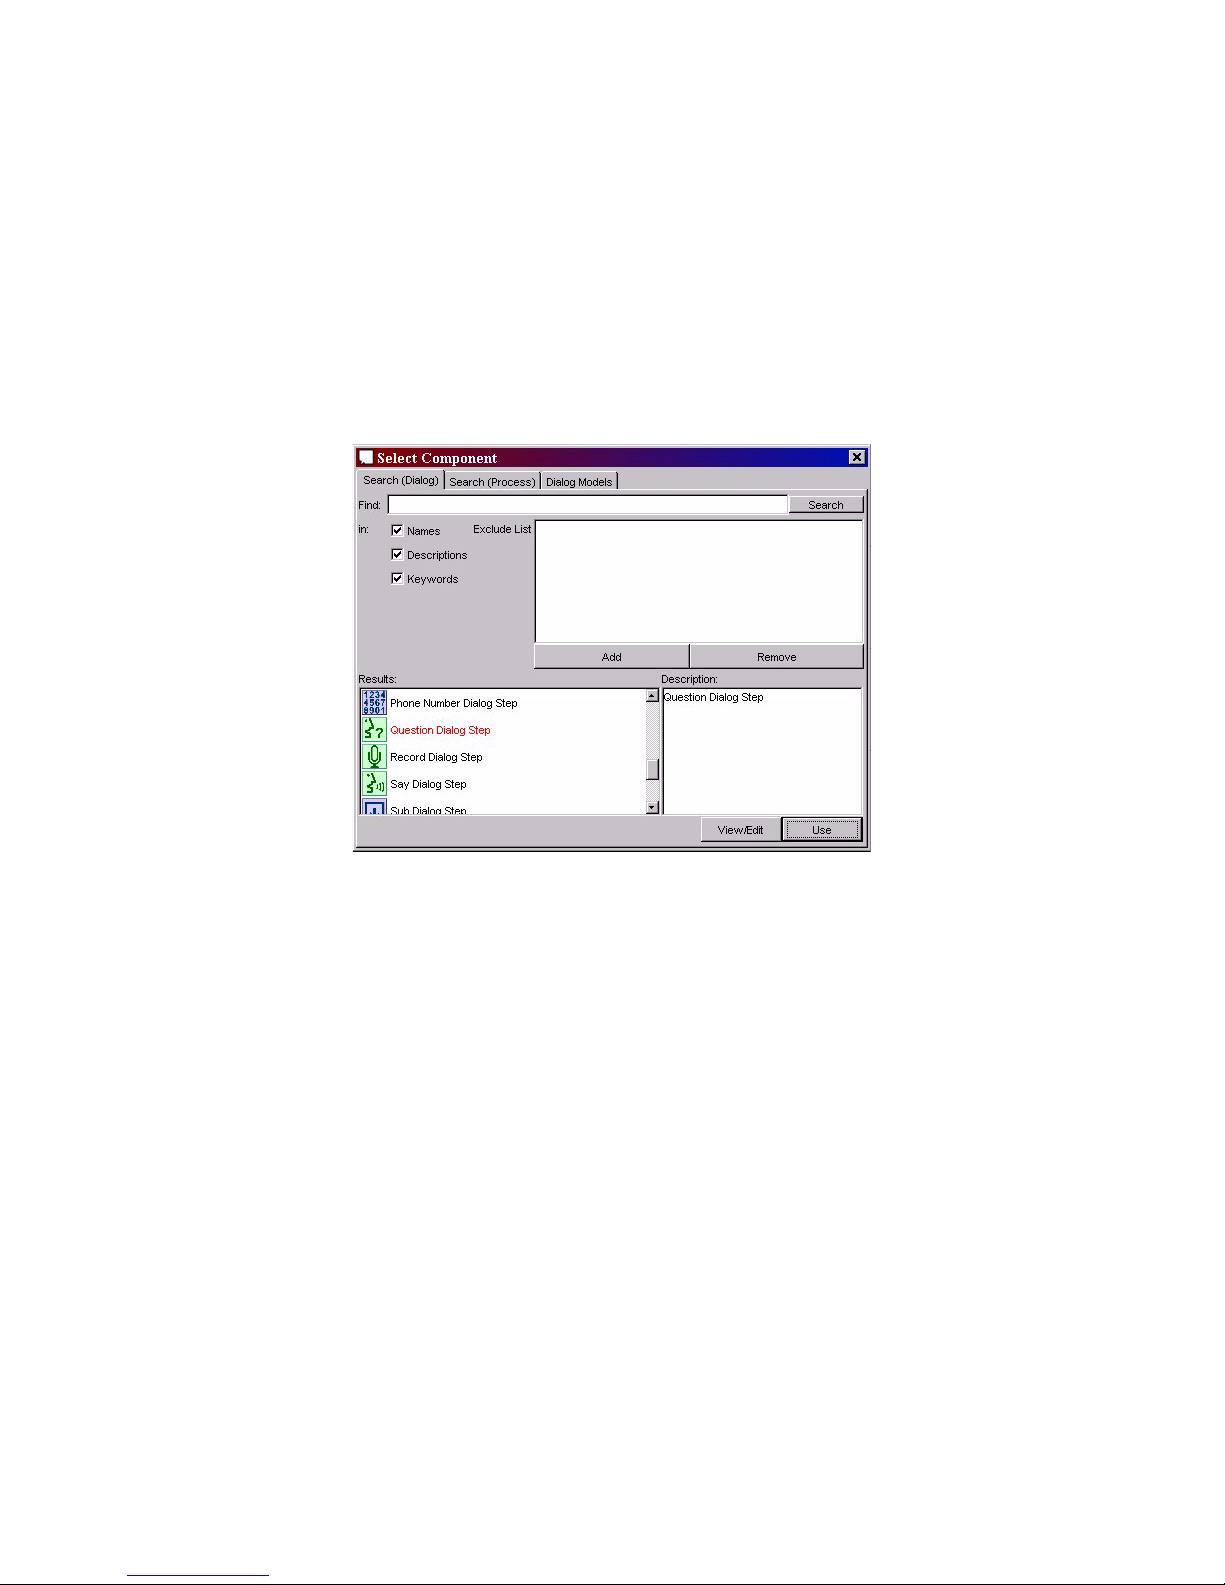
SAB displays the Select Component dialog box.
Figure 28. The Select Component dialog box showing the Search (Dialog) tab selected
2. Select
• the Search (Dialog) tab to find a dialog component
• the Search (Process) tab to find a process component.
3. Do one of the following:
• to find a specific component, type the component name, or partial name, into the Find field
• to find all available components, leave the Find field blank.
A list of components can be found in Appendix A, page 108.
Page 40
Speech Applications Builder Configurator User Guide • May 15, 2004 • page 40 of 116
To direct the search, you can also
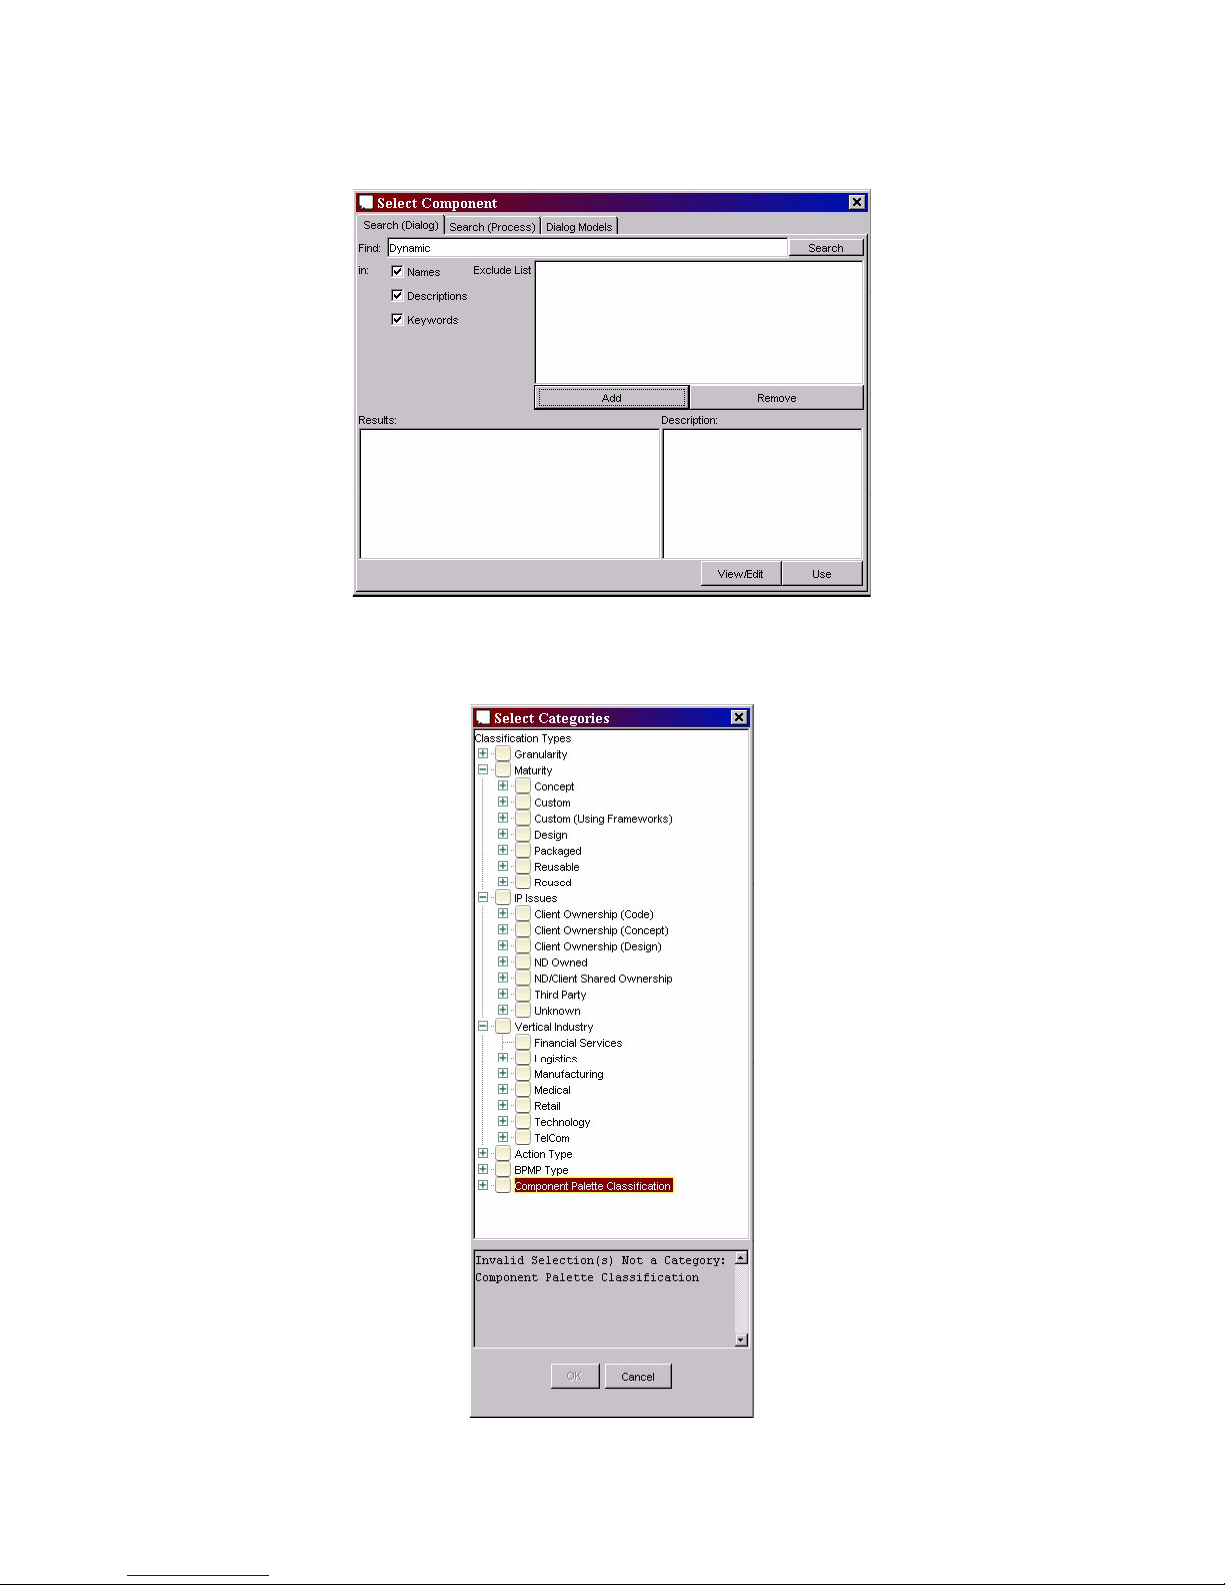
• compile a list of exclusion criteria by clicking on Add.
Figure 29. The Select Component dialog box, showing the Add button (center)
SAB displays the Select Categories dialog box.
Figure 30. The Select Categories dialog box, showing a selection of valid categories
Page 41

Speech Applications Builder Configurator User Guide • May 15, 2004 • page 41 of 116
Select the categories to be excluded from the search. Multiple categories may be selected by holding
down the CTRL key. Click OK.
A category can be removed from the Exclude List by selecting it then clicking the Remove button.
Avoid unchecking Names, Descriptions, or Keywords, unless you are certain where the name or keyword you
have specified appears.
4. Click Search.
SAB displays a list of components in the Results field.
5. Click on the component you require. A brief description of the component appears in the
Description field.
6. Click Use.
The cursor changes to a hand holding a component symbol.
7. Click on the canvas of the Dialog Modeler window.
SAB pastes the component onto the canvas. You can reposition it by clicking on it (in the case of a
dialog component, click on its title box) dragging it to a new position, and dropping it.
Adding a connection
To add a connection:
1. Click on the first step. In the case of a dialog step, click on the appropriate result bar. The selected
step is highlighted in yellow.
Figure 31. First dialog step with result bar selected
2. Click on the Add Connection button.
The cursor changes to a hand holding a connection symbol.
Page 42
Speech Applications Builder Configurator User Guide • May 15, 2004 • page 42 of 116
3. Click on the second step. In the case of a dialog step, click on the title box.
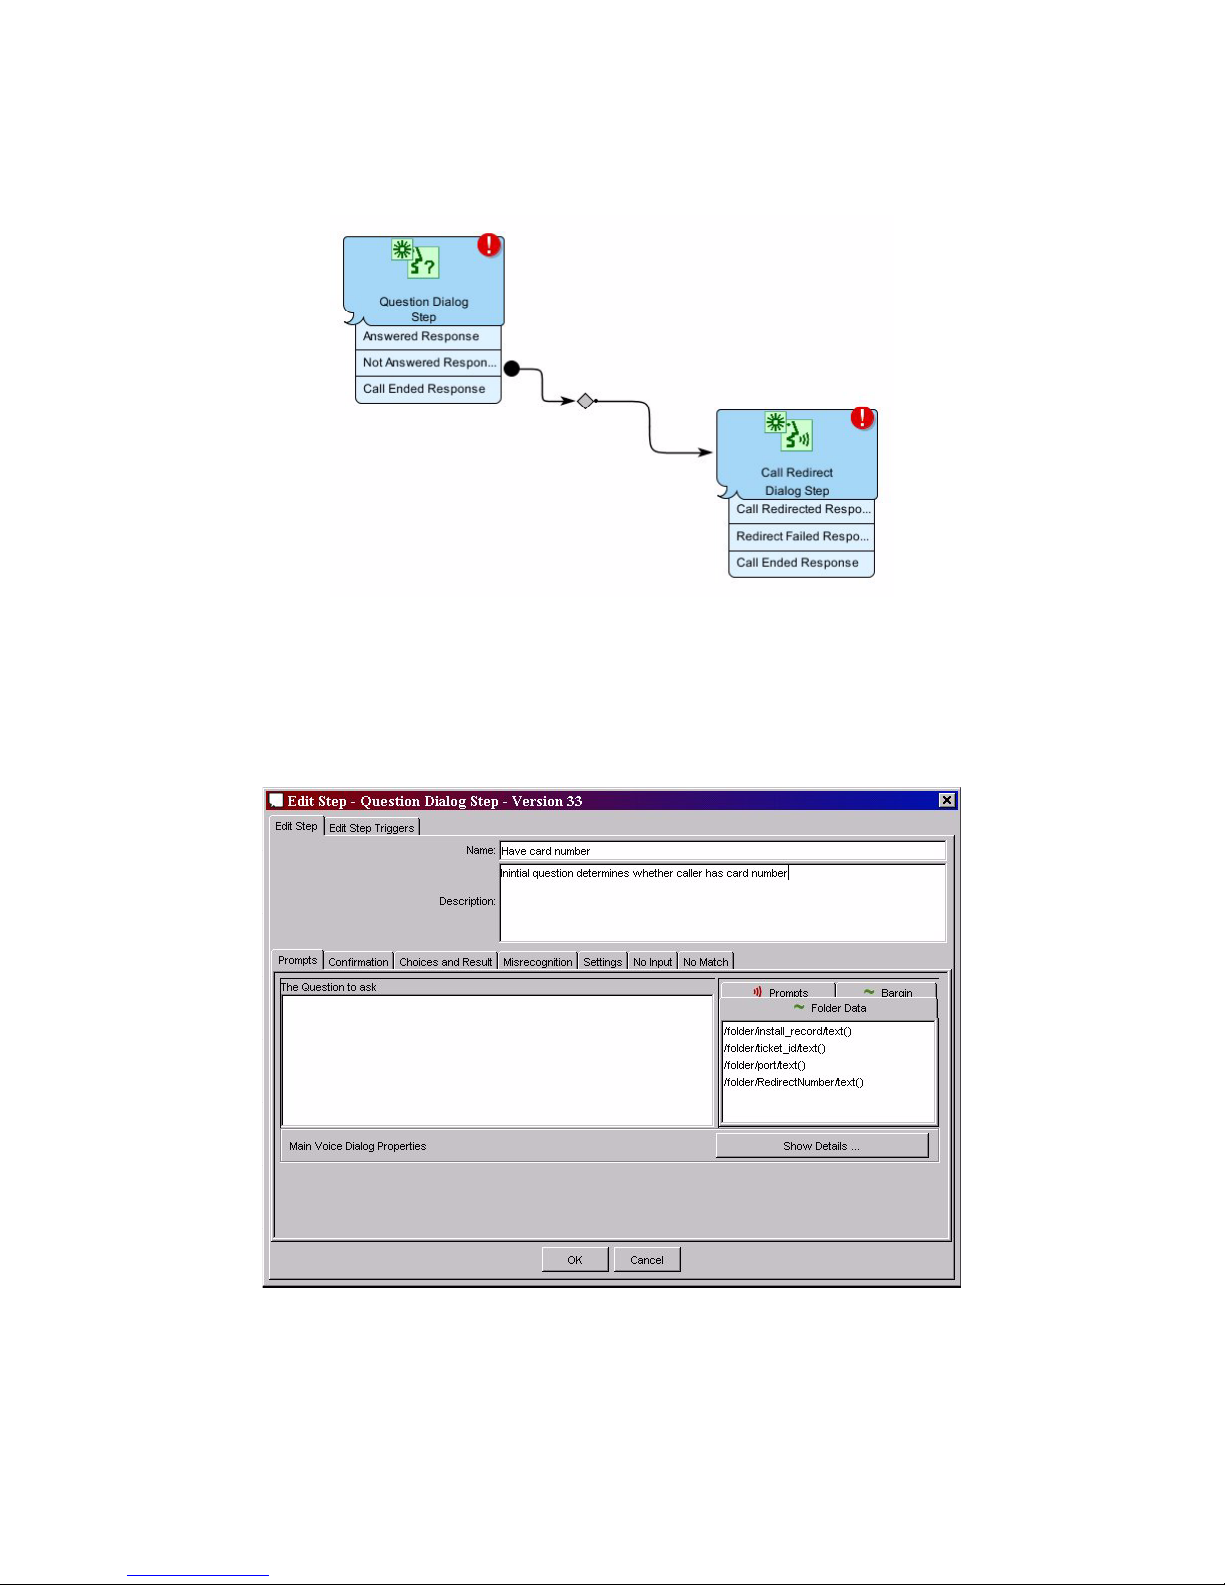
SAB draws the connection, complete with a decision point (the grey diamond shown in the Figure
below) that can be used to add a rule to allow branching (see page 64).
Figure 32. A connection between two dialog steps
Setting up or editing a dialog step
To set up or edit a dialog step, double-click on the title box of the component. SAB displays the Edit
Step dialog box.
Figure 33. The Edit Step dialog box of the Question component, used to edit dialog steps
Page 43

Speech Applications Builder Configurator User Guide • May 15, 2004 • page 43 of 116
Each dialog step must be configured to perform the specific task required by the dialog flow. The
majority of dialog steps handle an interaction with the caller and typically perform the following tasks:
• Play out an initial prompt; for example, Please select one of the following options: Red, Blue or
Yellow (this is configured on the Prompts page of the Edit Step dialog box, see Figure above)
• Recognize the caller’s utterance by matching it against a grammar. The grammar may be
supplied by the component (as in the case of Date, Time and Money recognitions) or it may be
supplied by the developer. Some components allow you to specify the grammar as a series of
‘choices’ (typically configured on the Choices and Results page, see the Figure above).
Other components allow you to specify an external grammar, written in GSL or JSGF, and
stored in a separate file (typically configured on the Grammar Mapping page).
• (Optionally) repeat the result back to the caller and ask him or her to confirm it. (Both the
prompt used and the circumstances under which confirmation is required are configured on
the Confirmation page, see the Figure above).
• Handle other behavior by the caller, for example:
o disconfirmation, by playing out a prompt that repeats the initial request to the caller; for
example, Please repeat your selection: red, blue or yellow. (This is configured on the
Misrecognition page, see the Figure above)
o silence, by playing out a prompt such as, I’m sorry I didn’t hear that, then repeating the
request to the caller by playing out the Misrecognition prompt. (This is configured on
the No Input page, see the Figure above)
o nonsense, by playing out a prompt such as, I’m sorry I didn’t understand that, then
repeating the request to the caller by playing out the Misrecognition prompt. (This is
configured on the No Match page).
• For each recognition it performs, the dialog step may also re-configure the speech recognizer.
(This is set up in the Voice Properties dialog box, see page 47).
• A dialog step may also be set to repeat some of these tasks up to a specified maximum
number of times. This is configured on the Settings page.
The following examples illustrate the configuration of a typical component; other components may
differ in detail.
Page 44
Speech Applications Builder Configurator User Guide • May 15, 2004 • page 44 of 116
Name and description
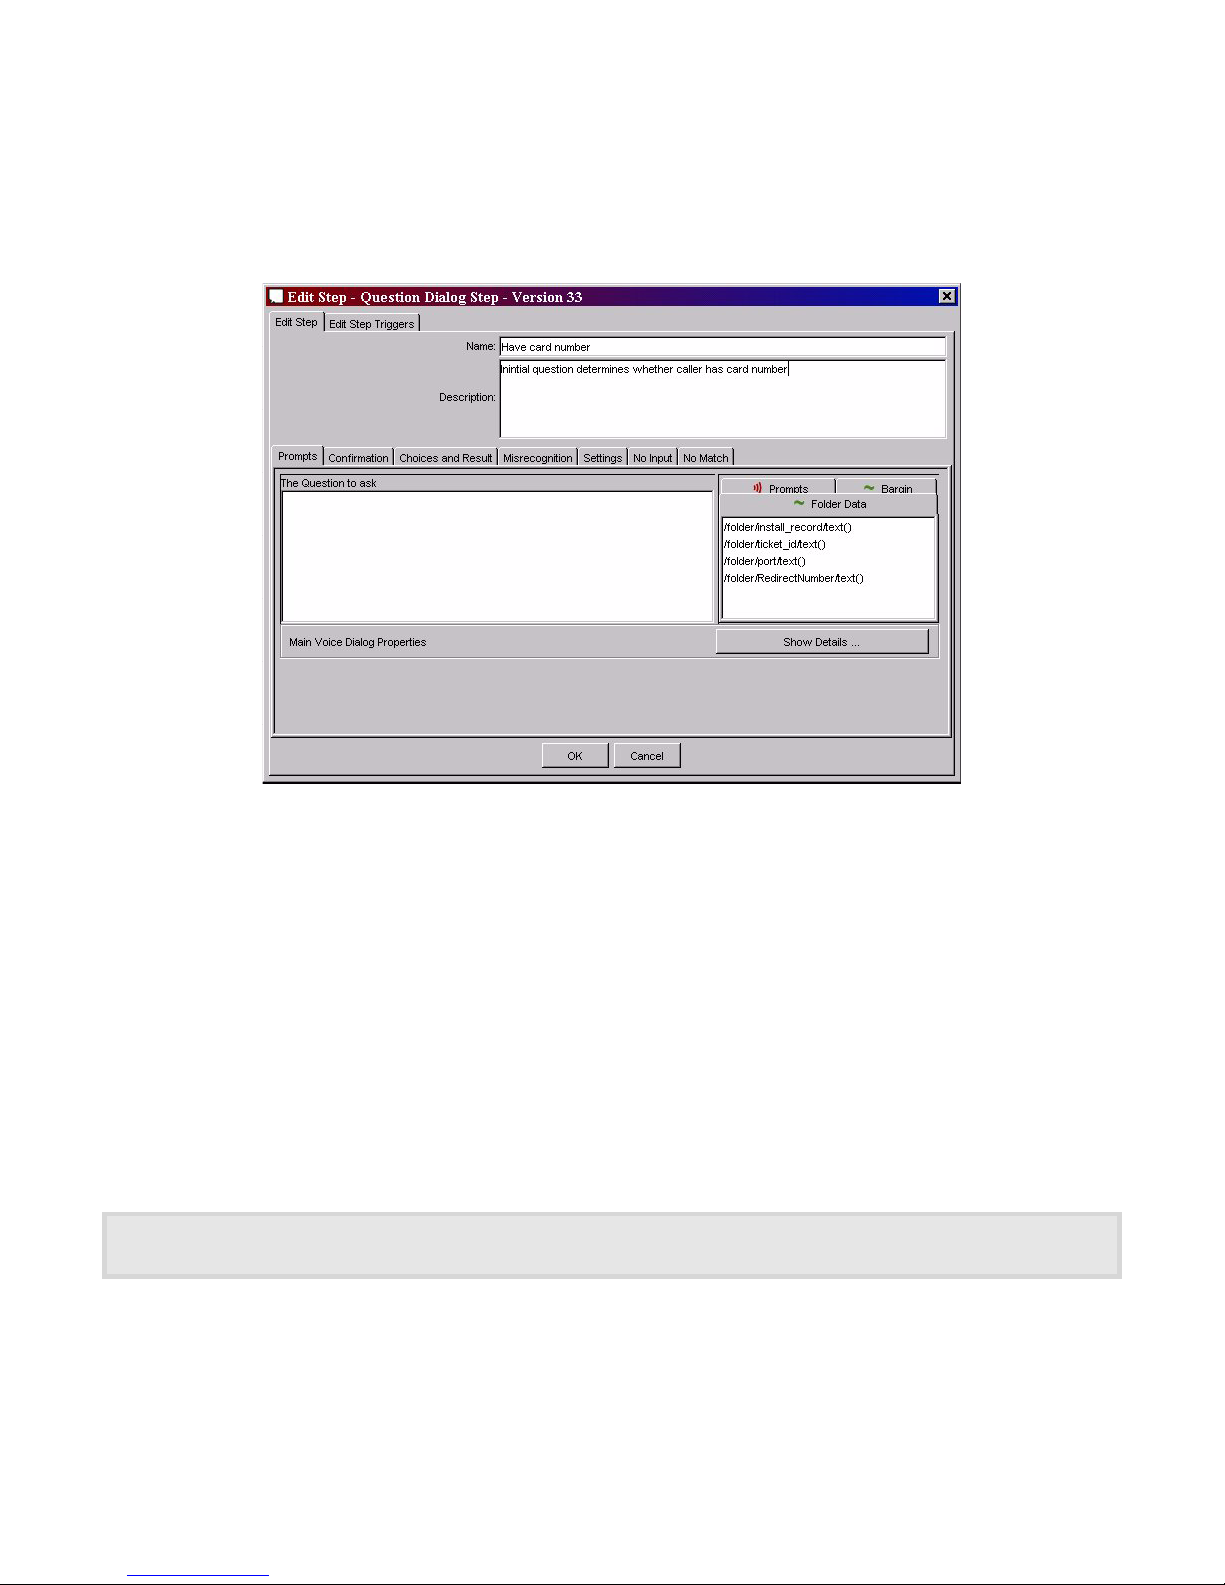
To begin configuring a component step:
1. Enter a specific name in the Name field (that describes the purpose of the step).
2. Enter a brief description in the Description field.
Figure 34. The Edit Step dialog box
Prompt
To define the main prompt, select the Prompts tab and do one or more of the following:
• type the text of the prompt into The question to ask field
• if you want to include variable data in the prompt, select the Folder Data tab and drag and
drop the appropriate variable into The question to ask field. Note that the step must be linked
to previous steps before SAB can populate the Folder Data field
• if you want to specify an existing .wav file, stored in the SAB database, click on the Prompts
tab, browse to the file and drag and drop it into The question to ask field
• if you want to turn on barge-in click on the Barge-in tab and drag and drop the BARGE-IN
ON command into The question to ask field.
If barge-in is set to ON in Voice Properties, this setting will take precedence over the BARGE-IN ON command
and barge-in will be enabled over the entire prompt.
Page 45
Speech Applications Builder Configurator User Guide • May 15, 2004 • page 45 of 116
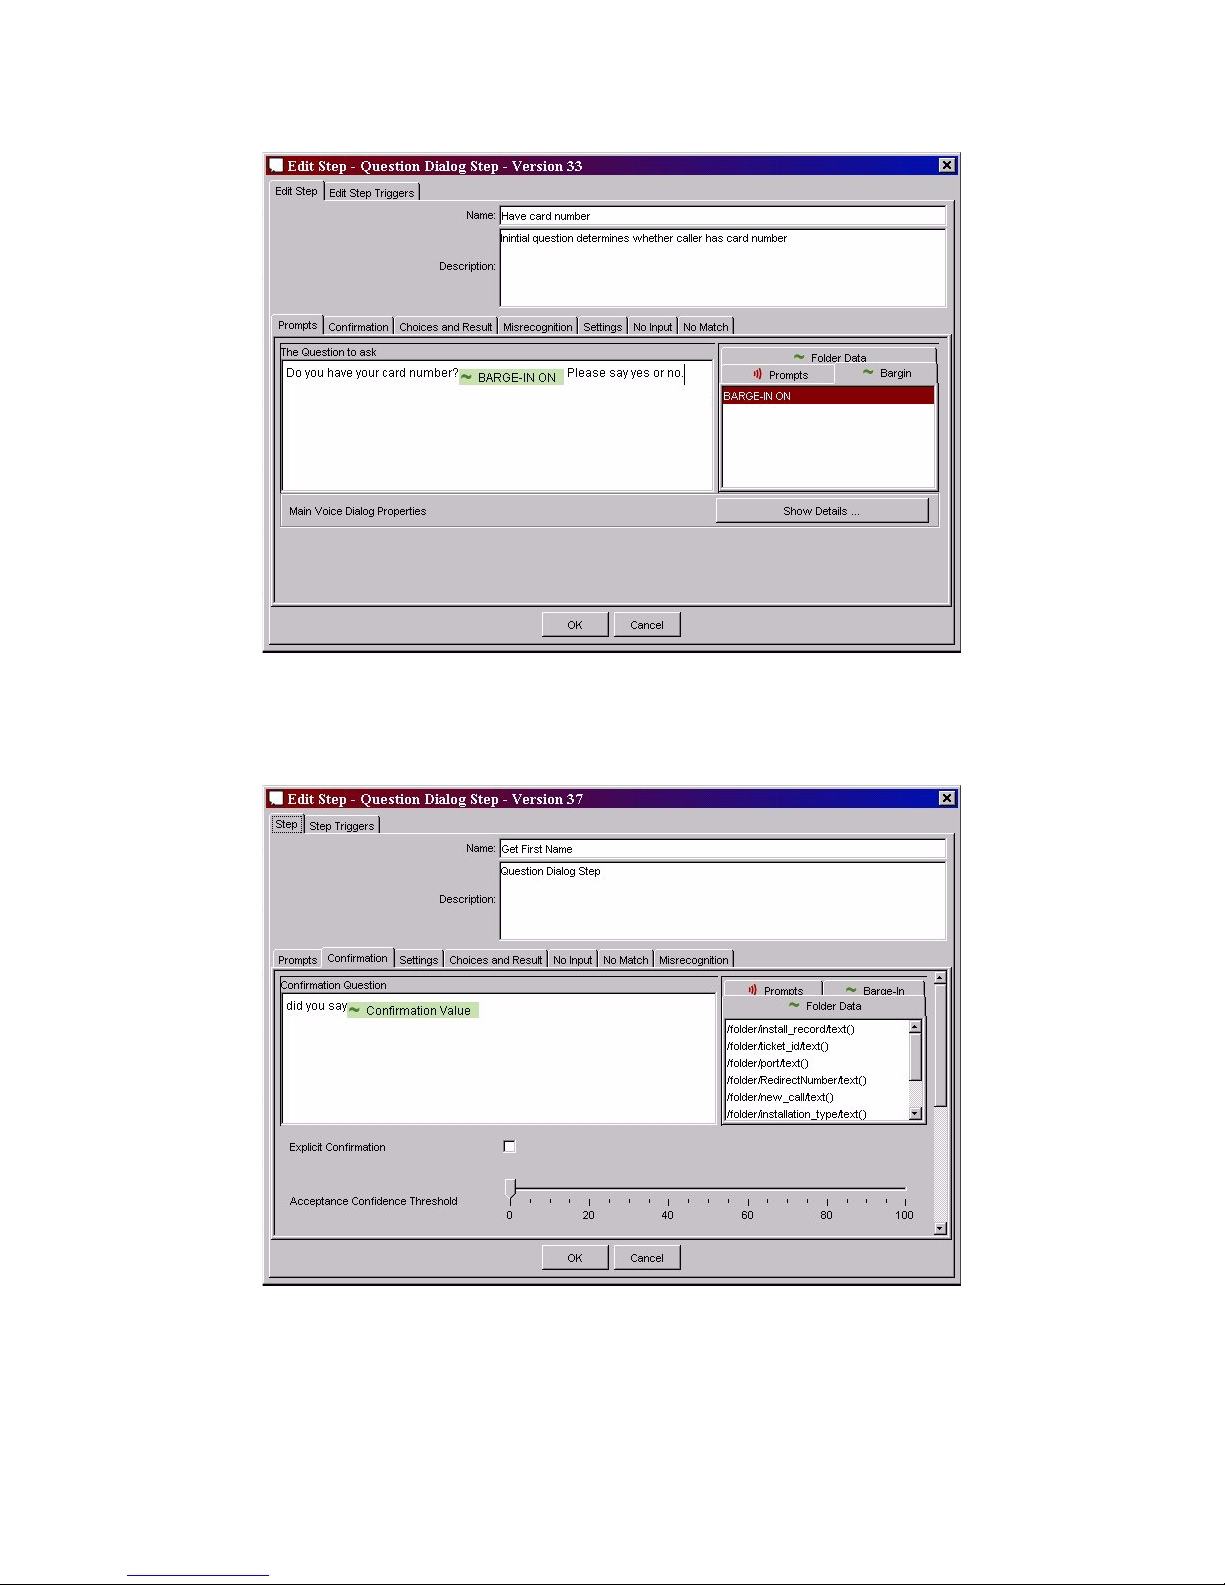
A prompt can be built up from several of these elements; for example:
Figure 35. Defining a prompt
Dynamic information is formatted (for example, as a date or an amount of money) using variable
handlers.
Figure 36. A variable token
Page 46
Speech Applications Builder Configurator User Guide • May 15, 2004 • page 46 of 116
To enable a variable handler:
a. Right-click on the variable token (for example, ~Confirmation Value, in the Figure above). The
SAB displays a Context menu: click on Edit. The SAB displays the Variable Properties dialogue
box
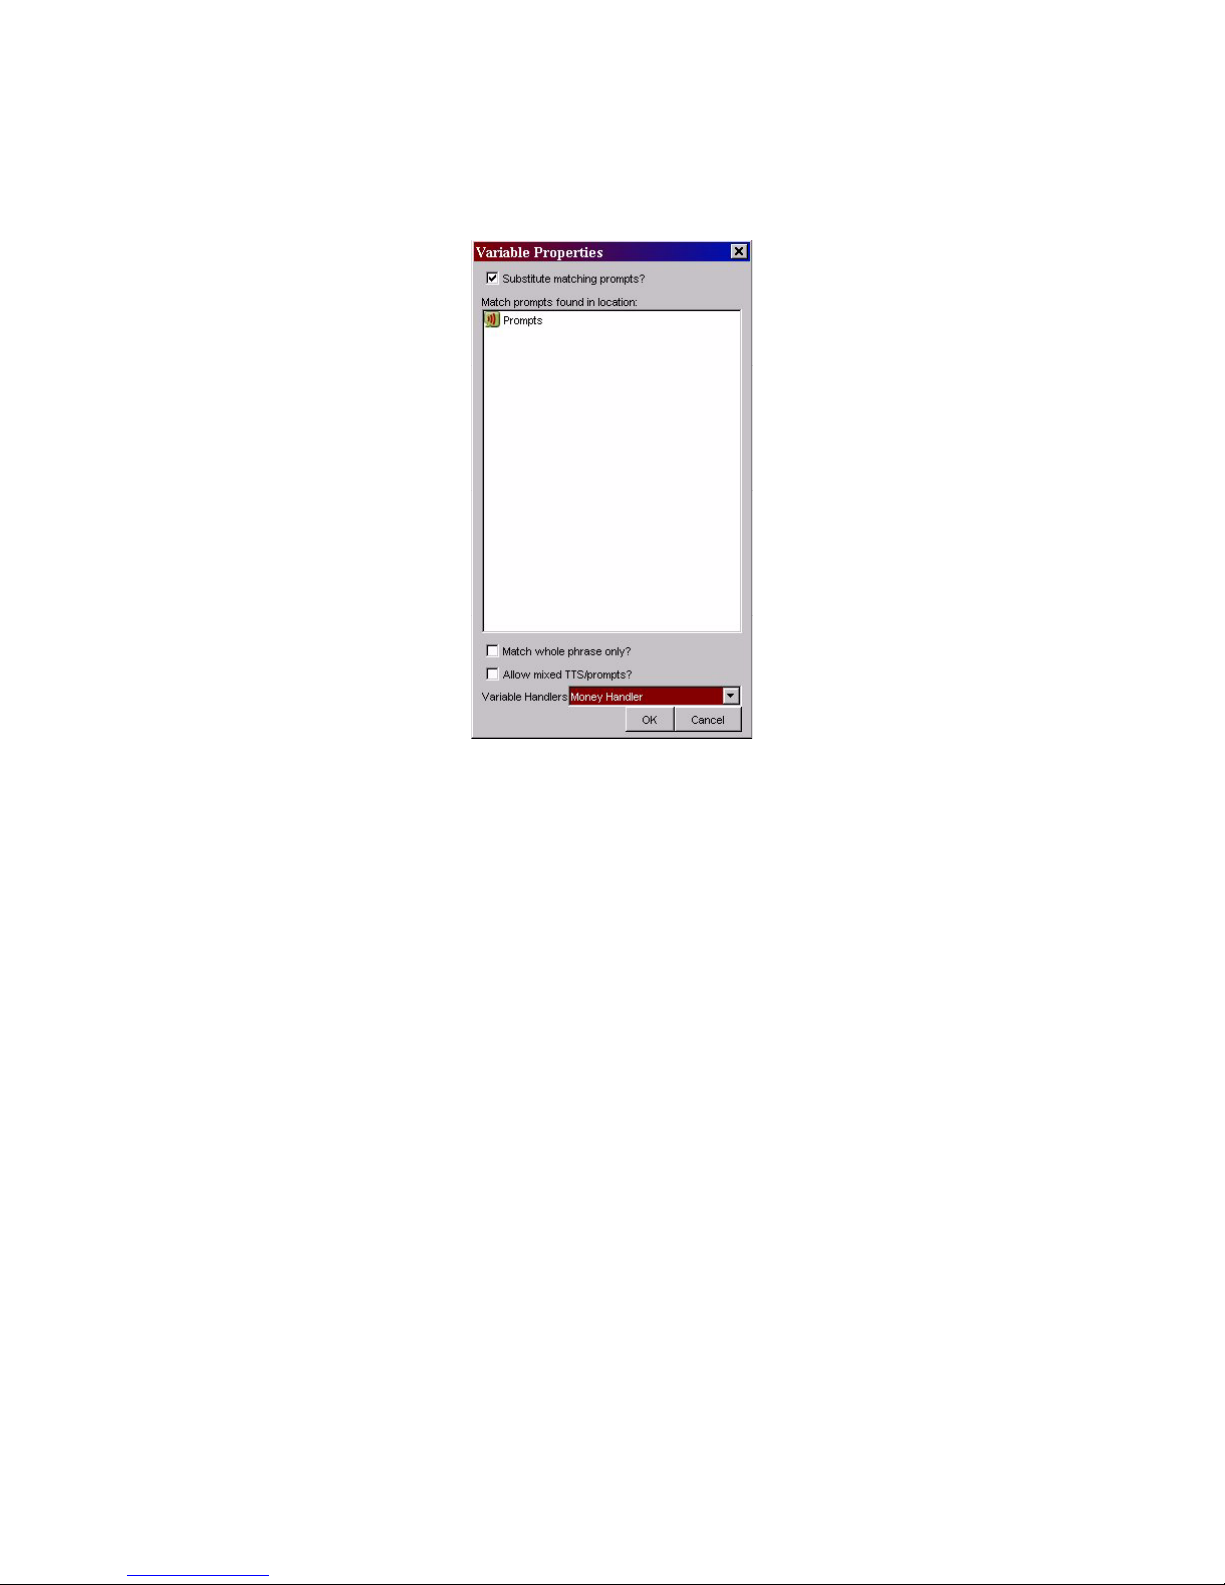
Figure 37. The Variable Properties dialogue box
b. Check Substitute matching prompts. This tells SAB to search through the stored prompt files,
select the audio file with the same name as the variable token, and play it out. A tree of prompt
folders is displayed in the dialogue box. Select the appropriate folder (this will narrow the search
and speed up retrieval of the prompt file at runtime).
c. Check either of the following:
• Match whole phrase only – if SAB cannot find the appropriate file it will leave a “blank” in the
prompt
• Allow mixed TTS/prompts – if SAB cannot find the appropriate file it will use TTS to supply
the missing word or phrase.
Page 47
Speech Applications Builder Configurator User Guide • May 15, 2004 • page 47 of 116
Select the appropriate variable handler. The options include:
none
-
Base64binary
Use when playing out a prompt file recorded using a RecordDialogStep. Messages
recorded by RecordDialogStep (WAV files) are encoded in base 64 so that they
can be stored as XML. The Base64binary handler restores the file to its original
format so that it can be played to the caller outside the RecordDialogStep.
Default
-
Digit
Sequence TTS
Reads a string of digits as a sequence of digits; for example, three, nine, one not
three hundred and ninety one.
Character
Prompt
Reads a single character. Typically used for constructing phonetic alphabet prompts;
for example, Was that A for Alpha?
Date
Use with any of the Date dialog components. Reads a numerical variable as a date.
Money
Use with any of the Money dialog components. Reads a numerical variable as an
amount of money.
Voice Properties
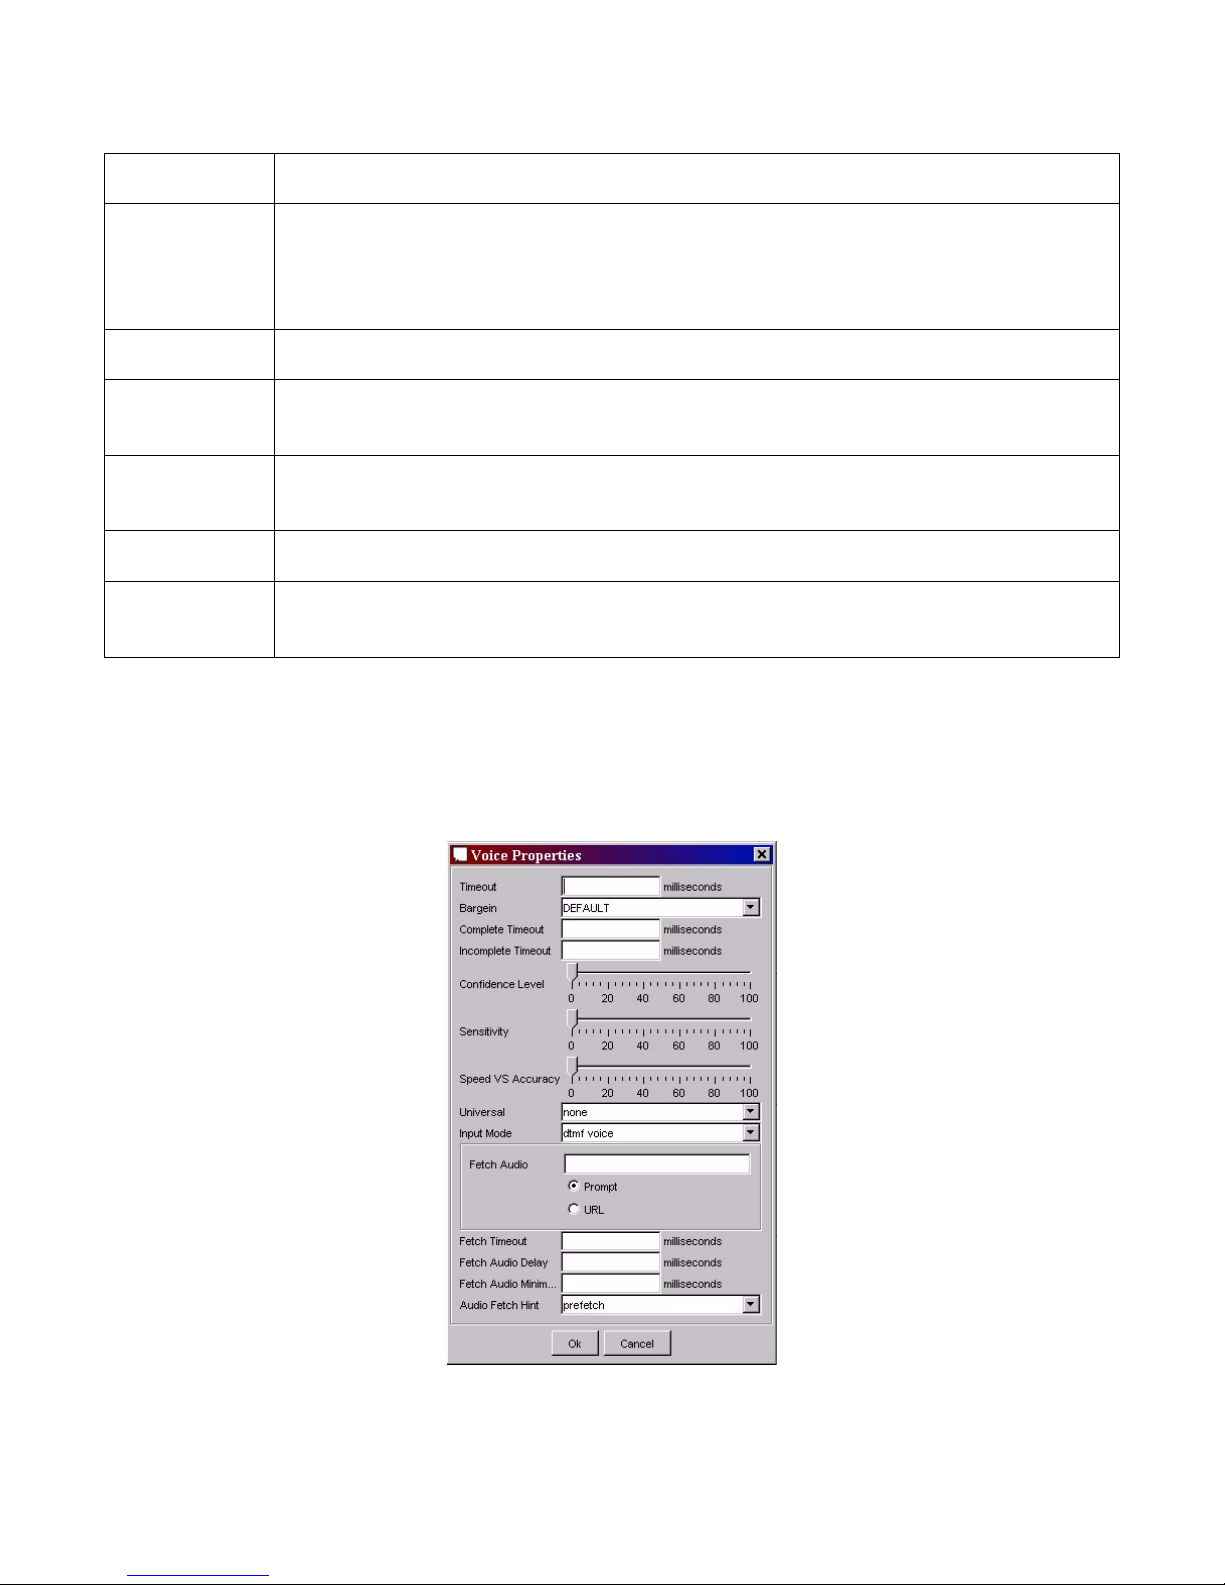
To set the “Voice Properties” (the recognition parameters for this recognition), click Show Details.
SAB displays the Voice Properties dialog box.
Figure 38. The Voice Properties dialog box
Page 48

Speech Applications Builder Configurator User Guide • May 15, 2004 • page 48 of 116
SAB allows you to configure the following recognition parameters:
Parameter
Description
Timeout
The Timeout parameter sets the length of silence that must elapse before the
recognizer returns a value of No Input.
Barge-in
The Barge-in parameter specifies the barge-in setting to be used on this
recognition. Options are:
• ON
• OFF
• DEFAULT
If Barge-in is set to ON here, it is enabled on the entire prompt; if it is set to
OFF here, it can be turned on at a specific point in the prompt using the
BARGE-IN ON command. See page 44.
Complete Timeout
The Complete Timeout parameter sets the length of silence that must follow the
caller’s utterance before the recognizer assumes that the utterance has ended,
and finalizes a result. The result may be a successful recognition or a nomatch.
If Complete Timeout is set too low, the recognizer may timeout before the caller
has finished speaking (for example, in a pause between phrases).
If Complete Timeout is set too high, recognition time will be unnecessarily
increased.
Note that the recognizer times out after Complete Timeout when it has a
complete match to an active grammar; it uses Incomplete Timeout when the
speech is an incomplete match to an active grammar. Complete Timeout
should always, therefore, be set to a slightly lower value than Incomplete
Timeout.
Incomplete
Timeout
The Incomplete Timeout parameter sets the length of silence that must follow
the caller’s utterance before the recognizer finalizes a result. This value is used
when the caller’s utterance (prior to the silence) is an incomplete match to all
active grammars. The partial result is classified as a no-match.
Incomplete Timeout is also used when the caller’s utterance (prior to the
silence) is a complete match to an active grammar, but it would be possible for
him or her to speak further and still match the grammar.
If Incomplete Timeout is set too low, the recognizer may timeout before the
caller has finished speaking (for example, in a pause between phrases).
If Incomplete Timeout is set too high, recognition time will be unnecessarily
increased.
The Incomplete Timeout should be set to a slightly higher value than Complete
Timeout, to allow callers to pause mid-utterance.
Page 49

Speech Applications Builder Configurator User Guide • May 15, 2004 • page 49 of 116
Parameter
Description
Confidence Level
Confidence is a floating point value that indicates the perceived accuracy of the
recognition result.
The Confidence Level parameter sets the accuracy threshold: a recognition
result with a confidence value above the threshold is considered successful; a
recognition result with a confidence value below the threshold is considered a
no-match.
Sensitivity
The Sensitivity parameter configures the recognizer to handle the expected
signal level. A value of 100 is highly sensitive (suitable for quiet input); a value
of 0 is least sensitive.
Note that the setting required to handle a given signal level will depend on the
recognizer being used.
Speed VS
Accuracy
The Speed VS Accuracy parameter controls the trade-off between recognition
speed and recognition accuracy. A value of 0 specifies the fastest recognition;
a value of 100 specifies highest accuracy.
Universal
Some platforms provide optional universal command grammars, to recognize
utterances such as "Help", "Cancel", or "Exit", which are always active.
The Universal parameter is used to specify which universals are to be handled
in this recognition. The options include
• none
• all
• help exit
• help cancel
• help cancel exit
• help cancel repeat
• help cancel exit repeat
These are selected from a drop-down list.
Note that the availability of this feature is dependent-dependent.
Input Mode
The Input Mode parameter specifies which mode or modes the caller can use
to respond for this recognition. The options are
• dtmf voice (either)
• dtmf
• voice
These are selected from a drop-down list.
Note that this parameter does not activate or de-activate speech recognition
grammars.
Page 50
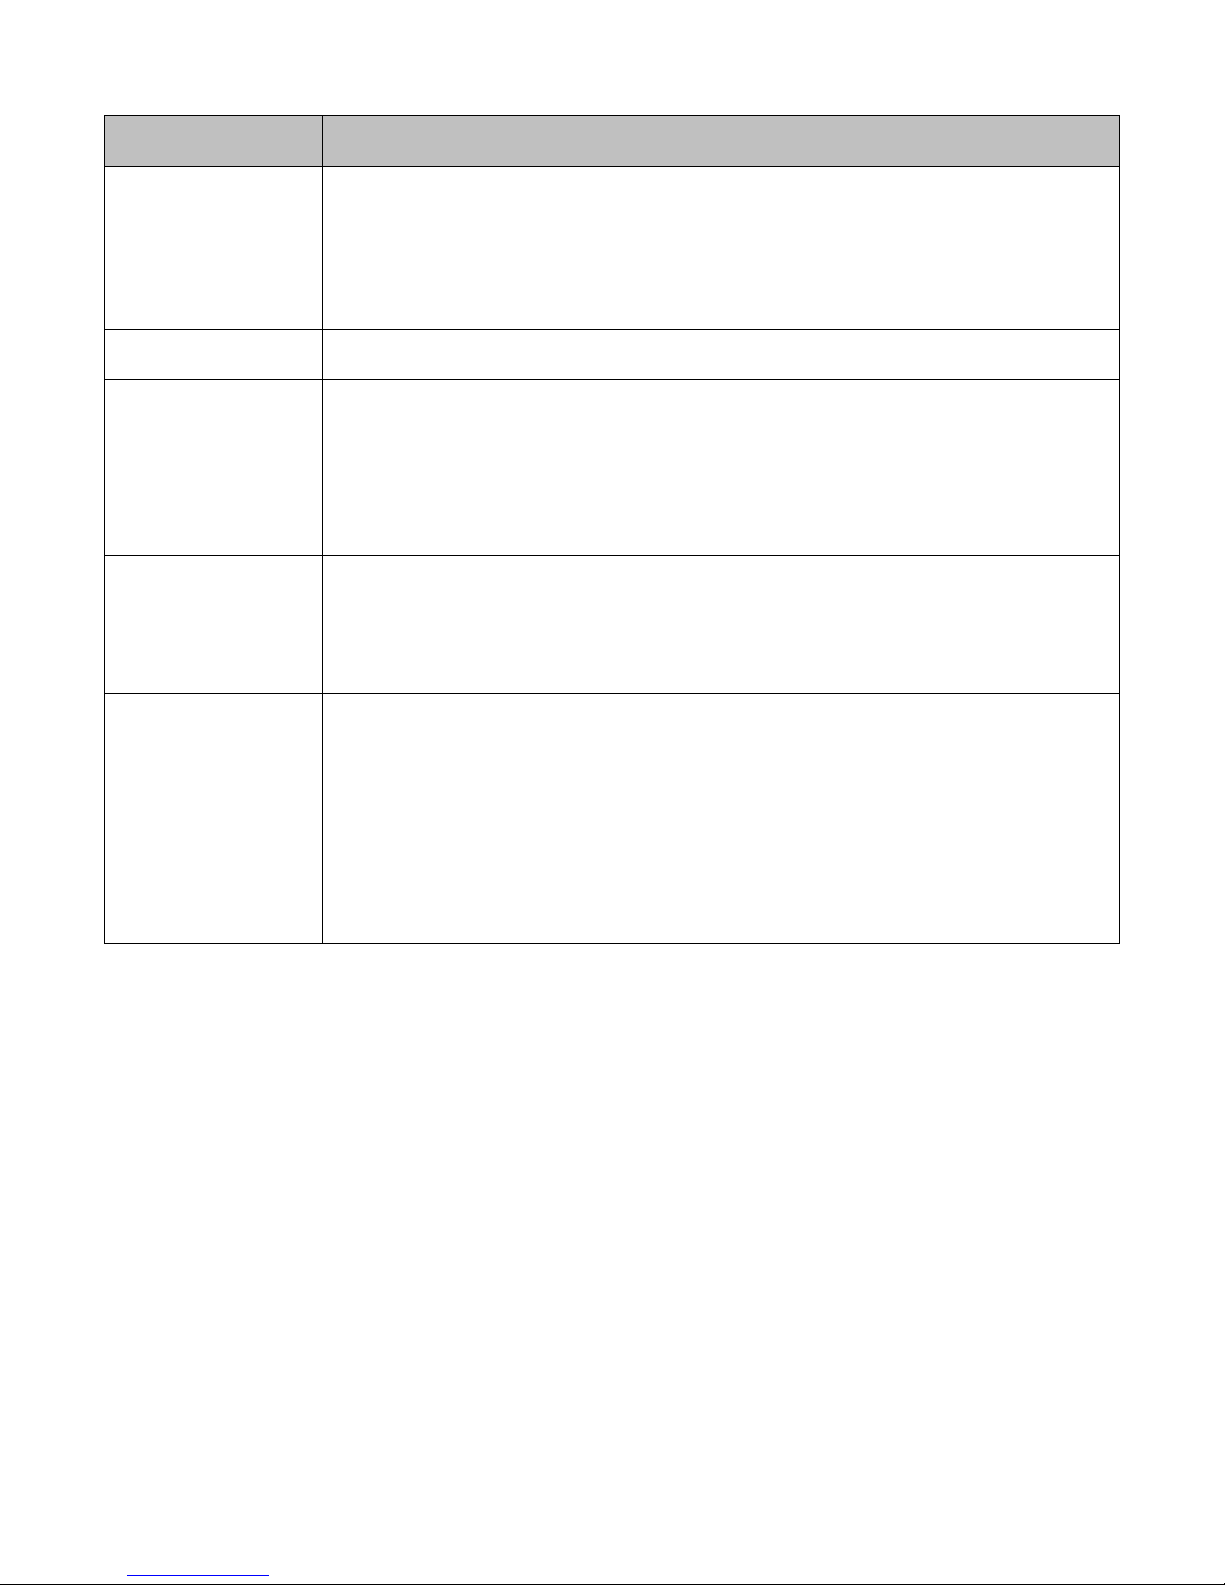
Speech Applications Builder Configurator User Guide • May 15, 2004 • page 50 of 116
Parameter
Description
Fetch Audio
The Fetch Audio parameter specifies the location of the audio clip to be played
to cover the delay while waiting for a document to be fetched. The fetching of
the audio clip is governed by the values of Audio Fetch Hint and Fetch Timeout.
The playing of the audio clip is governed by the values of Fetch Audio Delay
and Fetch Audio Minimum.
Fetch Timeout
The Fetch Timeout parameter sets the maximum length of time for fetches.
Fetch Audio Delay
When a fetch delay is short, it may be better to allow a few seconds of silence
rather than play a very short snatch of audio.
The Fetch Audio Delay parameter sets the time interval that must elapse at the
start of a fetch delay before the audio clip is played. See Fetch Audio Minimum.
The default interval is platform-dependent.
Fetch Audio
Minimum
The Fetch Audio Minimum parameter specifies the minimum length of time an
audio clip is played, once started, even if the fetch result arrives in the
meantime. See Fetch Audio Delay.
The default is platform-dependent.
Audio Fetch Hint
The Audio Fetch Hint parameter specifies whether the platform can attempt to
optimize dialog interpretation by pre-fetching the audio. The options are
• safe - the platform fetches the audio when it is needed
• prefetch - the platform is permitted, but not required, to pre-fetch the
audio
• default
These are selected from a drop-down list.
Once you have set the appropriate voice properties, click OK.
Page 51
Speech Applications Builder Configurator User Guide • May 15, 2004 • page 51 of 116
Confirmation
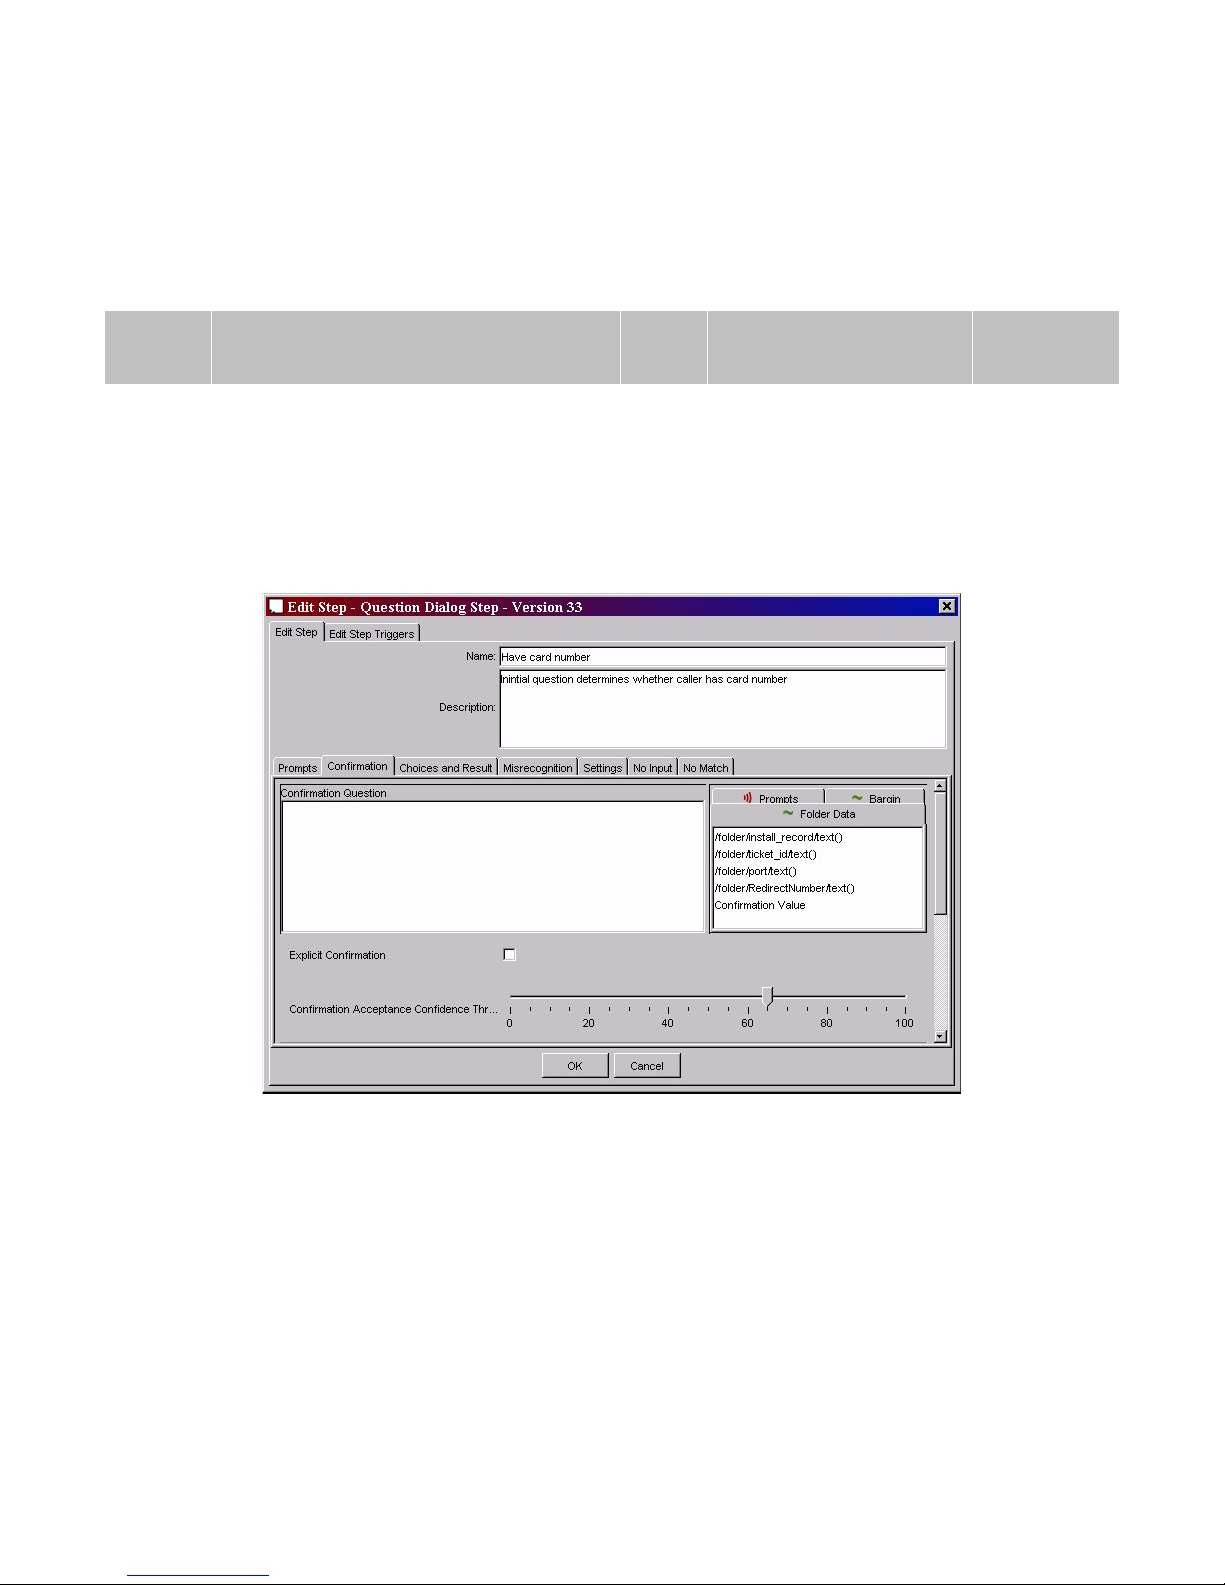
If the caller’s answer requires confirmation select the Confirmation tab and do the following:
• define the confirmation prompt as described in the previous step. A confirmation prompt
typically has the following format:
Typed
Variable dragged and dropped from
a list of previously defined variables
Typed
Command dragged
and dropped
Typed
Did you
say
<caller_data>
?
<BARGE-IN_ON>
Please say
yes or no.
Figure 39. A confirmation prompt
• if you want the step to confirm the data it has captured in every case, check the Explicit
confirmation box.
Figure 40. Setting up confirmation handling 1
Page 52
Speech Applications Builder Configurator User Guide • May 15, 2004 • page 52 of 116
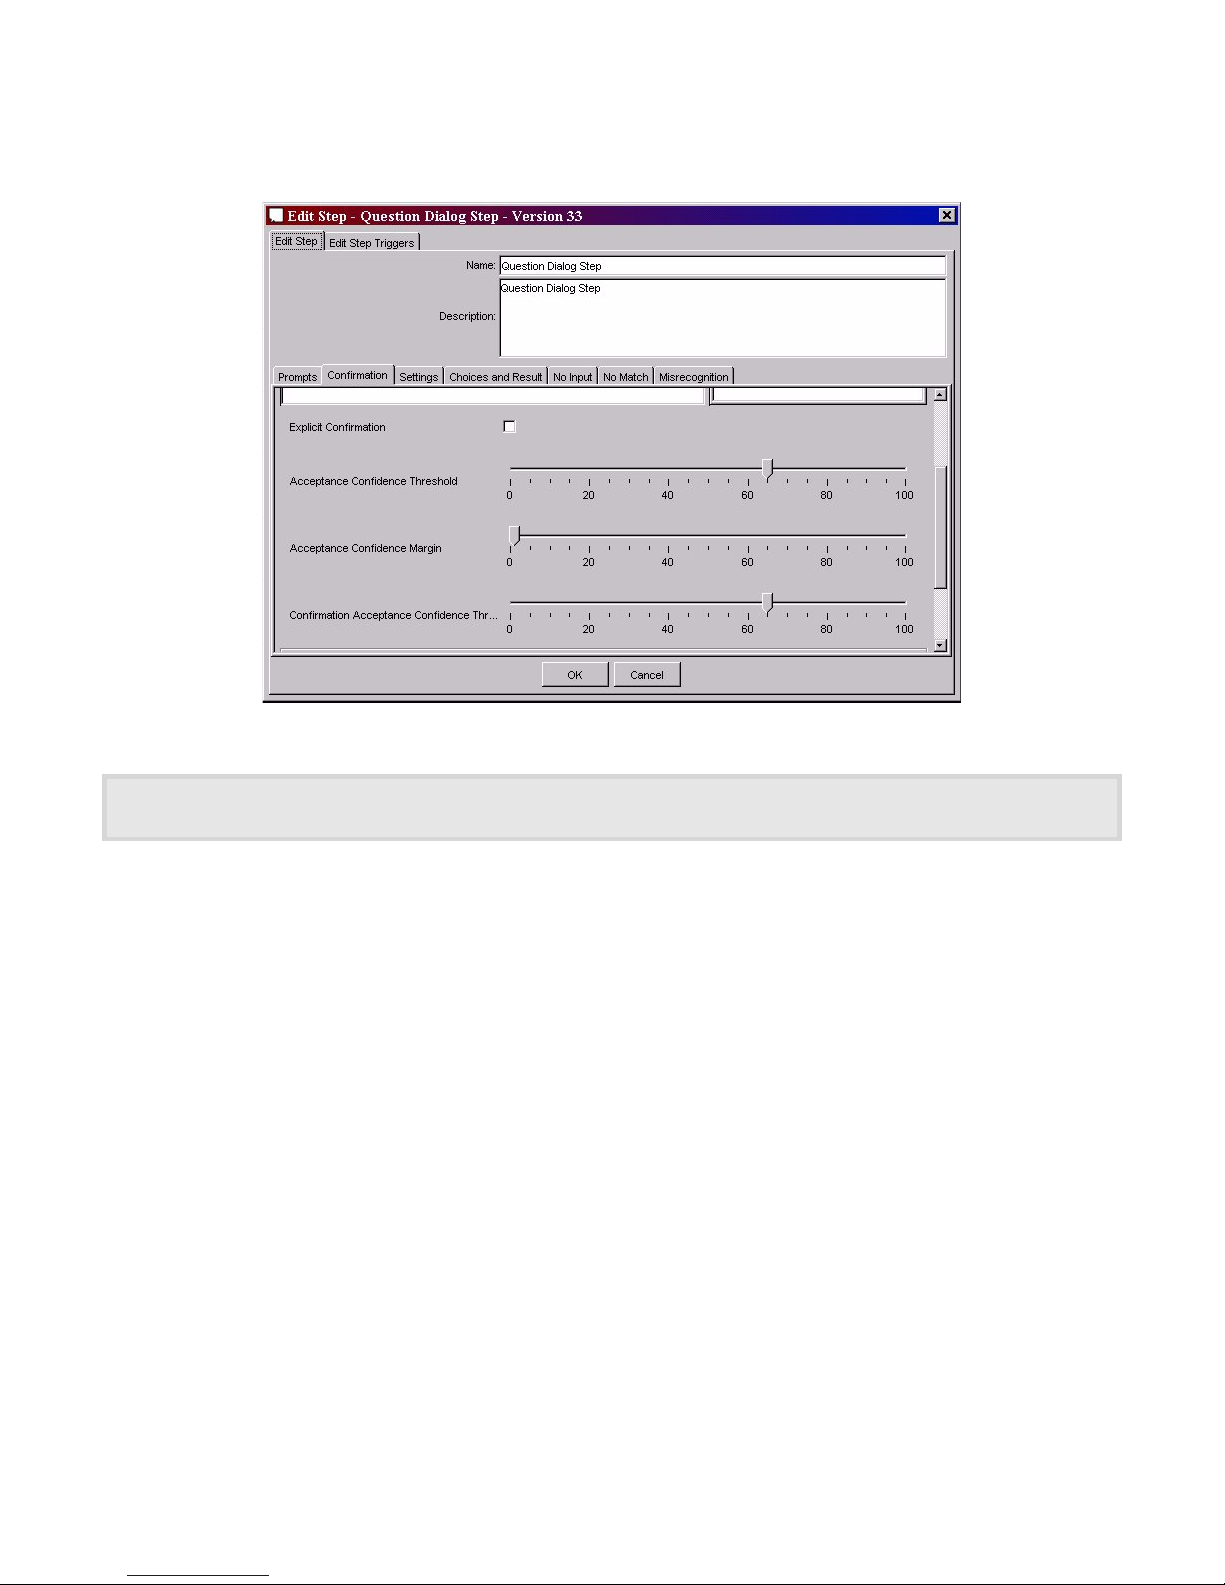
• if you want the step to confirm the data it has captured only if the recognition result has a
confidence value below a certain threshold, leave the Explicit confirmation box unchecked
and set the slider controls to the thresholds you require
Figure 41. Setting up confirmation handling 2
When using a Nuance recognizer: to set a confidence value of approximately zero, position the pointer slightly
above zero. If you set it to zero SAM will use the Global Setting of 50.
o the Acceptance Confidence Threshold sets a confidence limit on the recognition result.
If the result has a confidence value above this threshold, it is accepted without
confirmation. If it has a confidence value below this threshold it is played back to the
caller who is asked to confirm that it is correct
o the Acceptance Confidence Margin specifies the margin by which the result with the
highest confidence level must beat the remaining results to be considered correct
o the Confirmation Acceptance Confidence Threshold sets a confidence limit on the
recognition result of the confirmation dialog.
• Set the Voice Properties (Confirmation Voice Dialog Properties), see page 47.
• A caller who responds to the confirmation question with a no-match utterance (nonsense) or
with silence, is handled by setting Confirmation No Match and Confirmation No Input,
respectively.
Page 53
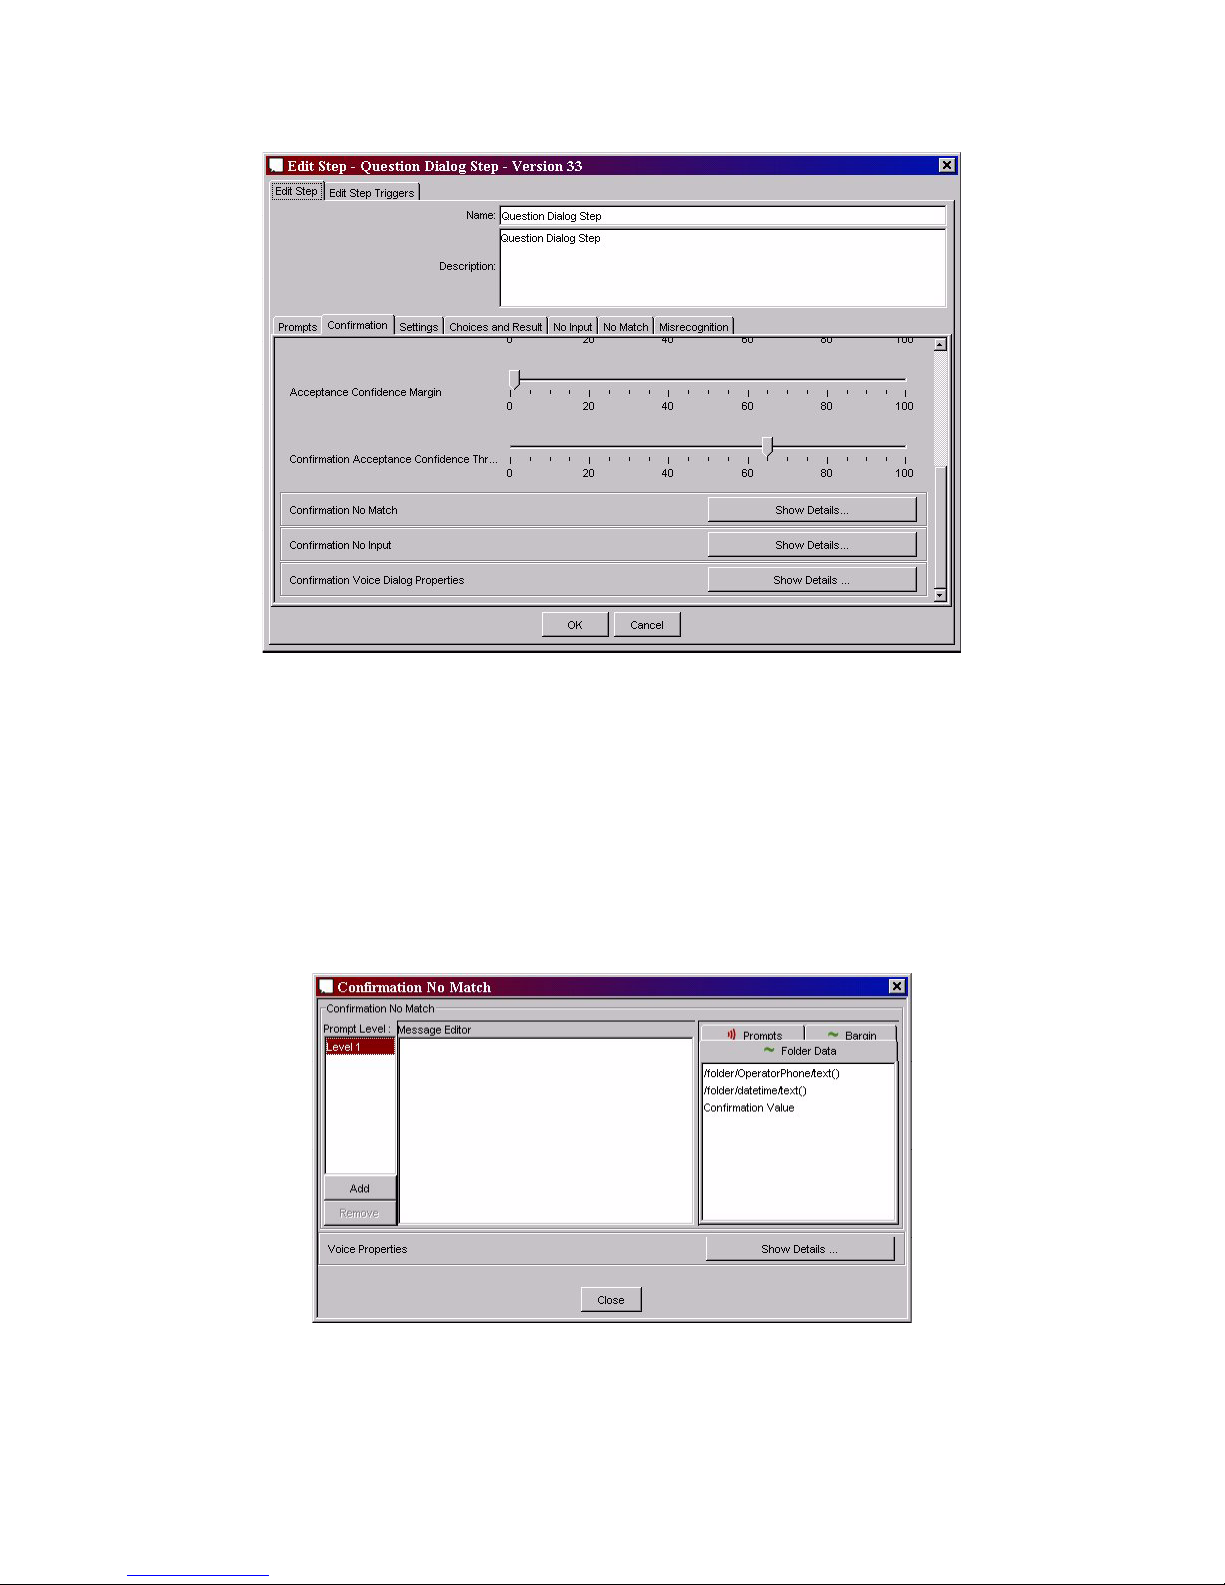
Speech Applications Builder Configurator User Guide • May 15, 2004 • page 53 of 116
To set either of these functions, click the appropriate Show Details button.
Figure 42. Setting up confirmation handling 3
SAB opens a dialog box; for example, the Confirmation No Match dialog box is shown in the Figure
below.
• Define the prompt wording.
• Configure the recognition parameters (Voice Properties). Different sets of voice properties may
be configured for each recognition.
A step may be configured (via the Settings page, shown in the Figure above) to re-prompt the caller
once, or more than once, and each prompt may be worded differently. The dialog box defaults to the
Level 1 prompt; to add another prompt, click Add.
Figure 43. The Confirmation No Match dialog box
When you have defined the prompt or prompts, click Close.
Page 54
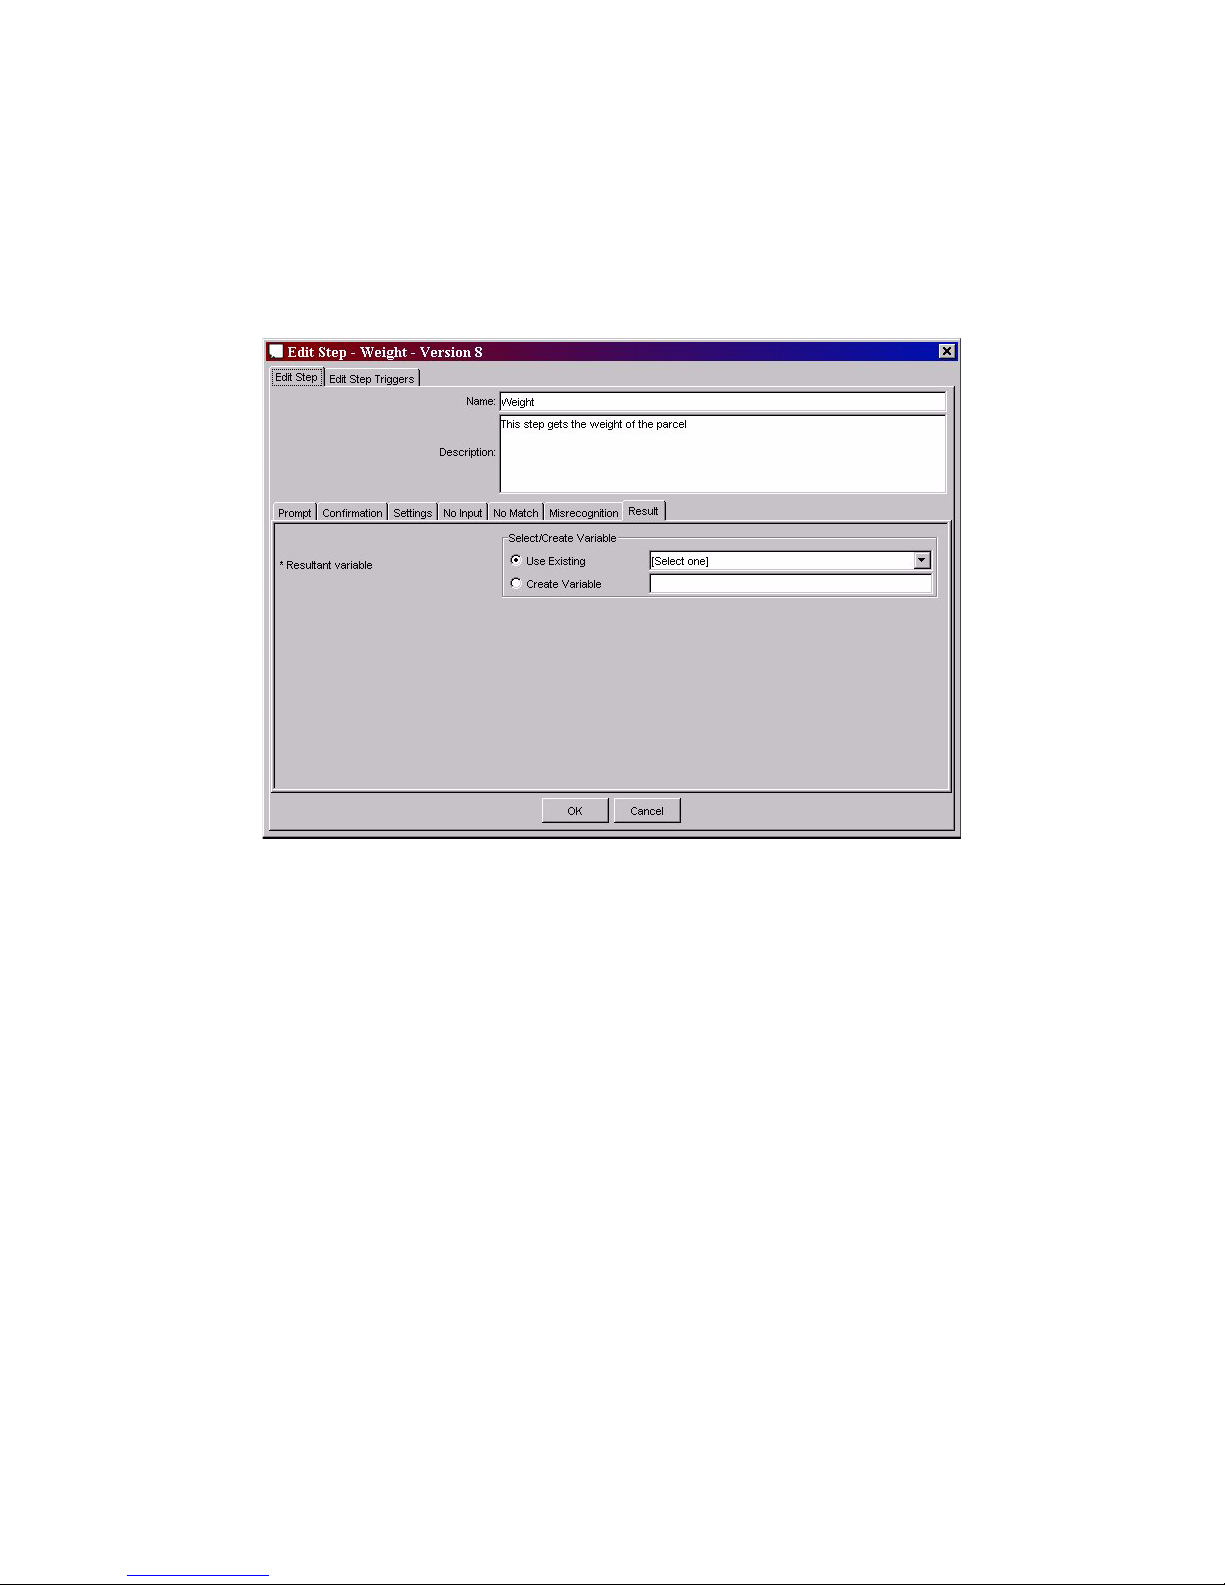
Speech Applications Builder Configurator User Guide • May 15, 2004 • page 54 of 116
Note that confirmation is not usually required when the main prompt is a yes-no question, but is often
necessary if the caller has provided accurate data, such as a postcode or an amount of money.
Speech recognition
Components that are designed to recognize a standard item of data, such as a date, a time or a
weight, have built-in grammars that will recognize any valid response. For these components it is
typically only necessary to specify a result variable. This is done on the Results page.
Figure 44. The Edit Step dialog box of the Weight component, showing the Results page
Page 55
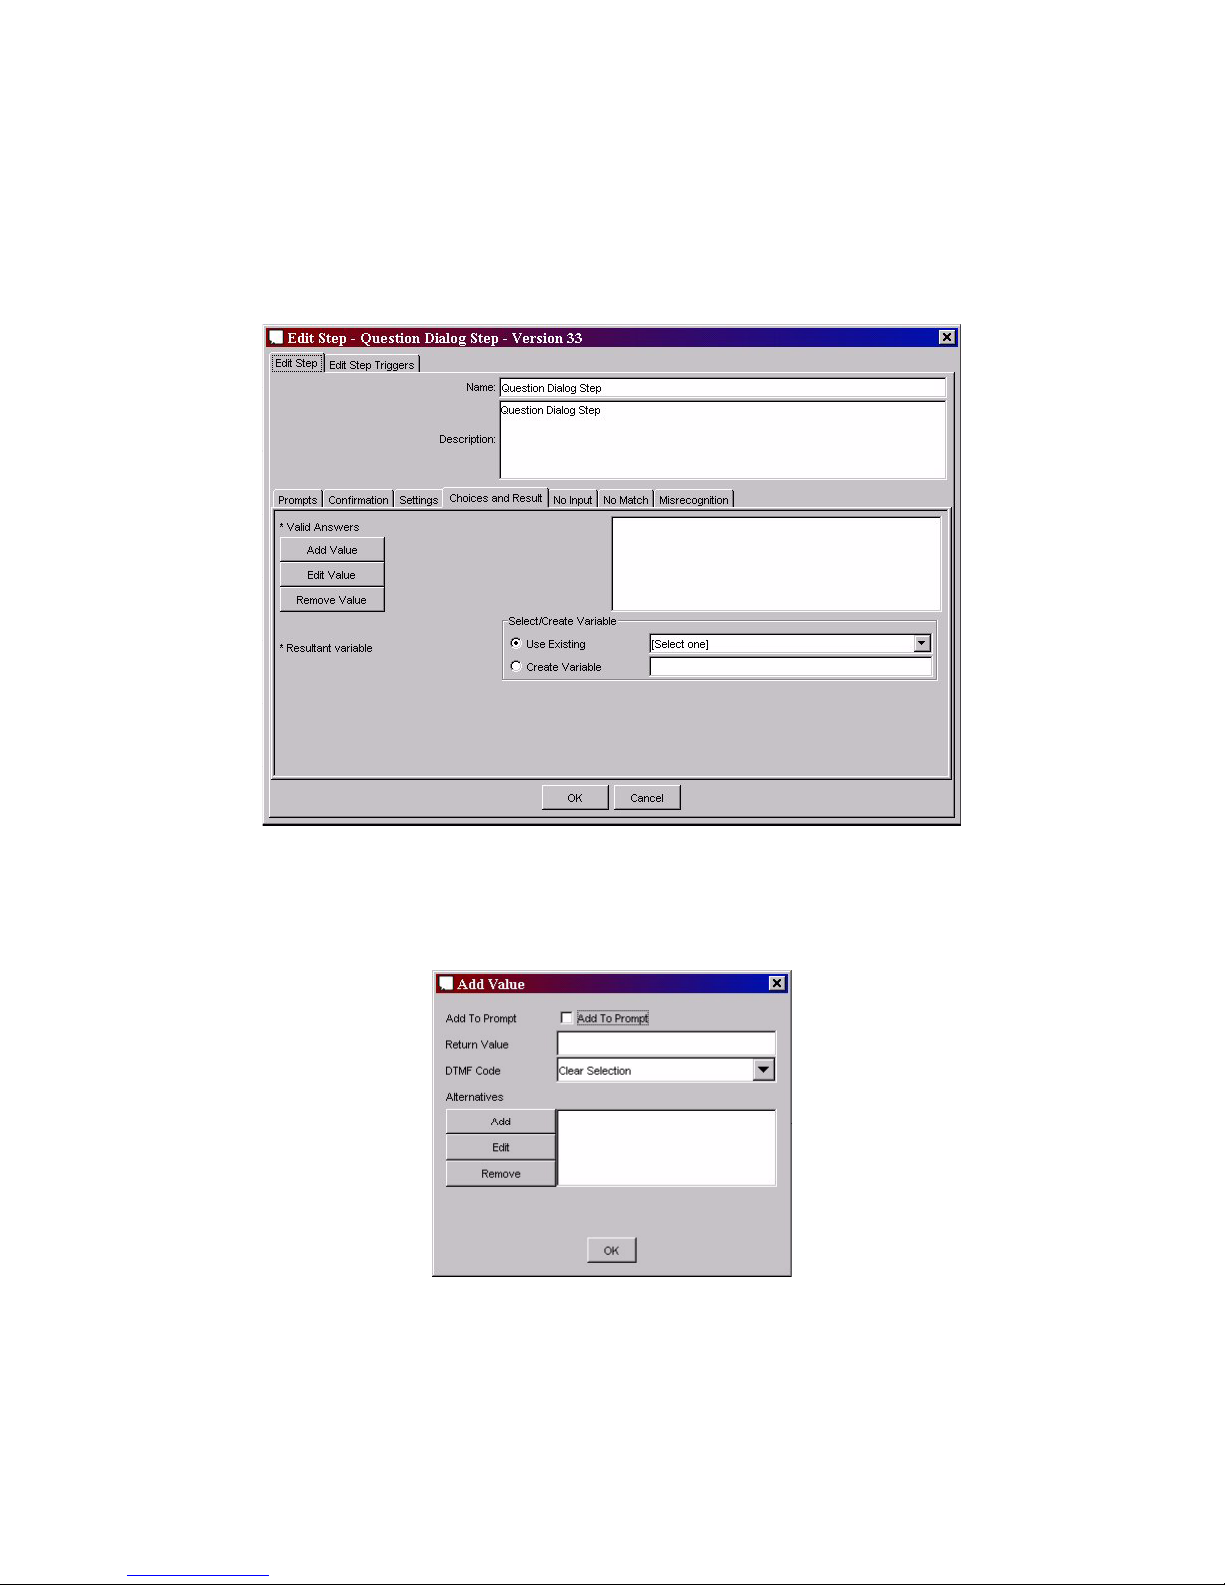
Speech Applications Builder Configurator User Guide • May 15, 2004 • page 55 of 116
Other components are designed to capture information specified by the developer.
Choices
For example, for the Question Dialog Step you must define a set of valid caller responses, with
synonyms (alternative words) if appropriate, and SAB uses these to generate a recognition grammar.
These recognitions are typically configured on the Choices and Results page.
Figure 45. The Choices and Result page of the Question component Edit Step dialog box
To add a valid response:
1. Click Add Value. SAB displays Add Value dialog box.
Figure 46. The Add Value dialog box
2. Enter the word to be recognized in the Return Value field.
3. (Optionally) select a DTMF equivalent from the drop-down list in the DTMF Code field.
Page 56
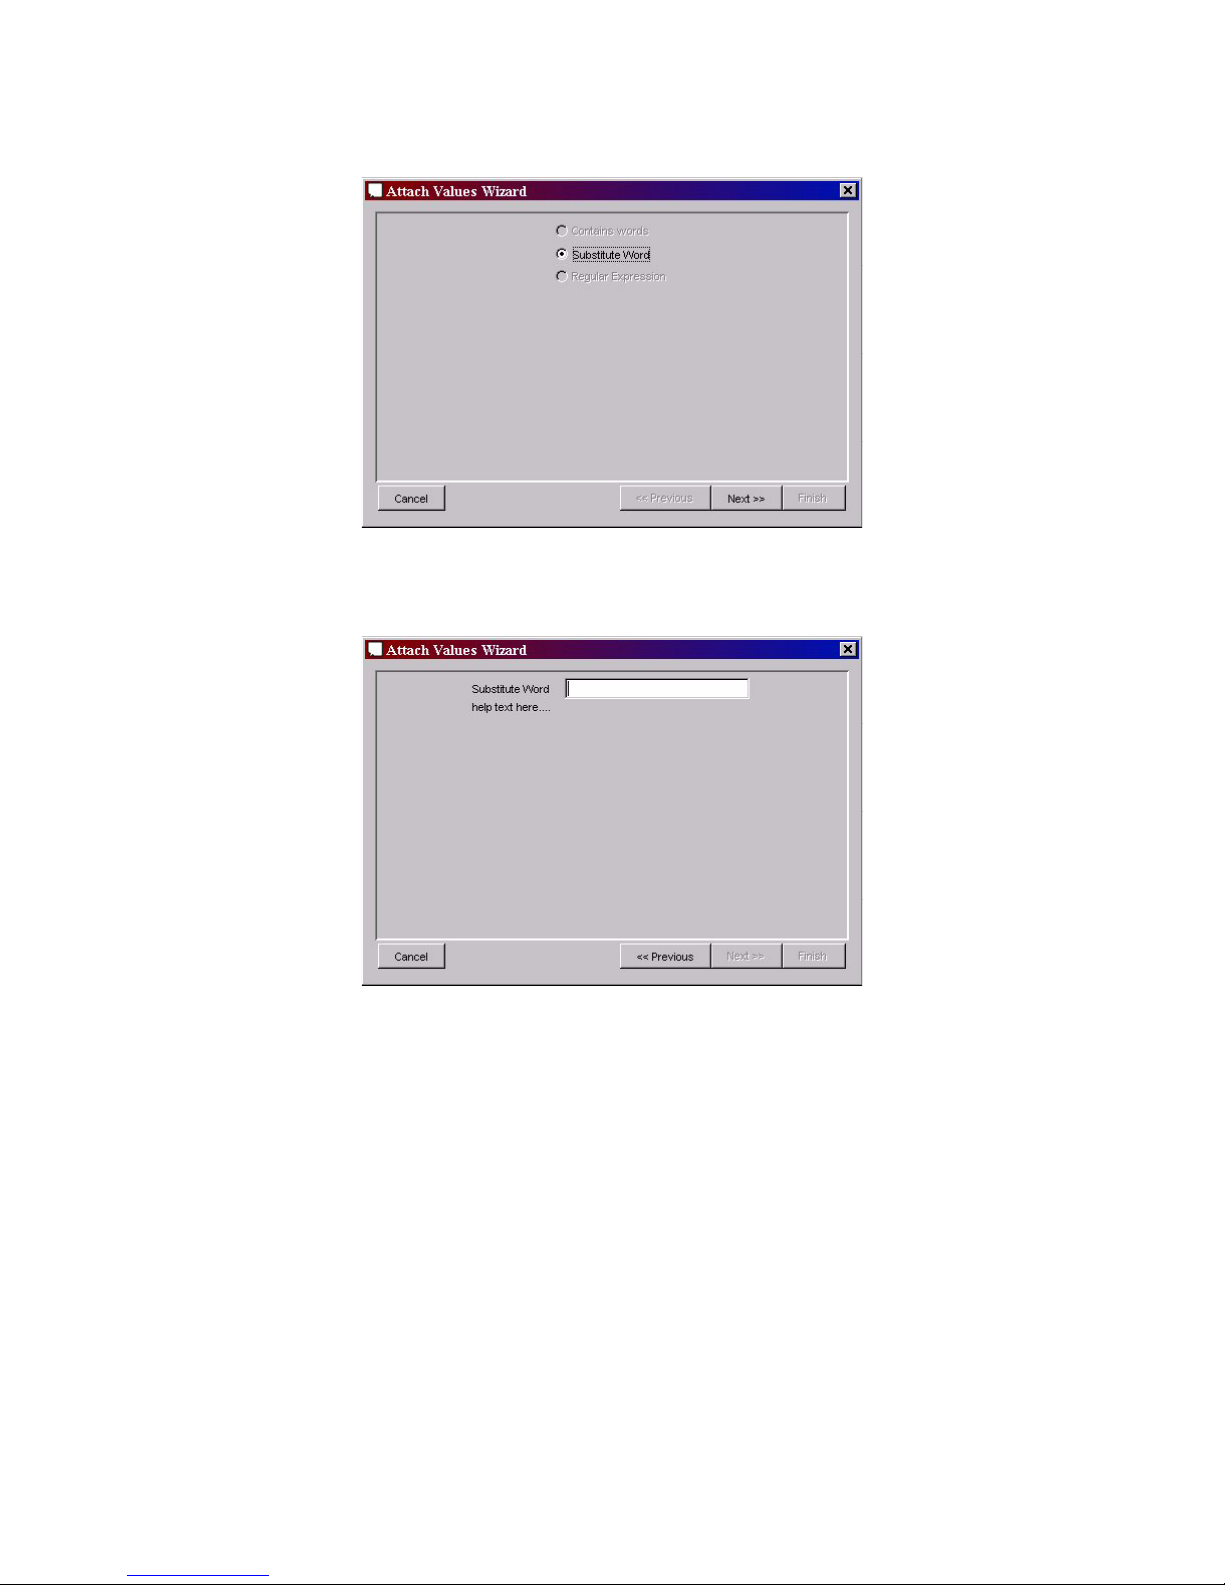
Speech Applications Builder Configurator User Guide • May 15, 2004 • page 56 of 116
4. To (optionally) enter a synonym, click the Alternatives : Add button. SAB displays the first page
of the Attach Values wizard.
Figure 47. Attach Values 1
5. Click Next. SAB displays the second page.
Figure 48. Attach Values 2
6. Enter the synonym in the Substitute Word field. Click Finish. SAB re-displays the Add Value
dialog box, with the alternative word shown in the Alternatives field.
Page 57
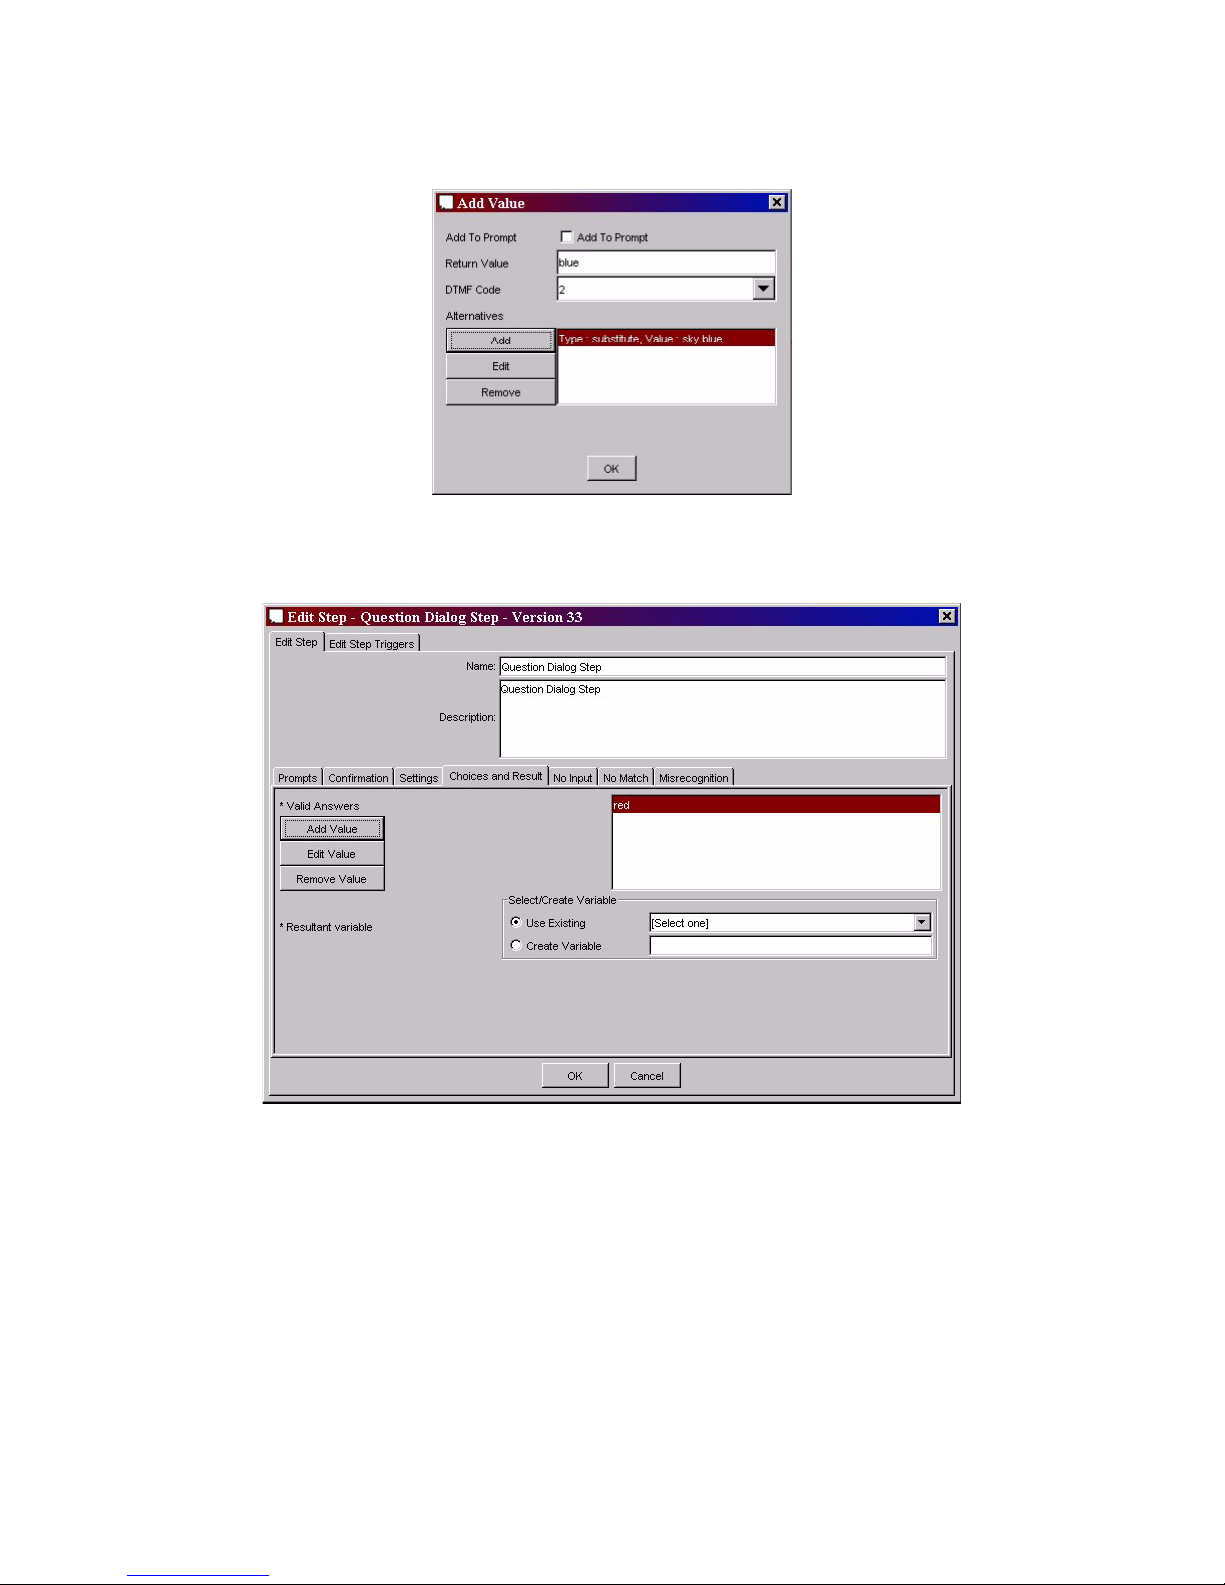
Speech Applications Builder Configurator User Guide • May 15, 2004 • page 57 of 116
7. Repeat from Step 4 to define further synonyms.
Once the word or phrase, its DTMF equivalent, and its synonyms are defined, click OK.
Figure 49. The Add Value dialog box, showing a valid response
SAB displays the option in the Valid Answers field of the Edit Step dialog box.
Figure 50. The Edit Step dialog box of the Question component, showing a valid response
defined
To define another valid response, repeat from Step 1 above.
Select or create the result variable.
External grammars
Some components, such as the SpecifiedGrammarQuestionDialogStep, allow you to specify more
complex grammars, which are defined using GSL (for a Nuance speech recognizer) or JSGF (for an
IBM speech recognizer) and saved in a file labeled <grammar_name>.grammar or
<grammar_name>.jsgf respectively.
Page 58
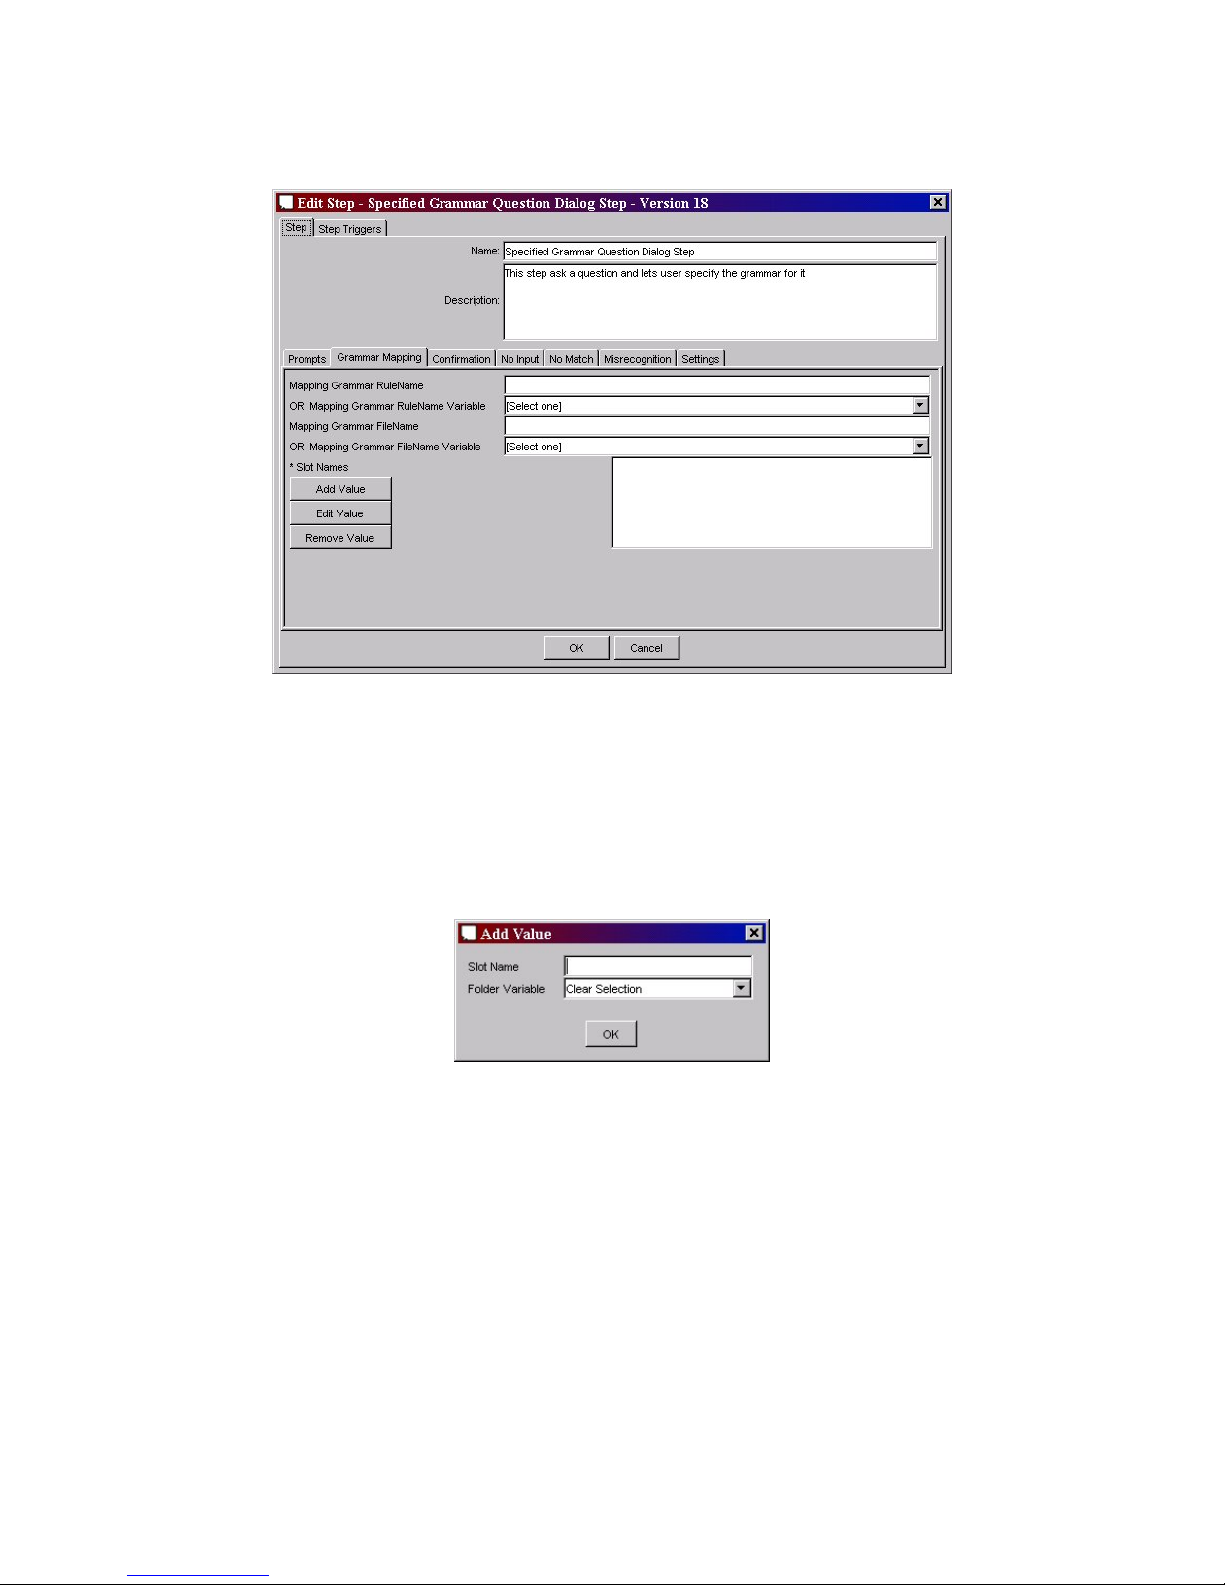
Speech Applications Builder Configurator User Guide • May 15, 2004 • page 58 of 116
To specify the grammar:
1. Open the Edit Step dialog box and select the Grammar Mapping page.
Figure 51. The Grammar Mapping page
2. Enter the grammar rule name in the Mapping Grammar Rulename field.
3. Enter the grammar filename in the Mapping Grammar FileName field. It is not necessary to
include the file extension.
4. Specify how the recognition results are handled by defining the Slot Names as follows:
a) Click on Add Value. SAB displays the Add Value dialog box.
Figure 52. The Add Value dialog box
b) Enter the first Slot Name associated with the grammar rule.
c) Enter the variable into which the value associated with the slot (the semantic value of the
recognition result) is to be written.
d) Click OK.
e) Repeat from step a) until all the Slot Names associated with the grammar have been defined.
Page 59
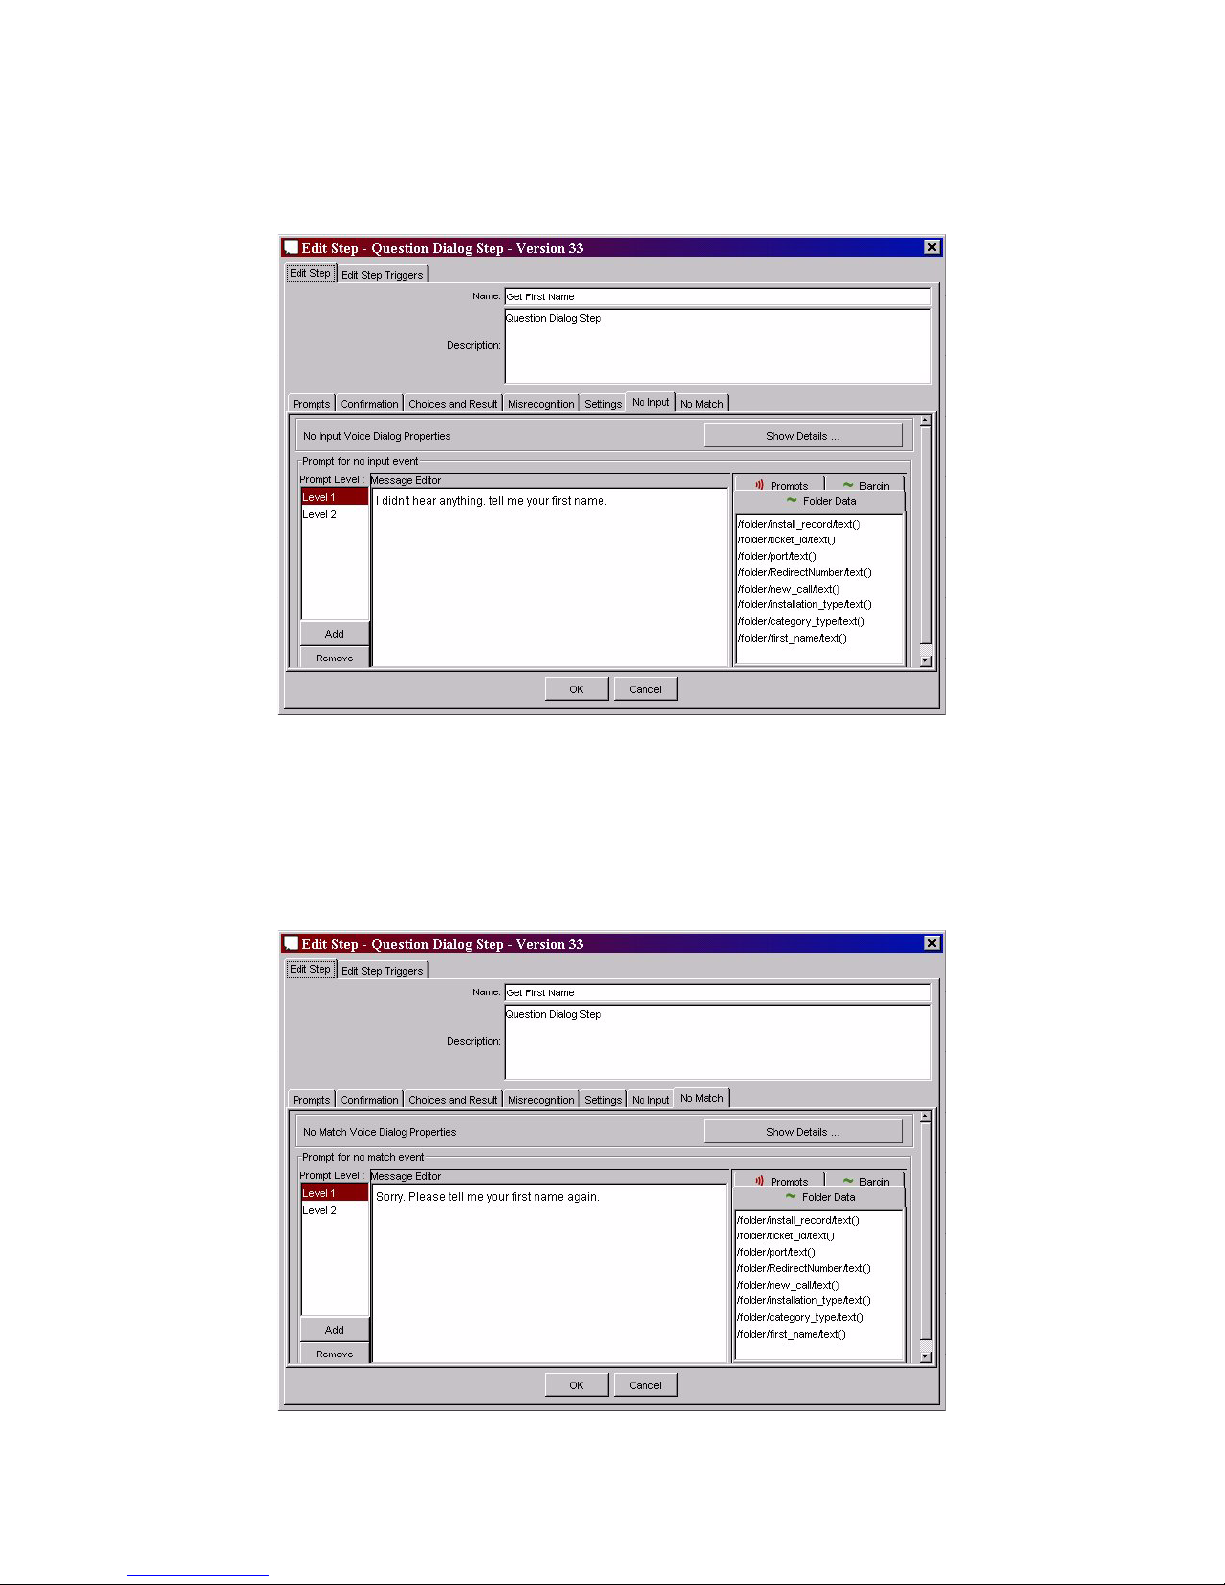
Speech Applications Builder Configurator User Guide • May 15, 2004 • page 59 of 116
No Input
If the caller remains silent, the dialog step plays the prompt that has been defined on the No Input
page. For an explanation of prompt levels, see page 53.
Figure 53. The No Input page, showing a typical No Input prompt.
No Match
If the caller says something that does not match any of the choices defined on the Choices and
Results page, the dialog step plays the prompt that has been defined on the No Match page. For an
explanation of prompt levels, see page 53.
Figure 54. The No Match page, showing a typical No Match prompt.
Page 60
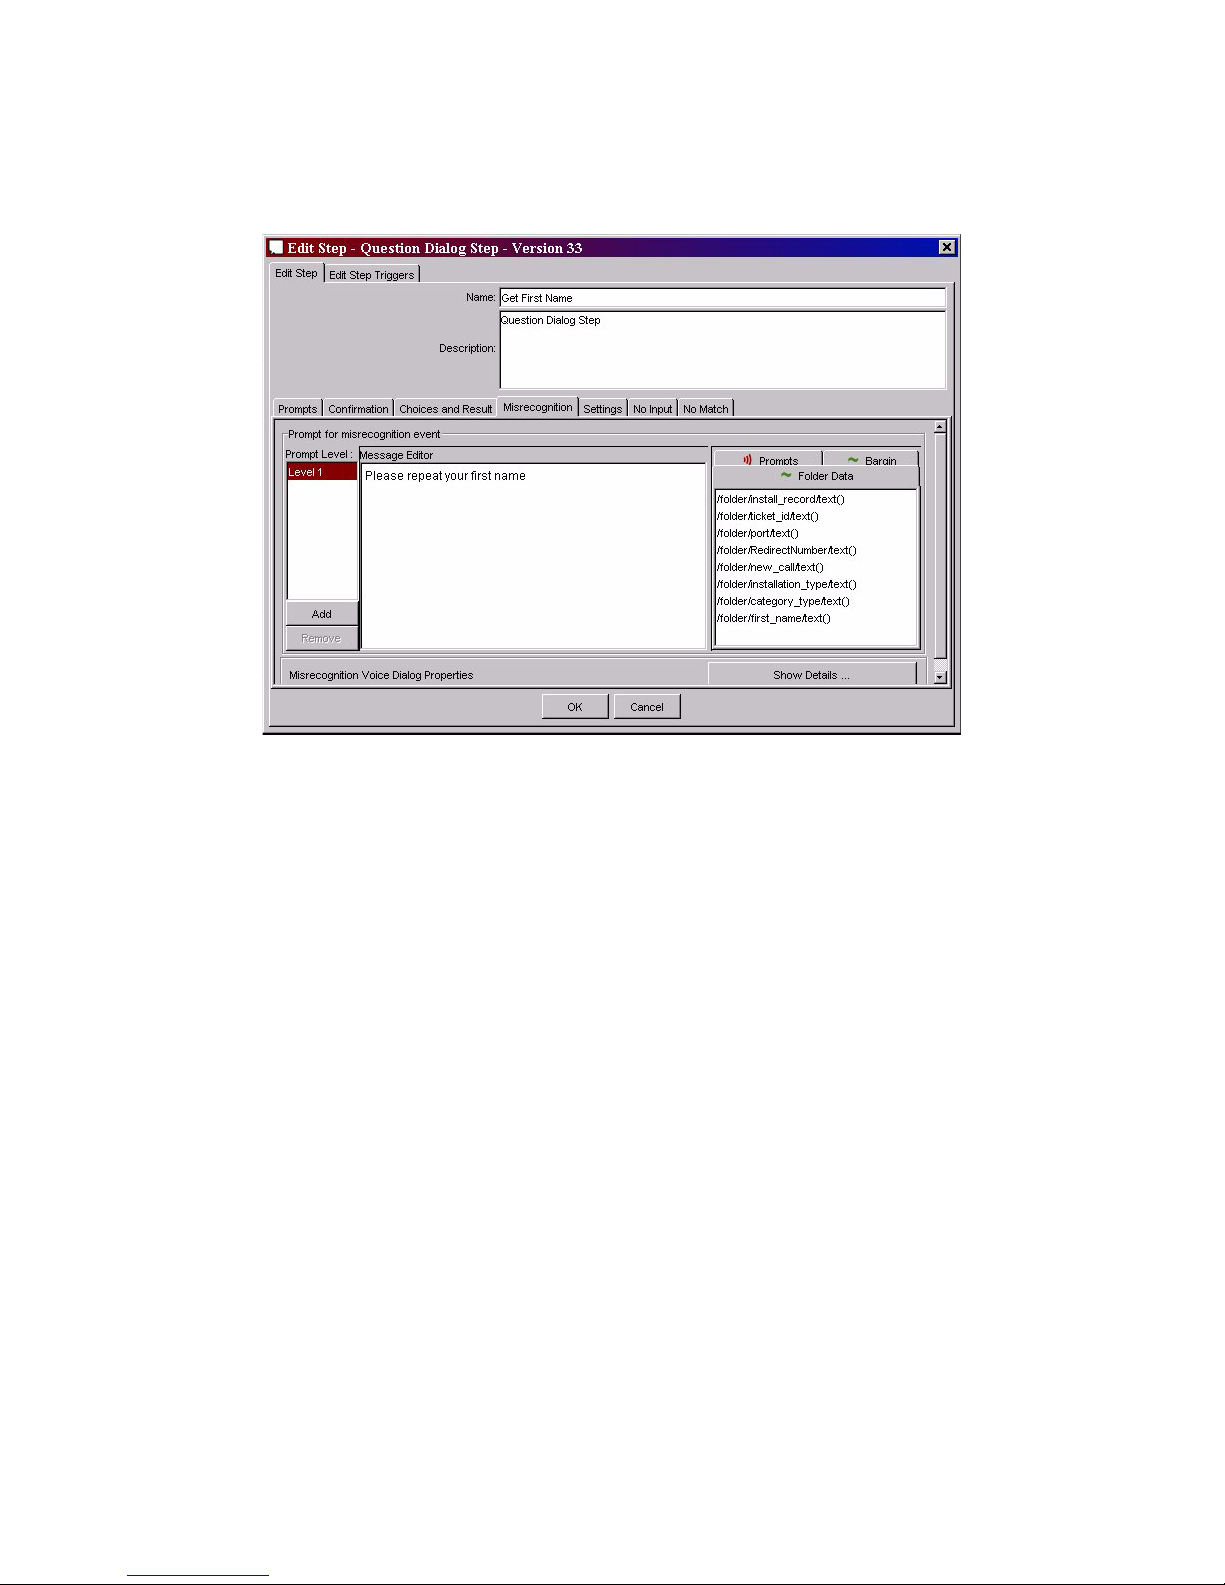
Speech Applications Builder Configurator User Guide • May 15, 2004 • page 60 of 116
Misrecognition
If the caller disconfirms the recognition result, the dialog step plays the prompt that has been defined
on the Misrecognition page. For an explanation of prompt levels, see page 53.
Figure 55. The Misrecognition page, showing a typical Misrecognition prompt.
Settings
The Settings page is used to configure the general behavior of the dialog step. Its contents are
component specific. For example, the Settings page of the Question dialog step allows you to set:
• Maximum reprompts allowed for confirmation
• Maximum reprompt
• Maximum disambiguation prompts allowed.
The Settings page of the Call Redirect dialog step allows you to:
• set the target address
• enable or disable tromboning
And the Settings page of the Number Sequence dialog step allows you to set:
• Minimum Length
• Maximum Length
• Validation
• Maximum reprompts allowed for confirmation
• Maximum reprompts
• Maximum disambiguation prompts allowed
Page 61
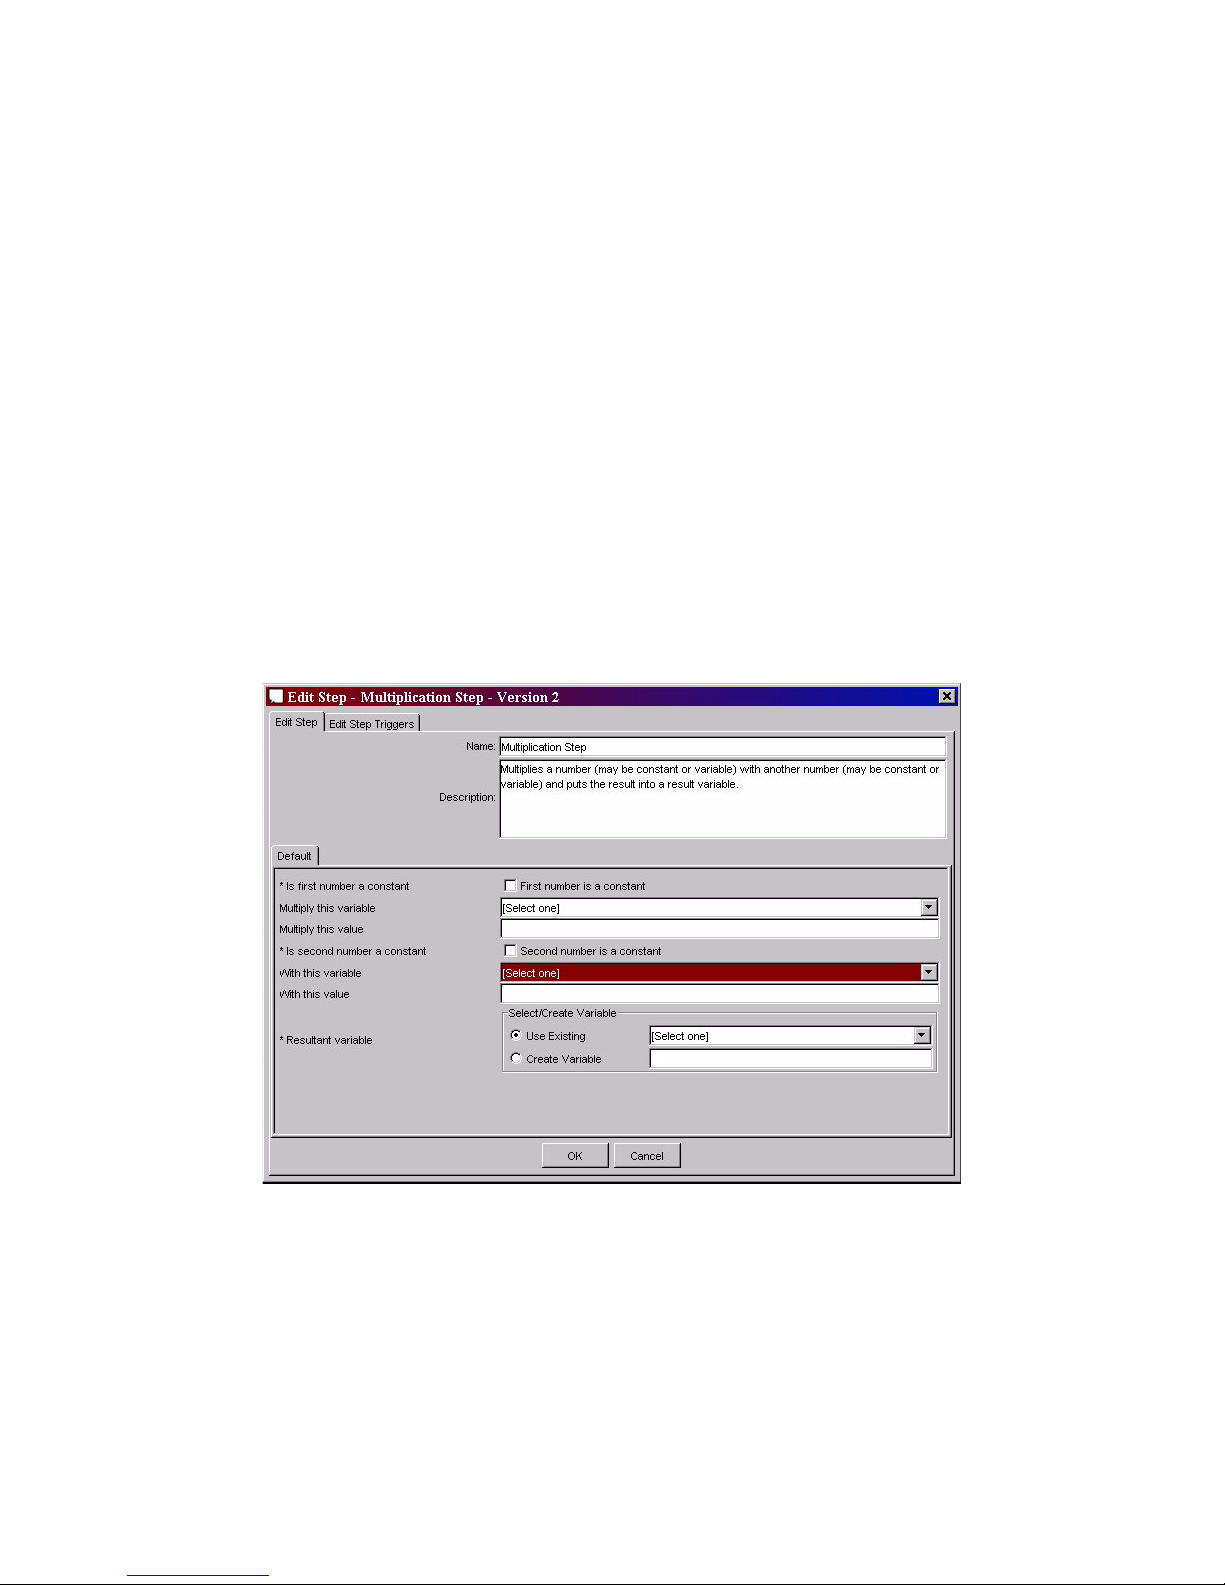
Speech Applications Builder Configurator User Guide • May 15, 2004 • page 61 of 116
Setting up or editing a process component
Process steps handle data. SAB processes include:
• addition, subtraction, multiplication, division, total, exponentiation
• check lookup table
• capitalize, change case
• set variable, copy variable, insert new variable
• report call end, report call information
• send event code
and so on. The data being manipulated may be static, or derived from a recognition result, or retrieved
from a database.
To set up a process component:
1. Double click on the process step icon. SAB displays the Edit Step dialog box.
2. The majority of Process components are configured via a single page, called Default. The data
that must be entered is component-specific. As you build a dialog flow, SAB automatically makes
available to the current component all the variables defined in all the previous components in the
path. These are selected from drop-down lists.
Figure 56. An example of a Process component Edit Step dialog box
3. A step trigger may be set up as described below.
Page 62

Speech Applications Builder Configurator User Guide • May 15, 2004 • page 62 of 116
Setting up a trigger
Certain types of event - including loggable events and Java exceptions - can be handled using
triggers. These are (typically short) alternative dialog flows that are run when the triggering event
occurs.
There are five types of trigger:
• Exception - evaluated only when an exception occurs within a dialog flow
• Before step validated - legacy feature - DO NOT USE
• Before step runs - evaluated before the step
• After step runs - evaluated after the step
• Unhandled control - evaluated if the path required is not defined in the dialog flow.
Triggers may be configured
• as part of a flow, in the Trigger Modeler window. These triggers are used by default when any
triggering event occurs in that flow, if the step in which the event occurs does not specifically
handle triggers
• as part of a step, in the Edit Step dialog box. Step-based triggers are specific to the particular
instance of the component and take priority over any global triggers.
Handling exceptions
If an exception occurs in a flow, and no Exception trigger has been defined, the flow will fail.
There are three ways handle an Exception trigger.
• try the step again
• skip over the offending step
• elegantly end the call
To configure the flow either to try the step again or to skip over the step, it is necessary to include an
ExceptionFlowControlStep in the trigger dialog flow (see page 63). However, if the
ExceptionFlowControlStep is not defined, the flow will throw and unhandled exception and the caller
will hear the default error message defined by the Voice Stack that is being used.
To end the call elegantly, you must build a trigger dialog flow that hangs up the call and add a
TerminateStep at the end of the flow. This will instruct the runtime that the flow must end immediately
and the flow will not throw an unhandled exception.
Flow trigger
To set up a flow trigger:
1. Select the Trigger Modeler window.
2. Select the type of trigger you want to create (see list above).
3. Check Create. SAB opens a dialog window.
4. Build the alternative dialog flow. If the trigger being defined is an Exception trigger, ensure that the
dialog flow contains an ExceptionFlowControlStep (see below).
Page 63
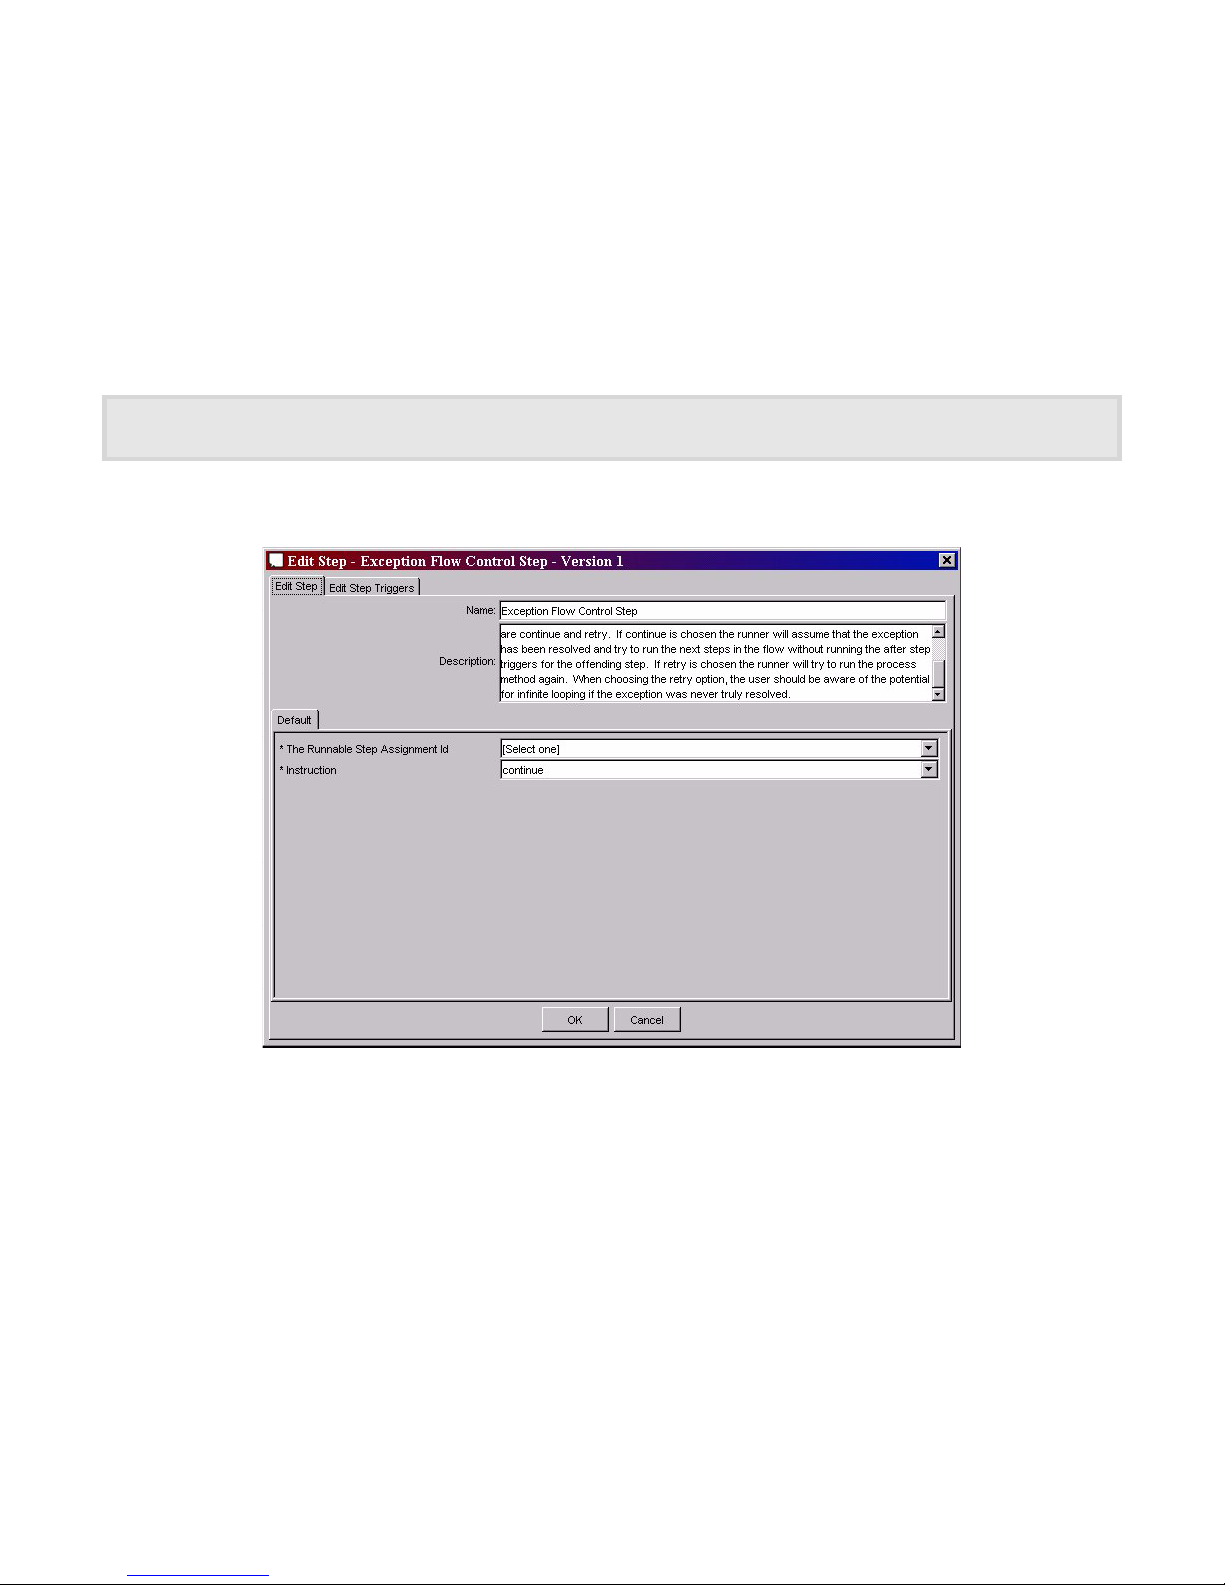
Speech Applications Builder Configurator User Guide • May 15, 2004 • page 63 of 116
Step trigger
To set up a step trigger:
1. Open the Edit Step dialog box.
2. Select the Edit Step trigger page.
3. Create the trigger as described above.
ExceptionFlowControlStep
An exception trigger dialog flow must always contain at least one ExceptionFlowControlStep, which must be
in a path that will be executed whenever the trigger dialog flow is run.
The ExceptionFlowControlStep is used to specify how the runtime environment should return from
the exception trigger.
Figure 57. The ExceptionFlowControlStep
To configure the step:
1. Select the appropriate Runnable Step Assignment id from the drop down list. This indicates the
step that has triggered the exception.
2. Select the instruction required. The ExceptionFlowControlStep provides two options:
• retry - execute the step that generated the exception again
• continue - execute the step after the step that generated the exception.
Page 64
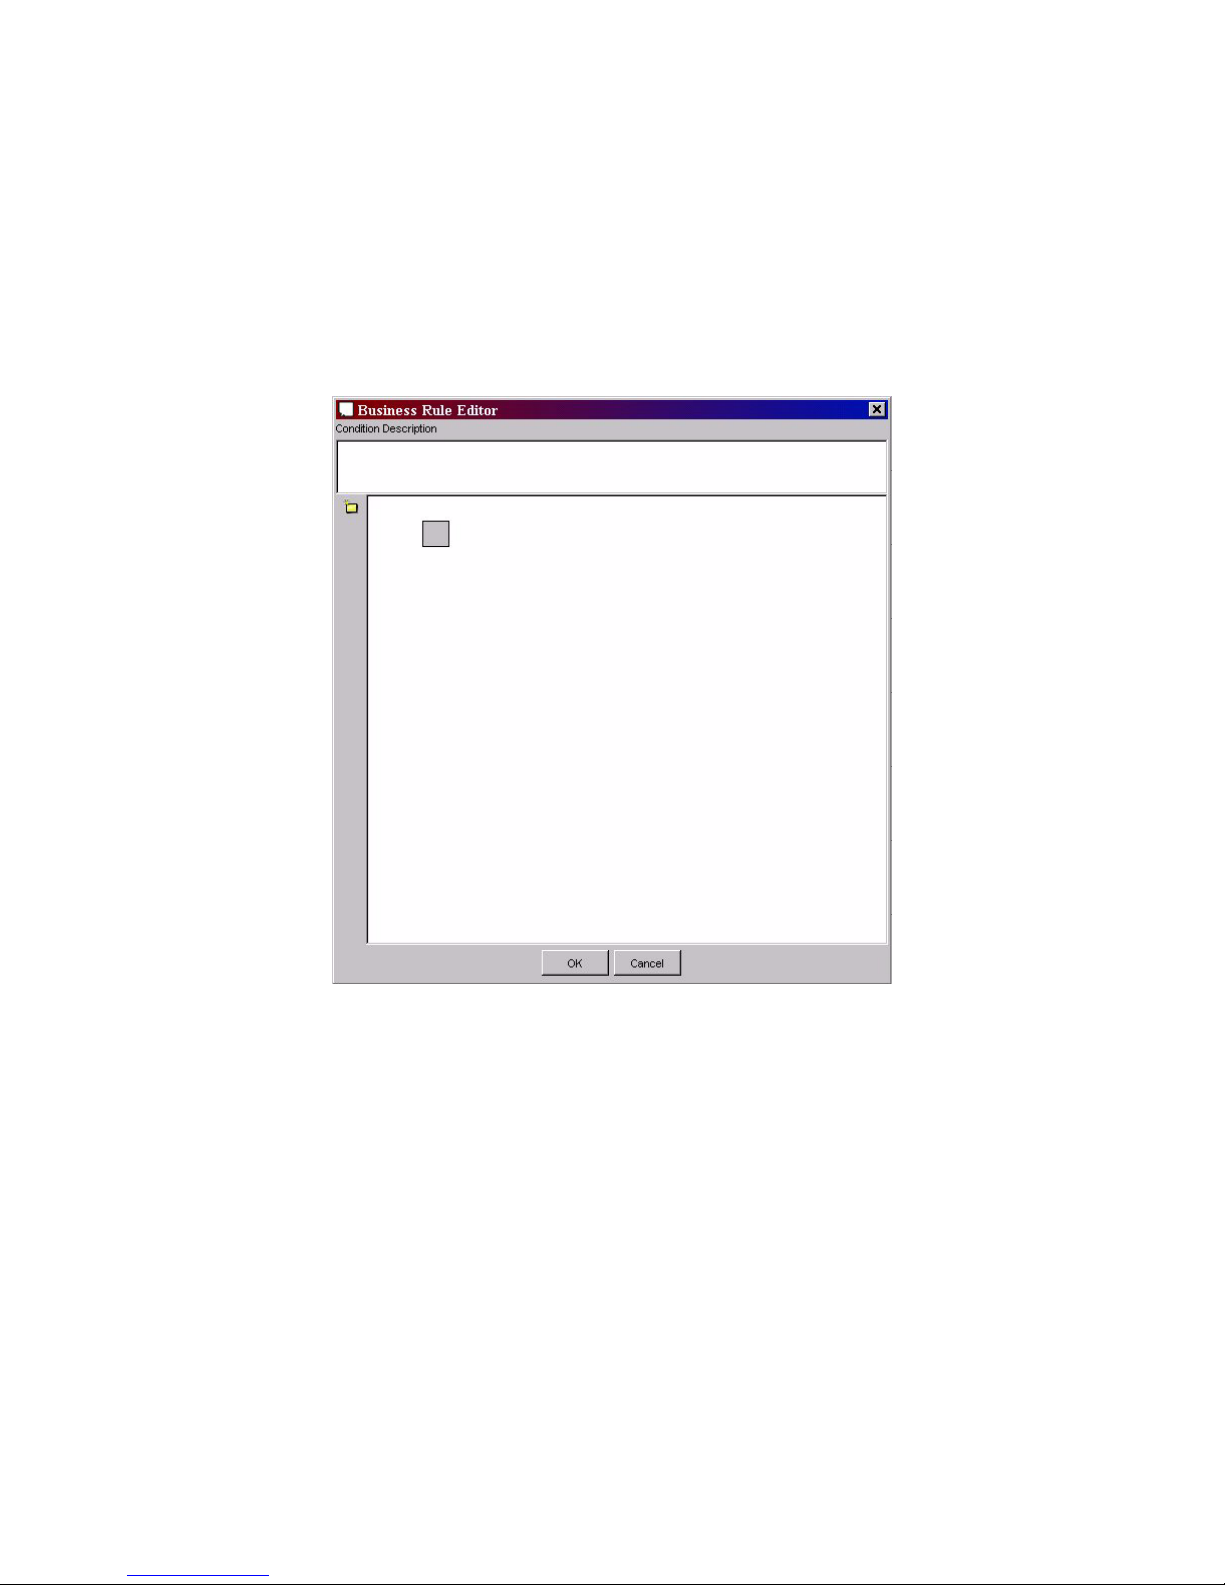
Speech Applications Builder Configurator User Guide • May 15, 2004 • page 64 of 116
Adding a rule
To define a rule:
1. The order in which you draw the connections between the source step and the steps to be
executed is used by SAB to determine how to interpret the rule.
First, add a connection between the source step and the step that must be executed if the rule
yields a TRUE result; secondly, add a connection between the source step and the step that must
be executed if the rule yields a FALSE result.
2. Double click on the decision point on the TRUE path. SAB opens the Rule Editor dialog box.
Figure 58. The Rule Editor dialog box
3. Enter a brief description. This will be displayed next to the rule in the Dialog Modeler window.
4. Click on the Select Component button. SAB displays the Select Component dialog box.
Page 65
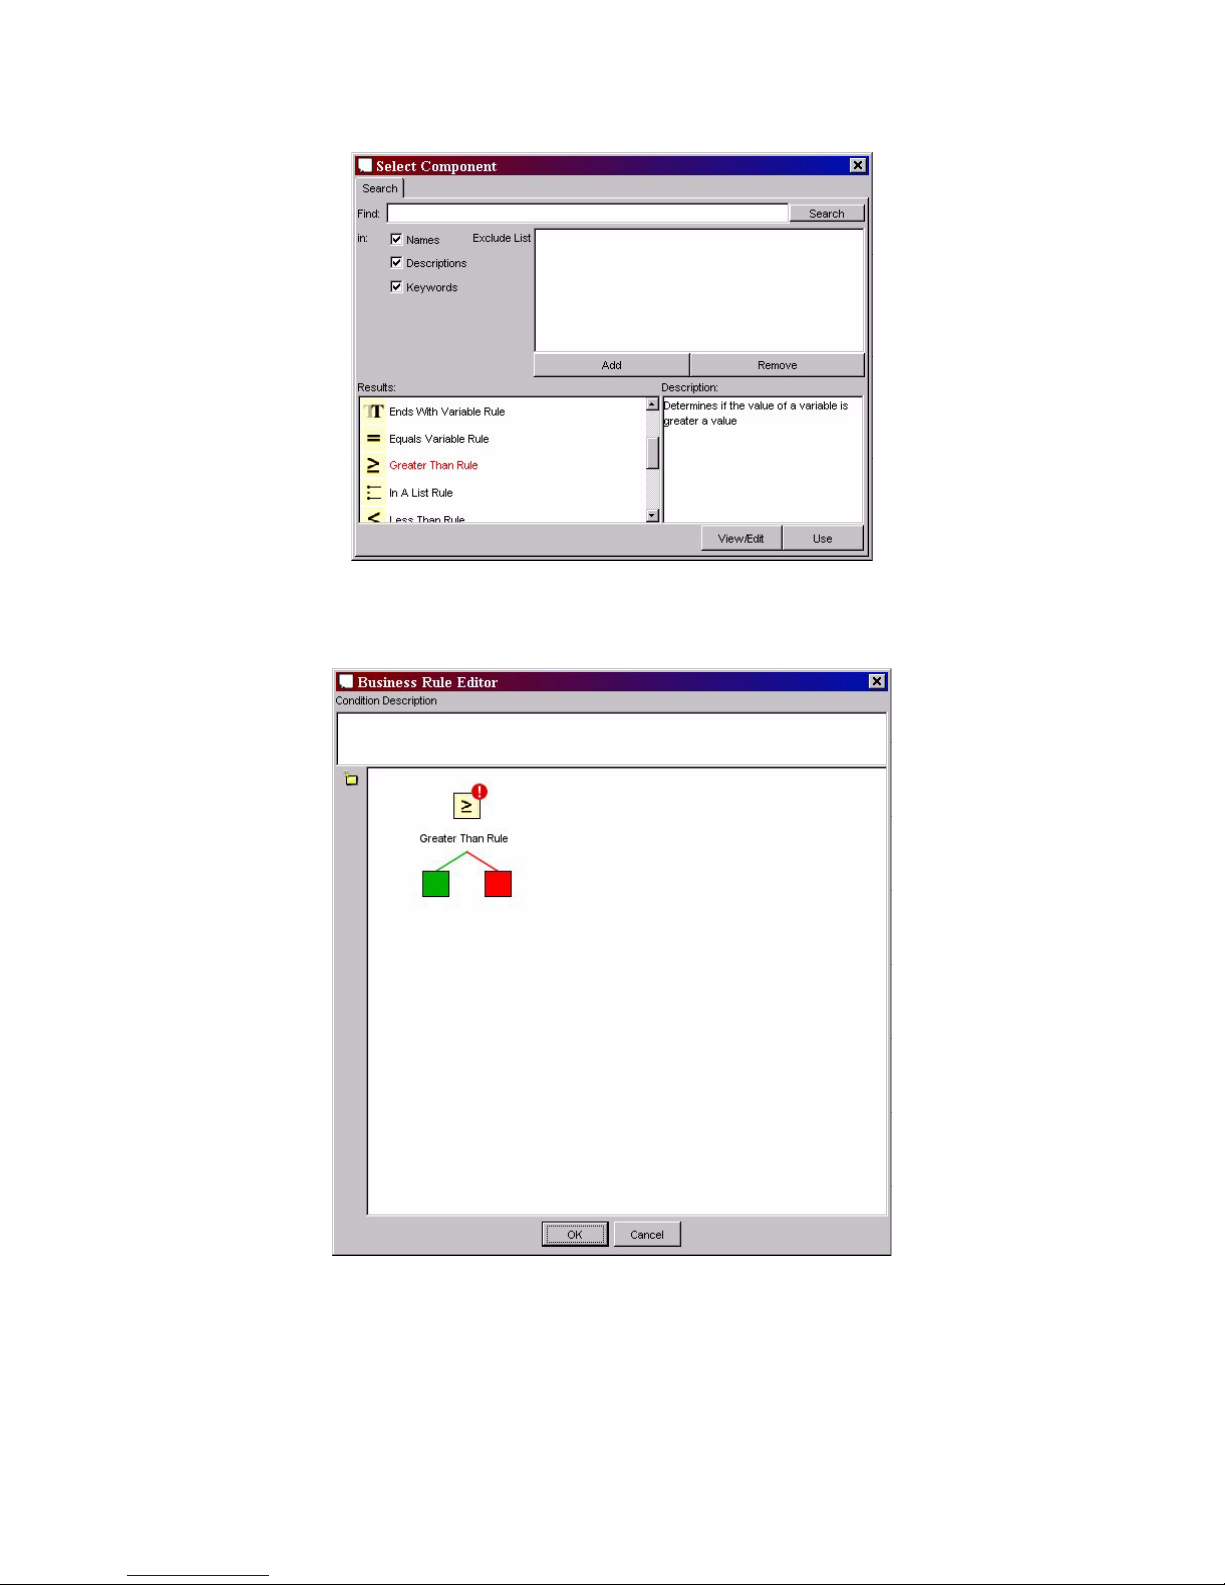
Speech Applications Builder Configurator User Guide • May 15, 2004 • page 65 of 116
5. Select the component you require, using the search facility (see page 39).
Figure 59. The Select Component dialog box
6. Click Use. SAB displays the undefined rule in the Rule Editor dialog box.
Figure 60. The undefined rule
Page 66
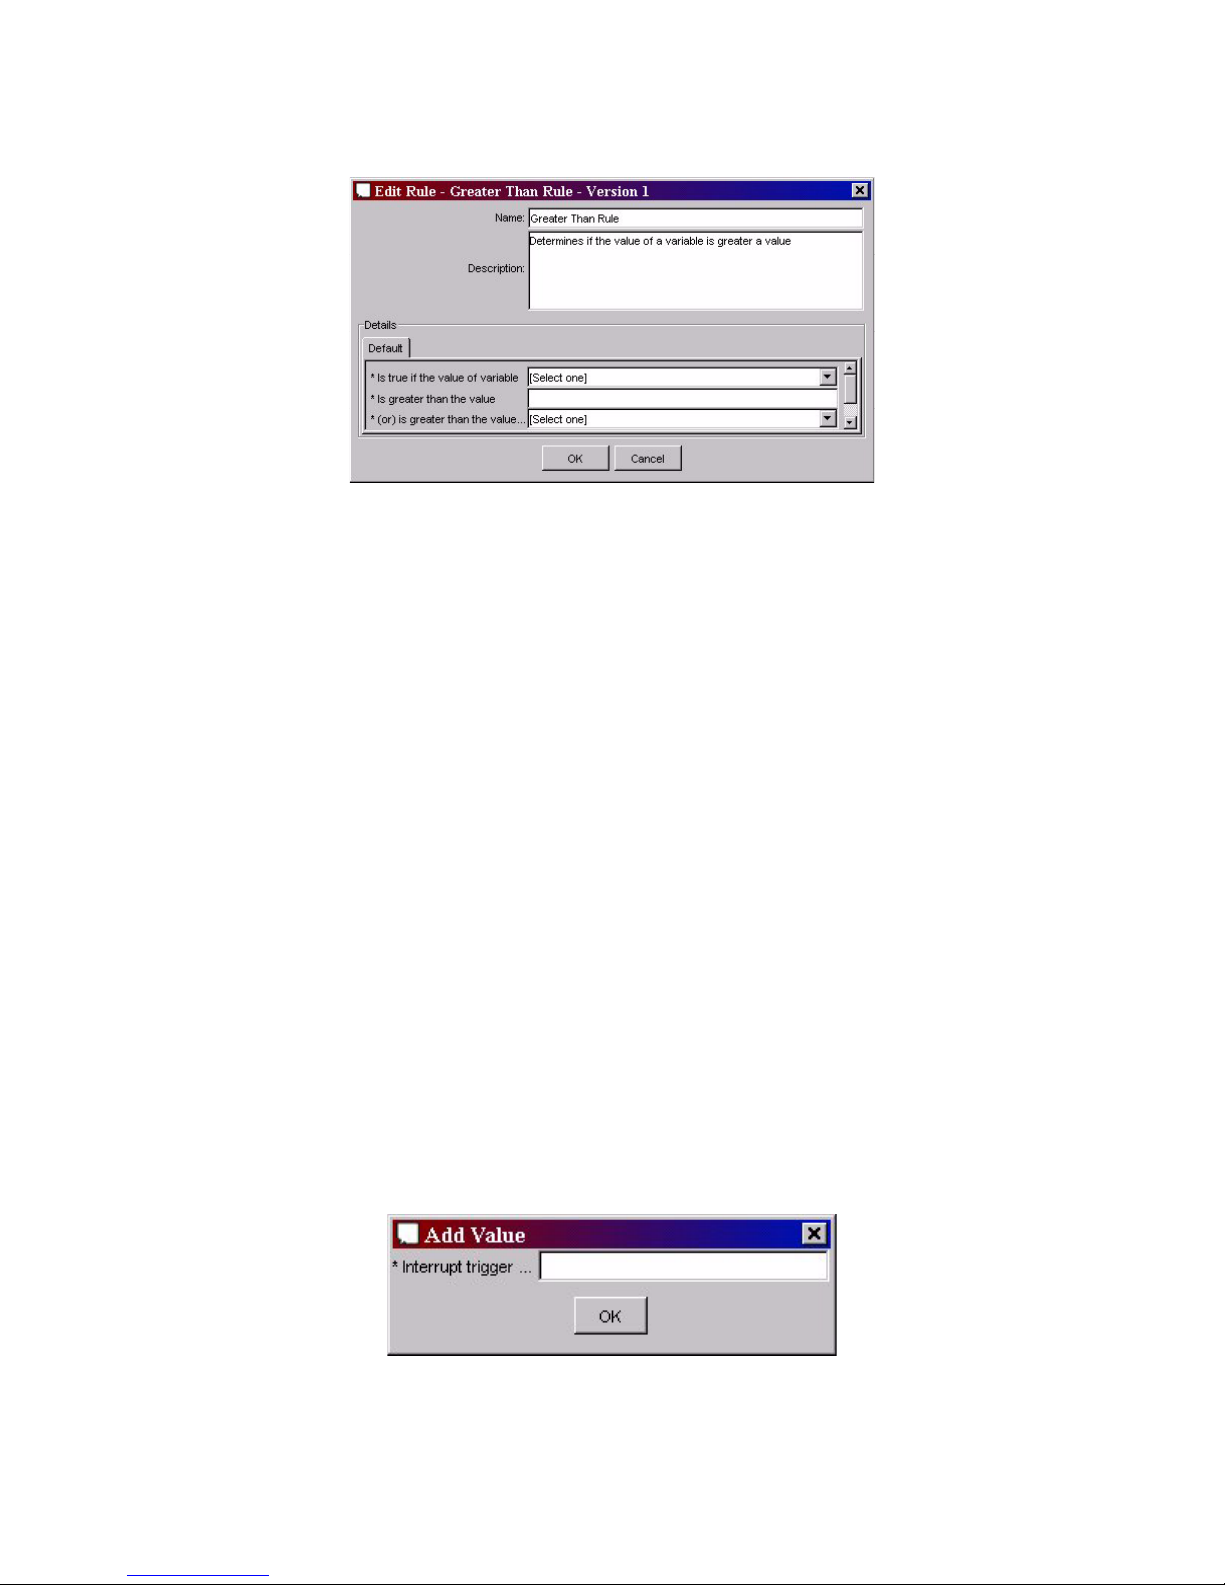
Speech Applications Builder Configurator User Guide • May 15, 2004 • page 66 of 116
7. Double click on the rule icon (“less than or equals to” in the Figure above). SAB displays the Edit
Rule dialog box.
Figure 61. The Edit Rule dialog box
8. The data you will need to enter is rule-specific. As you build a dialog flow, SAB automatically
makes available to the current component all the variables defined in all the previous components
in the path. These are selected from drop-down lists.
9. Click OK.
Adding an Interrupt Step
An Interrupt Step step handles inputs from the caller (such as “Help” or "Cancel") that may happen at
any point in the dialog.
An Interrupt Step can be added at any point in the dialog flow. It must have no entrance point, but
should lead to a (typically short) dialog flow designed to handle the caller’s command.
Once an interrupt step has been added to a flow, the specified phrase will interrupt any step in the
same flow that performs a recognition (that can detect what the caller has said).
If required, when the alternate flow has completed, you can route the caller back to the step that was
interrupted, using a ReturnFromInterrupt process step.
To add an Interrupt step:
• Click on the Interrupt Step icon on the vertical toolbar, then drop the component in the Dialog
Modeler window, as normal.
To configure an Interrupt step:
1. Double click on the component. SAB displays the Edit Step dialog box.
2. Click Add Value. SAB displays the Add Value dialog box.
Figure 62. The Add Value dialog box
3. Enter the Interrupt trigger (such as help or cancel).
Page 67
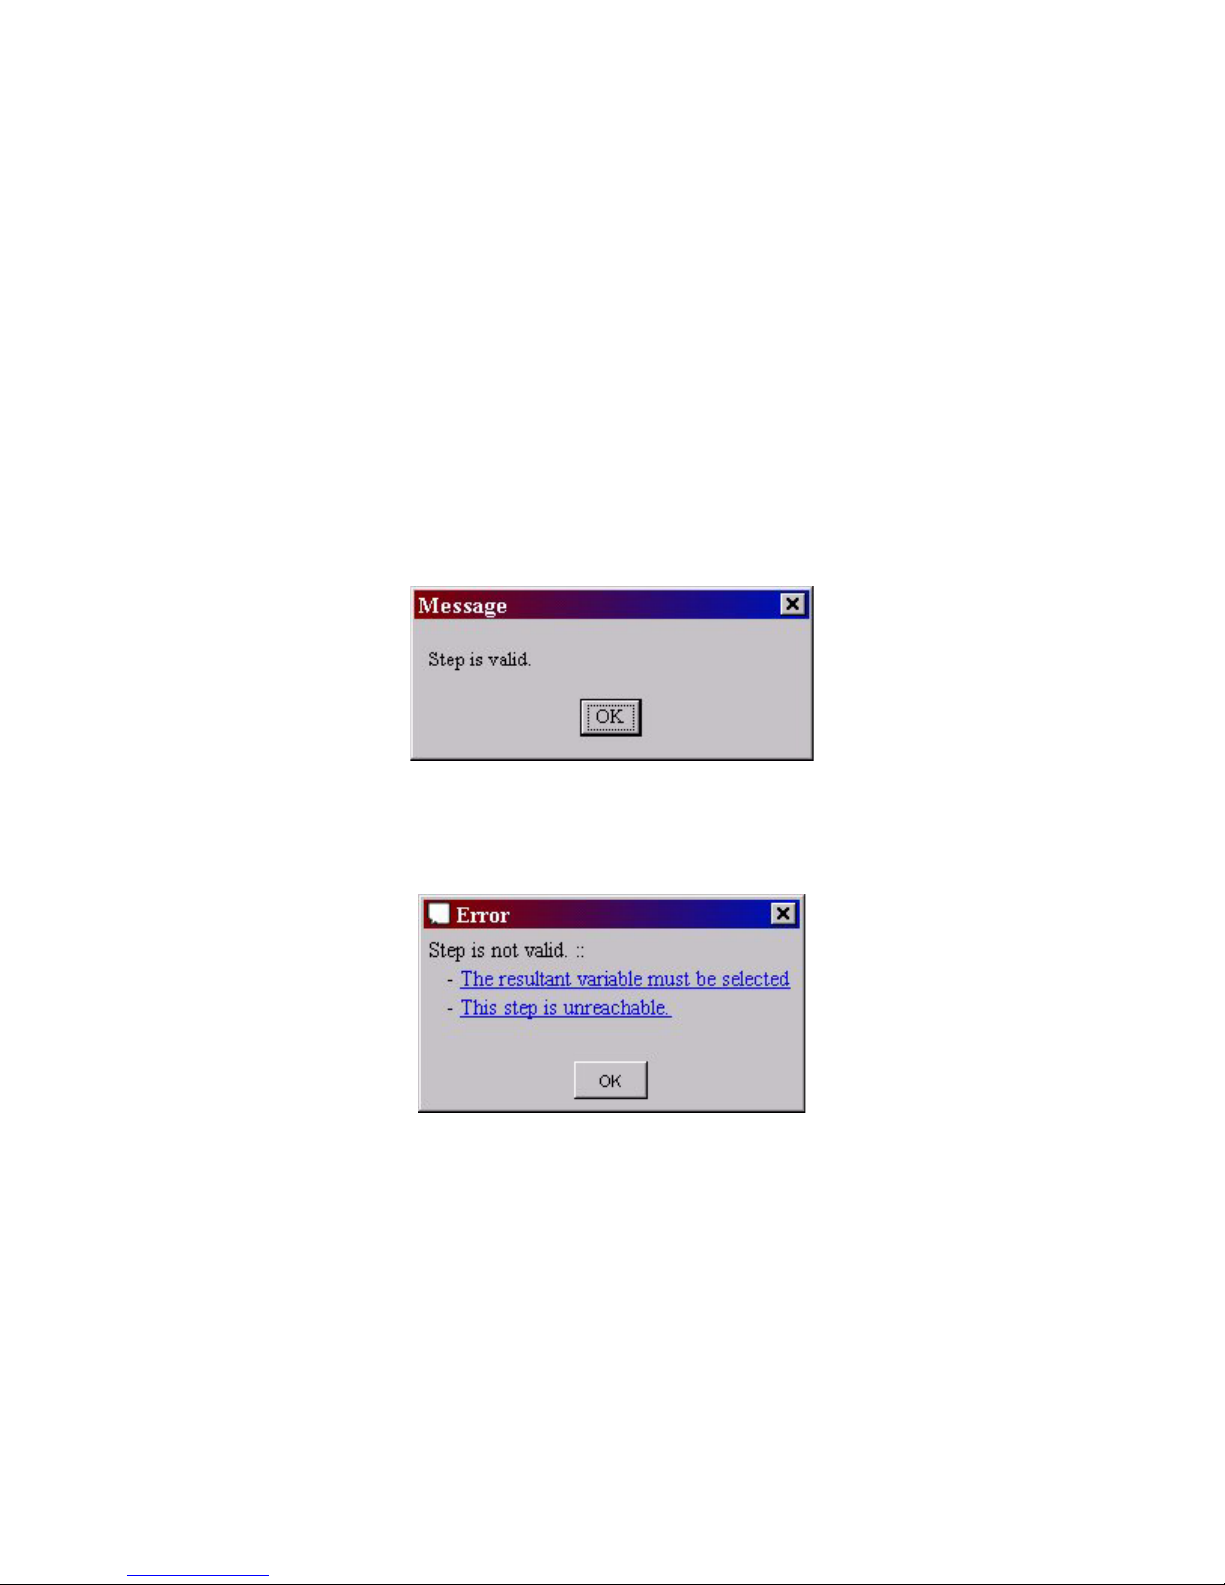
Speech Applications Builder Configurator User Guide • May 15, 2004 • page 67 of 116
4. Click OK. The Interrupt trigger is displayed in the Interrupt Trigger Conditions field. To define
another trigger, repeat the process.
5. Click OK.
Validating a step
The Validate Step tool checks the selected step has been correctly configured.
To validate a step:
1. Click on the step.
The step is highlighted in yellow.
2. Do one of the following:
• right-click on the component to display the pop-up Context menu and select Validate Step
• click on the Validate Step button on the Dialog Modeler Tool bar.
If the step is valid, SAB displays the result in a pop-up message:
Figure 63. Step valid message
If the step is invalid, SAB displays a pop-up error message, which lists the errors it has detected
and provides links to the Java stack trace.
Figure 64. Step invalid error message
Page 68

Speech Applications Builder Configurator User Guide • May 15, 2004 • page 68 of 116
Sub-dialogs
A dialog flow can be inserted into another dialog flow as a sub-dialog.
Any data to be passed into the sub-dialog from the calling dialog flow must be specified in the
Required Data window, and then assigned in the Sub Dialog step; any data to be passed out of the
sub-dialog to the calling dialog must be specified in the Output Data window, and then assigned in the
Sub Dialog step.
The Required Data window
Data to be passed from a dialog flow to a sub-dialog flow must be specified in the Required Data
window.
To define an input variable:
1. With the sub-dialog flow open in the Dialog Modeler window, click on the Required Data tab. SAB
displays the Required Data window.
2. Click Add. Voice Runner displays the Add Data Type wizard.
3. Select the data type required.
4. Click Next
5. Enter a variable name and set the maximum and minimum occurrences (set values of 1 for a
variable or set the appropriate values for an array).
6. Click Finish.
The variable is listed in the Required Data window.
Variable names must not
• start with a number or punctuation
• start with “xml” or “XML”
• contain spaces.
See Appendix B, page 113 for a complete list of data types.
The Output Data window
Data to be passed from a sub-dialog flow back to the calling dialog flow must be specified in the
Output Data window, and then declared in the Sub Dialog step.
To define an output variable:
1. With the sub-dialog flow open in the Dialog Modeler window, click on the Output Data tab.
2. Click Add Assignment. SAB displays the New Datatype wizard, which lists the data items
associated with the current dialog flow.
3. Select the data item required.
4. Click Next.
5. Enter a variable name.
6. Click Finish.
Page 69
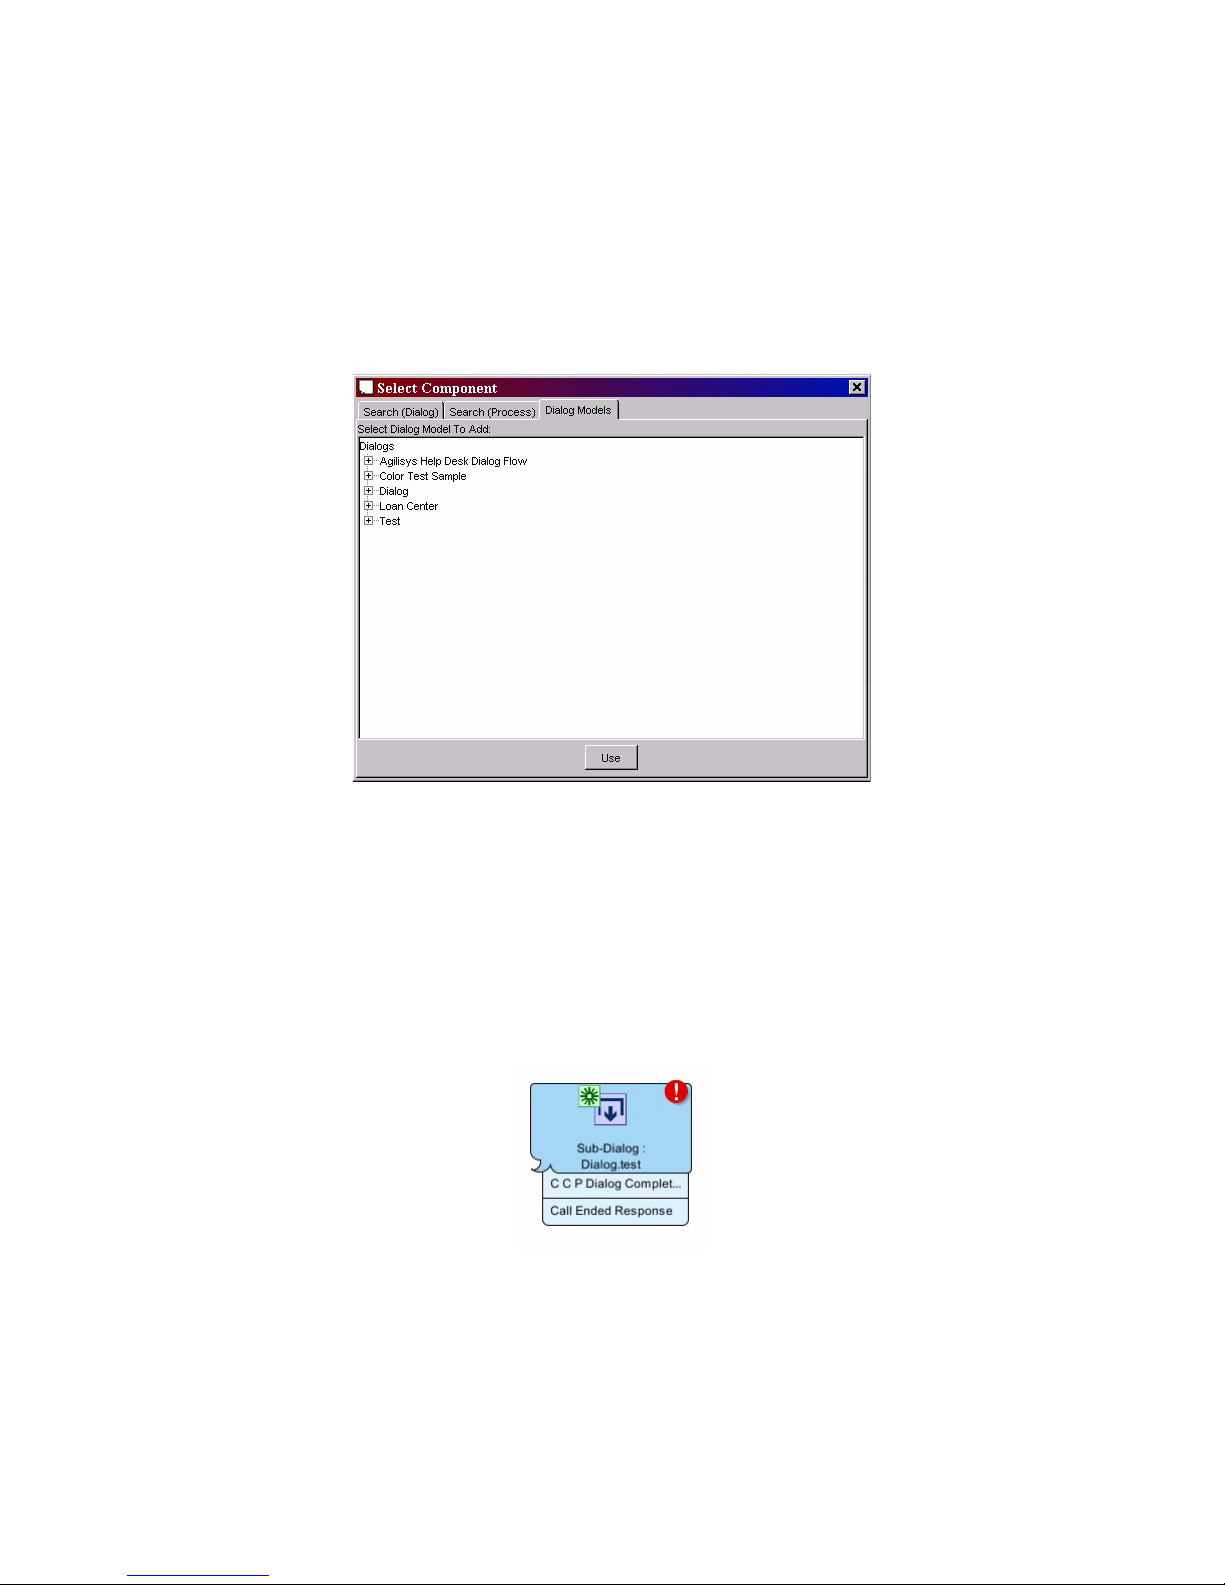
Speech Applications Builder Configurator User Guide • May 15, 2004 • page 69 of 116
The variable is listed in the Output Data window.
Adding a sub-dialog to a dialog flow
To add a sub-dialog to a dialog flow:
1. Click on the Add Component button.
SAB displays the Select Component dialog box.
2. Select the Dialog Models tab.
Figure 65. The Select Component dialog box showing the Dialog Models tab selected
3. Browse to the dialog flow you require and highlight it.
4. Click Use.
The cursor changes to a hand holding a component symbol.
5. Click on the canvas of the Dialog Modeler window.
SAB pastes the dialog flow onto the canvas as a single component. You can reposition it by
clicking on its title box, dragging it to a new position, and dropping it.
Figure 66. A sub-dialog component
Page 70
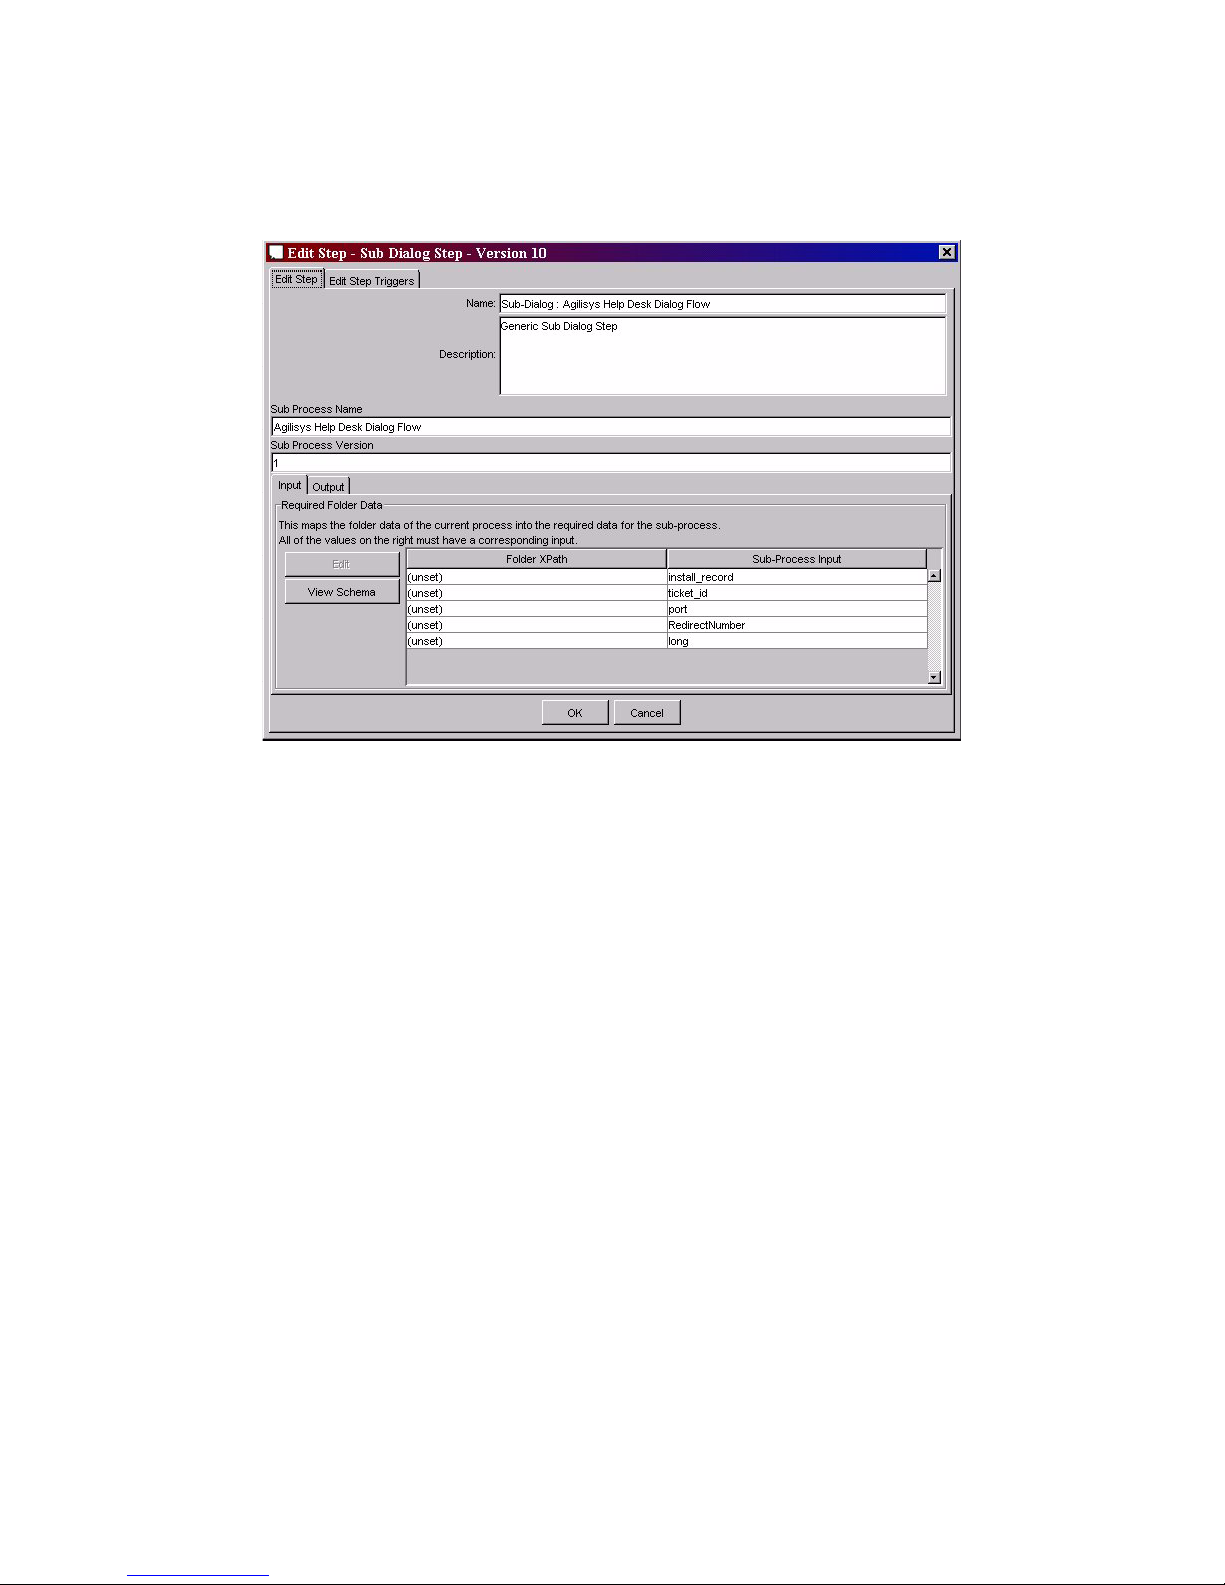
Speech Applications Builder Configurator User Guide • May 15, 2004 • page 70 of 116
To assign the input variables:
1. Double click the Sub-Dialog step. SAB displays the Step Editor, which lists, in the Sub-Process
input column of the Input tab, the input variables that you have already specified in the Required
Data window.
Figure 67. The Sub Dialog step
2. Select the variable you want to assign.
3. Click Edit. SAB lists the variables visible to the sub-dialog component.
4. Select the variable you require and click OK.
To assign an output variable:
5. Select the Output tab.
Page 71
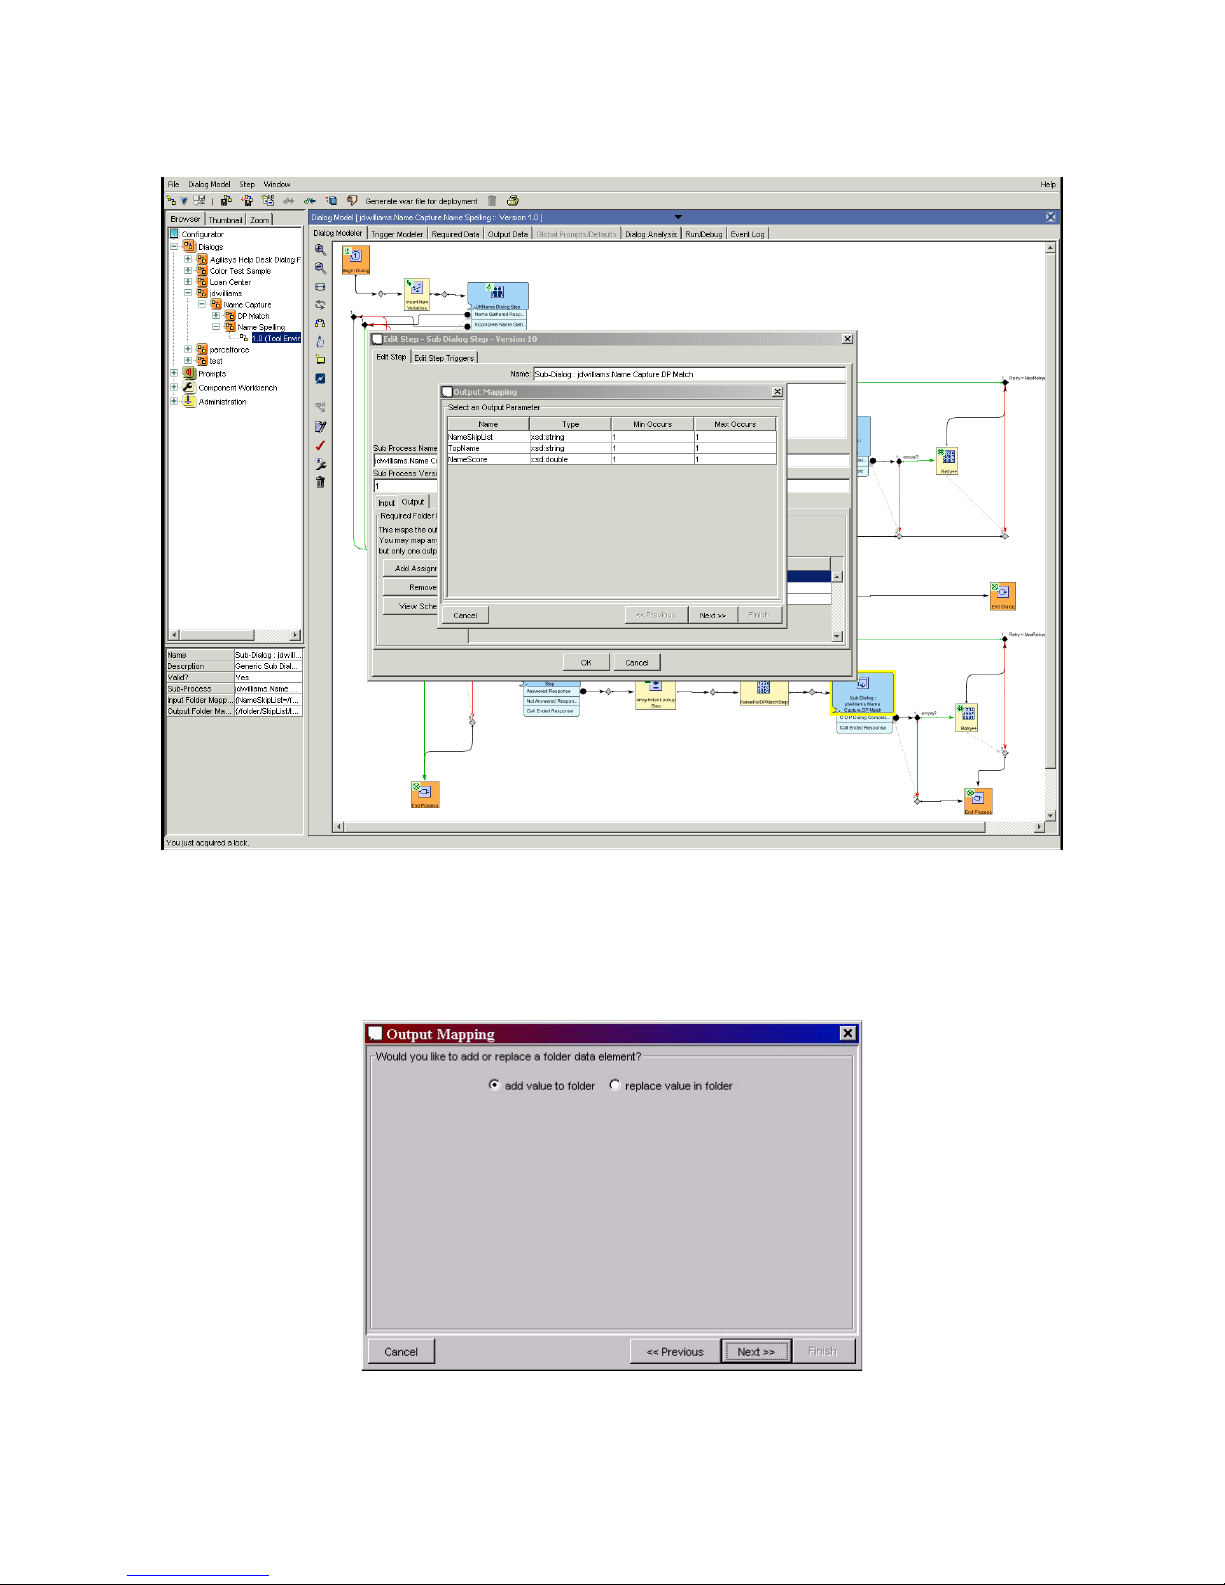
Speech Applications Builder Configurator User Guide • May 15, 2004 • page 71 of 116
6. Click Add Assignment. SAB lists the output variables you have already defined in the Output
Data window.
Figure 68. The Output Data window
7. Select the variable you require and click Next.
8. Select Add value to folder (add variable) or Replace value in folder (overwrite variable). Click
Next.
Figure 69. The Output Mapping dialog box
Page 72

Speech Applications Builder Configurator User Guide • May 15, 2004 • page 72 of 116
9. Do one of the following:
• if you have opted to add a variable, enter a variable name
• if you have opted to overwrite a variable, select the variable you want to overwrite.
10. Click Finish.
Deleting a dialog flow
To delete a dialog flow:
• Do one of the following:
o right-click on the dialog flow icon (not the version number) to display the pop-up
Context menu and select Delete Dialog Model
o select the dialog flow icon (not the version number) and select Dialog Model > Deletes
the Selected Dialog Model Version
SAB asks you to confirm that you want to delete the dialog flow. Click Yes. The dialog flow is deleted.
Deleting components and connections
A component must be physically connected to another component to see its variables. If you delete a
component or a connection, and break the flow of the dialog, subsequent components will lose all reference to
variables from components earlier in the flow (the fields will be blank). To replace the variables it is necessary to
restore a connection, then edit each component and re-select the variable names. To avoid this, always draw
an alternative connection (possibly temporary), before deleting a component or a connection.
Deleting a dialog or process component
To delete a dialog or process component:
1. Click on the component to highlight it.
2. Do one of the following:
• Right-click on the component to display the pop-up Context menu then select Delete Step
• Click on the Delete button on the Dialog Modeler Tool bar
Deleting connections
To delete a connection:
1. Click on the rule, or on the undefined decision point, that lies on the connection you want to
delete.
2. Do one of the following:
• Right-click on the component to display the pop-up Context menu then select Delete Decision
• Click on the Delete button on the Dialog Modeler Tool bar
Page 73

Speech Applications Builder Configurator User Guide • May 15, 2004 • page 73 of 116
Deleting rules
If you use the method described in the previous section to delete a rule, SAB will also delete the connection it
lies on.
To delete a rule:
1. Double click on the rule. Voice Runner opens the Rule Editor dialog box.
2. Right click on the rule icon.
3. Select Delete Rule.
4. Click OK.
Finding a stored dialog
The Dialogs tree
To find a stored dialog: expand the Dialogs tree and select the dialog you require.
• Click on the dialog folder to display the version index.
• Click on the dialog version number to open a read-only version of the dialog in the Dialog
Modeler window.
The version index consists of two tabbed worksheets:
• Dialog Information - which lists the available versions of your selected dialog flow, and
indicates the environment in which they operate.
• Authorized Members - which lists the dialog flow’s owners and authorized members (users
who are permitted to edit the dialog flow).
The search engine
SAB provides a search engine that can be used to search for the dialog flow you require. To search:
1. Click on a parent node in the Dialogs tree. Voice Runner displays its Dialog Search engine in the
Dialog modeler window.
2. Type the name, or partial name, of the dialog flow you want to find into the Name field. If you have
used a partial name, ensure that the Partial Match box is also checked.
3. Select the environment you want to search:
• Any environment - searches all environments; this is the default
• Tool - searches the Tool environment. This contains dialog flows that are under construction
(and related prompts)
• Production - searches the Production environment. This contains dialog flows that are
deployed (and related prompts)
• Decommission - searches the Decommission environment. This consists of dialog flows that
have been taken out of deployment (and related prompts).
4. Click Search. SAB displays a list of all matching dialog flows in the Dialogs modeler window.
5. Click Show Details to display all available versions of the dialog flow.
Page 74
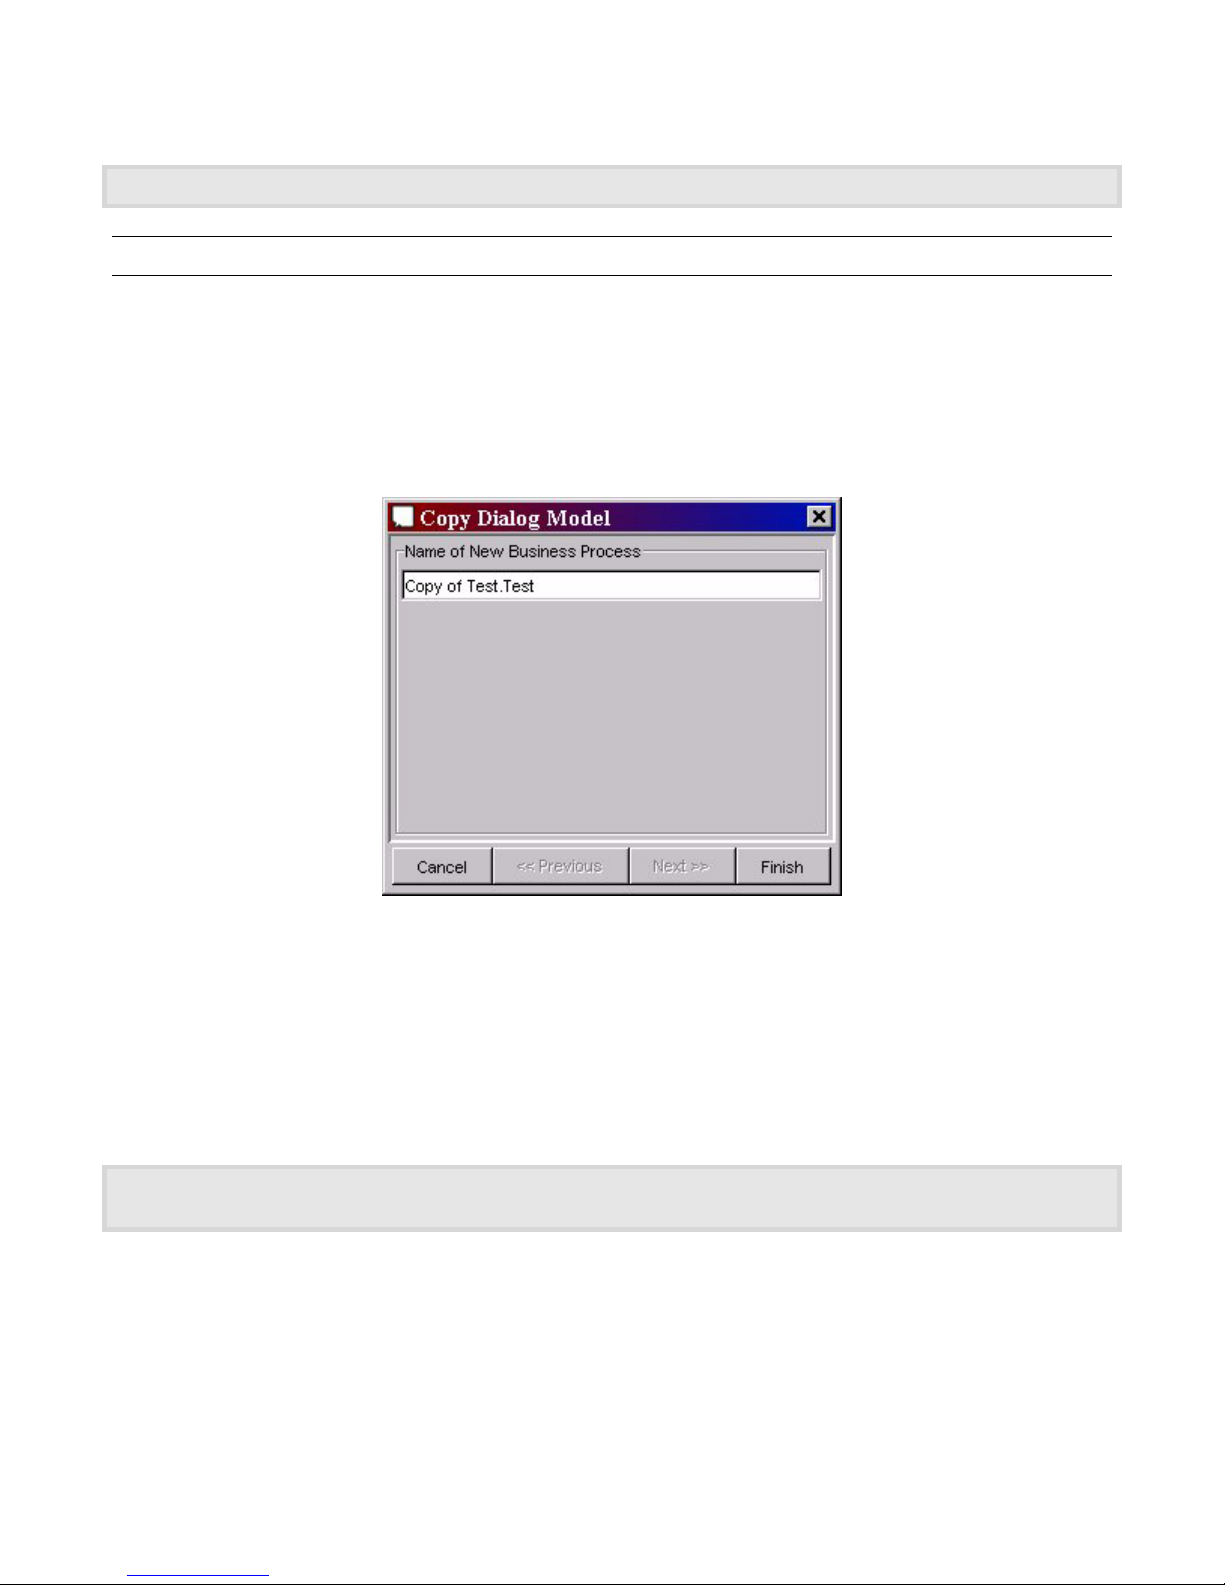
Speech Applications Builder Configurator User Guide • May 15, 2004 • page 74 of 116
6. Click on the version number to open a read-only copy of the dialog flow.
Before you can edit a dialog flow, you must check it out, see page 37.
Copying a dialog flow
Copy with the same version number
To copy a dialog flow with the same version number:
1. Right click on the dialog flow icon (not the version number) to display the pop-up Context menu.
2. Select Copy dialog model and a selected version. SAB displays the Copy Dialog Model dialog
box.
Figure 70. The Copy Dialog Model dialog box
3. By default, SAB assigns the name “Copy of...” to the new dialog; this may be changed. If more
than one version of the dialog is available, select the version number you require.
4. Click Finish. SAB displays the new dialog flow in the Dialogs tree. Note that files are displayed in
alphabetical order, so “Copy of...” will be displayed near the top of the tree.
Copy with an incremented version number
Before a dialog flow can be copied with an incremented version number it must be migrated to the Production
Environment, see page 76. The new dialog flow is created in the tool environment.
To copy a dialog flow with an incremented version number:
1. Do one of the following:
• right-click on the dialog flow icon (not the version number) to display the pop-up Context menu
and select Increments the version of the selected dialog version
• open the dialog flow and click on the Increments the version of the selected dialog version
button or select Dialog Model > Increments the version of the selected dialog version.
Page 75
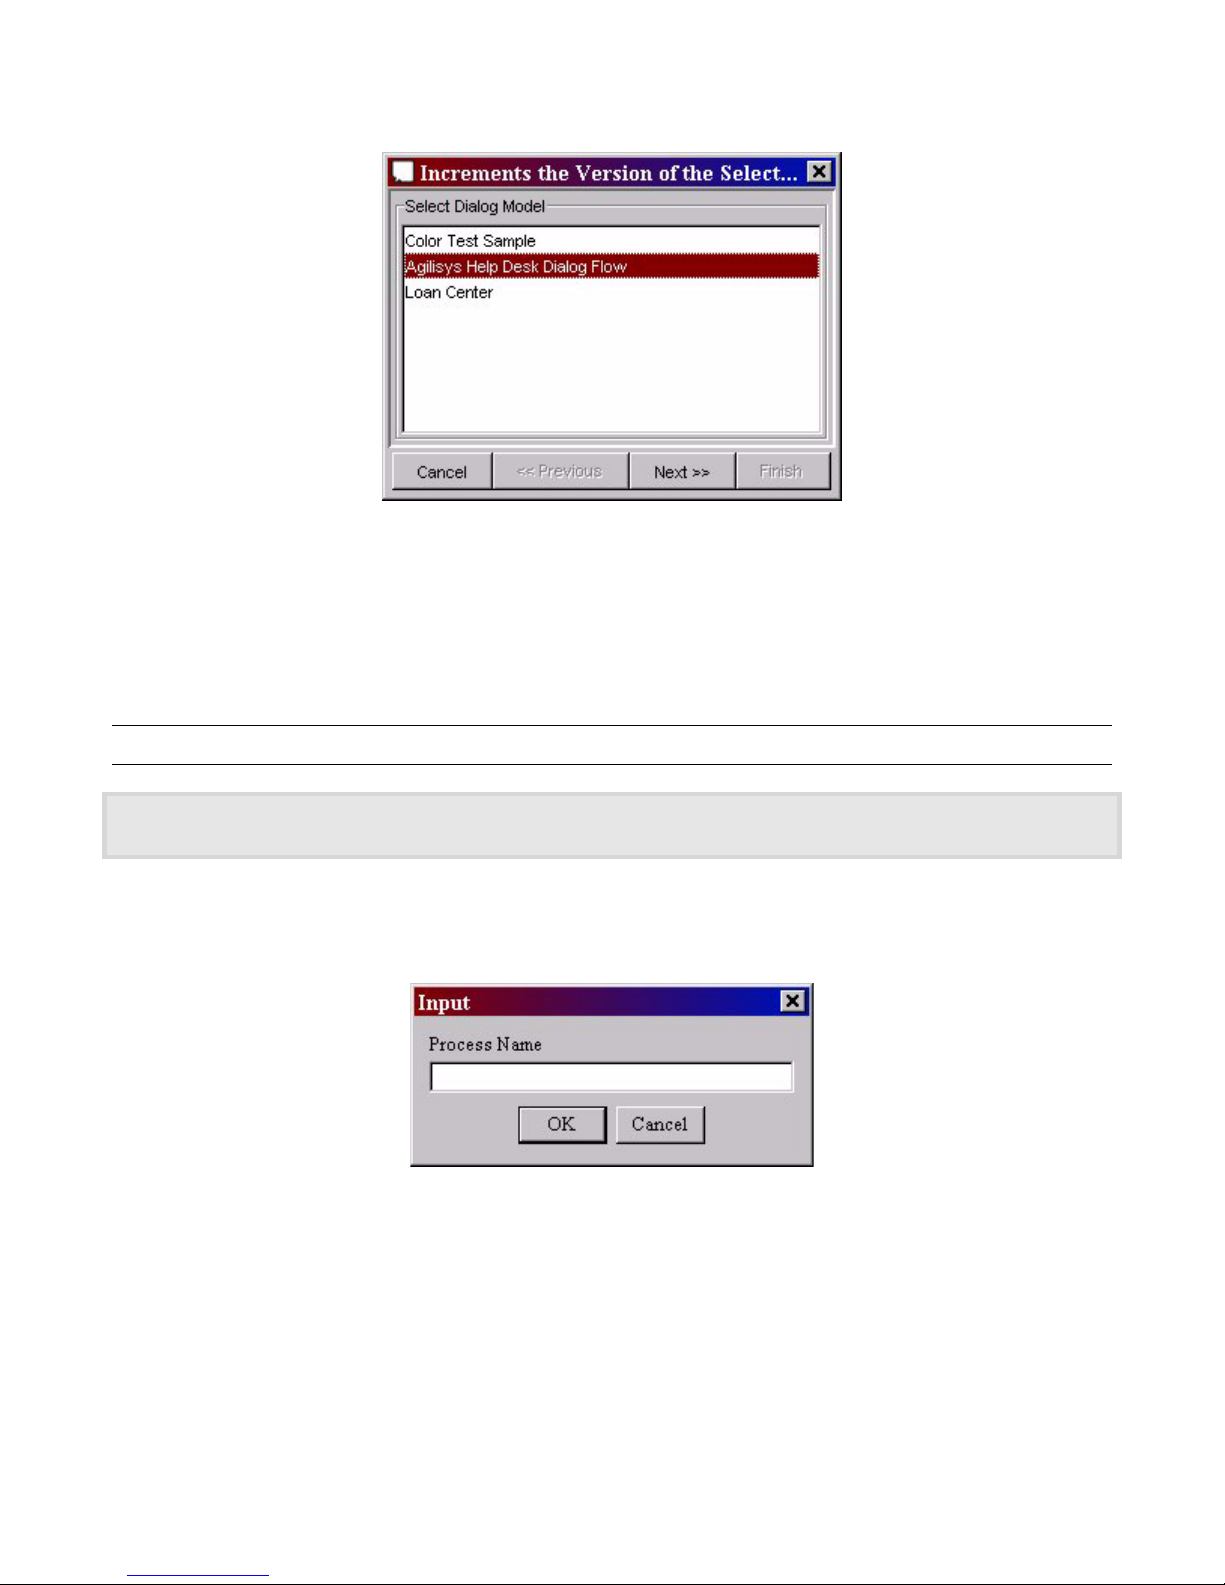
Speech Applications Builder Configurator User Guide • May 15, 2004 • page 75 of 116
2. SAB displays a list of dialog flows.
Figure 71. The Increments the version of the selected dialog version button dialog box
3. Select the dialog flow you want to copy. Click Next.
4. Select the version number you want to copy. Click Next.
5. Click Finish. The new dialog flow is created in the tool environment. SAB displays it in the Dialogs
tree and automatically opens an editable version in the Dialog Modeler window.
Renaming a dialog flow
If the dialog flow you are renaming has a classification and you want to retain it, you must include the
classification path as part of the new name.
To rename a dialog flow:
1. Right-click on the dialog flow icon (not the version number) to display the pop-up Context menu
and select Rename Dialog Model. SAB displays an Input dialog box.
Figure 72. Input dialog box
2. Enter the new name. If the dialog flow you are renaming has a classification and you want to
retain it, include the classification path as part of the new name; for example,
Banking.DirectDebit.MainFlow specifies a flow name MainFlow, located in the DirectDebit
folder, which is located in the Banking folder.
3. Click OK.
Page 76
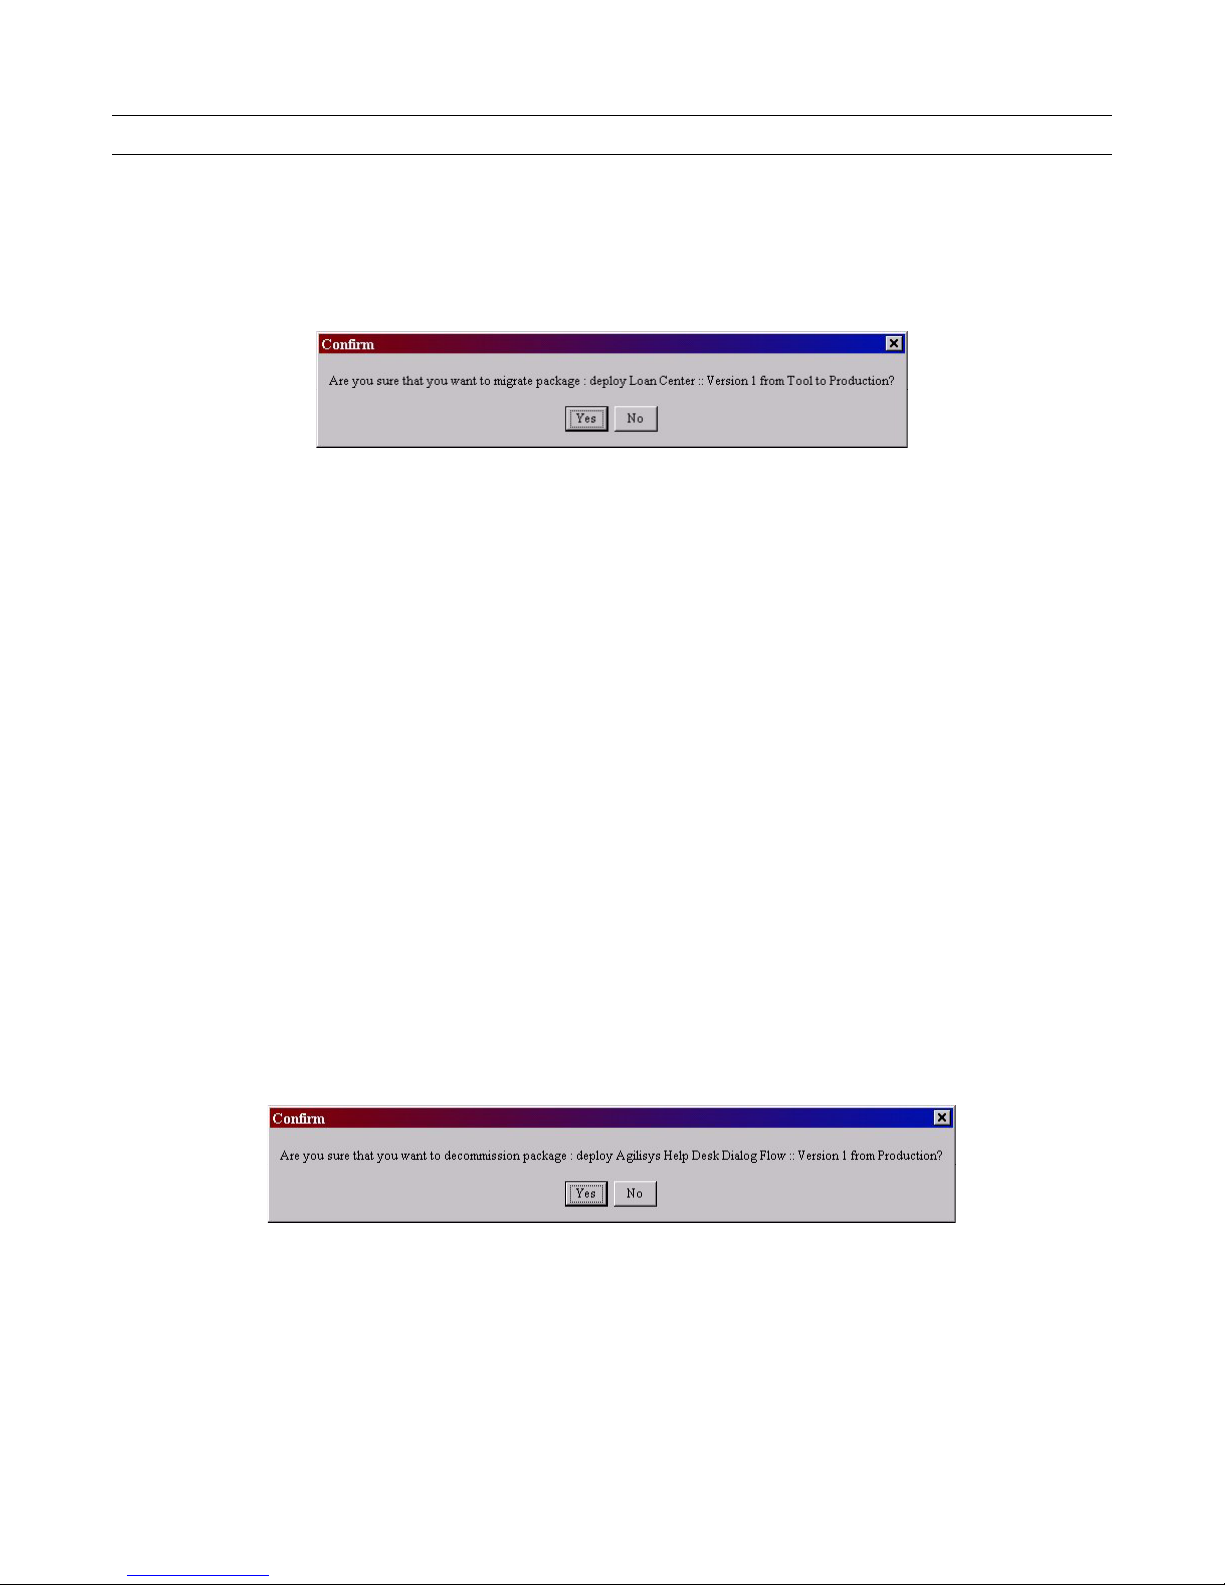
Speech Applications Builder Configurator User Guide • May 15, 2004 • page 76 of 116
Migrating a dialog flow
To migrate a dialog flow from the Tool environment to the Production environment:
1. Open the dialog flow.
2. Check the dialog flow out (see page 37).
3. Click on the Migrate button. SAB will ask you to confirm that you want to migrate the dialog flow.
4. Click Yes.
5. SAB will check if the dialog flow is valid.
• If the dialog flow is not valid, it displays a list of errors.
• If the dialog flow is valid, it migrates the dialog and displays a read only version in the Dialog
Modeler window.
There is now a limited set of operations you can perform on the dialog flow:
• Save
• Export
• Copy with incremented version number (see page 74)
• Check in
• Decommission
• Generate war file for deployment
Decommission
To decommission a Production Environment dialog flow:
Open the dialog flow.
1. Click on the Decommission button. SAB will ask you to confirm that you want to decommission the
dialog flow.
2. Click Yes.
Page 77

Speech Applications Builder Configurator User Guide • May 15, 2004 • page 77 of 116
Saving a dialog flow
By default, dialog flows are saved in the SAB database. However, they can also be exported to an
external file (see page 77).
Saving a dialog flow to the SAB database
To save an open dialog flow:
• Do one of the following:
o Select Dialog Model > Save
o Click on the Saves Current Dialog Model Version
Exporting one or more dialog flows to file
To upgrade the SAB Configurator it is necessary first to uninstall the existing version. When SAB is uninstalled
all dialog flows and related resources stored within the SAB database are also deleted. It is therefore essential
to export dialog flows to file before uninstalling SAB. The dialog flows can be re-imported after the Configurator
has been upgraded.
Multiple dialog flows
To export multiple dialog flows:
1. Expand the Dialogs tree.
2. Do one of the following:
• Click on the parent dialog, then select Dialog Model > Exports Multiple Selected Dialog
Models to a File from the Menu bar
• Click on the parent dialog, then click the Exports Multiple Selected Dialog Models to a File
button
• Right click on the parent dialog to display the pop-up Dialogs context menu and select
Exports Multiple Selected Dialog Models to a File.
Page 78
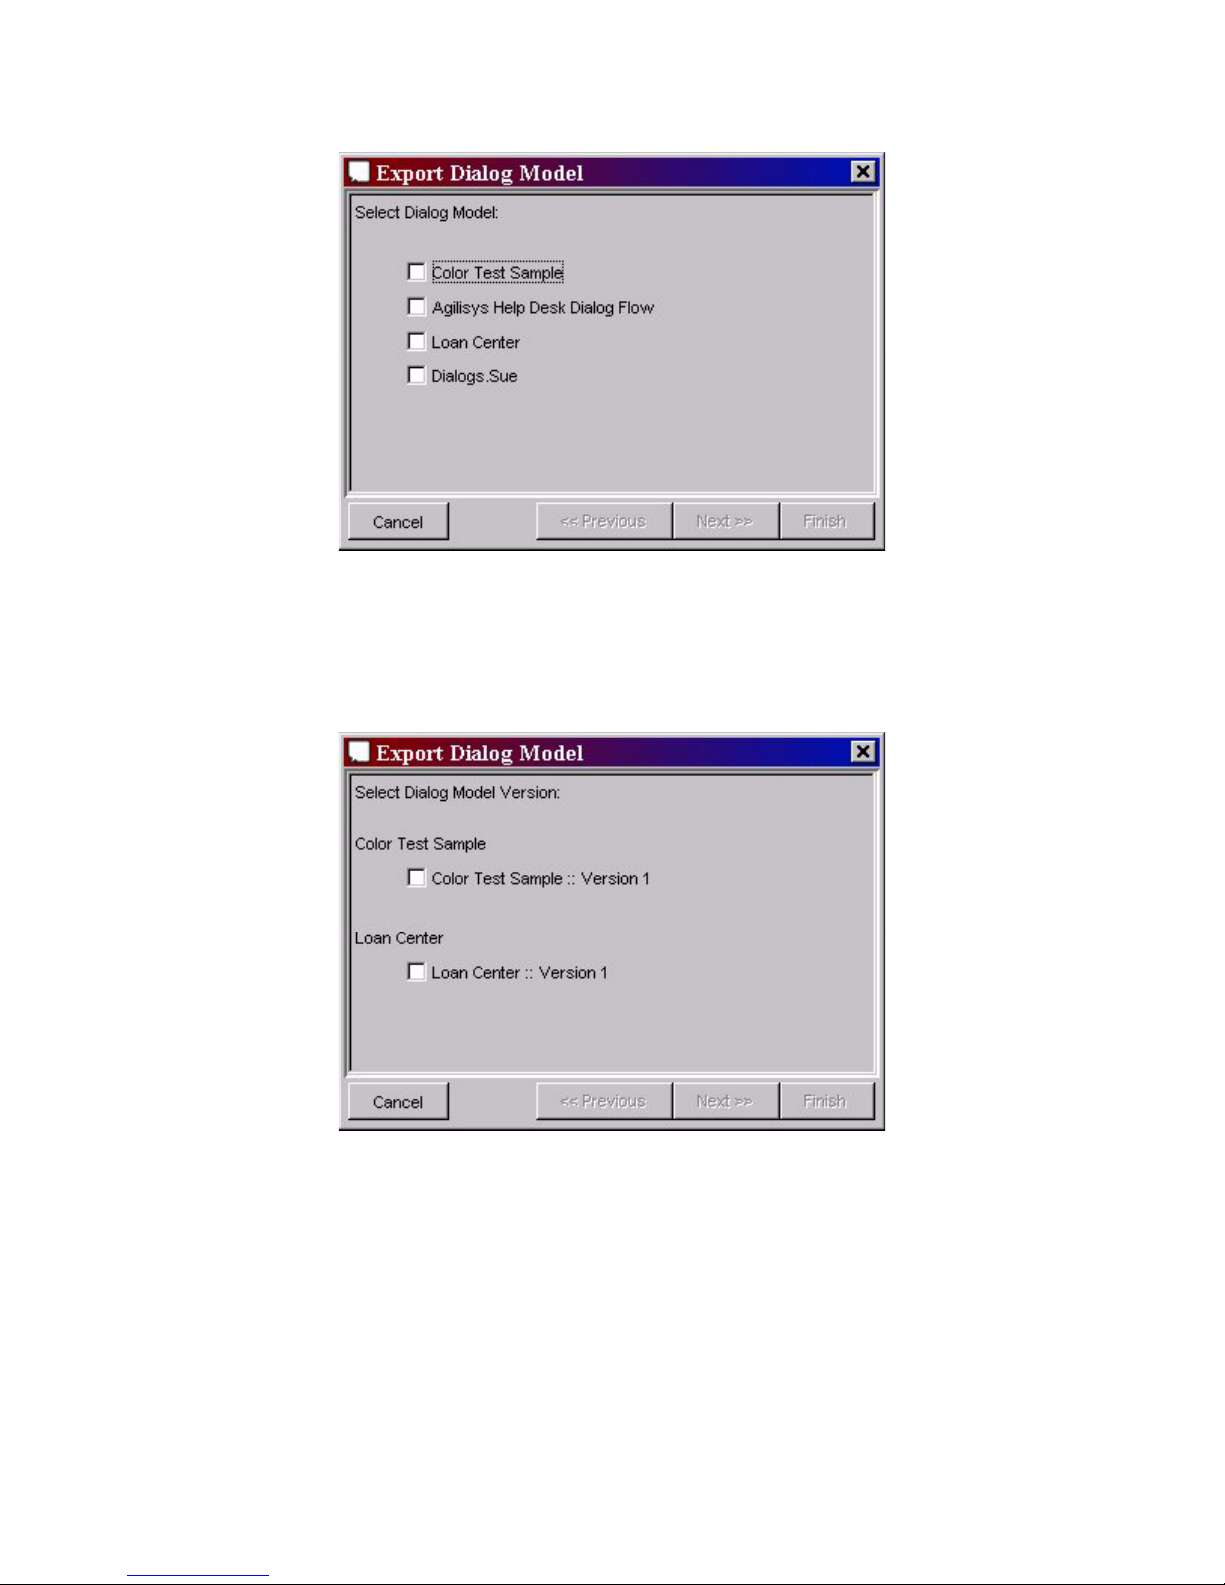
Speech Applications Builder Configurator User Guide • May 15, 2004 • page 78 of 116
SAB displays the Export Dialog Model dialog box, which lists all the dialogs available.
Figure 73. Export Dialog Model dialog box 1
3. Check the Dialog flows you want to export.
4. Click Next.
SAB lists the available models of the dialog flows you have selected.
Figure 74. Export Dialog Model dialog box 2
5. Check the versions you want to export
6. Click Finish. SAB displays the Save dialog box.
7. Browse to the appropriate location and click Save.
Page 79
Speech Applications Builder Configurator User Guide • May 15, 2004 • page 79 of 116
Single dialog flow
To export a single dialog flow:
1. Expand the Dialogs tree.
2. Do one of the following:
• Click on the dialog flow, then select Dialog Model > Export the Dialog Model to a File from
the Menu bar
• Click on the dialog flow, then click the Export the Dialog Model to a File button
• Right click on the dialog flow to display the pop-up Dialogs context menu and select Export
the Dialog Model to a File
SAB displays the Export Dialog Model dialog box, which lists all available versions of the selected
dialog flow.
Figure 75. Export Dialog Model dialog box 1
3. Check the versions you want to export.
4. Click Finish. SAB displays the Save dialog box.
5. Browse to the appropriate location and click Save.
Importing a dialog flow from file
To import a dialog flow from file:
1. Click on the Dialogs tree in the Browser window. Do one of the following:
• Select Dialog Model > Imports a Dialog Model from File from the Menu bar
• Click on the Imports a Dialog Model from File button
• Right click on the Dialogs tree to display the pop-up Dialogs context menu and select Imports
a Dialog Model from File
2. Browse to the location of the .vra file, select it and click Open.
If the .vra file contains out of date components, SAB displays a warning and may ask you to
resolve any step conflicts that arise (see page on page 80).
Page 80
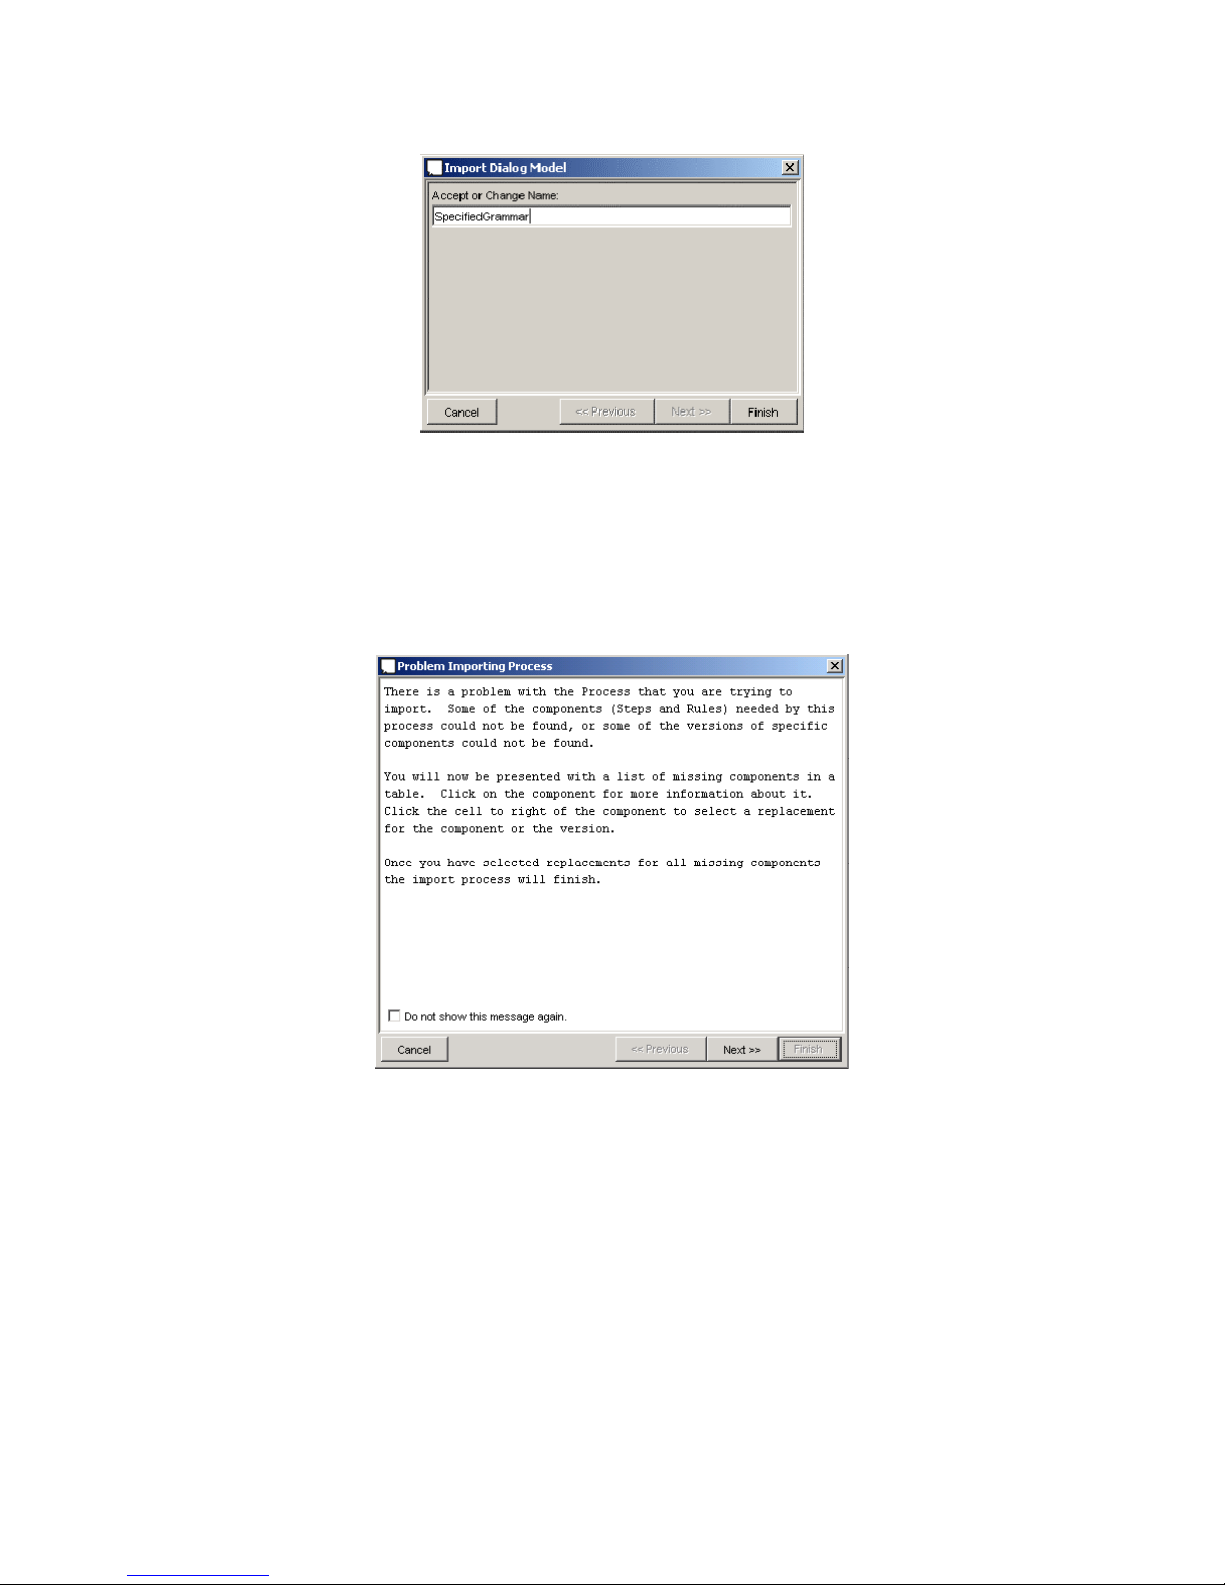
Speech Applications Builder Configurator User Guide • May 15, 2004 • page 80 of 116
3. (Optionally) enter an new dialog flow name.
Figure 76. Change name of imported dialog flow
4. Click Finish.
Problems with importing
If the .vra file contains out of date components, SAB displays the following warning.
Figure 77. Out of date components warning
Page 81
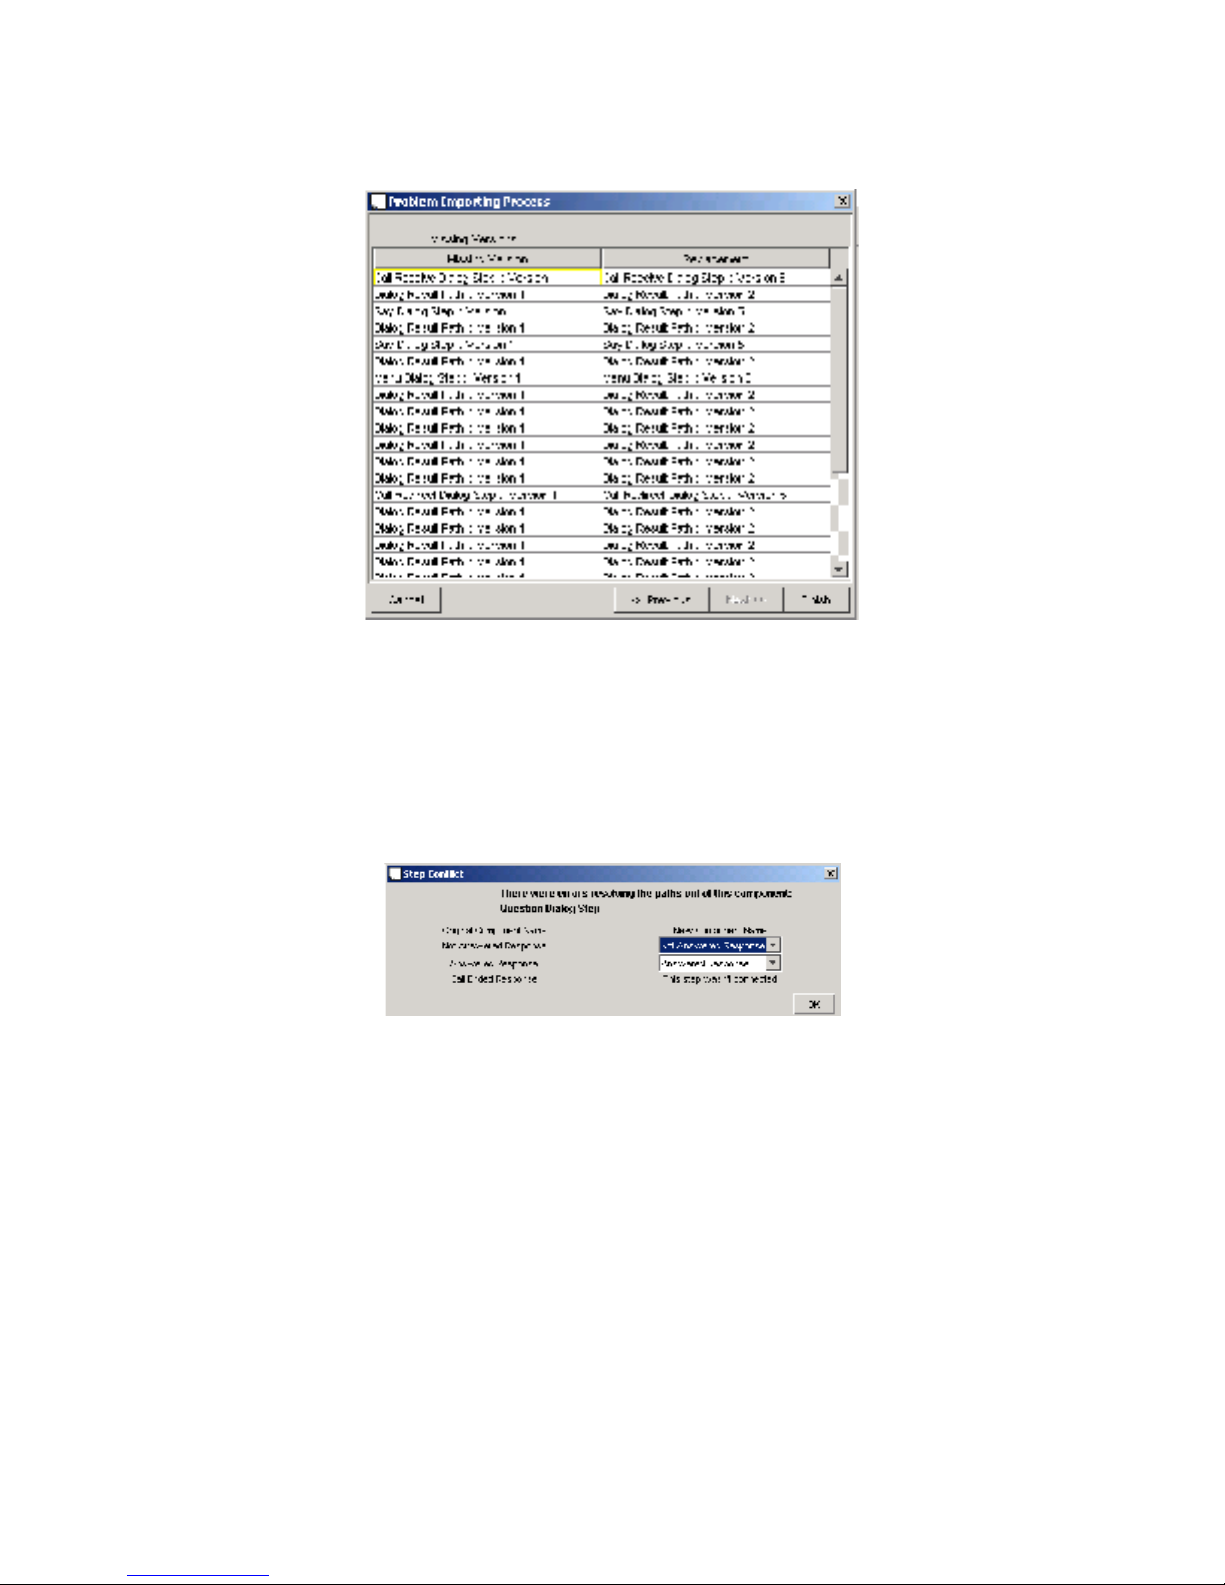
Speech Applications Builder Configurator User Guide • May 15, 2004 • page 81 of 116
5. Click Next.
SAB displays a table of missing component versions and their possible replacements.
Figure 78. Component replacements
6. Click Finish.
Step conflict
If a component cannot automatically be upgraded to a new equivalent, SAB displays Step Conflict
information.
Figure 79. Step conflict dialog box
To resolve the step conflict:
1. Either select the appropriate new component from the drop down list or select Leave
unconnected to delete the path.
2. Click OK.
Page 82
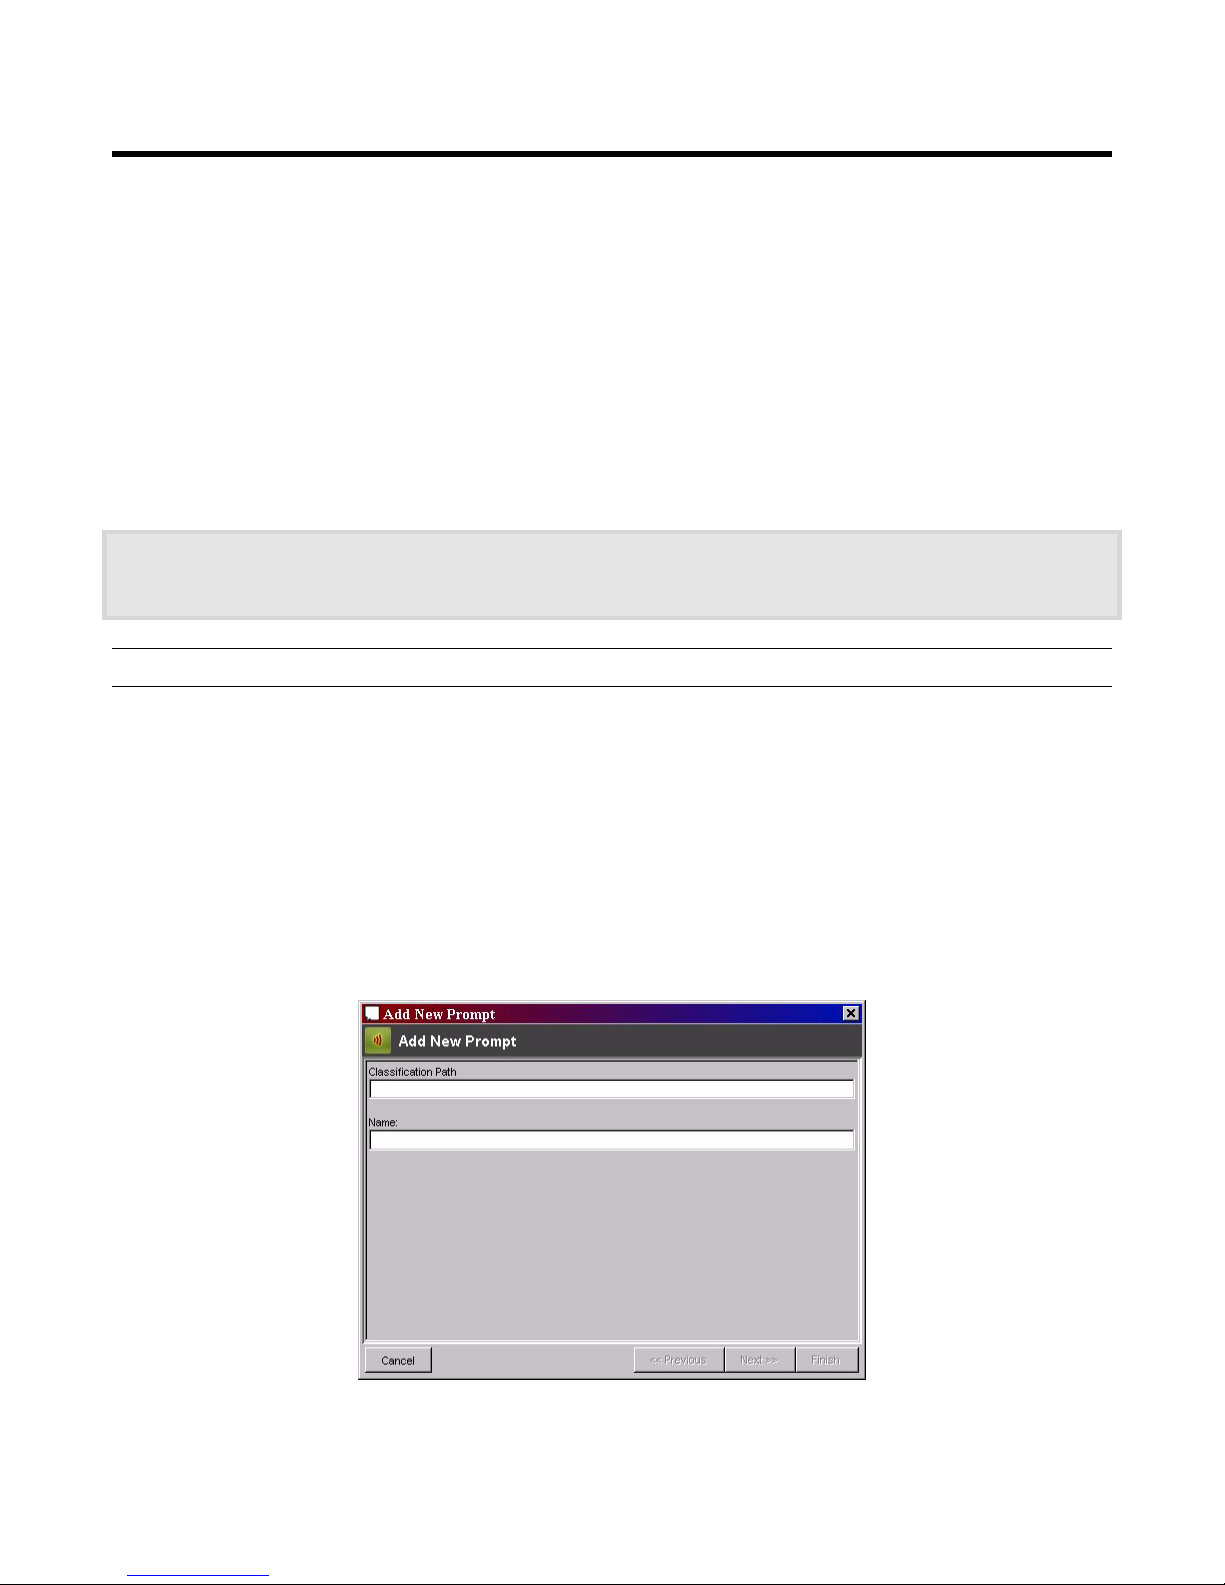
Speech Applications Builder Configurator User Guide • May 15, 2004 • page 82 of 116
The Prompts tree
Prompts are questions or messages that are played out to the caller as part of an interaction (dialog).
Prompts may be created as audio (.wav) files or as text, which is converted to electronic speech using
a Text-To-Speech (TTS) Synthesizer.
Prompts are managed using the Prompts resource.
The Prompts resource provides
• a list or tree of prompt files, displayed in the Browser window
• a Prompt Search engine
• a simple prompt recording and editing facility, displayed in the Dialog Modeler window.
The options presented in the Menu bar and as buttons in the Tool bar are configured dynamically according to
the feature you are using. For a complete list of the Prompts menu options, see page on page 20; for a
complete list of Prompts buttons see page on page 23.
Adding a new recorded prompt
To add a new recorded prompt:
1. Click on Prompts in the Browser window. Do one of the following:
• Select Prompt > Add Prompt from the Menu bar
• Click on the Add button and select Add Prompt
• Click on the Add Prompt button
• Right click on the Prompts tree to display the pop-up Prompts context menu and select Add
Prompt
SAB displays the first Add New Prompt dialog box.
Figure 80. Add New Prompt 1
Page 83
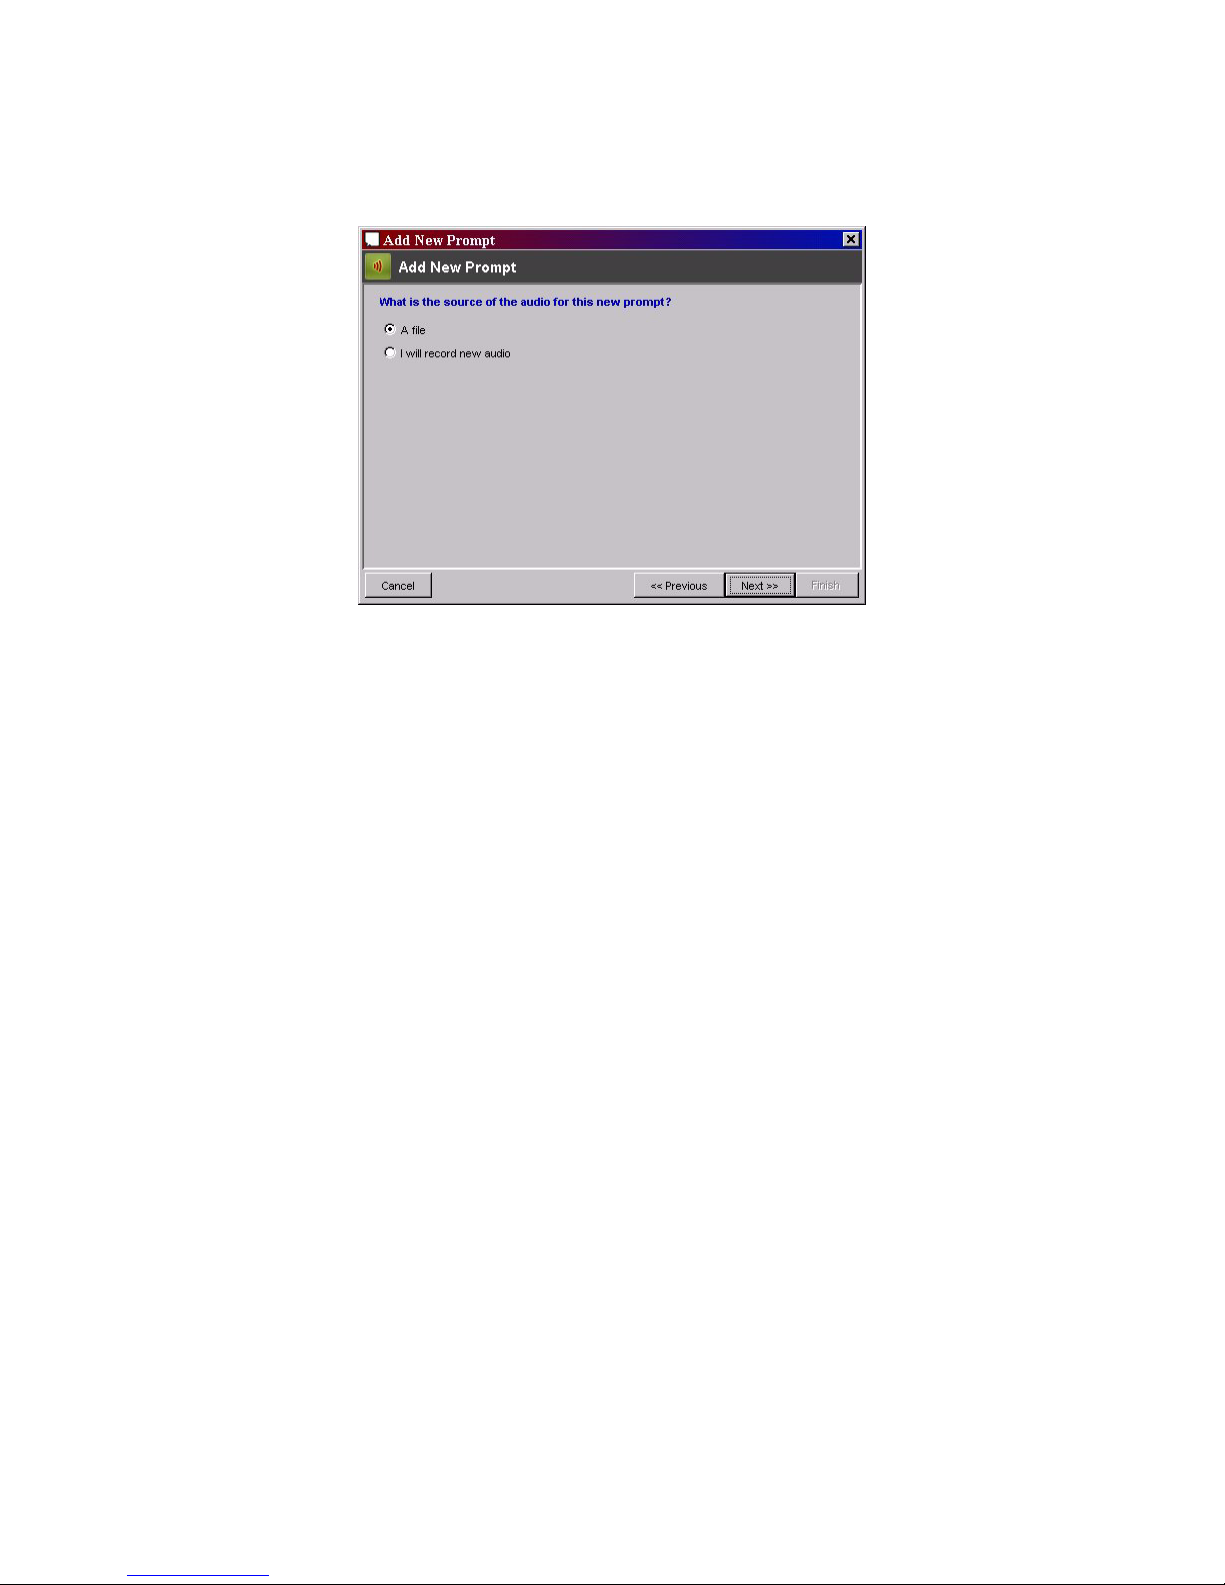
Speech Applications Builder Configurator User Guide • May 15, 2004 • page 83 of 116
2. (Optionally) enter a classification path name (see page 34 for an explanation of classification).
3. Enter a prompt name.
4. Click Next.
Figure 81. Add New Prompt 2
5. Specify the source of the new prompt - an existing file or a new recording.
6. Click Next.
Page 84
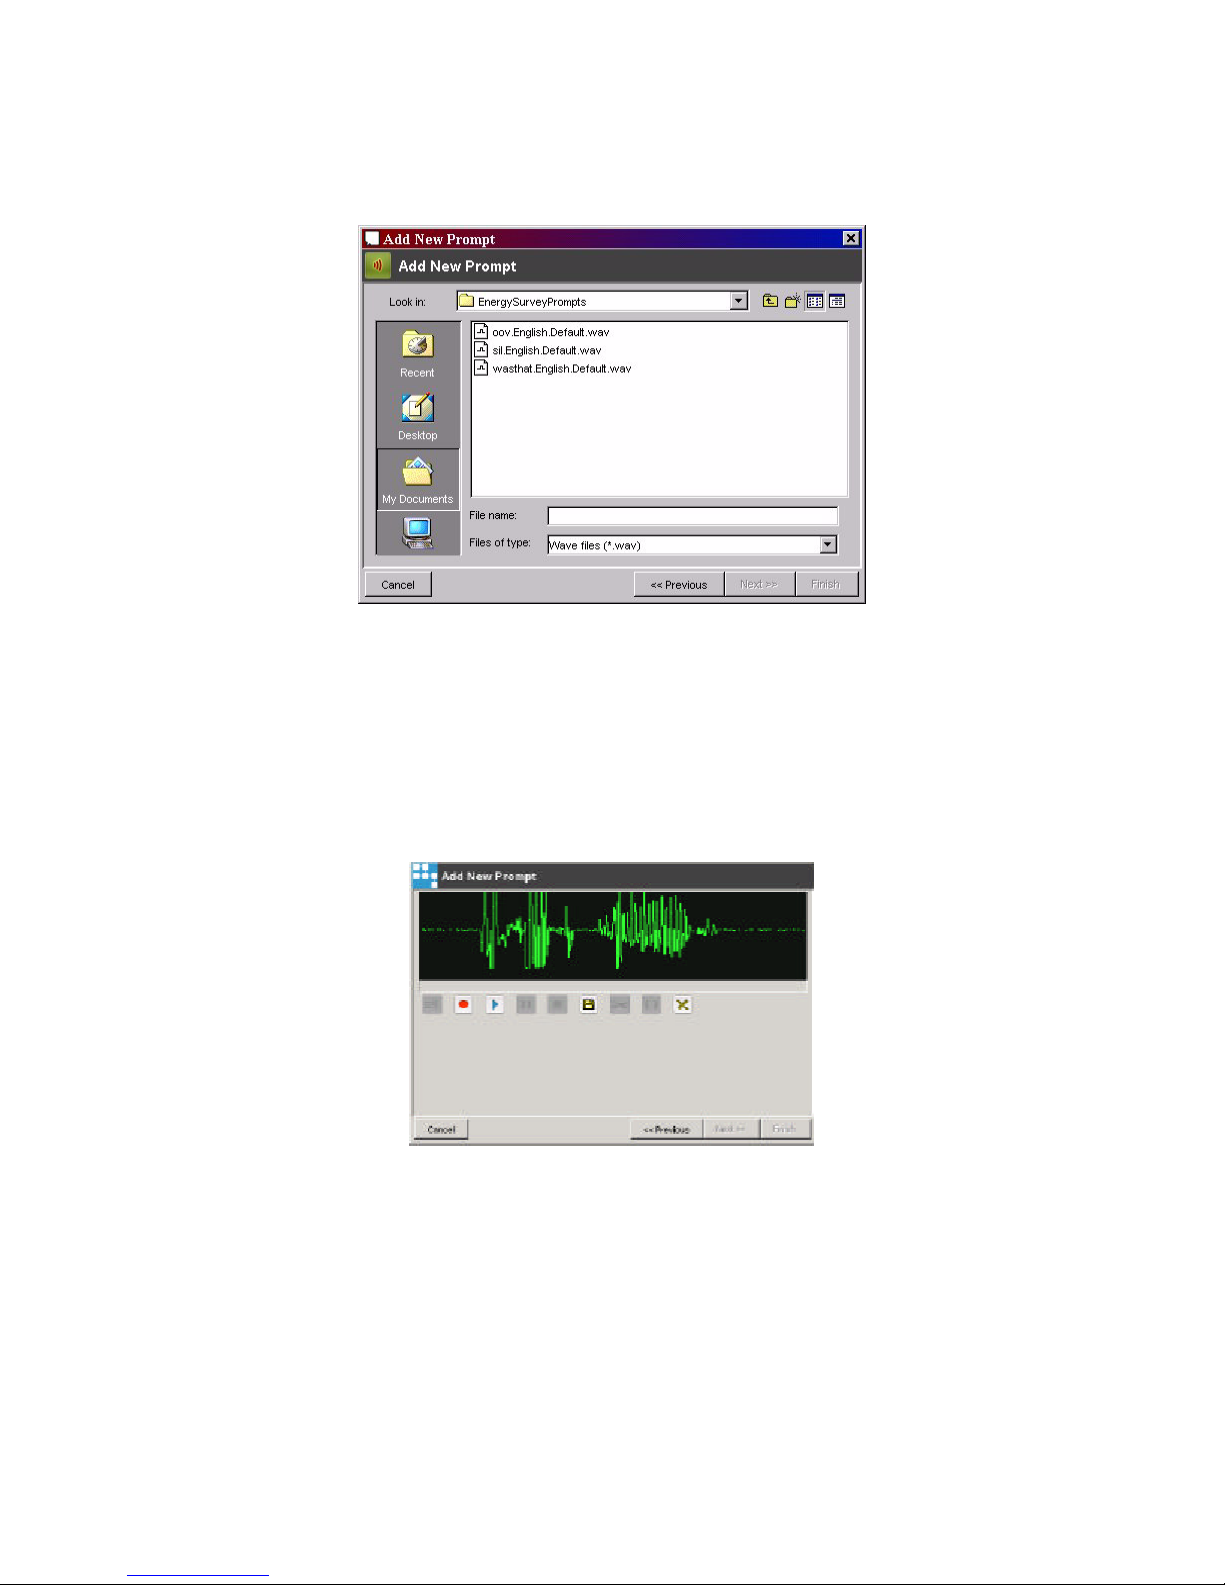
Speech Applications Builder Configurator User Guide • May 15, 2004 • page 84 of 116
Specifying an existing file
If you have opted to use an existing file, SAB opens a file selection window.
Figure 82. Add New Prompt file selector
1. Select the .wav file required.
2. Click Next. Save the prompt (see page 86).
Recording a new prompt
If you have opted to record a new prompt, SAB displays the recording tool shown below.
Figure 83. Add New Prompt 3: recording tool
Page 85
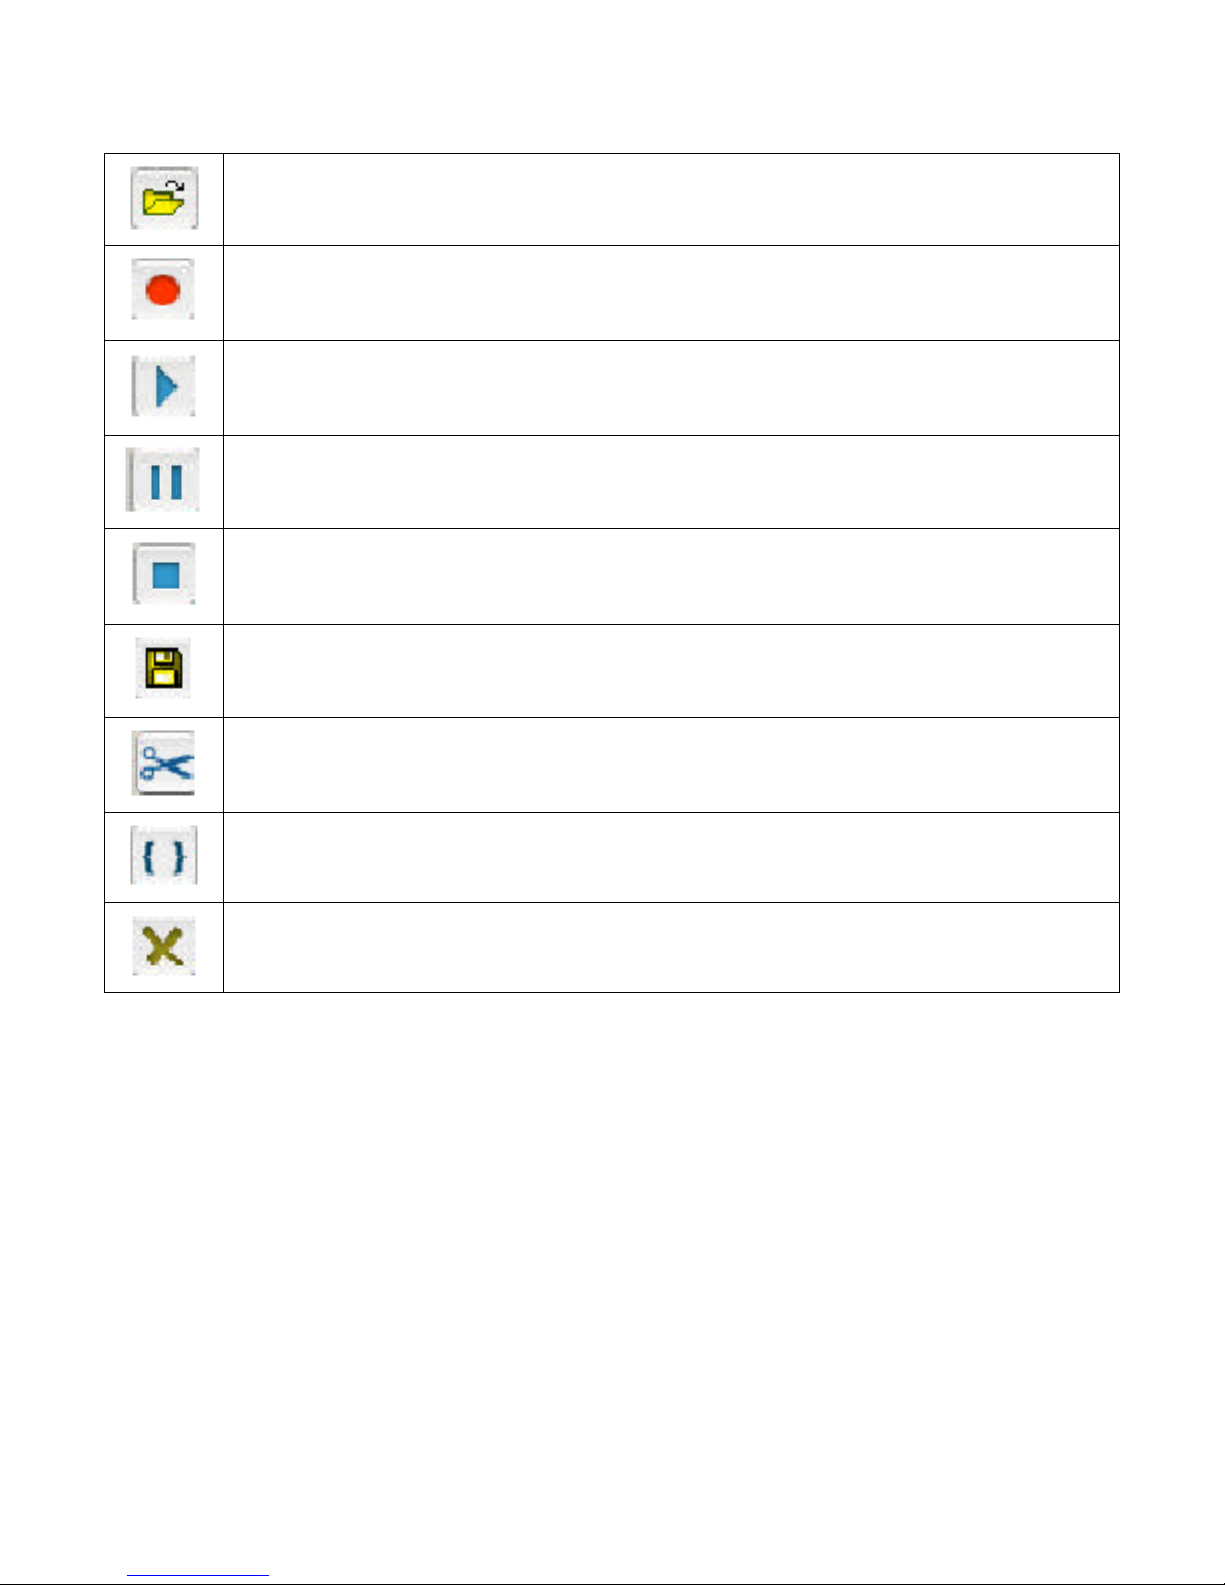
Speech Applications Builder Configurator User Guide • May 15, 2004 • page 85 of 116
The following options are provided by the Prompt editor.
Load Prompt from File
Record Prompt
Play Prompt
Pause Prompt
Stop Prompt
Save Prompt to File
Remove selected audio
Remove all but selected audio
Clear
To record a prompt:
1. Connect a headset and microphone to the sound card on your computer.
2. Click the Record button and say the prompt.
3. Click the Stop button to stop recording.
To hear the recording, click the Play button.
To re-record the prompt, follow the recording procedure described above.
Page 86
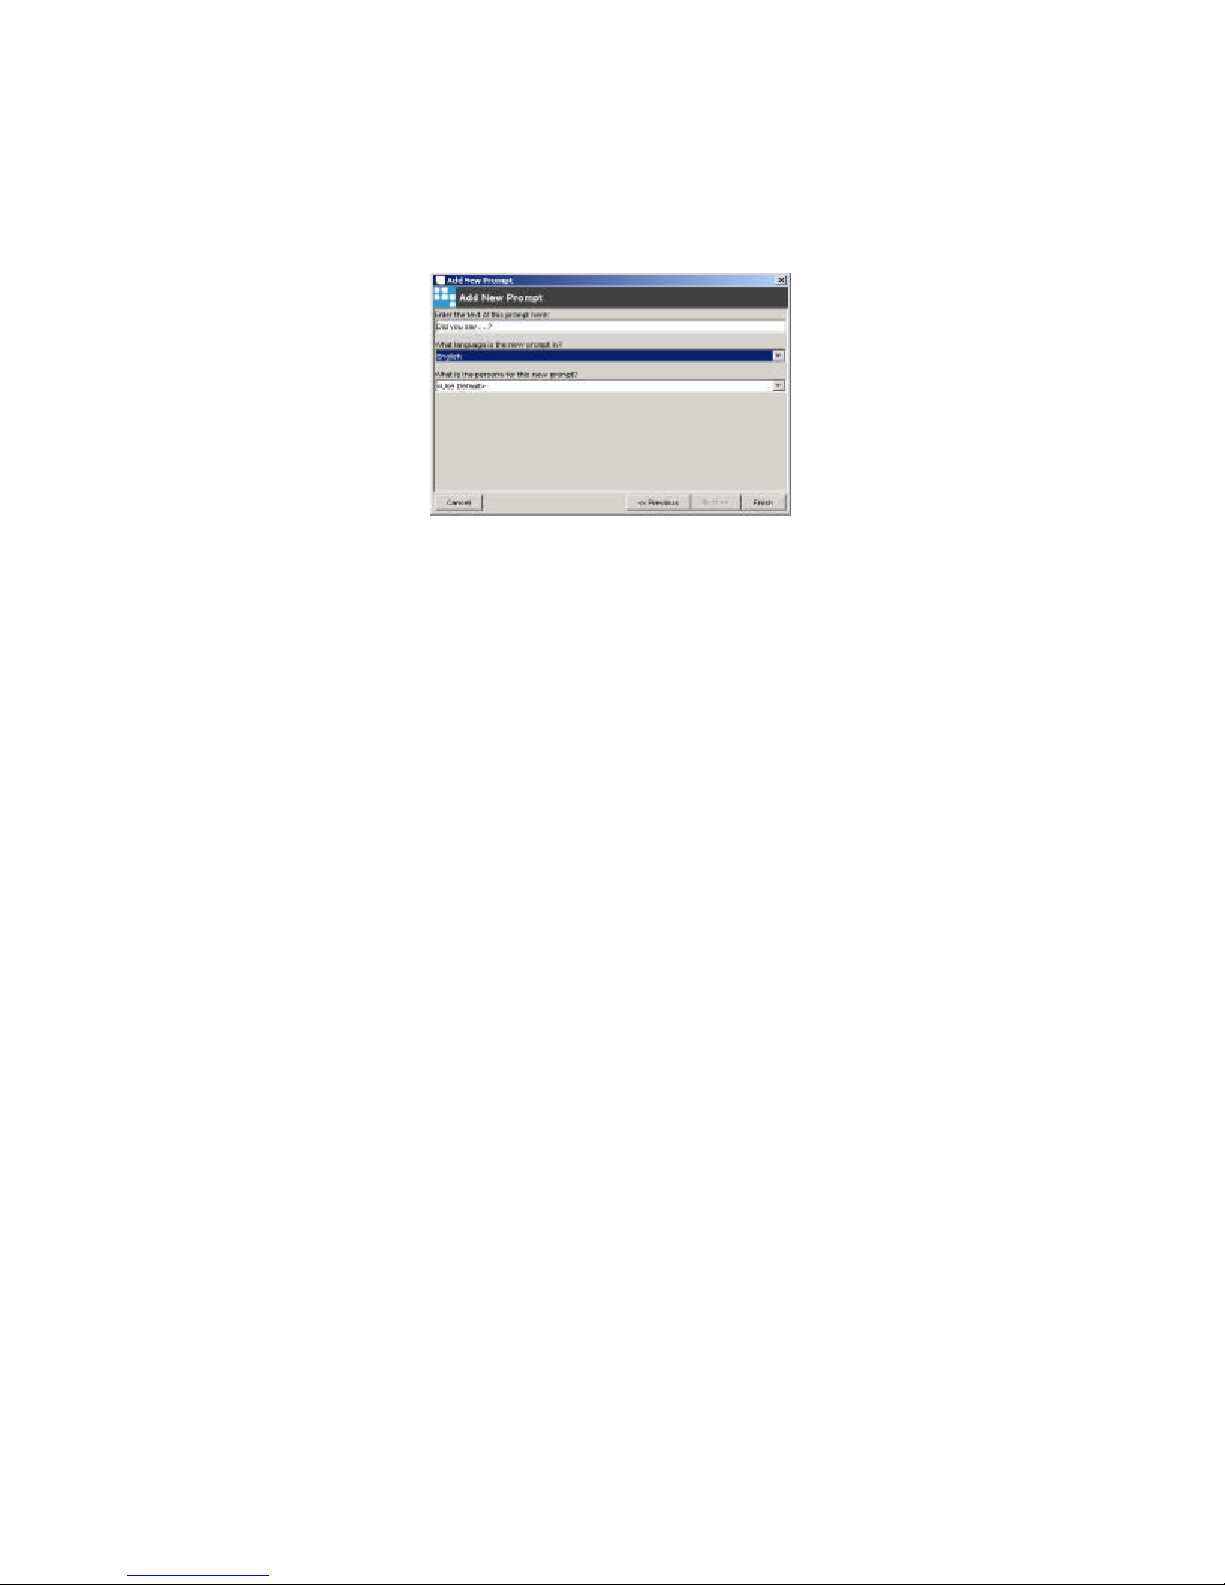
Speech Applications Builder Configurator User Guide • May 15, 2004 • page 86 of 116
Saving the prompt
To save the prompt, when you have either selected the correct .wav file or are satisfied with the
recording:
1. Click Next. SAB displays the final dialog box:
Figure 84. Add New Prompt 4
2. Enter the exact text of the prompt you have recorded into the top field. This text will be used under
the following circumstances:
• it is played out using TTS if the .wav file is not available (to prevent the dialog coming to a
halt)
• it is used to select the correct .wav file when you are concatenating prompts to generate a
longer prompt
so it is important to enter the wording correctly.
3. Select the prompt language from the drop down list. This information is used to select
• the correct version of the prompt file (you can design an application to offer multiple languages
by creating identically named sets of prompts in different languages)
• the correct TTS engine
4. Select the persona from the drop down list (see page 90 for an explanation of persona). This
information is used to select
• the correct version of the prompt file (you can design an application to offer multiple personae
by creating identically named sets of prompts in different persona types)
• the correct TTS engine
5. Click Finish.
The new prompt file appears, at the appropriate position in the Prompts tree, in the Browser window.
Page 87
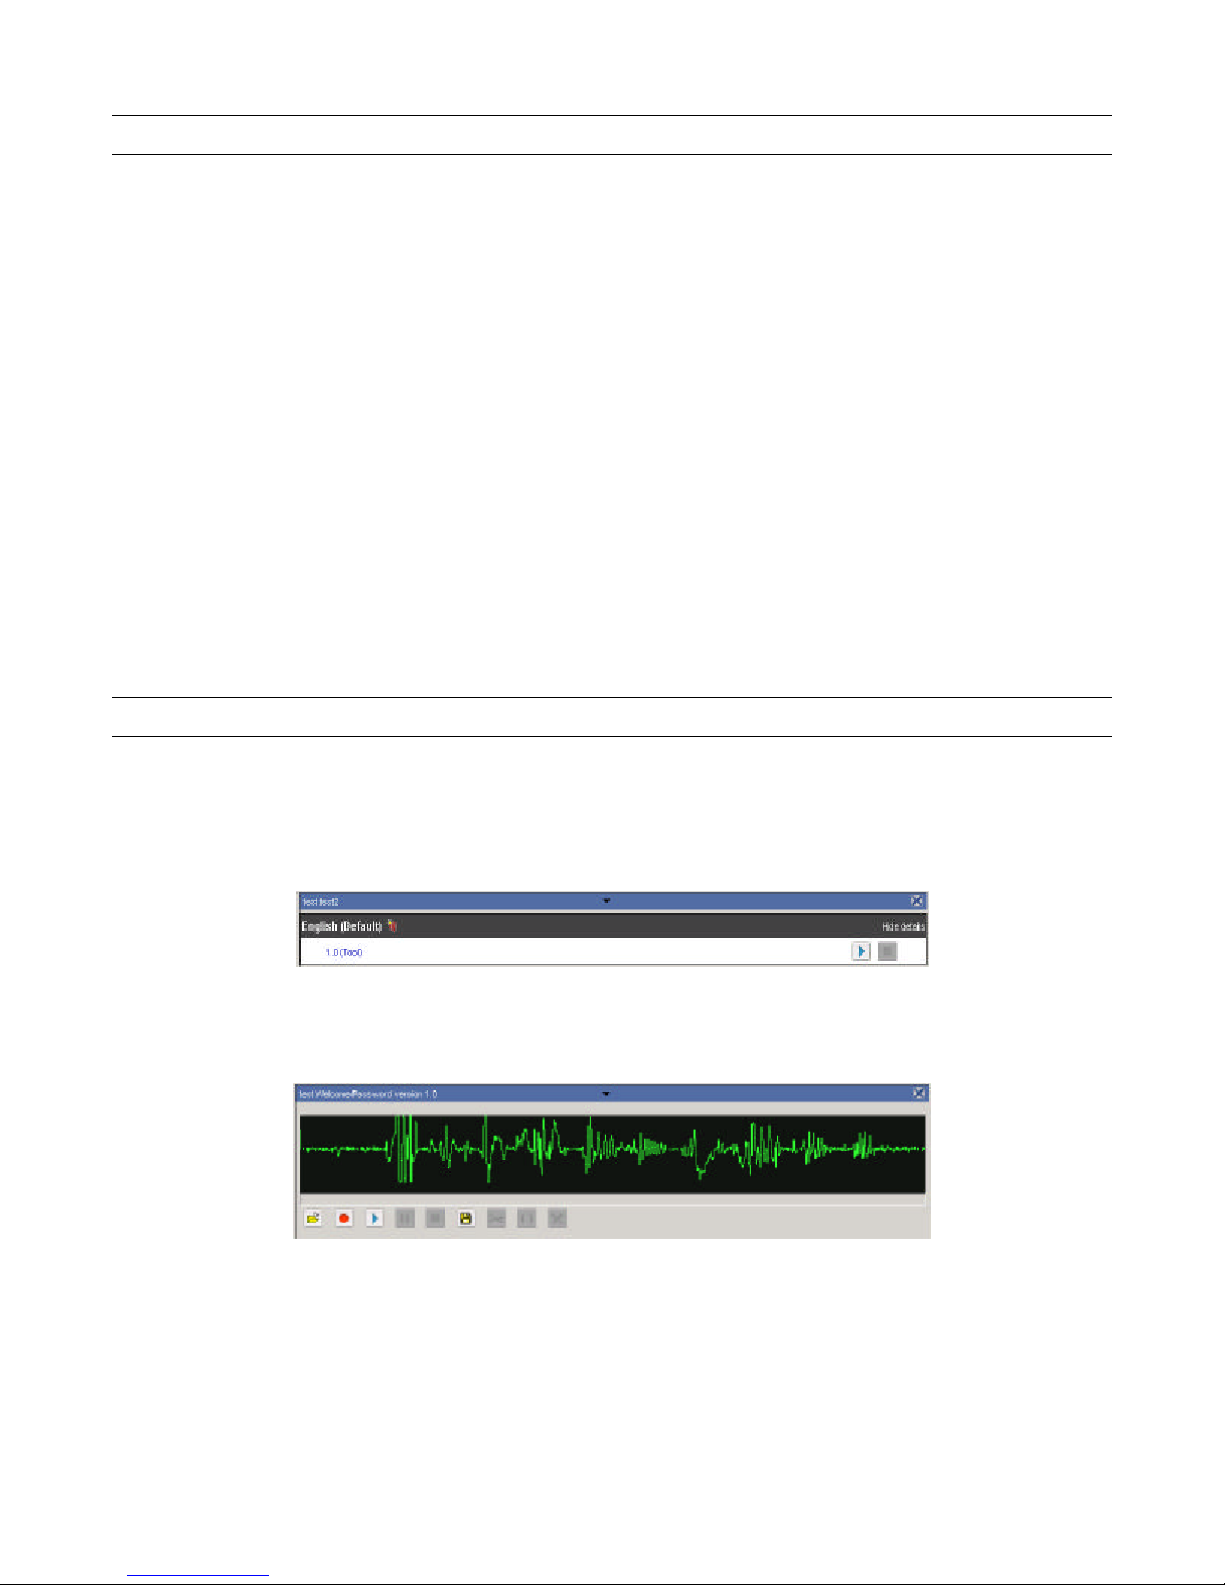
Speech Applications Builder Configurator User Guide • May 15, 2004 • page 87 of 116
Searching for a prompt
SAB provides a search engine that can be used to search for the prompt you require. To search:
1. Click on the Prompts tree. Voice Runner displays its Prompt Search engine in the Dialog Modeler
window.
2. Type the name, or partial name, of the prompt you want to find into the Name field. If you have
used a partial name, ensure that the Partial Match box is also checked.
3. Select the environment you want to search:
• Any environment - searches all environments; this is the default
• Tool - searches the Tool environment. This contains dialog flows that are under construction
(and related prompts)
• Production - searches the Production environment. This contains dialog flows that are
deployed (and related prompts)
• Decommission - searches the Decommission environment. This consists of dialog flows that
have been taken out of deployment (and related prompts).
4. Click Search. SAB displays a list of all matching prompts in the Dialogs modeler window.
5. Click Show Details to display all available versions of the prompt.
Viewing a recorded prompt
Prompt files in the Tool environment can be edited. To open a .wav file for editing:
Either select the prompt in the Prompts tree or use the Prompt Search facility to locate the file (see
above). SAB lists the available versions of the prompt in the Dialog Modeler window; you can click
Play to hear the prompt, and on Stop to stop playout, if necessary
Figure 85. Prompt list
Click on the prompt version number to open the prompt editor.
Figure 86. Prompt editing
Use the drop down arrow (in the center of the title bar) to list the dialog version associated with this
prompt.
Page 88
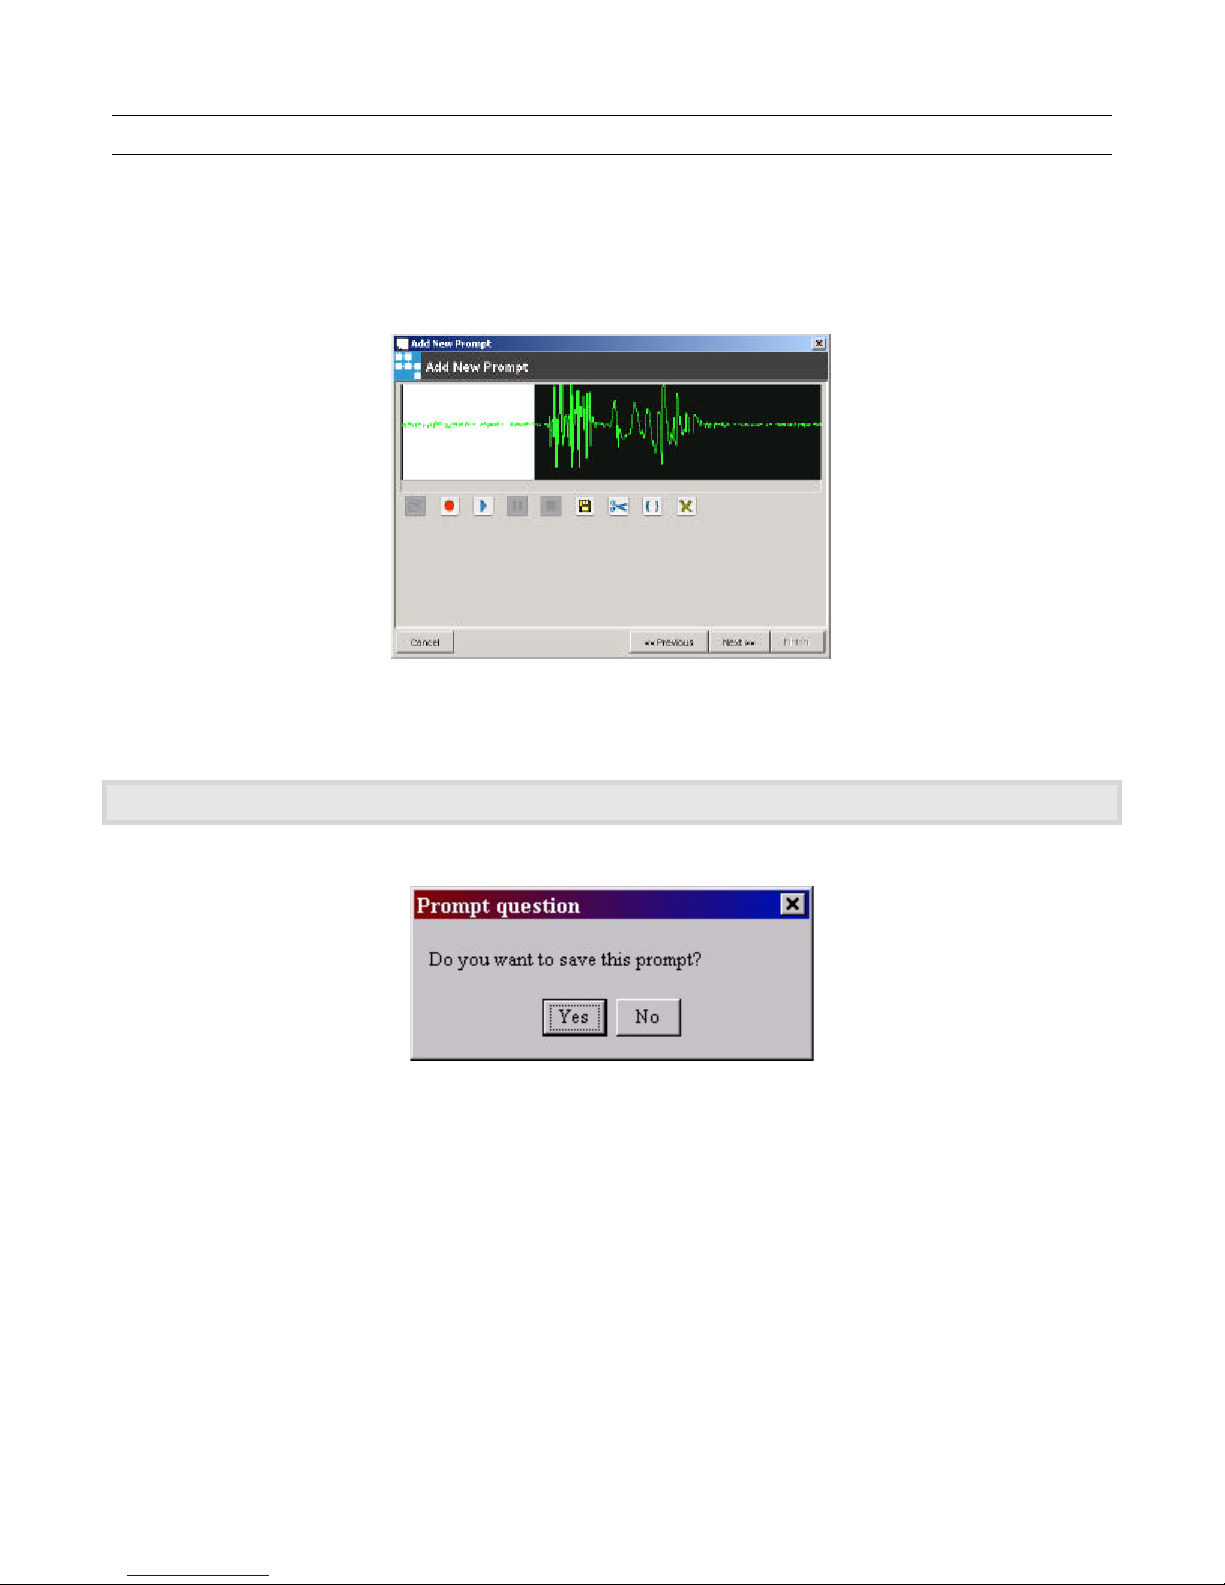
Speech Applications Builder Configurator User Guide • May 15, 2004 • page 88 of 116
Editing a prompt
A recorded prompt can be edited; for example a long silence at the start of the prompt can be
removed. To edit a prompt:
1. Using the mouse, highlight the section of the prompt to be removed. (Place the cursor at the start
of the section, press and hold the left mouse button, drag the cursor to the end of the section, then
release the mouse button).
Figure 87. Editing a prompt
2. Click the Scissors button to delete the selected area.
Alternatively, you can delete everything but the selected area by clicking on the Curly brackets button.
3. When you select another resource, SAB asks whether you want to save your changes.
Figure 88. Save prompt dialog box
4. Click Yes.
Page 89

Speech Applications Builder Configurator User Guide • May 15, 2004 • page 89 of 116
Exporting and importing prompt files
All SAB prompts are stored by default in the SAB database.
Saving a prompt to file
To save a prompt to file:
1. Open the prompt .wav file
2. Click on the Disk icon. SAB displays a Save dialog box.
3. Browse to the file location and enter the appropriate filename.
4. Click Save.
Saving a prompt directory as a .zip file
To save a prompt directory as a .zip file:
1. Do one of the following:
• click on the directory name in the Prompts tree, then select Prompt > Create Wave Extract
• right click on the directory name in the Prompts tree to display the pop-up menu, then select
Create Wave Extract.
2. Browse to the file location and enter the appropriate filename. It is not necessary to include the
.zip extension.
3. Click Save.
Importing prompts from a .zip file
To import prompts from a .zip file:
1. Do one of the following:
• click on the name of the directory (in which you want to store the imported prompts) in the
Prompts tree, then select Prompt > Import Wave Zip
• right click on the name of the directory in the Prompts tree to display the pop-up menu, then
select Import Wave Zip.
2. Browse to the location of the .zip file and select it.
3. Click Open.
The new prompts directory is displayed in the Prompts tree.
Refresh
If the imported prompts do not automatically appear in the Prompts tree:
• Right click on the parent directory to display the pop-up menu and select Refresh Tree From
Here.
This option, placed strategically at various nodes of the directory tree, refreshes all the child nodes of the
selected node.
Page 90

Speech Applications Builder Configurator User Guide • May 15, 2004 • page 90 of 116
Persona
What is persona?
A persona is the “personality” one person assigns to another person (real or virtual) based on how he
or she looks or sounds, or seems to behave. In the case of an automated telephone service, persona
is created by details such as
• the voice type – sex, age, accent
• the language used – formal, informal
• the speed at which it “talks”
• more subtle qualities – such as perceived friendliness, authority or patience.
When a person interacts with another person, both parties assume well-defined roles that allow them
to interpret the other’s intentions, anticipate what he or she will do next, and react accordingly. One
way to create an automated telephone service that is easy to use is to give it a consistent persona
that is appropriate to the task it is performing.
There are several advantages to doing this:
• if you do not, callers will by default. Research has shown that, when using an automated
service, people automatically respond to the system as a person, interpreting the voice, its
inflections, and the vocabulary it uses in social terms. It is, therefore, very important to present
callers with a persona that is carefully constructed to represent the brand, not a haphazard set
of inconsistent characteristics
• the persona can reinforce and develop the brand in a unique way. Using an automated service
is always a direct experience for the caller and the persona is the only aspect of a brand that
customers interact with, and may even develop a relationship with. This makes it the ideal
medium for transmitting positive marketing messages
• research has shown that callers will respond more positively if they sense that the “person”
that they are talking to has the right personality for the job. If the persona is developed in the
same way as the rest of the brand, using a profile if the typical customer, callers will have a
higher opinion of the automated system and will be more inclined to co-operate with it. They
will interpret any problems they have in using the system in the light of its personality and be
more lenient. They will generally have a much more positive experience of the call.
Devising a persona
Devising a persona for an automated system typically involves finding a human equivalent of the
company brand. The designers work to create a character with a name, a clearly defined function, and
a mini-biography. This information is used
• by the voice talent agency to select a voice artist who matches the specifications
• by the voice artist to help him or her maintain a consistent character
• the dialog designer to ensure that the application uses appropriate language and performs
tasks in an appropriate way.
Page 91

Speech Applications Builder Configurator User Guide • May 15, 2004 • page 91 of 116
Using persona with SAB
To implement a persona:
1. Record the prompts using the appropriate voice artist and prompt wording.
2. Create the prompts by specifying an existing file (see page 84).
3. Assign the appropriate persona type (see page 86). SAB then stores the prompt in the SAB
database with the appropriate persona label.
Page 92
Speech Applications Builder Configurator User Guide • May 15, 2004 • page 92 of 116
The Component Workbench
The Component Workbench is used to import new SAB components. The components are supplied
as a .jar file.
Importing components
To import new components:
1. Expand the Component Workbench (by clicking on the + sign) in the Browser window.
2. Click on Import New Components. SAB displays the Import/Update Jar File dialog window.
Figure 89. Import/Update Jar File dialog window
3. Click on the No File Selected button to navigate to and select the .jar file you want to import. The
name and extension of the .jar file are displayed in the Name and Document Extension fields; a
description of the components is displayed in the Description field.
4. Select any dependent files.
5. Click the Import Document button to read the .jar file and import the components. The dialog box
lists the components and the updates that are being imported, and any error or warning
messages.
Page 93
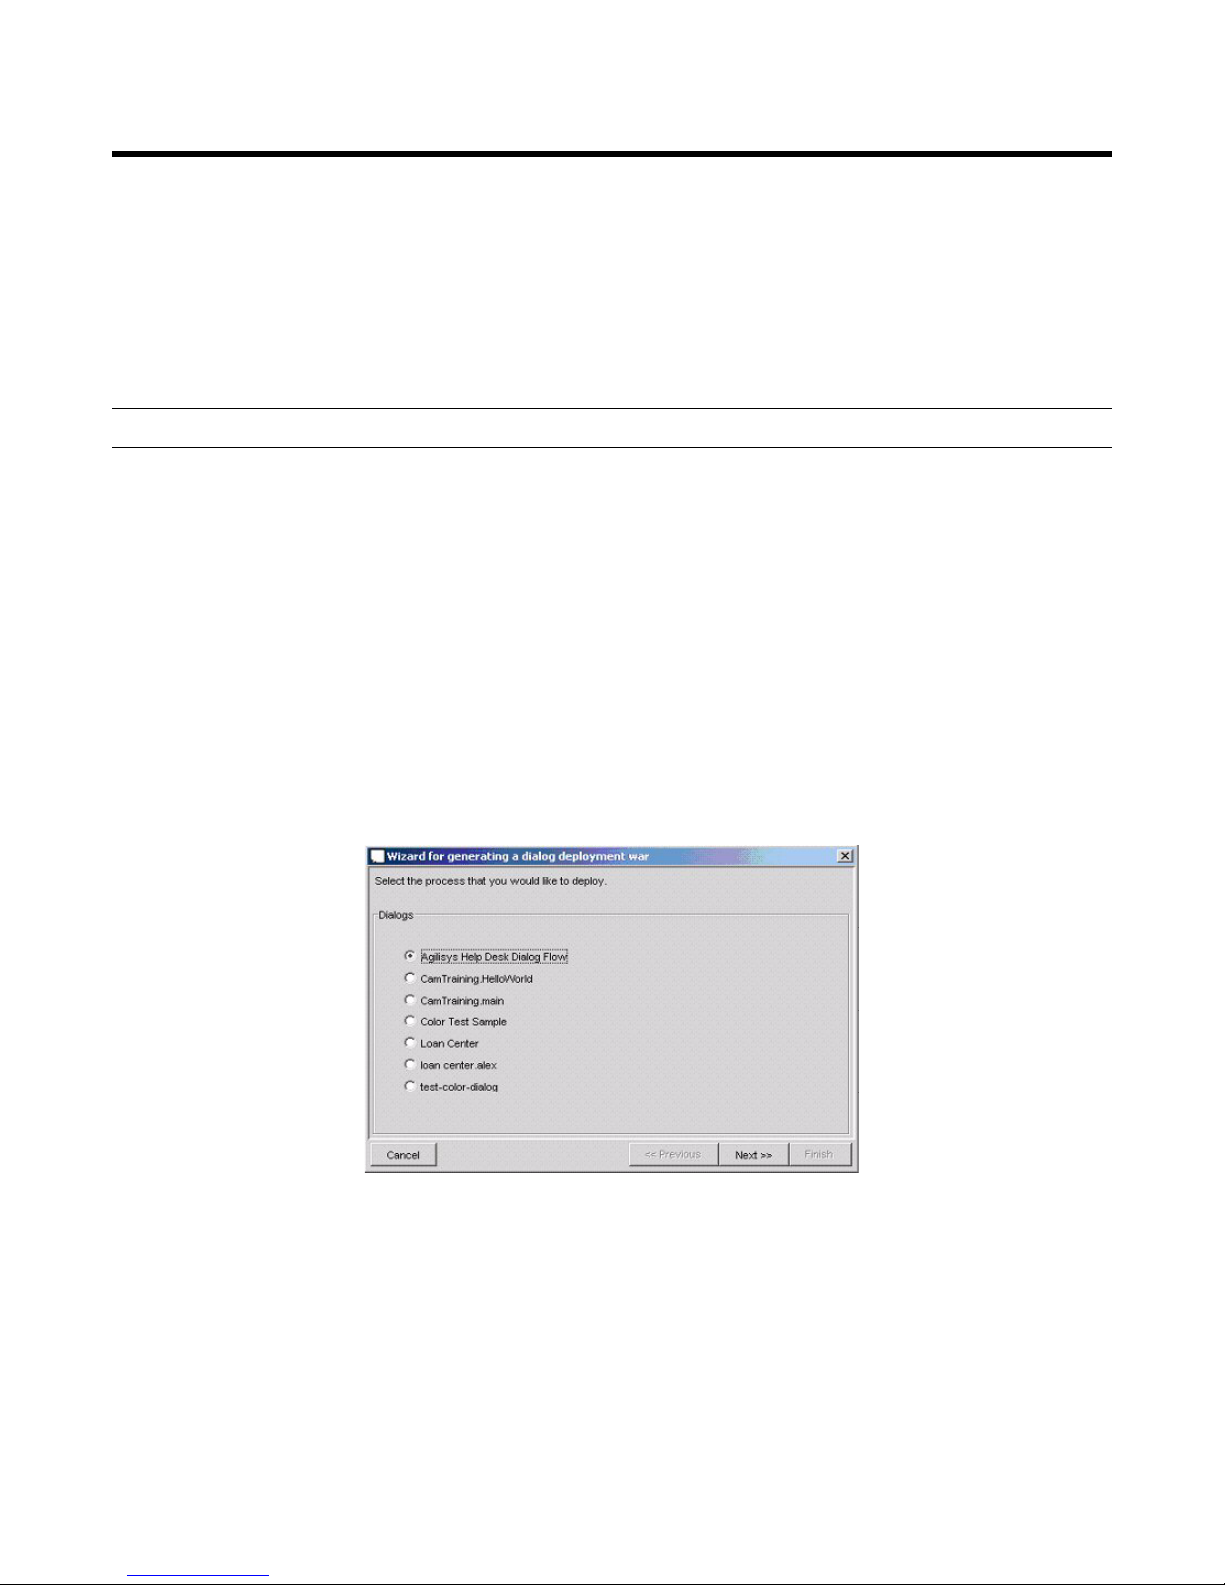
Speech Applications Builder Configurator User Guide • May 15, 2004 • page 93 of 116
The Administration resource
The Administration resource is used to manage:
• Dialog Configuration, including language and persona
• Multiple users
• Permissions.
Dialog Configuration
Generating a .war file
For more information about war files and the deployment of SAB dialogs, see Configuring the Speech
Applications Builder for Deployment.
A .war file is a zipped archive of files that contains an application and all its resources. It contains
everything needed by the runtime part of the SAB platform. Once the .war file has been generated,
deployment is simply a matter of installing it on the servlet engine of choice. To generate a .war file:
1. Expand the Administration tree.
2. Click on Dialog Configuration. SAB displays a Generate War File for Deployment button in the
Dialog Modeler window.
3. Click on the Generate War File for Deployment button. SAB displays the Dialog deployment war
file wizard.
Figure 90. Dialog deployment war wizard 1
4. All SAB applications have a top level flow - the flow that will be run first when a caller interacts with
an application. Select the top level flow.
5. Click Next.
Page 94
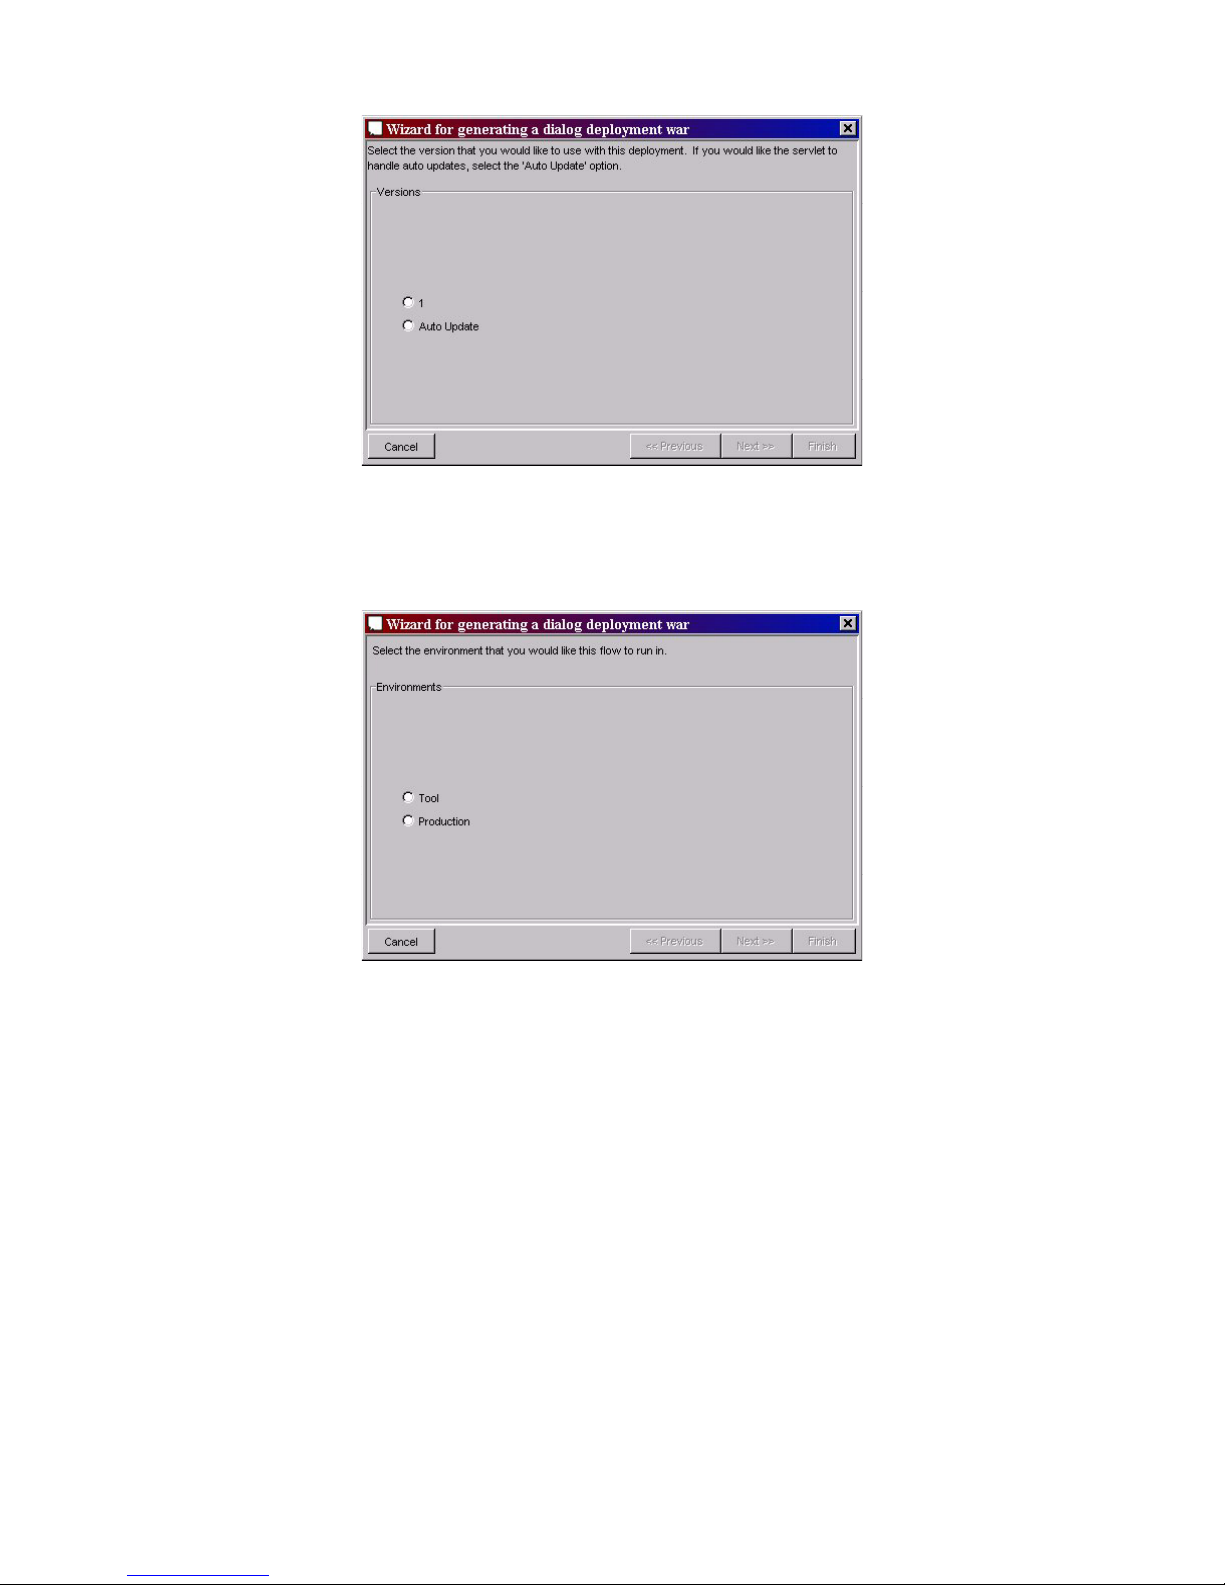
Speech Applications Builder Configurator User Guide • May 15, 2004 • page 94 of 116
Figure 91. Dialog deployment war wizard 2
6. Either check the version number you want to deploy or check AutoUpdate.
7. Click Next.
Figure 92. Dialog deployment war wizard 3
8. Check the environment you want the war file to run in:
• Tool - under construction
• Production - for deployment.
If you have created a custom environment - such as Testing - it will be presented as an option here.
Click Next.
Page 95
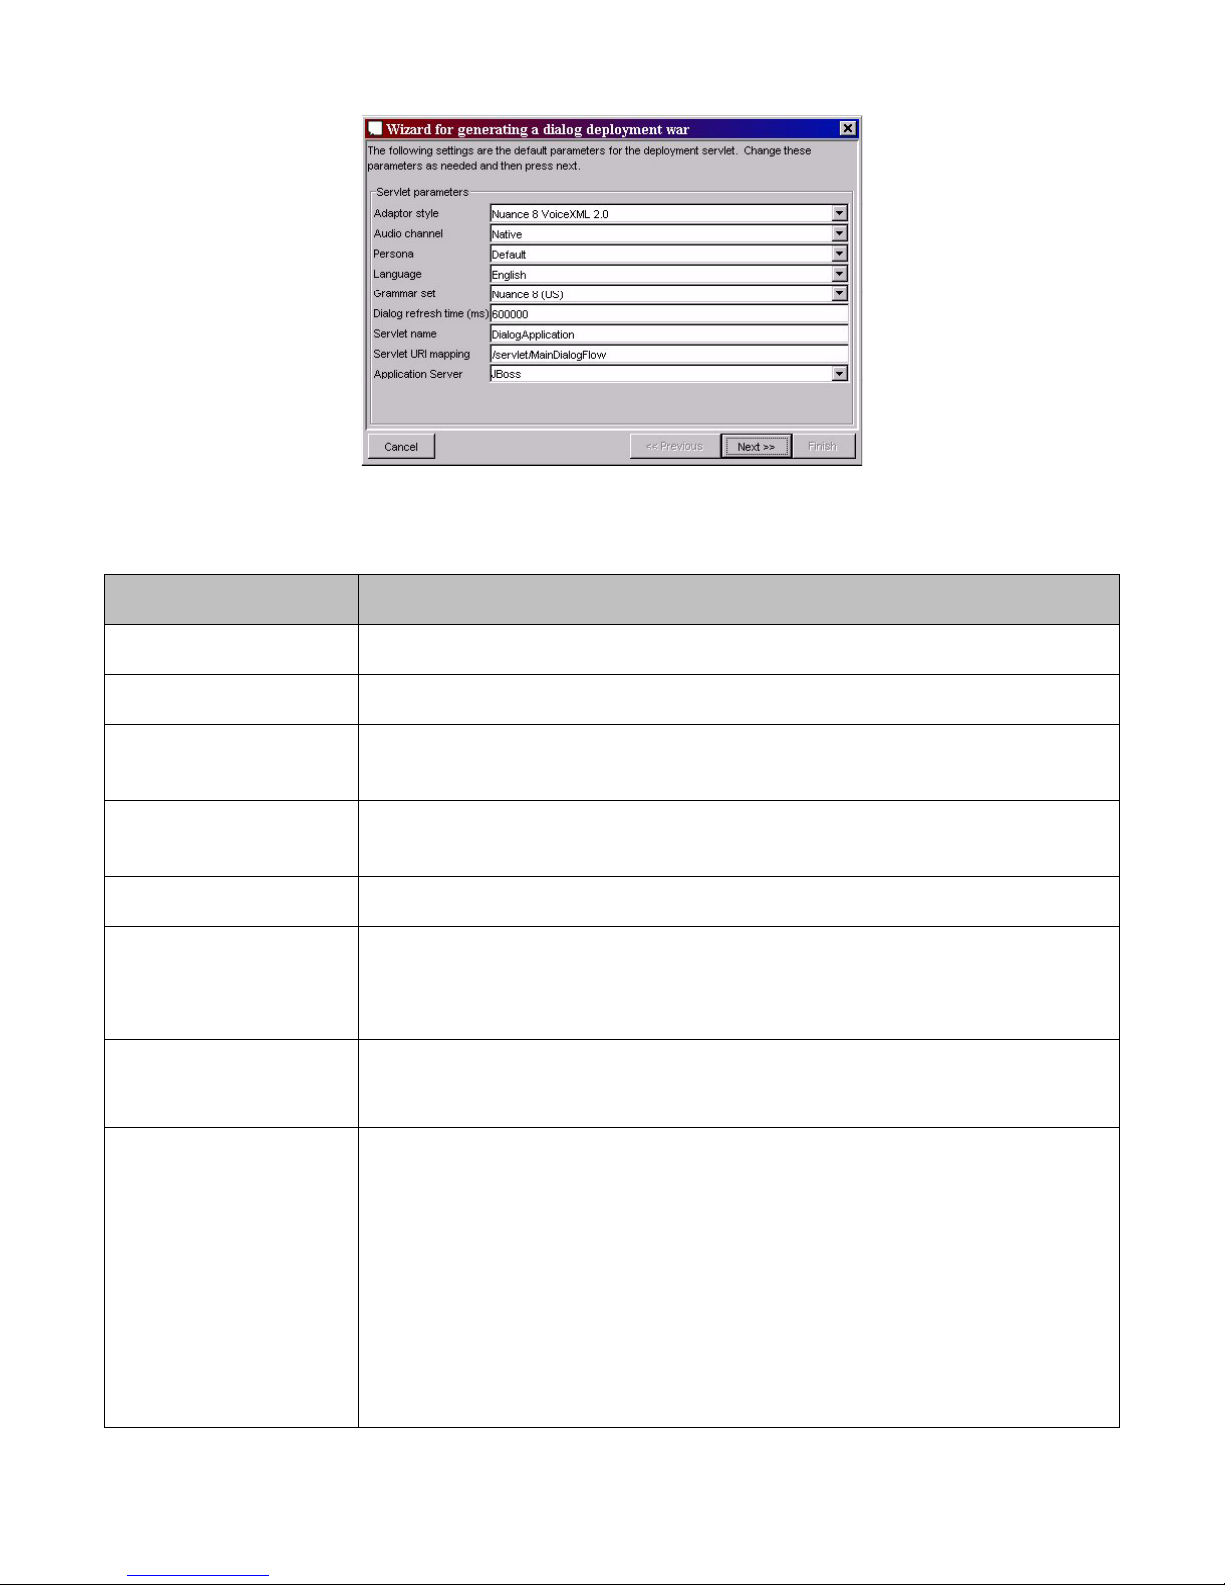
Speech Applications Builder Configurator User Guide • May 15, 2004 • page 95 of 116
Figure 93. Dialog deployment war wizard 4
9. Configure the Servlet for the system on which the .war file is to be deployed, as follows:
Parameter
Description
Adaptor style
Select the type of voice platform the application will be running on.
Audio channel
Select the correct telephony.
Persona
Select the persona to be used - together with Language, this specifies the
prompt set to be used
Language
Select the language to be used - together with Persona, this specifies the
prompt set to be used.
Grammar set
Select the correct grammar set for the voice platform you are using.
Dialog refresh time
(ms)
Specifies how often the system must check the database for updated flows
(only if the .war file is generated with Auto-update selected).
Defaults to 600,000 ms
Servlet name
Defines how the SAB servlet will be named to the application server.
Accept default.
Servlet URI mapping
Defines what URI the application server should map the servlet to.
Application servers typically append this to the name of the context SAB is
executing in, which in turn they usually name after the WAR file from which
it was loaded, without the .war suffix. This means that the default value of
/servlet/MainDialogFlow will typically make SAB available at
http://Machine:Port/sab/servlet/MainDialog
if the SAB WAR is called sab.war and Machine and Port are the address
and port on which the servlet container is listening for HTTP requests.
Accept default
Page 96
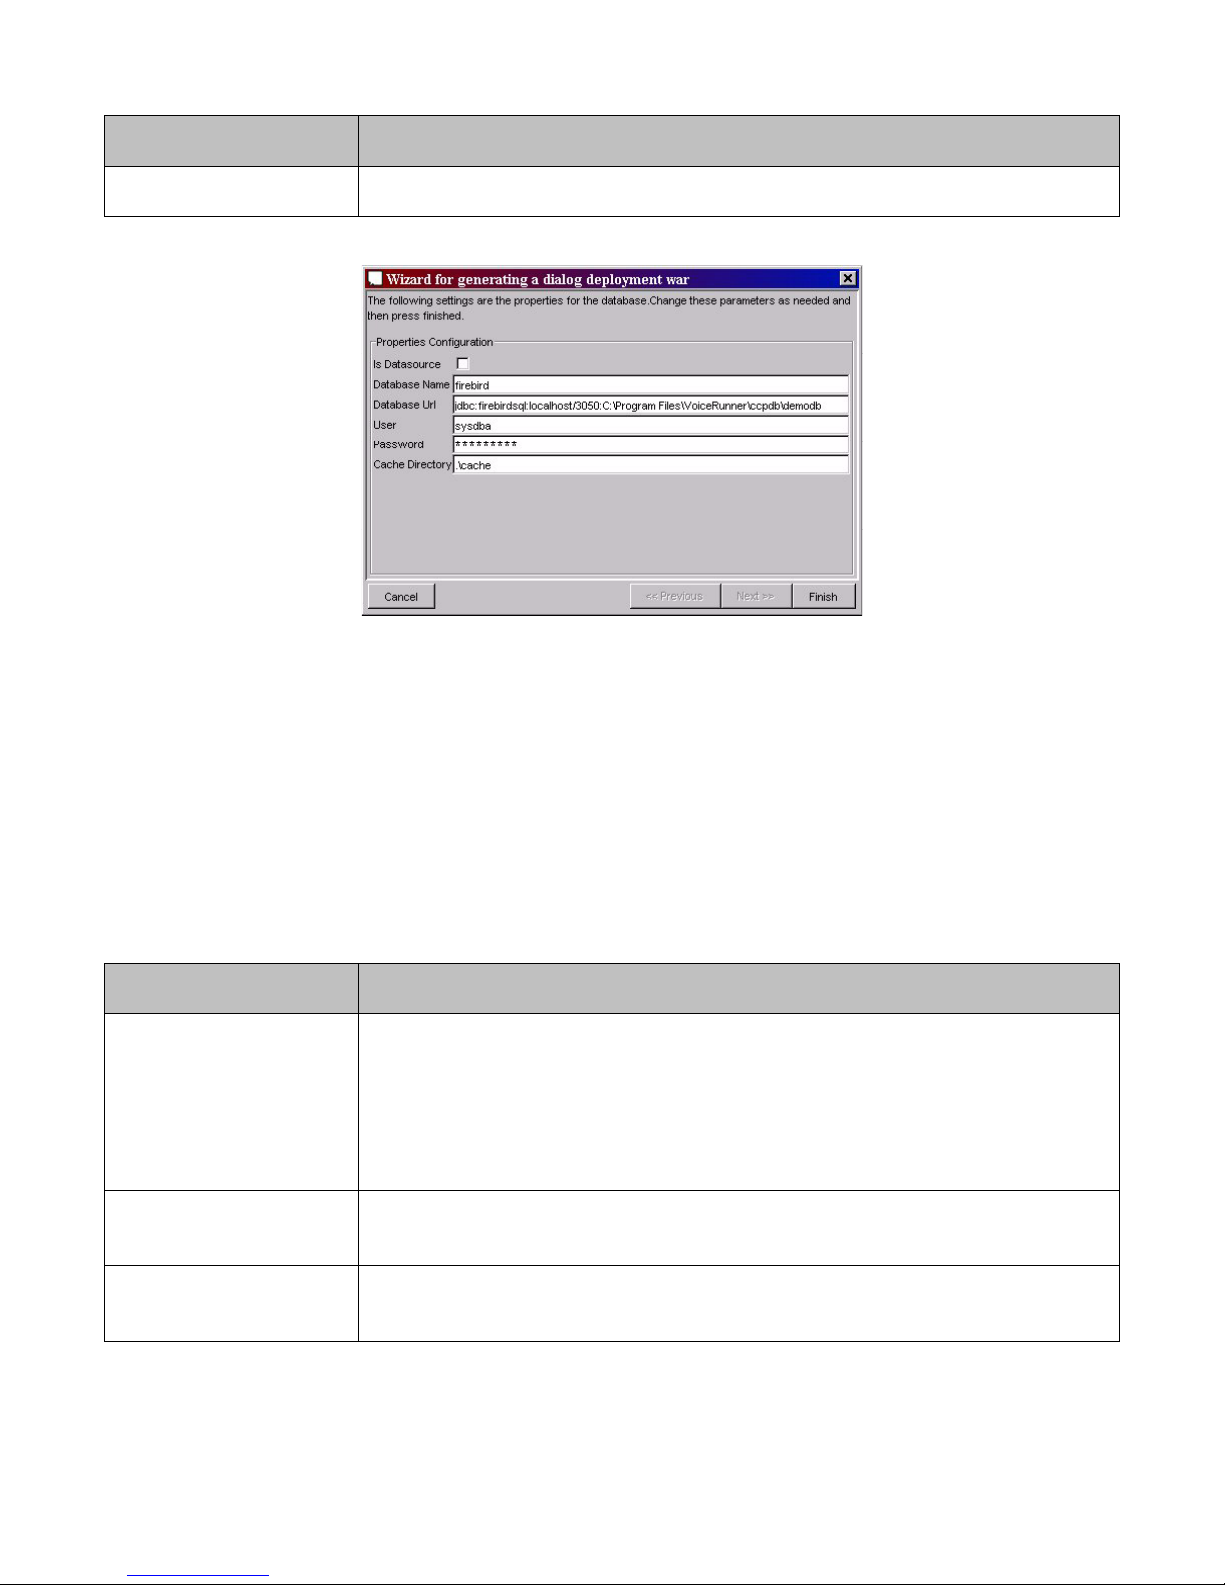
Speech Applications Builder Configurator User Guide • May 15, 2004 • page 96 of 116
Parameter
Description
Application Server
Select correct application server for the voice platform you are using
10. Click Next.
Figure 94. Dialog deployment war wizard 5
11. Configure the servlet to use the SAB database.
These parameters are initialized to whatever values are currently in the ccp.properties file, which
correspond to the values the SAB Configurator is using to access the repository database. The
values will typically not need to change if the runtime is to use the same database as the
Configurator, however it may be necessary to change the address of the database server to a
format which resolves correctly from the machine where the runtime is to be deployed.
For example, using the address localhost will only work if the database server is on the same
machine as the runtime.
Parameter
Description
Is Datasource
Determines whether SAB should interpret the database URL specified later
as a JDBC connection string or as a Java datasource name. Using a JDBC
connection string results in SAB making a direct connection to the specified
database with that connection string. Using a datasource name results in
SAB delegating the connection to a Java datasource defined within the
application server.
Database name
Used by SAB to look up a properties file containing low level information
about how to use the database.
Database Url
This is interpreted either as a JDBC connection string or as a Java
datasource name depending on the setting of the datasource flag.
Page 97
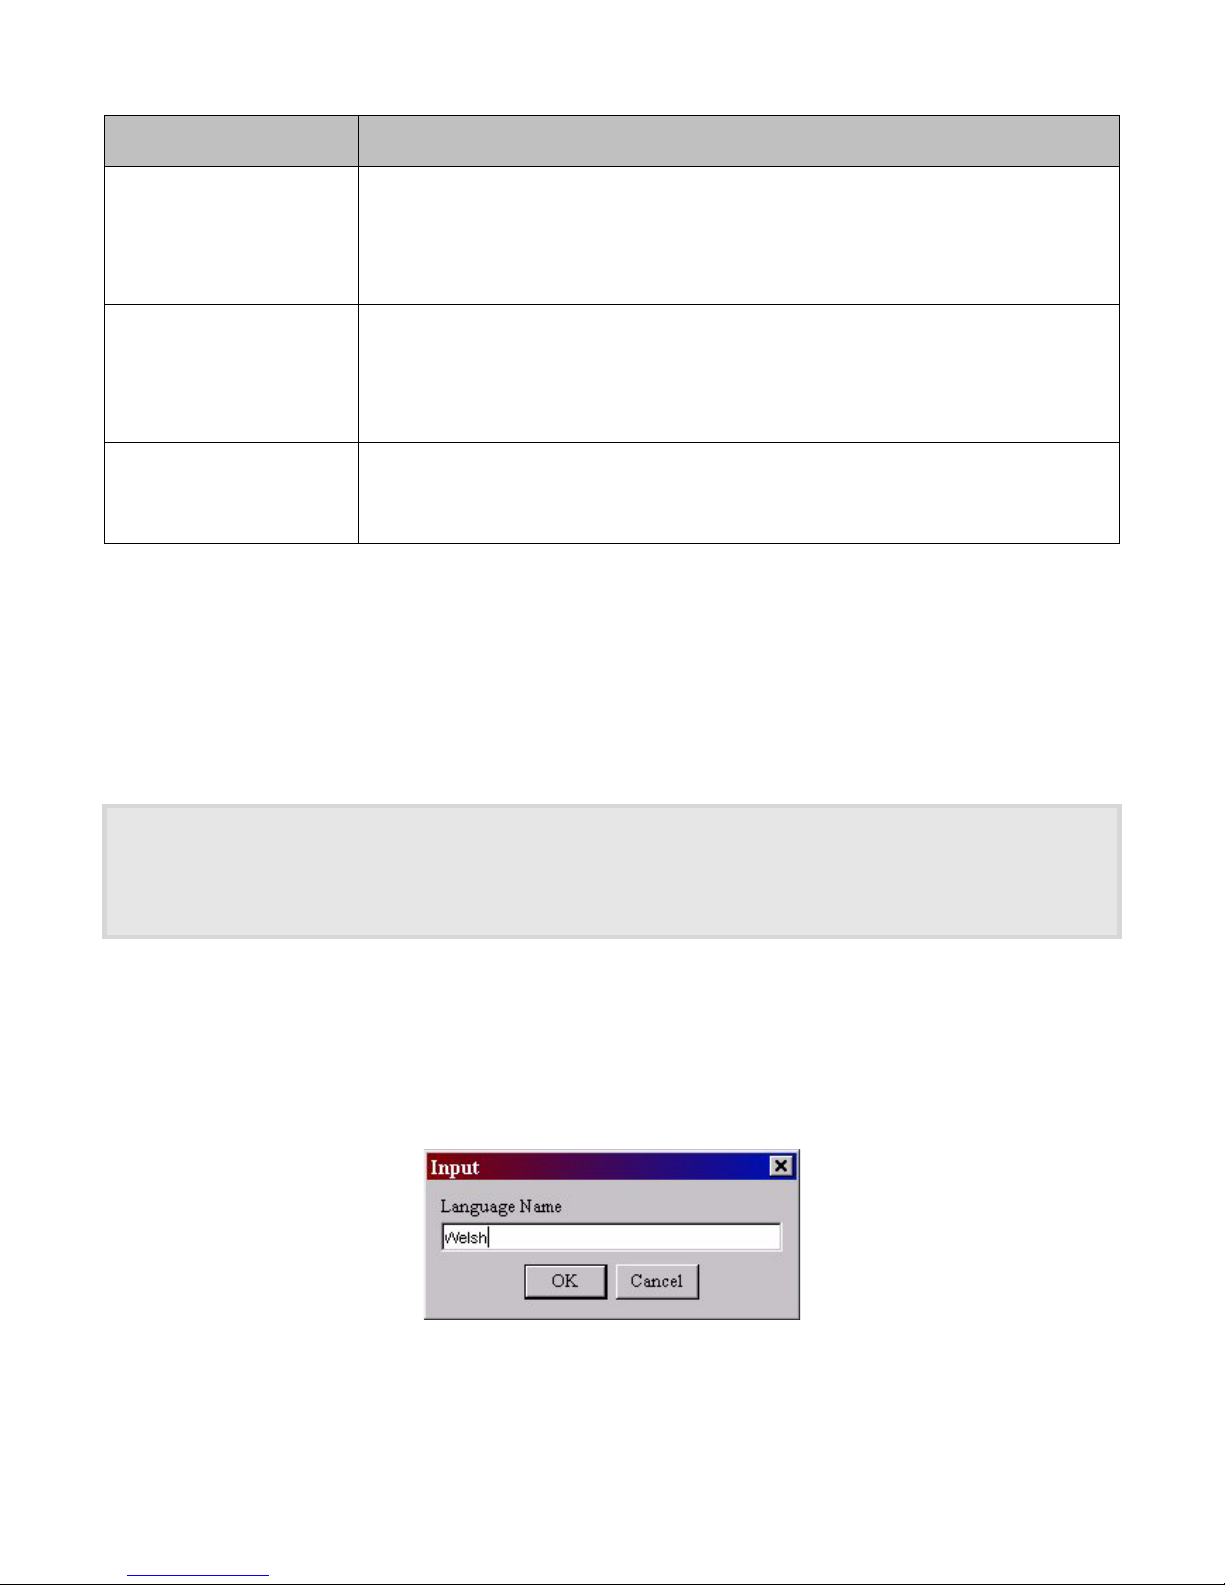
Speech Applications Builder Configurator User Guide • May 15, 2004 • page 97 of 116
Parameter
Description
User
This is the SQL username used to authenticate the connection to the
repository database. The required value is entirely dependent on how the
database itself is configured.
The user is set by default to sysdba.
Password
This is the SQL password used to authenticate the connection to the
repository database. The required value is entirely dependent on how the
database itself is configured.
The password is set by default to masterkey.
Cache Directory
When SAB reads flows, prompts and components from the repository
database, it caches them in a directory or folder in the filesystem. This
setting specifies the location of that cache directory.
12. Click Finish. SAB displays the Save dialog box.
13. Browse to the appropriate location and click Select. Generating the .war file may take a few
moments.
Language
When creating a prompt (see page 86) you are asked to specify its language and SAB labels the
prompt file accordingly. This feature allows you to create a single application in multiple languages.
Some languages have multiple variants or 'locales' (for example, US English, UK English) which are
pronounced differently. When you specify a language with multiple locales, ensure that you use the complete
language id, including the correct locale, for example, 'en-US' (for US English), or 'en-GB' (for GB English). The
locale setting must match one of those that is supported by the recogniser you are using. The precise id used to
specify the locale is recogniser-specific.
SAB’s list of languages and locales is configured in the Administration resource.
To add a language:
1. Expand the Administration tree.
2. Click Language. SAB displays the Language tool in the Dialog Modeler window.
3. Click on the Add button. SAB displays the Input dialog box.
Figure 95. Input dialog box
4. Enter the language name.
5. Click OK.
Page 98
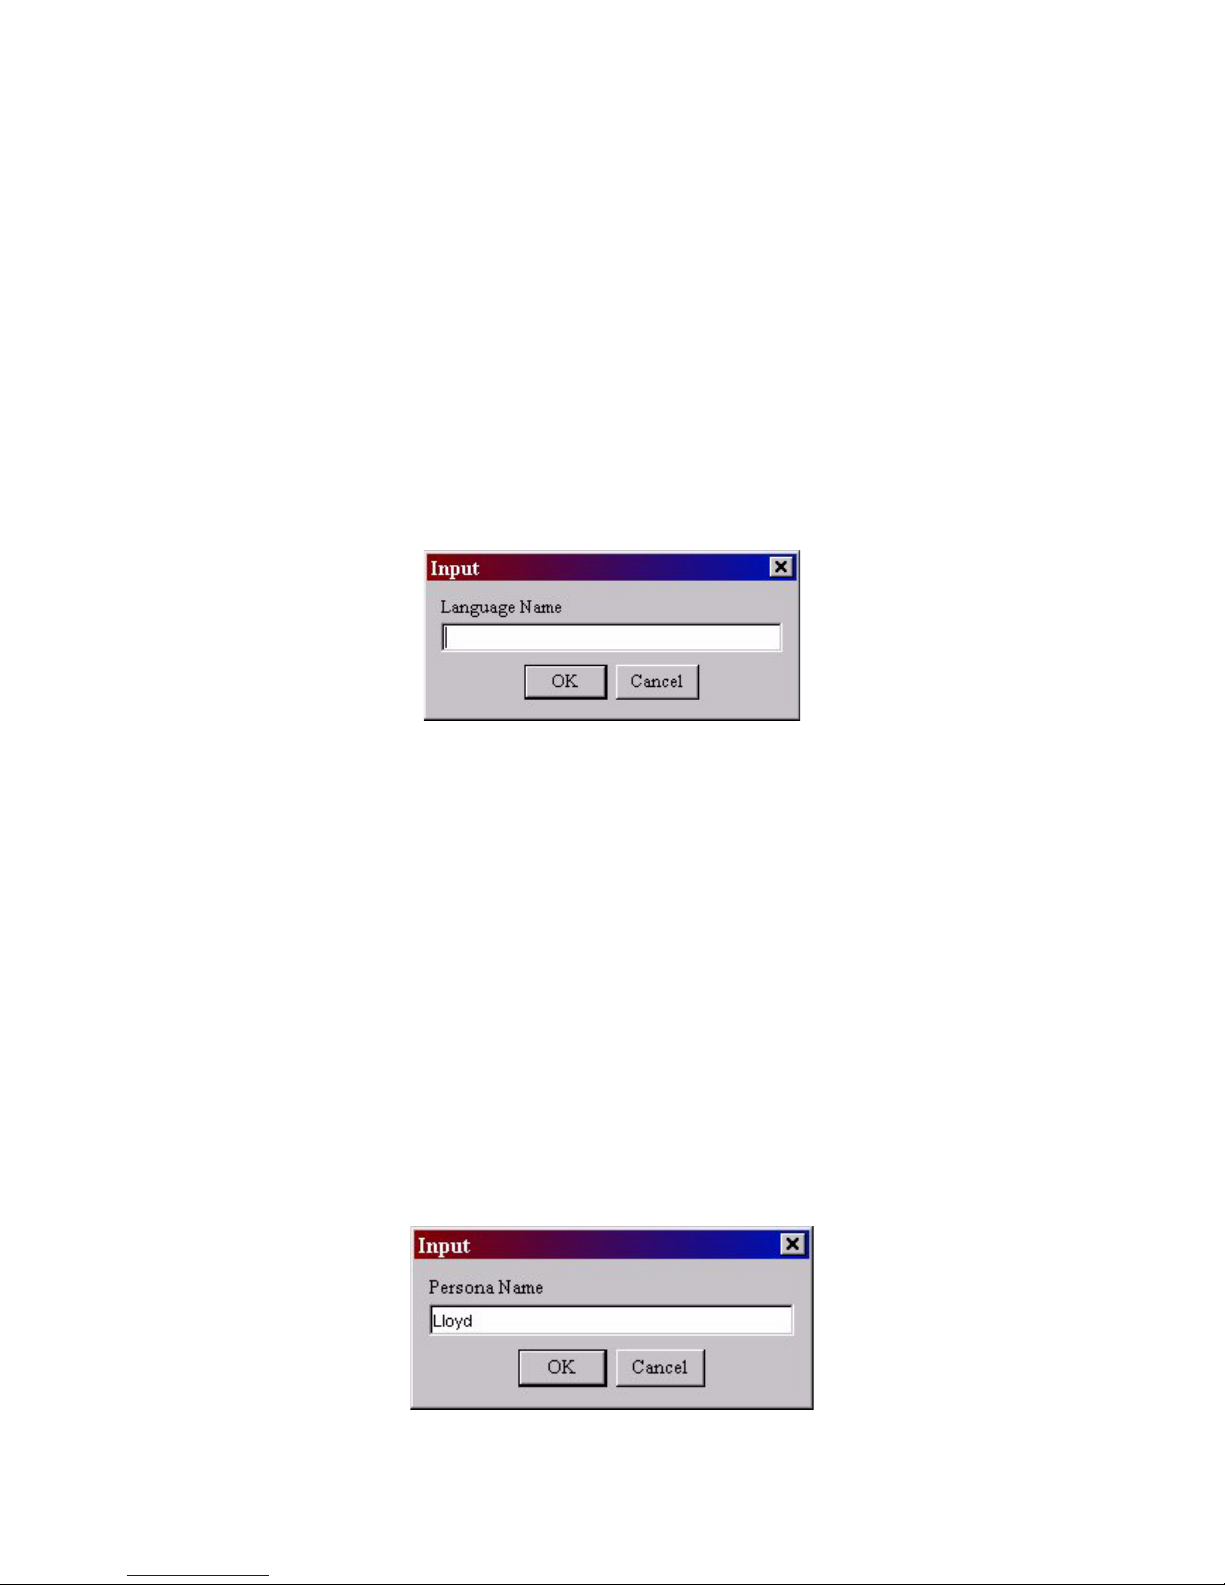
Speech Applications Builder Configurator User Guide • May 15, 2004 • page 98 of 116
The new language is listed in the Language tool and will appear as an option in the appropriate
Prompt creation dialog box.
To remove a language:
1. Open the Language tool (see above).
2. Select the language name.
3. Click on the Remove button. The language is deleted.
To edit a language:
1. Open the Language tool (see above).
2. Select the language name.
3. Click on the Edit button. SAB displays the Input dialog box (with an empty field).
Figure 96. Input dialog box (used to edit Language)
4. Enter the corrected language name.
5. Click OK.
Persona
When creating a prompt (see page 86) you are asked to specify a persona and SAB labels the prompt
file accordingly. This feature allows you to create a single application that uses multiple personae.
Persona is discussed in detail earlier.
SAB’s list of personae is configured in the Administration resource.
To add a persona:
1. Expand the Administration tree.
2. Click Persona. SAB displays the Persona tool in the Dialog Modeler window.
3. Click on the Add button. SAB displays the Input dialog box.
Figure 97. Input dialog box
Page 99
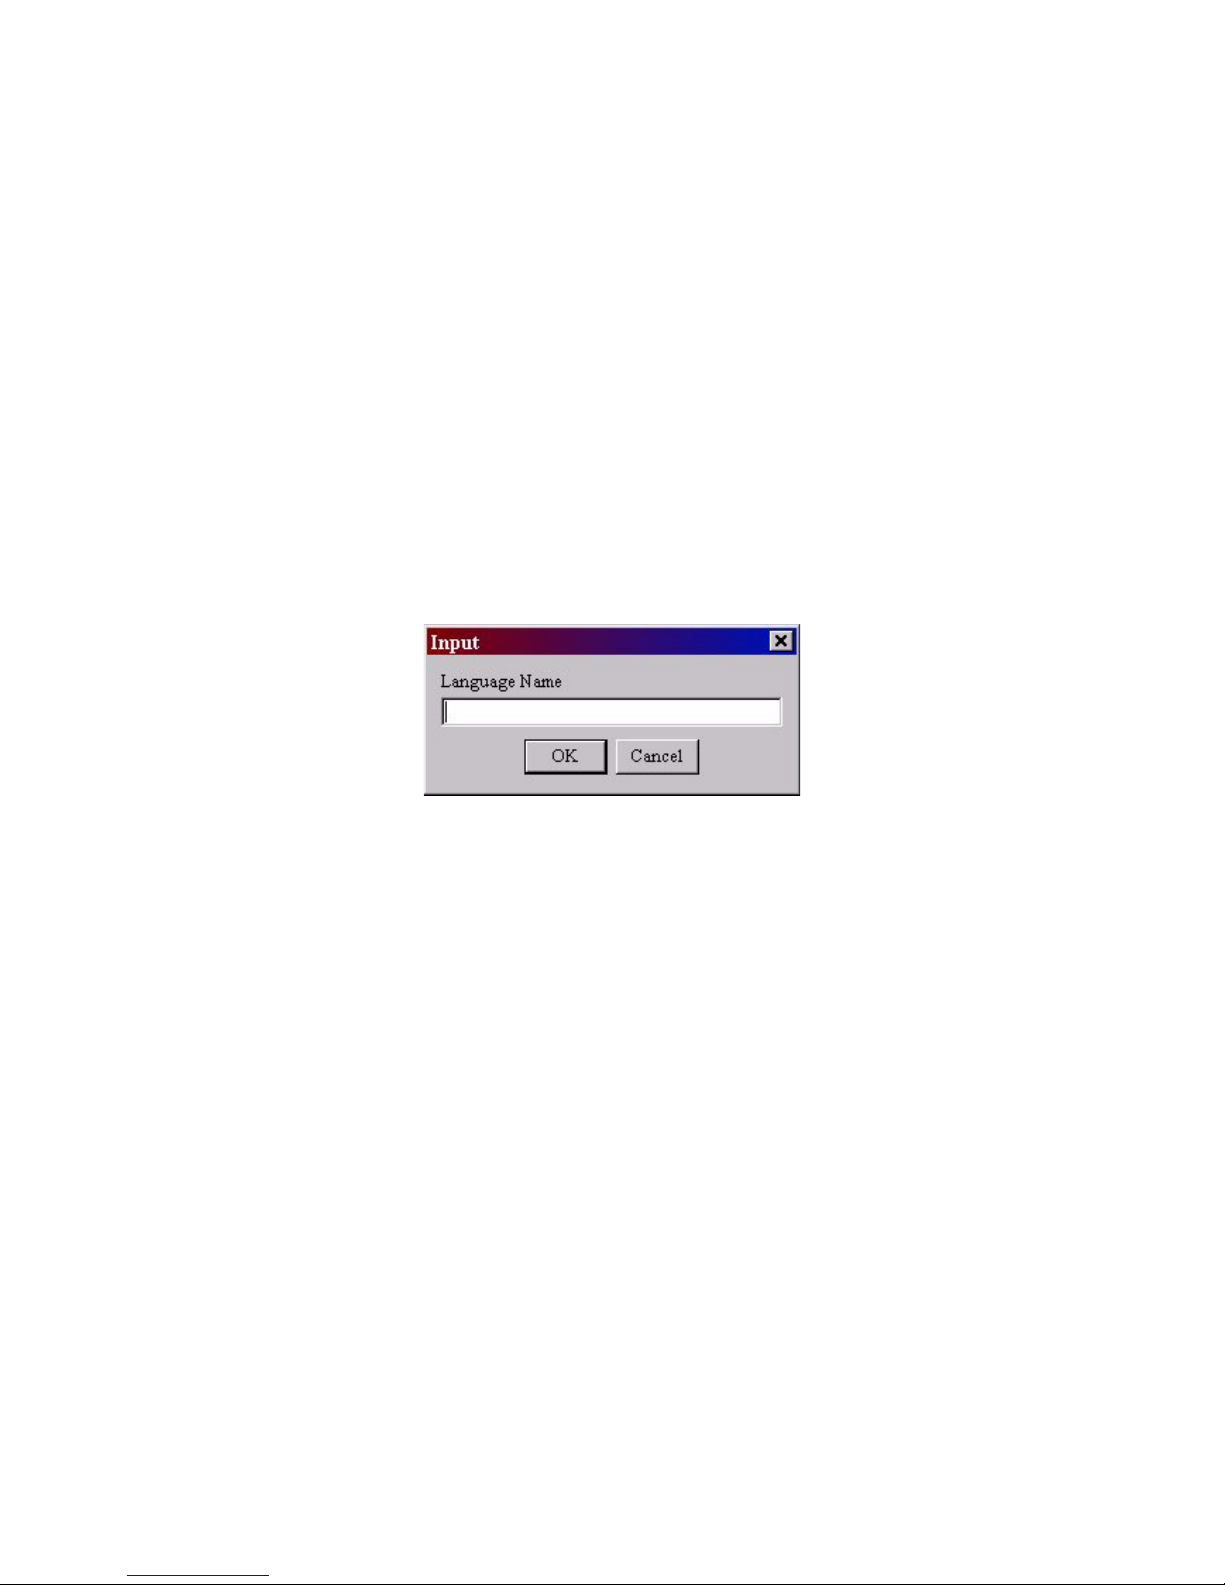
Speech Applications Builder Configurator User Guide • May 15, 2004 • page 99 of 116
4. Enter the persona name.
5. Click OK.
The new persona is listed in the Persona tool and will appear as an option in the appropriate Prompt
creation dialog box.
To remove a persona:
1. Open the Persona tool (see above).
2. Select the persona name.
3. Click on the Remove button. The persona is deleted.
To edit a persona:
1. Open the Persona tool (see above).
2. Select the persona name.
3. Click on the Edit button. SAB displays the Input dialog box (with an empty field).
Figure 98. Input dialog box (used to edit Persona)
4. Enter the corrected persona name.
5. Click OK.
Page 100
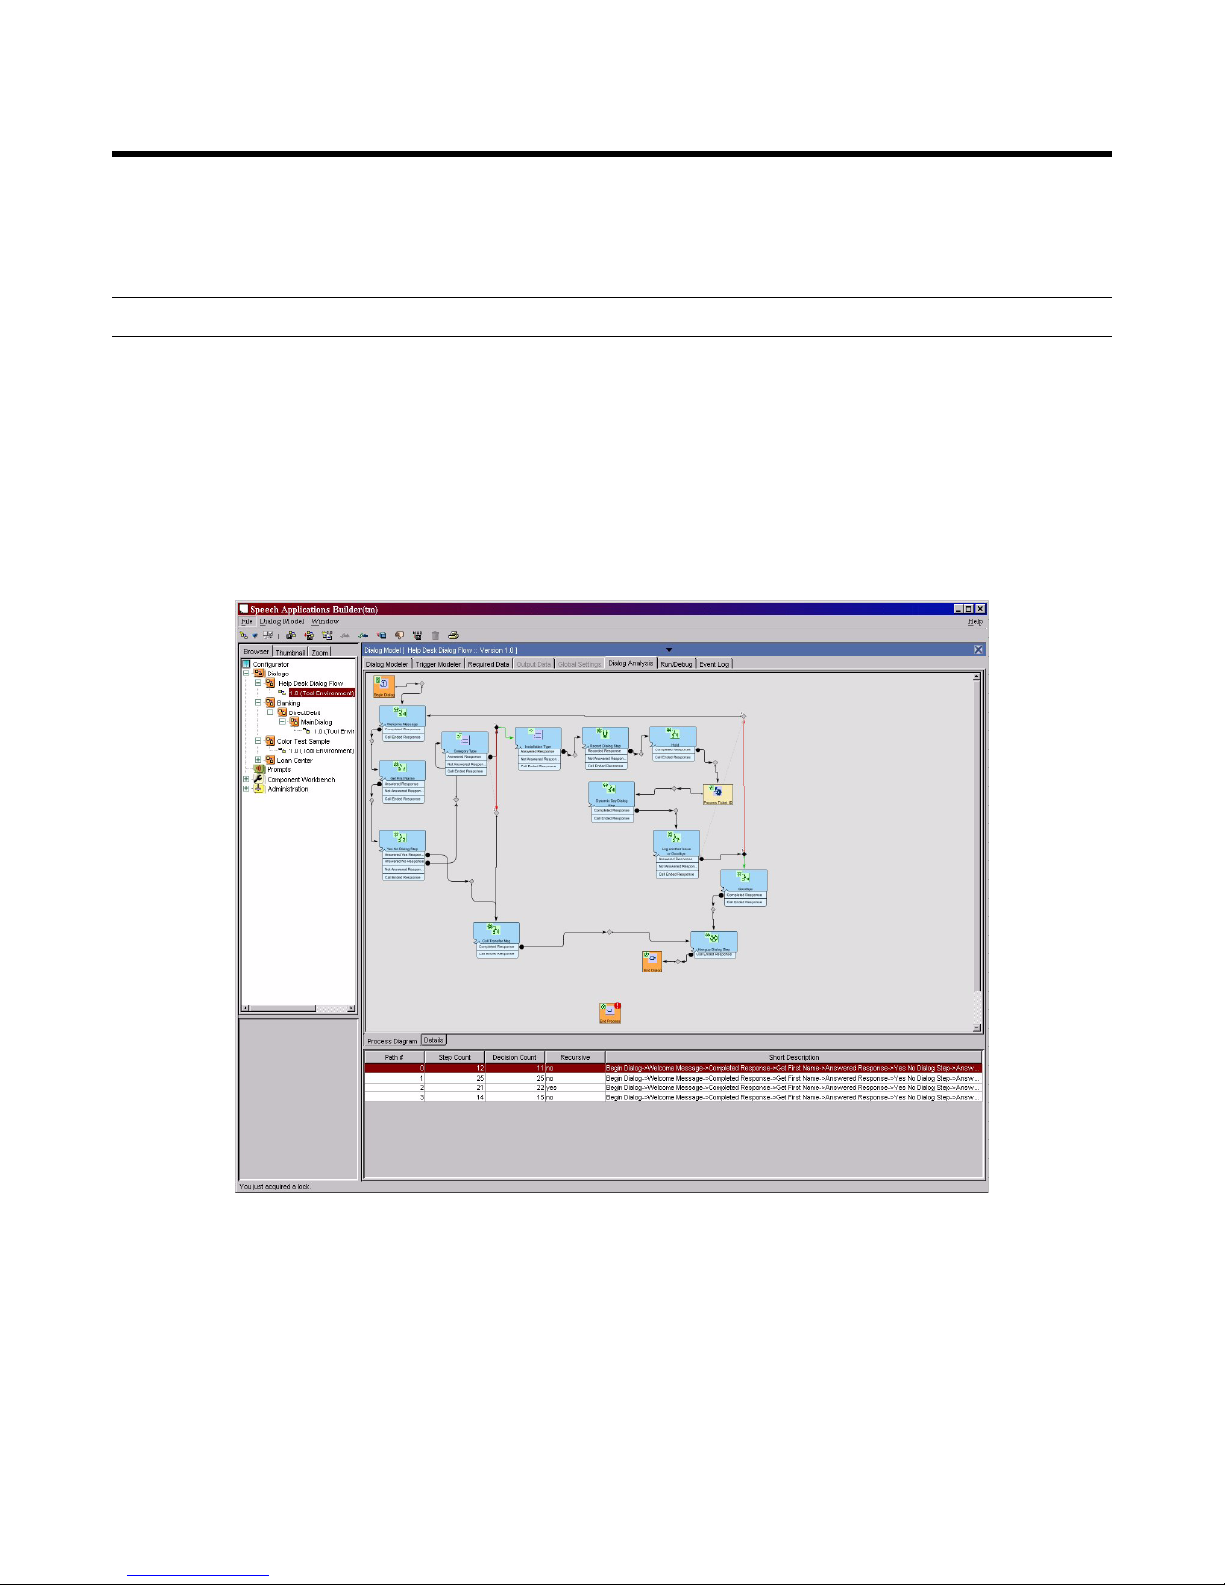
Speech Applications Builder Configurator User Guide • May 15, 2004 • page 100 of 116
Debugging a dialog
The Speech Applications Builder provides facilities for analyzing and debugging a dialog flow.
Dialog Analysis
The Dialog Analysis facility lists and describes every path through the selected dialog flow. The data it
provides can be used to build test cases.
To view the Dialog Analysis window:
1. Open the dialog flow.
2. Check out the dialog flow.
3. Select the Dialog Analysis tab. SAB splits the right-hand window into two areas, then displays
the entire dialog flow in the upper window and lists the individual dialog paths in the lower window.
Figure 99. The Dialog Analysis window with Process Diagram selected
 Loading...