

Page 1

PeriProducer User’s Guide
Software Release 3.0
Avaya Business Communications Manager
Release 6.0
Document Status: Standard
Document Number: P0995131
Document Version: 05.02
Date: June 2010
Page 2

© 2010 Avaya Inc.
All Rights Reserved.
Notices
While reasonable efforts have been made to ensure that the information in this document is complete and accurate at the time of printing,
Avaya assumes no liability for any errors. Avaya reserves the right to make changes and corrections to the information in this document
without the obligation to notify any person or organization of such changes.
Documentation disclaimer
Avaya shall not be responsible for any modifications, additions, or deletions to the original published version of this documentation
unless such modifications, additions, or deletions were performed by Avaya. End User agree to indemnify and hold harmless Avaya,
Avaya’s agents, servants and employees against all claims, lawsuits, demands and judgments arising out of, or in connection with,
subsequent modifications, additions or deletions to this documentation, to the extent made by End User.
Link disclaimer
Avaya is not responsible for the contents or reliability of any linked Web sites referenced within this site or documentation(s) provided by
Avaya. Avaya is not responsible for the accuracy of any information, statement or content provided on these sites and does not
necessarily endorse the products, services, or information described or offered within them. Avaya does not guarantee that these links will
work all the time and has no control over the availability of the linked pages.
Warranty
Avaya provides a limited warranty on this product. Refer to your sales agreement to establish the terms of the limited warranty. In
addition, Avaya’s standard warranty language, as well as information regarding support for this product, while under warranty, is
available to Avaya customers and other parties through the Avaya Support Web site: http://www.avaya.com/support
Please note that if you acquired the product from an authorized reseller, the warranty is provided to you by said reseller and not by Avaya.
Licenses
THE SOFTWARE LICENSE TERMS AVAILABLE ON THE AVAYA WEBSITE, HTTP://SUPPORT.AVAYA.COM/LICENSEINFO/
ARE APPLICABLE TO ANYONE WHO DOWNLOADS, USES AND/OR INSTALLS AVAYA SOFTWARE, PURCHASED FROM
AVAYA INC., ANY AVAYA AFFILIATE, OR AN AUTHORIZED AVAYA RESELLER (AS APPLICABLE) UNDER A
COMMERCIAL AGREEMENT WITH AVAYA OR AN AUTHORIZED AVAYA RESELLER. UNLESS OTHERWISE AGREED TO
BY AVAYA IN WRITING, AVAYA DOES NOT EXTEND THIS LICENSE IF THE SOFTWARE WAS OBTAINED FROM ANYONE
OTHER THAN AVAYA, AN AVAYA AFFILIATE OR AN AVAYA AUTHORIZED RESELLER, AND AVAYA RESERVES THE
RIGHT TO T AKE LEGAL ACTION AGAINST YOU AND ANYONE ELSE USING OR SELLING THE SOFTWARE WITHOUT A
LICENSE. BY INSTALLING, DOWNLOADING OR USING THE SOFTWARE, OR AUTHORIZING OTHERS TO DO SO, YOU,
ON BEHALF OF YOURSELF AND THE ENTITY FOR WHOM YOU ARE INSTALLING, DOWNLOADING OR USING THE
SOFTWARE (HEREINAFTER REFERRED TO INTERCHANGEABLY AS "YOU" AND "END USER"), AGREE TO THESE
TERMS AND CONDITIONS AND CREATE A BINDING CONTRACT BETWEEN YOU AND AVAYA INC. OR THE
APPLICABLE AVAYA AFFILIATE ("AVAYA").
Copyright
Except where expressly stated otherwise, no use should be made of the Documentation(s) and Pr oduct( s) p rovided by Avaya. All content
in this documentation(s) and the product(s) pr ov id ed by Avaya including the selection, arrangement and design of the content is owned
either by Avaya or its licensors and is protected b y copyright and other intellectual property laws including the sui generis rights relating
to the protection of databases. You may not modify, copy, reproduce, republish, upload, post, transmit or distribute in any way any
content, in whole or in part, including any code and software. Unauthorized reproduction, transmission, dissemination, storage, and or
use without the express written consent of Avaya can be a criminal, as well as a civil offense under the applicable law.
Third Party Components
Certain software programs or portions thereof included in the Product may contain software distributed under third party agreements
("Third Party Components"), which may contain terms that expand or limit rights to use certain portions of the Product ("Third Party
Terms" ). Information regarding distributed Linux OS source code (for those Products that have distributed the Linux OS source code),
and identifying the copyright holders of the Third Party Components and the Third Party Terms that apply to them is available on the
Avaya Support Web site: http://support.avaya.com/Copyright.
Trademarks
The trademarks, logos and service marks ("Marks") displayed in this site, the documentation(s) and product(s) pr ovided by Avaya are the
registered or unregistered Marks of Avaya, its affiliates, or other third parties. Users are not permitted to use such Marks without prior
written consent from A vaya or such third party which may own the Mark. Nothing contained in this site, the documentation(s) and
product(s) should be construed as granting, by implication, estoppel, or otherwise, any license or right in and to the Marks without the
express written permission of Avaya or the applicable third party. Avaya is a registered trademark of Avaya Inc. All non-Avaya
trademarks are the property of their respective owners.
Downloading documents
For the most current versions of documentation, see the Avaya Support. Web site: http://www.avaya.c om/support
Contact Avaya Support
Avaya provides a telephone number for you to use to report problems or to ask questions about your product. The support telephone
number is 1-800-242-2121 in the United States. For additional support telephone numbers, see the Avaya Web site: http://
www.avaya.com/support
Page 3

Table of Contents
Preface . . . . . . . . . . . . . . . . . . . . . . . . . . . . . . . . . . . . . . . . . . 23
Scope . . . . . . . . . . . . . . . . . . . . . . . . . . . . . . . . . . . . . . . . . . . . . . 24
Intended Audience . . . . . . . . . . . . . . . . . . . . . . . . . . . . . . . . . . . . 24
How to Use This Manual . . . . . . . . . . . . . . . . . . . . . . . . . . . . . . . 24
Organization of This Manual . . . . . . . . . . . . . . . . . . . . . . . . . . . . 25
Conventions Used in This Manual . . . . . . . . . . . . . . . . . . . . . . . . 26
Solaris and Windows 2000 Conventions . . . . . . . . . . . . . . . . . . . 27
Two-Button (Windows 2000) vs. Three-Button (Solaris)
Mouse . . . . . . . . . . . . . . . . . . . . . . . . . . . . . . . . . . . . . . . . . . 27
Trademark Conventions . . . . . . . . . . . . . . . . . . . . . . . . . . . . . . . . 28
Copyright Information . . . . . . . . . . . . . . . . . . . . . . . . . . . . . . . . . 28
HylaFAX Facsimile Software. . . . . . . . . . . . . . . . . . . . . . . . 28
Chapter 1 — Overview of PeriProducer Features . . . . . . . 31
PeriProducer Description . . . . . . . . . . . . . . . . . . . . . . . . . . . . . . . 32
Voice Response Applications . . . . . . . . . . . . . . . . . . . . . . . . . . . 32
Application Execution and Diagnostic Facilities . . . . . . . . . . . . . 33
Chapter 2 — PeriProducer Basics . . . . . . . . . . . . . . . . . . . . 35
Starting PeriProducer . . . . . . . . . . . . . . . . . . . . . . . . . . . . . . . . . . 36
Checking the PeriProducer Version . . . . . . . . . . . . . . . . . . . 36
Default Startup Display . . . . . . . . . . . . . . . . . . . . . . . . . . . . 37
Getting Help . . . . . . . . . . . . . . . . . . . . . . . . . . . . . . . . . . . . . . . . . 38
Loading an Application . . . . . . . . . . . . . . . . . . . . . . . . . . . . . . . . 39
Loading an Autosave File . . . . . . . . . . . . . . . . . . . . . . . . . . . 41
Loading an Errorsave (Recovery) File . . . . . . . . . . . . . . . . . 42
Loading an Earlier Version of an Application . . . . . . . . . . . 42
Loading a Backup File . . . . . . . . . . . . . . . . . . . . . . . . . . . . . 43
Adding a Title to the Main Container. . . . . . . . . . . . . . . . . . 43
Saving Applications . . . . . . . . . . . . . . . . . . . . . . . . . . . . . . . . . . . 45
Saving an Application. . . . . . . . . . . . . . . . . . . . . . . . . . . . . . 46
Saving an Application to a Different Name/Location . . . . . 46
Understanding the Backup (.pBK) File . . . . . . . . . . . . . . . . 47
Automatic Error Saving . . . . . . . . . . . . . . . . . . . . . . . . . . . . 47
Saving a New Version of an Application . . . . . . . . . . . . . . . 48
Automatically Saving Applications (Autosave) . . . . . . . . . . 49
Saving a Container Block . . . . . . . . . . . . . . . . . . . . . . . . . . . 51
Leaving References Unresolved . . . . . . . . . . . . . . . . . . . 52
PeriProducer Application File Types . . . . . . . . . . . . . . . . . . 53
Printing an Application . . . . . . . . . . . . . . . . . . . . . . . . . . . . . . . . 54
Printing Options . . . . . . . . . . . . . . . . . . . . . . . . . . . . . . . . . . 56
Printing in Batch Mode. . . . . . . . . . . . . . . . . . . . . . . . . . . . . 58
# P0995131 Page 3
Page 4

PeriProducer User’s Guide
Quitting PeriProducer . . . . . . . . . . . . . . . . . . . . . . . . . . . . . . . . . 66
Working With Blocks . . . . . . . . . . . . . . . . . . . . . . . . . . . . . . . . . 67
Changing the Default Print Settings . . . . . . . . . . . . . . . . 58
Selecting the Printer . . . . . . . . . . . . . . . . . . . . . . . . . . . . . . . 59
Setting the PPROPOSTPRINTER Environment
Variable . . . . . . . . . . . . . . . . . . . . . . . . . . . . . . . . . . . . . . 59
Viewing the PostScript Output . . . . . . . . . . . . . . . . . . . . . . . 59
Version Control. . . . . . . . . . . . . . . . . . . . . . . . . . . . . . . . . . . 60
Version Renaming Process . . . . . . . . . . . . . . . . . . . . . . . . . . 60
Enabling Version Control . . . . . . . . . . . . . . . . . . . . . . . . . . . 61
Assigning a Version Identifying Number to an Application 62
Comparing Versions . . . . . . . . . . . . . . . . . . . . . . . . . . . . . . . 63
Excluding Building Blocks from Generation . . . . . . . . . . . . 64
Clearing a Container . . . . . . . . . . . . . . . . . . . . . . . . . . . . . . . 64
Standard Action Window Items . . . . . . . . . . . . . . . . . . . . . . 66
Adding a Block . . . . . . . . . . . . . . . . . . . . . . . . . . . . . . . . . . . 69
Customizing the Function of a Block . . . . . . . . . . . . . . . . . . 71
Changes to the Action Window . . . . . . . . . . . . . . . . . . . 72
Naming a Block . . . . . . . . . . . . . . . . . . . . . . . . . . . . . . . . . . 73
Locating Blocks within an Application . . . . . . . . . . . . . . . . 74
Using the Tool Kit . . . . . . . . . . . . . . . . . . . . . . . . . . . . . 74
Using the Blocks Menu . . . . . . . . . . . . . . . . . . . . . . . . . . 75
Using the Search Function . . . . . . . . . . . . . . . . . . . . . . . 76
Performing Operations on Grouped Blocks . . . . . . . . . . . . . 77
The Block Menu . . . . . . . . . . . . . . . . . . . . . . . . . . . . . . . . . . 78
Adding Notes to a Block. . . . . . . . . . . . . . . . . . . . . . . . . . . . 82
Editing Block Notes . . . . . . . . . . . . . . . . . . . . . . . . . . . . . . . 83
Copying a Block or Grouped Blocks . . . . . . . . . . . . . . . . . . 84
Moving a Block or Grouped Blocks . . . . . . . . . . . . . . . . . . . 85
Moving in a Single Construction Area . . . . . . . . . . . . . . 85
Moving Between Construction Areas . . . . . . . . . . . . . . . 85
Deleting a Block or Grouped Blocks . . . . . . . . . . . . . . . . . . 86
Restoring a Deleted Block or Grouped Blocks. . . . . . . . . . . 86
Reference Blocks . . . . . . . . . . . . . . . . . . . . . . . . . . . . . . . . . 87
Creating a Reference Block . . . . . . . . . . . . . . . . . . . . . . 88
Working With Reference Blocks . . . . . . . . . . . . . . . . . . 89
References to Parameterized Containers . . . . . . . . . . . . 90
Gathering Application Statistics (Block Execution
Statistics) . . . . . . . . . . . . . . . . . . . . . . . . . . . . . . . . . . . . . . . . 91
Determining Blocks Associated With a Counter . . . . . . 92
Passing Statistics Folders to a Linked Application . . . . . 93
Working With Block Connections and Connectors . . . . . . . 94
Understanding Block Connections . . . . . . . . . . . . . . . . . 94
Automatic Connections . . . . . . . . . . . . . . . . . . . . . . . . . . 94
Creating and Erasing Connections . . . . . . . . . . . . . . . . . 95
Using Connector Blocks . . . . . . . . . . . . . . . . . . . . . . . . . . . . 96
Page 4 # P0995131
Page 5

Adding a Connector Block . . . . . . . . . . . . . . . . . . . . . . . 97
Chapter 3 — Understanding PeriProducer’s Primary
Windows 99
The Main Container . . . . . . . . . . . . . . . . . . . . . . . . . . . . . . . . . . 100
The Main Container Menu Bar. . . . . . . . . . . . . . . . . . . . . . 101
The Main Container File Menu . . . . . . . . . . . . . . . . . . 102
The Main Container Blocks Menu . . . . . . . . . . . . . . . . 103
The Main Container Execute Menu . . . . . . . . . . . . . . . 104
The Main Container Properties Menu . . . . . . . . . . . . . 106
The Tool Kit . . . . . . . . . . . . . . . . . . . . . . . . . . . . . . . . . . . . . . . . 107
The Accessory Tool Kit . . . . . . . . . . . . . . . . . . . . . . . . . . . 108
Additional Tool Kits . . . . . . . . . . . . . . . . . . . . . . . . . . . . . . 110
Adding a Header to the Tool Kit . . . . . . . . . . . . . . . . . . . . 111
Using the Locator to Move Around an Application . . . . . . 111
Chapter 4 — Application Support Functions . . . . . . . . . . 113
Overview of Application Support Functions . . . . . . . . . . . . . . . 114
Executing Applications With PeriGEM . . . . . . . . . . . . . . . . . . 114
Using VEMUL . . . . . . . . . . . . . . . . . . . . . . . . . . . . . . . . . . 121
Understanding Condition Handling . . . . . . . . . . . . . . . . . . 121
Simulating Success and Failure Conditions . . . . . . . . . . . . 121
Entering Commands in the PeriGEM Window . . . . . . . . . 122
Vemul Options on the Command Line . . . . . . . . . . . . . 124
VEMUL Response Table . . . . . . . . . . . . . . . . . . . . . . . 124
PeriGEM Script Commands . . . . . . . . . . . . . . . . . . . . . . . . 127
Creating and Saving a Script . . . . . . . . . . . . . . . . . . . . . . . 128
Executing the Script . . . . . . . . . . . . . . . . . . . . . . . . . . . . . . 130
Condition Data Window . . . . . . . . . . . . . . . . . . . . . . . . . . . 132
Entering Data for a Get Input Response . . . . . . . . . . . . . . . 133
Understanding Local/Remote Connections . . . . . . . . . . . . 133
Generating the Application. . . . . . . . . . . . . . . . . . . . . . . . . 135
Batch Generating . . . . . . . . . . . . . . . . . . . . . . . . . . . . . 136
Testing and Running the Application . . . . . . . . . . . . . . . . . 136
Stepping Through the Application . . . . . . . . . . . . . . . . 137
Interacting With Applications in Real Mode . . . . . . . . 138
Interacting With Applications in Simulated Mode . . . . 139
Pausing the Execution . . . . . . . . . . . . . . . . . . . . . . . . . . 141
Using the Watch Mode . . . . . . . . . . . . . . . . . . . . . . . . . 142
Attaching to an Executing Application. . . . . . . . . . . . . . . . 143
Tracing the Execution. . . . . . . . . . . . . . . . . . . . . . . . . . . . . 144
Evaluating Application Development with Complexity
Metrics . . . . . . . . . . . . . . . . . . . . . . . . . . . . . . . . . . . . . . . . . . . . 146
# P0995131 Page 5
Page 6

PeriProducer User’s Guide
Chapter 5 — Managing Vocabularies . . . . . . . . . . . . . . . . 149
Overview of Vocabulary Management . . . . . . . . . . . . . . . . . . . 150
Using PeriStudio to Edit Vocabularies . . . . . . . . . . . . . . . . . . . 152
Understanding the Prompt Editor Window . . . . . . . . . . . . . . . . 153
Using Vocabularies . . . . . . . . . . . . . . . . . . . . . . . . . . . . . . . . . . 157
Understanding the Vocabulary Management Window . . . . . . . 159
Using Data Cards as Vocabulary Phrases . . . . . . . . . . . . . . . . . 163
Prompting the Caller When Requesting Data . . . . . . . . . . . . . . 169
Building Blocks Using Speech Output . . . . . . . . . . . . . . . . . . . 174
Vocabulary Elements . . . . . . . . . . . . . . . . . . . . . . . . . . . . . 150
Referencing Vocabulary Elements . . . . . . . . . . . . . . . . . . . 150
Preparing Applications That Use Vocabularies . . . . . . . . . 150
Manipulating the Phrases List. . . . . . . . . . . . . . . . . . . . . . . 155
Marking Errors in the Phrases to Be Spoken in Order
List . . . . . . . . . . . . . . . . . . . . . . . . . . . . . . . . . . . . . . . . 156
The Vocabulary List Menu . . . . . . . . . . . . . . . . . . . . . . . . . 157
The Vocabulary Prefix List Menu . . . . . . . . . . . . . . . . . . . 158
To Be Defined Vocabulary Elements . . . . . . . . . . . . . . . . . 158
Vocabulary Files Used in the Current Application. . . . . . . 162
Elements in the Current Vocabulary. . . . . . . . . . . . . . . . . . 162
Selecting Data Cards to Speak . . . . . . . . . . . . . . . . . . . . . . 163
Speech Formats for Data Cards . . . . . . . . . . . . . . . . . . . . . 163
Speaking Numeric Data Cards Containing Decimal Points 168
Implementing Voice Menus . . . . . . . . . . . . . . . . . . . . . . . . 171
Voice Menu Example . . . . . . . . . . . . . . . . . . . . . . . . . . 171
SPEAK to the Caller (Speak Block) . . . . . . . . . . . . . . . . . . 174
SELECT from a Menu (Select Block) . . . . . . . . . . . . . . . . 175
READ Data Entered by the Caller (Read Block) . . . . . . . . 177
Chapter 6 — Receiving Caller Data . . . . . . . . . . . . . . . . . . 181
Introduction . . . . . . . . . . . . . . . . . . . . . . . . . . . . . . . . . . . . . . . . 182
Receiving Touch Tone Data . . . . . . . . . . . . . . . . . . . . . . . . . . . 182
Caller Information. . . . . . . . . . . . . . . . . . . . . . . . . . . . . . . . 182
Input Timers and Partial Data. . . . . . . . . . . . . . . . . . . . . . . 183
READ Data Entered by the Caller (Read Block) . . . . . . . . 184
Editing Caller Data . . . . . . . . . . . . . . . . . . . . . . . . . . . . . . . 189
User Edit Sequences . . . . . . . . . . . . . . . . . . . . . . . . . . . . . . 190
Manage Touch Tone Edit Sequences (Edit Sequences
Block) . . . . . . . . . . . . . . . . . . . . . . . . . . . . . . . . . . . . . . . . . . 191
Voice Menus . . . . . . . . . . . . . . . . . . . . . . . . . . . . . . . . . . . . 192
SELECT from a Menu (Select Block) . . . . . . . . . . . . . . . . 193
Receiving Speech Recognition . . . . . . . . . . . . . . . . . . . . . . . . . 196
Receiving Data from Multiple Sources . . . . . . . . . . . . . . . . . . . 198
Page 6 # P0995131
Page 7

Chapter 7 — Managing Application Data . . . . . . . . . . . . . 199
Overview of Data Management . . . . . . . . . . . . . . . . . . . . . . . . . 200
Understanding Folders . . . . . . . . . . . . . . . . . . . . . . . . . . . . . . . . 200
Scope. . . . . . . . . . . . . . . . . . . . . . . . . . . . . . . . . . . . . . . . . . 201
Local Scope . . . . . . . . . . . . . . . . . . . . . . . . . . . . . . . . . . 201
Shared Scope . . . . . . . . . . . . . . . . . . . . . . . . . . . . . . . . . 201
Persistent . . . . . . . . . . . . . . . . . . . . . . . . . . . . . . . . . . . . 202
Statistics . . . . . . . . . . . . . . . . . . . . . . . . . . . . . . . . . . . . 202
Include File . . . . . . . . . . . . . . . . . . . . . . . . . . . . . . . . . . 202
Shared Constant . . . . . . . . . . . . . . . . . . . . . . . . . . . . . . 202
Public . . . . . . . . . . . . . . . . . . . . . . . . . . . . . . . . . . . . . . 203
Container Scope . . . . . . . . . . . . . . . . . . . . . . . . . . . . . . . . . 203
Understanding Data Cards . . . . . . . . . . . . . . . . . . . . . . . . . . . . . 204
Selecting Folders and Data Cards Within an Application . . . . . 205
Using Data in Multiple Applications (Include Files) . . . . . . . . . 207
Accessing an Include File . . . . . . . . . . . . . . . . . . . . . . . . . . 208
Adding and Opening Include Files at Subfolder Levels. . . 209
Locating Include Files . . . . . . . . . . . . . . . . . . . . . . . . . . . . 211
Modifying an Include File . . . . . . . . . . . . . . . . . . . . . . . . . 211
Running PeriGEM with Include Files . . . . . . . . . . . . . . . . 212
Composite Data Items . . . . . . . . . . . . . . . . . . . . . . . . . . . . . . . . 212
Using a Date as a Character and a Number . . . . . . . . . . . . 212
Accessing Individual Year Digits . . . . . . . . . . . . . . . . . . . . 212
Organizing Data With Lower-level Folders . . . . . . . . . . . . 213
Creating Multiple Copies of Data . . . . . . . . . . . . . . . . . . . . . . . 215
Understanding the Manage Data Folders Window . . . . . . . . . . 216
Global Manage Data Folders Window . . . . . . . . . . . . . . . . 216
Local Manage Data Folders Window . . . . . . . . . . . . . . . . . 217
Organizing the Folder List . . . . . . . . . . . . . . . . . . . . . . . . . 218
Data Folders Window Options . . . . . . . . . . . . . . . . . . . . . . 218
Saving a Folder . . . . . . . . . . . . . . . . . . . . . . . . . . . . . . . 218
Folder Options . . . . . . . . . . . . . . . . . . . . . . . . . . . . . . . 219
Data Item Options . . . . . . . . . . . . . . . . . . . . . . . . . . . . . 221
Understanding the System Folder . . . . . . . . . . . . . . . . . . . . . . . 223
Using Expressions to Manipulate Data . . . . . . . . . . . . . . . . . . . 227
Numeric Expressions . . . . . . . . . . . . . . . . . . . . . . . . . . . . . 228
Character Expressions. . . . . . . . . . . . . . . . . . . . . . . . . . . . . 229
Conditional Expressions . . . . . . . . . . . . . . . . . . . . . . . . . . . 230
Conditional Expression with {And} and {Or} . . . . . . . 233
Assignment Expressions . . . . . . . . . . . . . . . . . . . . . . . . . . . 235
Assignment Operators for Numeric Expressions . . . . . 236
Assignment Squeeze Operator for String Expressions . 238
Assigning Data Card Values . . . . . . . . . . . . . . . . . . . . . 240
Conversion Operators . . . . . . . . . . . . . . . . . . . . . . . . . . 240
# P0995131 Page 7
Page 8

PeriProducer User’s Guide
Chapter 8 — PeriProducer RDBMS Support . . . . . . . . . . 251
SQL Access to RDBMS (SQL Block) . . . . . . . . . . . . . . . . . . . . 252
Manipulating an RDBMS With the SQL Block . . . . . . . . . . . . 262
Automatically Generating SQL Commands (PeriSQL) . . . . . . 277
Converting Between Attribute:Value Strings and Data
Folders . . . . . . . . . . . . . . . . . . . . . . . . . . . . . . . . . . . . . 241
Subscript Expressions . . . . . . . . . . . . . . . . . . . . . . . . . . . . . 245
Entering Expressions (the Expression-Entry Panel). . . . . . 245
Selecting From Multiple Occurrences of a Folder or Data
Card . . . . . . . . . . . . . . . . . . . . . . . . . . . . . . . . . . . . . . . . . . . 248
SQL Block Window Options . . . . . . . . . . . . . . . . . . . . . . . 254
Valid Data Types for SQL Parameters . . . . . . . . . . . . . . . . 261
Setting the RDBMS Environment Variables . . . . . . . . . . . 262
Accelerating RDBMS Access With SQLClnt (Oracle,
Sybase, and ODBC only) . . . . . . . . . . . . . . . . . . . . . . . . . . . 263
Logging On and Off the RDBMS. . . . . . . . . . . . . . . . . . . . 264
Logging On the RDBMS . . . . . . . . . . . . . . . . . . . . . . . 264
Logging Off the RDBMS . . . . . . . . . . . . . . . . . . . . . . . 264
Password Protection . . . . . . . . . . . . . . . . . . . . . . . . . . . 264
RDBMS Information Locking . . . . . . . . . . . . . . . . . . . . . . 265
Storing Data From an SQL SELECT . . . . . . . . . . . . . . . . . 265
Storing a Returned NULL Value . . . . . . . . . . . . . . . . . 265
Storing Data in Existing Folders/Data Cards . . . . . . . . 265
Automatically Creating Folders and Data Cards . . . . . 266
Using Data Cards in the SQL Command . . . . . . . . . . . . . . 267
Using SELECT With a Wildcard (*) . . . . . . . . . . . . . . . . . 269
Fetching Multiple Records From a Database . . . . . . . . . . . 270
Setting Up a NEXT RECORD . . . . . . . . . . . . . . . . . . . 272
Accessing Records From a Result Set . . . . . . . . . . . . . . . . 272
Support for Oracle Linked Tables . . . . . . . . . . . . . . . . . . . 274
Support for Sybase/MSSQL Built-In System Functions . . 274
Stored Procedures and Functions . . . . . . . . . . . . . . . . . . . . 274
Handling RAISE Exception Condition . . . . . . . . . . . . . 275
Debugging an SQL Application . . . . . . . . . . . . . . . . . . . . . 276
Debugging SQL Commands . . . . . . . . . . . . . . . . . . . . . 276
Using System Status Messages . . . . . . . . . . . . . . . . . . . 277
Chapter 9 — Controlling Application Flow . . . . . . . . . . . 279
Overview of Application Control . . . . . . . . . . . . . . . . . . . . . . . 280
Understanding Connector Blocks . . . . . . . . . . . . . . . . . . . . . . . 281
Entering a Container (Entry Connector). . . . . . . . . . . . . . . 281
Exiting a Container (Exit Connector) . . . . . . . . . . . . . . . . . 281
Uncluttering the Display (Anonymous Connector) . . . . . . 282
Jumping to a Different Block (Source Connector) . . . . . . . 283
Page 8 # P0995131
Page 9

Ending a Jump (Destination Connector). . . . . . . . . . . . . . . 284
Ending a Logical Path (Finish Execution Connector) . . . . 285
Resuming Execution After a Status/Exception Condition
(Resume Connector) . . . . . . . . . . . . . . . . . . . . . . . . . . . . . . 285
Resuming After Initiating a Timer . . . . . . . . . . . . . . . . 285
Understanding Resume Failures . . . . . . . . . . . . . . . . . . 286
Handling Shared Memory Locks During a Resume . . . 287
Positioning Blocks Executed by Reference (Anchor
Block) . . . . . . . . . . . . . . . . . . . . . . . . . . . . . . . . . . . . . . . . . . 287
COMPUTE - Assign/Move/Convert (Compute Block) . . . . . . . 288
Assignments Using a Portion of a Characters Card
(Substring) . . . . . . . . . . . . . . . . . . . . . . . . . . . . . . . . . . . . . . 292
Substring Syntax and Guidelines . . . . . . . . . . . . . . . . . 292
Substring Assignment Examples . . . . . . . . . . . . . . . . . 293
Manipulating the List of Operations. . . . . . . . . . . . . . . . . . 294
Marking Errors in the List of Operations . . . . . . . . . . . 294
Assignments Using Conditional Expressions . . . . . . . . . . . 295
Specifying the Item Prefix String . . . . . . . . . . . . . . . . . . . . 296
Clearing the Item Prefix . . . . . . . . . . . . . . . . . . . . . . . . 297
Item Prefix in a Linked Program . . . . . . . . . . . . . . . . . 297
SWITCH - Choose the Next Block (Switch Block) . . . . . . . . . 299
Comparisons Using a Portion of a Characters Card
(Substring) . . . . . . . . . . . . . . . . . . . . . . . . . . . . . . . . . . . . . . 301
Substring Syntax and Guidelines . . . . . . . . . . . . . . . . . 301
Substring Comparison Examples . . . . . . . . . . . . . . . . . 302
CONTAINER Block . . . . . . . . . . . . . . . . . . . . . . . . . . . . . . . . . 303
Adding a Container. . . . . . . . . . . . . . . . . . . . . . . . . . . . . . . 304
Grouping Blocks Into Containers . . . . . . . . . . . . . . . . . 304
Containers and Lower-Level Construction Areas . . . . . . . 304
Data Local to a Container . . . . . . . . . . . . . . . . . . . . . . . . . . 305
Parameterized Containers . . . . . . . . . . . . . . . . . . . . . . . . . . 305
Code Sharing. . . . . . . . . . . . . . . . . . . . . . . . . . . . . . . . . . . . 307
Reference Blocks in a Saved Container . . . . . . . . . . . . 307
Looping a Container . . . . . . . . . . . . . . . . . . . . . . . . . . . . . . 308
Calling an External VEX File . . . . . . . . . . . . . . . . . . . . 309
Using an Index . . . . . . . . . . . . . . . . . . . . . . . . . . . . . . . 310
Executing a Container For . . . . . . . . . . . . . . . . . . . . . . 310
Executing a Container While . . . . . . . . . . . . . . . . . . . . 310
Executing a Container Until . . . . . . . . . . . . . . . . . . . . . 311
Loop Expressions Using a Portion of a Character Card
(Substring) . . . . . . . . . . . . . . . . . . . . . . . . . . . . . . . . . . . . . . 311
Substring Syntax and Guidelines . . . . . . . . . . . . . . . . . 312
Substring Comparison Examples . . . . . . . . . . . . . . . . . 312
Vexlinked Applications with Containers . . . . . . . . . . . . . . 313
Creating an External container: . . . . . . . . . . . . . . . . . . 313
Making the Final Vex File . . . . . . . . . . . . . . . . . . . . . . 314
# P0995131 Page 9
Page 10

PeriProducer User’s Guide
DYNAMIC Menus Block . . . . . . . . . . . . . . . . . . . . . . . . . . . . . 315
Access to CORBA Server Object Block . . . . . . . . . . . . . . . . . . 321
Blocking/Non-blocking Execution . . . . . . . . . . . . . . . . . . . . . . 326
Chapter 10 — Communicating With a Host Computer . . 329
Overview of Host Communication . . . . . . . . . . . . . . . . . . . . . . 330
Screen Mode . . . . . . . . . . . . . . . . . . . . . . . . . . . . . . . . . . . . . . . 331
Monitoring and Debugging Host Interaction . . . . . . . . . . . . . . . 333
Managing Host Timers and Exception Conditions . . . . . . . . . . 336
Verifying Host Availability . . . . . . . . . . . . . . . . . . . . . . . . . . . . 337
The Screen Mapper Utility . . . . . . . . . . . . . . . . . . . . . . . . . . . . 338
SEND HOST Information (SendHost Block) . . . . . . . . . . . . . . 348
RECEIVE HOST Information (ReceiveHost Block) . . . . . . . . 351
Initializing Dynamic Menus . . . . . . . . . . . . . . . . . . . . . . . . 315
Creating Selection Paths . . . . . . . . . . . . . . . . . . . . . . . . . . . 317
Adding Menu Items . . . . . . . . . . . . . . . . . . . . . . . . . . . . . . 318
User Data Entry . . . . . . . . . . . . . . . . . . . . . . . . . . . . . . 318
Prompt Phrase Data . . . . . . . . . . . . . . . . . . . . . . . . . . . 319
Sample Application using Dynamic Menus . . . . . . . . . . . . 320
corbaclnt Operation. . . . . . . . . . . . . . . . . . . . . . . . . . . . . . . 321
CORBA Block . . . . . . . . . . . . . . . . . . . . . . . . . . . . . . . . . . 323
Screen Definitions. . . . . . . . . . . . . . . . . . . . . . . . . . . . . . . . 331
Screen Identification . . . . . . . . . . . . . . . . . . . . . . . . . . . . . . 332
Message-Based Interaction . . . . . . . . . . . . . . . . . . . . . . . . . 332
Host Simulation (Simulated Mode) . . . . . . . . . . . . . . . . . . 333
Host Simulation (Real Mode) . . . . . . . . . . . . . . . . . . . . . . . 334
Mirroring Host Interaction (Real Mode) . . . . . . . . . . . . . . 335
Customizing the Host Simulation Window . . . . . . . . . . . . 335
Command Line Access to PeriMap . . . . . . . . . . . . . . . . . . 338
Accessing PeriMap From Within PeriProducer . . . . . . . . . 338
Determining the Save Status of the Current Map . . . . . . . . 339
Resizing the PeriMap Window . . . . . . . . . . . . . . . . . . . . . . 339
PeriMap Cells . . . . . . . . . . . . . . . . . . . . . . . . . . . . . . . . . . . 339
Selecting a Map Field . . . . . . . . . . . . . . . . . . . . . . . . . . . . . 339
Creating a Map . . . . . . . . . . . . . . . . . . . . . . . . . . . . . . . . . . 340
Creating and Defining PeriMap fields . . . . . . . . . . . . . 340
Naming PeriMap Fields . . . . . . . . . . . . . . . . . . . . . . . . 341
Naming Maps in PeriMap . . . . . . . . . . . . . . . . . . . . . . . 341
Transferring Maps to PeriProducer . . . . . . . . . . . . . . . . 341
Grouping and Saving Maps . . . . . . . . . . . . . . . . . . . . . . . . 342
Saving a Map in a File . . . . . . . . . . . . . . . . . . . . . . . . . . . . 342
PeriMap Window Options . . . . . . . . . . . . . . . . . . . . . . . . . 343
Customizing PeriMap Properties . . . . . . . . . . . . . . . . . . . . 346
Page 10 # P0995131
Page 11

Chapter 11 — Telephone Line Management . . . . . . . . . . . 353
Overview of Telephone Line Management . . . . . . . . . . . . . . . . 354
Phone Line Environment Parameters . . . . . . . . . . . . . . . . . . . . 354
Originating and Transferring (Referring) Calls . . . . . . . . . . . . . 355
Registering for Up/Down Service State Change of the Phone
Line . . . . . . . . . . . . . . . . . . . . . . . . . . . . . . . . . . . . . . . . . . . . . . 355
Set ENVIRONMENT Options (Environment Block) . . . . . . . . 357
Working With Environment Options . . . . . . . . . . . . . . . . . 358
Setting Environment Options From Data Cards . . . . . . . . . 359
ANSWER the Phone with a Greeting (Answer Block) . . . . . . . 360
ORIGINATE Block . . . . . . . . . . . . . . . . . . . . . . . . . . . . . . . . . . 363
Transferring (Referring) a Call . . . . . . . . . . . . . . . . . . . . . . 365
Implementing an Automatic Referral . . . . . . . . . . . . . . 365
Call Progress Detection (Call Progress Detection Block) . . . . . 366
Handling a Call Progress Detection Event . . . . . . . . . . . . . 368
DISCONNECT (Hang Up) the Phone (Disconnect Block) . . . . 369
Detecting a TDD Call . . . . . . . . . . . . . . . . . . . . . . . . . . . . . . . . 372
Advanced Telephone Line Functions . . . . . . . . . . . . . . . . . . . . 375
Bridging Calls . . . . . . . . . . . . . . . . . . . . . . . . . . . . . . . . . . . 375
Implementing a Customized Referral . . . . . . . . . . . . . . 375
Returning to the Original Referral Line . . . . . . . . . . . . 377
BRIDGE Block . . . . . . . . . . . . . . . . . . . . . . . . . . . . . . . . . . 378
Chapter 12 — Using Caller Message Recording (CMR) . 381
Overview of Caller Message Recording. . . . . . . . . . . . . . . . . . 382
CMR Examples . . . . . . . . . . . . . . . . . . . . . . . . . . . . . . . . . . . . . 382
Understanding Media Storage (MS) Tokens . . . . . . . . . . . . . . . 384
Updating Vocabulary Elements with CMR Data . . . . . . . . . . . 385
CMR Watermark Conditions . . . . . . . . . . . . . . . . . . . . . . . . . . . 386
Suggested Handle Block Settings for CMR . . . . . . . . . . . . . . . 387
CMR Timeout Parameters . . . . . . . . . . . . . . . . . . . . . . . . . . . . . 388
RECORD a Message From the Caller (Record Block) . . . . . . . 389
Recording Related Messages . . . . . . . . . . . . . . . . . . . . . . . 393
Indexing the List of Messages . . . . . . . . . . . . . . . . . . . 393
Playing a Message to the Caller . . . . . . . . . . . . . . . . . . . . . . . . . 394
Appending to an existing recording . . . . . . . . . . . . . . . . . . 395
Appending to an existing Vocabulary Item . . . . . . . . . . . . 395
Appending to an existing CMR recording . . . . . . . . . . . . . 395
Appending to an existing WAV file . . . . . . . . . . . . . . . . . . 395
Deleting a CMR Message or Vocabulary Item. . . . . . . . . . 396
Chapter 13 — Using the Fax Resource . . . . . . . . . . . . . . . . 397
Overview of Fax Management . . . . . . . . . . . . . . . . . . . . . . . . . 398
Introduction to Fax Reception . . . . . . . . . . . . . . . . . . . . . . 398
# P0995131 Page 11
Page 12

PeriProducer User’s Guide
RECEIVE a FAX (Receive Fax Block) . . . . . . . . . . . . . . . . . . . 399
SEND a FAX (Send Fax Block) . . . . . . . . . . . . . . . . . . . . . . . . 401
COMPOSE a FAX (within PeriProducer) . . . . . . . . . . . . . . . . . 404
Chapter 14 — Using Call Conferencing . . . . . . . . . . . . . . 415
Overview of Call Conferencing . . . . . . . . . . . . . . . . . . . . . . . . . 416
Call Conferencing Functions (Call Conferencing Block) . . . . . 417
Creating a Conference . . . . . . . . . . . . . . . . . . . . . . . . . . . . . . . . 420
Setting Conference Parameters . . . . . . . . . . . . . . . . . . . . . . . . . 421
Joining a Conference . . . . . . . . . . . . . . . . . . . . . . . . . . . . . . . . . 424
Leaving a Conference . . . . . . . . . . . . . . . . . . . . . . . . . . . . . . . . 427
Destroying a Conference . . . . . . . . . . . . . . . . . . . . . . . . . . . . . . 428
Introduction to Fax Transmission . . . . . . . . . . . . . . . . . . . . 398
Introduction to Fax Composition . . . . . . . . . . . . . . . . . . . . 398
2FAX Utility . . . . . . . . . . . . . . . . . . . . . . . . . . . . . . . . . . . . 405
Synopsis . . . . . . . . . . . . . . . . . . . . . . . . . . . . . . . . . . . . 405
2FAX Options . . . . . . . . . . . . . . . . . . . . . . . . . . . . . . . . 405
Sample.ASC . . . . . . . . . . . . . . . . . . . . . . . . . . . . . . . . . 409
TIFFCP Utility . . . . . . . . . . . . . . . . . . . . . . . . . . . . . . . . . . 410
EXAMPLES . . . . . . . . . . . . . . . . . . . . . . . . . . . . . . . . . 412
Conference Size . . . . . . . . . . . . . . . . . . . . . . . . . . . . . . . . . 421
Connection Types . . . . . . . . . . . . . . . . . . . . . . . . . . . . . . . . 422
Coaching . . . . . . . . . . . . . . . . . . . . . . . . . . . . . . . . . . . . . . . 423
Local Conference Model . . . . . . . . . . . . . . . . . . . . . . . . . . 424
Global Conference Model. . . . . . . . . . . . . . . . . . . . . . . . . . 425
Conferencing Handle/Exception Conditions . . . . . . . . . . . 426
Chapter 15 — Using Databases and Flat Files . . . . . . . . . 429
Overview of Application File Management . . . . . . . . . . . . . . . 430
Flat files (Queues) . . . . . . . . . . . . . . . . . . . . . . . . . . . . . . . . . . . 431
Database (Direct Access) Files . . . . . . . . . . . . . . . . . . . . . . . . . 432
Identifying Records to be Read . . . . . . . . . . . . . . . . . . . . . 432
Hashed Files . . . . . . . . . . . . . . . . . . . . . . . . . . . . . . . . . . . . 433
Indexed Files. . . . . . . . . . . . . . . . . . . . . . . . . . . . . . . . . . . . 433
Exclusive Locks on File Records . . . . . . . . . . . . . . . . . . . . 434
Sequenced Access to Records (Browsing) . . . . . . . . . . . . . 436
Starting a Browse . . . . . . . . . . . . . . . . . . . . . . . . . . . . . 436
Retrieving Records . . . . . . . . . . . . . . . . . . . . . . . . . . . . 436
Changing a Browse . . . . . . . . . . . . . . . . . . . . . . . . . . . . 436
Ending a Browse . . . . . . . . . . . . . . . . . . . . . . . . . . . . . . 437
Browse ID . . . . . . . . . . . . . . . . . . . . . . . . . . . . . . . . . . . 437
Database Conversion . . . . . . . . . . . . . . . . . . . . . . . . . . . . . . . . . 437
Platform Conversion . . . . . . . . . . . . . . . . . . . . . . . . . . . . . . 437
Starting a Reader . . . . . . . . . . . . . . . . . . . . . . . . . . . . . . 437
Starting a Writer . . . . . . . . . . . . . . . . . . . . . . . . . . . . . . 438
Page 12 # P0995131
Page 13

Database Format Conversion . . . . . . . . . . . . . . . . . . . . . . . 438
Reader/Writer Synchronization . . . . . . . . . . . . . . . . . . . . . 438
The File List Window . . . . . . . . . . . . . . . . . . . . . . . . . . . . . . . . 439
DISK I/O To or From a File (DiskIO Block) . . . . . . . . . . . . . . 441
Chapter 16 — Special Purpose Blocks . . . . . . . . . . . . . . . . 447
HANDLE Exception Conditions (Handle Block) . . . . . . . . . . . 448
Condition Message Handling . . . . . . . . . . . . . . . . . . . . . . . 449
Noticing a Condition . . . . . . . . . . . . . . . . . . . . . . . . . . . 450
Handling/Catching/Ignoring Conditions. . . . . . . . . . . . . . . 452
Displaying Instances of a Condition Connector . . . . . . 454
Common Handle Block Settings . . . . . . . . . . . . . . . . . . 454
Handle According to Status . . . . . . . . . . . . . . . . . . . . . 456
Use SYSTEM Services (System Block) . . . . . . . . . . . . . . . . . . 457
Passing Parameters to Linked Applications . . . . . . . . . 464
CONSOLE Map Accept/Display (Console Block) . . . . . . . . . . 468
Console Block Overview . . . . . . . . . . . . . . . . . . . . . . . . . . 468
Customizing the Display Window . . . . . . . . . . . . . . . . . . . 470
Customizing the Size and Location of the Window . . . 470
Specifying the Display Node . . . . . . . . . . . . . . . . . . . . 472
Displaying Maps . . . . . . . . . . . . . . . . . . . . . . . . . . . . . . . . . 472
Accepting Input from Map Displays . . . . . . . . . . . . . . . . . 473
Row and Column Operands . . . . . . . . . . . . . . . . . . . . . . . . 474
Handling Unusual Conditions. . . . . . . . . . . . . . . . . . . . . . . 474
Implementation Notes. . . . . . . . . . . . . . . . . . . . . . . . . . . . . 474
Access an External RESOURCE (Resource Block) . . . . . . . . . 475
Available Resources . . . . . . . . . . . . . . . . . . . . . . . . . . . . . . 477
Perform Media Operations (Media Operations Block) . . . . . . . 479
Line Operations (Line Operations Block) . . . . . . . . . . . . . . . . . 481
Call Control (Call Control Block) . . . . . . . . . . . . . . . . . . . . . . . 484
Abort Outstanding I/O (Abort Block) . . . . . . . . . . . . . . . . . . . . 486
Date Calculations (Datecalc Block) . . . . . . . . . . . . . . . . . . . . . . 487
Converting Dates . . . . . . . . . . . . . . . . . . . . . . . . . . . . . . . . 488
Adding or Subtracting Dates. . . . . . . . . . . . . . . . . . . . . . . . 488
Datecalc Return Codes . . . . . . . . . . . . . . . . . . . . . . . . . . . . 489
Specifying a Conversion or Computation Pattern . . . . . . . 490
Datecalc <source-format> Characters . . . . . . . . . . . . . 490
Datecalc <operation> Characters . . . . . . . . . . . . . . . . . 491
Datecalc <target-format> Characters . . . . . . . . . . . . . . 491
Send E-mail (E-mail Block) . . . . . . . . . . . . . . . . . . . . . . . . . . . 493
Working with Tables . . . . . . . . . . . . . . . . . . . . . . . . . . . . . . . . . 494
Setting Up a Table . . . . . . . . . . . . . . . . . . . . . . . . . . . . . . . 494
Initializing a Table . . . . . . . . . . . . . . . . . . . . . . . . . . . . . . . 496
Sorting a Table . . . . . . . . . . . . . . . . . . . . . . . . . . . . . . . . . . 497
Searching a Table . . . . . . . . . . . . . . . . . . . . . . . . . . . . . . . . 498
# P0995131 Page 13
Page 14

PeriProducer User’s Guide
Chapter 17 — Customizing PeriProducer . . . . . . . . . . . . . 501
Changing PeriProducer Properties . . . . . . . . . . . . . . . . . . . . . . . 502
Creating Custom Containers . . . . . . . . . . . . . . . . . . . . . . . . . . . 517
Table Sort (Table Sort Block). . . . . . . . . . . . . . . . . . . . . . . 499
Table Search (Table Search Block) . . . . . . . . . . . . . . . . . . 500
Configuring Main Container Properties . . . . . . . . . . . . . . . 502
PeriProducer 2.30 Runtime Behavior . . . . . . . . . . . . . . . . . 503
Handle Conditions . . . . . . . . . . . . . . . . . . . . . . . . . . . . 503
Speak with Locked Keyboard . . . . . . . . . . . . . . . . . . . . 504
Configuring Application Properties . . . . . . . . . . . . . . . . . . 504
Configuring Generator Properties. . . . . . . . . . . . . . . . . . . . 510
Changing Colors . . . . . . . . . . . . . . . . . . . . . . . . . . . . . . 514
Construction Area Grid Size . . . . . . . . . . . . . . . . . . . . . 515
Accessing Vocabulary Options. . . . . . . . . . . . . . . . . . . . . . 516
Adding Custom Containers to the Tool Kit . . . . . . . . . . . . 516
Redisplaying the Tool Kit. . . . . . . . . . . . . . . . . . . . . . . . . . 516
Defining and Modifying Custom Containers . . . . . . . . . . . 517
Undoing Changes to the Tool Kit . . . . . . . . . . . . . . . . . . . . 520
Working With Custom Containers . . . . . . . . . . . . . . . . . . . 521
Defining a Custom Container . . . . . . . . . . . . . . . . . . . . 521
Changing a Custom Container . . . . . . . . . . . . . . . . . . . 521
Removing a Custom Container . . . . . . . . . . . . . . . . . . . 522
Positioning the Custom Containers . . . . . . . . . . . . . . . . 522
Passing Data to or From a Custom Container. . . . . . . . . . . 522
Chapter 18 — Answers to Frequently Asked Questions . 523
Starting PeriProducer . . . . . . . . . . . . . . . . . . . . . . . . . . . . . . . . . 524
Why Won't PeriProducer Start? . . . . . . . . . . . . . . . . . . 524
Why is the Tool Kit Blank When PeriProducer Starts? 524
How Can I Change the Location of the Default
Vocabulary? . . . . . . . . . . . . . . . . . . . . . . . . . . . . . . . . . 524
Why Won't PeriStudio Start? . . . . . . . . . . . . . . . . . . . . 524
Why Won't the Help Key Work? . . . . . . . . . . . . . . . . . 524
Can I Use SCCS to Maintain PeriProducer Source
Code? . . . . . . . . . . . . . . . . . . . . . . . . . . . . . . . . . . . . . . 525
Why Did I Get an “attribute not found in current table”
Error? . . . . . . . . . . . . . . . . . . . . . . . . . . . . . . . . . . . . . . 525
Creating an Application . . . . . . . . . . . . . . . . . . . . . . . . . . . . . . . 526
How Do I Acknowledge a Notice Using the
Keyboard? . . . . . . . . . . . . . . . . . . . . . . . . . . . . . . . . . . . 526
Why Are Some Block Options Unavailable (Grayed-Out)?
526
Why Doesn't a Break Point That is Set on a Container Cause
a Reference to That Container to Stop? . . . . . . . . . . . . 526
Page 14 # P0995131
Page 15

What Should I do When the Case Connectors From a Switch
Go Outside the Container? . . . . . . . . . . . . . . . . . . . . . . 526
How Do I Keep From Closing (Unpinning) a Block Too
Soon? . . . . . . . . . . . . . . . . . . . . . . . . . . . . . . . . . . . . . . 526
How Are the {And} and {Or} Operators in a Switch block
Evaluated? . . . . . . . . . . . . . . . . . . . . . . . . . . . . . . . . . . . 527
Why isn't Paste Enabled After Copying a Group of
Blocks? . . . . . . . . . . . . . . . . . . . . . . . . . . . . . . . . . . . . . 527
Why Can't I Paste a Container or a Handle Block That has
Source or Destination Connectors? . . . . . . . . . . . . . . . . 528
How Do I Display Several Messages on a Single
Line? . . . . . . . . . . . . . . . . . . . . . . . . . . . . . . . . . . . . . . . 528
How Do I Select an Array Element as an Operand in a
Block? . . . . . . . . . . . . . . . . . . . . . . . . . . . . . . . . . . . . . . 528
Why Does My File List Have Files in it That I Didn't Define?
. . . . . . . . . . . . . . . . . . . . . . . . . . . . . . . . . . . . . . . . . . . . 528
How Do I Select a Condition That Is Not In the List? . 528
Is the Terminator Character Saved Somewhere After a Read
Phone Block? . . . . . . . . . . . . . . . . . . . . . . . . . . . . . . . . 529
Can I Batch Generate Applications? . . . . . . . . . . . . . . . 529
Can I Customize the Host Simulation Window? . . . . . 529
Can I Customize the Console Block Window? . . . . . . 529
How Do I Pass More Than Six Parameters to a Call
Function? . . . . . . . . . . . . . . . . . . . . . . . . . . . . . . . . . . . 529
Executing an Application . . . . . . . . . . . . . . . . . . . . . . . . . . . . . . 530
Why Am I Getting the Output Failure Condition of When I
Execute an Answer Block in Simulated Mode? . . . . . . 530
Why Does PeriProducer Think My Application Has Been
Changed When I Open an Empty Container For the First
Time? . . . . . . . . . . . . . . . . . . . . . . . . . . . . . . . . . . . . . . 530
Why Isn't a Breakpoint Set at the Current Block? . . . . 530
Why Does My Application Immediately Stop After
Starting? . . . . . . . . . . . . . . . . . . . . . . . . . . . . . . . . . . . . 530
How Are Block Statistics (Application Statistics)
Managed? . . . . . . . . . . . . . . . . . . . . . . . . . . . . . . . . . . . 530
Can You Just Print an Application? . . . . . . . . . . . . . . . 530
How Does PeriProducer Manage Conditions in a Linked
Application? . . . . . . . . . . . . . . . . . . . . . . . . . . . . . . . . . 530
Why Does the FAX Send Map Only Put Unprotected Fields
In the FAX? . . . . . . . . . . . . . . . . . . . . . . . . . . . . . . . . . 530
How Are Parameters Passed to a Linked Application? 531
Why Does the Host Environment Option ertimeout Produce
an Error Message When Set to 2 Minutes? . . . . . . . . . . 531
What Does <Message> Mean? . . . . . . . . . . . . . . . . . . . 532
Troubleshooting an Application . . . . . . . . . . . . . . . . . . . . . . . . 533
# P0995131 Page 15
Page 16

PeriProducer User’s Guide
Speech Issues . . . . . . . . . . . . . . . . . . . . . . . . . . . . . . . . . . . . . . . 534
Appendix A — Call Functions
Reference . . . . . . . . . . . . . . . . . . . . . . . . . . . . . . . . . . . . . . . 537
Using Call Functions . . . . . . . . . . . . . . . . . . . . . . . . . . . . . . . . . 538
List of Call Functions . . . . . . . . . . . . . . . . . . . . . . . . . . . . . . . . 541
Call Function Library . . . . . . . . . . . . . . . . . . . . . . . . . . . . . . . . . 544
What does it mean when the message, “Please, submit file
<filename> to R&D” is displayed? . . . . . . . . . . . . . . . . 533
How Do I Speak Fractional Values? . . . . . . . . . . . . . . . 534
How Does PeriProducer Speak a Two Digit Year? . . . 535
Alphabetical Index . . . . . . . . . . . . . . . . . . . . . . . . . . . . . . . 541
Category Index . . . . . . . . . . . . . . . . . . . . . . . . . . . . . . . . . . 542
String Manipulations . . . . . . . . . . . . . . . . . . . . . . . . . . . 542
Speak and Telephony . . . . . . . . . . . . . . . . . . . . . . . . . . 542
VMS Message Processing . . . . . . . . . . . . . . . . . . . . . . 542
Host . . . . . . . . . . . . . . . . . . . . . . . . . . . . . . . . . . . . . . . . 542
Time and Date . . . . . . . . . . . . . . . . . . . . . . . . . . . . . . . . 543
Data Manipulations . . . . . . . . . . . . . . . . . . . . . . . . . . . . 543
Binary Data . . . . . . . . . . . . . . . . . . . . . . . . . . . . . . . . . . 543
Misc . . . . . . . . . . . . . . . . . . . . . . . . . . . . . . . . . . . . . . . 543
alarm . . . . . . . . . . . . . . . . . . . . . . . . . . . . . . . . . . . . . . . . . . 544
array-qsort. . . . . . . . . . . . . . . . . . . . . . . . . . . . . . . . . . . . . . 545
array-read . . . . . . . . . . . . . . . . . . . . . . . . . . . . . . . . . . . . . . 546
array-write. . . . . . . . . . . . . . . . . . . . . . . . . . . . . . . . . . . . . . 547
ask-date . . . . . . . . . . . . . . . . . . . . . . . . . . . . . . . . . . . . . . . . 548
avs-to-fol. . . . . . . . . . . . . . . . . . . . . . . . . . . . . . . . . . . . . . . 549
Exceptions . . . . . . . . . . . . . . . . . . . . . . . . . . . . . . . . . . . 549
Case Sensitivity . . . . . . . . . . . . . . . . . . . . . . . . . . . . . . . 550
char-to-hex . . . . . . . . . . . . . . . . . . . . . . . . . . . . . . . . . . . . . 551
char-to-num. . . . . . . . . . . . . . . . . . . . . . . . . . . . . . . . . . . . . 553
concat-strings . . . . . . . . . . . . . . . . . . . . . . . . . . . . . . . . . . . 555
condition-data . . . . . . . . . . . . . . . . . . . . . . . . . . . . . . . . . . . 556
convert-base . . . . . . . . . . . . . . . . . . . . . . . . . . . . . . . . . . . . 559
convert-from-binary . . . . . . . . . . . . . . . . . . . . . . . . . . . . . . 561
convert-to-binary . . . . . . . . . . . . . . . . . . . . . . . . . . . . . . . . 562
crc16-a . . . . . . . . . . . . . . . . . . . . . . . . . . . . . . . . . . . . . . . . 563
crc16-b . . . . . . . . . . . . . . . . . . . . . . . . . . . . . . . . . . . . . . . . 563
current-mode. . . . . . . . . . . . . . . . . . . . . . . . . . . . . . . . . . . . 564
data-length . . . . . . . . . . . . . . . . . . . . . . . . . . . . . . . . . . . . . 565
data-replace. . . . . . . . . . . . . . . . . . . . . . . . . . . . . . . . . . . . . 566
Translation Units and Pattern Processing . . . . . . . . . . . 567
Special Cases . . . . . . . . . . . . . . . . . . . . . . . . . . . . . . . . 567
date-calc . . . . . . . . . . . . . . . . . . . . . . . . . . . . . . . . . . . . . . . 568
date-calc Rules . . . . . . . . . . . . . . . . . . . . . . . . . . . . . . . 569
Page 16 # P0995131
Page 17

Date Conversions and Computations . . . . . . . . . . . . . . 569
Holiday Tables . . . . . . . . . . . . . . . . . . . . . . . . . . . . . . . 571
day-of-week . . . . . . . . . . . . . . . . . . . . . . . . . . . . . . . . . . . . 574
double-mod10-check . . . . . . . . . . . . . . . . . . . . . . . . . . . . . 575
execute-command . . . . . . . . . . . . . . . . . . . . . . . . . . . . . . . . 576
extern . . . . . . . . . . . . . . . . . . . . . . . . . . . . . . . . . . . . . . . . . 578
fol-to-avs. . . . . . . . . . . . . . . . . . . . . . . . . . . . . . . . . . . . . . . 579
Exceptions . . . . . . . . . . . . . . . . . . . . . . . . . . . . . . . . . . . 579
fol-to-xml . . . . . . . . . . . . . . . . . . . . . . . . . . . . . . . . . . . . . . 580
Parameters: . . . . . . . . . . . . . . . . . . . . . . . . . . . . . . . . . . 580
format-string . . . . . . . . . . . . . . . . . . . . . . . . . . . . . . . . . . . . 581
get-configuration. . . . . . . . . . . . . . . . . . . . . . . . . . . . . . . . . 582
get-next-token . . . . . . . . . . . . . . . . . . . . . . . . . . . . . . . . . . . 584
get-parameter . . . . . . . . . . . . . . . . . . . . . . . . . . . . . . . . . . . 586
get-random . . . . . . . . . . . . . . . . . . . . . . . . . . . . . . . . . . . . . 587
get-token-info . . . . . . . . . . . . . . . . . . . . . . . . . . . . . . . . . . . 588
hex-to-char . . . . . . . . . . . . . . . . . . . . . . . . . . . . . . . . . . . . . 589
hex-to-decimal . . . . . . . . . . . . . . . . . . . . . . . . . . . . . . . . . . 591
host-status . . . . . . . . . . . . . . . . . . . . . . . . . . . . . . . . . . . . . . 593
item-prefix . . . . . . . . . . . . . . . . . . . . . . . . . . . . . . . . . . . . . 594
item-prefix in Linked Applications . . . . . . . . . . . . . . . . 596
justify . . . . . . . . . . . . . . . . . . . . . . . . . . . . . . . . . . . . . . . . . 597
last-condition . . . . . . . . . . . . . . . . . . . . . . . . . . . . . . . . . . . 599
last-message-addr . . . . . . . . . . . . . . . . . . . . . . . . . . . . . . . . 600
lrc8-a . . . . . . . . . . . . . . . . . . . . . . . . . . . . . . . . . . . . . . . . . . 602
lrc8-b. . . . . . . . . . . . . . . . . . . . . . . . . . . . . . . . . . . . . . . . . . 602
message-queue . . . . . . . . . . . . . . . . . . . . . . . . . . . . . . . . . . 603
mod10-check. . . . . . . . . . . . . . . . . . . . . . . . . . . . . . . . . . . . 604
move-data . . . . . . . . . . . . . . . . . . . . . . . . . . . . . . . . . . . . . . 605
pack-pace . . . . . . . . . . . . . . . . . . . . . . . . . . . . . . . . . . . . . . 606
prev-para . . . . . . . . . . . . . . . . . . . . . . . . . . . . . . . . . . . . . . . 607
process . . . . . . . . . . . . . . . . . . . . . . . . . . . . . . . . . . . . . . . . 608
command_name = create . . . . . . . . . . . . . . . . . . . . . . . 608
command_name = write-to . . . . . . . . . . . . . . . . . . . . . . 608
command_name = close . . . . . . . . . . . . . . . . . . . . . . . . 609
command_name = read-from . . . . . . . . . . . . . . . . . . . . 609
command_name = wait-for . . . . . . . . . . . . . . . . . . . . . . 609
command_name = detach . . . . . . . . . . . . . . . . . . . . . . . 610
command_name = kill . . . . . . . . . . . . . . . . . . . . . . . . . 610
recordmmf-status . . . . . . . . . . . . . . . . . . . . . . . . . . . . . . . . 611
reminder-cancel . . . . . . . . . . . . . . . . . . . . . . . . . . . . . . . . . 612
reminder-message . . . . . . . . . . . . . . . . . . . . . . . . . . . . . . . . 613
scan-string. . . . . . . . . . . . . . . . . . . . . . . . . . . . . . . . . . . . . . 614
service-status. . . . . . . . . . . . . . . . . . . . . . . . . . . . . . . . . . . . 617
set-currency. . . . . . . . . . . . . . . . . . . . . . . . . . . . . . . . . . . . . 618
set-date-prefix . . . . . . . . . . . . . . . . . . . . . . . . . . . . . . . . . . . 621
# P0995131 Page 17
Page 18

PeriProducer User’s Guide
shared-memory-init. . . . . . . . . . . . . . . . . . . . . . . . . . . . . . . 623
speak . . . . . . . . . . . . . . . . . . . . . . . . . . . . . . . . . . . . . . . . . . 624
speak-as-fraction. . . . . . . . . . . . . . . . . . . . . . . . . . . . . . . . . 626
speak-cid . . . . . . . . . . . . . . . . . . . . . . . . . . . . . . . . . . . . . . . 628
speak-conversion-type . . . . . . . . . . . . . . . . . . . . . . . . . . . . 630
Other Methods for Setting Language Rules . . . . . . . . . 631
Implicit Settings Invoked by speak-conversion-type . . 631
Specifying the year spoken form . . . . . . . . . . . . . . . . . 632
Implementing British Language Rules . . . . . . . . . . . . . 633
Using English Tokens . . . . . . . . . . . . . . . . . . . . . . . . . . 633
speak-gender-type. . . . . . . . . . . . . . . . . . . . . . . . . . . . . . . . 634
table-search . . . . . . . . . . . . . . . . . . . . . . . . . . . . . . . . . . . . . 635
Defining the Array . . . . . . . . . . . . . . . . . . . . . . . . . . . . 636
table-sort . . . . . . . . . . . . . . . . . . . . . . . . . . . . . . . . . . . . . . . 637
Defining the Array . . . . . . . . . . . . . . . . . . . . . . . . . . . . 638
throw . . . . . . . . . . . . . . . . . . . . . . . . . . . . . . . . . . . . . . . . . . 639
time-calc . . . . . . . . . . . . . . . . . . . . . . . . . . . . . . . . . . . . . . . 640
timer-difference . . . . . . . . . . . . . . . . . . . . . . . . . . . . . . . . . 644
timer-start . . . . . . . . . . . . . . . . . . . . . . . . . . . . . . . . . . . . . . 645
timestamp . . . . . . . . . . . . . . . . . . . . . . . . . . . . . . . . . . . . . . 646
to-lower. . . . . . . . . . . . . . . . . . . . . . . . . . . . . . . . . . . . . . . . 647
to-upper. . . . . . . . . . . . . . . . . . . . . . . . . . . . . . . . . . . . . . . . 649
translate. . . . . . . . . . . . . . . . . . . . . . . . . . . . . . . . . . . . . . . . 651
trim-spaces . . . . . . . . . . . . . . . . . . . . . . . . . . . . . . . . . . . . . 653
unpack-pace . . . . . . . . . . . . . . . . . . . . . . . . . . . . . . . . . . . . 654
web-translate. . . . . . . . . . . . . . . . . . . . . . . . . . . . . . . . . . . . 655
xml . . . . . . . . . . . . . . . . . . . . . . . . . . . . . . . . . . . . . . . . . . . 656
Node Interface Commands . . . . . . . . . . . . . . . . . . . . . . 658
Node List Interface Commands . . . . . . . . . . . . . . . . . . 661
xml-to-fol . . . . . . . . . . . . . . . . . . . . . . . . . . . . . . . . . . . . . . 663
Parameters: . . . . . . . . . . . . . . . . . . . . . . . . . . . . . . . . . . 663
xtranslate. . . . . . . . . . . . . . . . . . . . . . . . . . . . . . . . . . . . . . . 665
Appendix B — Environment Options Reference . . . . . . . 667
Environment Options Overview . . . . . . . . . . . . . . . . . . . . . . . . 668
Application and System Environment . . . . . . . . . . . . . . . . . . . . 668
Host Environment . . . . . . . . . . . . . . . . . . . . . . . . . . . . . . . . . . . 671
Generic Environment Options . . . . . . . . . . . . . . . . . . . . . . . . . . 672
VENGINE Environment . . . . . . . . . . . . . . . . . . . . . . . . . . . . . . 673
Appendix C — Handle Conditions Reference . . . . . . . . . . 677
Overview . . . . . . . . . . . . . . . . . . . . . . . . . . . . . . . . . . . . . . . . . . 678
Application Management Exception Conditions . . . . . . . . . . . . 678
Phone Line Messages and Events . . . . . . . . . . . . . . . . . . . . . . . 683
Page 18 # P0995131
Page 19

Phone Line Status/Timeout/Data Conditions . . . . . . . . . . . . . . 686
Resource Management Conditions . . . . . . . . . . . . . . . . . . . . . . 687
Message Recording and Multimedia Conditions . . . . . . . . . . . . 690
Call Conferencing Conditions . . . . . . . . . . . . . . . . . . . . . . . . . . 692
Fax Conditions . . . . . . . . . . . . . . . . . . . . . . . . . . . . . . . . . . . . . . 695
Host Status/Exception Conditions . . . . . . . . . . . . . . . . . . . . . . . 696
File Access Status/Exception Conditions . . . . . . . . . . . . . . . . . 699
RDBMS Exception Conditions . . . . . . . . . . . . . . . . . . . . . . . . . 701
CORBA Server Exceptions . . . . . . . . . . . . . . . . . . . . . . . . . . . . 703
Miscellaneous Responses (not typically handled) . . . . . . . . . . . 704
Group I . . . . . . . . . . . . . . . . . . . . . . . . . . . . . . . . . . . . . . . . 704
Group II. . . . . . . . . . . . . . . . . . . . . . . . . . . . . . . . . . . . . . . . 706
Group III . . . . . . . . . . . . . . . . . . . . . . . . . . . . . . . . . . . . . . . 708
Generic Status Condition Data . . . . . . . . . . . . . . . . . . . . . . . . . 709
Appendix D — Response Folder Reference . . . . . . . . . . . 711
Response Folder Condition Data . . . . . . . . . . . . . . . . . . . . . . . . 712
Enhanced Condition Data . . . . . . . . . . . . . . . . . . . . . . . . . . 712
Appendix E — Sample Printer
Output . . . . . . . . . . . . . . . . . . . . . . . . . . . . . . . . . . . . . . . . . . 719
Cover Sheet . . . . . . . . . . . . . . . . . . . . . . . . . . . . . . . . . . . . . . . . 720
Flow Diagrams . . . . . . . . . . . . . . . . . . . . . . . . . . . . . . . . . . . . . . 721
Block Action Details . . . . . . . . . . . . . . . . . . . . . . . . . . . . . . . . . 722
System Folder . . . . . . . . . . . . . . . . . . . . . . . . . . . . . . . . . . . . . . 723
Data Dictionary . . . . . . . . . . . . . . . . . . . . . . . . . . . . . . . . . . . . . 724
Vocabulary Items . . . . . . . . . . . . . . . . . . . . . . . . . . . . . . . . . . . . 725
Application Complexity Metrics . . . . . . . . . . . . . . . . . . . . . . . . 726
Container Index . . . . . . . . . . . . . . . . . . . . . . . . . . . . . . . . . . . . . 727
Block Index . . . . . . . . . . . . . . . . . . . . . . . . . . . . . . . . . . . . . . . . 728
Index . . . . . . . . . . . . . . . . . . . . . . . . . . . . . . . . . . . . . . . . . . 729
# P0995131 Page 19
Page 20

PeriProducer User’s Guide
This page has been intentionally left blank.
Page 20 # P0995131
Page 21

List of Tables
Application File Types 53
Print Container Window 56
Standard Fields and Functions 66
Standard PeriProducer Blocks 67
Block Menu 79
Main Container File Menu 102
Main Container Execute Menu 104
Main Container Properties Menu 106
Accessory Tool Kit blocks 108
PeriGEM Window Options 115
Vemul Commands 122
Vemul Options 124
List of Commands Available in a Script during
Simulation 127
Prompt window options 154
Vocabulary Management window 160
Speak Block Options 174
Select Block Options 175
Read Block Options 177
Read Block Options 185
Manage Edit Sequences Block 191
Select Block Options 193
Data Card Types 204
Manage Data Folders window 219
Manage Data Folders window 221
System Folder Data Cards/Folders 223
Expression-entry Panel Options 246
SQL block options 254
Data Types for SQL Parameters 261
Compute Block Options 290
Switch Block Options 300
Container Properties Window Options 308
CORBA Block Options 323
PeriMap Options 343
Mapper Properties Window Options 346
SendHost Options 348
ReceiveHost Options 351
Environment Block Options 358
Answer Block Options 361
Originate Block Options 364
Call Progress Detection Block Options 366
Disconnect Block Options 371
Bridge Block Options 379
Record Block Options 389
# P0995131 Page 21
Page 22

PeriProducer User’s Guide
Receive Fax Options 399
Send Fax Options 402
Call Conferencing Block Options 418
File List Window Options 439
DiskIO Block Options 442
Blocks Which Enable Message Reception 451
System Block Options 457
Console Block Options 468
Resource Block Options 476
Available Resources 477
Media Operations Block Options 479
Line Operations Block 482
Call Contol Block 484
Abort Block 486
Datecalc Return Codes 489
Datecalc block <source-format> Characters 490
E-mail Block Options 493
Table Sort Block Options 499
Table Search Options 500
Application Configuration Options 504
date-calc Source Format Pattern Characters 569
Operations and Operation Target Format 570
Target Format Pattern Characters for Conversion 570
date-calc Return Code 572
Mode Parameter for Gender of Currency Units 618
time-calc Source Format Pattern Characters 641
time-calc Operations and Operation Target
Format 642
time-calc Target Format Pattern Characters for
Conversion 642
time-calc Return Codes 643
Application and System Environment Options 668
Host Environment Options 671
VENGINE Environment Options 673
Response Folders ( ) 712
Page 22 # P0995131
Page 23

Preface
Page 24

PeriProducer User’s Guide
Scope
This manual documents the use and features of PeriProducer on Avaya Media
Processing Server (MPS) Series Platforms. However, PeriProducer is designed to
stand alone without a manual. Application developers should learn about telephone
media application functions and the features of the PeriProducer environment by
interacting directly with the software. All PeriProducer features are contained in the
blocks and other user-friendly windows.
Intended Audience
Although this is a User’s Guide with How-To procedures and detailed explanations, it
also serves as a reference for more experienced programmers.
Avaya recommends that application developers attend an on-site PeriProducer class as
well as a system familiarization training program before attempting to create voice
applications.
How to Use This Manual
This manual uses many standard terms relating to computer system, software
application functions, and the Internet. However, it contains some terminology that
can only be explained in the context of the MPS system. Refer to the Glossary of
Avaya Media Processing Server (MPS) Terminology for definitions of MPS Series
specific terms.
Initially, you should read this manual at least once, from start to finish. Later, you can
use the Table of Contents to locate topics of interest for reference and review.
If you are reading this document online, use the cross-reference links (shown in blue)
to quickly locate related topics. <L
with your cursor over the cross-reference link. Click on any point in a Table of
Contents entry to move to that topic. Click on the page number of any Index entry to
access that topic page.
To familiarize yourself with various specialized textual references within the manual,
see Conventions Used in This Manual on page 26.
Periphonics is now part of Avaya. The name Periphonics, and variations thereof,
appear in this manual only where it is referred to in a product. (For examples, a
PeriProducer application, the PERImps package, the perirev command, etc.)
EFT> click once with your mouse while positioned
Page 24 # P0995131
Page 25

Organization of This Manual
• Chapters 1 - 3:
These chapters overview PeriProducer and provide the basics for loading,
saving, printing, and constructing applications. Chapter 3 introduces the Main
Container and the Tool Kit.
• Chapters 4 - 16:
These chapters detail more application specific activities including
vocabulary management, data management, Caller Message Recording, fax
management, and Call Conferencing. Each chapter describes PeriProducer
blocks designed for these tasks.
• Chapter 17:
This chapter describes how to customize PeriProducer and create and use
custom Containers.
• Chapter 18:
This chapter is a PeriProducer FAQ (Frequently Asked Questions) list. Refer
to this chapter for tips before you contact technical support.
• Appendix A:
This appendix describes the Call functions available to PeriProducer
applications.
• Appendix B:
This appendix details the environment options available in an Environment
block.
• Appendix C:
This appendix details the status/exception conditions available from the
Handle block.
• Appendix D:
This appendix contains samples of output from the PeriProducer print facility.
# P0995131 Page 25
Page 26

PeriProducer User’s Guide
Conventions Used in This Manual
This manual uses different fonts and symbols to differentiate between document
elements and types of information. These conventions are summarized in the
following table.
Conventions Used in This Manual Sheet 1 of 2
Notation Description
Normal text
important term
system
command
command,
condition
and alarm
file name /
directory
on-screen field
<KEY NAME>
Book Reference
Normal text font is used for most of the document.
The Italics font is used to introduce new terms, to highlight
meaningful words or phrases, or to distinguish specific terms from
nearby text.
This font indicates a system command and/or its arguments. Such
keywords are to be entered exactly as shown (i.e., users are not to
fill in their own values).
Command, Condition and Alarm references appear on the screen
in magenta text and reference the Command Reference Manual,
the PeriProducer User’s Guide, or the Alarm Reference Manual,
respectively. Refer to these documents for detailed information
Commands, Conditions, and Alarms.
about
This font is used for highlighting the names of disk directories, files,
and extensions for file names. It is also used to show displays on
text-based screens (e.g., to show the contents of a file.)
This font is used for field labels, on-screen menu buttons, and
action buttons.
A term that appears within angled brackets denotes a terminal
keyboard key, a telephone keypad button, or a system mouse
button.
This font indicates the names of other publications referenced
within the document.
cross reference
!
A cross reference is shown on the screen in blue. Click on the
cross reference to access the referenced location. A cross
reference that refers to a section name accesses the first page of
that section.
The Note icon identifies notes, important facts, and other keys to
understanding.
The Caution icon identifies procedures or events that require
special attention. The icon indicates a warning that serious
problems may arise if the stated instructions are improperly
followed.
Page 26 # P0995131
Page 27

Conventions Used in This Manual Sheet 2 of 2
Notation Description
The flying Window icon identifies procedures or events that apply
to the Windows 2000 operating system only.
The Solaris icon identifies procedures or events that apply to the
Solaris operating system only.
1. Windows 2000 and the flying Window logo are either trademarks or registered
trademarks of the Microsoft Corporation.
2. Solaris® is a registered trademark of The Open Group in the U.S. and other
countries.
Solaris and Windows 2000 Conventions
This manual depicts examples (command line syntax, configuration files, and screen
shots) in Solaris format. In certain instances Windows 2000 specific commands,
procedures, or screen shots are shown where required. The following table lists
examples of general operating system conventions to keep in mind when using this
manual with either the Solaris or Windows 2000 operating system.
1
2
Solaris Windows 2000
Environment $PPROHOME %PPROHOME%
Paths $PPROHOME/bin %PPROHOME%\bin
Command <command> & start /b <command>
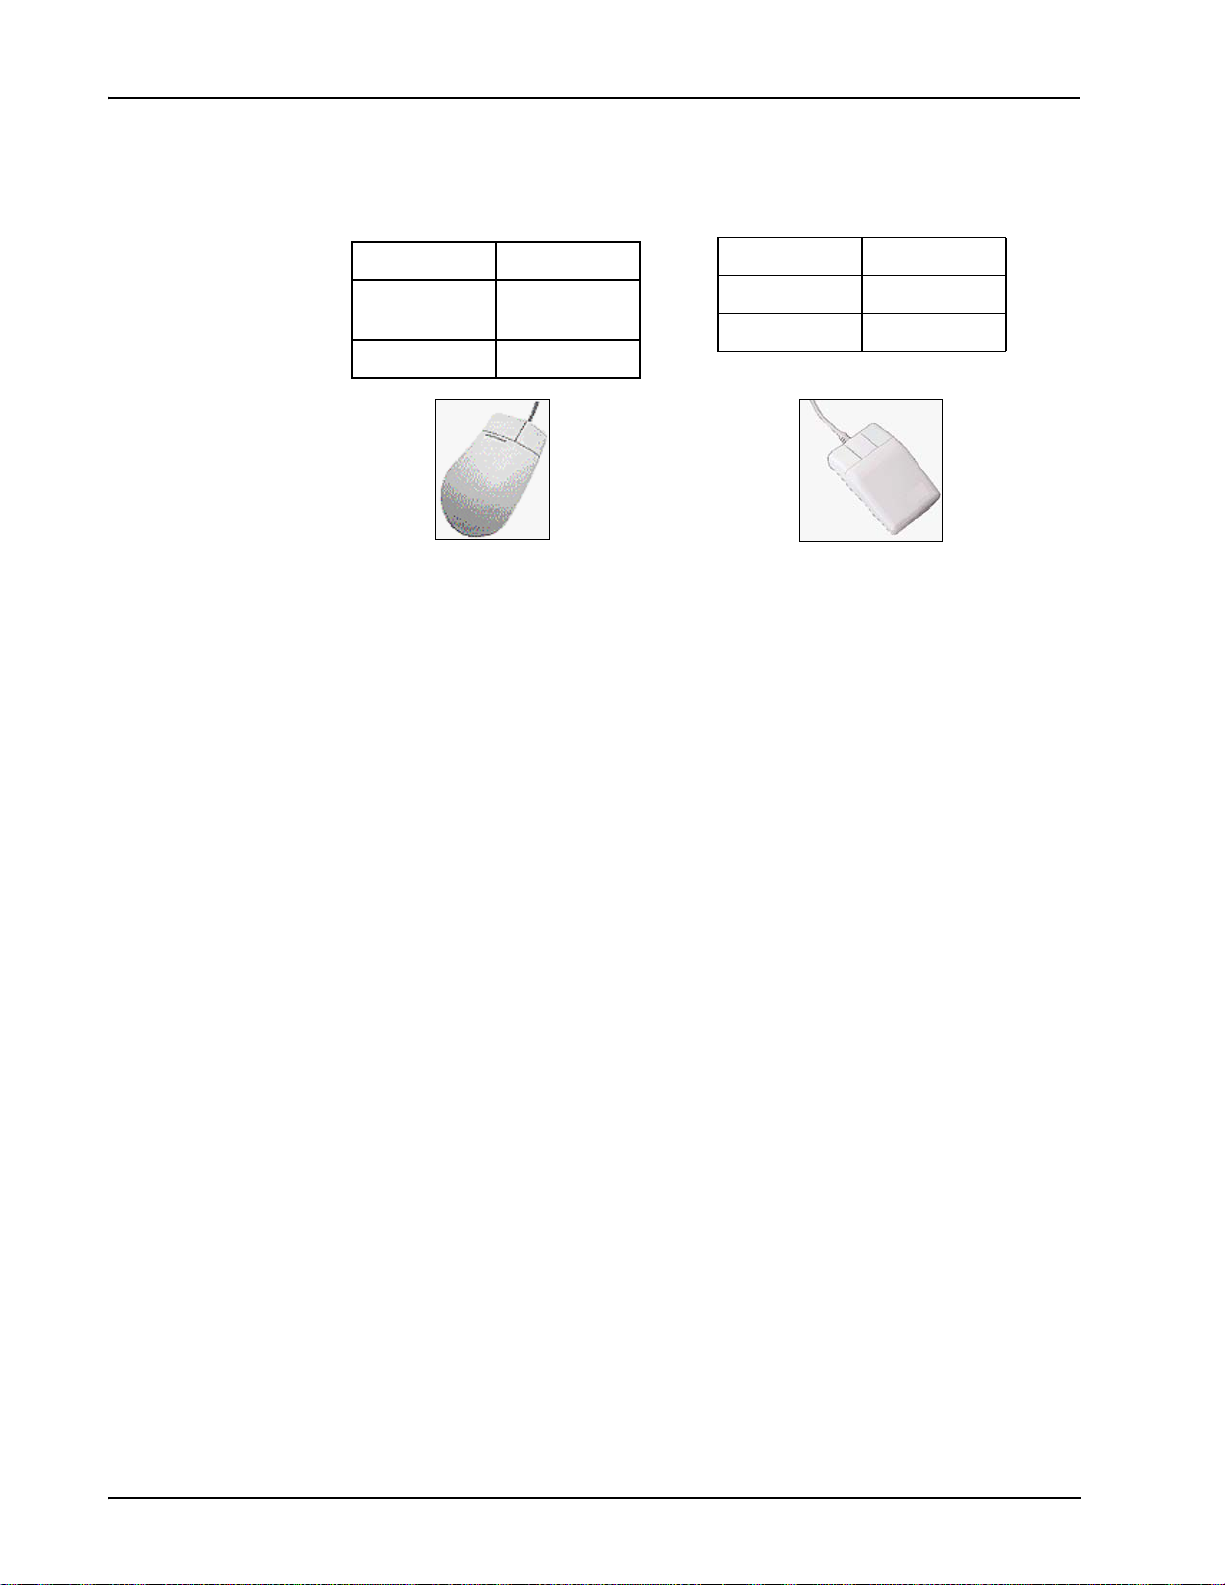
Two-Button (Windows 2000) vs. Three-Button (Solaris)
# P0995131 Page 27
Page 28
PeriProducer User’s Guide
Mouse
<SELECT> Left button
<ADJUST> Left and Right
<MENU> Right button
Trademark Conventions
The following trademark information is presented here and applies throughout for
third party products discussed within this manual. Trademarking information is not
repeated hereafter.
Solaris
other countries.
Solaris, SunOS, OpenWindows, SPARC, and UltraSPARC are trademarks or
registered trademarks of Sun Microsystems, Inc. in the United States and other
countries.
®
<SELECT> Left button
<ADJUST> Middle button
together
<MENU> Right button
and Motif® are registered trademarks of The Open Group in the U.S. and
Microsoft, MSSQL, Windows, Windows 2000, Internet Explorer, and the Flying
Windows logo are either trademarks or registered trademarks of Microsoft
Corporation.
Oracle
Sybase
Informix
affiliates.
Copyright Information
HylaFAX Facsimile Software
Copyright (c) 1990-1996 Sam Leffler
Copyright (c) 1991-1996 Silicon Graphics, Inc.
HylaFAX is a trademark of Silicon Graphics, Inc.
Permission to use, copy, modify, distribute, and sell this software and its
®
is a registered trademark of Oracle Corporation.
™
and SYBASE™ are trademarks of Sybase, Inc. or its subsidiaries.
®
and INFORMIX® are registered trademarks of Informix Corporation or its
Page 28 # P0995131
Page 29

documentation for any purpose is hereby granted without fee, provided that
(i) the above copyright notices and this permission notice appear in all copies of the
software and related documentation, and
(ii) the names of Sam Leffler and Silicon Graphics may not be used in any advertising
or publicity relating to the software without the specific, prior written permission of
Sam Leffler and Silicon Graphics.
THE SOFTWARE IS PROVIDED "AS-IS" AND WITHOUT WARRANTY OF
ANY KIND, EXPRESS, IMPLIED OR OTHERWISE, INCLUDING WITHOUT
LIMITATION, ANY WARRANTY OF MERCHANTABILITY OR FITNESS FOR
A PARTICULAR PURPOSE.
IN NO EVENT SHALL SAM LEFFLER OR SILICON GRAPHICS BE LIABLE
FOR ANY SPECIAL, INCIDENTAL, INDIRECT OR CONSEQUENTIAL
DAMAGES OF ANY KIND, OR ANY DAMAGES WHATSOEVER RESULTING
FROM LOSS OF USE, DATA OR PROFITS, WHETHER OR NOT ADVISED OF
THE POSSIBILITY OF DAMAGE, AND ON ANY THEORY OF LIABILITY,
ARISING OUT OF OR IN CONNECTION WITH THE USE OR PERFORMANCE
OF THIS SOFTWARE.
# P0995131 Page 29
Page 30

PeriProducer User’s Guide
This page has been intentionally left blank.
Page 30 # P0995131
Page 31

Overview of PeriProducer
Features
This chapter covers:
1. PerProducer Description
2. Voice Response Applications
3. Application Execution and
Diagnostic Facilities
Page 32

PeriProducer User’s Guide
PeriProducer Description
The PeriProducer software package is a graphical development environment for
creating Interactive Voice Response (IVR) applications. With PeriProducer, users
who understand their application requirements, but are not necessarily well-versed in
phone system characteristics or IVR application programming, can create their
applications directly.
PeriProducer employs a graphical user interface (GUI) with icons, drag-and-drop icon
placement, pull-down menus, fill-in-the-blanks data entry, default parameter values,
extensive online help screens, and other features that make application development
quicker and easier. The various functions PeriProducer can perform are represented by
icons, which are referred to as blocks. The application developer constructs the
application by selecting and sequencing the blocks. The completed application is
represented by a graphical layout during development as well as at run time.
Voice Response Applications
Typically, voice response applications automate call processing by emulating the
actions of a human telephone operator. You execute applications by assigning them to
the system's telephone lines. Generally, an IVR system runs multiple lines
concurrently. You can use the lines to run different applications, multiple instances
(that is, copies) of the same application, or a combination of applications.
The following functions are available for processing caller transactions. An
application may use some or all of these features:
• speaking to callers in recorded and/or synthesized speech
• accepting input from the caller using touch tone, speech recognition, or speech
recording
• concurrently interfacing to multiple hosts
• processing information via computation
• accessing local files
• sending or receiving a fax
• controlling phone lines
• processing exceptions
Page 32 # P0995131
Page 33

Application Execution and Diagnostic Facilities
The PeriProducer environment provides a number of features to verify the
performance and function of an application either before or after it is in a production
environment.
You can simulate the execution of an application in the PeriProducer software
environment on a development workstation. You can execute blocks, hear voice
prompts, supply input to the application, etc., entirely from within the development
environment. You can run all or part of the application, testing the logic paths and
application functions. Using this capability, you do not have to complete an
application before you begin to test it. The set of diagnostic functions includes a
monitoring feature, which allows you to view the internal workings of an application
while it executes. You can monitor applications in terms of the execution of blocks
and/or modifications to data names.
The diagnostic facilities within the PeriProducer environment include the following
functions:
Overview of PeriProducer Features
Function Description
stepped execution During testing, you can execute an application in a stepped fashion. In
this mode, PeriProducer pauses before each block, allowing you to
view changes to data structures, files, phone line state, etc. In this way,
you can isolate the effects of any individual block on the system.
breakpoints You can execute an application normally until it reaches a pre-
specified breakpoint. While the application pauses at a breakpoint, you
can subject it to certain events (for example, simulating a host failure
condition, phone line occurrence, etc.). You can then continue with
stepped or normal execution.
data display During the application’s execution, you can display the contents of any
data name. The system can also automatically create a breakpoint or
display the contents of a data card/folder whenever the values of one
or more specified data names change.
phone line
interaction
traced execution PeriProducer can automatically trace the flow of an application. In this
You can simulate the interaction of an application with its phone line.
Use a pop-up window to enter touchtone data, phone line events, host
messages, etc. This allows you to see how the application handles
expected and unexpected conditions.
mode, PeriProducer shows the used and unused logic paths in
different colors. Each time the application takes a path, PeriProducer
increases its brightness. You can see at a glance which logic paths
have been executed and how often. You can also save the current
state of an execution trace.
# P0995131 Page 33
Page 34

PeriProducer User’s Guide
This page has been intentionally left blank.
Page 34 # P0995131
Page 35

PeriProducer Basics
This chapter covers:
1. Starting PeriProducer
2. Getting Help
3. Saving an Application
4. Printing an Application
5. Quitting PeriProducer
6. Working With Blocks
Page 36

PeriProducer User’s Guide
Starting PeriProducer
PeriProducer runs in the X-windows environment of the MPS operating system. Use
the following procedures to start PeriProducer on each of these systems.
Starting PeriProducer
PeriProducer can be started by entering peripro & at any command line.
PeriProducer can be started by entering peripro at any command prompt.
For additional startup options, see the peripro command description in the
Command Reference Manual. If you have trouble starting PeriProducer, see Why
Won't PeriProducer Start? on page 524.
Checking the PeriProducer Version
Select the logo in the Main Container to display detailed information about the version
of PeriProducer you are running.
Page 36 # P0995131
Page 37

Too l K i t
Main Container
Click here for
version information
Construction area
PeriProducer Basics
Default Startup Display
When PeriProducer starts, the system displays the Main Container and the Tool Kit.
You build applications by selecting blocks from the Tool Kit and adding them to the
construction area of the Main Container. For a detailed description of the Main
Container and the Tool Kit, see The Main Container on page 100.
# P0995131 Page 37
Page 38

PeriProducer User’s Guide
Getting Help
PeriProducer supports context-sensitive help screens online. To display a pop-up help
window, move the mouse pointer to a particular object and press <H
keyboard.
If your keyboard does not have <HELP>, use <F1>.
Use the <F1> key.
selected help
object
ELP> on the
The help system displays:
• the object you are pointing to with the mouse.
• the first block of help text.
Use the scroll bars to view text that does not fit in the window.
If you point to a generic window object (for example, a window panel), the help
window is produced by the Open Look window manager.
Page 38 # P0995131
Page 39

Loading an Application
You can load an application into the construction area of the Main Container or
directly into the construction area of a Container block.
You can only load files previously created in PeriProducer.
If the application is a Container saved without copying references, PeriProducer
attempts to resolve the reference when you load the application. For information about
saving Containers without copying references, see Code Sharing on page 307.
How to ... Load an Application
1. Use the menu bar of the Container where you want PeriProducer to load the
application, to display the Load selection window.
PeriProducer Basics
Load selection
window
(subcontainer)
contents of
current
directory
current
directory
Double-click here
to move up one
directory level
• To load an application into the Main Container, use the Main Container
menu bar and follow the menu path File - Load.
• To load an application into a subcontainer, use the menu bar of that
Container and follow the menu path File - Load.
2. Select the name of the application from the scrolling list.
3. Select Load.
When you load an application file into the Main Container, PeriProducer replaces any
blocks that are currently in that area. This includes subcontainers (that is, Container
blocks). If you have unsaved changes to the application, PeriProducer prompts you to
confirm your action. Choose Cancel the Load request or Ignore the changes and
load.
# P0995131 Page 39
Page 40

PeriProducer User’s Guide
Loading Into a Container Block
If you load directly into a subcontainer, PeriProducer does not prompt you
!
before it replaces blocks currently in that Container. You cannot recover any
unsaved changes to the Container.
If you load new application file directly into a subcontainer, the new application
becomes part of the current application. PeriProducer uses the Main Container
application properties for the entire application.
Any global data associated with the application you load into a subcontainer become
local to that Container.
The following section, Loading Options (Main container Only), is for Solaris systems
only.
Loading Options (Main Container Only)
You can load application files into the Main Container by dragging the file icon from
the File Manager and dropping it on the Main Container drop target.
Drop Target
file to load
You can also specify an application for PeriProducer to load at startup. See the
peripro command description in the Command Reference Manual for additional
startup options.
Page 40 # P0995131
Page 41

PeriProducer Basics
Loading an Autosave File
PeriProducer can automatically save the current application at regular intervals. For
information about customizing the autosave feature, see Automatically Saving
Applications (Autosave) on page 49.
Use the Back Load window to load the autosave file (if any) for the current
application. Only 1 autosave file per application keeps getting overwritten.
How to ... Load an Autosave File
1. From the Main Container menu bar, follow the menu path File - Back Load.
PeriProducer displays the Back Load window.
current directory
Double-click here to move
up one directory level
contents of current
directory
2. Select the autosave file. PeriProducer adds the .AUTOSAVE extension to the entire
application file name. For example, if you have an application with the file name
numdemo.ppr, PeriProducer names the autosave file
numdemo.ppr.AUTOSAVE.
3. Select Load.
When you load an autosave file into the Container, PeriProducer replaces any blocks
that are currently in that construction area. If you have unsaved changes to the
application, PeriProducer prompts you to confirm your action.
# P0995131 Page 41
Page 42

PeriProducer User’s Guide
Loading an Errorsave (Recovery) File
If PeriProducer detects an internal error, it attempts to save the current application to
the file ppro.ERRSAVE.PPR. For additional information about PeriProducer error
saving feature, see Automatic Error Saving on page 47.
Loading an Earlier Version of an Application
PeriProducer can automatically maintain a specified number of versions of each
application. For information about enabling and customizing version control, see
Version Control on page 60.
Use the Back Load window to load an earlier version of the current application.
How to ...Load an Earlier Version of an Application
1. From the Main Container menu bar, follow the menu path File - Back Load.
PeriProducer displays the Back Load window.
contents of current
directory
2. Select the version of the application you want to load. To distinguish versions,
PeriProducer adds a number to the extension of the application filename. For
additional information, see Version Control on page 60.
3. Select Load.
Page 42 # P0995131
Page 43

PeriProducer Basics
Loading a Backup File
When you save an application under the same name, PeriProducer creates a backup
file with the same name and the .pBK extension. For example, assume you save an
application as numdemo.ppr. The next time you save the file, PeriProducer saves
the current application and also creates the file numdemo.pBK.
This backup file is a copy of the application before the last save operation. For
additional information about PeriProducer backup files, see Understanding the
Backup (.pBK) File on page 47.
Use the Back Load window to load a backup file for the current application. Use Save
As to rename the file without the .pBK extension.
How to ... Load a Backup File
1. From the Main Container, follow the menu path File - Back Load. PeriProducer
displays the Back Load window.
2. Select the .pBK file.
3. From the Main Container menu bar, follow the menu path File - Save As.
4. Type a new name for the application, or reenter the original name.
5. Select Save. PeriProducer saves the application with a .ppr extension.
Adding a Title to the Main Container
PeriProducer displays the Main Container title in Main Container’s window header.
The Main Container title is not necessarily the same as the application file name (see
Saving Applications on page 45).
Main Container title
The Main Container title should reflect the function of the entire application. You
should also name Containers and blocks with descriptive text (see Naming a Block on
page 73).
How to ...Add a Title to the Main Container
1. From the Main Container menu bar, click <MENU> on Properties.
2. From the Properties pull-down menu, select Main Container..... PeriProducer
displays the Main Container Properties window.
# P0995131 Page 43
Page 44

PeriProducer User’s Guide
3. Type the application title in the Block Name field.
4. Select Apply. PeriProducer reflects the new title in the window headers of the
Properties window and the Main Container.
Main Container
title
Page 44 # P0995131
Page 45

Saving Applications
Regularly save the entire application during development or modification. You can
also save a Container block (subcontainer) independently from the main application
(see Saving a Container Block on page 51).
Use the logo in the menu bar of the Main Container to check the save-state of the
entire application.
PeriProducer Basics
No changes since
last save (green)
Unsaved changes
(yellow)
You can customize these default colors. PeriProducer displays the “no changes” logo
in the Notices color and the “unsaved changes” logo in the Warning color. For
additional information about assigning colors to PeriProducer, see Changing Colors
on page 514.
PeriProducer will back up your application when you save it (see Understanding the
Backup (.pBK) File on page 47). You can also save a predetermined number of
versions of the same application (see Saving a New Version of an Application on
page 48), or save the application with a different name or in a different location (see
Saving an Application to a Different Name/Location on page 46).
# P0995131 Page 45
Page 46

PeriProducer User’s Guide
Saving an Application
Use the Main Container menu bar to save current changes to the entire application.
How to ...Save an Entire Application
1. From the Main Container menu bar, click <MENU> on File.
2. From the File pull-down menu, select Save.
• If this is the first save for the application, PeriProducer displays the Save
Application As... window. Type a descriptive file name for the application
and select Save.
• If you previously saved the application, PeriProducer saves the current changes
to the same file name. PeriProducer also moves the version of the application
just prior to the save to a backup file. This backup file has the same name as the
application with the extension .pBK. For additional information, see
Understanding the Backup (.pBK) File on page 47.
PeriProducer displays the new file name at the right side of the window footer.
Saving an Application to a Different Name/Location
When you save an entire application, you can change its name or its location or both.
How to ...Save an Application to a Different Name/Location
1. From the Main Container menu bar, click <MENU> on File.
2. From the File pull-down menu, select Save As.... PeriProducer displays the Save
Application As... window.
Directory where PeriProducer
will save the application
Double-click here to move
up one directory level
3. Type a descriptive file name for the application, change to another directory, or
do both.
4. Select Save.
PeriProducer saves the application to the new name and/or location. The original
application is unchanged.
Page 46 # P0995131
Page 47

PeriProducer Basics
Understanding the Backup (.pBK) File
PeriProducer protects you from overwriting an existing application by mistake.
If you perform a “save” or “save as” operation and the application file name already
exists, PeriProducer automatically makes a backup file. This file receives the
extension .pBK.
For example, suppose you are working on an application called weather. The first
time you save the application, PeriProducer creates the file weather.ppr. If you
save again, PeriProducer creates a new weather.ppr and renames the original file
as weather.pBK.
Backup files do not appear in the Load selection Application window. To load a
backup file, see Loading a Backup File on page 43.
Automatic Error Saving
If PeriProducer detects an internal error, it attempts to save the current application to
the file ppro.ERRSAVE.PPR.
If PeriProducer can recover from the internal error, it prompts you before saving to
ppro.ERRSAVE.PPR.
Save the current application to the
file ppro.ERRSAVE.PPR
Do not save the current application;
continue normal operation.
The ErrorSave (recovery) file can be loaded from the Back Load fIle chooser.
# P0995131 Page 47
Page 48

PeriProducer User’s Guide
Saving a New Version of an Application
You can customize PeriProducer to maintain a specified number of versions of each
application. For information about enabling and customizing version control, see
Version Control on page 60.
Use the Main Container menu bar to create a new version of the application.
How to ... Save a New Version
1. Load the application into the Main Container (see Loading an Application on
page 39).
2. Enable version control (see Version Control on page 60).
3. From the Main Container menu bar, click <
MENU> on File.
4. Select Save Version.
This causes all versions of the file to become one version older and the current file to
become the most recent prior version. PeriProducer increments the Version
Identifying Number associated with the current version. For example, if the
application file name is balances.ppr, the version renaming conversion is:
before save after save
Version
filename
balances.ppr.N-1 X-N -----------> balances.ppr.N X-N
balances.ppr.N-2 X-(N-1) -----------> balances.ppr.N-1 X-(N-1)
. . -----------> . .
. . -----------> . .
. . -----------> . .
balances.ppr.1 X-1 -----------> balances.ppr.2 X-1
balances.ppr X -----------> balances.ppr.1 X
Identifying
Number
filename
Versi on
Identifying
Number
where N is the number of prior saved version, and X is the Version Identifying
Number assigned to the application just prior to the save version operation.
In this example, the current application would now have filename balances.ppr
and Version Identifying Number X+1.
Page 48 # P0995131
Page 49

PeriProducer Basics
Automatically Saving Applications (Autosave)
PeriProducer automatically saves the current application to a special autosave file at
specified intervals. You can set this interval anywhere from 0 to 60 minutes. An
interval of 0 disables autosave.
The autosave interval remains in effect until you change it; it applies to every
application you load. PeriProducer stores this interval in the configuration file
.pprorc.
When PeriProducer does an autosave, it displays Autosave Completed in the left side
of the Main Container window footer.
PeriProducer always does the autosave to the file <application-
name.ppr.AUTOSAVE> where application-name is the filename of the
current application. The save does not change any other file associated with the
application (see PeriProducer Application File Types on page 53).
Each autosave uses the same .AUTOSAVE file and overwrites the file’s contents.
Each application can have its own .AUTOSAVE file.
For information about loading an autosave file, see Loading an Autosave File on page
41.
How to ... Enable Autosave
1. From the Main Container menu bar, click <MENU> on Properties.
2. From the Properties pull-down menu, select Generator.... PeriProducer displays
the Generator Properties window.
# P0995131 Page 49
Page 50

PeriProducer User’s Guide
autosave currently
disabled
3. Set Minutes Between AutoSave to a value from 0 to 60.
4. Select Apply.
To disable autosave, set this value to 0.
Page 50 # P0995131
Page 51

PeriProducer Basics
Saving a Container Block
You can save Container blocks (subcontainers) independently from the entire
application. PeriProducer can turn Reference blocks in the Container into copies of the
original block, or leave the Reference blocks unchanged. You can also save a
subcontainer to a different name, a different location, or both. PeriProducer displays
the file name associated with the Container in the window footer for that Container.
Container
menu bar
PeriProducer saves the Container as a complete application; after you save it, you can
load it like any other application. When you save a subcontainer, PeriProducer
includes:
• data folders referenced by the Container.
• any lower level Containers (that is, Container blocks in the construction area).
How to ...Save a Container Block
1. From the menu bar of the Container, click <MENU> on File.
2. From the File pull-down menu, select Save.
• If this is the first save for the Container, PeriProducer displays the Save
Container As window. Type a descriptive file name for the application and
select Save.
• If you previously saved the Container without closing the window, PeriProducer
saves the current changes to the same file name. PeriProducer also moves the
version of the container just prior to the save to a backup file. This backup file
has the same name as the Container with the extension .pBK. For additional
information, see Understanding the Backup (.pBK) File on page 47.
PeriProducer turns Reference blocks in the Container into copies of the original
blocks. You can also leave these references unresolved. See Leaving References
Unresolved on page 52.
# P0995131 Page 51
Page 52

PeriProducer User’s Guide
How to ...Save a Container Block to a Different Name/Location
1. From the Container menu bar, click <MENU> on File.
2. From the File pull-down menu, select Save As. PeriProducer displays the Save
Container As window.
3. Type a descriptive name for the Container, change to another directory, or do
both.
Directory where PeriProducer
will save the Container
Double-click here to move
up one directory level
4. Select Save.
You only need to use Save As if you want to save to a different name/location without
first closing the Container. When you close and reopen the Container, PeriProducer
considers it a new Container; Save or Save As both display the Save Container As
window.
Leaving References Unresolved
When you save a Container, PeriProducer turns Reference blocks in the Container into
copies of the original blocks. However, to facilitate code sharing, you can save a
Container without making copies of the Reference blocks—that is, you can leave the
references unresolved.
How to ...Save a Container Block Without Copying References
1. From the Container menu bar, click <MENU> on File.
2. From the File pull-down menu, select Save (w/o Copying References).
PeriProducer displays the Save Container (w/o Copying References) As window.
3. Type a descriptive file name for the application, change to another directory, or
do both.
4. Select Save.
When you load a Container saved without copying references into an application,
PeriProducer attempts to resolve the references. If you have not set up a block to
resolve the reference, PeriProducer displays a message and changes it to an empty
Container. For additional information, see Code Sharing on page 307.
Page 52 # P0995131
Page 53

PeriProducer Basics
PeriProducer Application File Types
PeriProducer uses a number of file names and extensions to differentiate between
various renditions of an application file.
Application File Types
File Name Description
[application-name].ppr The standard PeriProducer application file.
[application-name].pBK The application backup file. PeriProducer creates
this file when you perform the second save on an
application. This file contains the version of the
application just prior to the last save operation. To
load the backup file, see Loading a Backup File on
page 43. For additional information, see
Understanding the Backup (.pBK) File on page 47.
[application-name].ppr.AUTOSAVE The autosave file. PeriProducer can save the
current version of the application to this file at
specified intervals. To load an autosave file, see
Loading an Autosave File on page 41. For additional
information, see Automatically Saving Applications
(Autosave) on page 49.
[application-name].ppr.[1,2,...] A saved version of the application. To load an
earlier version of an application, see Loading an
Earlier Version of an Application on page 42. For
additional information, see Version Control on page
60.
ppro.ERRSAVE.PPR The errorsave (recovery) file. If PeriProducer
detects an internal error, it attempts to save the
current application to this file. Load this file like a
regular PeriProducer application (see Loading an
Errorsave (Recovery) File on page 42). For additional
information, see Automatic Error Saving on page 47.
[application-name].ppr.ps PostScript output from a print operation. See
Printing an Application on page 54.
# P0995131 Page 53
Page 54

PeriProducer User’s Guide
Printing an Application
PeriProducer can print a variety of information about all Containers in the application,
or about any one Container with or without its subcontainers.
The reports and diagrams generated by PeriProducer are in standard Postscript format.
You can print them from a standard Postscript printer. In a typical MPS environment,
the printer is connected to the PeriView workstation. The printer may also be available
as a network resource; check with your system administrator.
PeriProducer can also print as a stand-alone batch utility. For additional information,
see Printing in Batch Mode on page 58.
Regardless of the type of printout you choose, PeriProducer includes a cover sheet that
summarizes the print job.
software version
printouts included
with this job
Page 54 # P0995131
Page 55

PeriProducer Basics
Use the Print Container window to customize PeriProducer reports and diagrams.
How to ...Print Reports and Diagrams
1. Use the menu bar of the Container you want to print to display the Print
Container window. Follow the menu path File - Print.
current Container
Select the
reports/diagrams
to print.
Select the index
order (pull-down
menu).
Select the scope of
the print job (pulldown menu).
Select the
page size and
format to print.
Type a postscript
printer name, accept
the default, or print only
to a file.
2. Select the printing options. For details on these options, see Printing Options on
page 56.
3. Select Pages. PeriProducer displays the number of pages and bytes determined by
the current print options (no actual printout). If necessary, adjust the printing options.
4. Select Print.
To display the current print output in a postscript viewer on your workstation, select
View.
To cancel the print job, select Cancel. PeriProducer stops and dequeues the print job.
For examples of a variety of printouts, see Cover Sheet on page 720.
# P0995131 Page 55
Page 56

PeriProducer User’s Guide
Printing Options
Use the options in the Print Container window to customize how PeriProducer prints
reports and diagrams for each print job.
window selection meaning
Flow Diagrams
Block Action Details
Data Dictionary
Print Container Window Sheet 1 of 2
1
1
Print the construction area(s) as it/they appear on-screen,
including arrows to indicate flow.
Commented out blocks appear with their outlines dashed.
1
Print an information form for each block. For each type of
block, the relevant actions and information is printed. If
applicable, PeriProducer indicates the next block(s) to be
executed.
Commented out blocks appear with their outlines dashed.
Print the application Data Dictionary. This includes all global
and local data folders.
For each available folder, PeriProducer prints the folder type
and scope. For each folder and data card, PeriProducer
prints the data type, length, occurs clause, total length, initial
value, and description, as applicable.
Vocabulary Items
Container Index
Maps Print an x by y grid representing each map in the local and
1
1
Print Criteria
Block Notes Print any block notes on the block forms. You must also
System Folder
1
Print all vocabulary elements referenced in the application
and the blocks that reference them.
Print a list of all Container blocks, in numerical and/or
alphabetical order.
global Data Dictionary.
PeriProducer shows the various fields at their respective x,y
coordinates. The attribute byte is represented by @.
Unprotected fields are in dark shading and protected fields
are in light shading. PeriProducer lists all fields, with their
specific row, column, length, and attributes (Protected,
Numeric, Autoskip, Hidden).
Note: If a map contains a field with the “hidden” attribute, the
printout lists an “H” under the “Attrib” column.
select Block Action Details.
Print information about each data card in the System folder.
This includes data type, length, etc.
Cross-References Identify which blocks reference each data name contained in
the Data Dictionary and/or System folder.
Block Index
1
List all blocks except case and anonymous connectors, in
numerical and/or alphabetical order.
Page 56 # P0995131
Page 57

PeriProducer Basics
Print Container Window Sheet 2 of 2
window selection meaning
Alphabetically Sort Container and/or Block Index alphabetically.
Numerically Sort Container and/or Block Index numerically.
Alphabetically and
Numerically
Sort Container and/or Block Index both alphabetically and
numerically.
Index Order
All Containers Print reports and diagrams for all Containers.
This Container Only Print reports and diagrams for the current Container
From This Container
Scope
Down
Choose from:
Letter, Tabloid
2
Folio
2
, Ledger2, Legal2, Statement2, Executive2, A32, A4, A52, B42, B52,
Print reports and diagrams for the current Container and any
subcontainers.
Page Size
Full-size Print one flow diagram per page and Block Details in a single
column. Use a larger font and more vertical space.
Compressed Print a maximum of four flow diagrams per page and block
Format
Printer Name Print to the specified PostScript printer. See Selecting the
Print Produce the printout using the selected options. Whether or
details in double columns. Use a smaller font and less
vertical space.
Printer on page 59.
not you specify a printer name, PeriProducer always saves
the PostScript output to a file. See Selecting the Printer on
page 59.
Reset Return the Print Container window to the settings for the
previous print job (Print or Pages).
Pages Display the number of pages and bytes specified by the
current options (no printout). Use this feature before you
send a print job to the printer.
View Display the current printout in a PostScript viewer. See
Viewing the PostScript Output on page 59.
Cancel Cancel the current print job. PeriProducer automatically
stops and dequeues the print job.
1. For a sample printout, see Cover Sheet on page 720.
2. Not currently implemented
# P0995131 Page 57
Page 58

PeriProducer User’s Guide
Printing in Batch Mode
You can use PeriProducer as a stand-alone batch printing utility.
To print an application with the default print settings, use the syntax peripro -P
<app_name>, where <app_name> is the file name of the application you want to
print.
The default print settings are:
• Print Criteria - Flow Diagrams
• Index Order - Alphabetically and Numerically
• Page Size - Letter
• Format - Compressed
• Printer Name - the default (see Selecting the Printer on page 59).
You can use the silent mode option (-s) with batch printing. Using silent
mode with batch printing changes the batch operation behavior. No console
is created and all operations are performed silently.
For example: peripro -P -s <app_name>
Changing the Default Print Settings
From the command line, you can change the default print settings by configuring the
environment variable PPROPRTOPTIONS to any combination of the following:
switch description
-A accept defaults stated above
-f Flow Diagrams
-d Block Action Details
-n Notes
-D Data Dictionary
-v Vocabulary Items
-m Maps
-r Cross References
-c Container Index
-b Block Index
-F Full Size
-C Compressed
-P Page Size (LETTER, A4)
-p <printer_name> Printer to use
-s Only show the number of pages and bytes—no output
-S System Folder Data
Page 58 # P0995131
Page 59

PeriProducer Basics
For example, the commands
setenv PPROPRTOPTIONS "-f -d -m -C -p hplaser"
peripro -P testfile.ppr
prints flow diagrams, block details, and maps in compressed mode on the hplaser
printer.
Selecting the Printer
You can specify the name of the output PostScript printer in the Printer Name field of
the Print Container window, or through the environment variable
PPROPOSTPRINTER or PPROPRTOPTIONS. If do not know the printer name, see
your local system administrator.
The printer, whether local or remote, must be mapped to a device name (e.g. LPT1:)
which is used in the Printer Name field. A remote printer is typically mapped by the
command: net use devicename \\computername\printername.
For example: net use LPT1: \\RND1\hplaser24, maps printer hplaser24 to
device name LPT1.
Whether or not you specify a printer name, PeriProducer always saves the PostScript
output to a file. This file has the same name as the application with the .ps extension.
For example, PeriProducer saves the printer output from sample1.ppr as
sample1.ppr.ps.
Setting the
To set the PPROPOSTPRINTER environment variable, use the following syntax at
the command line:
setenv PPROPOSTPRINTER <printername>
where <printername> is the name of a local PostScript printer (for example,
hplaser).
PeriProducer saves the name of the printer through the current session, but not
between sessions. You can set PPROPOSTPRINTER in the local .cshrc or
.login file so it is set every time you start a new shell. The value of
PPROPOSTPRINTER appears as the default in the Print Container window.
PPROPOSTPRINTER Environment Variable
Viewing the PostScript Output
Use View to display the current printout in a PostScript viewer on your workstation.
You must select Print to create the PostScript file before you can use View.
# P0995131 Page 59
Page 60

PeriProducer User’s Guide
By default (Solaris only), PeriProducer displays the output using PageView. You can
specify another PostScript viewer through the Generator Properties window. See
Configuring Generator Properties on page 510.
Version Control
You can customize PeriProducer to automatically maintain numbered versions of each
application. You can assign a Version Identifying Number to each version of the
application, or allow PeriProducer to number the versions for you.
Version control is a property of each application. That is, PeriProducer can manage
each application differently. You can compare versions by having blocks that have
changed in the current version display in a different color.
For information about saving a new version of an application, see Saving a New
Version of an Application on page 48. For information about loading a different
version of an application, see Loading an Earlier Version of an Application on page
42.
Version Renaming Process
When you save a new version of an application, PeriProducer causes all versions of
the file to become one version older and the current file to become the most recent
prior version. PeriProducer also increments the Version Identifying Number
associated with the current version.
For example, if the application file name is balances.ppr, the version renaming
convention is:
before save after save
Version
filename
balances.ppr.N-1 X-N -----------> balances.ppr.N X-N
balances.ppr.N-2 X-(N-1) -----------> balances.ppr.N-1 X-(N-1)
. . -----------> . .
. . -----------> . .
. . -----------> . .
balances.ppr.1 X-1 -----------> balances.ppr.2 X-1
Identifying
Number
filename
Version
Identifying
Number
balances.ppr X -----------> balances.ppr.1 X
where N is the number of prior saved version, and X is the Version Identifying
Number assigned to the application just prior to the save version operation.
In this example, the current application would now have filename balances.ppr
and Version Identifying Number X+1.
Page 60 # P0995131
Page 61

PeriProducer Basics
Enabling Version Control
By default, version control is disabled. To have PeriProducer maintain numbered
versions of an application, enable version control for that application.
Version control is a property of each application. That is, PeriProducer can manage
each application differently.
How to ...Enable Version Control
1. Load the application into the Main Container (see Loading an Application on
page 39).
2. From the Main Container menu bar, click <
MENU> on Properties.
3. From the Properties pull-down menu, select Main Container....
Version Identifying Number set this number manually, or allow
PeriProducer to increment it every time
you save a new version.
4. Set the “Save __ Prior Version(s)” field.
• PeriProducer maintains this number of previous versions of the application.
• To disable version control for this application, set this number to zero.
5. Select Apply.
• A notice appears which offers the chance to Cancel the Save or Continue.
# P0995131 Page 61
Page 62

PeriProducer User’s Guide
Assigning a Version Identifying Number to an Application
PeriProducer associates a Version Identifying Number with each version of an
application. This is the number that appears in the Main Container Properties window
for the application.
Unlike the version filename, the Version Identifying Number remains associated with
each version when you save a new version. See Version Renaming Process on page
60.
Version Identifying
Number
You can:
• assign a particular Version Identifying Number to each version.
• assign a Version Identifying Number to the current version and then allow
PeriProducer to increment the number each time you save a new version.
• allow PeriProducer to assign “0” to the current version and increment the number
each time you save a new version (the default).
How to ...Assign a Version Identifying Number
1. Load the application into the Main Container (see Loading an Application on
page 39).
2. From the Main Container menu bar, click <
3. From the Properties pull-down menu, select Main Container....
4. Set the “This Version is:” field. PeriProducer assigns this number to the current
version of the application.
MENU> on Properties.
Page 62 # P0995131
Page 63

PeriProducer Basics
Comparing Versions
PeriProducer can display all blocks that have changed in the current version in a
different color than unchanged blocks.
How to ...Enable Changed Block Color
1. From the Main Container menu bar, click <MENU> on Properties.
2. From the Properties pull-down menu, select Generator.... PeriProducer displays
the Generator Properties window.
Select here to enable
changed block color
3. Select Show Changes in Current Version.
4. Select A
PPLY.
To disable Show Changes in Current Version, uncheck the box and select Apply.
Show Changes in Current Version is a Generator property. It remains in effect until
you change it. PeriProducer stores this information in .pprorc.
A changed block is any block you have added or changed since the last Save Version
operation. To change a block you must select Apply before you close it or if it is
enabled, answer Yes to the “Do you want to apply these changes?” prompt.
PeriProducer displays changed blocks in the Warning color. For information about
changing the default colors, see Changing Colors on page 514.
# P0995131 Page 63
Page 64

PeriProducer User’s Guide
Excluding Building Blocks from Generation
PeriProducer can exclude user specified building blocks from application generation.
The building blocks to exclude are named with a common prefix. For example, in the
illustration below, all blocks prefixed with “Debug” such as “Debug_environment” do
not get generated.
How to ...Exclude a Building Block from Generation
1. Load the application into the Main Container (see Loading an Application on
page 39).
2. From the Main Container menu bar, click <
MENU> on Properties.
3. From the Properties pull-down menu, select Main Container....
Prefix of building block names
to exclude during application
generation.
4. Enter the prefix name of the building blocks to exclude in the “Exclude Name
(use list menu):” field.
• In order for a block to be excluded from generation its name must be of the
same length or longer than the prefix. Each excluded block is noted by a
message in the generation window. If there is more than one prefix in the
exclusion list, each block name is compared against each prefix during
generation. An excluded block is treated as if it were "Commented" through
the Block menu. Exclusion is the same as commenting out all blocks which
begin with any prefix in the exclusion list.
5. Click <
MENU> in the Main Container window. Select one of the ADD options to
include the prefix name on the exclude list.
6. Click the check box, E
7. Select A
PPLY.
NABLE BLOCK EXCLUSION, to enable the feature.
Clearing a Container
Use the clear option during development to restart a Container “from scratch.” A clear
operation removes data folders associated with the Container, Container properties,
and all building blocks (including Container blocks) in the construction area.
Page 64 # P0995131
Page 65

PeriProducer Basics
How to ... Clear a Container
• To clear the Main Container and any subcontainers, use the Main
Container menu bar and follow the menu path File - Clear.
• To clear a Container block and any lower Containers, use the menu bar of
that Container and follow the menu path File - Clear.
If you have unsaved changes to the main Container or any of its subcontainers,
PeriProducer displays a warning notice when clearing the main Container:
return to the
application without
clearing
confirm the clear
request
You cannot recover a cleared Container.
There is no warning notice when clearing subcontainers.
# P0995131 Page 65
Page 66

PeriProducer User’s Guide
Quitting PeriProducer
Use the quit option to leave the PeriProducer environment.
How to ... Quit PeriProducer
Choose from the following:
• From the Main Container menu bar, follow the menu path File - Quit.
• Click <
MENU> on the Main Container window header. Select Quit from the
window header pop-up menu.
If you have unsaved changes to the application, PeriProducer displays a warning
notice.
Return to the
application
Confirm the quit
request
Standard Action Window Items
A number of fields and functions appear in the action window of every block or in the
Properties window of Container and Handle blocks.
Standard Fields and Functions
Item Purpose
Block Name Use this text entry field to add a descriptive name to each block in the
application. PeriProducer supplies a default name for each block. See
Naming a Block on page 73.
Notes... Select this option to add notes to a block. See Adding Notes to a Block on
page 82.
Apply Select this option to apply any changes in the current action window. You
must select this option for any changes to take effect. If you close (unpin)
the action window without selecting Apply, PeriProducer disregards the
changes.
You can configure PeriProducer to warn you before discarding changes.
See Customizing the Function of a Block on page 71.
Reset Select this option to disregard changes you made to the action window
since the last Apply. PeriProducer returns the window to its settings at the
last Apply.
Page 66 # P0995131
Page 67

Working With Blocks
A block represents an application processing step. Each block icon reflects its
function. PeriProducer also provides a short description of each block’s function. To
see this description, position the mouse pointer over a block in the Tool Kit.
The blocks provide all the functions needed to build a voice processing application for
MPS systems.
block name function
CONTAINER Block Add a lower-level container
ANSWER the Phone with a Greeting Answer the phone with a greeting
DISCONNECT (Hang up) Disconnect (hang up) the phone
SPEAK to the Caller Speak to the caller
SELECT from a Menu Get a selection from the caller
READ Data Entered by the Caller Read data entered by the caller
PeriProducer Basics
Standard PeriProducer Blocks
Use SYSTEM Services Use system services
SEND HOST Information Send information to the host
RECEIVE HOST Information Receive a host response
DISK I/O To or From a File Move data to or from a file
SEND a FAX Transmission Send a fax transmission
RECEIVE a FAX Transmission Receive a fax transmission
ORIGINATE/Transfer call Originate or transfer a call
COMPUTE - Assign/Move/Convert Specify data movement and calculations
SWITCH - Choose the Next Block Use a comparison to select the next block
RECORD a Message from the Caller Record a message from the caller
HANDLE Exception Conditions Handle exception conditions
Set ENVIRONMENT Options Set environment options
Access an External RESOURCE Access an external resource
CONSOLE Map Accept/Display Accept/Display console messages
SQL Access to RDBMS Access an RDBMS
DYNAMI C M e nu s Create dynamic selection menus
Access to CORBA Server Object Access CORBA server objects
Manage a CONFERENCE Create/modify/delete a call conference
MEDIA Operations Delete/import/export multimedia elements
ABORT outstanding operations Abort any outstanding I/O operations
# P0995131 Page 67
Page 68

PeriProducer User’s Guide
block name function
Manage EDIT SEQUENCES Enable/modify/disable caller edit sequences
BRIDGE call connections Create/hold/destroy a line bridge
CALL CONTROL (protocol-specific) Perform line protocol-specific operations
Standard PeriProducer Blocks
LINE OPERATIONS
(Get/Free/Offer/Accept)
Perform operations with another line
In addition to these standard blocks, you can create and use custom Containers for
application-specific functions. For additional information, see Creating Custom
Containers on page 517. There are also blocks for commonly used system functions
and call functions in the Accessory Toolkit. For additional information, see The
Accessory Tool Kit on page 108.
Create telephone media applications by:
• adding blocks to the construction area.
• customizing the basic function of each block through its action window.
• connecting the appropriate blocks to determine the logical flow of the application.
Page 68 # P0995131
Page 69

PeriProducer Basics
Adding a Block
You can add a block to an application by:
• dragging the block from the Tool Kit to the desired location.
• selecting the block in the Tool Kit.
• selecting the block from the Blocks menu of each Container or Handle block.
If you drag a block from the Tool Kit and drop it in an open spot in a construction
area, PeriProducer makes it the current block. If you drag a block to a position that
touches or overlaps another block, PeriProducer does not add it; you can only add a
block to a clear area of the construction area.
If you select a block in the Tool Kit or from a Blocks menu, PeriProducer attempts to
add it to the construction area of the current Container and make it the current block.
See Block Position on page 70.
When you add a block to a construction area, PeriProducer attempts to connect it to
the application. See Understanding Block Connections on page 94.
The Current Block
PeriProducer displays the current block in each construction area with a shaded
border, and the name of the current block in the window footer. Only one block in
each construction area can be current.
current block
block name
A block must be current before you can connect it to the rest of the application. Select
any block already in the construction area to make it the current block.
There are several ways to automatically make a new block current:
• Select the block in the Tool Kit. If PeriProducer successfully adds and connects
the block, it is automatically current.
• Select the block from a Blocks menu. If PeriProducer successfully adds and
connects the block, it is automatically current.
• Drag the block from the Tool Kit. When you drop the block in a construction area,
it is current.
If you select an empty spot in the construction area, PeriProducer deselects the current
block. There will be no current block in that construction area until you add or select
# P0995131 Page 69
Page 70

PeriProducer User’s Guide
another one.
Current Container
The Container you are working in is the current Container. To make a Container
current, move the mouse pointer inside its borders and/or select its title bar. Only one
Container is current at a time.
PeriProducer indicates the current Container by arrows surrounding the Container title
in the window header. A Container remains current until you move the mouse to
another Container and/or select another title bar.
current Container
current construction
area
The construction area of the current Container is the current construction area.
Block Position
If you select a block from the Tool Kit or a Blocks menu, PeriProducer selects the best
location to add it to the current construction area, and attempts to connect it to the
application.
• If there is a current block in the construction area, PeriProducer connects the new
block to the current block.
• If there is no current block in the construction area or insufficient space,
PeriProducer adds the block to the upper left corner of the construction area. This
is the staging area. PeriProducer does not connect the new block.
• If there is already a block in the staging area and no other block in the construction
area is current, PeriProducer does not add the block. Clear the staging area by
dragging the block somewhere else in the construction area.
If PeriProducer does not add the block, it displays an error message in the window
footer of the current Container.
staging area
Page 70 # P0995131
Page 71

Select block
action window
Answer block
action window
PeriProducer Basics
When you add a block to a construction area, PeriProducer attempts to connect it to
another block when possible. See Understanding Block Connections on page 94.
Customizing the Function of a Block
You customize the basic function of each block through its action window.
pushpin
Access the action window of the current block by selecting it. Access the action
window of any block by selecting it to make it current and then selecting it again; two
clicks on any block makes it current and opens its action window.
Modify the fields and parameters in the action window of each block to customize its
function. You can also accept the default settings. For details on the action window of
a particular block, use the Table of Contents or Index to locate the section on a
particular block.
To free screen space, select the pushpin to close (unpin) each action window.
# P0995131 Page 71
Page 72

PeriProducer User’s Guide
Changes to the Action Window
If you close an action window without selecting Apply, PeriProducer warns you
before discarding any changes.
To disable this warning, select Generator from the Main Container Properties menu.
In the Generator Properties window, remove the Warn About Unapplied Changes
check mark. To have action windows automatically close after applying changes,
select Close On Apply in the Generator Properties window. For additional
information about Generator Properties, see Configuring Generator Properties on
page 510.
apply changes
discard changes
Page 72 # P0995131
Page 73

PeriProducer Basics
Naming a Block
PeriProducer supplies a unique default name for each block when you add it to a
construction area. This name reflect the basic function of each block.
default block names
renamed blocks
Rename a block to reflect its specific function in each application. Descriptive block
names facilitate application development and future modifications.
Each block in a construction must have a unique name.
How to ... Name a Block
1. Add the block to a construction area (see Adding a Block on page 69).
2. Access the Block Name field.
•(Container and Handle blocks only) Open the block (see Customizing the
Function of a Block on page 71). From the Container menu bar, select
Properties....
•(all other blocks) Open the block (see Customizing the Function of a Block on
page 71).
3. Change the name in the Block Name field.
a. Highlight the existing name with <S
b. Type the new name. You can enter up to 64 characters for the block name.
The period character (".") is not valid in a block name.
4. Select Apply.
PeriProducer displays the new block name in the block icon. If the name is too long
for the icon, PeriProducer truncates the displayed name. This does not change the
block name. Open the block action window (or the Properties window for a Container
or Handle block) to see the entire block name.
ELECT>.
If you copy a block, PeriProducer assigns a unique default name to the copy. See
Copying a Block or Grouped Blocks on page 84. If you reference a block,
PeriProducer displays the original block name, prefaced with "R:", on the face of the
copy. See Reference Blocks on page 87.
# P0995131 Page 73
Page 74

PeriProducer User’s Guide
You can also add a title to the Main Container. See Adding a Title to the Main
Container on page 43.
Locating Blocks within an Application
PeriProducer can locate and select blocks in the current application in a variety of
ways. Finding a block can be accomplished using the tool kit, Blocks menu, or search
function. If a selected block is not in the current construction area, PeriProducer opens
the Container holding the block and makes it the current construction area.
Using the Tool Kit
To locate a block and make it current in the application using the tool kit, click
ENU> on the block icon in the tool kit, then click <MENU> on Search, finally click
<M
ELECT> on the desired block:
<S
select the block name to
make it the current block
Page 74 # P0995131
Page 75

PeriProducer Basics
Using the Blocks Menu
To locate a block and make it current in the application using the Blocks menu, click
ENU> on the block type in the Blocks menu, then click <SELECT> on the desired
<M
block:
select the block
name to make it the
current block
# P0995131 Page 75
Page 76

PeriProducer User’s Guide
Using the Search Function
There are several ways to locate a block in the application using the search function.
Blocks that are bookmarked (see Bookmark/ Unmark on page 80), commented (see
Comment/ Uncomment on page 80), or excluded (see Excluding Building Blocks
from Generation on page 64) are listed under their respective headings on the Search
for... menu. If a particular block has not been classified by one of these 3 criteria, a
name search can be performed.
Search for:
bookmarked blocks,
commented blocks,
excluded blocks,
or by name
By selecting Blocks by name... under the Search for... menu you can customize a
search for any block name.
1. Enter name of block to
search
2. Check for case sensitive
search
3. Check for partial match
search
4. <MENU> click on Search to
list results
Page 76 # P0995131
Page 77

PeriProducer Basics
Performing Operations on Grouped Blocks
Use a rubber band box to group a number of blocks in a construction area. Group
blocks to perform group operations available from the Block menu. After you group
blocks, you can:
• delete the entire group.
• move the entire group.
• enclose the entire group in a Container block.
• align the blocks in the group.
When you group a set of connected blocks, PeriProducer preserves the block
connections during the group operation.
How to ...Perform Operations on Grouped Blocks
1. Position the mouse pointer near the upper left corner of the blocks you want to
group.
2. Press <S
3. Drag the box until it completely encloses the desired blocks. Blocks and
connections that are not completely inside the box will not become part of the group.
4. Click <M
5. Select the group operation from the Block menu.
ELECT>. This anchors the corner of the rubber band box.
ENU> inside the box to display the Block menu.
To remove the rubber band box, select an area outside it.
For information about the Block menu and specific group operations, see The Block
Menu on page 78.
# P0995131 Page 77
Page 78

PeriProducer User’s Guide
The Block Menu
The Block menu is a hidden menu you access from any construction area. Use this
menu to:
• add notes to a block (Notes...)
• connect/disconnect blocks ((Dis)Connect)
• edit (Cut, Copy, Paste, Delete, Undelete) blocks
• create a reference block (Refer)
• perform group operations (Contain, Uncontain, Align)
• Comment/Uncomment a block
• Bookmark/Unmark a block
• Jump To a matching Source or Destination connector
• enable statistics Counters
• list Data Names used within a block
• list References to a block
• resolve unmatched Source and Destination Connectors
• list blocks containing a specific handle condition (Handles)
The Block menu is context sensitive. That is, the availability and function of the menu
items depend on the block over which the cursor is positioned, when you access the
Block menu. If a menu item is unavailable (grayed), that option is not valid for the
object you were pointing to when you accessed the menu.
To access the Block menu for:
• a single block, click <M
• a group of blocks, click <M
• the entire construction area, click <M
ENU> on the block.
ENU> inside the rubber band box.
ENU> on an empty spot in the construction
area
Page 78 # P0995131
Page 79

PeriProducer Basics
Block Menu Sheet 1 of 3
Notes... Access the Notes window for:
• the indicated block
• the current Container, if you indicated an empty spot in the
construction area
For details about adding notes to blocks, see Adding Notes to a Block on page
82.
(Dis)Connect Creates or removes block connections. If a connection exists and this
option is selected on the block that is not current, the connection is
removed. If no connection exists and this option is selected on a block that
is not current, a connection is made from the current block.
Cut Remove the indicated block or group of blocks and hold it in the internal
clipboard and the delete buffer. Restore the item to any construction area in
the application by selecting either Paste or Undelete.
The Cut option is equivalent to using Copy followed by Delete. You cannot
cut or delete an Entry, Exit, Source, Destination, Finish, Anchor, or Resume
connector. Cutting a Container retains its local folders.
For additional information, see Moving a Block or Grouped Blocks on page 85.
Copy Copy the indicated block or group of blocks to the internal clipboard. Add
the duplicated item to any construction area in the application by selecting
Paste.
You cannot copy an Entry, Exit, Source, Destination, Finish, Anchor, or
Resume connector. Copying a Container retains its local folders.
For additional information, see Copying a Block or Grouped Blocks on page
84.
Paste Put the current contents of the internal clipboard in the current construction
area. A pasted block retains the "base" name of the original block, which is
then appended by a numeric "suffix" to ensure uniqueness. Use Cut, Copy,
or Refer to put an object in the clipboard.
PeriProducer inserts the object at approximately the same coordinate
position from which it was taken. Pasting a Container retains its local
folders.
Refer Create a Reference block for the indicated block in the internal clipboard.
Use Paste to add the Reference block to the current construction area.
For details on creating and using Reference blocks, see Reference Blocks on
page 87.
Delete Remove the indicated block or group of blocks from the application.
PeriProducer puts the deleted object in the delete buffer.
Restore the deleted object with Undelete.
You cannot delete an Entry or Exit connector.
For additional information, see Deleting a Block or Grouped Blocks on page
86.
# P0995131 Page 79
Page 80

PeriProducer User’s Guide
Undelete Put the contents of the delete buffer back in the construction area from
Contain Enclose the indicated group in a Container block. If the group is valid for
Uncontain Move the block sequence in a Container into the parent construction area.
Block Menu Sheet 2 of 3
which it was deleted.
If necessary, PeriProducer opens the construction area in which to
undelete; you cannot use Undelete to move a deleted object to another
construction area.
enclosure in a Container, PeriProducer inserts the group in a Container and
replaces the group with a Container block in the construction area.
For details about valid Container groups, see Adding a Container on page
304. For information about grouping blocks, see Performing Operations on
Grouped Blocks on page 77.
This option deletes the indicated Container while preserving its internal
block arrangements.
Note: If there are references to a Container, the Uncontain option is not
enabled when the cursor is positioned over the Container.
Comment/
Uncomment
Bookmark/
Unmark
Jump To Jump to the matching Source or Destination connector.
Align Align the indicated group on the screen. For information about grouping
Disable or enable the function of the indicated block during execution.
Selecting this option initially disables the actions specified by the block.
Selecting this option again enables a previously disabled block.
Adds or removes the indicated block name from the Search for... -->
Bookmarked blocks function under the Blocks menu and changes the
block’s color (defined in the Color Chooser). If a block is both bookmarked
and marked as a change (selected in Generator Properties), the latter color
takes precedence visually.
Jump To makes the matching connector the current block.
blocks, see Performing Operations on Grouped Blocks on page 77.
Select from the following:
Align
Horizontally
Align
Vertically
Distribute
Horizontally
Move the blocks so they share the same horizontal axis.
Move the blocks so they share the same vertical axis.
Move the blocks so they are evenly spaced with respect to
their left and right sides.
Distribute
Vertically
Move the blocks so they are evenly spaced with respect to
their top and bottom sides.
Page 80 # P0995131
Page 81

PeriProducer Basics
Block Menu Sheet 3 of 3
Counters Enable statistics collection for the indicated block. For details on execution
statistics, see Gathering Application Statistics (Block Execution Statistics) on
page 91.
You can also enable a visible counter for all the blocks in the application.
See Tracing the Execution on page 144.
Select from the following:
Show Show the currently configured counters associated with the
block.
New Create and attach a default counter to the selected
statistics folder.
Attach Select/define a new counter. This counter must be
numeric, length nine.
Detach Select an existing counter to detach from the block.
Note:
To indicate a counter is attached to a block, a plus sign, “+” is displayed in
the corresponding block.
For example:
Data Names List all the data names that the indicated block references.
The list includes all the data cards and folders referenced in the block. For a
Container block, this also includes references in the internal construction
area.
You cannot select data names from the list; it is for viewing only.
References List all blocks that reference the indicated block (that is, Reference blocks).
If you select a block from the list, it becomes the current block.
For information about Reference blocks, see Reference Blocks on page 87.
Connectors List all the unmatched Source/Destination connectors in the application.
Select an item from the list to automatically create a matching connector.
See Jumping to a Different Block (Source Connector) on page 283.
Handles List all Handle Condition blocks in the current application that contain an
instance of the indicated condition connector.
For additional information about the Handle Condition block, see HANDLE
Exception Conditions (Handle Block) on page 448.
# P0995131 Page 81
Page 82

PeriProducer User’s Guide
Adding Notes to a Block
You can annotate individual blocks in an application to facilitate application
development and future modifications.
PeriProducer uses a small glyph to identify a block with notes attached.
Notes are entered as text and do not affect the execution of the application.
If the Show Block Reminder selection is checked in the Generator Properties window,
and the cursor is over a block with text notes attached, a window displaying the text
note appears.
text notes attached
For the Compute and Switch blocks, displaying line entries takes precedence over
displaying Notes.
How to ... Add Notes to a Block
1. Access the Notes window for the block. You can do this several ways:
•(all blocks) Click <M
•(Container blocks only) Open the Container. From the Container menu bar,
select Properties.... In the Container Properties window, select Notes.
•(all blocks except Containers and Connectors) Open the block. In the action
window of the block, select Notes.
2. Enter the note.
• Type the text in the window.
3. Select the pushpin to close (unpin) the window.
To review a text note after you close the window, access the window again, place the
cursor over the block, or select Notes from the Block menu.
ENU> on the block. From the Block menu, select Notes.
Page 82 # P0995131
Page 83

PeriProducer Basics
Editing Block Notes
You can edit, append to, or delete text notes already attached to a block.
For information about adding notes to a block, see Adding Notes to a Block on page
82.
How to ... Edit Block Notes
1. Access the Notes window for the block. You can do this several ways:
•(all blocks) Click <M
•(Container blocks only) Open the Container. From the Container menu bar,
select Properties.... In the Container Properties window, select Notes.
•(all blocks except Containers) Open the block. In the action window of the
block, select Notes.
2. Edit the note.
• Edit the text in the window.
3. Select the pushpin to close (unpin) the window.
ENU> on the block. From the Block menu, select Notes.
# P0995131 Page 83
Page 84

PeriProducer User’s Guide
Copying a Block or Grouped Blocks
Copy a block or grouped blocks when you need a specific function implemented
multiple times. You can copy between construction areas.
When PeriProducer copies a block or grouped blocks, it duplicates all the internal
information including the "base" name of the original block with a numeric suffix for
uniqueness and any attached block notes.
You cannot copy a Container that includes Source or Destination connectors.
How to ...Copy a Block or Grouped Blocks
1. Position the mouse pointer over the block or group of blocks. For information
about grouping blocks, see Performing Operations on Grouped Blocks on page 77.
2. Copy the block or group of blocks to the internal keyboard. You can do this two
ways:
• Press <C
OPY> on the keyboard.
• Click <M
ENU>. From the Block menu, select Copy.
3. Position the mouse pointer in the construction area where you want to insert the
copy.
4. Paste the block or group of blocks in the construction area. You can do this two
ways:
• Press <P
• Click <M
ASTE> on the keyboard.
ENU>. From the Block menu, select Paste.
When you paste, PeriProducer adds the current contents of the clipboard to the
indicated area at approximately the position of the original block or group coordinates.
You can paste several times without performing another copy.
When you copy to the internal clipboard, PeriProducer overwrites the current contents
of the clipboard.
If you copy a block into a construction that contains a block with the same name,
PeriProducer assigns a unique name to the copied block.
Page 84 # P0995131
Page 85

PeriProducer Basics
Moving a Block or Grouped Blocks
You can easily move a block or a group of blocks around a single construction area or
between construction areas.
Moving in a Single Construction Area
Arrange blocks or grouped blocks to any open spot in the current construction area by
pressing <S
PeriProducer redraws any existing connections to the new location. You cannot move
an object on top of another object.
Moving Between Construction Areas
You cannot drag a block or grouped blocks between construction areas. To move
between construction areas, use Cut and Paste.
How to ...Move an Object Between Construction Areas
1. Position the mouse pointer over the block or group of blocks. For information
about grouping blocks, see Performing Operations on Grouped Blocks on page 77.
ELECT> on the desired object and dragging it to the new position.
2. Cut the block or group of blocks to the internal keyboard. PeriProducer removes
the object form the construction area. You can do this two ways:
• Press <C
• Click <M
UT> on the keyboard.
ENU>. From the Block menu, select Cut.
3. Position the mouse pointer in the construction area where you want to insert the
object.
4. Paste the block or group of blocks in the construction area. You can do this two
ways:
• Press <P
• Click <M
ASTE> on the keyboard.
ENU>. From the Block menu, select Paste.
When you paste, PeriProducer adds the current contents of the clipboard to the
indicated area at approximately the position of the original block or group coordinates.
The pasted object does not have any connections. You can paste multiple times.
When you cut to the internal clipboard, PeriProducer overwrites the current contents
of the clipboard.
If you move a block into a construction that contains a block with the same name,
PeriProducer assigns a unique name to the new block.
# P0995131 Page 85
Page 86

PeriProducer User’s Guide
Deleting a Block or Grouped Blocks
There are a number of ways to remove a block or group of blocks from an application.
To remove a single block, you can:
• press <S
• position the mouse pointer over the block and press <D
• click <M
To remove a group of blocks, you can:
• position the mouse pointer over the group and press <D
• click <M
PeriProducer places the indicated object in the delete buffer so you can subsequently
restore it.
You can delete additional objects without overwriting the contents of the delete
buffer. PeriProducer adds additional deletions without disturbing any previous
contents.
ELECT> on the block and drag it completely out of the construction area.
ELETE> on the keyboard.
ENU> on the block. From the Block menu, select Delete.
ELETE> on the keyboard.
ENU> on the group. From the Block menu, select Delete.
For information about grouping blocks, see Performing Operations on Grouped
Blocks on page 77. To restore a deleted object, see Restoring a Deleted Block or
Grouped Blocks on page 86.
Restoring a Deleted Block or Grouped Blocks
You can easily restore deleted blocks or groups of blocks to the construction area from
which you deleted them.
There are two ways to restore a deleted object.
1. Position the mouse pointer over a construction area and press <UNDO> on
the keyboard, or
2. Position the mouse pointer over a construction area and click <M
From the Block menu, select Undelete.
PeriProducer restores objects on a last-in-first-out basis. That is, the most recently
deleted object is the first one restored.
When PeriProducer restores an object, it tries to reconstruct all the previous
connections. If you changed the construction area since you deleted the object, this
may not be possible. If PeriProducer cannot re-establish a connection, it displays a
message in the window footer that indicates the problem.
ENU>.
You can only restore an object to the construction area from which you deleted it. That
is, you can not use delete and undelete to move an object between construction areas.
If necessary, PeriProducer opens a construction area to perform an undelete. If the
"parent" construction area has been deleted, PeriProducer attempts to perform the
undelete of the next higher "parent". If PeriProducer cannot restore the object, it
displays a message indicating the problem.
Page 86 # P0995131
Page 87

PeriProducer Basics
If you quit PeriProducer or clear the Main Container, you also clear the delete/copy
buffer. You can only restore deleted blocks during the current session.
Reference Blocks
Reference blocks are an alternative to copying a block when you need that block’s
function in several places in an application.
indicates that this is a Reference block
name of the referenced (original)
block
A Reference block executes the block to which it refers. Any changes to the
referenced block (that is, the original) affect all of its references.
You can also reference a parameterized Container to pass data by reference between
Containers (see page 90).
!
If you want to duplicate the function of a block, but you need to edit the original
without affecting the duplicates, copy the block rather than referencing it. See
Copying a Block or Grouped Blocks on page 84.
If a block with references associated with it is deleted, cut, or dragged outside the
construction area, a warning box is displayed (see below). This warning box asks
whether to Cancel the deletion or Proceed and make one of the existing reference
blocks, the block to reference.
# P0995131 Page 87
Page 88

PeriProducer User’s Guide
Creating a Reference Block
Use the Block menu to create a reference to another block and add the reference(s) to
the application.
How to ...Create a Reference Block
1. Access the Block menu for the block you want to reference.
a. Position the mouse pointer over the block in the construction area.
b. Click <M
2. From the Block menu, select Refer. PeriProducer creates a reference to the indicated
block in the internal clipboard.
3. Access the Block menu for the destination Container.
a. Position the mouse pointer where you want to place the Reference block. You
ENU>.
can paste a reference in the current Container/Handle block or to another Container/Handle block.
b. Click <M
ENU>.
4. From the Block menu, select Paste. PeriProducer puts the current contents of the
clipboard in the construction area at the position of the mouse pointer.
You can paste multiple times without performing another Refer.
PeriProducer supplies a unique default name for each Reference block. To view or
edit this name, see Working With Reference Blocks on page 89.
Page 88 # P0995131
Page 89

PeriProducer Basics
Working With Reference Blocks
Use the Reference block action window (or the Block menu) to add notes to the
Reference block. You can also use the Reference block action window to open the
action window of the original block. With this option, the original block does not have
to be in the current construction area to open and edit its window.
Notes are also available via the Block menu.
For information about accessing and using action windows, see Customizing the
Function of a Block on page 71.
type a descriptive name
for the Reference block
open the action window
of the original block
location and name
of the original block
apply any changes in the
action window to the
Reference block
return the window
to the settings at
the last Apply
add notes to the
Reference block
Regardless of the block name you assign to the Reference block, PeriProducer
displays the name of the original block in the block icon. You must open the
Reference block to view (or edit) the actual block name.
# P0995131 Page 89
Page 90

PeriProducer User’s Guide
References to Parameterized Containers
Use parameter folders defined local to a Container to pass data to or from the
Container. For additional information, see Parameterized Containers on page 305.
A Reference block that refers to a Container with a local parameter folder displays the
Container’s parameters in its action window.
parameter fields
data passing out
return value
name and location
of the original block
Description fields in the definition
of the parameter folder
Page 90 # P0995131
Page 91

PeriProducer Basics
Gathering Application Statistics (Block Execution Statistics)
An application can be customized to record the number of times any single block (an
event) is executed during runtime. Recording these events is very useful in evaluating
an applications performance. Examples of events to track are; number of call referrals,
number of faxes sent or received, and number of caller message recordings.
Every 15 minutes (by default) , VSUPD broadcasts a statistics request to all executing
applications and collects available application statistics. This statistics collection
daemon stores these statistics for future reference. VSUPD also receives local
statistics from linked applications every time they return back to their calling
application.
To use block execution statistics (application statistics), create one or more Statistics
folders (Folders of Sevents) for the application and special statistics data cards (called
counters or stat events) for selected blocks. When PeriProducer executes the block
during runtime, it increments counters (stat events) associated with that block by one;
it does not reinitialize statistics folders when the application restarts. This allows
statistics to accumulate over many calls.
To use the system wide
statistics collection
utility, assign any legal
name to the folder.
(e.g. name the
Statistics Folders
strec1, strec2,...)
select Statistics
select Add
PeriProducer allows you to assign any legal name to Statistics folders.
If it is possible, use a single, unique statistics folder to gather the statistics from each
application. For example, gather all the statistics for application_1 in strec1
and all the statistics for application_2 in strec2.
How to ...Define Application (Block Execution) Statistics
1. Create a Statistics folder (Folder of "Sevents") for the application. From the Tool
Kit, select Folders.
2. Access the Block menu for the block you want to reference. Click <M
ENU> on the
block in the construction area.
3. From the Block menu, click <M
ENU> on Counters. Select from the counter options:
# P0995131 Page 91
Page 92

PeriProducer User’s Guide
If the Attach option is selected to manually create a statistics counter, first create a
data card within the Statistics folder (created in step 1 above). The data card must be
numeric of length nine.
4. Save the folder to a file. Follow the menu path File—Save As.
Show the currently configured counters.
Create and attach a default counter to the selected statistics folder.
Select /define a new counter. This counter must be numeric, length nine.
Detach an existing counter.
Supply a descriptive name for the file. PeriProducer adds
the suffix .folder.
5. To create a default report in PeriReporter, copy the .folder file to a working
directory on each node where PeriReporter is executing.
6. To create a more detailed report in PeriReporter, generate the vex file, then create a
stat record code stub(s) file by executing the following command:
vexdump -s app.vex
7. Copy the stat record code stub file (strec#.sre) from $ASEHOME/copy to
$ASEHOME/copy on each node where PeriReporter is executing.
See the Avaya Media Processing Server Series System Reference Manual for details
about VSUPD and the PeriReporter User’s Guide for details about reporting statistics.
You can create multiple statistics folders (folders of "sevents") for each application.
Determining Blocks Associated With a Counter
Use the global Manage Data Folders window to display the names of all the blocks in
the application that use a particular data card as a counter.
First, select the folder that contains the data card. Next, click <M
card name. Finally, from the hidden menu, click <M
ENU> on StatBlocks.
ENU> on the data
Page 92 # P0995131
Page 93

PeriProducer Basics
block that uses
sRHost1_1 as
a counter
Another way to see which blocks contain statistics counters is simply to look for
blocks with a plus sign, "+" in the upper right hand corner. For example:
strec2 is available
Passing Statistics Folders to a Linked Application
You can pass a statistics folder as a parameter to a linked application. In this case, the
system does not make the statistics folder available to VSUPD when the linked
application terminates, unless the linked application receives an explicit request from
VSUPD. Instead, the system makes the statistics folder available when the main
application terminates.
Main
execution
strec2 [type:statistics folder]
sRHost1_1[type:number]
Linked
LPstats:[type:parameter folder]
LFstrec2[type:lower-level folder]
sRHost1_1[type:number]
Local statistics folders in a linked application (not passed) are immediately available
to VSUPD when the linked application returns to the calling application.
For information about implementing linked applications, see Using Linked
# P0995131 Page 93
Page 94

PeriProducer User’s Guide
Applications on page 457.
Working With Block Connections and Connectors
Use block connections and various connector blocks to determine the logical flow of
the application.
Understanding Block Connections
A connection is a straight-line arrow that starts from one building block and points to
another.
The part of the arrow that exits a block is the exit connection. The point of the arrow,
where it enters a block, is the entry connection.
entry connection
exit connection
All blocks except Entry and Destination connectors support multiple entry
connections. You can connect multiple blocks to a single block.
Blocks normally have one exit connection. However, some blocks such as the Switch
and Select blocks, support multiple exits called case connectors. Customize the action
window of these blocks to establish the case connectors and determine which exit the
application uses.
You cannot connect a block to itself.
Determine the logical flow of the application by connecting the individual blocks.
You can:
• have PeriProducer create the connections automatically.
• create or erase the connections with the mouse.
Automatic Connections
When you add a block to a construction area that has a current block, PeriProducer
attempts to connect the new block to the current block. The direction of the connection
is from the existing block to the new block.
Page 94 # P0995131
Page 95

PeriProducer Basics
existing block
new block
There must be a current block in the construction area for PeriProducer to make an
automatic connection. If there is no current block, PeriProducer adds the block to the
staging area and does not connect it to the application. For additional information, see
Block Position on page 70.
If PeriProducer cannot create a connection, it displays a help message in the footer of
the construction area.
Creating and Erasing Connections
You can edit and customize the flow of the application by manually creating or
erasing block connections.
# P0995131 Page 95
Page 96

PeriProducer User’s Guide
How to ...Create Block Connections
1. Select the first block in the logical sequence. This becomes the current block.
2. Click <A
DJUST> on the second block in the logical sequence. PeriProducer
establishes the connection in the direction first block ---> second block.
If PeriProducer cannot make the connection, it displays a help message in the window
footer.
How to ...Erase Block Connections
1. Select a connected block. This becomes the current block.
2. Click <A
DJUST> on the block connected to it. PeriProducer erases the connection.
For erasing, the direction of the connection is irrelevant. However, if you leave the
mouse pointer over the second block and click <A
DJUST> again, PeriProducer
reconnects the blocks in the direction first block ---> second block.
You cannot erase the connection between a parent block and a case selector (for
example, a Select block and its case selectors). Delete a case block by opening the
parent and change the appropriate field/option. For information about opening a
block, see Customizing the Function of a Block on page 71. For details on the Select
block, see SELECT from a Menu (Select Block) on page 175.
Using Connector Blocks
In addition to using arrow-like block connections to determine the logical flow of an
application, you can also use connector blocks to:
• unclutter the display by arranging the standard connections.
• jump to a different block in the application.
• resume execution after receiving a status/exception condition.
• end a logical path without routing to the Exit connector.
• position blocks that are only executed by reference.
For details about each type of user-defined connector block, see Understanding
Connector Blocks on page 281.
Page 96 # P0995131
Page 97

PeriProducer Basics
Entry connector
Destination connector
Anonymous connector
Source connector
Exit connector
Adding a Connector Block
PeriProducer automatically places an Exit and an Entry connector in each construction
area (see Entering a Container (Entry Connector) on page 281). To add one of the
user-defined connectors, first add an Anonymous connector and then modify its action
window.
How to ...Add a Connector Block
1. Position the mouse pointer at the desired (unoccupied) position in the
construction area.
2. Click <A
location.
3. Access the action window for the Anonymous connector. For information about
opening a block, see Customizing the Function of a Block on page 71.
DJUST>. PeriProducer creates an Anonymous connector at the pointer
Click <Menu> here to access
the menu of connector
types
4. Select the type of connector from the pull-down menu.
# P0995131 Page 97
Page 98

PeriProducer User’s Guide
5. (All connectors except Anonymous) Type a descriptive name in the Block Name
field.
6. Select Apply.
When you add a connector, PeriProducer attempts to connect it to the application. If
the connection is successful, the connector becomes the current block. For additional
information, see Understanding Block Connections on page 94.
You can move a connector like any other block (see Moving a Block or Grouped
Blocks on page 85).
You may also want to add text to describe the function of the connector. For
information, see Adding Notes to a Block on page 82.
You can also add a Connector block by selecting CONNECTOR Block on the
Blocks menu in the Main Container, all inner containers, and all Handle blocks.
creates an Anonymous
connector
Page 98 # P0995131
Page 99

Understanding
PeriProducer’s Primary
Windows
This chapter covers:
1. The Main Container
2. The Tool Kit
3. The Locator
Page 100

PeriProducer User’s Guide
The Main Container
In the default startup configuration, the window on the right is the Main Container.
You can resize or move this window to suit your preference.
Main Container title
window
header
menu bar
Entry
Connector
construction
area
Exit
Connector
current
Container
logo
(color of logo
indicates state
of application)
window
footer
current
filename
Main Container Title
PeriProducer uses Untitled as the default title for the Main Container. The Main
Container title is not necessarily the same as the application filename. For additional
information, see Adding a Title to the Main Container on page 43.
You can create multiple construction areas to accommodate the function of a single
application. You can add a descriptive title to the Container of each construction area.
For additional information, see CONTAINER Block on page 303.
PeriProducer displays the title of each Container in its window header.
Page 100 # P0995131
 Loading...